Freezing Pillar: Difference between revisions
From Bulbapedia, the community-driven Pokémon encyclopedia.
Jump to navigationJump to search
mNo edit summary |
Pale Prism (talk | contribs) mNo edit summary |
||
| (5 intermediate revisions by 4 users not shown) | |||
| Line 4: | Line 4: | ||
|bordercolorscheme=Water | |bordercolorscheme=Water | ||
|name=Freezing Pillar | |name=Freezing Pillar | ||
|jname= | |jname={{tt|凍|こご}}える{{tt|柱|はしら}} | ||
|jtrans=Frozen Pillar | |jtrans=Frozen Pillar | ||
|image=Freezing Pillar PMDGTI.png | |image=Freezing Pillar PMDGTI.png | ||
| Line 12: | Line 12: | ||
|traps=Yes | |traps=Yes | ||
|monsterhouses=Yes | |monsterhouses=Yes | ||
|items= | |items=Current | ||
|money=Allowed | |money=Allowed | ||
|teamsize=4 | |teamsize=4 | ||
|startlevel=Current | |startlevel=Current | ||
|maintype= | |maintype=None | ||
|boss= | |boss=None | ||
}} | }} | ||
'''Freezing Pillar''' (Japanese: ''' | '''Freezing Pillar''' (Japanese: '''{{tt|凍|こご}}える{{tt|柱|はしら}}''' ''Frozen Pillar'') is a playable dungeon the {{player}} goes through in [[Pokémon Mystery Dungeon: Gates to Infinity]]. It has 14 floors and no boss. This dungeon is accessible after completing the main storyline or in [[Companion Mode]] after the quest to rescue {{mdc|Munna|gti}} has started. The third and ninth floors have a blue-locked door which requires a {{md|Key|Blue Key}} to pass through. These rooms contain training tiles and tiles that allow moves to be dodged more easily. | ||
==Pokémon encountered== | ==Pokémon encountered== | ||
| Line 40: | Line 40: | ||
==Items== | ==Items== | ||
{{DungeonItem/h|rock}} | {{DungeonItem/h|rock}} | ||
{{DungeonItem|Poké|4=70-208|sprite=Poké currency|3=1-14}} | {{DungeonItem|Poké|4=70-208|sprite=Poké currency V|3=1-14}} | ||
{{DungeonItem|Gravelerock|Throwing item|sprite=MDBag Gravelerock Sprite|3=1-14}} | {{DungeonItem|Gravelerock|Throwing item|sprite=MDBag Gravelerock V Sprite|3=1-14}} | ||
{{DungeonItem|Oran Berry|sprite=MDBag Oran Berry V Sprite|3=1-14}} | {{DungeonItem|Oran Berry|sprite=MDBag Oran Berry V Sprite|3=1-14}} | ||
{{DungeonItem|Chesto Berry|sprite=MDBag Chesto Berry V Sprite|3=1-14}} | {{DungeonItem|Chesto Berry|sprite=MDBag Chesto Berry V Sprite|3=1-14}} | ||
{{DungeonItem|Pecha Berry|sprite=MDBag Pecha Berry V Sprite|3=1-14}} | {{DungeonItem|Pecha Berry|sprite=MDBag Pecha Berry V Sprite|3=1-14}} | ||
{{DungeonItem|Health Orb|Wonder Orb|3=1-14}} | {{DungeonItem|Health Orb|Wonder Orb|sprite=MDBag Wonder Orb V Sprite|3=1-14}} | ||
{{DungeonItem|All-Dodge Orb|Wonder Orb|3=1-14}} | {{DungeonItem|All-Dodge Orb|Wonder Orb|sprite=MDBag Wonder Orb V Sprite|3=1-14}} | ||
{{DungeonItem|Violent Seed|Seed|3=1-14}} | {{DungeonItem|Violent Seed|Seed|sprite=MDBag Seed V Sprite|3=1-14}} | ||
{{DungeonItem|Blast Seed|Seed|3=1-14}} | {{DungeonItem|Blast Seed|Seed|sprite=MDBag Seed V Sprite|3=1-14}} | ||
{{DungeonItem|Stun Seed|Seed|3=1-14}} | {{DungeonItem|Stun Seed|Seed|sprite=MDBag Seed V Sprite|3=1-14}} | ||
{{DungeonItem|Max Elixir|Health drink|3=1-14}} | {{DungeonItem|Max Elixir|Health drink|sprite=MDBag Max Elixir V Sprite|3=1-14}} | ||
|} | |} | ||
==In other languages== | |||
{{langtable|color={{rock color}}|bordercolor={{water color dark}} | |||
|fr=Pilier Gelé | |||
|de=Frostsäule | |||
|it=Colonna del Gelo | |||
|es=Pilar Gélido | |||
}} | |||
{{-}} | {{-}} | ||
| Line 62: | Line 70: | ||
[[de:Frostsäule]] | [[de:Frostsäule]] | ||
[[es:Pilar Gélido]] | [[es:Pilar Gélido]] | ||
[[fr:Pilier Gelé]] | |||
[[it:Colonna del Gelo]] | |||
[[ja:凍える柱]] | [[ja:凍える柱]] | ||
[[zh:冰凍之柱]] | [[zh:冰凍之柱]] | ||
Latest revision as of 14:56, 22 June 2022
|
|
|
| ||||||||||||||||||||||||||||||||||||||||||
| ||||||||||||||||||||||||||||||||||||||||||
| ||||||||||||||||||||||||||||||||||||||||||
| ||||||||||||||||||||||||||||||||||||||||||
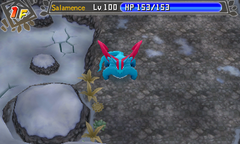
Freezing Pillar (Japanese: 凍える柱 Frozen Pillar) is a playable dungeon the player goes through in Pokémon Mystery Dungeon: Gates to Infinity. It has 14 floors and no boss. This dungeon is accessible after completing the main storyline or in Companion Mode after the quest to rescue Munna has started. The third and ninth floors have a blue-locked door which requires a Blue Key to pass through. These rooms contain training tiles and tiles that allow moves to be dodged more easily.
Pokémon encountered
| Pokémon | Floors | Levels | Recruit Rate | |
|---|---|---|---|---|
| Vaporeon | 1-14 | 27 | ?% | |
| Shelgon | 1-14 | 30 | ?% | |
| Pansear | 1-14 | 20 | ?% | |
| Zebstrika | 1-14 | 30 | ?% | |
| Excadrill | 3, 9 | ? | ?% | |
| Conkeldurr | 1-14 | 25 | ?% | |
| Seismitoad | 1-14 | 36 | ?% | |
| Krokorok | 1-14 | 29 | ?% | |
| Dwebble | 1-14 | 26 | ?% | |
| Archeops | 1-14 | ? | ?% | |
| Gothorita | 1-14 | 32 | ?% | |
| Druddigon | 1-14 | 30 | ?% | |
| Deino | 1-14 | 23 | ?% | |
Items
| Item | Floors | |
|---|---|---|
| 70-208 Poké | 1-14F | |
| Gravelerock | 1-14F | |
| Oran Berry | 1-14F | |
| Chesto Berry | 1-14F | |
| Pecha Berry | 1-14F | |
| Health Orb | 1-14F | |
| All-Dodge Orb | 1-14F | |
| Violent Seed | 1-14F | |
| Blast Seed | 1-14F | |
| Stun Seed | 1-14F | |
| Max Elixir | 1-14F | |
In other languages
| ||||||||||||||||||

|
This article is part of both Project Locations and Project Sidegames, Bulbapedia projects that, together, aim to write comprehensive articles on the Pokémon Locations and Sidegames, respectively. | 
|
