Narrative illustration (TCG): Difference between revisions
Apopheniac (talk | contribs) No edit summary |
m (image relink, replaced: InkayXYPromo105 → InkayRoaringSkies41, MeowthXYPromo106 → MeowthRoaringSkies67) |
||
| (91 intermediate revisions by 13 users not shown) | |||
| Line 1: | Line 1: | ||
{{incomplete|| | {{incomplete|needs=More descriptions need to be added.}} | ||
A '''narrative illustration''' is a card illustration that features one part of a story, and continues the story onto other related cards. Cards that form narrative illustrations are generally drawn by the same artist and released together in the same expansion, but there are instances of narratives that are collaborations between several artists or released decades apart. | {{split|multiple different pages}} | ||
A '''narrative illustration''' is a card illustration that features one part of a story, and continues the story onto other related cards. These are distinct from {{tcg|combined illustration}}s, which feature one illustration split across multiple cards. Cards that form narrative illustrations are generally drawn by the same artist and released together in the same expansion, but there are instances of narratives that are collaborations between several artists or released decades apart. The [[Pokémon]] [[Plusle]] and [[Minun]] have multiple narrative illustrations featuring them. | |||
In the {{tcg|Scarlet & Violet}} series, {{tcg|special illustration rare card}}s of {{tcg|Pokémon ex}} often form a narrative illustration with {{tcg|illustration rare card}}s of their pre-evolutions. | In the {{tcg|Scarlet & Violet}} series, {{tcg|special illustration rare card}}s of {{tcg|Pokémon ex}} often form a narrative illustration with {{tcg|illustration rare card}}s of their pre-evolutions. | ||
| Line 8: | Line 9: | ||
{| class="roundy" style="background: #FFED53" | {| class="roundy" style="background: #FFED53" | ||
| width="25%"| | | width="25%"| | ||
| class="roundy" style="background: #fff; border-style: solid; border-width: 5px; text-align: center" | [[File:AbraTeamRocket49.jpg|200px]]<br>{{TCG ID|Team Rocket|Abra|49}} | | class="roundy" style="background: #fff; border-style: solid; border-width: 5px; text-align: center"| [[File:AbraTeamRocket49.jpg|200px]]<br>{{TCG ID|Team Rocket|Abra|49}} | ||
| width="25%"| | | width="25%"| | ||
| class="roundy" style="background: #fff; border-style: solid; border-width: 5px; text-align: center" | [[File:ElgyemUnifiedMinds90.jpg|200px]]<br>{{TCG ID|Unified Minds|Elgyem|90}} | | class="roundy" style="background: #fff; border-style: solid; border-width: 5px; text-align: center"| [[File:ElgyemUnifiedMinds90.jpg|200px]]<br>{{TCG ID|Unified Minds|Elgyem|90}} | ||
| width="25%" | | | width="25%"| | ||
|- | |- | ||
| colspan="7" class="roundy" style="background: #fff; border-style: solid; border-width: 5px; text-align: center" | | | colspan="7" class="roundy" style="background: #fff; border-style: solid; border-width: 5px; text-align: center"| The first card depicts an {{p|Abra}} sitting atop a castle. The second card depicts an {{p|Elgyem}} sitting in the same spot. | ||
|} | |} | ||
==={{tcg| | ==={{tcg|Vending Machine cards}} and {{tcg|Unified Minds}}=== | ||
{| class="roundy" style="background: #FFED53" | {| class="roundy" style="background: #FFED53" | ||
| width="25%"| | | width="25%"| | ||
| class="roundy" style="background: #fff; border-style: solid; border-width: 5px; text-align: center" | [[File: | | class="roundy" style="background: #fff; border-style: solid; border-width: 5px; text-align: center"| [[File:BulbasaurVendingS1.jpg|200px]]<br>{{TCG ID|Vending|Bulbasaur|S1}} | ||
| width="25%"| | | width="25%"| | ||
| class="roundy" style="background: #fff; border-style: solid; border-width: 5px; text-align: center" | [[File: | | class="roundy" style="background: #fff; border-style: solid; border-width: 5px; text-align: center"| [[File:PurrloinUnifiedMinds135.jpg|200px]]<br>{{TCG ID|Unified Minds|Purrloin|135}} | ||
| width="25%"| | | width="25%"| | ||
| class="roundy" style="background: #fff; border-style: solid; border-width: 5px; text-align: center" | [[File: | |- | ||
| width="25%" | | | colspan="7" class="roundy" style="background: #fff; border-style: solid; border-width: 5px; text-align: center"| | ||
|- | |} | ||
| colspan="7" class="roundy" style="background: #fff; border-style: solid; border-width: 5px; text-align: center" | | |||
==={{tcg|P Promotional cards}}=== | |||
{| class="roundy" style="background: #FFED53" | |||
| width="25%"| | |||
| class="roundy" style="background: #fff; border-style: solid; border-width: 5px; text-align: center"| [[File:PikachuPPromo4.jpg|200px]]<br>{{TCG ID|P Promo|Pikachu|4}} | |||
| width="25%"| | |||
| class="roundy" style="background: #fff; border-style: solid; border-width: 5px; text-align: center"| [[File:LarvitarPPromo5.jpg|200px]]<br>{{TCG ID|P Promo|Larvitar|5}} | |||
| width="25%"| | |||
|- | |||
| colspan="7" class="roundy" style="background: #fff; border-style: solid; border-width: 5px; text-align: center"| The two cards depict the same scene from two different perspectives. In the scene, a {{p|Pikachu}} is hiding behind a hedge, telling the owner of the card to keep quiet, as a {{p|Larvitar}} is looking for it. Furthermore, on the first card, the Larvitar's silhouette is seen on the hedge with its horn sticking out, Likewise, the second card shows Pikachu's silhouette with one of its ears sticking out. | |||
|} | |||
==={{tcg|Aquapolis}}, {{tcg|P Promotional cards}}, {{tcg|Undaunted}}, and {{tcg|Unified Minds}}=== | |||
{| class="roundy" style="background: #e6dc3f" | |||
| width="20%"| | |||
| class="roundy" style="background: #fff; border-style: solid; border-width: 5px; text-align: center"| [[File:UmbreonAquapolis41.jpg|200px]]<br>{{TCG ID|Aquapolis|Umbreon|H29}} | |||
| width="20%"| | |||
| class="roundy" style="background: #fff; border-style: solid; border-width: 5px; text-align: center"| [[File:UmbreonPPromo25.jpg|200px]]<br>{{TCG ID|Aquapolis|Umbreon|H29}} | |||
| width="20%"| | |||
| class="roundy" style="background: #fff; border-style: solid; border-width: 5px; text-align: center"| [[File:UmbreonUndaunted10.jpg|200px]]<br>{{TCG ID|Undaunted|Umbreon|10}} | |||
| width="20%"| | |||
| class="roundy" style="background: #fff; border-style: solid; border-width: 5px; text-align: center"| [[File:UmbreonDarkraiGXUnifiedMinds125.jpg|200px]]<br>{{TCG ID|Unified Minds|Umbreon & Darkrai-GX|125}} | |||
| width="20%"| | |||
|- | |||
| colspan="9" class="roundy" style="background: #fff; border-style: solid; border-width: 5px; text-align: center"| The first two cards are both prints of {{TCG ID|Aquapolis|Umbreon|H29}} from {{tcg|Aquapolis}}. These show {{p|Umbreon}} on the rooftops of [[Puzzle Continent|The Town on No Map]], with one depicting Umbreon awake at night while the other depicts Umbreon sleeping during the day. The artist of all four cards, [[Mitsuhiro Arita]], stated that cat lovers enjoyed these illustrations.<ref>[https://www.eurogamer.net/inside-creatures-inc Inside Pokémon's house of cards, Eurogamer]</ref> Arita has confirmed that the fourth card forms a narrative with his first Umbreon card.<ref name = gamespot20/> | |||
|} | |} | ||
{{-}} | |||
==={{tcg|Aquapolis}} and {{tcg|Unbroken Bonds}}=== | |||
{| class="roundy" style="background: #FFED53" | |||
| width="25%"| | |||
| class="roundy" style="background: #fff; border-style: solid; border-width: 5px; text-align: center"| [[File:GrowlitheAquapolis80.jpg|200px]]<br>{{TCG ID|Aquapolis|Growlithe|80}} | |||
| width="25%"| | |||
| class="roundy" style="background: #fff; border-style: solid; border-width: 5px; text-align: center"| [[File:GrowlitheUnbrokenBonds21.jpg|200px]]<br>{{TCG ID|Unbroken Bonds|Growlithe|21}} | |||
| width="25%"| | |||
|- | |||
| colspan="7" class="roundy" style="background: #fff; border-style: solid; border-width: 5px; text-align: center"| | |||
|} | |||
==={{tcg|Aquapolis}} and {{tcg|Crown Zenith}}=== | |||
{| class="roundy" style="background: #FFED53" | |||
| width="25%"| | |||
| class="roundy" style="background: #fff; border-style: solid; border-width: 5px; text-align: center"| [[File:GloomAquapolis49.jpg|200px]]<br>{{TCG ID|Aquapolis|Gloom|49}} | |||
| width="25%"| | |||
| class="roundy" style="background: #fff; border-style: solid; border-width: 5px; text-align: center"| [[File:GloomCrownZenith2.jpg|200px]]<br>{{TCG ID|Crown Zenith|Gloom|2}} | |||
| width="25%"| | |||
|- | |||
| colspan="7" class="roundy" style="background: #fff; border-style: solid; border-width: 5px; text-align: center"| The first card depicts a {{p|Gloom}} sleeping on a tree branch. On the second card, the Gloom has awoken in shock, falling from the branch. | |||
|} | |||
==={{tcg|T Promotional cards}}=== | |||
{| class="roundy" style="background: #FFED53" | |||
| width="25%"| | |||
| class="roundy" style="background: #fff; border-style: solid; border-width: 5px; text-align: center"| [[File:500 T022 045GONYONYOima.jpg|200px]]<br>{{TCG ID|T Promo|Imakuni?'s Whismur|22}} | |||
| width="25%"| | |||
| class="roundy" style="background: #fff; border-style: solid; border-width: 5px; text-align: center"| [[File:500 T023 046DOGOMUima.jpg|200px]]<br>{{TCG ID|T Promo|Imakuni?'s Loudred|23}} | |||
| width="25%"| | |||
| class="roundy" style="background: #fff; border-style: solid; border-width: 5px; text-align: center"| [[File:500 T024 047BAKUONGUima.jpg|200px]]<br>{{TCG ID|T Promo|Imakuni?'s Exploud ex|24}} | |||
| width="25%"| | |||
|- | |||
| colspan="7" class="roundy" style="background: #fff; border-style: solid; border-width: 5px; text-align: center"| | |||
|} | |||
==={{tcg|EX Dragon}}=== | |||
{| class="roundy" style="background: #FFED53" | |||
| width="25%"| | |||
| class="roundy" style="background: #fff; border-style: solid; border-width: 5px; text-align: center"| [[File:MinunEXDragon7.jpg|200px]]<br>{{TCG ID|EX Dragon|Minun|7}} | |||
| width="25%"| | |||
| class="roundy" style="background: #fff; border-style: solid; border-width: 5px; text-align: center"| [[File:PlusleEXDragon8.jpg|200px]]<br>{{TCG ID|EX Dragon|Plusle|8}} | |||
| width="25%"| | |||
|- | |||
| colspan="7" class="roundy" style="background: #fff; border-style: solid; border-width: 5px; text-align: center"| | |||
|} | |||
==={{tcg|Movie Commemoration VS Pack: Sky-Splitting Deoxys}}=== | |||
{| class="roundy" style="background: #FFED53" | {| class="roundy" style="background: #FFED53" | ||
| width="25%"| | | width="25%"| | ||
| class="roundy" style="background: #fff; border-style: solid; border-width: 5px; text-align: center" | [[File: | | class="roundy" style="background: #fff; border-style: solid; border-width: 5px; text-align: center"| [[File:LaRoussePlusleMovieVSPack4.jpg|200px]]<br>{{TCG ID|Movie VS Pack|LaRousse's Plusle|4}} | ||
| width="25%"| | | width="25%"| | ||
| class="roundy" style="background: #fff; border-style: solid; border-width: 5px; text-align: center" | [[File: | | class="roundy" style="background: #fff; border-style: solid; border-width: 5px; text-align: center"| [[File:LaRousseMinunMovieVSPack5.jpg|200px]]<br>{{TCG ID|Movie VS Pack|LaRousse's Minun|5}} | ||
| width="25%"| | | width="25%"| | ||
|- | |||
| colspan="7" class="roundy" style="background: #fff; border-style: solid; border-width: 5px; text-align: center"| The two cards depict the same scene from two different perspectives. In the scene, a {{p|Plusle}} and a {{p|Minun}} are seen engrossed in conversation. The first card is focused on the Plusle, while the second card is focused on the Minun. | |||
|- | |||
| colspan="7" class="roundy" style="background: #fff; border-style: solid; border-width: 5px; text-align: center" | | |||
|} | |} | ||
{{ | |||
==={{tcg|EX Team Rocket Returns}}=== | |||
{| class="roundy" style="background: #FFED53" | {| class="roundy" style="background: #FFED53" | ||
| width="25%"| | | width="25%"| | ||
| class="roundy" style="background: #fff; border-style: solid; border-width: 5px; text-align: center" | [[File: | | class="roundy" style="background: #fff; border-style: solid; border-width: 5px; text-align: center"| [[File:SwinubEXTeamRocketReturns79.jpg|200px]]<br>{{TCG ID|EX Team Rocket Returns|Swinub|79}} | ||
| width="25%"| | | width="25%"| | ||
| class="roundy" style="background: #fff; border-style: solid; border-width: 5px; text-align: center" | [[File: | | class="roundy" style="background: #fff; border-style: solid; border-width: 5px; text-align: center"| [[File:HoundourEXTeamRocketReturns60.jpg|200px]]<br>{{TCG ID|EX Team Rocket Returns|Houndour|60}} | ||
| width="25%"| | | width="25%"| | ||
|- | |||
| colspan="7" class="roundy" style="background: #fff; border-style: solid; border-width: 5px; text-align: center"| In the first card, a group of {{p|Swinub}} are charging around a room with a tray of apples in the background. In the second card, a {{p|Houndour}} is shown eating one of the apples that were dropped. | |||
|- | |||
| colspan="7" class="roundy" style="background: #fff; border-style: solid; border-width: 5px; text-align: center" | | |||
|} | |} | ||
{{ | |||
==={{tcg|EX Deoxys}}=== | |||
{| class="roundy" style="background: #FFED53" | {| class="roundy" style="background: #FFED53" | ||
| width="25%"| | | width="25%"| | ||
| class="roundy" style="background: #fff; border-style: solid; border-width: 5px; text-align: center" | [[File: | | class="roundy" style="background: #fff; border-style: solid; border-width: 5px; text-align: center"| [[File:PlusleEXDeoxys44.jpg|200px]]<br>{{TCG ID|EX Deoxys|Plusle|44}} | ||
| width="25%"| | | width="25%"| | ||
| class="roundy" style="background: #fff; border-style: solid; border-width: 5px; text-align: center" | [[File: | | class="roundy" style="background: #fff; border-style: solid; border-width: 5px; text-align: center"| [[File:MinunEXDeoxys41.jpg|200px]]<br>{{TCG ID|EX Deoxys|Minun|41}} | ||
| width="25%"| | | width="25%"| | ||
| class="roundy" style="background: #fff; border-style: solid; border-width: 5px; text-align: center" | | |- | ||
| colspan="7" class="roundy" style="background: #fff; border-style: solid; border-width: 5px; text-align: center"| The two cards depict the same scene from two different perspectives. On the first card, a {{p|Plusle}} is seen posing with a {{p|Minun}} in the background, while the second card depicts vice vera. | |||
|} | |} | ||
{{ | |||
==={{tcg|EX Emerald}}=== | |||
{| class="roundy" style="background: #FFED53" | {| class="roundy" style="background: #FFED53" | ||
| width="25%"| | | width="25%"| | ||
| class="roundy" style="background: #fff; border-style: solid; border-width: 5px; text-align: center" | [[File: | | class="roundy" style="background: #fff; border-style: solid; border-width: 5px; text-align: center"| [[File:MinunEXEmerald37.jpg|200px]]<br>{{TCG ID|EX Emerald|Minun|37}} | ||
| width="25%"| | | width="25%"| | ||
| class="roundy" style="background: #fff; border-style: solid; border-width: 5px; text-align: center" | [[File: | | class="roundy" style="background: #fff; border-style: solid; border-width: 5px; text-align: center"| [[File:PlusleEXEmerald39.jpg|200px]]<br>{{TCG ID|EX Emerald|Plusle|39}} | ||
| width="25%"| | | width="25%"| | ||
|- | |||
| colspan="7" class="roundy" style="background: #fff; border-style: solid; border-width: 5px; text-align: center"| | |||
|- | |||
| colspan="7" class="roundy" style="background: #fff; border-style: solid; border-width: 5px; text-align: center" | | |||
|} | |} | ||
{{ | |||
==={{tcg|EX Delta Species}}=== | |||
{| class="roundy" style="background: #FFED53" | {| class="roundy" style="background: #FFED53" | ||
| width="25%"| | | width="25%"| | ||
| class="roundy" style="background: #fff; border-style: solid; border-width: 5px; text-align: center" | [[File: | | class="roundy" style="background: #fff; border-style: solid; border-width: 5px; text-align: center"| [[File:AzurillEXDeltaSpecies20.jpg|200px]]<br>{{TCG ID|EX Delta Species|Azurill|20}} | ||
| width="25%"| | | width="25%"| | ||
| class="roundy" style="background: #fff; border-style: solid; border-width: 5px; text-align: center" | [[File: | | class="roundy" style="background: #fff; border-style: solid; border-width: 5px; text-align: center"| [[File:MarillEXDeltaSpecies76.jpg|200px]]<br>{{TCG ID|EX Delta Species|Marill|76}} | ||
| width="25%"| | | width="25%"| | ||
|- | |||
| colspan="7" class="roundy" style="background: #fff; border-style: solid; border-width: 5px; text-align: center"| On the first card, an {{p|Azurill}} is seen playing in a river. On the second card, it has evolved into a {{p|Marill}}, and has started swimming. | |||
|- | |||
| colspan="7" class="roundy" style="background: #fff; border-style: solid; border-width: 5px; text-align: center" | | |||
|} | |} | ||
==={{tcg| | ==={{tcg|EX Trainer Kit 2}}=== | ||
{| class="roundy" style="background: #FFED53" | {| class="roundy" style="background: #FFED53" | ||
| width="25%"| | | width="25%"| | ||
| class="roundy" style="background: #fff; border-style: solid; border-width: 5px; text-align: center" | [[File: | | class="roundy" style="background: #fff; border-style: solid; border-width: 5px; text-align: center"| [[File:PluslePlusleHalfDeck6.jpg|200px]]<br>{{TCG ID|Plusle Half Deck|Plusle|6}} | ||
| width="25%"| | | width="25%"| | ||
| class="roundy" style="background: #fff; border-style: solid; border-width: 5px; text-align: center" | [[File: | | class="roundy" style="background: #fff; border-style: solid; border-width: 5px; text-align: center"| [[File:MinunMinunHalfDeck6.jpg|200px]]<br>{{TCG ID|Minun Half Deck|Minun|6}} | ||
| width="25%"| | | width="25%"| | ||
|- | |- | ||
| colspan="7" class="roundy" style="background: #fff; border-style: solid; border-width: 5px; text-align: center" | | | colspan="7" class="roundy" style="background: #fff; border-style: solid; border-width: 5px; text-align: center"| | ||
|} | |} | ||
==={{tcg| | ==={{tcg|EX Crystal Guardians}} and {{tcg|Sword & Shield}}=== | ||
{| class="roundy" style="background: #FFED53" | {| class="roundy" style="background: #FFED53" | ||
| width="25%"| | | width="25%"| | ||
| class="roundy" style="background: #fff; border-style: solid; border-width: 5px; text-align: center" | [[File: | | class="roundy" style="background: #fff; border-style: solid; border-width: 5px; text-align: center"| [[File:DiglettEXCrystalGuardians50.jpg|200px]]<br>{{TCG ID|EX Crystal Guardians|Diglett|50}} | ||
| width="25%"| | | width="25%"| | ||
| class="roundy" style="background: #fff; border-style: solid; border-width: 5px; text-align: center" | [[File: | | class="roundy" style="background: #fff; border-style: solid; border-width: 5px; text-align: center"| [[File:DugtrioSwordShield93.jpg|200px]]<br>{{TCG ID|Sword & Shield|Dugtrio|93}} | ||
| width="25%"| | | width="25%"| | ||
|- | |- | ||
| colspan="7" class="roundy" style="background: #fff; border-style: solid; border-width: 5px; text-align: center" | | | colspan="7" class="roundy" style="background: #fff; border-style: solid; border-width: 5px; text-align: center"| | ||
|} | |} | ||
==={{tcg| | ==={{tcg|Mysterious Treasures}}=== | ||
{| class="roundy" style="background: # | {| class="roundy" style="background: #FFED53" | ||
| width="25%"| | | width="25%"| | ||
| class="roundy" style="background: #fff; border-style: solid; border-width: 5px; text-align: center" | [[File: | | class="roundy" style="background: #fff; border-style: solid; border-width: 5px; text-align: center"| [[File:PikachuDPPromo16.jpg|200px]]<br>{{TCG ID|DP Promo|Pikachu|16}} | ||
| width="25%"| | | width="25%"| | ||
| class="roundy" style="background: #fff; border-style: solid; border-width: 5px; text-align: center" | [[File: | | class="roundy" style="background: #fff; border-style: solid; border-width: 5px; text-align: center"| [[File:PikachuMysteriousTreasures94.jpg|200px]]<br>{{TCG ID|Mysterious Treasures|Pikachu|94}} | ||
| width="25%"| | | width="25%"| | ||
| class="roundy" style="background: #fff; border-style: solid; border-width: 5px; text-align: center" | [[File: | |- | ||
| colspan="7" class="roundy" style="background: #fff; border-style: solid; border-width: 5px; text-align: center"| The two cards depict the same scene from two different perspectives. In the scene, a {{p|Pikachu}} is standing on a tree while another Pikachu runs below. Each card focuses on one of them. | |||
|} | |||
==={{tcg|DPt-P Promotional cards}}=== | |||
{| class="roundy" style="background: #FFED53" | |||
| width="25%"| | |||
| class="roundy" style="background: #fff; border-style: solid; border-width: 5px; text-align: center"| [[File:ChatotDPtPromo32.jpg|200px]]<br>{{TCG ID|DPt-P Promo|Chatot|32}} | |||
| width="25%"| | |||
| class="roundy" style="background: #fff; border-style: solid; border-width: 5px; text-align: center"| [[File:JigglypuffDPtPromo47.jpg|200px]]<br>{{TCG ID|DPt-P Promo|Jigglypuff|47}} | |||
| width="25%"| | | width="25%"| | ||
|- | |- | ||
| colspan="7" class="roundy" style="background: #fff; border-style: solid; border-width: 5px; text-align: center" | | | colspan="7" class="roundy" style="background: #fff; border-style: solid; border-width: 5px; text-align: center"| | ||
|} | |} | ||
==={{tcg| | ==={{tcg|Rising Rivals}}=== | ||
{| class="roundy" style="background: #FFED53" | |||
| width="15%"| | |||
| class="roundy" style="background: #fff; border-style: solid; border-width: 5px; text-align: center"| [[File:FanRotomRisingRivalsRT1.jpg|200px]]<br>{{TCG ID|Rising Rivals|Fan Rotom|RT1}} | |||
| width="15%"| | |||
| class="roundy" style="background: #fff; border-style: solid; border-width: 5px; text-align: center"| [[File:MowRotomRisingRivalsRT4.jpg|200px]]<br>{{TCG ID|Rising Rivals|Mow Rotom|RT4}} | |||
| width="15%"| | |||
| class="roundy" style="background: #fff; border-style: solid; border-width: 5px; text-align: center"| [[File:WashRotomRisingRivalsRT5.jpg|200px]]<br>{{TCG ID|Rising Rivals|Wash Rotom|RT5}} | |||
| width="15%"| | |||
| class="roundy" style="background: #fff; border-style: solid; border-width: 5px; text-align: center"| [[File:HeatRotomRisingRivalsRT3.jpg|200px]]<br>{{TCG ID|Rising Rivals|Heat Rotom|RT3}} | |||
| width="15%"| | |||
| class="roundy" style="background: #fff; border-style: solid; border-width: 5px; text-align: center"| [[File:FrostRotomRisingRivalsRT2.jpg|200px]]<br>{{TCG ID|Rising Rivals|Frost Rotom|RT2}} | |||
| width="15%"| | |||
|- | |||
| colspan="11" class="roundy" style="background: #fff; border-style: solid; border-width: 5px; text-align: center"| Each of the cards depict a different form of {{p|Rotom}} being used for different kinds of housework. | |||
|} | |||
==={{tcg|Platinum: Arceus}}=== | |||
{| class="roundy" style="background: #FFED53" | {| class="roundy" style="background: #FFED53" | ||
| width="25%"| | | width="25%"| | ||
| class="roundy" style="background: #fff; border-style: solid; border-width: 5px; text-align: center" | [[File: | | class="roundy" style="background: #fff; border-style: solid; border-width: 5px; text-align: center"| [[File:KabutopsArceus4.jpg|200px]]<br>{{TCG ID|Arceus|Kabutops|4}} | ||
| width="25%"| | |||
| class="roundy" style="background: #fff; border-style: solid; border-width: 5px; text-align: center"| [[File:OmastarArceus23.jpg|200px]]<br>{{TCG ID|Arceus|Omastar|23}} | |||
| width="25%"| | | width="25%"| | ||
|- | |||
| colspan="7" class="roundy" style="background: #fff; border-style: solid; border-width: 5px; text-align: center"| | |||
|- | |||
| colspan="7" class="roundy" style="background: #fff; border-style: solid; border-width: 5px; text-align: center" | | |||
|} | |} | ||
==={{tcg| | ==={{tcg|Pokémon Rumble}}=== | ||
{| class="roundy" style="background: #FFED53" | {| class="roundy" style="background: #FFED53" | ||
| width="25%"| | | width="25%"| | ||
| class="roundy" style="background: #fff; border-style: solid; border-width: 5px; text-align: center" | [[File: | | class="roundy" style="background: #fff; border-style: solid; border-width: 5px; text-align: center"| [[File:StarmiePokémonRumble5.jpg|200px]]<br>{{TCG ID|Pokémon Rumble|Starmie|5}} | ||
| width="25%"| | |||
| class="roundy" style="background: #fff; border-style: solid; border-width: 5px; text-align: center"| [[File:GyaradosPokémonRumble6.jpg|200px]]<br>{{TCG ID|Pokémon Rumble|Gyarados|6}} | |||
| width="25%"| | | width="25%"| | ||
| class="roundy" style="background: #fff; border-style: solid; border-width: 5px; text-align: center" | [[ | |- | ||
| colspan="7" class="roundy" style="background: #fff; border-style: solid; border-width: 5px; text-align: center"| As with the other cards in this set, these illustrations are renders made using assets from [[Pokémon Rumble]]. The two cards depict the same scene from two different perspectives. In the scene, a {{p|Starmie}} is hiding behind a palm tree on [[Bright Beach]] from a {{p|Gyarados}}. The first card focuses on the Starmie, while the second card focuses on the Gyarados. | |||
|} | |} | ||
==={{tcg| | ==={{tcg|HeartGold & SoulSilver}}=== | ||
{| class="roundy" style="background: #FFED53" | {| class="roundy" style="background: #FFED53" | ||
| width="25%"| | | width="25%"| | ||
| class="roundy" style="background: #fff; border-style: solid; border-width: 5px; text-align: center" | [[File: | | class="roundy" style="background: #fff; border-style: solid; border-width: 5px; text-align: center"| [[File:SlowpokeHeartGoldSoulSilver81.jpg|200px]]<br>{{TCG ID|HeartGold & SoulSilver|Slowpoke|81}} | ||
| width="25%"| | |||
| class="roundy" style="background: #fff; border-style: solid; border-width: 5px; text-align: center"| [[File:SlowbroHeartGoldSoulSilver52.jpg|200px]]<br>{{TCG ID|HeartGold & SoulSilver|Slowbro|52}} | |||
| width="25%"| | | width="25%"| | ||
| class="roundy" style="background: #fff; border-style: solid; border-width: 5px; text-align: center" | [[ | |- | ||
| colspan="7" class="roundy" style="background: #fff; border-style: solid; border-width: 5px; text-align: center"| The first card depicts a {{p|Slowpoke}} climbing down a well (presumably [[Slowpoke Well]]). On the second card, it has evolved into a {{p|Slowbro}}, and is looking down at the water in confusion. | |||
|} | |} | ||
==={{tcg| | ==={{tcg|Unleashed}}=== | ||
{| class="roundy" style="background: #FFED53" | |||
| width="25%"| | |||
| class="roundy" style="background: #fff; border-style: solid; border-width: 5px; text-align: center"| [[File:TurtwigUnleashed67.jpg|200px]]<br>{{TCG ID|Unleashed|Turtwig|67}} | |||
| width="25%"| | |||
| class="roundy" style="background: #fff; border-style: solid; border-width: 5px; text-align: center"| [[File:GrotleUnleashed31.jpg|200px]]<br>{{TCG ID|Unleashed|Grotle|31}} | |||
| width="25%"| | |||
| class="roundy" style="background: #fff; border-style: solid; border-width: 5px; text-align: center"| [[File:TorterraUnleashed10.jpg|200px]]<br>{{TCG ID|Unleashed|Torterra|10}} | |||
| width="25%"| | |||
|- | |||
| width="25%"| | |||
| class="roundy" style="background: #fff; border-style: solid; border-width: 5px; text-align: center"| [[File:CherubiUnleashed47.jpg|200px]]<br>{{TCG ID|Unleashed|Cherubi|47}} | |||
| width="25%"| | |||
| class="roundy" style="background: #fff; border-style: solid; border-width: 5px; text-align: center"| [[File:CherrimUnleashed28.jpg|200px]]<br>{{TCG ID|Unleashed|Cherrim|28}} | |||
| width="25%"| | |||
| class="roundy" style="background: #fff; border-style: solid; border-width: 5px; text-align: center"| [[File:TropiusUnleashed66.jpg|200px]]<br>{{TCG ID|Unleashed|Tropius|66}} | |||
| width="25%"| | |||
|- | |||
| width="25%"| | |||
| class="roundy" style="background: #fff; border-style: solid; border-width: 5px; text-align: center"| [[File:SquirtleUnleashed63.jpg|200px]]<br>{{TCG ID|Unleashed|Squirtle|63}} | |||
| width="25%"| | |||
| class="roundy" style="background: #fff; border-style: solid; border-width: 5px; text-align: center"| [[File:WartortleUnleashed42.jpg|200px]]<br>{{TCG ID|Unleashed|Wartortle|42}} | |||
| width="25%"| | |||
| class="roundy" style="background: #fff; border-style: solid; border-width: 5px; text-align: center"| [[File:BlastoiseUnleashed13.jpg|200px]]<br>{{TCG ID|Unleashed|Blastoise|13}} | |||
| width="25%"| | |||
|- | |||
| width="25%"| | |||
| class="roundy" style="background: #fff; border-style: solid; border-width: 5px; text-align: center"| [[File:BuizelUnleashed45.jpg|200px]]<br>{{TCG ID|Unleashed|Buizel|45}} | |||
| width="25%"| | |||
| class="roundy" style="background: #fff; border-style: solid; border-width: 5px; text-align: center"| [[File:FloatzelUnleashed16.jpg|200px]]<br>{{TCG ID|Unleashed|Floatzel|16}} | |||
| width="25%"| | |||
| class="roundy" style="background: #fff; border-style: solid; border-width: 5px; text-align: center"| [[File:ManaphyUnleashed3.jpg|200px]]<br>{{TCG ID|Unleashed|Manaphy|3}} | |||
| width="25%"| | |||
|- | |||
| width="25%"| | |||
| class="roundy" style="background: #fff; border-style: solid; border-width: 5px; text-align: center"| [[File:MagmarUnleashed52.jpg|200px]]<br>{{TCG ID|Unleashed|Magmar|52}} | |||
| width="25%"| | |||
| class="roundy" style="background: #fff; border-style: solid; border-width: 5px; text-align: center"| [[File:NinetalesUnleashed20.jpg|200px]]<br>{{TCG ID|Unleashed|Ninetales|20}} | |||
| width="25%"| | |||
| class="roundy" style="background: #fff; border-style: solid; border-width: 5px; text-align: center"| [[File:NumelUnleashed35.jpg|200px]]<br>{{TCG ID|Unleashed|Numel|35}} | |||
| width="25%"| | |||
|- | |||
| width="25%"| | |||
| class="roundy" style="background: #fff; border-style: solid; border-width: 5px; text-align: center"| [[File:MinunUnleashed34.jpg|200px]]<br>{{TCG ID|Unleashed|Minun|34}} | |||
| width="25%"| | |||
| class="roundy" style="background: #fff; border-style: solid; border-width: 5px; text-align: center"| [[File:PlusleUnleashed36.jpg|200px]]<br>{{TCG ID|Unleashed|Plusle|36}} | |||
| width="25%"| | |||
| class="roundy" style="background: #fff; border-style: solid; border-width: 5px; text-align: center"| [[File:LucarioUnleashed19.jpg|200px]]<br>{{TCG ID|Unleashed|Lucario|19}} | |||
| width="25%"| | |||
|- | |||
| colspan="9" class="roundy" style="background: #fff; border-style: solid; border-width: 5px; text-align: center"| | |||
All of these cards appear to depict a single battlefield, that has a grey floor and is surrounded by a forest. These Pokémon appear to be partaking in a battle. There are flags in the background which for each of the {{TCG|type}}s of the Pokémon involved, using the type's symbol and corresponding color. (The {{TCG ID|Unleashed|Lucario|19}} card has a {{TCG|Lightning}} flag in the art instead of a {{TCG|Fighting}} flag.) The {{TCG ID|Unleashed|Numel|35}} card has an additional {{TCG|Water}} flag visible and the {{p|Plusle}} on the {{TCG ID|Unleashed|Plusle|36}} card is depicted on the {{TCG ID|Unleashed|Minun|34}} card, clarifying that this is a singular space. | |||
|} | |||
{{-}} | |||
{| class="roundy" style="background: #FFED53" | {| class="roundy" style="background: #FFED53" | ||
| width="25%"| | | width="25%"| | ||
| class="roundy" style="background: #fff; border-style: solid; border-width: 5px; text-align: center" | [[File: | | class="roundy" style="background: #fff; border-style: solid; border-width: 5px; text-align: center"| [[File:LarvitarUnleashed50.jpg|200px]]<br>{{TCG ID|Unleashed|Larvitar|50}} | ||
| width="25%"| | |||
| class="roundy" style="background: #fff; border-style: solid; border-width: 5px; text-align: center"| [[File:PupitarUnleashed38.jpg|200px]]<br>{{TCG ID|Unleashed|Pupitar|38}} | |||
| width="25%"| | | width="25%"| | ||
|- | |||
| colspan="5" class="roundy" style="background: #fff; border-style: solid; border-width: 5px; text-align: center"| | |||
|- | This {{p|Larvitar}} and {{p|Pupitar}} face in opposite directions. Both cards depict the Pokémon emerging from a rocky wall. The first card takes place at a more temperate time, while the second card has snow covering the ground and the trees. | ||
| colspan=" | |||
|} | |} | ||
==={{tcg| | ==={{tcg|Undaunted}}=== | ||
{| class="roundy" style="background: #FFED53" | {| class="roundy" style="background: #FFED53" | ||
| width="25%"| | | width="25%"| | ||
| class="roundy" style="background: #fff; border-style: solid; border-width: 5px; text-align: center" | [[File: | | class="roundy" style="background: #fff; border-style: solid; border-width: 5px; text-align: center"| [[File:SlowpokeUndaunted66.jpg|200px]]<br>{{TCG ID|Undaunted|Slowpoke|66}} | ||
| width="25%"| | |||
| class="roundy" style="background: #fff; border-style: solid; border-width: 5px; text-align: center"| [[File:SlowbroUndaunted38.jpg|200px]]<br>{{TCG ID|Undaunted|Slowbro|38}} | |||
| width="25%"| | | width="25%"| | ||
|- | |||
| colspan="7" class="roundy" style="background: #fff; border-style: solid; border-width: 5px; text-align: center"| In the first card, a {{p|Slowpoke}} is eating from a pile of apples that have fallen from a tree. On the second card, it has evolved into a {{p|Slowbro}}, and is using its newly-acquired front arms to shake the tree. | |||
|- | |||
| colspan="7" class="roundy" style="background: #fff; border-style: solid; border-width: 5px; text-align: center" | | |||
|} | |} | ||
==={{tcg| | ==={{tcg|Triumphant}}=== | ||
{| class="roundy" style="background: #FFED53" | {| class="roundy" style="background: #FFED53" | ||
| width="25%"| | | width="25%"| | ||
| class="roundy" style="background: #fff; border-style: solid; border-width: 5px; text-align: center" | [[File: | | class="roundy" style="background: #fff; border-style: solid; border-width: 5px; text-align: center"| [[File:IllumiseTriumphant64.jpg|200px]]<br>{{TCG ID|Triumphant|Illumise|64}} | ||
| width="25%"| | |||
| class="roundy" style="background: #fff; border-style: solid; border-width: 5px; text-align: center"| [[File:VolbeatTriumphant82.jpg|200px]]<br>{{TCG ID|Triumphant|Volbeat|82}} | |||
| width="25%"| | | width="25%"| | ||
|- | |||
| colspan="7" class="roundy" style="background: #fff; border-style: solid; border-width: 5px; text-align: center"| | |||
|- | |||
| colspan="7" class="roundy" style="background: #fff; border-style: solid; border-width: 5px; text-align: center" | | |||
|} | |} | ||
| Line 197: | Line 339: | ||
{| class="roundy" style="background: #FFED53" | {| class="roundy" style="background: #FFED53" | ||
| width="25%"| | | width="25%"| | ||
| class="roundy" style="background: #fff; border-style: solid; border-width: 5px; text-align: center" | [[File:PlusleDarkExplorers39.jpg|200px]]<br>{{TCG ID|Dark Explorers|Plusle|39}} | | class="roundy" style="background: #fff; border-style: solid; border-width: 5px; text-align: center"| [[File:PlusleDarkExplorers39.jpg|200px]]<br>{{TCG ID|Dark Explorers|Plusle|39}} | ||
| width="25%"| | |||
| class="roundy" style="background: #fff; border-style: solid; border-width: 5px; text-align: center"| [[File:MinunDarkExplorers40.jpg|200px]]<br>{{TCG ID|Dark Explorers|Minun|40}} | |||
| width="25%"| | |||
|- | |||
| colspan="7" class="roundy" style="background: #fff; border-style: solid; border-width: 5px; text-align: center"| The two cards depict the same scene from two different perspectives. In the scene, a {{p|Plusle}} is running on the airport runway in [[Mistralton City]] in front of an airplane, while a {{p|Minun}} sits on one the airplane's wings. The first card is focused on the Plusle, while the second is focused on the Minun. | |||
|} | |||
==={{tcg|Dragons Exalted}}=== | |||
{| class="roundy" style="background: #FFED53" | |||
| width="25%"| | |||
| class="roundy" style="background: #fff; border-style: solid; border-width: 5px; text-align: center"| [[File:NinjaskDragonsExalted11.jpg|200px]]<br>{{TCG ID|Dragons Exalted|Ninjask|11}} | |||
| width="25%"| | | width="25%"| | ||
| class="roundy" style="background: #fff; border-style: solid; border-width: 5px; text-align: center" | [[File: | | class="roundy" style="background: #fff; border-style: solid; border-width: 5px; text-align: center"| [[File:ShedinjaDragonsExalted48.jpg|200px]]<br>{{TCG ID|Dragons Exalted|Shedinja|48}} | ||
| width="25%" | | | width="25%"| | ||
|- | |- | ||
| colspan="7" class="roundy" style="background: #fff; border-style: solid; border-width: 5px; text-align: center" | | | colspan="7" class="roundy" style="background: #fff; border-style: solid; border-width: 5px; text-align: center"| | ||
|} | |} | ||
| Line 208: | Line 361: | ||
{| class="roundy" style="background: #FFED53" | {| class="roundy" style="background: #FFED53" | ||
| width="25%"| | | width="25%"| | ||
| class="roundy" style="background: #fff; border-style: solid; border-width: 5px; text-align: center" | [[File:SawkPlasmaBlast52.jpg|200px]]<br>{{TCG ID|Plasma Blast|Sawk|52}} | | class="roundy" style="background: #fff; border-style: solid; border-width: 5px; text-align: center"| [[File:SawkPlasmaBlast52.jpg|200px]]<br>{{TCG ID|Plasma Blast|Sawk|52}} | ||
| width="25%"| | | width="25%"| | ||
| class="roundy" style="background: #fff; border-style: solid; border-width: 5px; text-align: center" | [[File:ThrohPlasmaBlast51.jpg|200px]]<br>{{TCG ID|Plasma Blast|Throh|51}} | | class="roundy" style="background: #fff; border-style: solid; border-width: 5px; text-align: center"| [[File:ThrohPlasmaBlast51.jpg|200px]]<br>{{TCG ID|Plasma Blast|Throh|51}} | ||
| width="25%" | | | width="25%"| | ||
|- | |- | ||
| colspan="7" class="roundy" style="background: #fff; border-style: solid; border-width: 5px; text-align: center" | | | colspan="7" class="roundy" style="background: #fff; border-style: solid; border-width: 5px; text-align: center"| The two cards depict the same scene from two different perspectives. On the first card, a {{p|Sawk}} is seen kicking while a {{p|Throh}} readies a punch in the background, while the second card depicts vice versa. | ||
|} | |} | ||
| Line 219: | Line 372: | ||
{| class="roundy" style="background: #e6dc3f" | {| class="roundy" style="background: #e6dc3f" | ||
| width="30%"| | | width="30%"| | ||
| class="roundy" style="background: #fff; border-style: solid; border-width: 5px; text-align: center" | [[File:CharmeleonLegendaryTreasures18.jpg|200px]]<br>{{TCG ID|Legendary Treasures|Charmeleon|18}} | | class="roundy" style="background: #fff; border-style: solid; border-width: 5px; text-align: center"| [[File:CharmeleonLegendaryTreasures18.jpg|200px]]<br>{{TCG ID|Legendary Treasures|Charmeleon|18}} | ||
| width="30%"| | | width="30%"| | ||
| class="roundy" style="background: #fff; border-style: solid; border-width: 5px; text-align: center" | [[File:SwabluLegendaryTreasures103.jpg|200px]]<br>{{TCG ID|Legendary Treasures|Swablu|103}} | | class="roundy" style="background: #fff; border-style: solid; border-width: 5px; text-align: center"| [[File:SwabluLegendaryTreasures103.jpg|200px]]<br>{{TCG ID|Legendary Treasures|Swablu|103}} | ||
| width="30%"| | | width="30%"| | ||
|- | |- | ||
| colspan="5" class="roundy" style="background: #fff; border-style: solid; border-width: 5px; text-align: center" | The first card shows a {{p|Charmeleon}} accidentally burning a {{p|Swablu}}'s wing with the flame on its tail. On the next card, the Swablu with its singed wing angrily flies away, while the surprised Charmeleon looks on. | | colspan="5" class="roundy" style="background: #fff; border-style: solid; border-width: 5px; text-align: center"| The first card shows a {{p|Charmeleon}} accidentally burning a {{p|Swablu}}'s wing with the flame on its tail. On the next card, the Swablu with its singed wing angrily flies away, while the surprised Charmeleon looks on. | ||
|} | |} | ||
{{-}} | {{-}} | ||
{| class="roundy" style="background: #e6dc3f" | {| class="roundy" style="background: #e6dc3f" | ||
| width="25%"| | | width="25%"| | ||
| class="roundy" style="background: #fff; border-style: solid; border-width: 5px; text-align: center" | [[File:TepigLegendaryTreasures25.jpg|200px]]<br>{{TCG ID|Legendary Treasures|Tepig|25}} | | class="roundy" style="background: #fff; border-style: solid; border-width: 5px; text-align: center"| [[File:TepigLegendaryTreasures25.jpg|200px]]<br>{{TCG ID|Legendary Treasures|Tepig|25}} | ||
| width="25%"| | | width="25%"| | ||
| class="roundy" style="background: #fff; border-style: solid; border-width: 5px; text-align: center" | [[File:PigniteLegendaryTreasures26.jpg|200px]]<br>{{TCG ID|Legendary Treasures|Pignite|26}} | | class="roundy" style="background: #fff; border-style: solid; border-width: 5px; text-align: center"| [[File:PigniteLegendaryTreasures26.jpg|200px]]<br>{{TCG ID|Legendary Treasures|Pignite|26}} | ||
| width="25%"| | | width="25%"| | ||
| class="roundy" style="background: #fff; border-style: solid; border-width: 5px; text-align: center" | [[File:EmboarLegendaryTreasures27.jpg|200px]]<br>{{TCG ID|Legendary Treasures|Emboar|27}} | | class="roundy" style="background: #fff; border-style: solid; border-width: 5px; text-align: center"| [[File:EmboarLegendaryTreasures27.jpg|200px]]<br>{{TCG ID|Legendary Treasures|Emboar|27}} | ||
| width="25%" | | | width="25%"| | ||
|- | |- | ||
| colspan="7" class="roundy" style="background: #fff; border-style: solid; border-width: 5px; text-align: center" | The first card shows a husband and wife depicted with their young son holding the family {{p|Tepig}}. On the next card, the family Tepig has evolved into {{p|Pignite}}, and the husband and wife appear to have had a daughter. On the last card, the family Tepig has fully evolved. On the left, the son has started a family of his own, while the aging husband and wife sit beside their daughter on the right. | | colspan="7" class="roundy" style="background: #fff; border-style: solid; border-width: 5px; text-align: center"| The first card shows a husband and wife depicted with their young son holding the family {{p|Tepig}}. On the next card, the family Tepig has evolved into {{p|Pignite}}, and the husband and wife appear to have had a daughter. On the last card, the family Tepig has fully evolved. On the left, the son has started a family of his own, while the aging husband and wife sit beside their daughter on the right. | ||
|} | |} | ||
{{-}} | {{-}} | ||
{| class="roundy" style="background: #FFED53" | {| class="roundy" style="background: #FFED53" | ||
| width="25%"| | | width="25%"| | ||
| class="roundy" style="background: #fff; border-style: solid; border-width: 5px; text-align: center" | [[File:MinunLegendaryTreasures48.jpg|200px]]<br>{{TCG ID|Legendary Treasures|Minun|48}} | | class="roundy" style="background: #fff; border-style: solid; border-width: 5px; text-align: center"| [[File:MinunLegendaryTreasures48.jpg|200px]]<br>{{TCG ID|Legendary Treasures|Minun|48}} | ||
| width="25%"| | | width="25%"| | ||
| class="roundy" style="background: #fff; border-style: solid; border-width: 5px; text-align: center" | [[File:PlusleLegendaryTreasures47.jpg|200px]]<br>{{TCG ID|Legendary Treasures|Plusle|47}} | | class="roundy" style="background: #fff; border-style: solid; border-width: 5px; text-align: center"| [[File:PlusleLegendaryTreasures47.jpg|200px]]<br>{{TCG ID|Legendary Treasures|Plusle|47}} | ||
| width="25%" | | | width="25%"| | ||
|- | |- | ||
| colspan="7" class="roundy" style="background: #fff; border-style: solid; border-width: 5px; text-align: center" | | | colspan="7" class="roundy" style="background: #fff; border-style: solid; border-width: 5px; text-align: center"| | ||
|} | |} | ||
{{-}} | {{-}} | ||
{| class="roundy" style="background: #e6dc3f" | {| class="roundy" style="background: #e6dc3f" | ||
| width="25%"| | | width="25%"| | ||
| class="roundy" style="background: #fff; border-style: solid; border-width: 5px; text-align: center" | [[File:TrubbishLegendaryTreasures67.jpg|200px]]<br>{{TCG ID|Legendary Treasures|Trubbish|67}} | | class="roundy" style="background: #fff; border-style: solid; border-width: 5px; text-align: center"| [[File:TrubbishLegendaryTreasures67.jpg|200px]]<br>{{TCG ID|Legendary Treasures|Trubbish|67}} | ||
| width="25%"| | |||
| class="roundy" style="background: #fff; border-style: solid; border-width: 5px; text-align: center"| [[File:PhioneLegendaryTreasures36.jpg|200px]]<br>{{TCG ID|Legendary Treasures|Phione|36}} | |||
| width="25%"| | | width="25%"| | ||
| class="roundy" style="background: #fff; border-style: solid; border-width: 5px; text-align: center" | [[File: | | class="roundy" style="background: #fff; border-style: solid; border-width: 5px; text-align: center"| [[File:EmpoleonLegendaryTreasures35.jpg|200px]]<br>{{TCG ID|Legendary Treasures|Empoleon|35}} | ||
| width="25%"| | | width="25%"| | ||
|- | |||
| colspan="7" class="roundy" style="background: #fff; border-style: solid; border-width: 5px; text-align: center"| The first card shows a {{p|Trubbish}} left at a landfill site. On the next card, the abandoned Trubbish meets a {{p|Phione}} upon reaching a waterfront. On the last card, the Phione appears to have introduced the abandoned Trubbish to an {{p|Empoleon}}. The Trubbish appears to be enjoying itself riding on the Empoleon's back as it travels through the water. | |||
|- | |||
| colspan="7" class="roundy" style="background: #fff; border-style: solid; border-width: 5px; text-align: center" | The first card shows a {{p|Trubbish}} left at a landfill site. On the next card, the abandoned Trubbish meets a {{p|Phione}} upon reaching a waterfront. On the last card, the Phione appears to have introduced the abandoned Trubbish to an {{p|Empoleon}}. The Trubbish appears to be enjoying itself riding on the Empoleon's back as it travels through the water. | |||
|} | |} | ||
{{-}} | {{-}} | ||
{| class="roundy" style="background: #e6dc3f" | {| class="roundy" style="background: #e6dc3f" | ||
| width="30%"| | | width="30%"| | ||
| class="roundy" style="background: #fff; border-style: solid; border-width: 5px; text-align: center" | [[File:NatuLegendaryTreasures55.jpg|200px]]<br>{{TCG ID|Legendary Treasures|Natu|55}} | | class="roundy" style="background: #fff; border-style: solid; border-width: 5px; text-align: center"| [[File:NatuLegendaryTreasures55.jpg|200px]]<br>{{TCG ID|Legendary Treasures|Natu|55}} | ||
| width="30%"| | | width="30%"| | ||
| class="roundy" style="background: #fff; border-style: solid; border-width: 5px; text-align: center" | [[File:BouffalantLegendaryTreasures107.jpg|200px]]<br>{{TCG ID|Legendary Treasures|Bouffalant|107}} | | class="roundy" style="background: #fff; border-style: solid; border-width: 5px; text-align: center"| [[File:BouffalantLegendaryTreasures107.jpg|200px]]<br>{{TCG ID|Legendary Treasures|Bouffalant|107}} | ||
| width="30%"| | | width="30%"| | ||
|- | |- | ||
| colspan="5" class="roundy" style="background: #fff; border-style: solid; border-width: 5px; text-align: center" | The first card shows two {{p|Natu}} huddled together in a blizzard, while a {{p|Bouffalant}} approaches in the distance. On the next card, the blizzard has abated, and the two Natu appear contently snug in Bouffalant's afro. | | colspan="5" class="roundy" style="background: #fff; border-style: solid; border-width: 5px; text-align: center"| The first card shows two {{p|Natu}} huddled together in a blizzard, while a {{p|Bouffalant}} approaches in the distance. On the next card, the blizzard has abated, and the two Natu appear contently snug in Bouffalant's afro. | ||
|} | |||
==={{tcg|XY Black Star Promos}}=== | |||
{| class="roundy" style="background: #FFED53" | |||
| width="25%"| | |||
| class="roundy" style="background: #fff; border-style: solid; border-width: 5px; text-align: center"| [[File:ZekromXYPromo76.jpg|200px]]<br>{{TCG ID|XY Promo|Zekrom|76}} | |||
| width="25%"| | |||
| class="roundy" style="background: #fff; border-style: solid; border-width: 5px; text-align: center"| [[File:PalkiaXYPromo75.jpg|200px]]<br>{{TCG ID|XY Promo|Palkia|75}} | |||
| width="25%"| | |||
| class="roundy" style="background: #fff; border-style: solid; border-width: 5px; text-align: center"| [[File:LatiosXYPromo79.jpg|200px]]<br>{{TCG ID|XY Promo|Latios|79}} | |||
| width="25%"| | |||
|- | |||
| colspan="7" class="roundy" style="background: #fff; border-style: solid; border-width: 5px; text-align: center"| | |||
|} | |||
==={{tcg|XY}}=== | |||
{| class="roundy" style="background: #FFED53" | |||
| width="25%"| | |||
| class="roundy" style="background: #fff; border-style: solid; border-width: 5px; text-align: center"| [[File:IllumiseXY9.jpg|200px]]<br>{{TCG ID|XY|Illumise|9}} | |||
| width="25%"| | |||
| class="roundy" style="background: #fff; border-style: solid; border-width: 5px; text-align: center"| [[File:VolbeatXY8.jpg|200px]]<br>{{TCG ID|XY|Volbeat|8}} | |||
| width="25%"| | |||
|- | |||
| colspan="7" class="roundy" style="background: #fff; border-style: solid; border-width: 5px; text-align: center"| | |||
|} | |} | ||
==={{tcg|Furious Fists}}=== | ==={{tcg|Furious Fists}}=== | ||
{| class="roundy" style="background: #FFED53" | {| class="roundy" style="background: #FFED53" | ||
| width="15%"| | |||
| class="roundy" style="background: #fff; border-style: solid; border-width: 5px; text-align: center"| [[File:MountainRingFuriousFists97.jpg|200px]]<br>{{TCG ID|Furious Fists|Mountain Ring|97}} | |||
| width="15%"| | |||
| class="roundy" style="background: #fff; border-style: solid; border-width: 5px; text-align: center"| [[File:SlakingFuriousFists83.jpg|200px]]<br>{{TCG ID|Furious Fists|Slaking|83}} | |||
| width="15%"| | |||
| class="roundy" style="background: #fff; border-style: solid; border-width: 5px; text-align: center"| [[File:MagmortarFuriousFists11.jpg|200px]]<br>{{TCG ID|Furious Fists|Magmortar|11}} | |||
| width="15%"| | |||
| class="roundy" style="background: #fff; border-style: solid; border-width: 5px; text-align: center"| [[File:ElectivireFuriousFists30.jpg|200px]]<br>{{TCG ID|Furious Fists|Electivire|30}} | |||
| width="15%"| | |||
| class="roundy" style="background: #fff; border-style: solid; border-width: 5px; text-align: center"| [[File:BreloomFuriousFists50.jpg|200px]]<br>{{TCG ID|Furious Fists|Breloom|50}} | |||
| width="15%"| | |||
|- | |||
| colspan="11" class="roundy" style="background: #fff; border-style: solid; border-width: 5px; text-align: center"| | |||
|} | |||
{{-}} | |||
{| class="roundy" style="background: #FFED53" | |||
| width="25%"| | |||
| class="roundy" style="background: #fff; border-style: solid; border-width: 5px; text-align: center"| [[File:FightingStadiumFuriousFists90.jpg|200px]]<br>{{TCG ID|Furious Fists|Fighting Stadium|90}} | |||
| width="25%"| | |||
| class="roundy" style="background: #fff; border-style: solid; border-width: 5px; text-align: center"| [[File:BattleReporterFuriousFists88.jpg|200px]]<br>{{TCG ID|Furious Fists|Battle Reporter|88}} | |||
| width="25%"| | | width="25%"| | ||
| class="roundy" style="background: #fff; border-style: solid; border-width: 5px; text-align: center" | [[File: | | class="roundy" style="background: #fff; border-style: solid; border-width: 5px; text-align: center"| [[File:HitmonchanFuriousFists48.jpg|200px]]<br>{{TCG ID|Furious Fists|Hitmonchan|48}} | ||
| width="25%"| | | width="25%"| | ||
| class="roundy" style="background: #fff; border-style: solid; border-width: 5px; text-align: center" | [[File:MinunFuriousFists32.jpg|200px]]<br>{{TCG ID|Furious Fists|Minun|32}} | |- | ||
| width=" | | width="25%"| | ||
|- | | class="roundy" style="background: #fff; border-style: solid; border-width: 5px; text-align: center"| [[File:MachampFuriousFists46.jpg|200px]]<br>{{TCG ID|Furious Fists|Machamp|46}} | ||
| colspan=" | | width="25%"| | ||
| class="roundy" style="background: #fff; border-style: solid; border-width: 5px; text-align: center"| [[File:MienshaoFuriousFists57.jpg|200px]]<br>{{TCG ID|Furious Fists|Mienshao|57}} | |||
| width="25%"| | |||
| class="roundy" style="background: #fff; border-style: solid; border-width: 5px; text-align: center"| [[File:LandorusFuriousFists58.jpg|200px]]<br>{{TCG ID|Furious Fists|Landorus|58}} | |||
| width="25%"| | |||
|- | |||
| colspan="9" class="roundy" style="background: #fff; border-style: solid; border-width: 5px; text-align: center"| {{me|Lucario}} is also shown at the Fighting Stadium on the [https://bulbapedia.bulbagarden.net/wiki/File:XY3_Booster_Lucario.jpg English booster pack artwork]. | |||
|} | |||
{{-}} | |||
{| class="roundy" style="background: #FFED53" | |||
| width="15%"| | |||
| class="roundy" style="background: #fff; border-style: solid; border-width: 5px; text-align: center"| [[File:PlusleFuriousFists31.jpg|200px]]<br>{{TCG ID|Furious Fists|Plusle|31}} | |||
| width="15%"| | |||
| class="roundy" style="background: #fff; border-style: solid; border-width: 5px; text-align: center"| [[File:MinunFuriousFists32.jpg|200px]]<br>{{TCG ID|Furious Fists|Minun|32}} | |||
| width="15%"| | |||
| class="roundy" style="background: #fff; border-style: solid; border-width: 5px; text-align: center"| [[File:ScraftyFuriousFists67.jpg|200px]]<br>{{TCG ID|Furious Fists|Scrafty|67}} | |||
| width="15%"| | |||
| class="roundy" style="background: #fff; border-style: solid; border-width: 5px; text-align: center"| [[File:MachopFuriousFists44.jpg|200px]]<br>{{TCG ID|Furious Fists|Machop|44}} | |||
| width="15%"| | |||
| class="roundy" style="background: #fff; border-style: solid; border-width: 5px; text-align: center"| [[File:HitmonleeFuriousFists47.jpg|200px]]<br>{{TCG ID|Furious Fists|Hitmonlee|47}} | |||
| width="15%"| | |||
|- | |||
| width="15%"| | |||
| class="roundy" style="background: #fff; border-style: solid; border-width: 5px; text-align: center"| [[File:MakuhitaFuriousFists51.jpg|200px]]<br>{{TCG ID|Furious Fists|Makuhita|51}} | |||
| width="15%"| | |||
| class="roundy" style="background: #fff; border-style: solid; border-width: 5px; text-align: center"| [[File:ThundurusFuriousFists33.jpg|200px]]<br>{{TCG ID|Furious Fists|Thundurus|33}} | |||
| width="15%"| | |||
| class="roundy" style="background: #fff; border-style: solid; border-width: 5px; text-align: center"| [[File:LickilickyFuriousFists79.jpg|200px]]<br>{{TCG ID|Furious Fists|Lickilicky|79}} | |||
| width="15%"| | |||
| class="roundy" style="background: #fff; border-style: solid; border-width: 5px; text-align: center"| [[File:GolurkFuriousFists43.jpg|200px]]<br>{{TCG ID|Furious Fists|Golurk|43}} | |||
| width="15%"| | |||
| class="roundy" style="background: #fff; border-style: solid; border-width: 5px; text-align: center"| [[File:BearticFuriousFists22.jpg|200px]]<br>{{TCG ID|Furious Fists|Beartic|22}} | |||
| width="15%"| | |||
|- | |||
| colspan="11" class="roundy" style="background: #fff; border-style: solid; border-width: 5px; text-align: center"| | |||
|} | |} | ||
{{-}} | {{-}} | ||
{| class="roundy" style="background: #FFED53" | {| class="roundy" style="background: #FFED53" | ||
| width=" | | width="25%"| | ||
| class="roundy" style="background: #fff; border-style: solid; border-width: 5px; text-align: center" | [[File: | | class="roundy" style="background: #fff; border-style: solid; border-width: 5px; text-align: center"| [[File:HawluchaFuriousFists63.jpg|200px]]<br>{{TCG ID|Furious Fists|Hawlucha|63}} | ||
| width=" | | width="25%"| | ||
| class="roundy" style="background: #fff; border-style: solid; border-width: 5px; text-align: center" | [[File: | | class="roundy" style="background: #fff; border-style: solid; border-width: 5px; text-align: center"| [[File:FlygonFuriousFists76.jpg|200px]]<br>{{TCG ID|Furious Fists|Flygon|76}} | ||
| width=" | | width="25%"| | ||
| class="roundy" style="background: #fff; border-style: solid; border-width: 5px; text-align: center" | [[File: | | class="roundy" style="background: #fff; border-style: solid; border-width: 5px; text-align: center"| [[File:ScraggyFuriousFists66.jpg|200px]]<br>{{TCG ID|Furious Fists|Scraggy|66}} | ||
| width=" | | width="25%"| | ||
| class="roundy" style="background: #fff; border-style: solid; border-width: 5px; text-align: center" | [[File: | |- | ||
| width=" | | colspan="9" class="roundy" style="background: #fff; border-style: solid; border-width: 5px; text-align: center"| {{p|Hawlucha}} is confirmed to be in the same location as per the [https://bulbapedia.bulbagarden.net/wiki/File:XY3_Booster_Hawlucha.jpg English booster pack artwork]. | ||
|- | |} | ||
| colspan=" | |||
==={{tcg|Double Crisis}}=== | |||
{| class="roundy" style="background: #FFED53" | |||
| width="25%"| | |||
| class="roundy" style="background: #fff; border-style: solid; border-width: 5px; text-align: center"| [[File:TeamMagmaGroudonEXDoubleCrisis15.jpg|200px]]<br>{{TCG ID|Double Crisis|Team Magma's Groudon-EX|15}} | |||
| width="25%"| | |||
| class="roundy" style="background: #fff; border-style: solid; border-width: 5px; text-align: center"| [[File:TeamAquaKyogreEXDoubleCrisis6.jpg|200px]]<br>{{TCG ID|Double Crisis|Team Aqua's Kyogre-EX|6}} | |||
| width="25%"| | |||
|- | |||
| colspan="7" class="roundy" style="background: #fff; border-style: solid; border-width: 5px; text-align: center"| | |||
|} | |} | ||
==={{tcg|Roaring Skies}}=== | ==={{tcg|Roaring Skies}}=== | ||
{| class="roundy" style="background: #99FFCC" | {| class="roundy" style="background: #99FFCC" | ||
| width="30%"| | | width="30%"| | ||
| class="roundy" style="background: #fff; border-style: solid; border-width: 5px; text-align: center" | [[File: | | class="roundy" style="background: #fff; border-style: solid; border-width: 5px; text-align: center"| [[File:ExeggcuteRoaringSkies1.jpg|200px]]<br>{{TCG ID|Roaring Skies|Exeggcute|1}} | ||
| width="30%"| | | width="30%"| | ||
| class="roundy" style="background: #fff; border-style: solid; border-width: 5px; text-align: center" | [[File: | | class="roundy" style="background: #fff; border-style: solid; border-width: 5px; text-align: center"| [[File:ExeggutorRoaringSkies2.jpg|200px]]<br>{{TCG ID|Roaring Skies|Exeggutor|2}} | ||
| width="30%"| | | width="30%"| | ||
|- | |- | ||
| colspan="5" class="roundy" style="background: #fff; border-style: solid; border-width: 5px; text-align: center" | The first card shows an {{p|Exeggcute}} that is being harassed by a {{p|Spearow}}. On the next card, the Exeggcute has evolved into {{p|Exeggutor}} and takes its revenge on a flock of Spearow. | | colspan="5" class="roundy" style="background: #fff; border-style: solid; border-width: 5px; text-align: center"| The first card shows an {{p|Exeggcute}} that is being harassed by a {{p|Spearow}}. On the next card, the Exeggcute has evolved into {{p|Exeggutor}} and takes its revenge on a flock of Spearow. | ||
|} | |} | ||
{{-}} | {{-}} | ||
{| class="roundy" style="background: #99FFCC" | {| class="roundy" style="background: #99FFCC" | ||
| width="30%"| | | width="30%"| | ||
| class="roundy" style="background: #fff; border-style: solid; border-width: 5px; text-align: center" | [[File: | | class="roundy" style="background: #fff; border-style: solid; border-width: 5px; text-align: center"| [[File:MeowthRoaringSkies67.jpg|200px]]<br>{{TCG ID|Roaring Skies|Meowth|67}} | ||
| width="30%"| | | width="30%"| | ||
| class="roundy" style="background: #fff; border-style: solid; border-width: 5px; text-align: center" | [[File: | | class="roundy" style="background: #fff; border-style: solid; border-width: 5px; text-align: center"| [[File:InkayRoaringSkies41.jpg|200px]]<br>{{TCG ID|Roaring Skies|Inkay|41}} | ||
| width="30%"| | | width="30%"| | ||
|- | |- | ||
| colspan="5" class="roundy" style="background: #fff; border-style: solid; border-width: 5px; text-align: center" | The first card shows a {{p|Meowth}} overjoyed at finding a Berry, while an {{p|Inkay}} watches from a distance. On the next card, the Inkay has ambushed the Meowth with a spray of ink and made off with its Berry. | | colspan="5" class="roundy" style="background: #fff; border-style: solid; border-width: 5px; text-align: center"| The first card shows a {{p|Meowth}} overjoyed at finding a Berry, while an {{p|Inkay}} watches from a distance. On the next card, the Inkay has ambushed the Meowth with a spray of ink and made off with its Berry. | ||
|} | |||
==={{tcg|Roaring Skies}} and {{tcg|Ancient Origins}}=== | |||
{| class="roundy" style="background: #FFED53" | |||
| width="25%"| | |||
| class="roundy" style="background: #fff; border-style: solid; border-width: 5px; text-align: center"| [[File:GligarRoaringSkies36.jpg|200px]]<br>{{TCG ID|Roaring Skies|Gligar|36}} | |||
| width="25%"| | |||
| class="roundy" style="background: #fff; border-style: solid; border-width: 5px; text-align: center"| [[File:GolettAncientOrigins34.jpg|200px]]<br>{{TCG ID|Ancient Origins|Golett|34}} | |||
| width="25%"| | |||
| class="roundy" style="background: #fff; border-style: solid; border-width: 5px; text-align: center"| [[File:GolurkAncientOrigins41.jpg|200px]]<br>{{TCG ID|Ancient Origins|Golurk|41}} | |||
| width="25%"| | |||
|- | |||
| colspan="7" class="roundy" style="background: #fff; border-style: solid; border-width: 5px; text-align: center"| | |||
|} | |} | ||
| Line 319: | Line 573: | ||
{| class="roundy" style="background: #065cae" | {| class="roundy" style="background: #065cae" | ||
| width="30%"| | | width="30%"| | ||
| class="roundy" style="background: #fff; border-style: solid; border-width: 5px; text-align: center" | [[File:ChespinBREAKthrough9.jpg|200px]]<br>{{TCG ID|BREAKthrough|Chespin|9}} | | class="roundy" style="background: #fff; border-style: solid; border-width: 5px; text-align: center"| [[File:ChespinBREAKthrough9.jpg|200px]]<br>{{TCG ID|BREAKthrough|Chespin|9}} | ||
| width="30%"| | | width="30%"| | ||
| class="roundy" style="background: #fff; border-style: solid; border-width: 5px; text-align: center" | [[File:SnorlaxBREAKthrough118.jpg|200px]]<br>{{TCG ID|BREAKthrough|Snorlax|118}} | | class="roundy" style="background: #fff; border-style: solid; border-width: 5px; text-align: center"| [[File:SnorlaxBREAKthrough118.jpg|200px]]<br>{{TCG ID|BREAKthrough|Snorlax|118}} | ||
| width="30%"| | | width="30%"| | ||
|- | |- | ||
| colspan=" | | colspan="7" class="roundy" style="background: #fff; border-style: solid; border-width: 5px; text-align: center"| The first card shows a {{p|Chespin}} climbing a tree in an attempt to reach some [[Razz Berry|Razz Berries]], while a {{p|Snorlax}} sleeps below. On the next card, the Snorlax has awoken and is readily dashing to catch the Chespin that is falling from the tree. | ||
|} | |||
{{-}} | |||
{| class="roundy" style="background: #FFED53" | |||
| width="25%"| | |||
| class="roundy" style="background: #fff; border-style: solid; border-width: 5px; text-align: center"| [[File:FroakieBREAKthrough46.jpg|200px]]<br>{{TCG ID|BREAKthrough|Froakie|46}} | |||
| width="25%"| | |||
| class="roundy" style="background: #fff; border-style: solid; border-width: 5px; text-align: center"| [[File:FrogadierBREAKthrough47.jpg|200px]]<br>{{TCG ID|BREAKthrough|Frogadier|47}} | |||
| width="25%"| | |||
|- | |||
| colspan="7" class="roundy" style="background: #fff; border-style: solid; border-width: 5px; text-align: center"| The first card depicts a {{p|Froakie}} trying to run on water, presumably being coached by a {{p|Frogadier}}. On the second card, the Frogadier is demonstrating his technique to the Froakie, who watches in awe. | |||
|} | |||
{{-}} | |||
{| class="roundy" style="background: #FFED53" | |||
| width="25%"| | |||
| class="roundy" style="background: #fff; border-style: solid; border-width: 5px; text-align: center"| [[File:MarowakBREAKthrough78.jpg|200px]]<br>{{TCG ID|BREAKthrough|Marowak|78}} | |||
| width="25%"| | |||
| class="roundy" style="background: #fff; border-style: solid; border-width: 5px; text-align: center"| [[File:FlabébéBREAKthrough101.jpg|200px]]<br>{{TCG ID|BREAKthrough|Flabébé|101}} | |||
| width="25%"| | |||
|- | |||
| colspan="7" class="roundy" style="background: #fff; border-style: solid; border-width: 5px; text-align: center"| | |||
|} | |||
{{-}} | |||
{| class="roundy" style="background: #FFED53" | |||
| width="25%"| | |||
| class="roundy" style="background: #fff; border-style: solid; border-width: 5px; text-align: center"| [[File:MagnemiteBREAKthrough52.jpg|200px]]<br>{{TCG ID|BREAKthrough|Magnemite|52}} | |||
| width="25%"| | |||
| class="roundy" style="background: #fff; border-style: solid; border-width: 5px; text-align: center"| [[File:MagnemiteBREAKthrough51.jpg|200px]]<br>{{TCG ID|BREAKthrough|Magnemite|51}} | |||
| width="25%"| | |||
|- | |||
| colspan="7" class="roundy" style="background: #fff; border-style: solid; border-width: 5px; text-align: center"| | |||
|} | |} | ||
{{-}} | {{-}} | ||
{| class="roundy" style="background: #FFED53" | {| class="roundy" style="background: #FFED53" | ||
| width="25%"| | | width="25%"| | ||
| class="roundy" style="background: #fff; border-style: solid; border-width: 5px; text-align: center" | [[File: | | class="roundy" style="background: #fff; border-style: solid; border-width: 5px; text-align: center"| [[File:AxewBREAKthrough108.jpg|200px]]<br>{{TCG ID|BREAKthrough|Axew|108}} | ||
| width="25%"| | | width="25%"| | ||
| class="roundy" style="background: #fff; border-style: solid; border-width: 5px; text-align: center" | [[File: | | class="roundy" style="background: #fff; border-style: solid; border-width: 5px; text-align: center"| [[File:AxewBREAKthrough109.jpg|200px]]<br>{{TCG ID|BREAKthrough|Axew|109}} | ||
| width="25%" | | | width="25%"| | ||
|- | |- | ||
| colspan="7" class="roundy" style="background: #fff; border-style: solid; border-width: 5px; text-align: center" | | | colspan="7" class="roundy" style="background: #fff; border-style: solid; border-width: 5px; text-align: center"| | ||
|} | |} | ||
{{-}} | |||
{| class="roundy" style="background: #FFED53" | {| class="roundy" style="background: #FFED53" | ||
| width="25%"| | | width="25%"| | ||
| class="roundy" style="background: #fff; border-style: solid; border-width: 5px; text-align: center" | [[File: | | class="roundy" style="background: #fff; border-style: solid; border-width: 5px; text-align: center"| [[File:ChespinBREAKthrough7.jpg|200px]]<br>{{TCG ID|BREAKthrough|Chespin|7}} | ||
| width="25%"| | | width="25%"| | ||
| class="roundy" style="background: #fff; border-style: solid; border-width: 5px; text-align: center" | [[File: | | class="roundy" style="background: #fff; border-style: solid; border-width: 5px; text-align: center"| [[File:ChespinBREAKthrough8.jpg|200px]]<br>{{TCG ID|BREAKthrough|Chespin|8}} | ||
| width="25%" | | | width="25%"| | ||
|- | |- | ||
| colspan="7" class="roundy" style="background: #fff; border-style: solid; border-width: 5px; text-align: center" | | | colspan="7" class="roundy" style="background: #fff; border-style: solid; border-width: 5px; text-align: center"| | ||
|} | |} | ||
{{-}} | {{-}} | ||
{| class="roundy" style="background: #FFED53" | {| class="roundy" style="background: #FFED53" | ||
| width="25%"| | | width="25%"| | ||
| class="roundy" style="background: #fff; border-style: solid; border-width: 5px; text-align: center" | [[File: | | class="roundy" style="background: #fff; border-style: solid; border-width: 5px; text-align: center"| [[File:RemoraidBREAKthrough32.jpg|200px]]<br>{{TCG ID|BREAKthrough|Remoraid|32}} | ||
| width="25%"| | | width="25%"| | ||
| class="roundy" style="background: #fff; border-style: solid; border-width: 5px; text-align: center" | [[File: | | class="roundy" style="background: #fff; border-style: solid; border-width: 5px; text-align: center"| [[File:RemoraidBREAKthrough31.jpg|200px]]<br>{{TCG ID|BREAKthrough|Remoraid|31}} | ||
| width="25%" | | | width="25%"| | ||
|- | |- | ||
| colspan="7" class="roundy" style="background: #fff; border-style: solid; border-width: 5px; text-align: center" | | | colspan="7" class="roundy" style="background: #fff; border-style: solid; border-width: 5px; text-align: center"| | ||
|} | |} | ||
{{-}} | |||
{| class="roundy" style="background: #FFED53" | {| class="roundy" style="background: #FFED53" | ||
| width="25%"| | | width="25%"| | ||
| class="roundy" style="background: #fff; border-style: solid; border-width: 5px; text-align: center" | [[File: | | class="roundy" style="background: #fff; border-style: solid; border-width: 5px; text-align: center"| [[File:DoduoBREAKthrough115.jpg|200px]]<br>{{TCG ID|BREAKthrough|Doduo|115}} | ||
| width="25%"| | | width="25%"| | ||
| class="roundy" style="background: #fff; border-style: solid; border-width: 5px; text-align: center" | [[File: | | class="roundy" style="background: #fff; border-style: solid; border-width: 5px; text-align: center"| [[File:DoduoBREAKthrough116.jpg|200px]]<br>{{TCG ID|BREAKthrough|Doduo|116}} | ||
| width="25%"| | | width="25%"| | ||
|- | |||
| colspan="7" class="roundy" style="background: #fff; border-style: solid; border-width: 5px; text-align: center"| | |||
|- | |||
| colspan="7" class="roundy" style="background: #fff; border-style: solid; border-width: 5px; text-align: center" | | |||
|} | |} | ||
==={{tcg| | |||
{| class="roundy" style="background: # | ==={{tcg|BREAKthrough}}, {{tcg|BREAKpoint}}, and {{tcg|Fates Collide}}=== | ||
| width=" | {{main|Parallel Worlds (TCG)}} | ||
| class="roundy" style="background: #fff; border-style: solid; border-width: 5px; text-align: center" | [[File: | {| class="roundy" style="background: #FFED53" | ||
| width=" | | width="15%"| | ||
| class="roundy" style="background: #fff; border-style: solid; border-width: 5px; text-align: center" | [[File: | | class="roundy" style="background: #fff; border-style: solid; border-width: 5px; text-align: center"| [[File:XerneasBREAKthrough107.jpg|200px]]<br>{{TCG ID|BREAKthrough|Xerneas|107}} | ||
| width=" | | width="15%"| | ||
|- | | class="roundy" style="background: #fff; border-style: solid; border-width: 5px; text-align: center"| [[File:YveltalBREAKthrough94.jpg|200px]]<br>{{TCG ID|BREAKthrough|Yveltal|94}} | ||
| | | width="15%"| | ||
| class="roundy" style="background: #fff; border-style: solid; border-width: 5px; text-align: center"| [[File:NoctowlBREAKthrough120.jpg|200px]]<br>{{TCG ID|BREAKthrough|Noctowl|120}} | |||
| width="15%"| | |||
| class="roundy" style="background: #fff; border-style: solid; border-width: 5px; text-align: center"| [[File:StaraptorBREAKthrough127.jpg|200px]]<br>{{TCG ID|BREAKthrough|Staraptor|127}} | |||
| width="15%"| | |||
|- | |||
| width="15%"| | |||
| class="roundy" style="background: #fff; border-style: solid; border-width: 5px; text-align: center"| [[File:SigilyphRageBrokenHeavens38.jpg|200px]]<br>{{TCG ID|BREAKpoint|Sigilyph|55}} | |||
| width="15%"| | |||
| class="roundy" style="background: #fff; border-style: solid; border-width: 5px; text-align: center"| [[File:RattataRageBrokenHeavens64.jpg|200px]]<br>{{TCG ID|BREAKpoint|Rattata|87}} | |||
| width="15%"| | |||
| class="roundy" style="background: #fff; border-style: solid; border-width: 5px; text-align: center"| [[File:RaticateRageBrokenHeavens65.jpg|200px]]<br>{{TCG ID|BREAKpoint|Raticate|88}} | |||
| width="15%"| | |||
| class="roundy" style="background: #fff; border-style: solid; border-width: 5px; text-align: center"| [[File:RaticateBREAKRageBrokenHeavens66.jpg|200px]]<br>{{TCG ID|BREAKpoint|Raticate BREAK|89}} | |||
| width="15%"| | |||
|- | |||
| width="15%"| | |||
| class="roundy" style="background: #fff; border-style: solid; border-width: 5px; text-align: center"| [[File:BurmyAwakeningPsychicKing2.jpg|200px]]<br>{{TCG ID|Fates Collide|Burmy|2}} | |||
| width="15%"| | |||
| class="roundy" style="background: #fff; border-style: solid; border-width: 5px; text-align: center"| [[File:MandibuzzAwakeningPsychicKing45.jpg|200px]]<br>{{TCG ID|Fates Collide|Mandibuzz|58}} | |||
| width="15%"| | |||
| class="roundy" style="background: #fff; border-style: solid; border-width: 5px; text-align: center"| [[File:SeelAwakeningPsychicKing13.jpg|200px]]<br>{{TCG ID|Fates Collide|Seel|15}} | |||
| width="15%"| | |||
| class="roundy" style="background: #fff; border-style: solid; border-width: 5px; text-align: center"| [[File:OmastarFatesCollide18.jpg|200px]]<br>{{TCG ID|Fates Collide|Omastar|18}} | |||
| width="15%"| | |||
|- | |||
| width="15%"| | |||
| class="roundy" style="background: #fff; border-style: solid; border-width: 5px; text-align: center"| [[File:LucarioAwakeningPsychicKing50.jpg|200px]]<br>{{TCG ID|Fates Collide|Lucario|63}} | |||
| width="15%"| | |||
| class="roundy" style="background: #fff; border-style: solid; border-width: 5px; text-align: center"| [[File:AerodactylAwakeningPsychicKing56.jpg|200px]]<br>{{TCG ID|Fates Collide|Aerodactyl|76}} | |||
| width="15%"| | |||
| class="roundy" style="background: #fff; border-style: solid; border-width: 5px; text-align: center"| [[File:ChaosTowerAwakeningPsychicKing78.jpg|200px]]<br>{{TCG ID|Fates Collide|Chaos Tower|94}} | |||
| width="15%"| | |||
| class="roundy" style="background: #fff; border-style: solid; border-width: 5px; text-align: center"| [[File:PanpourBREAKthrough41.jpg|200px]]<br>{{TCG ID|BREAKthrough|Panpour|41}} | |||
| width="15%"| | |||
|- | |||
| colspan="11" class="roundy" style="background: #fff; border-style: solid; border-width: 5px; text-align: center"| | |||
|} | |} | ||
==={{tcg| | ==={{tcg|BREAKpoint}}=== | ||
{| class="roundy" style="background: #FFED53" | {| class="roundy" style="background: #FFED53" | ||
| width="25%"| | | width="25%"| | ||
| class="roundy" style="background: #fff; border-style: solid; border-width: 5px; text-align: center" | [[File: | | class="roundy" style="background: #fff; border-style: solid; border-width: 5px; text-align: center"| [[File:HypnoRageBrokenHeavens34.jpg|200px]]<br>{{TCG ID|BREAKpoint|Hypno|51}} | ||
| width="25%"| | | width="25%"| | ||
| class="roundy" style="background: #fff; border-style: solid; border-width: 5px; text-align: center" | [[File: | | class="roundy" style="background: #fff; border-style: solid; border-width: 5px; text-align: center"| [[File:ClefairyRageBrokenHeavens61.jpg|200px]]<br>{{TCG ID|BREAKpoint|Clefairy|81}} | ||
| width="25%"| | | width="25%"| | ||
|- | |||
| colspan="7" class="roundy" style="background: #fff; border-style: solid; border-width: 5px; text-align: center"| The two cards depict a story where {{p|Clefairy}} is going on a safe trail and encounters a {{p|Hypno}} next to a broken sign, who confuses Clefairy and leads it astray on a dark, unsafe path. | |||
|- | |||
| colspan="7" class="roundy" style="background: #fff; border-style: solid; border-width: 5px; text-align: center" | | |||
|} | |} | ||
==={{tcg| | |||
==={{tcg|BREAKpoint}} and {{tcg|Fates Collide}}=== | |||
{| class="roundy" style="background: #FFED53" | {| class="roundy" style="background: #FFED53" | ||
| width="25%"| | | width="25%"| | ||
| class="roundy" style="background: #fff; border-style: solid; border-width: 5px; text-align: center" | [[File: | | class="roundy" style="background: #fff; border-style: solid; border-width: 5px; text-align: center"| [[File:ChikoritaRageBrokenHeavens1.jpg|200px]]<br>{{TCG ID|BREAKpoint|Chikorita|1}} | ||
| width="25%"| | |||
| class="roundy" style="background: #fff; border-style: solid; border-width: 5px; text-align: center"| [[File:FennekinAwakeningPsychicKing9.jpg|200px]]<br>{{TCG ID|Fates Collide|Fennekin|10}} | |||
| width="25%"| | | width="25%"| | ||
| class="roundy" style="background: #fff; border-style: solid; border-width: 5px; text-align: center" | | |- | ||
| colspan="7" class="roundy" style="background: #fff; border-style: solid; border-width: 5px; text-align: center"| The first card shows a {{p|Chikorita}} seeing a {{P|Fennekin}} in the rift hole torn between the {{TCG|Parallel Worlds|twin worlds}}. On the second card, the twin worlds are unified and remade, with both Fennekin and Chikorita playing together in the unified world. | |||
|} | |} | ||
{{-}} | {{-}} | ||
{| class="roundy" style="background: #FFED53" | {| class="roundy" style="background: #FFED53" | ||
| width="25%"| | | width="25%"| | ||
| class="roundy" style="background: #fff; border-style: solid; border-width: 5px; text-align: center" | [[File: | | class="roundy" style="background: #fff; border-style: solid; border-width: 5px; text-align: center"| [[File:ShellderRageBrokenHeavens16.jpg|200px]]<br>{{TCG ID|BREAKpoint|Shellder|22}} | ||
| width="25%"| | |||
| class="roundy" style="background: #fff; border-style: solid; border-width: 5px; text-align: center"| [[File:SolosisAwakeningPsychicKing30.jpg|200px]]<br>{{TCG ID|Fates Collide|Solosis|33}} | |||
| width="25%"| | |||
|- | |||
| colspan="7" class="roundy" style="background: #fff; border-style: solid; border-width: 5px; text-align: center"| | |||
|} | |||
==={{tcg|Generations}}=== | |||
{| class="roundy" style="background: #FFED53" | |||
| width="25%"| | |||
| class="roundy" style="background: #fff; border-style: solid; border-width: 5px; text-align: center"| [[File:CharmanderGenerationsRC3.jpg|200px]]<br>{{TCG ID|Generations|Charmander|RC3}} | |||
| width="25%"| | |||
| class="roundy" style="background: #fff; border-style: solid; border-width: 5px; text-align: center"| [[File:CharmeleonGenerationsRC4.jpg|200px]]<br>{{TCG ID|Generations|Charmeleon|RC4}} | |||
| width="25%"| | |||
| class="roundy" style="background: #fff; border-style: solid; border-width: 5px; text-align: center"| [[File:CharizardGenerationsRC5.jpg|200px]]<br>{{TCG ID|Generations|Charizard|RC5}} | |||
| width="25%"| | |||
|- | |||
| colspan="7" class="roundy" style="background: #fff; border-style: solid; border-width: 5px; text-align: center"| The first card shows a young boy being teased by his mischievous {{p|Charmander}}. On the next card, the boy is now older, and his Charmander has evolved into {{p|Charmeleon}}. The two have forged a close friendship and are engrossed in discussion. On the last card, the boy is now a young man, and his Charmeleon has evolved into {{p|Charizard}}. Their tale of friendship continues, with Charizard shielding the young man from snow. | |||
|} | |||
==={{tcg|Fates Collide}}=== | |||
{| class="roundy" style="background: #FFED53" | |||
| width="25%"| | |||
| class="roundy" style="background: #fff; border-style: solid; border-width: 5px; text-align: center"| [[File:GrumpigAwakeningPsychicKing29.jpg|200px]]<br>{{TCG ID|Fates Collide|Grumpig|31}} | |||
| width="25%"| | | width="25%"| | ||
| class="roundy" style="background: #fff; border-style: solid; border-width: 5px; text-align: center" | [[File: | | class="roundy" style="background: #fff; border-style: solid; border-width: 5px; text-align: center"| [[File:MinccinoAwakeningPsychicKing64.jpg|200px]]<br>{{TCG ID|Fates Collide|Minccino|86}} | ||
| width="25%"| | | width="25%"| | ||
|- | |||
| colspan="7" class="roundy" style="background: #fff; border-style: solid; border-width: 5px; text-align: center"| | |||
|- | |||
| colspan="7" class="roundy" style="background: #fff; border-style: solid; border-width: 5px; text-align: center" | | |||
|} | |} | ||
| Line 419: | Line 756: | ||
{| class="roundy" style="background: #FFED53" | {| class="roundy" style="background: #FFED53" | ||
| width="25%"| | | width="25%"| | ||
| class="roundy" style="background: #fff; border-style: solid; border-width: 5px; text-align: center" | [[File: | | class="roundy" style="background: #fff; border-style: solid; border-width: 5px; text-align: center"| [[File:ChikoritaSMPromo373.jpg|200px]]<br>{{TCG ID|SM-P Promo|Chikorita|373}} | ||
| width="25%"| | | width="25%"| | ||
| class="roundy" style="background: #fff; border-style: solid; border-width: 5px; text-align: center" | [[File: | | class="roundy" style="background: #fff; border-style: solid; border-width: 5px; text-align: center"| [[File:LittenSMPromo374.jpg|200px]]<br>{{TCG ID|SM-P Promo|Litten|374}} | ||
| width="25%"| | | width="25%"| | ||
| class="roundy" style="background: #fff; border-style: solid; border-width: 5px; text-align: center" | [[File: | | class="roundy" style="background: #fff; border-style: solid; border-width: 5px; text-align: center"| [[File:MeowthSMPromo375.jpg|200px]]<br>{{TCG ID|SM-P Promo|Meowth|375}} | ||
| width="25%" | | | width="25%"| | ||
|- | |- | ||
| colspan="7" class="roundy" style="background: #fff; border-style: solid; border-width: 5px; text-align: center" | | | colspan="7" class="roundy" style="background: #fff; border-style: solid; border-width: 5px; text-align: center"| | ||
|} | |} | ||
{{-}} | {{-}} | ||
{| class="roundy" style="background: #FFED53" | {| class="roundy" style="background: #FFED53" | ||
| width="25%"| | |||
| class="roundy" style="background: #fff; border-style: solid; border-width: 5px; text-align: center"| [[File:LittenSMPromo259.jpg|200px]]<br>{{TCG ID|SM-P Promo|Litten|259}} | |||
| width="25%"| | |||
| class="roundy" style="background: #fff; border-style: solid; border-width: 5px; text-align: center"| [[File:ChespinSMPromo260.jpg|200px]]<br>{{TCG ID|SM-P Promo|Chespin|260}} | |||
| width="25%"| | |||
| class="roundy" style="background: #fff; border-style: solid; border-width: 5px; text-align: center"| [[File:InkaySMPromo261.jpg|200px]]<br>{{TCG ID|SM-P Promo|Inkay|261}} | |||
| width="25%"| | |||
|- | |||
| colspan="7" class="roundy" style="background: #fff; border-style: solid; border-width: 5px; text-align: center"| | |||
|} | |||
{{-}} | |||
{| class="roundy" style="background: #FFED53" | |||
| width="17%"| | |||
| class="roundy" style="background: #fff; border-style: solid; border-width: 5px; text-align: center"| [[File:PsyduckSMPromo286.jpg|200px]]<br>{{TCG ID|SM-P Promo|Psyduck|286}} | |||
| width="17%"| | | width="17%"| | ||
| class="roundy" style="background: #fff; border-style: solid; border-width: 5px; text-align: center" | [[File: | | class="roundy" style="background: #fff; border-style: solid; border-width: 5px; text-align: center"| [[File:EeveeSMPromo287.jpg|200px]]<br>{{TCG ID|SM-P Promo|Eevee|287}} | ||
| width="17%"| | | width="17%"| | ||
| class="roundy" style="background: #fff; border-style: solid; border-width: 5px; text-align: center" | [[File: | | class="roundy" style="background: #fff; border-style: solid; border-width: 5px; text-align: center"| [[File:PikachuSMPromo288.jpg|200px]]<br>{{TCG ID|SM-P Promo|Pikachu|288}} | ||
| width="17%"| | | width="17%"| | ||
| class="roundy" style="background: #fff; border-style: solid; border-width: 5px; text-align: center" | [[File: | | class="roundy" style="background: #fff; border-style: solid; border-width: 5px; text-align: center"| [[File:MimikyuSMPromo289.jpg|200px]]<br>{{TCG ID|SM-P Promo|Mimikyu|289}} | ||
| width="17%"| | | width="17%"| | ||
| class="roundy" style="background: #fff; border-style: solid; border-width: 5px; text-align: center" | [[File: | | class="roundy" style="background: #fff; border-style: solid; border-width: 5px; text-align: center"| [[File:RowletSMPromo290.jpg|200px]]<br>{{TCG ID|SM-P Promo|Rowlet|290}} | ||
| width="17%"| | | width="17%"| | ||
| class="roundy" style="background: #fff; border-style: solid; border-width: 5px; text-align: center" | | |- | ||
| colspan="11" class="roundy" style="background: #fff; border-style: solid; border-width: 5px; text-align: center"| All five cards are parodies of "{{wp|The Scream}}" by Edvard Munch. When placed in collector number order, the Pokémon of each card appears in silhouette on the next card. (Psyduck is first, so {{p|Haunter}} and {{p|Gengar}} are on its card. Rowlet is last, and does not appear as a silhouette.) | |||
|} | |} | ||
==={{tcg| | ==={{tcg|Shining Legends}} and {{tcg|SM Black Star Promos}}=== | ||
{| class="roundy" style="background: # | {| class="roundy" style="background: #e6dc3f" | ||
| width="25%"| | |||
| class="roundy" style="background: #fff; border-style: solid; border-width: 5px; text-align: center"| [[File:LatiosShiningLegends41.jpg|200px]]<br>{{TCG ID|Shining Legends|Latios|41}} | |||
| width="25%"| | |||
| class="roundy" style="background: #fff; border-style: solid; border-width: 5px; text-align: center"| [[File:LatiasSMPromo87.jpg|200px]]<br>{{TCG ID|SM Promo|Latias|87}} | |||
| width="25%"| | | width="25%"| | ||
| class="roundy" style="background: #fff; border-style: solid; border-width: 5px; text-align: center" | [[File: | | class="roundy" style="background: #fff; border-style: solid; border-width: 5px; text-align: center"| [[File:LatiosSMPromo88.jpg|200px]]<br>{{TCG ID|SM Promo|Latios|88}} | ||
| width="25%"| | | width="25%"| | ||
|- | |||
| colspan="7" class="roundy" style="background: #fff; border-style: solid; border-width: 5px; text-align: center"| | |||
|- | |||
| colspan="7" class="roundy" style="background: #fff; border-style: solid; border-width: 5px; text-align: center" | | |||
|} | |} | ||
==={{tcg| | ==={{tcg|Shining Legends}} and {{tcg|Unified Minds}}=== | ||
{| class="roundy" style="background: #e6dc3f" | |||
| width="30%"| | |||
| class="roundy" style="background: #fff; border-style: solid; border-width: 5px; text-align: center"| [[File:MewtwoGXShiningLegends78.jpg|200px]]<br>{{TCG ID|Shining Legends|Mewtwo-GX|39}} | |||
| width="30%"| | |||
| class="roundy" style="background: #fff; border-style: solid; border-width: 5px; text-align: center"| [[File:MewtwoMewGXUnifiedMinds71.jpg|200px]]<br>{{TCG ID|Unified Minds|Mewtwo & Mew-GX|71}} | |||
| width="30%"| | |||
|- | |||
| colspan="5" class="roundy" style="background: #fff; border-style: solid; border-width: 5px; text-align: center"| The first card shows a {{p|Mewtwo}} confined within a laboratory enclosure. On the next card, Mewtwo and {{p|Mew}} appear together, in front of the shattered glass of the now-destroyed enclosure. Both cards were illustrated by [[Mitsuhiro Arita]], who suggested that Mew has helped Mewtwo escape the enclosure.<ref name = gamespot20>[https://www.gamespot.com/articles/uncovering-the-hidden-inspiration-and-stories-behi/1100-6468906/ Uncovering The Hidden Inspiration And Stories Behind Pokemon Cards, GameSpot]</ref> | |||
|} | |||
==={{tcg|Team Up}} and {{tcg|Unified Minds}}=== | |||
{| class="roundy" style="background: #FFED53" | {| class="roundy" style="background: #FFED53" | ||
| width="25%"| | | width="25%"| | ||
| class="roundy" style="background: #fff; border-style: solid; border-width: 5px; text-align: center" | [[File: | | class="roundy" style="background: #fff; border-style: solid; border-width: 5px; text-align: center"| [[File:PikachuZekromGXTeamUp33.jpg|200px]]<br>{{TCG ID|Team Up|Pikachu & Zekrom-GX|33}} | ||
| width="25%"| | | width="25%"| | ||
| class="roundy" style="background: #fff; border-style: solid; border-width: 5px; text-align: center" | [[File: | | class="roundy" style="background: #fff; border-style: solid; border-width: 5px; text-align: center"| [[File:CoachTrainerUnifiedMinds192.jpg|200px]]<br>{{TCG ID|Unified Minds|Coach Trainer|192}} | ||
| width="25%" | | | width="25%"| | ||
|- | |- | ||
| colspan="7" class="roundy" style="background: #fff; border-style: solid; border-width: 5px; text-align: center" | | | colspan="7" class="roundy" style="background: #fff; border-style: solid; border-width: 5px; text-align: center"| | ||
|} | |} | ||
==={{tcg| | ==={{tcg|Unified Minds}}=== | ||
{| class="roundy" style="background: #FFED53" | {| class="roundy" style="background: #FFED53" | ||
| width="25%"| | | width="25%"| | ||
| class="roundy" style="background: #fff; border-style: solid; border-width: 5px; text-align: center" | [[File: | | class="roundy" style="background: #fff; border-style: solid; border-width: 5px; text-align: center"| [[File:LucarioUnifiedMinds117.jpg|200px]]<br>{{TCG ID|Unified Minds|Lucario|117}} | ||
| width="25%"| | |||
| class="roundy" style="background: #fff; border-style: solid; border-width: 5px; text-align: center"| [[File:GarchompGiratinaGXUnifiedMinds146.jpg|200px]]<br>{{TCG ID|Unified Minds|Garchomp & Giratina-GX|146}} | |||
| width="25%"| | |||
| class="roundy" style="background: #fff; border-style: solid; border-width: 5px; text-align: center"| [[File:MeloettaUnifiedMinds123.jpg|200px]]<br>{{TCG ID|Unified Minds|Meloetta|123}} | |||
| width="25%"| | | width="25%"| | ||
|- | |||
| colspan="7" class="roundy" style="background: #fff; border-style: solid; border-width: 5px; text-align: center"| | |||
|- | |||
| colspan="7" class="roundy" style="background: #fff; border-style: solid; border-width: 5px; text-align: center" | | |||
|} | |} | ||
{{-}} | {{-}} | ||
{| class="roundy" style="background: #FFED53" | {| class="roundy" style="background: #FFED53" | ||
| width="25%"| | | width="25%"| | ||
| class="roundy" style="background: #fff; border-style: solid; border-width: 5px; text-align: center" | [[File: | | class="roundy" style="background: #fff; border-style: solid; border-width: 5px; text-align: center"| [[File:KangaskhanUnifiedMinds163.jpg|200px]]<br>{{TCG ID|Unified Minds|Kangaskhan|163}} | ||
| width="25%"| | |||
| class="roundy" style="background: #fff; border-style: solid; border-width: 5px; text-align: center"| [[File:RaichuAlolanRaichuGXUnifiedMinds54.jpg|200px]]<br>{{TCG ID|Unified Minds|Raichu & Alolan Raichu-GX|221}} | |||
| width="25%"| | |||
| class="roundy" style="background: #fff; border-style: solid; border-width: 5px; text-align: center"| [[File:DrifblimUnifiedMinds81.jpg|200px]]<br>{{TCG ID|Unified Minds|Drifblim|81}} | |||
| width="25%"| | | width="25%"| | ||
|- | |||
| colspan="7" class="roundy" style="background: #fff; border-style: solid; border-width: 5px; text-align: center"| | |||
|- | |||
| colspan="7" class="roundy" style="background: #fff; border-style: solid; border-width: 5px; text-align: center" | | |||
|} | |} | ||
{{-}} | |||
{| class="roundy" style="background: #FFED53" | {| class="roundy" style="background: #FFED53" | ||
| width="20%"| | | width="20%"| | ||
| class="roundy" style="background: #fff; border-style: solid; border-width: 5px; text-align: center" | [[File: | | class="roundy" style="background: #fff; border-style: solid; border-width: 5px; text-align: center"| [[File:DwebbleUnifiedMinds10.jpg|200px]]<br>{{TCG ID|Unified Minds|Dwebble|10}} | ||
| width="20%"| | | width="20%"| | ||
| class="roundy" style="background: #fff; border-style: solid; border-width: 5px; text-align: center" | [[File: | | class="roundy" style="background: #fff; border-style: solid; border-width: 5px; text-align: center"| [[File:EkansHiddenFates26.jpg|200px]]<br>{{TCG ID|Hidden Fates|Ekans|26}} | ||
| width="20%"| | | width="20%"| | ||
| class="roundy" style="background: #fff; border-style: solid; border-width: 5px; text-align: center" | [[File: | | class="roundy" style="background: #fff; border-style: solid; border-width: 5px; text-align: center"| [[File:HoothootUnifiedMinds165.jpg|200px]]<br>{{TCG ID|Unified Minds|Hoothoot|165}} | ||
| width="20%"| | | width="20%"| | ||
| class="roundy" style="background: #fff; border-style: solid; border-width: 5px; text-align: center" | [[File: | | class="roundy" style="background: #fff; border-style: solid; border-width: 5px; text-align: center"| [[File:MoltresZapdosArticunoGXHiddenFates44.jpg|200px]]<br>{{TCG ID|Hidden Fates|Moltres & Zapdos & Articuno-GX|44}} | ||
| width="20%" | | | width="20%"| | ||
|- | |- | ||
| colspan="9" class="roundy" style="background: #fff; border-style: solid; border-width: 5px; text-align: center" | | | colspan="9" class="roundy" style="background: #fff; border-style: solid; border-width: 5px; text-align: center"| The first three cards depict a {{p|Dwebble}}, {{p|Ekans}}, and {{p|Hoothoot}} each witnessing the [[legendary birds]]. The fourth card depicts all of legendary birds together. | ||
|} | |} | ||
==={{tcg| | ==={{tcg|Cosmic Eclipse}}=== | ||
{| class="roundy" style="background: #FFED53" | |||
| width="25%"| | |||
| class="roundy" style="background: #fff; border-style: solid; border-width: 5px; text-align: center"| [[File:MawileAlterGenesis53.jpg|200px]]<br>{{TCG ID|Cosmic Eclipse|Mawile|140}} | |||
| width="25%"| | |||
| class="roundy" style="background: #fff; border-style: solid; border-width: 5px; text-align: center"| [[File:MegaLopunnyJigglypuffGXCosmicEclipse165.jpg|200px]]<br>{{TCG ID|Cosmic Eclipse|Mega Lopunny & Jigglypuff-GX|226}} | |||
| width="25%"| | |||
|- | |||
| colspan="7" class="roundy" style="background: #fff; border-style: solid; border-width: 5px; text-align: center"| | |||
|} | |||
{{-}} | |||
{| class="roundy" style="background: #FFED53" | {| class="roundy" style="background: #FFED53" | ||
| width="20%"| | | width="20%"| | ||
| class="roundy" style="background: #fff; border-style: solid; border-width: 5px; text-align: center" | [[File: | | class="roundy" style="background: #fff; border-style: solid; border-width: 5px; text-align: center"| [[File:TeddiursaCosmicEclipse171.jpg|200px]]<br>{{TCG ID|Cosmic Eclipse|Teddiursa|171}} | ||
| width="20%"| | |||
| class="roundy" style="background: #fff; border-style: solid; border-width: 5px; text-align: center"| [[File:NosepassAlterGenesis40.jpg|200px]]<br>{{TCG ID|Cosmic Eclipse|Nosepass|106}} | |||
| width="20%"| | | width="20%"| | ||
| class="roundy" style="background: #fff; border-style: solid; border-width: 5px; text-align: center" | [[File: | | class="roundy" style="background: #fff; border-style: solid; border-width: 5px; text-align: center"| [[File:SkrelpAlterGenesis33.jpg|200px]]<br>{{TCG ID|Cosmic Eclipse|Skrelp|91}} | ||
| width="20%"| | | width="20%"| | ||
| class="roundy" style="background: #fff; border-style: solid; border-width: 5px; text-align: center" | [[File: | | class="roundy" style="background: #fff; border-style: solid; border-width: 5px; text-align: center"| [[File:ArceusDialgaPalkiaGXCosmicEclipse221.jpg|200px]]<br>{{TCG ID|Cosmic Eclipse|Arceus & Dialga & Palkia-GX|156}} | ||
| width="20%"| | | width="20%"| | ||
| class="roundy" style="background: #fff; border-style: solid; border-width: 5px; text-align: center" | [[File: | |- | ||
| width=" | | colspan="9" class="roundy" style="background: #fff; border-style: solid; border-width: 5px; text-align: center"| The first three cards depict a {{p|Teddiursa}}, {{p|Nosepass}}, and {{p|Skrelp}} finding ancient statues of {{p|Arceus}}, {{p|Dialga}}, and {{p|Palkia}}, respectively. The fourth card depicts the three statues together. | ||
|- | |} | ||
| colspan=" | |||
==={{tcg|S-P Promotional cards}}=== | |||
{| class="roundy" style="background: #FFED53" | |||
| width="25%"| | |||
| class="roundy" style="background: #fff; border-style: solid; border-width: 5px; text-align: center"| [[File:SobbleSPromo146.jpg|200px]]<br>{{TCG ID|S-P Promo|Sobble|146}} | |||
| width="25%"| | |||
| class="roundy" style="background: #fff; border-style: solid; border-width: 5px; text-align: center"| [[File:KanazawaPikachuSPromo144.jpg|200px]]<br>{{TCG ID|S-P Promo|Pikachu|144}} | |||
| width="25%"| | |||
| class="roundy" style="background: #fff; border-style: solid; border-width: 5px; text-align: center"| [[File:MiloticSPromo145.jpg|200px]]<br>{{TCG ID|S-P Promo|Milotic|145}} | |||
| width="25%"| | |||
|- | |||
| colspan="7" class="roundy" style="background: #fff; border-style: solid; border-width: 5px; text-align: center"| | |||
|} | |} | ||
==={{tcg| | ==={{tcg|SWSH Black Star Promos}}=== | ||
{| class="roundy" style="background: #FFED53" | |||
| width="25%"| | |||
| class="roundy" style="background: #fff; border-style: solid; border-width: 5px; text-align: center"| [[File:ScorbunnySWSHPromo71.jpg|200px]]<br>{{TCG ID|SWSH Promo|Scorbunny|71}} | |||
| width="25%"| | |||
| class="roundy" style="background: #fff; border-style: solid; border-width: 5px; text-align: center"| [[File:GrookeySWSHPromo70.jpg|200px]]<br>{{TCG ID|SWSH Promo|Grookey|70}} | |||
| width="25%"| | |||
| class="roundy" style="background: #fff; border-style: solid; border-width: 5px; text-align: center"| [[File:SobbleSWSHPromo73.jpg|200px]]<br>{{TCG ID|SWSH Promo|Sobble|73}} | |||
| width="25%"| | |||
|- | |||
| colspan="7" class="roundy" style="background: #fff; border-style: solid; border-width: 5px; text-align: center"| In the first card, a {{p|Scorbunny}} finds a pile of Berries, while a {{p|Grookey}} and a {{p|Sobble}} take notice from a bush. In the second card, the Scorbunny has made off with a handful of Berries, while the Grookey inspects of what's left. The last card shows the Sobble crying because the Grookey took the entire pile. | |||
|} | |||
{{-}} | |||
{| class="roundy" style="background: #FFED53" | |||
| width="25%"| | |||
| class="roundy" style="background: #fff; border-style: solid; border-width: 5px; text-align: center"| [[File:EeveeSWSHPromo127.jpg|200px]]<br>{{TCG ID|SWSH Promo|Eevee|127}} | |||
| width="25%"| | |||
| class="roundy" style="background: #fff; border-style: solid; border-width: 5px; text-align: center"| [[File:UmbreonSWSHPromo129.jpg|200px]]<br>{{TCG ID|SWSH Promo|Umbreon|129}} | |||
| width="25%"| | |||
|- | |||
| colspan="7" class="roundy" style="background: #fff; border-style: solid; border-width: 5px; text-align: center"| The first card depicts an {{p|Eevee}} playing with a puddle of water at nighttime. On the second card, the Eevee has evolved into an {{p|Umbreon}}, and is running across the puddle. | |||
|} | |||
{{-}} | |||
{| class="roundy" style="background: #FFED53" | |||
| width="25%"| | |||
| class="roundy" style="background: #fff; border-style: solid; border-width: 5px; text-align: center"| [[File:EeveeSWSHPromo175.jpg|200px]]<br>{{TCG ID|SWSH Promo|Eevee|175}} | |||
| width="25%"| | |||
| class="roundy" style="background: #fff; border-style: solid; border-width: 5px; text-align: center"| [[File:EspeonSWSHPromo174.jpg|200px]]<br>{{TCG ID|SWSH Promo|Espeon|174}} | |||
| width="25%"| | |||
|- | |||
| colspan="7" class="roundy" style="background: #fff; border-style: solid; border-width: 5px; text-align: center"| The first card depicts an {{p|Eevee}} about to fall asleep on a bench surrounded by flowers. On the second card, it has evolved into an {{p|Espeon}}, and has woken up. | |||
|} | |||
{{-}} | |||
{| class="roundy" style="background: #FFED53" | |||
| width="25%"| | |||
| class="roundy" style="background: #fff; border-style: solid; border-width: 5px; text-align: center"| [[File:EeveeSWSHPromo190.jpg|200px]]<br>{{TCG ID|SWSH Promo|Eevee|190}} | |||
| width="25%"| | |||
| class="roundy" style="background: #fff; border-style: solid; border-width: 5px; text-align: center"| [[File:GlaceonSWSHPromo192.jpg|200px]]<br>{{TCG ID|SWSH Promo|Glaceon|192}} | |||
| width="25%"| | |||
| class="roundy" style="background: #fff; border-style: solid; border-width: 5px; text-align: center"| [[File:LeafeonSWSHPromo191.jpg|200px]]<br>{{TCG ID|SWSH Promo|Leafeon|191}} | |||
| width="25%"| | |||
|- | |||
| colspan="7" class="roundy" style="background: #fff; border-style: solid; border-width: 5px; text-align: center"| The first card depicts an {{p|Eevee}} observing a budding flower in the Winter. On the second card, the flower is starting to bloom, and a {{p|Glaceon}} is seen protecting it. On the third card, it is now Spring, and the flower has fully bloomed, with a {{p|Leafeon}} running towards it. | |||
|} | |||
{{-}} | |||
{| class="roundy" style="background: #FFED53" | |||
| width="25%"| | |||
| class="roundy" style="background: #fff; border-style: solid; border-width: 5px; text-align: center"| [[File:EeveeSWSHPromo212.jpg|200px]]<br>{{TCG ID|SWSH Promo|Eevee|190}} | |||
| width="25%"| | |||
| class="roundy" style="background: #fff; border-style: solid; border-width: 5px; text-align: center"| [[File:SylveonSWSHPromo211.jpg|200px]]<br>{{TCG ID|SWSH Promo|Sylveon|211}} | |||
| width="25%"| | |||
|- | |||
| colspan="7" class="roundy" style="background: #fff; border-style: solid; border-width: 5px; text-align: center"| The first card depicts an {{p|Eevee}} running around a playroom playing with a ball. On the second card, the Eevee has evolved into a {{p|Sylveon}}, and is sitting on a cushion, holding the ball with its feelers. | |||
|} | |||
==={{tcg|Sword & Shield}}=== | |||
{| class="roundy" style="background: #FFED53" | |||
| width="25%"| | |||
| class="roundy" style="background: #fff; border-style: solid; border-width: 5px; text-align: center"| [[File:HitmonleeSwordShield94.jpg|200px]]<br>{{TCG ID|Sword & Shield|Hitmonlee|94}} | |||
| width="25%"| | |||
| class="roundy" style="background: #fff; border-style: solid; border-width: 5px; text-align: center"| [[File:HitmonchanSwordShield95.jpg|200px]]<br>{{TCG ID|Sword & Shield|Hitmonchan|95}} | |||
| width="25%"| | |||
|- | |||
| colspan="7" class="roundy" style="background: #fff; border-style: solid; border-width: 5px; text-align: center"| | |||
|} | |||
==={{tcg|Vivid Voltage}}=== | |||
{| class="roundy" style="background: #FFED53" | |||
| width="25%"| | |||
| class="roundy" style="background: #fff; border-style: solid; border-width: 5px; text-align: center"| [[File:ArrokudaVividVoltage41.jpg|200px]]<br>{{TCG ID|Vivid Voltage|Arrokuda|41}} | |||
| width="25%"| | |||
| class="roundy" style="background: #fff; border-style: solid; border-width: 5px; text-align: center"| [[File:CramorantVividVoltage40.jpg|200px]]<br>{{TCG ID|Vivid Voltage|Cramorant|40}} | |||
| width="25%"| | |||
|- | |||
| colspan="7" class="roundy" style="background: #fff; border-style: solid; border-width: 5px; text-align: center"| The first card depicts an {{p|Arrokuda}} swimming underwater with a {{p|Cramorant}} diving in the background. On the second card, the Cramorant has caught the Arrokuda in its beak. | |||
|} | |||
==={{tcg|Battle Styles}}=== | |||
{| class="roundy" style="background: #FFED53" | {| class="roundy" style="background: #FFED53" | ||
| width="25%"| | | width="25%"| | ||
| class="roundy" style="background: #fff; border-style: solid; border-width: 5px; text-align: center" | [[File: | | class="roundy" style="background: #fff; border-style: solid; border-width: 5px; text-align: center"| [[File:PigniteBattleStyles24.jpg|200px]]<br>{{TCG ID|Battle Styles|Pignite|24}} | ||
| width="25%"| | | width="25%"| | ||
| class="roundy" style="background: #fff; border-style: solid; border-width: 5px; text-align: center" | [[File: | | class="roundy" style="background: #fff; border-style: solid; border-width: 5px; text-align: center"| [[File:TyranitarVBattleStyles155.jpg|200px]]<br>{{TCG ID|Battle Styles|Tyranitar V|155}} | ||
| width="25%"| | | width="25%"| | ||
|- | |||
| colspan="7" class="roundy" style="background: #fff; border-style: solid; border-width: 5px; text-align: center"| | |||
|- | |||
| colspan="7" class="roundy" style="background: #fff; border-style: solid; border-width: 5px; text-align: center" | | |||
|} | |} | ||
==={{tcg| | ==={{tcg|Battle Styles}} and {{tcg|S-P Promotional cards}}=== | ||
{| class="roundy" style="background: #FFED53" | {| class="roundy" style="background: #FFED53" | ||
| width="25%"| | | width="25%"| | ||
| class="roundy" style="background: #fff; border-style: solid; border-width: 5px; text-align: center" | [[File: | | class="roundy" style="background: #fff; border-style: solid; border-width: 5px; text-align: center"| [[File:TepigBattleStyles23.jpg|200px]]<br>{{TCG ID|Battle Styles|Tepig|23}} | ||
| width="25%"| | |||
| class="roundy" style="background: #fff; border-style: solid; border-width: 5px; text-align: center"| [[File:TepigSWSHPromo172.jpg|200px]]<br>{{TCG ID|SWSH Promo|Tepig|172}} | |||
| width="25%"| | | width="25%"| | ||
|- | |||
| colspan="7" class="roundy" style="background: #fff; border-style: solid; border-width: 5px; text-align: center"| | |||
|- | |||
| colspan="7" class="roundy" style="background: #fff; border-style: solid; border-width: 5px; text-align: center" | | |||
|} | |} | ||
==={{tcg| | ==={{tcg|Chilling Reign}} and {{tcg|SWSH Black Star Promos}}=== | ||
{| class="roundy" style="background: #FFED53" | |||
| width="25%"| | |||
| class="roundy" style="background: #fff; border-style: solid; border-width: 5px; text-align: center"| [[File:PassimianChillingReign88.jpg|200px]]<br>{{TCG ID|Chilling Reign|Passimian|88}} | |||
| width="25%"| | |||
| class="roundy" style="background: #fff; border-style: solid; border-width: 5px; text-align: center"| [[File:PassimianSWSHPromo115.jpg|200px]]<br>{{TCG ID|SWSH Promo|Passimian|115}} | |||
| width="25%"| | |||
|- | |||
| colspan="7" class="roundy" style="background: #fff; border-style: solid; border-width: 5px; text-align: center"| | |||
|} | |||
{{-}} | |||
{| class="roundy" style="background: #FFED53" | {| class="roundy" style="background: #FFED53" | ||
| width="25%"| | | width="25%"| | ||
| class="roundy" style="background: #fff; border-style: solid; border-width: 5px; text-align: center" | [[File: | | class="roundy" style="background: #fff; border-style: solid; border-width: 5px; text-align: center"| [[File:BlitzleChillingReign50.jpg|200px]]<br>{{TCG ID|Chilling Reign|Blitzle|50}} | ||
| width="25%"| | | width="25%"| | ||
| class="roundy" style="background: #fff; border-style: solid; border-width: 5px; text-align: center" | [[File: | | class="roundy" style="background: #fff; border-style: solid; border-width: 5px; text-align: center"| [[File:BlitzleSWSHPromo173.jpg|200px]]<br>{{TCG ID|SWSH Promo|Blitzle|173}} | ||
| width="25%" | | | width="25%"| | ||
|- | |- | ||
| colspan="7" class="roundy" style="background: #fff; border-style: solid; border-width: 5px; text-align: center" | | | colspan="7" class="roundy" style="background: #fff; border-style: solid; border-width: 5px; text-align: center"| The first card shows a {{p|Blitzle}} standing on an iceberg. On the second card, the iceberg is starting to melt, with the Blitzle looking down worryingly. | ||
|} | |||
==={{tcg|Evolving Skies}} and {{tcg|Fusion Strike}}=== | |||
{| class="roundy" style="background: #FFED53" | |||
| width="20%"| | |||
| class="roundy" style="background: #fff; border-style: solid; border-width: 5px; text-align: center"| [[File:SmeargleEvolvingSkies128.jpg|200px]]<br>{{TCG ID|Evolving Skies|Smeargle|128}} | |||
| width="20%"| | |||
| class="roundy" style="background: #fff; border-style: solid; border-width: 5px; text-align: center"| [[File:MeowthFusionStrike199.jpg|200px]]<br>{{TCG ID|Fusion Strike|Meowth|199}} | |||
| width="20%"| | |||
| class="roundy" style="background: #fff; border-style: solid; border-width: 5px; text-align: center"| [[File:EldegossEvolvingSkies16.jpg|200px]]<br>{{TCG ID|Evolving Skies|Eldegoss|16}} | |||
| width="20%"| | |||
| class="roundy" style="background: #fff; border-style: solid; border-width: 5px; text-align: center"| [[File:MawileFusionStrike119.jpg|200px]]<br>{{TCG ID|Fusion Strike|Mawile|119}} | |||
| width="20%"| | |||
|- | |||
| colspan="9" class="roundy" style="background: #fff; border-style: solid; border-width: 5px; text-align: center"| | |||
|} | |} | ||
{{-}} | {{-}} | ||
{| class="roundy" style="background: #FFED53" | {| class="roundy" style="background: #FFED53" | ||
| width="25%"| | | width="25%"| | ||
| class="roundy" style="background: #fff; border-style: solid; border-width: 5px; text-align: center" | [[File: | | class="roundy" style="background: #fff; border-style: solid; border-width: 5px; text-align: center"| [[File:SewaddleFusionStrike9.jpg|200px]]<br>{{TCG ID|Fusion Strike|Sewaddle|9}} | ||
| width="25%"| | | width="25%"| | ||
| class="roundy" style="background: #fff; border-style: solid; border-width: 5px; text-align: center" | [[File: | | class="roundy" style="background: #fff; border-style: solid; border-width: 5px; text-align: center"| [[File:RaichuEvolvingSkies50.jpg|200px]]<br>{{TCG ID|Evolving Skies|Raichu|50}} | ||
| width="25%" | | | width="25%"| | ||
|- | | class="roundy" style="background: #fff; border-style: solid; border-width: 5px; text-align: center"| [[File:RotomFusionStrike94.jpg|200px]]<br>{{TCG ID|Fusion Strike|Rotom|94}} | ||
| colspan="7" class="roundy" style="background: #fff; border-style: solid; border-width: 5px; text-align: center" | | | width="25%"| | ||
|- | |||
| colspan="7" class="roundy" style="background: #fff; border-style: solid; border-width: 5px; text-align: center"| | |||
|} | |} | ||
==={{tcg| | ==={{tcg|Celebrations}}=== | ||
{| class="roundy" style="background: #FFED53" | {| class="roundy" style="background: #FFED53" | ||
| width="20%"| | | width="20%"| | ||
| class="roundy" style="background: #fff; border-style: solid; border-width: 5px; text-align: center" | [[File: | | class="roundy" style="background: #fff; border-style: solid; border-width: 5px; text-align: center"| [[File:CosmogCelebrations13.jpg|200px]]<br>{{TCG ID|Celebrations|Cosmog|13}} | ||
| width="20%"| | | width="20%"| | ||
| class="roundy" style="background: #fff; border-style: solid; border-width: 5px; text-align: center" | [[File: | | class="roundy" style="background: #fff; border-style: solid; border-width: 5px; text-align: center"| [[File:CosmoemCelebrations14.jpg|200px]]<br>{{TCG ID|Celebrations|Cosmoem|14}} | ||
| width="20%"| | | width="20%"| | ||
| class="roundy" style="background: #fff; border-style: solid; border-width: 5px; text-align: center" | [[File: | | class="roundy" style="background: #fff; border-style: solid; border-width: 5px; text-align: center"| [[File:SolgaleoCelebrations21.jpg|200px]]<br>{{TCG ID|Celebrations|Solgaleo|21}} | ||
| width="20%"| | | width="20%"| | ||
|- | | class="roundy" style="background: #fff; border-style: solid; border-width: 5px; text-align: center"| [[File:LunalaCelebrations15.jpg|200px]]<br>{{TCG ID|Celebrations|Lunala|15}} | ||
| colspan="9" class="roundy" style="background: #fff; border-style: solid; border-width: 5px; text-align: center" | | | width="20%"| | ||
|- | |||
| colspan="9" class="roundy" style="background: #fff; border-style: solid; border-width: 5px; text-align: center"| The first card shows [[Lillie]] playing with [[Nebby]], her {{p|Cosmog}}. On the second card, Nebby has evolved into a {{p|Cosmoem}}, and is shown sleeping next to Lillie. The next two cards seem to split into two different timelines. In the first timeline, Cosmoem has evolved into {{p|Solgaleo}}, and is accompanying Lillie in a field. In the second timeline, it has evolved into {{p|Lunala}}, and is flying next to Lillie, who is standing on a rock near the seaside. | |||
|} | |||
{{-}} | |||
{| class="roundy" style="background: #FFED53" | |||
| width="25%"| | |||
| class="roundy" style="background: #fff; border-style: solid; border-width: 5px; text-align: center"| [[File:KyogreCelebrations3.jpg|200px]]<br>{{TCG ID|Celebrations|Kyogre|3}} | |||
| width="25%"| | |||
| class="roundy" style="background: #fff; border-style: solid; border-width: 5px; text-align: center"| [[File:GroudonCelebrations17.jpg|200px]]<br>{{TCG ID|Celebrations|Groudon|17}} | |||
| width="25%"| | |||
|- | |||
| colspan="7" class="roundy" style="background: #fff; border-style: solid; border-width: 5px; text-align: center"| | |||
|} | |||
==={{tcg|Fusion Strike}}=== | |||
{| class="roundy" style="background: #FFED53" | |||
| width="25%"| | |||
| class="roundy" style="background: #fff; border-style: solid; border-width: 5px; text-align: center"| [[File:AraquanidFusionStrike20.jpg|200px]]<br>{{TCG ID|Fusion Strike|Araquanid|20}} | |||
| width="25%"| | |||
| class="roundy" style="background: #fff; border-style: solid; border-width: 5px; text-align: center"| [[File:MudkipFusionStrike62.jpg|200px]]<br>{{TCG ID|Fusion Strike|Mudkip|62}} | |||
| width="25%"| | |||
| class="roundy" style="background: #fff; border-style: solid; border-width: 5px; text-align: center"| [[File:SandygastFusionStrike125.jpg|200px]]<br>{{TCG ID|Fusion Strike|Sandygast|125}} | |||
| width="25%"| | |||
|- | |||
| colspan="7" class="roundy" style="background: #fff; border-style: solid; border-width: 5px; text-align: center"| | |||
|} | |} | ||
==={{tcg| | ==={{tcg|Fusion Strike}} and {{tcg|Brilliant Stars}}=== | ||
{| class="roundy" style="background: #FFED53" | {| class="roundy" style="background: #FFED53" | ||
| width="25%"| | | width="25%"| | ||
| class="roundy" style="background: #fff; border-style: solid; border-width: 5px; text-align: center" | [[File: | | class="roundy" style="background: #fff; border-style: solid; border-width: 5px; text-align: center"| [[File:OctilleryBrilliantStarsTG3.jpg|200px]]<br>{{TCG ID|Battle Styles|Octillery|37}} | ||
| width="25%"| | | width="25%"| | ||
| class="roundy" style="background: #fff; border-style: solid; border-width: 5px; text-align: center" | [[File: | | class="roundy" style="background: #fff; border-style: solid; border-width: 5px; text-align: center"| [[File:BasculinFusionStrike70.jpg|200px]]<br>{{TCG ID|Fusion Strike|Basculin|70}} | ||
| width="25%" | | | width="25%"| | ||
|- | |- | ||
| colspan="7" class="roundy" style="background: #fff; border-style: solid; border-width: 5px; text-align: center" | | | colspan="7" class="roundy" style="background: #fff; border-style: solid; border-width: 5px; text-align: center"| | ||
|} | |} | ||
==={{tcg| | ==={{tcg|Brilliant Stars}}=== | ||
{| class="roundy" style="background: #FFED53" | {| class="roundy" style="background: #FFED53" | ||
| width="25%"| | | width="25%"| | ||
| class="roundy" style="background: #fff; border-style: solid; border-width: 5px; text-align: center" | [[File: | | class="roundy" style="background: #fff; border-style: solid; border-width: 5px; text-align: center"| [[File:MagmortarBrilliantStars20.jpg|200px]]<br>{{TCG ID|Brilliant Stars|Magmortar|20}} | ||
| width="25%"| | | width="25%"| | ||
| class="roundy" style="background: #fff; border-style: solid; border-width: 5px; text-align: center" | [[File: | | class="roundy" style="background: #fff; border-style: solid; border-width: 5px; text-align: center"| [[File:ElectivireBrilliantStars47.jpg|200px]]<br>{{TCG ID|Brilliant Stars|Electivire|47}} | ||
| width="25%"| | | width="25%"| | ||
|- | |||
| colspan="7" class="roundy" style="background: #fff; border-style: solid; border-width: 5px; text-align: center"| | |||
|- | |||
| colspan="7" class="roundy" style="background: #fff; border-style: solid; border-width: 5px; text-align: center" | | |||
|} | |} | ||
{{ | |||
==={{tcg|Brilliant Stars}} and {{tcg|SWSH Black Star Promos}}=== | |||
{| class="roundy" style="background: #FFED53" | {| class="roundy" style="background: #FFED53" | ||
| width="25%"| | | width="25%"| | ||
| class="roundy" style="background: #fff; border-style: solid; border-width: 5px; text-align: center" | [[File: | | class="roundy" style="background: #fff; border-style: solid; border-width: 5px; text-align: center"| [[File:CharizardVBrilliantStars154.jpg|200px]]<br>{{TCG ID|Brilliant Stars|Charizard V|154}} | ||
| width="25%"| | |||
| class="roundy" style="background: #fff; border-style: solid; border-width: 5px; text-align: center"| [[File:CharizardVSWSHPromo260.jpg|200px]]<br>{{TCG ID|SWSH Promo|Charizard V|260}} | |||
| width="25%"| | | width="25%"| | ||
|- | |||
| colspan="7" class="roundy" style="background: #fff; border-style: solid; border-width: 5px; text-align: center"| The first card depicts a Pokémon battle between a {{p|Charizard}}, and a {{p|Venusaur}}. The second card takes place afterwards, with the both of them resting in the forest destroyed by them battling. | |||
|- | |||
| colspan="7" class="roundy" style="background: #fff; border-style: solid; border-width: 5px; text-align: center" | | |||
|} | |} | ||
{{ | |||
==={{tcg|Silver Tempest}}=== | |||
{| class="roundy" style="background: #FFED53" | {| class="roundy" style="background: #FFED53" | ||
| width="25%"| | | width="25%"| | ||
| class="roundy" style="background: #fff; border-style: solid; border-width: 5px; text-align: center" | [[File: | | class="roundy" style="background: #fff; border-style: solid; border-width: 5px; text-align: center"| [[File:LittenSilverTempest30.jpg|200px]]<br>{{TCG ID|Silver Tempest|Litten|30}} | ||
| width="25%"| | |||
| class="roundy" style="background: #fff; border-style: solid; border-width: 5px; text-align: center"| [[File:TorracatSilverTempest31.jpg|200px]]<br>{{TCG ID|Silver Tempest|Torracat|31}} | |||
| width="25%"| | |||
| class="roundy" style="background: #fff; border-style: solid; border-width: 5px; text-align: center"| [[File:IncineroarSilverTempest32.jpg|200px]]<br>{{TCG ID|Silver Tempest|Incineroar|32}} | |||
| width="25%"| | | width="25%"| | ||
| class="roundy" style="background: #fff; border-style: solid; border-width: 5px; text-align: center" | [[ | |- | ||
| colspan="7" class="roundy" style="background: #fff; border-style: solid; border-width: 5px; text-align: center"| The first card shows {{p|Litten}} cowering in fear near the aquarium in [[Professor Kukui]]'s lab on {{rt|1|Alola}}. On the second card, the Litten has evolved into {{p|Torracat}} and is now more energetic. It is leaping at the aquarium. The third card has the evolved form of Torracat, {{p|Incineroar}}, sleeping soundly in front of the tank.<ref>[https://www.pokemon.com/us/pokemon-news/art-of-the-pokemon-tcg-sword-shield-silver-tempest-expansion Art of the Pokémon TCG: Sword & Shield—Silver Tempest Expansion], [[Pokémon.com]]</ref> | |||
|- | |||
|} | |} | ||
{{-}} | {{-}} | ||
{| class="roundy" style="background: #FFED53" | |||
| width="20%"| | |||
| class="roundy" style="background: #fff; border-style: solid; border-width: 5px; text-align: center"| [[File:TogedemaruSilverTempest127.jpg|200px]]<br>{{TCG ID|Silver Tempest|Togedemaru|127}} | |||
| width="20%"| | |||
| class="roundy" style="background: #fff; border-style: solid; border-width: 5px; text-align: center"| [[File:DedenneSilverTempest85.jpg|200px]]<br>{{TCG ID|Silver Tempest|Dedenne|85}} | |||
| width="20%"| | |||
| class="roundy" style="background: #fff; border-style: solid; border-width: 5px; text-align: center"| [[File:MorpekoSilverTempest116.jpg|200px]]<br>{{TCG ID|Silver Tempest|Morpeko|116}} | |||
| width="20%"| | |||
| class="roundy" style="background: #fff; border-style: solid; border-width: 5px; text-align: center"| [[File:PikachuSilverTempest49.jpg|200px]]<br>{{TCG ID|Silver Tempest|Pikachu|49}} | |||
| width="20%"| | |||
|- | |||
| colspan="9" class="roundy" style="background: #fff; border-style: solid; border-width: 5px; text-align: center"| All four cards are part of two combos of attacks that can be executed consecutively. The first card shows only a {{p|Togedemaru}} and has the Toge Dash attack, starting the combo. The second card also shows Togedemaru, necessary to use the {{p|Dedenne}}'s Dede-Short attack. The third card shows both Togedemaru and Dedenne, both of which are required to use {{p|Morpeko}}'s Peko Blaster attack. The fourth card also shows Togedemaru and Dedenne, which strengthen {{p|Pikachu}}'s Pika Strike attack. | |||
|} | |||
==={{tcg|Crown Zenith}}=== | |||
{| class="roundy" style="background: #FFED53" | {| class="roundy" style="background: #FFED53" | ||
| width="25%"| | | width="25%"| | ||
| class="roundy" style="background: #fff; border-style: solid; border-width: 5px; text-align: center" | [[File: | | class="roundy" style="background: #fff; border-style: solid; border-width: 5px; text-align: center"| [[File:ElectivireCrownZenithGG8.jpg|200px]]<br>{{TCG ID|Crown Zenith|Electivire|GG8}} | ||
| width="25%"| | | width="25%"| | ||
| class="roundy" style="background: #fff; border-style: solid; border-width: 5px; text-align: center" | [[File: | | class="roundy" style="background: #fff; border-style: solid; border-width: 5px; text-align: center"| [[File:MagmortarCrownZenithGG3.jpg|200px]]<br>{{TCG ID|Crown Zenith|Magmortar|GG3}} | ||
| width="25%"| | | width="25%"| | ||
|- | |||
| colspan="7" class="roundy" style="background: #fff; border-style: solid; border-width: 5px; text-align: center"| | |||
|- | |||
| colspan="7" class="roundy" style="background: #fff; border-style: solid; border-width: 5px; text-align: center" | | |||
|} | |} | ||
{{ | |||
==={{tcg|Crown Zenith}} and {{tcg|SWSH Black Star Promos}}=== | |||
{| class="roundy" style="background: #FFED53" | {| class="roundy" style="background: #FFED53" | ||
| width="25%"| | | width="25%"| | ||
| class="roundy" style="background: #fff; border-style: solid; border-width: 5px; text-align: center" | [[File: | | class="roundy" style="background: #fff; border-style: solid; border-width: 5px; text-align: center"| [[File:CharizardVSTARSWSHPromo262.jpg|200px]]<br>{{TCG ID|SWSH Promo|Charizard VSTAR|262}} | ||
| width="25%"| | |||
| class="roundy" style="background: #fff; border-style: solid; border-width: 5px; text-align: center"| [[File:MewtwoVSTARCrownZenithGG44.jpg|200px]]<br>{{TCG ID|Crown Zenith|Mewtwo VSTAR|GG44}} | |||
| width="25%"| | | width="25%"| | ||
|- | |||
| colspan="7" class="roundy" style="background: #fff; border-style: solid; border-width: 5px; text-align: center"| | |||
|- | |||
| colspan="7" class="roundy" style="background: #fff; border-style: solid; border-width: 5px; text-align: center" | | |||
|} | |} | ||
| Line 647: | Line 1,176: | ||
{| class="roundy" style="background: #FFED53" | {| class="roundy" style="background: #FFED53" | ||
| width="17%"| | | width="17%"| | ||
| class="roundy" style="background: #fff; border-style: solid; border-width: 5px; text-align: center" | [[File:WoolooSwordShield152.jpg|200px]]<br>[[Wooloo (Sword & Shield 152)]] | | class="roundy" style="background: #fff; border-style: solid; border-width: 5px; text-align: center"| [[File:WoolooSwordShield152.jpg|200px]]<br>[[Wooloo (Sword & Shield 152)]] | ||
| width="17%"| | |||
| class="roundy" style="background: #fff; border-style: solid; border-width: 5px; text-align: center"| [[File:GrubbinRebelClash16.jpg|200px]]<br>[[Grubbin (Rebel Clash 16)]] | |||
| width="17%"| | |||
| class="roundy" style="background: #fff; border-style: solid; border-width: 5px; text-align: center"| [[File:VullabyRebelClash119.jpg|200px]]<br>[[Vullaby (Rebel Clash 119)]] | |||
| width="17%"| | |||
| class="roundy" style="background: #fff; border-style: solid; border-width: 5px; text-align: center"| [[File:LarvitarDarknessAblaze86.jpg|200px]]<br>[[Larvitar (Darkness Ablaze 86)]] | |||
| width="17%"| | |||
| class="roundy" style="background: #fff; border-style: solid; border-width: 5px; text-align: center"| [[File:GothitaDarknessAblaze73.jpg|200px]]<br>[[Gothita (Darkness Ablaze 73)]] | |||
| width="17%"| | |||
|- | |||
| width="17%"| | |||
| class="roundy" style="background: #fff; border-style: solid; border-width: 5px; text-align: center"| [[File:KakunaVividVoltage2.jpg|200px]]<br>[[Kakuna (Vivid Voltage 2)]] | |||
| width="17%"| | |||
| class="roundy" style="background: #fff; border-style: solid; border-width: 5px; text-align: center"| [[File:TynamoVividVoltage57.jpg|200px]]<br>[[Tynamo (Vivid Voltage 57)]] | |||
| width="17%"| | | width="17%"| | ||
| class="roundy" style="background: #fff; border-style: solid; border-width: 5px; text-align: center" | [[File: | | class="roundy" style="background: #fff; border-style: solid; border-width: 5px; text-align: center"| [[File:SnomShiningFates29.jpg|200px]]<br>[[Snom (Shining Fates 29)]] | ||
| width="17%"| | | width="17%"| | ||
| class="roundy" style="background: #fff; border-style: solid; border-width: 5px; text-align: center" | [[File: | | class="roundy" style="background: #fff; border-style: solid; border-width: 5px; text-align: center"| [[File:SpoinkBattleStyles55.jpg|200px]]<br>[[Spoink (Battle Styles 55)]] | ||
| width="17%"| | | width="17%"| | ||
| class="roundy" style="background: #fff; border-style: solid; border-width: 5px; text-align: center" | [[File: | | class="roundy" style="background: #fff; border-style: solid; border-width: 5px; text-align: center"| [[File:GalarianMrMimeBattleStyles34.jpg|200px]]<br>[[Galarian Mr. Mime (Battle Styles 34)]] | ||
| width="17%"| | | width="17%"| | ||
|- | |||
|- | |||
| width="17%"| | | width="17%"| | ||
| class="roundy" style="background: #fff; border-style: solid; border-width: 5px; text-align: center" | [[File: | | class="roundy" style="background: #fff; border-style: solid; border-width: 5px; text-align: center"| [[File:RuffletEvolvingSkies136.jpg|200px]]<br>[[Rufflet (Evolving Skies 136)]] | ||
| width="17%"| | | width="17%"| | ||
| class="roundy" style="background: #fff; border-style: solid; border-width: 5px; text-align: center" | [[File: | | class="roundy" style="background: #fff; border-style: solid; border-width: 5px; text-align: center"| [[File:RaltsChillingReign59.jpg|200px]]<br>[[Ralts (Chilling Reign 59)]] | ||
| width="17%"| | | width="17%"| | ||
| class="roundy" style="background: #fff; border-style: solid; border-width: 5px; text-align: center" | [[File: | | class="roundy" style="background: #fff; border-style: solid; border-width: 5px; text-align: center"| [[File:RibombeeEvolvingSkies79.jpg|200px]]<br>[[Ribombee (Evolving Skies 79)]] | ||
| width="17%"| | | width="17%"| | ||
| class="roundy" style="background: #fff; border-style: solid; border-width: 5px; text-align: center" | [[File: | | class="roundy" style="background: #fff; border-style: solid; border-width: 5px; text-align: center"| [[File:MarshtompFusionStrike63.jpg|200px]]<br>[[Marshtomp (Fusion Strike 63)]] | ||
| width="17%"| | | width="17%"| | ||
| class="roundy" style="background: #fff; border-style: solid; border-width: 5px; text-align: center" | [[File: | | class="roundy" style="background: #fff; border-style: solid; border-width: 5px; text-align: center"| [[File:LotadEvolvingSkies32.jpg|200px]]<br>[[Lotad (Evolving Skies 32)]] | ||
| width="17%"| | | width="17%"| | ||
|- | |- | ||
| width="17%"| | | width="17%"| | ||
| class="roundy" style="background: #fff; border-style: solid; border-width: 5px; text-align: center" | [[File: | | class="roundy" style="background: #fff; border-style: solid; border-width: 5px; text-align: center"| [[File:StuffulFusionStrike150.jpg|200px]]<br>[[Stufful (Fusion Strike 150)]] | ||
| width="17%"| | | width="17%"| | ||
| class="roundy" style="background: #fff; border-style: solid; border-width: 5px; text-align: center" | [[File: | | class="roundy" style="background: #fff; border-style: solid; border-width: 5px; text-align: center"| [[File:BunnelbyFusionStrike214.jpg|200px]]<br>[[Bunnelby (Fusion Strike 214)]] | ||
| width="17%"| | | width="17%"| | ||
| class="roundy" style="background: #fff; border-style: solid; border-width: 5px; text-align: center" | [[File: | | class="roundy" style="background: #fff; border-style: solid; border-width: 5px; text-align: center"| [[File:MilceryBrilliantStars70.jpg|200px]]<br>[[Milcery (Brilliant Stars 70)]] | ||
| width="17%"| | | width="17%"| | ||
| class="roundy" style="background: #fff; border-style: solid; border-width: 5px; text-align: center" | [[File: | | class="roundy" style="background: #fff; border-style: solid; border-width: 5px; text-align: center"| [[File:ShroomishBrilliantStars3.jpg|200px]]<br>[[Shroomish (Brilliant Stars 3)]] | ||
| width="17%"| | | width="17%"| | ||
|- | | class="roundy" style="background: #fff; border-style: solid; border-width: 5px; text-align: center"| [[File:LitleoLostOrigin28.jpg|200px]]<br>[[Litleo (Lost Origin 28)]] | ||
| width="17%"| | | width="17%"| | ||
| | |- | ||
| width="17%"| | | width="17%"| | ||
| class="roundy" style="background: #fff; border-style: solid; border-width: 5px; text-align: center" | [[File: | | class="roundy" style="background: #fff; border-style: solid; border-width: 5px; text-align: center"| [[File:DewottAstralRadiance42.jpg|200px]]<br>[[Dewott (Astral Radiance 42)]] | ||
| width="17%"| | | width="17%"| | ||
| class="roundy" style="background: #fff; border-style: solid; border-width: 5px; text-align: center" | [[File: | | class="roundy" style="background: #fff; border-style: solid; border-width: 5px; text-align: center"| [[File:KomalaLostOrigin149.jpg|200px]]<br>[[Komala (Lost Origin 149)]] | ||
| width="17%"| | | width="17%"| | ||
| class="roundy" style="background: #fff; border-style: solid; border-width: 5px; text-align: center" | [[File: | | class="roundy" style="background: #fff; border-style: solid; border-width: 5px; text-align: center"| [[File:GolbatSilverTempest104.jpg|200px]]<br>[[Golbat (Silver Tempest 104)]] | ||
| width="17%"| | | width="17%"| | ||
|- | | class="roundy" style="background: #fff; border-style: solid; border-width: 5px; text-align: center"| [[File:UnfezantPokémonGO63.jpg|200px]]<br>[[Unfezant (Pokémon GO 63)]] | ||
| width="17%"| | | width="17%"| | ||
| class="roundy" style="background: #fff; border-style: solid; border-width: 5px; text-align: center" | [[File: | | class="roundy" style="background: #fff; border-style: solid; border-width: 5px; text-align: center"| [[File:EmolgaSilverTempest54.jpg|200px]]<br>[[Emolga (Silver Tempest 54)]] | ||
| width="17%"| | | width="17%"| | ||
| | |- | ||
| width="17%"| | | width="17%"| | ||
| class="roundy" style="background: #fff; border-style: solid; border-width: 5px; text-align: center" | [[File: | | class="roundy" style="background: #fff; border-style: solid; border-width: 5px; text-align: center"| [[File:FennekinSilverTempest25.jpg|200px]]<br>[[Fennekin (Silver Tempest 25)]] | ||
| width="17%"| | | width="17%"| | ||
| class="roundy" style="background: #fff; border-style: solid; border-width: 5px; text-align: center" | [[File: | | class="roundy" style="background: #fff; border-style: solid; border-width: 5px; text-align: center"| [[File:SolosisSilverTempest76.jpg|200px]]<br>[[Solosis (Silver Tempest 76)]] | ||
| width="17%"| | | width="17%"| | ||
| class="roundy" style="background: #fff; border-style: solid; border-width: 5px; text-align: center" | [[File: | | class="roundy" style="background: #fff; border-style: solid; border-width: 5px; text-align: center"| [[File:KricketuneCrownZenithGG2.jpg|200px]]<br>[[Kricketune (Crown Zenith GG2)]] | ||
| width="17%"| | | width="17%"| | ||
| class="roundy" style="background: #fff; border-style: solid; border-width: 5px; text-align: center" | [[File: | | class="roundy" style="background: #fff; border-style: solid; border-width: 5px; text-align: center"| [[File:PeacefulParkSPromo316.jpg|200px]]<br>[[Peaceful Park (S-P Promo 316)]] | ||
| width="17%"| | | width="17%"| | ||
|- | |||
| colspan="11" class="roundy" style="background: #fff; border-style: solid; border-width: 5px; text-align: center"| | |||
|- | |||
| colspan="11" class="roundy" style="background: #fff; border-style: solid; border-width: 5px; text-align: center" | | |||
|} | |} | ||
| Line 722: | Line 1,251: | ||
{| class="roundy" style="background: #FFED53" | {| class="roundy" style="background: #FFED53" | ||
| width="25%"| | | width="25%"| | ||
| class="roundy" style="background: #fff; border-style: solid; border-width: 5px; text-align: center" | [[File:RaltsScarletViolet211.jpg|200px]]<br>{{TCG ID|Scarlet & Violet|Ralts|211}} | | class="roundy" style="background: #fff; border-style: solid; border-width: 5px; text-align: center"| [[File:RaltsScarletViolet211.jpg|200px]]<br>{{TCG ID|Scarlet & Violet|Ralts|211}} | ||
| width="25%"| | | width="25%"| | ||
| class="roundy" style="background: #fff; border-style: solid; border-width: 5px; text-align: center" | [[File:KirliaScarletViolet212.jpg|200px]]<br>{{TCG ID|Scarlet & Violet|Kirlia|212}} | | class="roundy" style="background: #fff; border-style: solid; border-width: 5px; text-align: center"| [[File:KirliaScarletViolet212.jpg|200px]]<br>{{TCG ID|Scarlet & Violet|Kirlia|212}} | ||
| width="25%"| | | width="25%"| | ||
| class="roundy" style="background: #fff; border-style: solid; border-width: 5px; text-align: center" | [[File:GardevoirexScarletViolet245.jpg|200px]]<br>{{TCG ID|Scarlet & Violet|Gardevoir ex|245}} | | class="roundy" style="background: #fff; border-style: solid; border-width: 5px; text-align: center"| [[File:GardevoirexScarletViolet245.jpg|200px]]<br>{{TCG ID|Scarlet & Violet|Gardevoir ex|245}} | ||
| width="25%" | | | width="25%"| | ||
|- | |- | ||
| colspan="7" class="roundy" style="background: #fff; border-style: solid; border-width: 5px; text-align: center" | | | colspan="7" class="roundy" style="background: #fff; border-style: solid; border-width: 5px; text-align: center"| The first card shows a young woman and her husband moving into a house with their {{p|Ralts}}. On the second card, the Ralts has evolved into a {{p|Kirlia}}, and the woman appears to have since given birth to a baby. On the final card, the Ralts has fully evolved, and the couple are now elderly, with {{p|Gardevoir}} caring for them. | ||
|} | |||
{{-}} | |||
{| class="roundy" style="background: #FFED53" | |||
| width="25%"| | |||
| class="roundy" style="background: #fff; border-style: solid; border-width: 5px; text-align: center"| [[File:MabosstiffScarletViolet218.jpg|200px]]<br>{{TCG ID|Scarlet & Violet|Mabosstiff|218}} | |||
| width="25%"| | |||
| class="roundy" style="background: #fff; border-style: solid; border-width: 5px; text-align: center"| [[File:ArvenScarletViolet249.jpg|200px]]<br>{{TCG ID|Scarlet & Violet|Arven|249}} | |||
| width="25%"| | |||
|- | |||
| colspan="7" class="roundy" style="background: #fff; border-style: solid; border-width: 5px; text-align: center"| | |||
|} | |} | ||
| Line 735: | Line 1,274: | ||
{| class="roundy" style="background: #FFED53" | {| class="roundy" style="background: #FFED53" | ||
| width="25%"| | | width="25%"| | ||
| class="roundy" style="background: #fff; border-style: solid; border-width: 5px; text-align: center" | [[File:SprigatitoPaldeaEvolved196.jpg|200px]]<br>{{TCG ID|Paldea Evolved|Sprigatito|196}} | | class="roundy" style="background: #fff; border-style: solid; border-width: 5px; text-align: center"| [[File:SprigatitoPaldeaEvolved196.jpg|200px]]<br>{{TCG ID|Paldea Evolved|Sprigatito|196}} | ||
| width="25%"| | |||
| class="roundy" style="background: #fff; border-style: solid; border-width: 5px; text-align: center"| [[File:FloragatoPaldeaEvolved197.jpg|200px]]<br>{{TCG ID|Paldea Evolved|Floragato|197}} | |||
| width="25%"| | |||
| class="roundy" style="background: #fff; border-style: solid; border-width: 5px; text-align: center"| [[File:MeowscaradaexPaldeaEvolved256.jpg|200px]]<br>{{TCG ID|Paldea Evolved|Meowscarada ex|256}} | |||
| width="25%"| | |||
|- | |||
| colspan="7" class="roundy" style="background: #fff; border-style: solid; border-width: 5px; text-align: center"| | |||
|} | |||
{{-}} | |||
{| class="roundy" style="background: #FFED53" | |||
| width="25%"| | |||
| class="roundy" style="background: #fff; border-style: solid; border-width: 5px; text-align: center"| [[File:FuecocoPaldeaEvolved201.jpg|200px]]<br>{{TCG ID|Paldea Evolved|Fuecoco|201}} | |||
| width="25%"| | |||
| class="roundy" style="background: #fff; border-style: solid; border-width: 5px; text-align: center"| [[File:CrocalorPaldeaEvolved202.jpg|200px]]<br>{{TCG ID|Paldea Evolved|Crocalor|202}} | |||
| width="25%"| | |||
| class="roundy" style="background: #fff; border-style: solid; border-width: 5px; text-align: center"| [[File:SkeledirgeexPaldeaEvolved258.jpg|200px]]<br>{{TCG ID|Paldea Evolved|Skeledirge ex|258}} | |||
| width="25%"| | |||
|- | |||
| colspan="7" class="roundy" style="background: #fff; border-style: solid; border-width: 5px; text-align: center"| | |||
|} | |||
{{-}} | |||
{| class="roundy" style="background: #FFED53" | |||
| width="25%"| | |||
| class="roundy" style="background: #fff; border-style: solid; border-width: 5px; text-align: center"| [[File:QuaxlyPaldeaEvolved206.jpg|200px]]<br>{{TCG ID|Paldea Evolved|Quaxly|206}} | |||
| width="25%"| | |||
| class="roundy" style="background: #fff; border-style: solid; border-width: 5px; text-align: center"| [[File:QuaxwellPaldeaEvolved207.jpg|200px]]<br>{{TCG ID|Paldea Evolved|Quaxwell|207}} | |||
| width="25%"| | |||
| class="roundy" style="background: #fff; border-style: solid; border-width: 5px; text-align: center"| [[File:QuaquavalexPaldeaEvolved260.jpg|200px]]<br>{{TCG ID|Paldea Evolved|Quaquaval ex|260}} | |||
| width="25%"| | |||
|- | |||
| colspan="7" class="roundy" style="background: #fff; border-style: solid; border-width: 5px; text-align: center"| The first card depicts a {{p|Quaxly}} looking at itself in the mirror with many haircare products sitting on the sink. On the second card, the Quaxly has evolved into a {{p|Quaxwell}}, and is busy styling its pompadour. On the third card, the Quaxly is fully evolved into {{p|Quaquaval}}, and is looking at itself proudly in the mirror. The soap dispenser in each card's illustration "evolves" along with the Pokémon, being based on {{p|Poliwag}}, {{p|Poliwhirl}}, and {{p|Poliwrath}} respectively. | |||
|} | |||
{{-}} | |||
{| class="roundy" style="background: #FFED53" | |||
| width="25%"| | |||
| class="roundy" style="background: #fff; border-style: solid; border-width: 5px; text-align: center"| [[File:FrigibaxPaldeaEvolved208.jpg|200px]]<br>{{TCG ID|Paldea Evolved|Frigibax|208}} | |||
| width="25%"| | |||
| class="roundy" style="background: #fff; border-style: solid; border-width: 5px; text-align: center"| [[File:ArctibaxPaldeaEvolved209.jpg|200px]]<br>{{TCG ID|Paldea Evolved|Arctibax|209}} | |||
| width="25%"| | |||
| class="roundy" style="background: #fff; border-style: solid; border-width: 5px; text-align: center"| [[File:BaxcaliburPaldeaEvolved210.jpg|200px]]<br>{{TCG ID|Paldea Evolved|Baxcalibur|210}} | |||
| width="25%"| | |||
|- | |||
| colspan="7" class="roundy" style="background: #fff; border-style: solid; border-width: 5px; text-align: center"| | |||
|} | |||
{{-}} | |||
{| class="roundy" style="background: #FFED53" | |||
| width="25%"| | |||
| class="roundy" style="background: #fff; border-style: solid; border-width: 5px; text-align: center"| [[File:TinkatinkPaldeaEvolved216.jpg|200px]]<br>{{TCG ID|Paldea Evolved|Tinkatink|216}} | |||
| width="25%"| | |||
| class="roundy" style="background: #fff; border-style: solid; border-width: 5px; text-align: center"| [[File:TinkatuffPaldeaEvolved217.jpg|200px]]<br>{{TCG ID|Paldea Evolved|Tinkatuff|217}} | |||
| width="25%"| | |||
| class="roundy" style="background: #fff; border-style: solid; border-width: 5px; text-align: center"| [[File:TinkatonexPaldeaEvolved262.jpg|200px]]<br>{{TCG ID|Paldea Evolved|Tinkaton ex|262}} | |||
| width="25%"| | |||
|- | |||
| colspan="7" class="roundy" style="background: #fff; border-style: solid; border-width: 5px; text-align: center"| In the first illustration, a {{p|Tinkatink}} is gathering resources and settling into an underground crystal cave. In the second illustration, the Tinkatink has evolved into {{p|Tinkatuff}}, who is hard at work building her hammer. The scene concludes on the final illustration, where the Tinkatuff has evolved into {{p|Tinkaton}}, and has finished building her hammer. | |||
|} | |||
==={{tcg|Obsidian Flames}}=== | |||
{| class="roundy" style="background: #FFED53" | |||
| width="25%"| | |||
| class="roundy" style="background: #fff; border-style: solid; border-width: 5px; text-align: center"| [[File:VaroomObsidianFlames206.jpg|200px]]<br>{{TCG ID|Obsidian Flames|Varoom|206}} | |||
| width="25%"| | |||
| class="roundy" style="background: #fff; border-style: solid; border-width: 5px; text-align: center"| [[File:RevavroomexObsidianFlames224.jpg|200px]]<br>{{TCG ID|Obsidian Flames|Revavroom ex|224}} | |||
| width="25%"| | |||
|- | |||
| colspan="7" class="roundy" style="background: #fff; border-style: solid; border-width: 5px; text-align: center"| | |||
|} | |||
{{-}} | |||
{| class="roundy" style="background: #FFED53" | |||
| width="25%"| | |||
| class="roundy" style="background: #fff; border-style: solid; border-width: 5px; text-align: center"| [[File:PidgeyObsidianFlames207.jpg|200px]]<br>{{TCG ID|Obsidian Flames|Pidgey|207}} | |||
| width="25%"| | |||
| class="roundy" style="background: #fff; border-style: solid; border-width: 5px; text-align: center"| [[File:PidgeottoObsidianFlames208.jpg|200px]]<br>{{TCG ID|Obsidian Flames|Pidgeotto|208}} | |||
| width="25%"| | |||
| class="roundy" style="background: #fff; border-style: solid; border-width: 5px; text-align: center"| [[File:PidgeotexObsidianFlames225.jpg|200px]]<br>{{TCG ID|Obsidian Flames|Pidgeot ex|225}} | |||
| width="25%"| | |||
|- | |||
| colspan="7" class="roundy" style="background: #fff; border-style: solid; border-width: 5px; text-align: center"| | |||
|} | |||
{{-}} | |||
==={{tcg|151}}=== | |||
{| class="roundy" style="background: #FFED53" | |||
| width="25%"| | |||
| class="roundy" style="background: #fff; border-style: solid; border-width: 5px; text-align: center"| [[File:Bulbasaur166PokémonCard151.jpg|200px]]<br>{{TCG ID|151|Bulbasaur|1}} | |||
| width="25%"| | |||
| class="roundy" style="background: #fff; border-style: solid; border-width: 5px; text-align: center"| [[File:Charmander168PokémonCard151.jpg|200px]]<br>{{TCG ID|151|Charmander|4}} | |||
| width="25%"| | |||
| class="roundy" style="background: #fff; border-style: solid; border-width: 5px; text-align: center"| [[File:Squirtle170PokémonCard151.jpg|200px]]<br>{{TCG ID|151|Squirtle|7}} | |||
| width="25%"| | |||
|- | |||
| width="25%"| | |||
| class="roundy" style="background: #fff; border-style: solid; border-width: 5px; text-align: center"| [[File:Ivysaur167PokémonCard151.jpg|200px]]<br>{{TCG ID|151|Ivysaur|2}} | |||
| width="25%"| | |||
| class="roundy" style="background: #fff; border-style: solid; border-width: 5px; text-align: center"| [[File:Charmeleon169PokémonCard151.jpg|200px]]<br>{{TCG ID|151|Charmeleon|5}} | |||
| width="25%"| | |||
| class="roundy" style="background: #fff; border-style: solid; border-width: 5px; text-align: center"| [[File:Wartortle171PokémonCard151.jpg|200px]]<br>{{TCG ID|151|Wartortle|8}} | |||
| width="25%"| | |||
|- | |||
| width="25%"| | |||
| class="roundy" style="background: #fff; border-style: solid; border-width: 5px; text-align: center"| [[File:Venusaurex200PokémonCard151.jpg|200px]]<br>{{TCG ID|151|Venusaur ex|3}} | |||
| width="25%"| | |||
| class="roundy" style="background: #fff; border-style: solid; border-width: 5px; text-align: center"| [[File:Charizardex201PokémonCard151.jpg|200px]]<br>{{TCG ID|151|Charizard ex|6}} | |||
| width="25%"| | |||
| class="roundy" style="background: #fff; border-style: solid; border-width: 5px; text-align: center"| [[File:Blastoiseex202PokémonCard151.jpg|200px]]<br>{{TCG ID|151|Blastoise ex|9}} | |||
| width="25%"| | |||
|- | |||
| colspan="7" class="roundy" style="background: #fff; border-style: solid; border-width: 5px; text-align: center"| Each of the cards depict the [[Kanto]] [[First partner Pokémon]] exploring some sort of biome, and evolving the further they go. In the {{p|Bulbasaur}} card, it is exploring a forest, culminating in it finding a field of lushious plants upon becoming a {{p|Venusaur}}. On the {{p|Charmander}} card, it is climbing a volcanic canyon until it eventually evolves into a {{p|Charizard}}, and is able to fly above the canyon. Finally, on the {{p|Squirtle}} card, it is seen exploring the beach, is seen swimming underwater as a {{p|Wartortle}}, and manages to reach the depths of the ocean as a {{p|Blastoise}}. | |||
|} | |||
{{-}} | |||
{| class="roundy" style="background: #FFED53" | |||
| width="25%"| | |||
| class="roundy" style="background: #fff; border-style: solid; border-width: 5px; text-align: center"| [[File:Pikachu25PokémonCard151.jpg|200px]]<br>{{TCG ID|151|Pikachu|25}} | |||
| width="25%"| | |||
| class="roundy" style="background: #fff; border-style: solid; border-width: 5px; text-align: center"| [[File:Raichu26PokémonCard151.jpg|200px]]<br>{{TCG ID|151|Raichu|26}} | |||
| width="25%"| | |||
|- | |||
| colspan="7" class="roundy" style="background: #fff; border-style: solid; border-width: 5px; text-align: center"| The first card depicts a {{p|Pikachu}} in the day, walking to the left. On the second card, the Pikachu has evolved into a {{p|Raichu}}. He walks to the right as the sun sets and night falls. <ref name = 151site>[https://tcg.pokemon.com/en-us/expansions/151/ Pokémon TCG: Scarlet & Violet—151 | Pokémon Trading Card Game website]</ref> | |||
|} | |||
{{-}} | |||
{| class="roundy" style="background: #FFED53" | |||
| width="25%"| | |||
| class="roundy" style="background: #fff; border-style: solid; border-width: 5px; text-align: center"| [[File:Cubone104PokémonCard151.jpg|200px]]<br>{{TCG ID|151|Cubone|104}} | |||
| width="25%"| | |||
| class="roundy" style="background: #fff; border-style: solid; border-width: 5px; text-align: center"| [[File:Marowak105PokémonCard151.jpg|200px]]<br>{{TCG ID|151|Marowak|105}} | |||
| width="25%"| | |||
|- | |||
| colspan="7" class="roundy" style="background: #fff; border-style: solid; border-width: 5px; text-align: center"| The first card depicts a {{p|Cubone}} in a field of rocks at night. On the second card, Cubone has evolved into {{p|Marowak}} and time has progressed to the morning. It is smashing the rocks in the area. <ref name = 151site/> | |||
|} | |||
{{-}} | |||
{| class="roundy" style="background: #FFED53" | |||
| width="25%"| | |||
| class="roundy" style="background: #fff; border-style: solid; border-width: 5px; text-align: center"| [[File:Mankey56PokémonCard151.jpg|200px]]<br>{{TCG ID|151|Mankey|56}} | |||
| width="25%"| | |||
| class="roundy" style="background: #fff; border-style: solid; border-width: 5px; text-align: center"| [[File:Primeape57PokémonCard151.jpg|200px]]<br>{{TCG ID|151|Primeape|57}} | |||
| width="25%"| | |||
|- | |||
| colspan="7" class="roundy" style="background: #fff; border-style: solid; border-width: 5px; text-align: center"| The first card depicts a {{p|Mankey}} hanging from a tree as the sun sets. On the second card, Mankey has evolved into {{p|Primeape}} and time has progressed to night. It is standing on the ground instead. <ref name = 151artblog>[https://www.pokemon.com/us/pokemon-news/art-of-the-pokemon-tcg-scarlet-violet-151-expansion Art of the Pokémon TCG: Scarlet & Violet—151 Expansion | [[Pokémon.com]]]</ref> | |||
|} | |||
{{-}} | |||
{| class="roundy" style="background: #FFED53" | |||
| width="25%"| | |||
| class="roundy" style="background: #fff; border-style: solid; border-width: 5px; text-align: center"| [[File:Geodude74PokémonCard151.jpg|200px]]<br>{{TCG ID|151|Geodude|74}} | |||
| width="25%"| | |||
| class="roundy" style="background: #fff; border-style: solid; border-width: 5px; text-align: center"| [[File:Graveler75PokémonCard151.jpg|200px]]<br>{{TCG ID|151|Graveler|75}} | |||
| width="25%"| | |||
|- | |||
| colspan="7" class="roundy" style="background: #fff; border-style: solid; border-width: 5px; text-align: center"| The first card depicts a {{p|Geodude}} in a rugged area at night. On the second card, Geodude has evolved into {{p|Graveler}} and time has progressed to day. It is scaling the rocky walls. <ref name = 151evolution>[https://www.pokemon.com/us/pokemon-news/complete-and-cool-pokemon-evolution-chains-in-pokemon-tcg-scarlet-violet-151 Complete and Cool Pokémon Evolution Chains in Pokémon TCG: Scarlet & Violet—151 | [[Pokémon.com]]]</ref> | |||
|} | |||
{{-}} | |||
{| class="roundy" style="background: #FFED53" | |||
| width="25%"| | |||
| class="roundy" style="background: #fff; border-style: solid; border-width: 5px; text-align: center"| [[File:Magikarp129PokémonCard151.jpg|200px]]<br>{{TCG ID|151|Magikarp|129}} | |||
| width="25%"| | |||
| class="roundy" style="background: #fff; border-style: solid; border-width: 5px; text-align: center"| [[File:Gyarados130PokémonCard151.jpg|200px]]<br>{{TCG ID|151|Gyarados|130}} | |||
| width="25%"| | |||
|- | |||
| colspan="7" class="roundy" style="background: #fff; border-style: solid; border-width: 5px; text-align: center"| The first card depicts a {{p|Magikarp}} swimming up a river in the day. On the second card, Magikarp has evolved into {{p|Gyarados}} and time has progressed to midday. It thrashes about, creating waves in the water. <ref name = 151evolution/> | |||
|} | |||
{{-}} | |||
{| class="roundy" style="background: #FFED53" | |||
| width="25%"| | |||
| class="roundy" style="background: #fff; border-style: solid; border-width: 5px; text-align: center"| [[File:Dratini147PokémonCard151.jpg|200px]]<br>{{TCG ID|151|Dratini|147}} | |||
| width="25%"| | |||
| class="roundy" style="background: #fff; border-style: solid; border-width: 5px; text-align: center"| [[File:Dragonair148PokémonCard151.jpg|200px]]<br>{{TCG ID|151|Dragonair|148}} | |||
| width="25%"| | |||
| class="roundy" style="background: #fff; border-style: solid; border-width: 5px; text-align: center"| [[File:Dragonite149PokémonCard151.jpg|200px]]<br>{{TCG ID|151|Dragonite|149}} | |||
| width="25%"| | |||
|- | |||
| colspan="7" class="roundy" style="background: #fff; border-style: solid; border-width: 5px; text-align: center"| The first card depicts a {{p|Dratini}} under the water. On the second card, Dratini has evolved into {{p|Dragonair}} and has come up to the surface at night. The third card has Dragonite, its evolution, flying through the air during the day. <ref name = 151evolution/> | |||
|} | |||
{{-}} | |||
{| class="roundy" style="background: #FFED53" | |||
| width="25%"| | |||
| class="roundy" style="background: #fff; border-style: solid; border-width: 5px; text-align: center"| [[File:Growlithe58PokémonCard151.jpg|200px]]<br>{{TCG ID|151|Growlithe|58}} | |||
| width="25%"| | |||
| class="roundy" style="background: #fff; border-style: solid; border-width: 5px; text-align: center"| [[File:Arcanine59PokémonCard151.jpg|200px]]<br>{{TCG ID|151|Arcanine|59}} | |||
| width="25%"| | |||
|- | |||
| colspan="7" class="roundy" style="background: #fff; border-style: solid; border-width: 5px; text-align: center"| The first card depicts a {{p|Growlithe}} bounding across a field near mountains in the day. On the second card, it is later in the day and Growlithe has evolved into {{p|Arcanine}}. It stands proudly on a mountain. <ref name = 151evolution/> | |||
|} | |||
{{-}} | |||
{| class="roundy" style="background: #FFED53" | |||
| width="25%"| | |||
| class="roundy" style="background: #fff; border-style: solid; border-width: 5px; text-align: center"| [[File:Charmander4PokémonCard151.jpg|200px]]<br>{{TCG ID|151|Charmander|4}} | |||
| width="25%"| | |||
| class="roundy" style="background: #fff; border-style: solid; border-width: 5px; text-align: center"| [[File:Charmeleon5PokémonCard151.jpg|200px]]<br>{{TCG ID|151|Charmeleon|5}} | |||
| width="25%"| | |||
| class="roundy" style="background: #fff; border-style: solid; border-width: 5px; text-align: center"| [[File:Charizardex6PokémonCard151.jpg|200px]]<br>{{TCG ID|151|Charizard ex|6}} | |||
| width="25%"| | |||
|- | |||
| colspan="7" class="roundy" style="background: #fff; border-style: solid; border-width: 5px; text-align: center"| The first card depicts a {{p|Charmander}} walking through a grassy area, as its tail incidentally lights some of the plants on fire. On the second card, the field has been devestated by the flames. The Charmander has evolved into {{p|Charmeleon}} and stands in the center of a ring of this fire. The destruction continues into {{TCG ID|151|Charizard ex|6}}, with a further evolved {{p|Charizard}} performing some kind of slashing attack. | |||
|} | |||
{{-}} | |||
{| class="roundy" style="background: #FFED53" | |||
| width="25%"| | |||
| class="roundy" style="background: #fff; border-style: solid; border-width: 5px; text-align: center"| [[File:Pidgey16PokémonCard151.jpg|200px]]<br>{{TCG ID|151|Pidgey|16}} | |||
| width="25%"| | |||
| class="roundy" style="background: #fff; border-style: solid; border-width: 5px; text-align: center"| [[File:Pidgeotto17PokémonCard151.jpg|200px]]<br>{{TCG ID|151|Pidgeotto|17}} | |||
| width="25%"| | |||
| class="roundy" style="background: #fff; border-style: solid; border-width: 5px; text-align: center"| [[File:Pidgeot18PokémonCard151.jpg|200px]]<br>{{TCG ID|151|Pidgeot|18}} | |||
| width="25%"| | |||
|- | |||
| colspan="7" class="roundy" style="background: #fff; border-style: solid; border-width: 5px; text-align: center"| The first card depicts a {{p|Pidgey}} in the branches of a tree in the early morning. The second and third cards have the Pokémon flying as it evolves, with one showing {{p|Pidgeotto}} in midday and the next showing {{p|Pidgeot}} at sunset. | |||
|} | |||
{{-}} | |||
{| class="roundy" style="background: #FFED53" | |||
| width="25%"| | |||
| class="roundy" style="background: #fff; border-style: solid; border-width: 5px; text-align: center"| [[File:Squirtle7PokémonCard151.jpg|200px]]<br>{{TCG ID|151|Squirtle|7}} | |||
| width="25%"| | |||
| class="roundy" style="background: #fff; border-style: solid; border-width: 5px; text-align: center"| [[File:Wartortle8PokémonCard151.jpg|200px]]<br>{{TCG ID|151|Wartortle|8}} | |||
| width="25%"| | |||
|- | |||
| colspan="7" class="roundy" style="background: #fff; border-style: solid; border-width: 5px; text-align: center"| The first card depicts a {{p|Squirtle}} diving into the water in a tropical area, at some time late in the day. On the second card, the sun has dropped closer to the horizon compared to the first card. Squirtle has evolved into {{p|Wartortle}} and splashes about on the coastline. | |||
|} | |||
{{-}} | |||
{| class="roundy" style="background: #FFED53" | |||
| width="25%"| | |||
| class="roundy" style="background: #fff; border-style: solid; border-width: 5px; text-align: center"| [[File:Spearow21PokémonCard151.jpg|200px]]<br>{{TCG ID|151|Spearow|21}} | |||
| width="25%"| | |||
| class="roundy" style="background: #fff; border-style: solid; border-width: 5px; text-align: center"| [[File:Fearow22PokémonCard151.jpg|200px]]<br>{{TCG ID|151|Fearow|22}} | |||
| width="25%"| | |||
|- | |||
| colspan="7" class="roundy" style="background: #fff; border-style: solid; border-width: 5px; text-align: center"| The first card depicts a {{p|Spearow}} in a tree canopy in the morning. On the second card shows a time period closer to sunset and Spearow, now a {{p|Fearow}}, is perched on a broken tree in a more open area. | |||
|} | |||
{{-}} | |||
{| class="roundy" style="background: #FFED53" | |||
| width="25%"| | |||
| class="roundy" style="background: #fff; border-style: solid; border-width: 5px; text-align: center"| [[File:Omanyte138PokémonCard151.jpg|200px]]<br>{{TCG ID|151|Omanyte|138}} | |||
| width="25%"| | | width="25%"| | ||
| class="roundy" style="background: #fff; border-style: solid; border-width: 5px; text-align: center" | [[File: | | class="roundy" style="background: #fff; border-style: solid; border-width: 5px; text-align: center"| [[File:Omastar139PokémonCard151.jpg|200px]]<br>{{TCG ID|151|Omastar|139}} | ||
| width="25%"| | | width="25%"| | ||
|- | |||
| colspan="7" class="roundy" style="background: #fff; border-style: solid; border-width: 5px; text-align: center"| The first card depicts a {{p|Omanyte}} sitting on a rock underwater, but is near the surface. On the second card, the light filtering into ocean leaves the area purpleish, suggesting a shift in the time of day. Omanyte has evolved into {{p|Omastar}}. There is more seaweed present on the second card, perhaps either having grown between cards or moved to the area by currents. | |||
|- | |||
| colspan="7" class="roundy" style="background: #fff; border-style: solid; border-width: 5px; text-align: center" | | |||
|} | |} | ||
{{-}} | {{-}} | ||
==={{tcg|Paradox Rift}}=== | |||
{| class="roundy" style="background: #FFED53" | {| class="roundy" style="background: #FFED53" | ||
| width="25%"| | | width="25%"| | ||
| class="roundy" style="background: #fff; border-style: solid; border-width: 5px; text-align: center" | [[File: | | class="roundy" style="background: #fff; border-style: solid; border-width: 5px; text-align: center"| [[File:WimpodParadoxRift191.jpg|200px]]<br>{{TCG ID|Paradox Rift|Wimpod|191}} | ||
| width="25%"| | | width="25%"| | ||
| class="roundy" style="background: #fff; border-style: solid; border-width: 5px; text-align: center" | [[File: | | class="roundy" style="background: #fff; border-style: solid; border-width: 5px; text-align: center"| [[File:GolisopodexParadoxRift246.jpg|200px]]<br>{{TCG ID|Paradox Rift|Golisopod ex|246}} | ||
| width="25%"| | | width="25%"| | ||
|- | |||
| colspan="7" class="roundy" style="background: #fff; border-style: solid; border-width: 5px; text-align: center"| | |||
|- | |||
| colspan="7" class="roundy" style="background: #fff; border-style: solid; border-width: 5px; text-align: center" | | |||
|} | |} | ||
{{-}} | {{-}} | ||
{| class="roundy" style="background: #FFED53" | {| class="roundy" style="background: #FFED53" | ||
| width="25%"| | | width="25%"| | ||
| class="roundy" style="background: #fff; border-style: solid; border-width: 5px; text-align: center" | [[File: | | class="roundy" style="background: #fff; border-style: solid; border-width: 5px; text-align: center"| [[File:SwabluParadoxRift213.jpg|200px]]<br>{{TCG ID|Paradox Rift|Swablu|213}} | ||
| width="25%"| | | width="25%"| | ||
| class="roundy" style="background: #fff; border-style: solid; border-width: 5px; text-align: center" | [[File: | | class="roundy" style="background: #fff; border-style: solid; border-width: 5px; text-align: center"| [[File:AltariaexParadoxRift253.jpg|200px]]<br>{{TCG ID|Paradox Rift|Altaria ex|253}} | ||
| width="25%"| | | width="25%"| | ||
|- | |||
| colspan="7" class="roundy" style="background: #fff; border-style: solid; border-width: 5px; text-align: center"| | |||
|- | |||
| colspan="7" class="roundy" style="background: #fff; border-style: solid; border-width: 5px; text-align: center" | | |||
|} | |} | ||
{{-}} | {{-}} | ||
==={{tcg|Temporal Forces}}=== | |||
{| class="roundy" style="background: #FFED53" | |||
| width="25%"| | |||
| class="roundy" style="background: #fff; border-style: solid; border-width: 5px; text-align: center"| [[File:MinccinoTemporalForces182.jpg|200px]]<br>{{TCG ID|Temporal Forces|Minccino|136}} | |||
| width="25%"| | |||
| class="roundy" style="background: #fff; border-style: solid; border-width: 5px; text-align: center"| [[File:CinccinoTemporalForces183.jpg|200px]]<br>{{TCG ID|Temporal Forces|Cinccino|137}} | |||
| width="25%"| | |||
|- | |||
| colspan="7" class="roundy" style="background: #fff; border-style: solid; border-width: 5px; text-align: center"| The first card depicts a {{p|Minccino}} encountering a messy, untidy room. The second card depicts the Minccino having evolved into {{p|Cinccino}}, and the messy room now fully cleaned. | |||
|} | |||
==={{tcg|Twilight Masquerade}}=== | |||
{| class="roundy" style="background: #FFED53" | |||
| width="25%"| | |||
| class="roundy" style="background: #fff; border-style: solid; border-width: 5px; text-align: center"| [[File:PoltchageistTwilightMasquerade171.jpg|200px]]<br>{{TCG ID|Twilight Masquerade|Poltchageist|171}} | |||
| width="25%"| | |||
| class="roundy" style="background: #fff; border-style: solid; border-width: 5px; text-align: center"| [[File:SinistchaexTwilightMasquerade210.jpg|200px]]<br>{{TCG ID|Twilight Masquerade|Sinistcha ex|210}} | |||
| width="25%"| | |||
|- | |||
| colspan="7" class="roundy" style="background: #fff; border-style: solid; border-width: 5px; text-align: center"| In the first card, a {{p|Poltchageist}} encounters a child who is reading through an album, and gets matcha powder onto their hand. In the second card, the child, now fully grown, looks through the same album while the Poltchageist, having evolved into {{p|Sinistcha}}, lurks nearby. The album has a hand print made of matcha powder on it. | |||
|} | |||
==={{tcg|Shrouded Fable}}=== | |||
{| class="roundy" style="background: #FFED53" | {| class="roundy" style="background: #FFED53" | ||
| width="25%"| | | width="25%"| | ||
| class="roundy" style="background: #fff; border-style: solid; border-width: 5px; text-align: center" | [[File: | | class="roundy" style="background: #fff; border-style: solid; border-width: 5px; text-align: center"| [[File:DuskullShroudedFable68.jpg|200px]]<br>{{TCG ID|Shrouded Fable|Duskull|68}} | ||
| width="25%"| | | width="25%"| | ||
| class="roundy" style="background: #fff; border-style: solid; border-width: 5px; text-align: center" | [[File: | | class="roundy" style="background: #fff; border-style: solid; border-width: 5px; text-align: center"| [[File:DusclopsShroudedFable69.jpg|200px]]<br>{{TCG ID|Shrouded Fable|Dusclops|69}} | ||
| width="25%"| | | width="25%"| | ||
| class="roundy" style="background: #fff; border-style: solid; border-width: 5px; text-align: center" | [[File: | | class="roundy" style="background: #fff; border-style: solid; border-width: 5px; text-align: center"| [[File:DusknoirShroudedFable70.jpg|200px]]<br>{{TCG ID|Shrouded Fable|Dusknoir|70}} | ||
| width="25%" | | | width="25%"| | ||
|- | |- | ||
| colspan="7" class="roundy" style="background: #fff; border-style: solid; border-width: 5px; text-align: center" | | | colspan="7" class="roundy" style="background: #fff; border-style: solid; border-width: 5px; text-align: center"| This set of {{TCG|illustration rare}} cards depict a slowly approaching {{p|Duskull}}. As it evolves, it encroaches upon the viewer more and more, from a sidewalk to a house's lawn to right outside the house's living room. | ||
|} | |} | ||
==={{tcg|Stellar Crown}}=== | |||
{| class="roundy" style="background: #FFED53" | |||
| width="25%"| | |||
| class="roundy" style="background: #fff; border-style: solid; border-width: 5px; text-align: center"| [[File:JoltikStellarCrown150.jpg|200px]]<br>{{TCG ID|Stellar Crown|Joltik|150}} | |||
| width="25%"| | |||
| class="roundy" style="background: #fff; border-style: solid; border-width: 5px; text-align: center"| [[File:GalvantulaexStellarCrown168.jpg|200px]]<br>{{TCG ID|Stellar Crown|Galvantula ex|168}} | |||
| width="25%"| | |||
|- | |||
| colspan="7" class="roundy" style="background: #fff; border-style: solid; border-width: 5px; text-align: center"| | |||
|} | |||
==={{tcg|Paradise Dragona}}=== | |||
{| class="roundy" style="background: #FFED53" | |||
| width="25%"| | |||
| class="roundy" style="background: #fff; border-style: solid; border-width: 5px; text-align: center"| [[File:ExeggcuteParadiseDragona65.jpg|200px]]<br>{{TCG ID|Paradise Dragona|Exeggcute|65}} | |||
| width="25%"| | |||
| class="roundy" style="background: #fff; border-style: solid; border-width: 5px; text-align: center"| [[File:AlolanExeggutorexParadiseDragona89.jpg|200px]]<br>{{TCG ID|Paradise Dragona|Alolan Exeggutor ex|89}} | |||
| width="25%"| | |||
|- | |||
| colspan="7" class="roundy" style="background: #fff; border-style: solid; border-width: 5px; text-align: center"| In the first card, an {{p|Exeggcute}} is seen on a basketball court. The following card depicts the Exeggcute having evolved into a {{Tera}}stallized {{rf|Alolan}} {{p|Exeggutor}}, standing tall on the basketball court amidst some palm trees. | |||
|} | |||
==References== | ==References== | ||
{{reflist}} | |||
{{Project TCG notice}} | {{Project TCG notice}} | ||
[[Category:Pokémon trading card classifications]] | [[Category:Pokémon trading card classifications]] | ||
Latest revision as of 10:43, 18 September 2024

|
This article is incomplete. Please feel free to edit this article to add missing information and complete it. Reason: More descriptions need to be added. |

|
The contents of this article have been suggested to be split into multiple different pages. Please discuss it on the talk page for this article. |
A narrative illustration is a card illustration that features one part of a story, and continues the story onto other related cards. These are distinct from combined illustrations, which feature one illustration split across multiple cards. Cards that form narrative illustrations are generally drawn by the same artist and released together in the same expansion, but there are instances of narratives that are collaborations between several artists or released decades apart. The Pokémon Plusle and Minun have multiple narrative illustrations featuring them.
In the Scarlet & Violet series, special illustration rare cards of Pokémon ex often form a narrative illustration with illustration rare cards of their pre-evolutions.
List of narrative illustrations
Team Rocket and Unified Minds
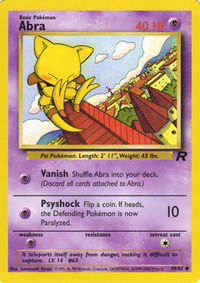 Abra |
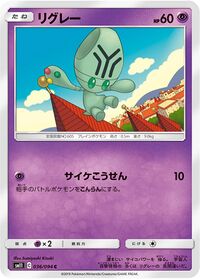 Elgyem |
|||||
| The first card depicts an Abra sitting atop a castle. The second card depicts an Elgyem sitting in the same spot. | ||||||
Vending Machine cards and Unified Minds
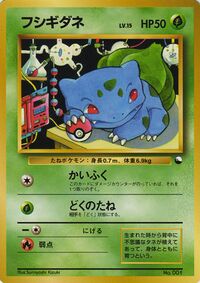 Bulbasaur |
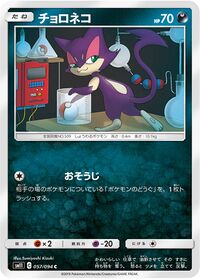 Purrloin |
|||||
P Promotional cards
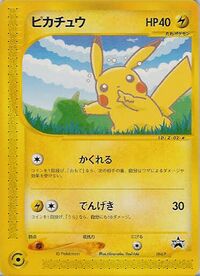 Pikachu |
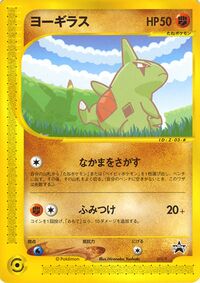 Larvitar |
|||||
| The two cards depict the same scene from two different perspectives. In the scene, a Pikachu is hiding behind a hedge, telling the owner of the card to keep quiet, as a Larvitar is looking for it. Furthermore, on the first card, the Larvitar's silhouette is seen on the hedge with its horn sticking out, Likewise, the second card shows Pikachu's silhouette with one of its ears sticking out. | ||||||
Aquapolis, P Promotional cards, Undaunted, and Unified Minds
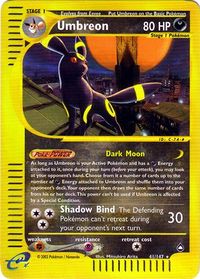 Umbreon |
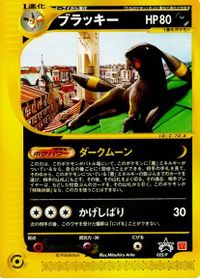 Umbreon |
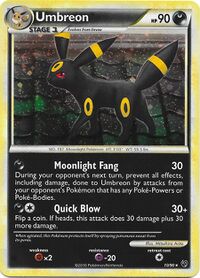 Umbreon |
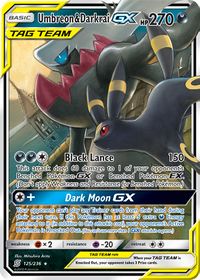 Umbreon & Darkrai-GX |
|||||
| The first two cards are both prints of Umbreon from Aquapolis. These show Umbreon on the rooftops of The Town on No Map, with one depicting Umbreon awake at night while the other depicts Umbreon sleeping during the day. The artist of all four cards, Mitsuhiro Arita, stated that cat lovers enjoyed these illustrations.[1] Arita has confirmed that the fourth card forms a narrative with his first Umbreon card.[2] | ||||||||
Aquapolis and Unbroken Bonds
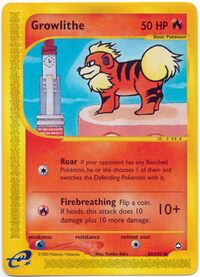 Growlithe |
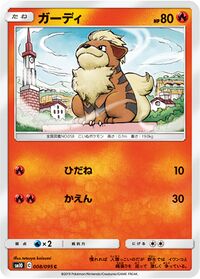 Growlithe |
|||||
Aquapolis and Crown Zenith
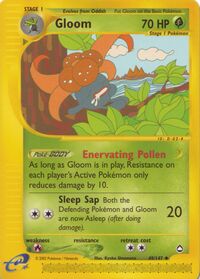 Gloom |
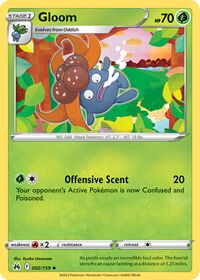 Gloom |
|||||
| The first card depicts a Gloom sleeping on a tree branch. On the second card, the Gloom has awoken in shock, falling from the branch. | ||||||
T Promotional cards
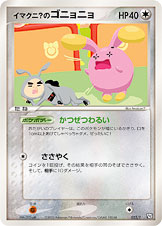 Imakuni?'s Whismur |
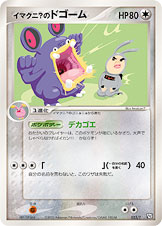 Imakuni?'s Loudred |
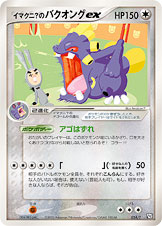 Imakuni?'s Exploud ex |
||||
EX Dragon
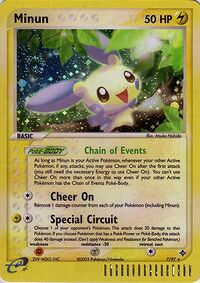 Minun |
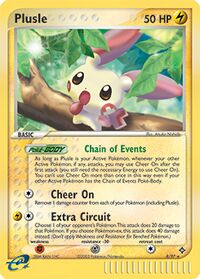 Plusle |
|||||
Movie Commemoration VS Pack: Sky-Splitting Deoxys
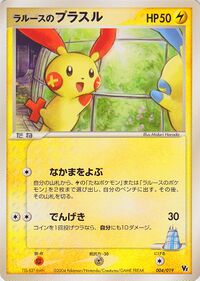 LaRousse's Plusle |
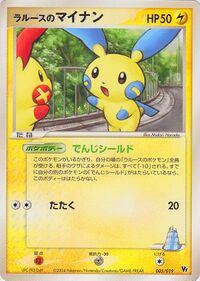 LaRousse's Minun |
|||||
| The two cards depict the same scene from two different perspectives. In the scene, a Plusle and a Minun are seen engrossed in conversation. The first card is focused on the Plusle, while the second card is focused on the Minun. | ||||||
EX Team Rocket Returns
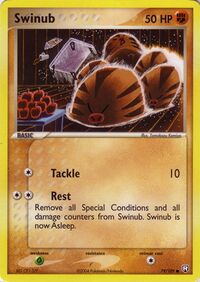 Swinub |
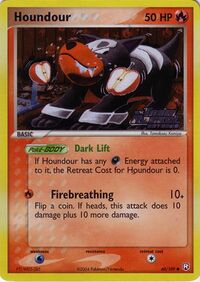 Houndour |
|||||
| In the first card, a group of Swinub are charging around a room with a tray of apples in the background. In the second card, a Houndour is shown eating one of the apples that were dropped. | ||||||
EX Deoxys
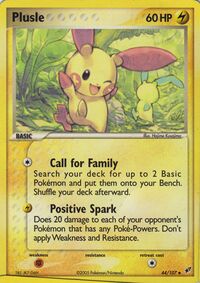 Plusle |
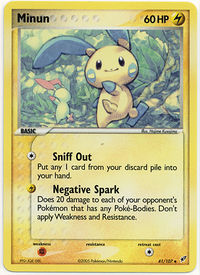 Minun |
|||||
| The two cards depict the same scene from two different perspectives. On the first card, a Plusle is seen posing with a Minun in the background, while the second card depicts vice vera. | ||||||
EX Emerald
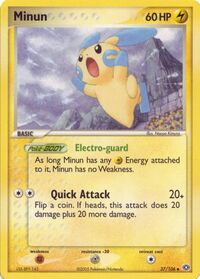 Minun |
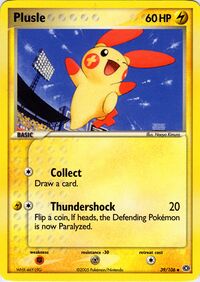 Plusle |
|||||
EX Delta Species
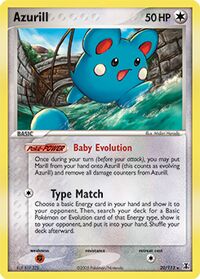 Azurill |
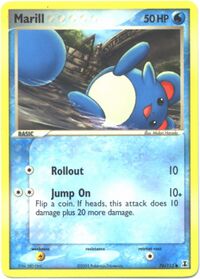 Marill |
|||||
| On the first card, an Azurill is seen playing in a river. On the second card, it has evolved into a Marill, and has started swimming. | ||||||
EX Trainer Kit 2
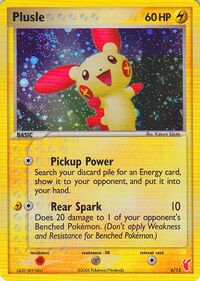 Plusle |
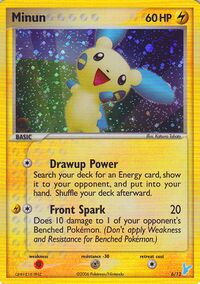 Minun |
|||||
EX Crystal Guardians and Sword & Shield
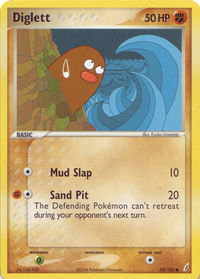 Diglett |
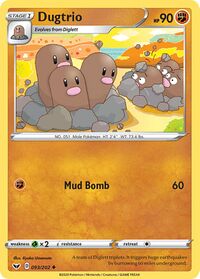 Dugtrio |
|||||
Mysterious Treasures
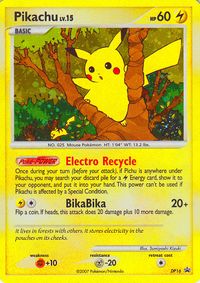 Pikachu |
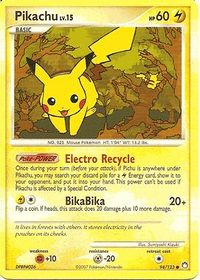 Pikachu |
|||||
| The two cards depict the same scene from two different perspectives. In the scene, a Pikachu is standing on a tree while another Pikachu runs below. Each card focuses on one of them. | ||||||
DPt-P Promotional cards
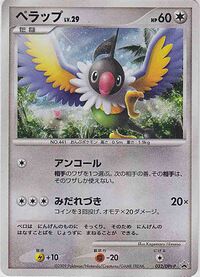 Chatot |
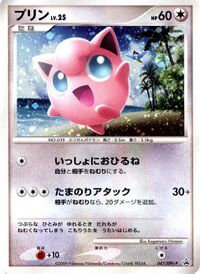 Jigglypuff |
|||||
Rising Rivals
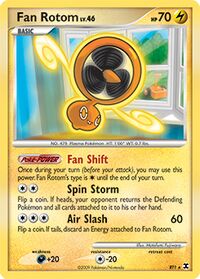 Fan Rotom |
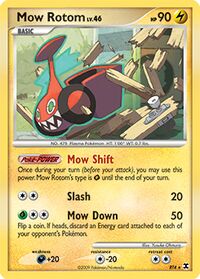 Mow Rotom |
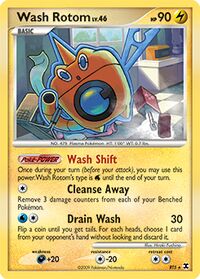 Wash Rotom |
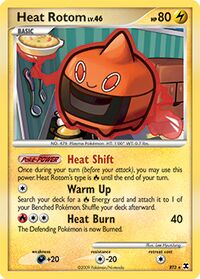 Heat Rotom |
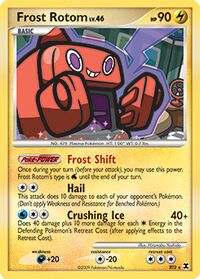 Frost Rotom |
||||||
| Each of the cards depict a different form of Rotom being used for different kinds of housework. | ||||||||||
Platinum: Arceus
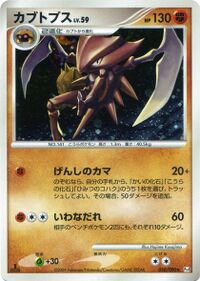 Kabutops |
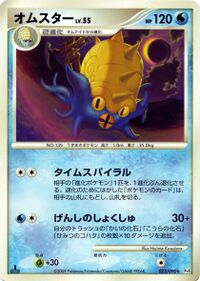 Omastar |
|||||
Pokémon Rumble
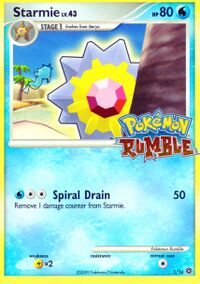 Starmie |
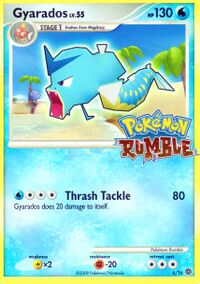 Gyarados |
|||||
| As with the other cards in this set, these illustrations are renders made using assets from Pokémon Rumble. The two cards depict the same scene from two different perspectives. In the scene, a Starmie is hiding behind a palm tree on Bright Beach from a Gyarados. The first card focuses on the Starmie, while the second card focuses on the Gyarados. | ||||||
HeartGold & SoulSilver
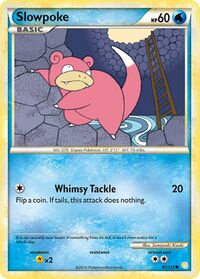 Slowpoke |
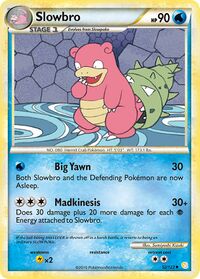 Slowbro |
|||||
| The first card depicts a Slowpoke climbing down a well (presumably Slowpoke Well). On the second card, it has evolved into a Slowbro, and is looking down at the water in confusion. | ||||||
Unleashed
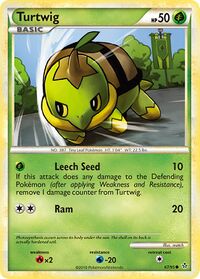 Turtwig |
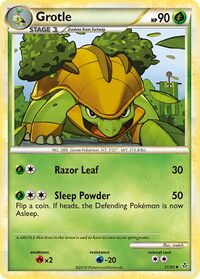 Grotle |
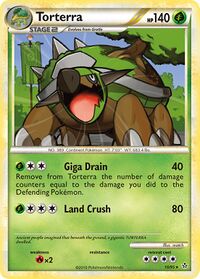 Torterra |
||||||
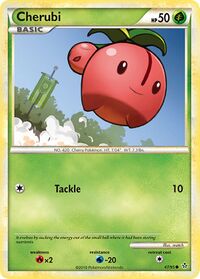 Cherubi |
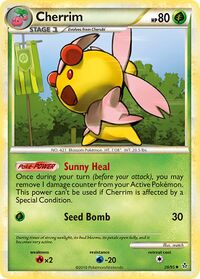 Cherrim |
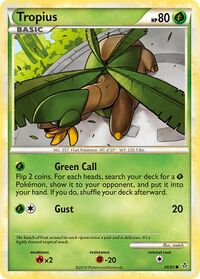 Tropius |
||||||
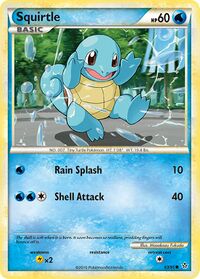 Squirtle |
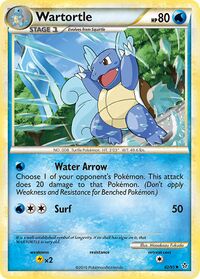 Wartortle |
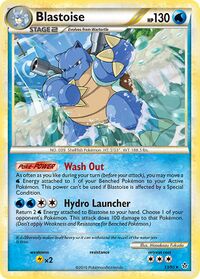 Blastoise |
||||||
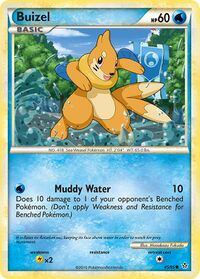 Buizel |
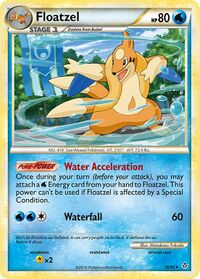 Floatzel |
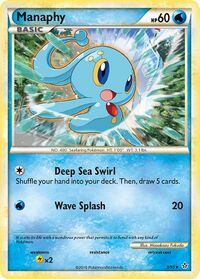 Manaphy |
||||||
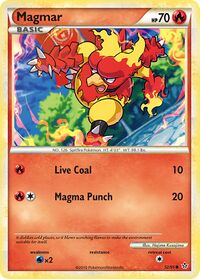 Magmar |
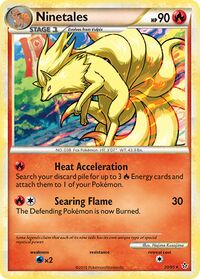 Ninetales |
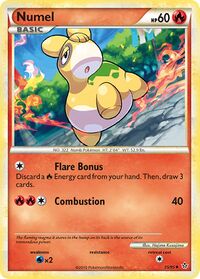 Numel |
||||||
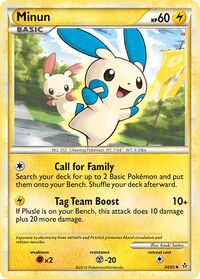 Minun |
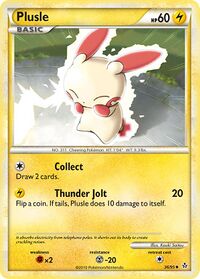 Plusle |
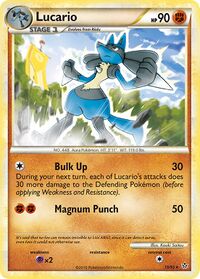 Lucario |
||||||
|
All of these cards appear to depict a single battlefield, that has a grey floor and is surrounded by a forest. These Pokémon appear to be partaking in a battle. There are flags in the background which for each of the types of the Pokémon involved, using the type's symbol and corresponding color. (The Lucario card has a Lightning flag in the art instead of a Fighting flag.) The Numel card has an additional Water flag visible and the Plusle on the Plusle card is depicted on the Minun card, clarifying that this is a singular space. | ||||||||
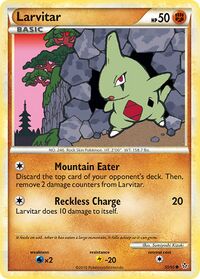 Larvitar |
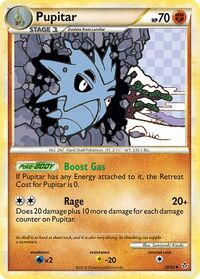 Pupitar |
|||
|
This Larvitar and Pupitar face in opposite directions. Both cards depict the Pokémon emerging from a rocky wall. The first card takes place at a more temperate time, while the second card has snow covering the ground and the trees. | ||||
Undaunted
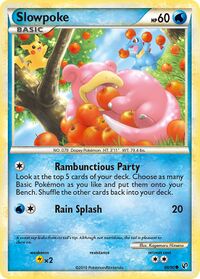 Slowpoke |
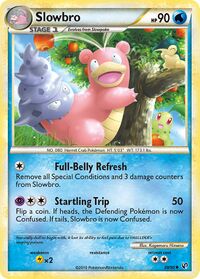 Slowbro |
|||||
| In the first card, a Slowpoke is eating from a pile of apples that have fallen from a tree. On the second card, it has evolved into a Slowbro, and is using its newly-acquired front arms to shake the tree. | ||||||
Triumphant
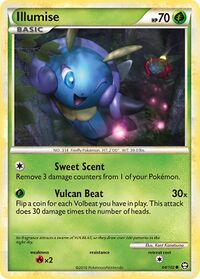 Illumise |
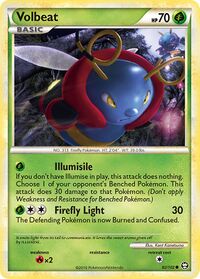 Volbeat |
|||||
Dark Explorers
 Plusle |
 Minun |
|||||
| The two cards depict the same scene from two different perspectives. In the scene, a Plusle is running on the airport runway in Mistralton City in front of an airplane, while a Minun sits on one the airplane's wings. The first card is focused on the Plusle, while the second is focused on the Minun. | ||||||
Dragons Exalted
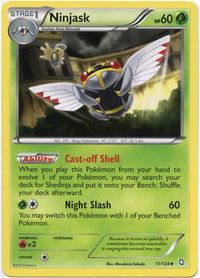 Ninjask |
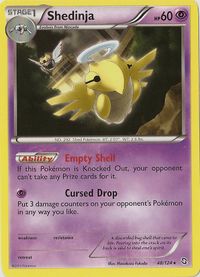 Shedinja |
|||||
Plasma Blast
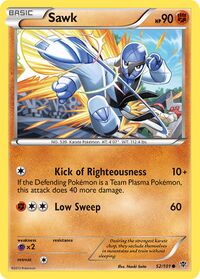 Sawk |
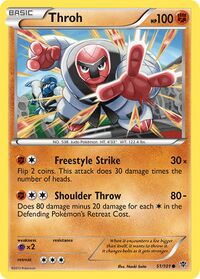 Throh |
|||||
| The two cards depict the same scene from two different perspectives. On the first card, a Sawk is seen kicking while a Throh readies a punch in the background, while the second card depicts vice versa. | ||||||
Legendary Treasures
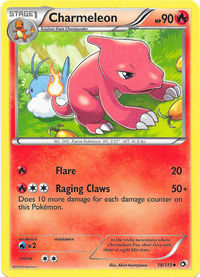 Charmeleon |
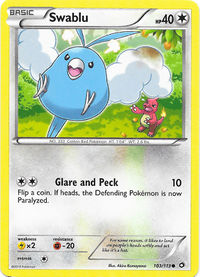 Swablu |
|||
| The first card shows a Charmeleon accidentally burning a Swablu's wing with the flame on its tail. On the next card, the Swablu with its singed wing angrily flies away, while the surprised Charmeleon looks on. | ||||
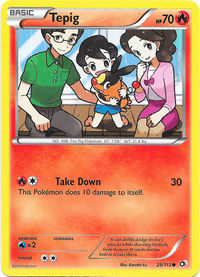 Tepig |
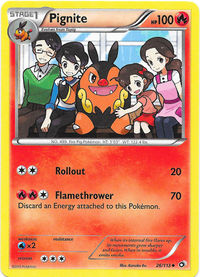 Pignite |
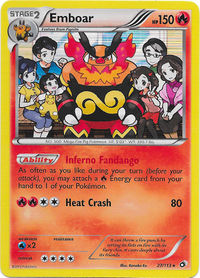 Emboar |
||||
| The first card shows a husband and wife depicted with their young son holding the family Tepig. On the next card, the family Tepig has evolved into Pignite, and the husband and wife appear to have had a daughter. On the last card, the family Tepig has fully evolved. On the left, the son has started a family of his own, while the aging husband and wife sit beside their daughter on the right. | ||||||
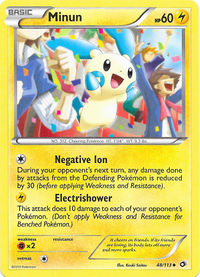 Minun |
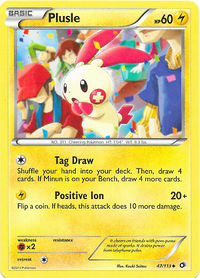 Plusle |
|||||
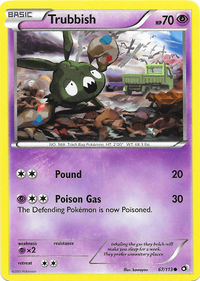 Trubbish |
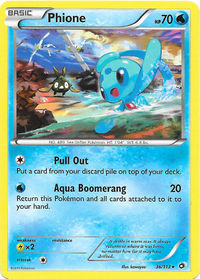 Phione |
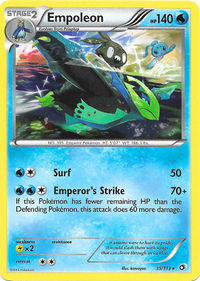 Empoleon |
||||
| The first card shows a Trubbish left at a landfill site. On the next card, the abandoned Trubbish meets a Phione upon reaching a waterfront. On the last card, the Phione appears to have introduced the abandoned Trubbish to an Empoleon. The Trubbish appears to be enjoying itself riding on the Empoleon's back as it travels through the water. | ||||||
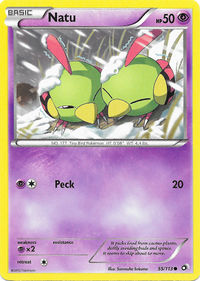 Natu |
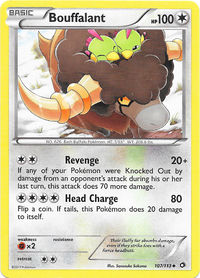 Bouffalant |
|||
| The first card shows two Natu huddled together in a blizzard, while a Bouffalant approaches in the distance. On the next card, the blizzard has abated, and the two Natu appear contently snug in Bouffalant's afro. | ||||
XY Black Star Promos
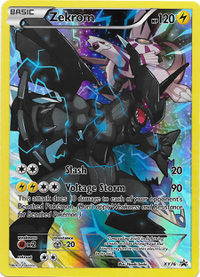 Zekrom |
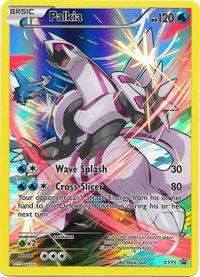 Palkia |
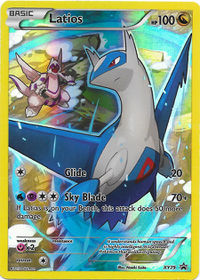 Latios |
||||
XY
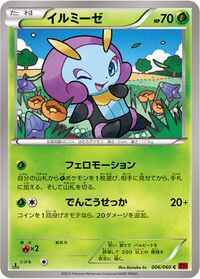 Illumise |
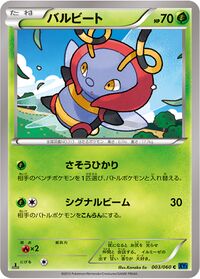 Volbeat |
|||||
Furious Fists
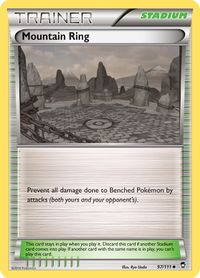 Mountain Ring |
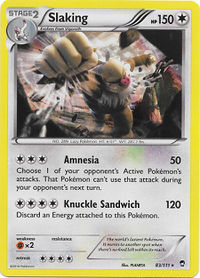 Slaking |
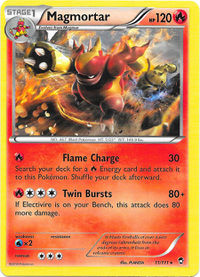 Magmortar |
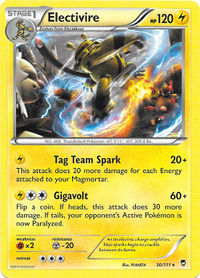 Electivire |
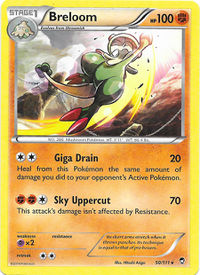 Breloom |
||||||
 Fighting Stadium |
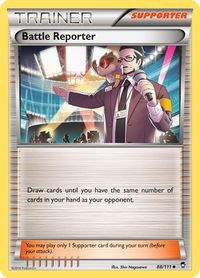 Battle Reporter |
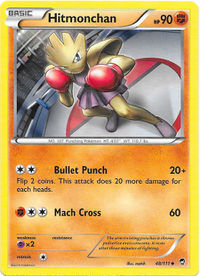 Hitmonchan |
||||||
 Machamp |
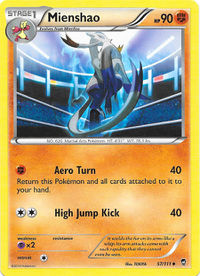 Mienshao |
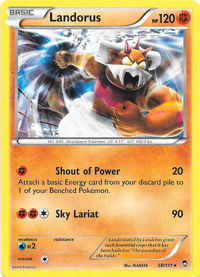 Landorus |
||||||
| Mega Lucario is also shown at the Fighting Stadium on the English booster pack artwork. | ||||||||
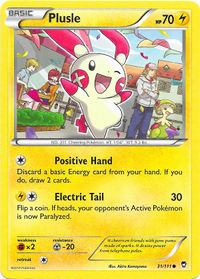 Plusle |
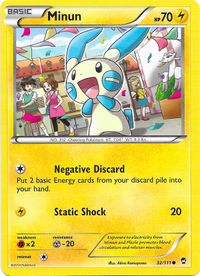 Minun |
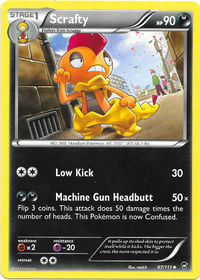 Scrafty |
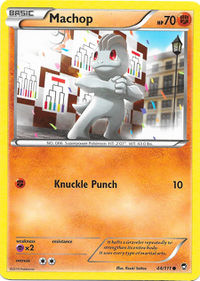 Machop |
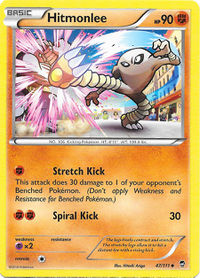 Hitmonlee |
||||||
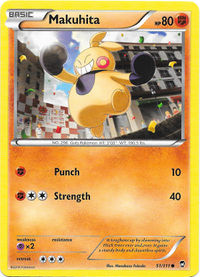 Makuhita |
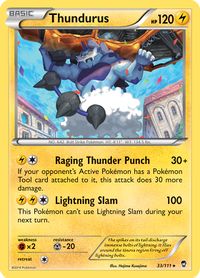 Thundurus |
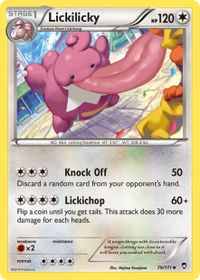 Lickilicky |
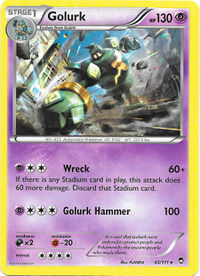 Golurk |
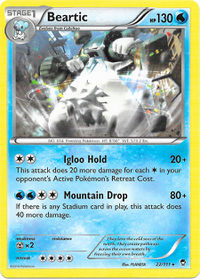 Beartic |
||||||
 Hawlucha |
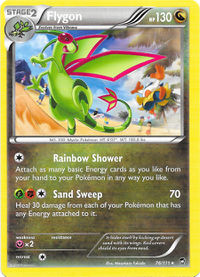 Flygon |
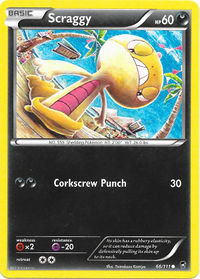 Scraggy |
||||||
| Hawlucha is confirmed to be in the same location as per the English booster pack artwork. | ||||||||
Double Crisis
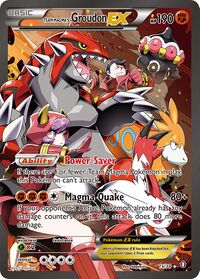 Team Magma's Groudon-EX |
 Team Aqua's Kyogre-EX |
|||||
Roaring Skies
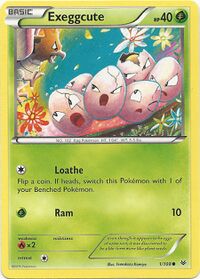 Exeggcute |
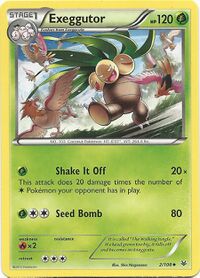 Exeggutor |
|||
| The first card shows an Exeggcute that is being harassed by a Spearow. On the next card, the Exeggcute has evolved into Exeggutor and takes its revenge on a flock of Spearow. | ||||
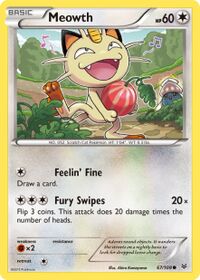 Meowth |
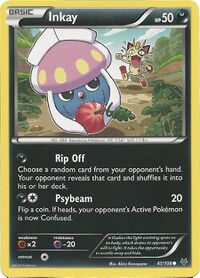 Inkay |
|||
| The first card shows a Meowth overjoyed at finding a Berry, while an Inkay watches from a distance. On the next card, the Inkay has ambushed the Meowth with a spray of ink and made off with its Berry. | ||||
Roaring Skies and Ancient Origins
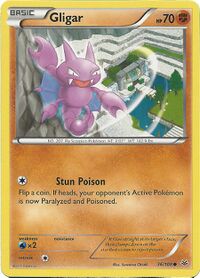 Gligar |
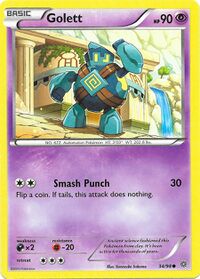 Golett |
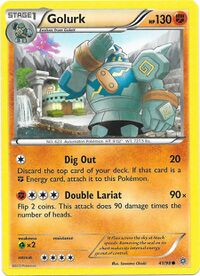 Golurk |
||||
BREAKthrough
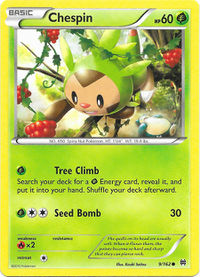 Chespin |
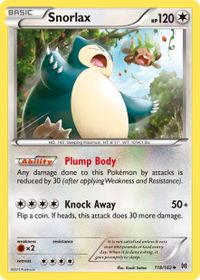 Snorlax |
|||||
| The first card shows a Chespin climbing a tree in an attempt to reach some Razz Berries, while a Snorlax sleeps below. On the next card, the Snorlax has awoken and is readily dashing to catch the Chespin that is falling from the tree. | ||||||
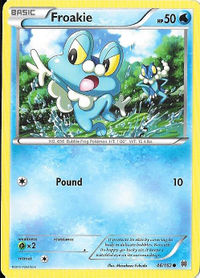 Froakie |
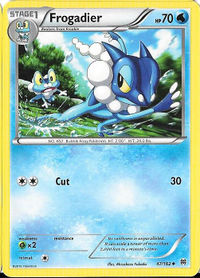 Frogadier |
|||||
| The first card depicts a Froakie trying to run on water, presumably being coached by a Frogadier. On the second card, the Frogadier is demonstrating his technique to the Froakie, who watches in awe. | ||||||
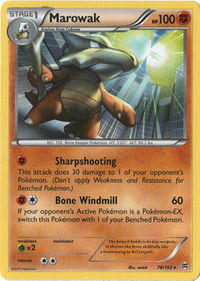 Marowak |
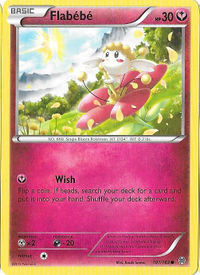 Flabébé |
|||||
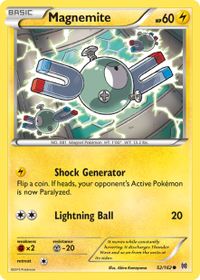 Magnemite |
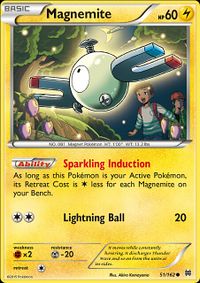 Magnemite |
|||||
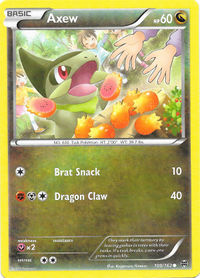 Axew |
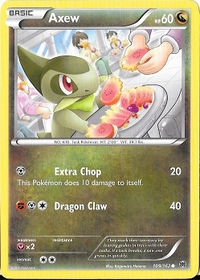 Axew |
|||||
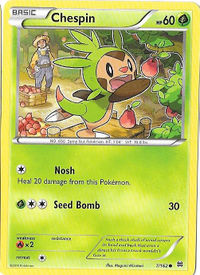 Chespin |
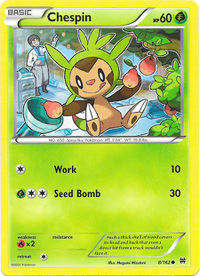 Chespin |
|||||
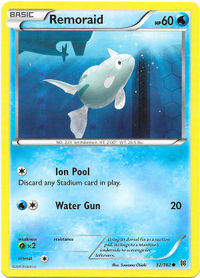 Remoraid |
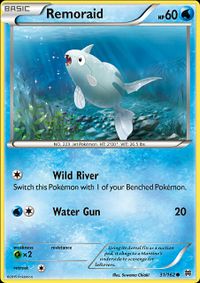 Remoraid |
|||||
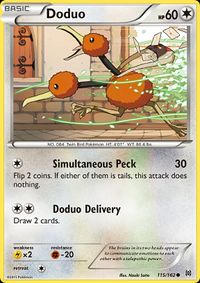 Doduo |
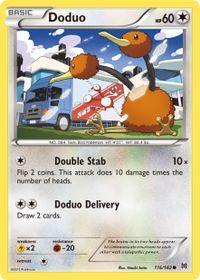 Doduo |
|||||
BREAKthrough, BREAKpoint, and Fates Collide
- Main article: Parallel Worlds (TCG)
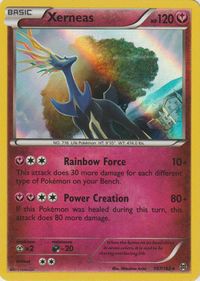 Xerneas |
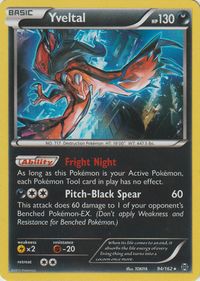 Yveltal |
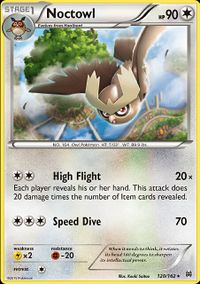 Noctowl |
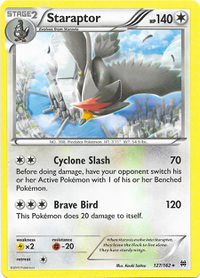 Staraptor |
|||||||
 Sigilyph |
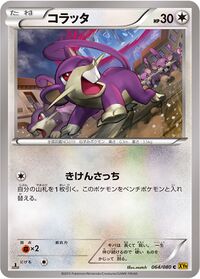 Rattata |
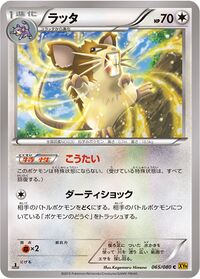 Raticate |
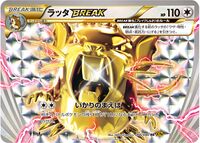 Raticate BREAK |
|||||||
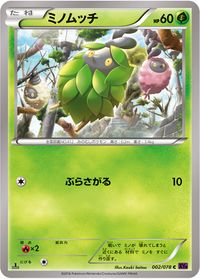 Burmy |
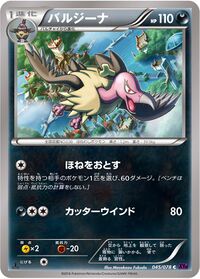 Mandibuzz |
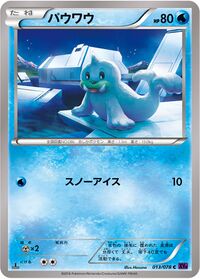 Seel |
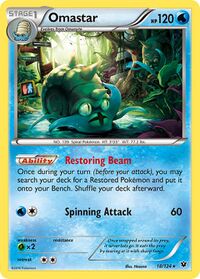 Omastar |
|||||||
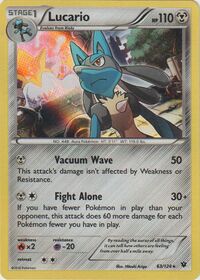 Lucario |
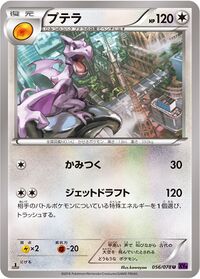 Aerodactyl |
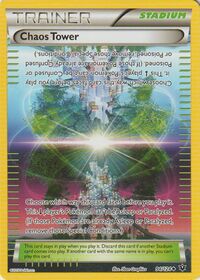 Chaos Tower |
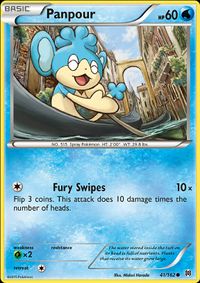 Panpour |
|||||||
BREAKpoint
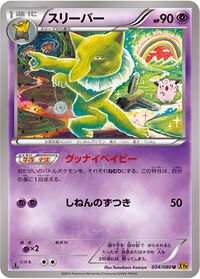 Hypno |
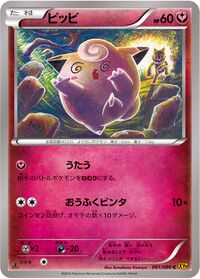 Clefairy |
|||||
| The two cards depict a story where Clefairy is going on a safe trail and encounters a Hypno next to a broken sign, who confuses Clefairy and leads it astray on a dark, unsafe path. | ||||||
BREAKpoint and Fates Collide
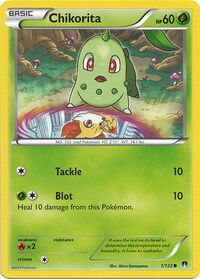 Chikorita |
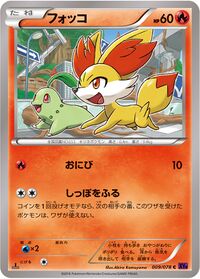 Fennekin |
|||||
| The first card shows a Chikorita seeing a Fennekin in the rift hole torn between the twin worlds. On the second card, the twin worlds are unified and remade, with both Fennekin and Chikorita playing together in the unified world. | ||||||
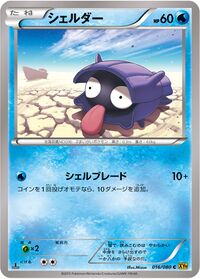 Shellder |
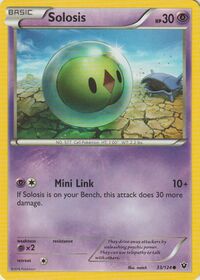 Solosis |
|||||
Generations
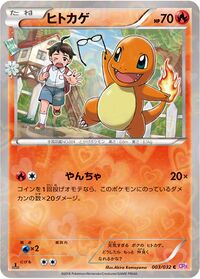 Charmander |
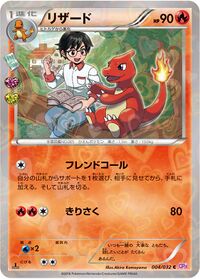 Charmeleon |
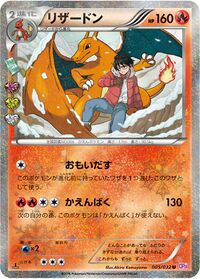 Charizard |
||||
| The first card shows a young boy being teased by his mischievous Charmander. On the next card, the boy is now older, and his Charmander has evolved into Charmeleon. The two have forged a close friendship and are engrossed in discussion. On the last card, the boy is now a young man, and his Charmeleon has evolved into Charizard. Their tale of friendship continues, with Charizard shielding the young man from snow. | ||||||
Fates Collide
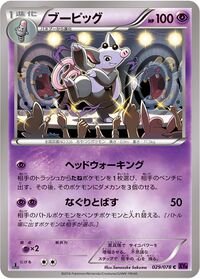 Grumpig |
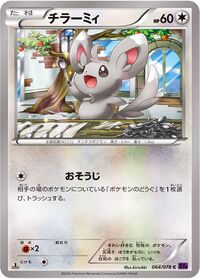 Minccino |
|||||
SM-P Promotional cards
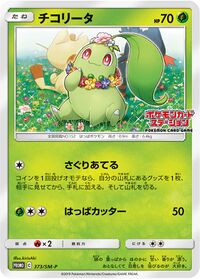 Chikorita |
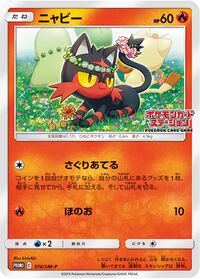 Litten |
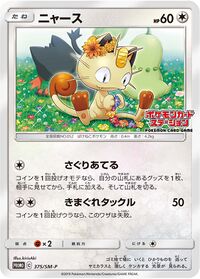 Meowth |
||||
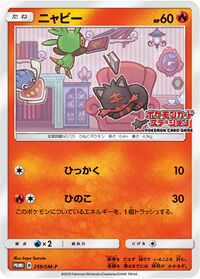 Litten |
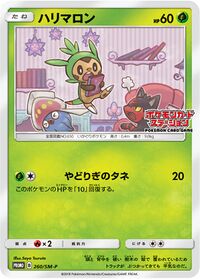 Chespin |
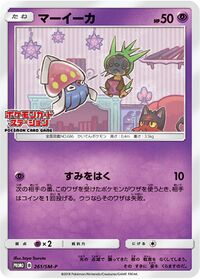 Inkay |
||||
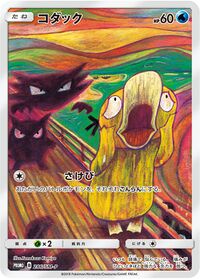 Psyduck |
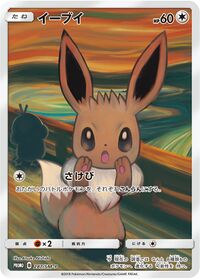 Eevee |
 Pikachu |
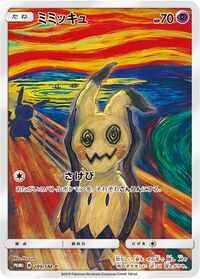 Mimikyu |
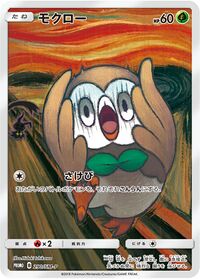 Rowlet |
||||||
| All five cards are parodies of "The Scream" by Edvard Munch. When placed in collector number order, the Pokémon of each card appears in silhouette on the next card. (Psyduck is first, so Haunter and Gengar are on its card. Rowlet is last, and does not appear as a silhouette.) | ||||||||||
Shining Legends and SM Black Star Promos
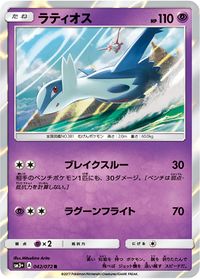 Latios |
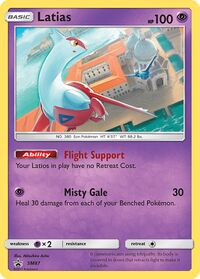 Latias |
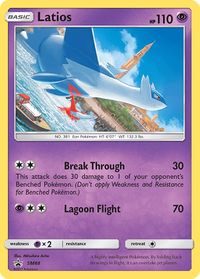 Latios |
||||
Shining Legends and Unified Minds
 Mewtwo-GX |
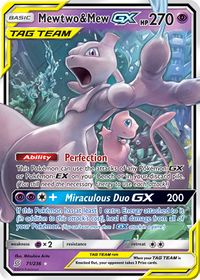 Mewtwo & Mew-GX |
|||
| The first card shows a Mewtwo confined within a laboratory enclosure. On the next card, Mewtwo and Mew appear together, in front of the shattered glass of the now-destroyed enclosure. Both cards were illustrated by Mitsuhiro Arita, who suggested that Mew has helped Mewtwo escape the enclosure.[2] | ||||
Team Up and Unified Minds
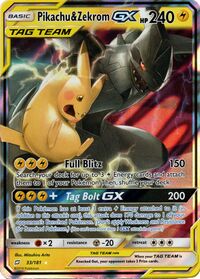 Pikachu & Zekrom-GX |
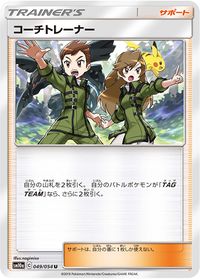 Coach Trainer |
|||||
Unified Minds
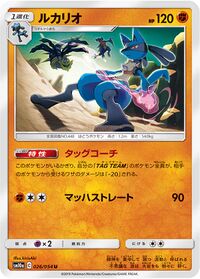 Lucario |
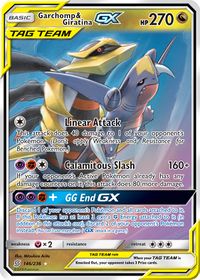 Garchomp & Giratina-GX |
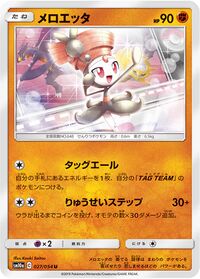 Meloetta |
||||
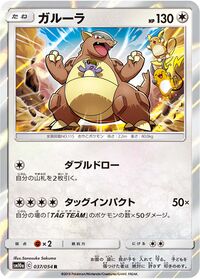 Kangaskhan |
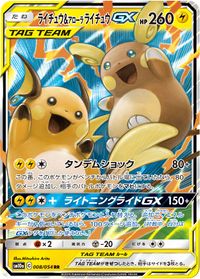 Raichu & Alolan Raichu-GX |
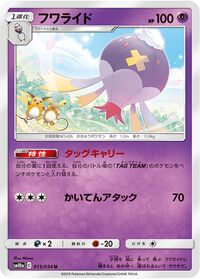 Drifblim |
||||
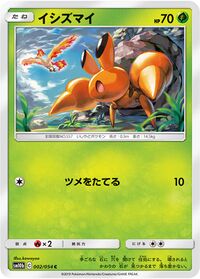 Dwebble |
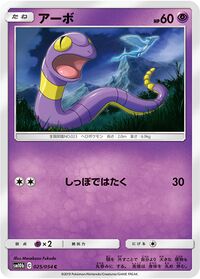 Ekans |
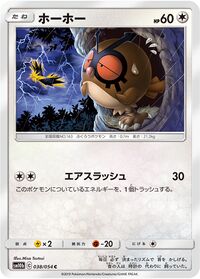 Hoothoot |
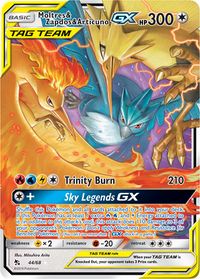 Moltres & Zapdos & Articuno-GX |
|||||
| The first three cards depict a Dwebble, Ekans, and Hoothoot each witnessing the legendary birds. The fourth card depicts all of legendary birds together. | ||||||||
Cosmic Eclipse
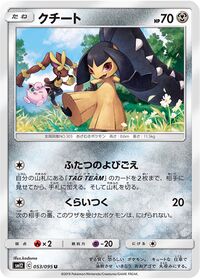 Mawile |
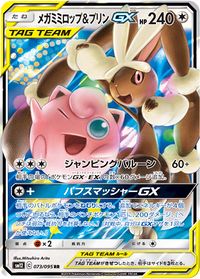 Mega Lopunny & Jigglypuff-GX |
|||||
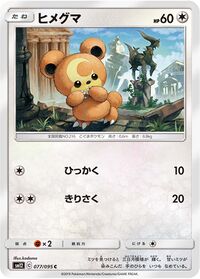 Teddiursa |
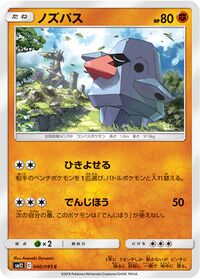 Nosepass |
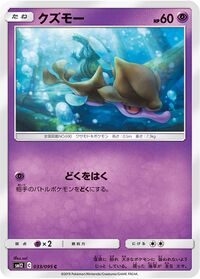 Skrelp |
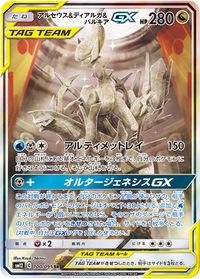 Arceus & Dialga & Palkia-GX |
|||||
| The first three cards depict a Teddiursa, Nosepass, and Skrelp finding ancient statues of Arceus, Dialga, and Palkia, respectively. The fourth card depicts the three statues together. | ||||||||
S-P Promotional cards
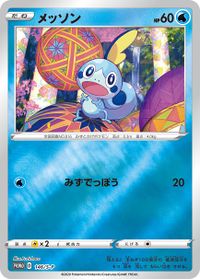 Sobble |
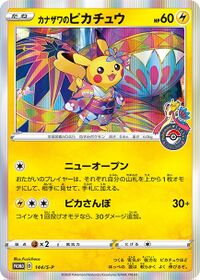 Pikachu |
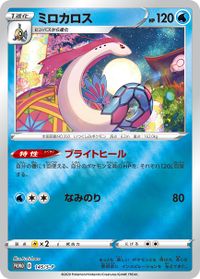 Milotic |
||||
SWSH Black Star Promos
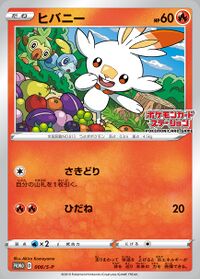 Scorbunny |
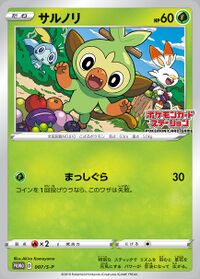 Grookey |
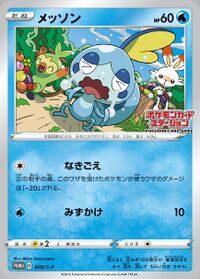 Sobble |
||||
| In the first card, a Scorbunny finds a pile of Berries, while a Grookey and a Sobble take notice from a bush. In the second card, the Scorbunny has made off with a handful of Berries, while the Grookey inspects of what's left. The last card shows the Sobble crying because the Grookey took the entire pile. | ||||||
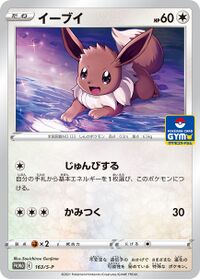 Eevee |
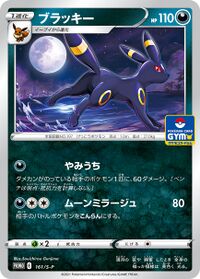 Umbreon |
|||||
| The first card depicts an Eevee playing with a puddle of water at nighttime. On the second card, the Eevee has evolved into an Umbreon, and is running across the puddle. | ||||||
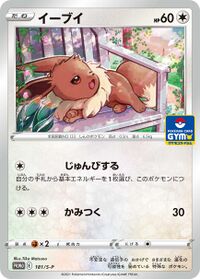 Eevee |
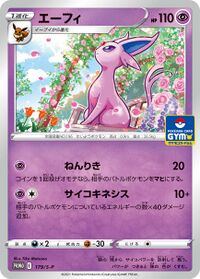 Espeon |
|||||
| The first card depicts an Eevee about to fall asleep on a bench surrounded by flowers. On the second card, it has evolved into an Espeon, and has woken up. | ||||||
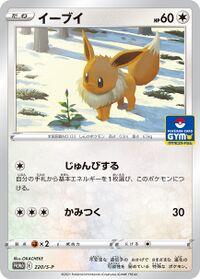 Eevee |
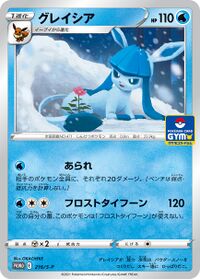 Glaceon |
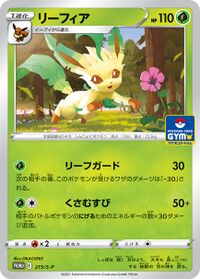 Leafeon |
||||
| The first card depicts an Eevee observing a budding flower in the Winter. On the second card, the flower is starting to bloom, and a Glaceon is seen protecting it. On the third card, it is now Spring, and the flower has fully bloomed, with a Leafeon running towards it. | ||||||
 Eevee |
 Sylveon |
|||||
| The first card depicts an Eevee running around a playroom playing with a ball. On the second card, the Eevee has evolved into a Sylveon, and is sitting on a cushion, holding the ball with its feelers. | ||||||
Sword & Shield
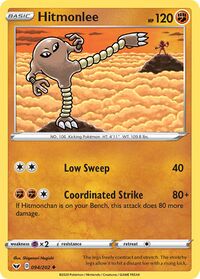 Hitmonlee |
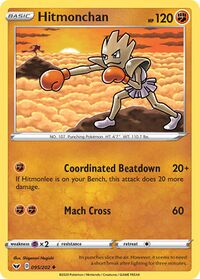 Hitmonchan |
|||||
Vivid Voltage
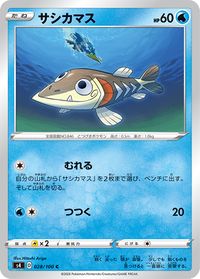 Arrokuda |
 Cramorant |
|||||
| The first card depicts an Arrokuda swimming underwater with a Cramorant diving in the background. On the second card, the Cramorant has caught the Arrokuda in its beak. | ||||||
Battle Styles
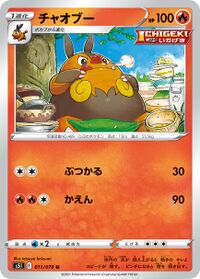 Pignite |
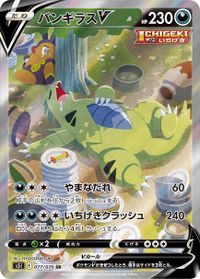 Tyranitar V |
|||||
Battle Styles and S-P Promotional cards
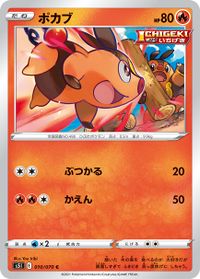 Tepig |
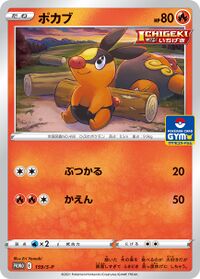 Tepig |
|||||
Chilling Reign and SWSH Black Star Promos
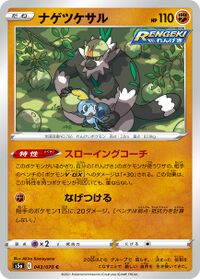 Passimian |
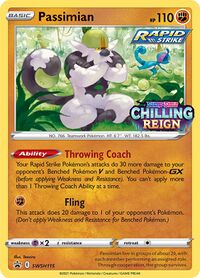 Passimian |
|||||
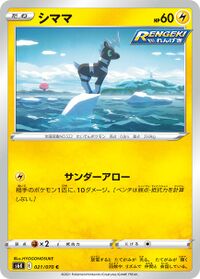 Blitzle |
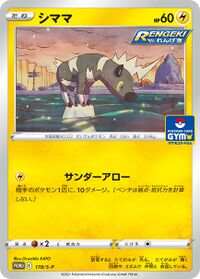 Blitzle |
|||||
| The first card shows a Blitzle standing on an iceberg. On the second card, the iceberg is starting to melt, with the Blitzle looking down worryingly. | ||||||
Evolving Skies and Fusion Strike
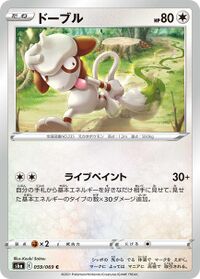 Smeargle |
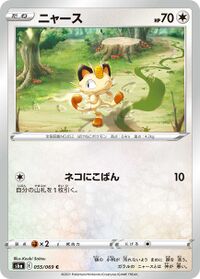 Meowth |
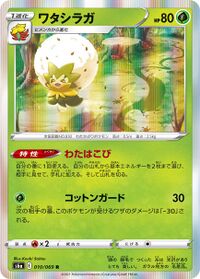 Eldegoss |
 Mawile |
|||||
 Sewaddle |
 Raichu |
 Rotom |
||||
Celebrations
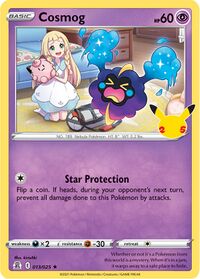 Cosmog |
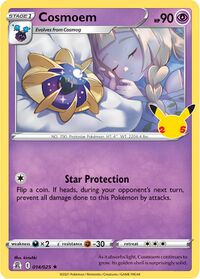 Cosmoem |
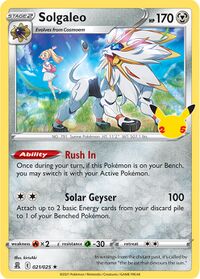 Solgaleo |
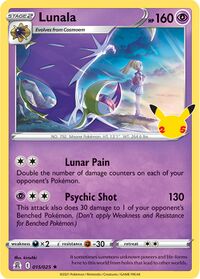 Lunala |
|||||
| The first card shows Lillie playing with Nebby, her Cosmog. On the second card, Nebby has evolved into a Cosmoem, and is shown sleeping next to Lillie. The next two cards seem to split into two different timelines. In the first timeline, Cosmoem has evolved into Solgaleo, and is accompanying Lillie in a field. In the second timeline, it has evolved into Lunala, and is flying next to Lillie, who is standing on a rock near the seaside. | ||||||||
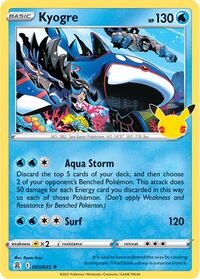 Kyogre |
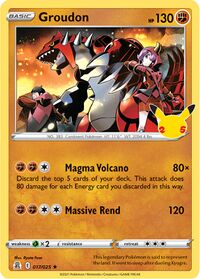 Groudon |
|||||
Fusion Strike
 Araquanid |
 Mudkip |
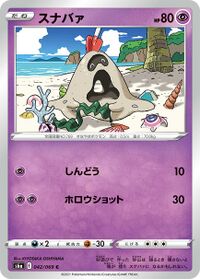 Sandygast |
||||
Fusion Strike and Brilliant Stars
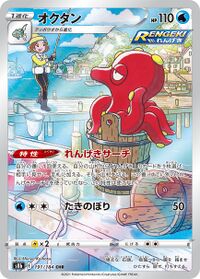 Octillery |
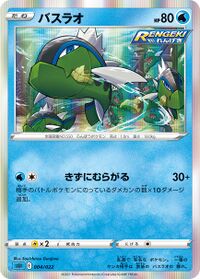 Basculin |
|||||
Brilliant Stars
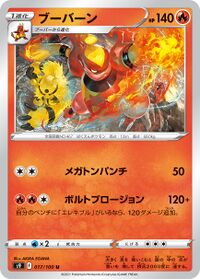 Magmortar |
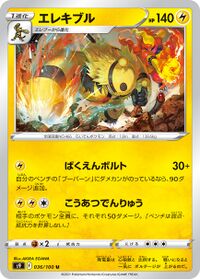 Electivire |
|||||
Brilliant Stars and SWSH Black Star Promos
 Charizard V |
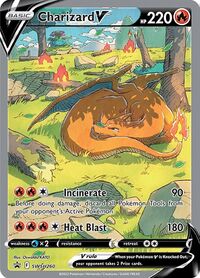 Charizard V |
|||||
| The first card depicts a Pokémon battle between a Charizard, and a Venusaur. The second card takes place afterwards, with the both of them resting in the forest destroyed by them battling. | ||||||
Silver Tempest
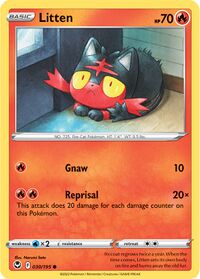 Litten |
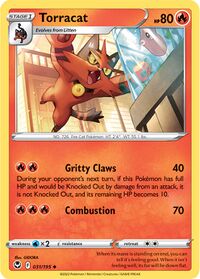 Torracat |
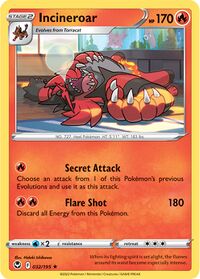 Incineroar |
||||
| The first card shows Litten cowering in fear near the aquarium in Professor Kukui's lab on Route 1. On the second card, the Litten has evolved into Torracat and is now more energetic. It is leaping at the aquarium. The third card has the evolved form of Torracat, Incineroar, sleeping soundly in front of the tank.[3] | ||||||
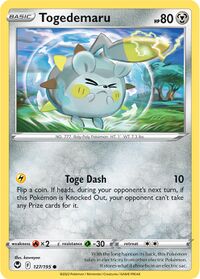 Togedemaru |
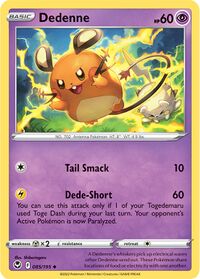 Dedenne |
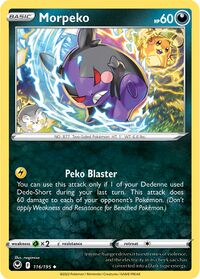 Morpeko |
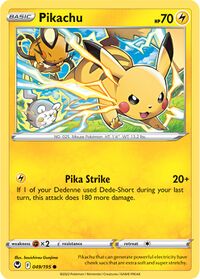 Pikachu |
|||||
| All four cards are part of two combos of attacks that can be executed consecutively. The first card shows only a Togedemaru and has the Toge Dash attack, starting the combo. The second card also shows Togedemaru, necessary to use the Dedenne's Dede-Short attack. The third card shows both Togedemaru and Dedenne, both of which are required to use Morpeko's Peko Blaster attack. The fourth card also shows Togedemaru and Dedenne, which strengthen Pikachu's Pika Strike attack. | ||||||||
Crown Zenith
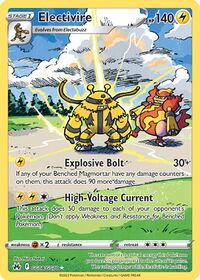 Electivire |
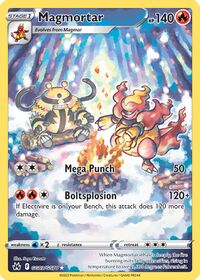 Magmortar |
|||||
Crown Zenith and SWSH Black Star Promos
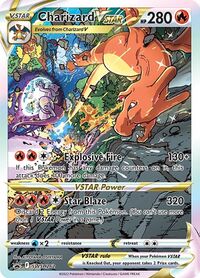 Charizard VSTAR |
 Mewtwo VSTAR |
|||||
Throughout the Sword & Shield series
Scarlet & Violet
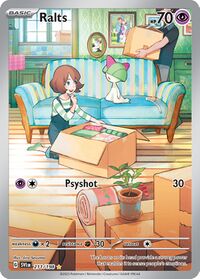 Ralts |
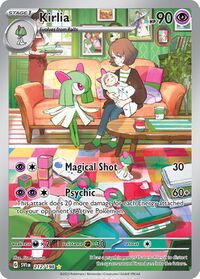 Kirlia |
 Gardevoir ex |
||||
| The first card shows a young woman and her husband moving into a house with their Ralts. On the second card, the Ralts has evolved into a Kirlia, and the woman appears to have since given birth to a baby. On the final card, the Ralts has fully evolved, and the couple are now elderly, with Gardevoir caring for them. | ||||||
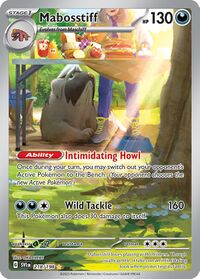 Mabosstiff |
 Arven |
|||||
Paldea Evolved
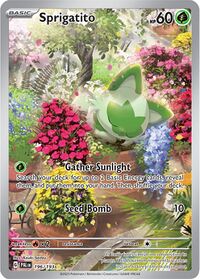 Sprigatito |
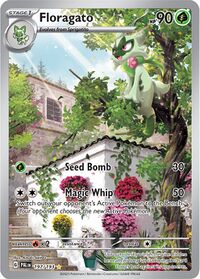 Floragato |
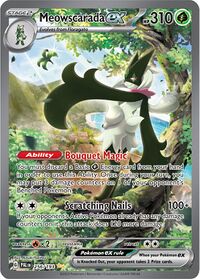 Meowscarada ex |
||||
 Fuecoco |
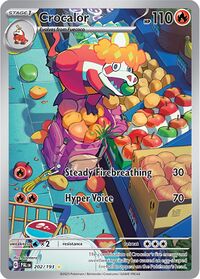 Crocalor |
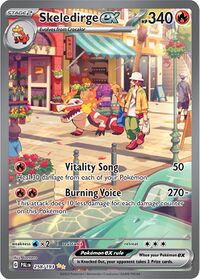 Skeledirge ex |
||||
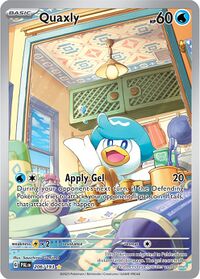 Quaxly |
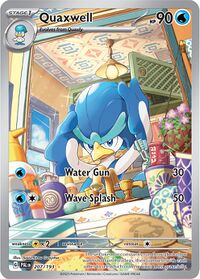 Quaxwell |
 Quaquaval ex |
||||
| The first card depicts a Quaxly looking at itself in the mirror with many haircare products sitting on the sink. On the second card, the Quaxly has evolved into a Quaxwell, and is busy styling its pompadour. On the third card, the Quaxly is fully evolved into Quaquaval, and is looking at itself proudly in the mirror. The soap dispenser in each card's illustration "evolves" along with the Pokémon, being based on Poliwag, Poliwhirl, and Poliwrath respectively. | ||||||
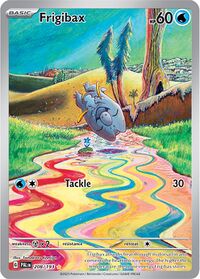 Frigibax |
 Arctibax |
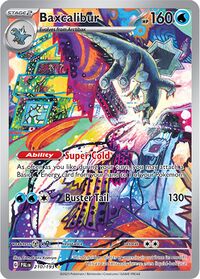 Baxcalibur |
||||
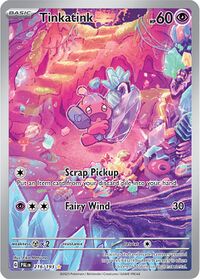 Tinkatink |
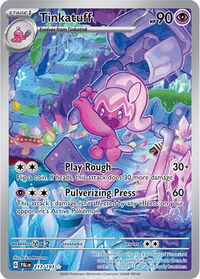 Tinkatuff |
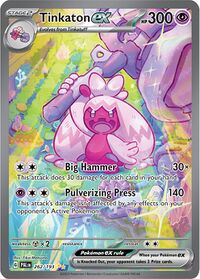 Tinkaton ex |
||||
| In the first illustration, a Tinkatink is gathering resources and settling into an underground crystal cave. In the second illustration, the Tinkatink has evolved into Tinkatuff, who is hard at work building her hammer. The scene concludes on the final illustration, where the Tinkatuff has evolved into Tinkaton, and has finished building her hammer. | ||||||
Obsidian Flames
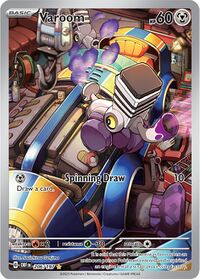 Varoom |
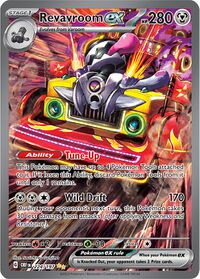 Revavroom ex |
|||||
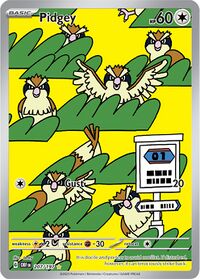 Pidgey |
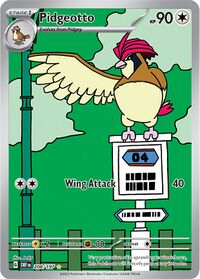 Pidgeotto |
 Pidgeot ex |
||||
151
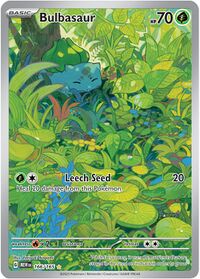 Bulbasaur |
 Charmander |
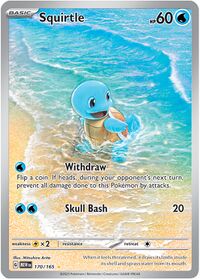 Squirtle |
||||
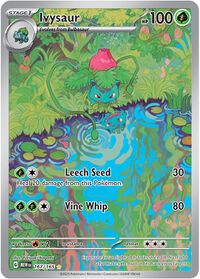 Ivysaur |
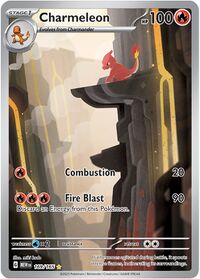 Charmeleon |
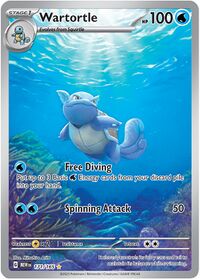 Wartortle |
||||
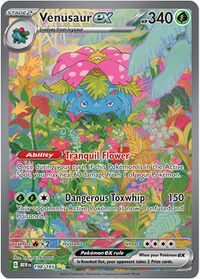 Venusaur ex |
 Charizard ex |
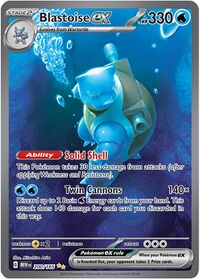 Blastoise ex |
||||
| Each of the cards depict the Kanto First partner Pokémon exploring some sort of biome, and evolving the further they go. In the Bulbasaur card, it is exploring a forest, culminating in it finding a field of lushious plants upon becoming a Venusaur. On the Charmander card, it is climbing a volcanic canyon until it eventually evolves into a Charizard, and is able to fly above the canyon. Finally, on the Squirtle card, it is seen exploring the beach, is seen swimming underwater as a Wartortle, and manages to reach the depths of the ocean as a Blastoise. | ||||||
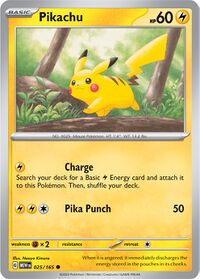 Pikachu |
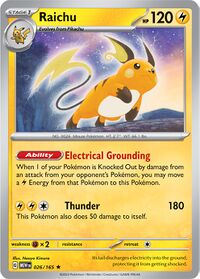 Raichu |
|||||
| The first card depicts a Pikachu in the day, walking to the left. On the second card, the Pikachu has evolved into a Raichu. He walks to the right as the sun sets and night falls. [4] | ||||||
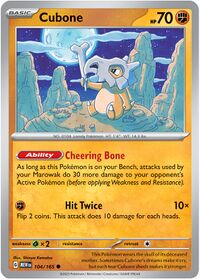 Cubone |
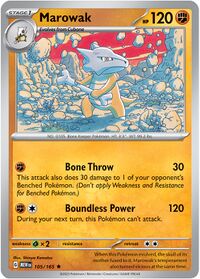 Marowak |
|||||
| The first card depicts a Cubone in a field of rocks at night. On the second card, Cubone has evolved into Marowak and time has progressed to the morning. It is smashing the rocks in the area. [4] | ||||||
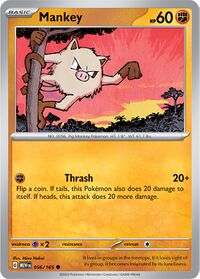 Mankey |
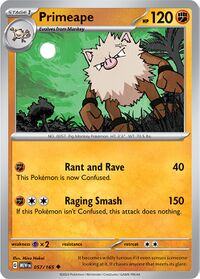 Primeape |
|||||
| The first card depicts a Mankey hanging from a tree as the sun sets. On the second card, Mankey has evolved into Primeape and time has progressed to night. It is standing on the ground instead. [5] | ||||||
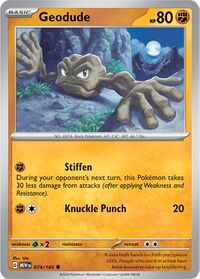 Geodude |
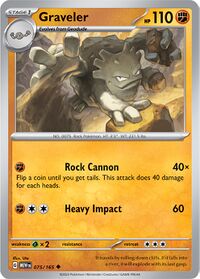 Graveler |
|||||
| The first card depicts a Geodude in a rugged area at night. On the second card, Geodude has evolved into Graveler and time has progressed to day. It is scaling the rocky walls. [6] | ||||||
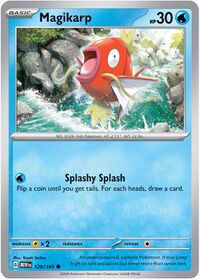 Magikarp |
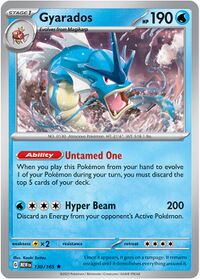 Gyarados |
|||||
| The first card depicts a Magikarp swimming up a river in the day. On the second card, Magikarp has evolved into Gyarados and time has progressed to midday. It thrashes about, creating waves in the water. [6] | ||||||
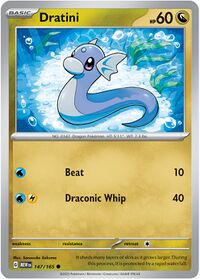 Dratini |
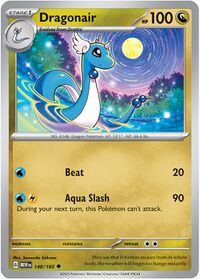 Dragonair |
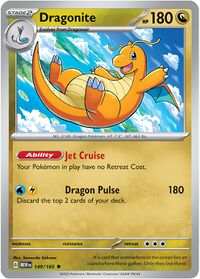 Dragonite |
||||
| The first card depicts a Dratini under the water. On the second card, Dratini has evolved into Dragonair and has come up to the surface at night. The third card has Dragonite, its evolution, flying through the air during the day. [6] | ||||||
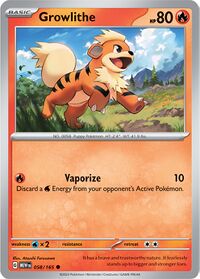 Growlithe |
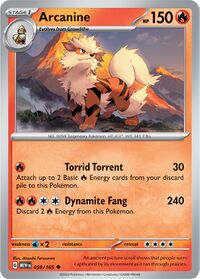 Arcanine |
|||||
| The first card depicts a Growlithe bounding across a field near mountains in the day. On the second card, it is later in the day and Growlithe has evolved into Arcanine. It stands proudly on a mountain. [6] | ||||||
 Charmander |
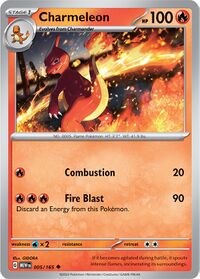 Charmeleon |
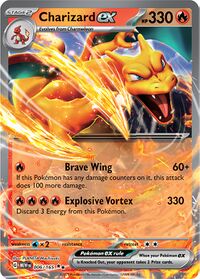 Charizard ex |
||||
| The first card depicts a Charmander walking through a grassy area, as its tail incidentally lights some of the plants on fire. On the second card, the field has been devestated by the flames. The Charmander has evolved into Charmeleon and stands in the center of a ring of this fire. The destruction continues into Charizard ex, with a further evolved Charizard performing some kind of slashing attack. | ||||||
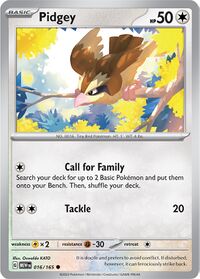 Pidgey |
 Pidgeotto |
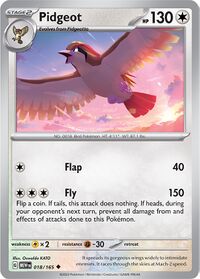 Pidgeot |
||||
| The first card depicts a Pidgey in the branches of a tree in the early morning. The second and third cards have the Pokémon flying as it evolves, with one showing Pidgeotto in midday and the next showing Pidgeot at sunset. | ||||||
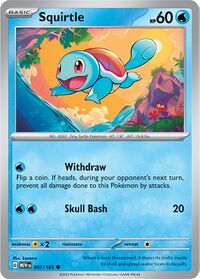 Squirtle |
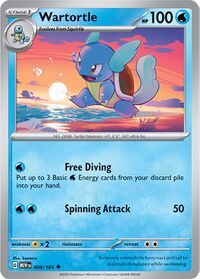 Wartortle |
|||||
| The first card depicts a Squirtle diving into the water in a tropical area, at some time late in the day. On the second card, the sun has dropped closer to the horizon compared to the first card. Squirtle has evolved into Wartortle and splashes about on the coastline. | ||||||
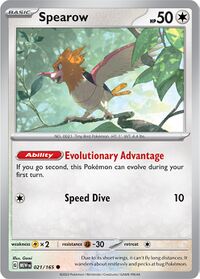 Spearow |
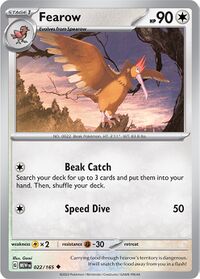 Fearow |
|||||
| The first card depicts a Spearow in a tree canopy in the morning. On the second card shows a time period closer to sunset and Spearow, now a Fearow, is perched on a broken tree in a more open area. | ||||||
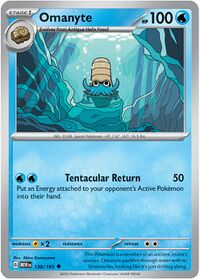 Omanyte |
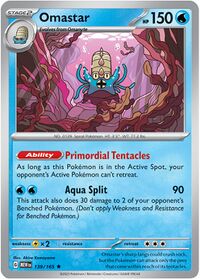 Omastar |
|||||
| The first card depicts a Omanyte sitting on a rock underwater, but is near the surface. On the second card, the light filtering into ocean leaves the area purpleish, suggesting a shift in the time of day. Omanyte has evolved into Omastar. There is more seaweed present on the second card, perhaps either having grown between cards or moved to the area by currents. | ||||||
Paradox Rift
 Wimpod |
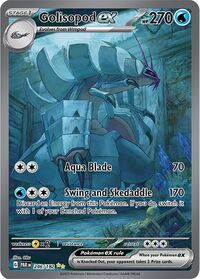 Golisopod ex |
|||||
 Swablu |
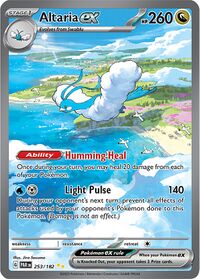 Altaria ex |
|||||
Temporal Forces
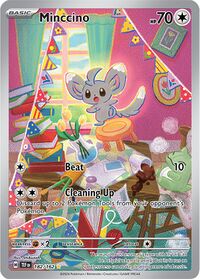 Minccino |
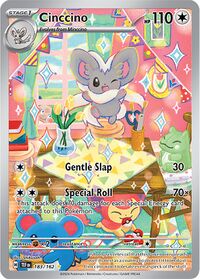 Cinccino |
|||||
| The first card depicts a Minccino encountering a messy, untidy room. The second card depicts the Minccino having evolved into Cinccino, and the messy room now fully cleaned. | ||||||
Twilight Masquerade
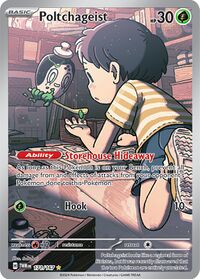 Poltchageist |
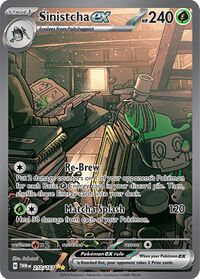 Sinistcha ex |
|||||
| In the first card, a Poltchageist encounters a child who is reading through an album, and gets matcha powder onto their hand. In the second card, the child, now fully grown, looks through the same album while the Poltchageist, having evolved into Sinistcha, lurks nearby. The album has a hand print made of matcha powder on it. | ||||||
Shrouded Fable
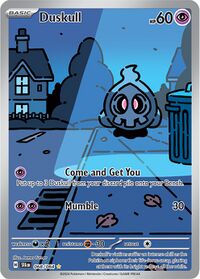 Duskull |
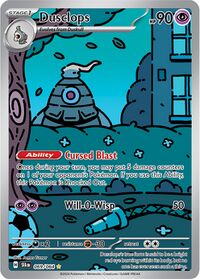 Dusclops |
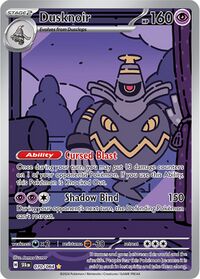 Dusknoir |
||||
| This set of illustration rare cards depict a slowly approaching Duskull. As it evolves, it encroaches upon the viewer more and more, from a sidewalk to a house's lawn to right outside the house's living room. | ||||||
Stellar Crown
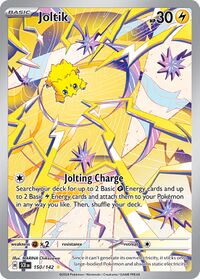 Joltik |
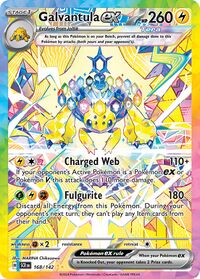 Galvantula ex |
|||||
Paradise Dragona
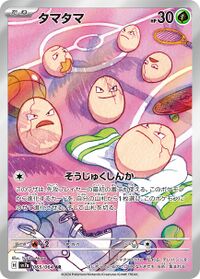 Exeggcute |
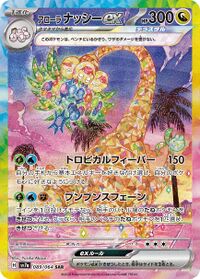 Alolan Exeggutor ex |
|||||
| In the first card, an Exeggcute is seen on a basketball court. The following card depicts the Exeggcute having evolved into a Terastallized Alolan Exeggutor, standing tall on the basketball court amidst some palm trees. | ||||||
References
- ↑ Inside Pokémon's house of cards, Eurogamer
- ↑ 2.0 2.1 Uncovering The Hidden Inspiration And Stories Behind Pokemon Cards, GameSpot
- ↑ Art of the Pokémon TCG: Sword & Shield—Silver Tempest Expansion, Pokémon.com
- ↑ 4.0 4.1 Pokémon TCG: Scarlet & Violet—151 | Pokémon Trading Card Game website
- ↑ Art of the Pokémon TCG: Scarlet & Violet—151 Expansion | Pokémon.com
- ↑ 6.0 6.1 6.2 6.3 Complete and Cool Pokémon Evolution Chains in Pokémon TCG: Scarlet & Violet—151 | Pokémon.com

|
This article is part of Project TCG, a Bulbapedia project that aims to report on every aspect of the Pokémon Trading Card Game. |
