Purifying Cave: Difference between revisions
mNo edit summary |
No edit summary |
||
| Line 46: | Line 46: | ||
{{mdloc/f|Flying|These Pokémon are recruited through the Connection Orb rather than fighting them.}} | {{mdloc/f|Flying|These Pokémon are recruited through the Connection Orb rather than fighting them.}} | ||
==Items Found== | |||
{{DungeonItem/h|Flying}} | {{DungeonItem/h|Flying}} | ||
{{DungeonItem|Poké|3=|4=|sprite=Poké currency}} | {{DungeonItem|Poké|3=B1F-B5|4=35-91|sprite=Poké currency}} | ||
{{DungeonItem/f|Psychic}} | {{DungeonItem|Apple|Apple|3=B1F-B15}} | ||
{{DungeonItem|Cheri Berry|Cheri Berry|B13}} | |||
{{DungeonItem|Oran Berry|Oran Berry|B8}} | |||
{{DungeonItem|Elixir|Health drink|B11}} | |||
{{DungeonItem|Max Elixir|Health drink|B11}} | |||
{{DungeonItem|Distance Dodge|Emera|B1F-B15}} | |||
{{DungeonItem|PP Restore|Emera|B1F-B15}} | |||
{{DungeonItem|Dizzying Payback|Emera|B1F-B15}} | |||
{{DungeonItem|Better Odds|Emera|B1F-B15}} | |||
{{DungeonItem|Paralysis Guard|Emera|B1F-B15}} | |||
{{DungeonItem|Clutch Performer|Emera|B1F-B15}} | |||
{{DungeonItem|Burn Guard|Emera|B1F-B15}} | |||
{{DungeonItem|Guard Boost|Emera|B1F-B15}} | |||
{{DungeonItem|Petrify Power|Emera|B1F-B15}} | |||
{{DungeonItem|Super Critical|Emera|B1F-B15}} | |||
{{DungeonItem|Status Mirror|Emera|B1F-B15}} | |||
{{DungeonItem|Confusion Guard|Emera|B1F-B15}} | |||
{{DungeonItem|Slow Orb|Wonder Orb|B1}} | |||
{{DungeonItem|Scanner Orb|Wonder Orb|B1}} | |||
{{DungeonItem|Escape Orb|Wonder Orb|B13}} | |||
{{DungeonItem|Guiding Wand|Wand|B4}} | |||
{{DungeonItem|Slumber Wand|Wand|B11}} | |||
{{DungeonItem|Two-Edged Wand|Wand|B12}} | |||
{{DungeonItem|Gravelrock|Gravelerock|4=3-6|sprite=MDBag_Stone_Sprite|B1FB15}} | |||
{{DungeonItem|Wooden Spike|4=7|Gravelrock|sprite=MDBag_Stick_Sprite|B5}} | |||
{{DungeonItem/f|Psychic}} | |||
==Traps encountered== | ==Traps encountered== | ||
| Line 64: | Line 89: | ||
| Emera-Swap Trap | | Emera-Swap Trap | ||
| style="{{roundybr|5px}}"| B12F | | style="{{roundybr|5px}}"| B12F | ||
<!--Warp Trap B12F | |||
Spiky Trap B13F--> | |||
|} | |} | ||
Revision as of 08:45, 13 June 2018
|
|
|

|
This article is incomplete. Please feel free to edit this article to add missing information and complete it. Reason: monster houses, items, traps |
| ||||||||||||||||||||||||||||||||||||||||||
| ||||||||||||||||||||||||||||||||||||||||||
| ||||||||||||||||||||||||||||||||||||||||||
| ||||||||||||||||||||||||||||||||||||||||||
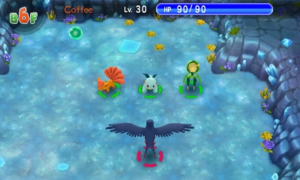
Purifying Cave (Japanese: じょうかの洞窟 Purification Cave) is a dungeon in Pokémon Super Mystery Dungeon that is located on the Water Continent. It is unlocked during Chapter 11 of the story, and is also the final story dungeon of the game's epilogue.
During the epilogue, after fighting through the dungeon's fifteen floors, the player arrives at the cave's pit, where they find an unconscious Mew, along with Nuzleaf and the Beheeyem. Nuzleaf apologizes to the player, claiming that they did so to prevent Dark Matter from ever coming back, and Mew begins to glow with light and seemingly fade away. Reminded of the partner's departure, the player refuses this, not wanting to say goodbye again. At this time, the player's Harmony Scarf begins glowing, combining with the light surrounding Mew, which restores the partner. Ampharos, Mawile, and Xatu appear, admitting that the "kidnapping" was all a set-up. Xatu had already foreseen the events; the set-up was a test to prove the player's desire for the partner's return. The Expedition Society, reunited with the partner, return home happily, while Nuzleaf and the Beheeyem are allowed to stay at Nuzleaf's old home in Serene Village. Mew returns home, but remains a usable ally to go exploring with.
| Spoilers end here. |
|---|
Pokémon encountered
| Pokémon | Floors | Levels | Recruit Rate | |
|---|---|---|---|---|
| Aerodactyl | B1F-B15F | ?? | Unrecruitable | |
| Gligar | B1F-B15F | ?? | Unrecruitable | |
| Swellow | B1F-B15F | ?? | Unrecruitable | |
| Milotic | B1F-B15F | ?? | Unrecruitable | |
| Absol | B14F-B15F | ?? | Unrecruitable | |
| Salamence | B14F-B15F | ?? | Unrecruitable | |
| Metagross | B1F-B15F | ?? | Unrecruitable | |
| Honchkrow | B1F-B15F | ?? | Unrecruitable | |
| Musharna | B1F-B15F | ?? | Unrecruitable | |
| Reuniclus | B1F-B15F | ?? | Unrecruitable | |
| Vanilluxe | B1F-B15F | ?? | Unrecruitable | |
| Bisharp | ?? | ?? | Unrecruitable | |
| Meowstic | B1F-B15F | ?? | Unrecruitable | |
| Meowstic | B1F-B15F | ?? | Unrecruitable | |
| Noivern | ?? | ?? | Unrecruitable | |
| These Pokémon are recruited through the Connection Orb rather than fighting them. | ||||
Items Found
Traps encountered
| Image | Trap | Floors |
|---|---|---|

|
Poison Trap | B13F |

|
Emera-Swap Trap | B12F |
In other languages

|
This section is incomplete. Please feel free to edit this section to add missing information and complete it. |
| ||||||||||||

|
This article is part of both Project Locations and Project Sidegames, Bulbapedia projects that, together, aim to write comprehensive articles on the Pokémon Locations and Sidegames, respectively. | 
|
