|
|
| Line 14: |
Line 14: |
|
| |
|
| ==Geography== | | ==Geography== |
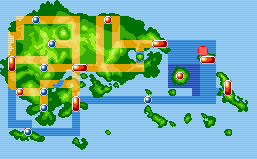
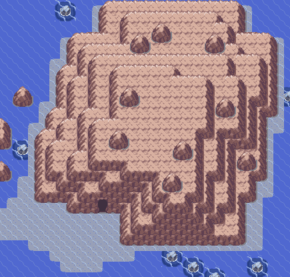
| Shoal Cave is a cave north of Mossdeep City. This cave was carved into the side of a rocky mountain rising from the ocean. At predetermined times of the day, every six hours, the tides rise or fall. During high tide, the cave floods, allowing the {{player}} to use {{m|Surf}} to access levels of terrain otherwise out of reach on foot. Conversely during low tide, the receding waters allow the player to descend to levels that would otherwise be underwater, most notably the ice floor at the lowest level in the cave. This icy room contains the {{DL|Type-enhancing item|Never-Melt Ice}}, and can only be accessed if the player has {{m|Strength}}. Near the entrance to the icy area is a {{tc|Black Belt}} who gives away a {{DL|In-battle effect item|Focus Band}}. | | Shoal Cave is a cave north of Mossdeep City. This cave was carved into the side of a rocky mountain rising from the ocean. At predetermined times of the day, every six hours, the tides rise or fall. During high tide, the cave floods, allowing the {{player}} to use {{m|Surf}} to access levels of terrain otherwise out of reach on foot. Conversely during low tide, the receding waters allow the player to descend to levels that would otherwise be underwater, most notably the ice floor at the lowest level in the cave. This icy room contains the [[Never-Melt Ice]], and can only be accessed if the player has {{m|Strength}}. Near the entrance to the icy area is a {{tc|Black Belt}} who gives away a [[Focus Band]]. |
|
| |
|
| In Omega Ruby and Alpha Sapphire only, the [[Ice Rock]] is located in the icy room, which allows {{p|Eevee}} to [[evolution|evolve]] into {{p|Glaceon}}. | | In Omega Ruby and Alpha Sapphire only, the [[Ice Rock]] is located in the icy room, which allows {{p|Eevee}} to [[evolution|evolve]] into {{p|Glaceon}}. |
| Line 84: |
Line 84: |
|
| |
|
| ===Obtaining the Shell Bell=== | | ===Obtaining the Shell Bell=== |
| Four [[Exchangeable item#Shoal Shell and Shoal Salt|Shoal Salt]]s and four [[Exchangeable item#Shoal Shell and Shoal Salt|Shoal Shell]]s are found in the Shoal Cave. If all four Shoal Salts and four Shoal Shells are in the [[Bag]], the {{player}} can give the ingredients to the old man in the first room, and he makes a {{DL|In-battle effect item|Shell Bell}}. The player can only obtain the Shoal Salt during low tide, and can only obtain the Shoal Shell at high tide, and may obtain as many Shell Bells as he or she wants. Immediately after crafting a Shell Bell for the player, the old man prompts the player to find the ingredients for another. However, the player must wait for the tide to change in order to gather the salts and shells again. Shoal Cave is the only place where Shoal Salts and Shoal Shells can be found in [[Generation III]], and they can only be obtained in [[Generation IV]] by obtaining them in Generation III and transferring Pokémon holding them via [[Pal Park]]. | | Four [[Exchangeable item#Shoal Shell and Shoal Salt|Shoal Salt]]s and four [[Exchangeable item#Shoal Shell and Shoal Salt|Shoal Shell]]s are found in the Shoal Cave. If all four Shoal Salts and four Shoal Shells are in the [[Bag]], the {{player}} can give the ingredients to the old man in the first room, and he makes a [[Shell Bell]]. The player can only obtain the Shoal Salt during low tide, and can only obtain the Shoal Shell at high tide, and may obtain as many Shell Bells as he or she wants. Immediately after crafting a Shell Bell for the player, the old man prompts the player to find the ingredients for another. However, the player must wait for the tide to change in order to gather the salts and shells again. Shoal Cave is the only place where Shoal Salts and Shoal Shells can be found in [[Generation III]], and they can only be obtained in [[Generation IV]] by obtaining them in Generation III and transferring Pokémon holding them via [[Pal Park]]. |
|
| |
|
| ==Items== | | ==Items== |
| ===Any time=== | | ===Any time=== |
| {{itlisth|{{#switch: {{#time: g}}|9|10|11|12|1|2=water|cave}}}} | | {{itlisth|{{#switch: {{#time: g}}|9|10|11|12|1|2=water|cave}}}} |
| {{Itemlist|Shell Bell|Entrance room, from the old man near the entrance if brought four Shoal Salt and Shoal Shell|Ru=yes|Sa=yes|E=yes|OR=yes|AS=yes|display={{DL|In-battle effect item|Shell Bell}}}} | | {{Itemlist|Shell Bell|Entrance room, from the old man near the entrance if brought four Shoal Salt and Shoal Shell|Ru=yes|Sa=yes|E=yes|OR=yes|AS=yes}} |
| {{Itemlist|Slowbronite|Entrance room, from the old man near the entrance after trading for Shell Bell for the first time|OR=yes|AS=yes|display={{DL|Mega Stone|Slowbronite}}}} | | {{Itemlist|Slowbronite|Entrance room, from the old man near the entrance after trading for Shell Bell for the first time|OR=yes|AS=yes|display={{DL|Mega Stone|Slowbronite}}}} |
| {{itlistfoot|{{#switch: {{#time: g}}|9|10|11|12|1|2=water|cave}}}} | | {{itlistfoot|{{#switch: {{#time: g}}|9|10|11|12|1|2=water|cave}}}} |
| Line 96: |
Line 96: |
| {{itlisth|water}} | | {{itlisth|water}} |
| {{Itemlist|Star Piece|Entrance room, southwest ''(hidden)''|OR=yes|AS=yes|display={{DL|Valuable item|Star Piece}}}} | | {{Itemlist|Star Piece|Entrance room, southwest ''(hidden)''|OR=yes|AS=yes|display={{DL|Valuable item|Star Piece}}}} |
| {{Itemlist|Rare Candy|Inner room, east of central ledge|Ru=yes|Sa=yes|E=yes|OR=yes|AS=yes|display={{DL|Vitamin|Rare Candy}}}} | | {{Itemlist|Rare Candy|Inner room, east of central ledge|Ru=yes|Sa=yes|E=yes|OR=yes|AS=yes}} |
| {{Itemlist|Big Pearl|Entrance room, northeast, accessible from southeast inner room|Ru=yes|Sa=yes|E=yes|OR=yes|AS=yes|display={{DL|Valuable item|Big Pearl}}}} | | {{Itemlist|Big Pearl|Entrance room, northeast, accessible from southeast inner room|Ru=yes|Sa=yes|E=yes|OR=yes|AS=yes|display={{DL|Valuable item|Big Pearl}}}} |
| {{Itemlist|Shoal Shell| | | {{Itemlist|Shoal Shell| |
| Line 113: |
Line 113: |
| *Inner room, outside western exit from lower room | | *Inner room, outside western exit from lower room |
| *Inner room, under the northern bridge|Ru=yes|Sa=yes|E=yes|OR=yes|AS=yes|display={{DL|Exchangeable item|Shoal Salt}} ×4}} | | *Inner room, under the northern bridge|Ru=yes|Sa=yes|E=yes|OR=yes|AS=yes|display={{DL|Exchangeable item|Shoal Salt}} ×4}} |
| {{Itemlist|Ice Heal|Stairs room, east of the ladder|Ru=yes|Sa=yes|E=yes|OR=yes|AS=yes|display={{DL|Status condition healing item|Ice Heal}}}} | | {{Itemlist|Ice Heal|Stairs room, east of the ladder|Ru=yes|Sa=yes|E=yes|OR=yes|AS=yes}} |
| {{Itemlist|Focus Band|Lower room, given by the {{tc|Black Belt}}|Ru=yes|Sa=yes|E=yes|OR=yes|AS=yes|display={{DL|In-battle effect item|Focus Band}}}} | | {{Itemlist|Focus Band|Lower room, given by the {{tc|Black Belt}}|Ru=yes|Sa=yes|E=yes|OR=yes|AS=yes}} |
| {{Itemlist|TM Ice VI|Lower room, up muddy slopes (requires {{DL|Bicycle|Mach Bike}})|OR=yes|AS=yes|display={{TM|79|Frost Breath}}}} | | {{Itemlist|TM Ice VI|Lower room, up muddy slopes (requires {{DL|Bicycle|Mach Bike}})|OR=yes|AS=yes|display={{TM|79|Frost Breath}}}} |
| {{Itemlist|Never-Melt Ice|Ice room, on the elevated floor|Ru=yes|Sa=yes|E=yes|OR=yes|AS=yes|display={{DL|Type-enhancing item|Never-Melt Ice}}}} | | {{Itemlist|Never-Melt Ice|Ice room, on the elevated floor|Ru=yes|Sa=yes|E=yes|OR=yes|AS=yes}} |
| {{Itemlist|Glalitite|Ice room, on the elevated floor|OR=yes|AS=yes|display={{DL|Mega Stone|Glalitite}}}} | | {{Itemlist|Glalitite|Ice room, on the elevated floor|OR=yes|AS=yes|display={{DL|Mega Stone|Glalitite}}}} |
| {{Itemlist|Ice Heal|Ice room, west of the Glalitite ''(hidden)''|OR=yes|AS=yes|display={{DL|Status condition healing item|Ice Heal}}}} | | {{Itemlist|Ice Heal|Ice room, west of the Glalitite ''(hidden)''|OR=yes|AS=yes}} |
| {{Itemlist|TM Ice VI|Ice room, near the ledge|Ru=yes|Sa=yes|E=yes|OR=yes|AS=yes|display={{TM|07|Hail}}}} | | {{Itemlist|TM Ice VI|Ice room, near the ledge|Ru=yes|Sa=yes|E=yes|OR=yes|AS=yes|display={{TM|07|Hail}}}} |
| {{itlistfoot|cave}} | | {{itlistfoot|cave}} |
| Line 126: |
Line 126: |
| {{Itemlist|Big Pearl|Randomly found by {{m|Rock Smash|smashing rocks}}|OR=yes|AS=yes|display={{DL|Valuable item|Big Pearl}}}} | | {{Itemlist|Big Pearl|Randomly found by {{m|Rock Smash|smashing rocks}}|OR=yes|AS=yes|display={{DL|Valuable item|Big Pearl}}}} |
| {{Itemlist|Ether|Randomly found by {{m|Rock Smash|smashing rocks}}|OR=yes|AS=yes}} | | {{Itemlist|Ether|Randomly found by {{m|Rock Smash|smashing rocks}}|OR=yes|AS=yes}} |
| {{Itemlist|Hard Stone|Randomly found by {{m|Rock Smash|smashing rocks}}|OR=yes|AS=yes|display={{DL|Type-enhancing item|Hard Stone}}}} | | {{Itemlist|Hard Stone|Randomly found by {{m|Rock Smash|smashing rocks}}|OR=yes|AS=yes}} |
| {{Itemlist|Heart Scale|Randomly found by {{m|Rock Smash|smashing rocks}}|OR=yes|AS=yes|display={{DL|Exchangeable item|Heart Scale}}}} | | {{Itemlist|Heart Scale|Randomly found by {{m|Rock Smash|smashing rocks}}|OR=yes|AS=yes|display={{DL|Exchangeable item|Heart Scale}}}} |
| {{Itemlist|Max Ether|Randomly found by {{m|Rock Smash|smashing rocks}}|OR=yes|AS=yes}} | | {{Itemlist|Max Ether|Randomly found by {{m|Rock Smash|smashing rocks}}|OR=yes|AS=yes}} |
| Line 133: |
Line 133: |
| {{Itemlist|Pearl|Randomly found by {{m|Rock Smash|smashing rocks}}|OR=yes|AS=yes|display={{DL|Valuable item|Pearl}}}} | | {{Itemlist|Pearl|Randomly found by {{m|Rock Smash|smashing rocks}}|OR=yes|AS=yes|display={{DL|Valuable item|Pearl}}}} |
| {{Itemlist|Revive|Randomly found by {{m|Rock Smash|smashing rocks}}|OR=yes|AS=yes|display={{DL|Revive|Revive}}}} | | {{Itemlist|Revive|Randomly found by {{m|Rock Smash|smashing rocks}}|OR=yes|AS=yes|display={{DL|Revive|Revive}}}} |
| {{Itemlist|Soft Sand|Randomly found by {{m|Rock Smash|smashing rocks}}|OR=yes|AS=yes|display={{DL|Type-enhancing item|Soft Sand}}}} | | {{Itemlist|Soft Sand|Randomly found by {{m|Rock Smash|smashing rocks}}|OR=yes|AS=yes}} |
| {{Itemlist|Star Piece|Randomly found by {{m|Rock Smash|smashing rocks}}|OR=yes|AS=yes|display={{DL|Valuable item|Star Piece}}}} | | {{Itemlist|Star Piece|Randomly found by {{m|Rock Smash|smashing rocks}}|OR=yes|AS=yes|display={{DL|Valuable item|Star Piece}}}} |
| {{Itlistfoot|cave}} | | {{Itlistfoot|cave}} |


