Mt. Freeze: Difference between revisions
m →Intro |
Teganrose1 (talk | contribs) →Generation VIII: Added Gen 8 items and floors Tags: Mobile edit Mobile web edit |
||
| Line 253: | Line 253: | ||
{{DungeonItem|Joy Ribbon|Scarf (Mystery Dungeon)|sprite=MDBag Equipment RTDX Sprite|3=12, 18}} | {{DungeonItem|Joy Ribbon|Scarf (Mystery Dungeon)|sprite=MDBag Equipment RTDX Sprite|3=12, 18}} | ||
{{DungeonItem|Lucky Ribbon|Scarf (Mystery Dungeon)|sprite=MDBag Equipment RTDX Sprite|3=4}} | {{DungeonItem|Lucky Ribbon|Scarf (Mystery Dungeon)|sprite=MDBag Equipment RTDX Sprite|3=4}} | ||
{{DungeonItem|Mach Ribbon|Scarf (Mystery Dungeon)|sprite=MDBag Equipment RTDX Sprite|3=9, 14}} | {{DungeonItem|Mach Ribbon|Scarf (Mystery Dungeon)|sprite=MDBag Equipment RTDX Sprite|3=8-9, 12, 14}} | ||
{{DungeonItem|Nullify Bandanna|Scarf (Mystery Dungeon)|sprite=MDBag Equipment RTDX Sprite|3=1, 12}} | {{DungeonItem|Nullify Bandanna|Scarf (Mystery Dungeon)|sprite=MDBag Equipment RTDX Sprite|3=1, 12}} | ||
{{DungeonItem|Prosper Ribbon|Scarf (Mystery Dungeon)|sprite=MDBag Equipment RTDX Sprite|3=3, 20}} | {{DungeonItem|Prosper Ribbon|Scarf (Mystery Dungeon)|sprite=MDBag Equipment RTDX Sprite|3=3, 20}} | ||
| Line 264: | Line 264: | ||
{{DungeonItem|Oran Berry|Berry|sprite=MDBag Oran Berry RTDX Sprite|3=1-20}} | {{DungeonItem|Oran Berry|Berry|sprite=MDBag Oran Berry RTDX Sprite|3=1-20}} | ||
{{DungeonItem|Blast Seed|Seed|sprite=MDBag Seed RTDX Sprite|3=5-6, 8-19}} | {{DungeonItem|Blast Seed|Seed|sprite=MDBag Seed RTDX Sprite|3=5-6, 8-19}} | ||
{{DungeonItem|Sleep Seed|Seed|sprite=MDBag Seed RTDX Sprite|3=1- | {{DungeonItem|Sleep Seed|Seed|sprite=MDBag Seed RTDX Sprite|3=1-3, 6, 8, 13, 15, 18}} | ||
{{DungeonItem|Stun Seed|Seed|sprite=MDBag Seed RTDX Sprite|3=2, 5, 9-10, 13, 16, 18-20}} | {{DungeonItem|Stun Seed|Seed|sprite=MDBag Seed RTDX Sprite|3=2, 5, 9-10, 13, 16, 18-20}} | ||
{{DungeonItem|Tiny Reviver Seed|Seed|sprite=MDBag Seed RTDX Sprite|3=1-2, 4-7, 9-20}} | {{DungeonItem|Tiny Reviver Seed|Seed|sprite=MDBag Seed RTDX Sprite|3=1-2, 4-7, 9-20}} | ||
{{DungeonItem|Training Seed|Seed|sprite=MDBag Seed RTDX Sprite|3=4- | {{DungeonItem|Training Seed|Seed|sprite=MDBag Seed RTDX Sprite|3=4-7, 10, 17}} | ||
{{DungeonItem|Totter Seed|Seed|sprite=MDBag Seed RTDX Sprite|3=5-6, 9-10, 13, 16, 20}} | {{DungeonItem|Totter Seed|Seed|sprite=MDBag Seed RTDX Sprite|3=5-6, 9-10, 13-14, 16, 18, 20}} | ||
{{DungeonItem|Max Ether|Health drink|sprite=MDBag Max Ether RTDX Sprite|3=1 | {{DungeonItem|Max Ether|Health drink|sprite=MDBag Max Ether RTDX Sprite|3=1-20}} | ||
{{DungeonItem|Brick Break TM|List of TM and HM locations (Mystery Dungeon)|sprite=MDBag TM RTDX Sprite|3=14}} | {{DungeonItem|Brick Break TM|List of TM and HM locations (Mystery Dungeon)|sprite=MDBag TM RTDX Sprite|3=14}} | ||
{{DungeonItem|Dragon Tail TM|List of TM and HM locations (Mystery Dungeon)|sprite=MDBag TM RTDX Sprite|3=1}} | {{DungeonItem|Dragon Tail TM|List of TM and HM locations (Mystery Dungeon)|sprite=MDBag TM RTDX Sprite|3=1}} | ||
{{DungeonItem|Explosion TM|List of TM and HM locations (Mystery Dungeon)|sprite=MDBag TM RTDX Sprite|3=3}} | {{DungeonItem|Explosion TM|List of TM and HM locations (Mystery Dungeon)|sprite=MDBag TM RTDX Sprite|3=3}} | ||
{{DungeonItem|Focus Blast TM|List of TM and HM locations (Mystery Dungeon)|sprite=MDBag TM RTDX Sprite|3=3}} | {{DungeonItem|Focus Blast TM|List of TM and HM locations (Mystery Dungeon)|sprite=MDBag TM RTDX Sprite|3=3}} | ||
{{DungeonItem|Hail TM|List of TM and HM locations (Mystery Dungeon)|sprite=MDBag TM RTDX Sprite|3=5}} | |||
{{DungeonItem|Giga Impact TM|List of TM and HM locations (Mystery Dungeon)|sprite=MDBag TM RTDX Sprite|3=17}} | {{DungeonItem|Giga Impact TM|List of TM and HM locations (Mystery Dungeon)|sprite=MDBag TM RTDX Sprite|3=17}} | ||
{{DungeonItem|Gyro Ball TM|List of TM and HM locations (Mystery Dungeon)|sprite=MDBag TM RTDX Sprite|3=11}} | {{DungeonItem|Gyro Ball TM|List of TM and HM locations (Mystery Dungeon)|sprite=MDBag TM RTDX Sprite|3=11}} | ||
{{DungeonItem|Poison Jab TM|List of TM and HM locations (Mystery Dungeon)|sprite=MDBag TM RTDX Sprite|3=12}} | {{DungeonItem|Poison Jab TM|List of TM and HM locations (Mystery Dungeon)|sprite=MDBag TM RTDX Sprite|3=12}} | ||
{{DungeonItem|Return TM|List of TM and HM locations (Mystery Dungeon)|sprite=MDBag TM RTDX Sprite|3=12}} | |||
{{DungeonItem|Rock Slide TM|List of TM and HM locations (Mystery Dungeon)|sprite=MDBag TM RTDX Sprite|3=4}} | {{DungeonItem|Rock Slide TM|List of TM and HM locations (Mystery Dungeon)|sprite=MDBag TM RTDX Sprite|3=4}} | ||
{{DungeonItem|Sleep Talk TM|List of TM and HM locations (Mystery Dungeon)|sprite=MDBag TM RTDX Sprite|3=7}} | {{DungeonItem|Sleep Talk TM|List of TM and HM locations (Mystery Dungeon)|sprite=MDBag TM RTDX Sprite|3=7}} | ||
| Line 285: | Line 287: | ||
{{DungeonItem|Escape Orb|Wonder Orb|sprite=MDBag Wonder Orb RTDX Sprite|3=2, 12, 16}} | {{DungeonItem|Escape Orb|Wonder Orb|sprite=MDBag Wonder Orb RTDX Sprite|3=2, 12, 16}} | ||
{{DungeonItem|Foe-Hold Orb|Wonder Orb|sprite=MDBag Wonder Orb RTDX Sprite|3=10, 14}} | {{DungeonItem|Foe-Hold Orb|Wonder Orb|sprite=MDBag Wonder Orb RTDX Sprite|3=10, 14}} | ||
{{DungeonItem|Foe-Seal Orb|Wonder Orb|sprite=MDBag Wonder Orb RTDX Sprite|3=5, 7}} | {{DungeonItem|Foe-Seal Orb|Wonder Orb|sprite=MDBag Wonder Orb RTDX Sprite|3=5, 7, 19}} | ||
{{DungeonItem|Nullify Orb|Wonder Orb|sprite=MDBag Wonder Orb RTDX Sprite|3=3, 8-9, 13, 15, 20}} | {{DungeonItem|Nullify Orb|Wonder Orb|sprite=MDBag Wonder Orb RTDX Sprite|3=3, 8-9, 13, 15, 20}} | ||
{{DungeonItem|Quick Orb|Wonder Orb|sprite=MDBag Wonder Orb RTDX Sprite|3=4, 13, 20}} | {{DungeonItem|Quick Orb|Wonder Orb|sprite=MDBag Wonder Orb RTDX Sprite|3=4, 13, 20}} | ||
{{DungeonItem|Petrify Orb|Wonder Orb|sprite=MDBag Wonder Orb RTDX Sprite|3=3, 5-6, 20}} | {{DungeonItem|Petrify Orb|Wonder Orb|sprite=MDBag Wonder Orb RTDX Sprite|3=3, 5-6, 20}} | ||
{{DungeonItem|Rollcall Orb|Wonder Orb|sprite=MDBag Wonder Orb RTDX Sprite|3=5, 13-14, 18, 20}} | {{DungeonItem|Rollcall Orb|Wonder Orb|sprite=MDBag Wonder Orb RTDX Sprite|3=5, 9, 13-14, 18, 20}} | ||
{{DungeonItem|Slow Orb|Wonder Orb|sprite=MDBag Wonder Orb RTDX Sprite|3=6, 12}} | {{DungeonItem|Slow Orb|Wonder Orb|sprite=MDBag Wonder Orb RTDX Sprite|3=6, 12}} | ||
{{DungeonItem|Slumber Orb|Wonder Orb|sprite=MDBag Wonder Orb RTDX Sprite|3=3, 8, 16-17, 19}} | {{DungeonItem|Slumber Orb|Wonder Orb|sprite=MDBag Wonder Orb RTDX Sprite|3=3, 8, 16-17, 19}} | ||
| Line 298: | Line 300: | ||
{{DungeonItem|Slow Wand|Wand|4=3-5|sprite=MDBag Wand RTDX Sprite|3=7, 10, 15, 18}} | {{DungeonItem|Slow Wand|Wand|4=3-5|sprite=MDBag Wand RTDX Sprite|3=7, 10, 15, 18}} | ||
{{DungeonItem|Slumber Wand|Wand|4=3|sprite=MDBag Wand RTDX Sprite|3=17}} | {{DungeonItem|Slumber Wand|Wand|4=3|sprite=MDBag Wand RTDX Sprite|3=17}} | ||
{{DungeonItem|Stayaway Wand|Wand|4=3-4|sprite=MDBag Wand RTDX Sprite|3=4, 13}} | {{DungeonItem|Stayaway Wand|Wand|4=3-4|sprite=MDBag Wand RTDX Sprite|3=2, 4, 13}} | ||
{{DungeonItem|Tunnel Wand|Wand|4=3-4|sprite=MDBag Wand RTDX Sprite|3=5, 20}} | {{DungeonItem|Tunnel Wand|Wand|4=3-4|sprite=MDBag Wand RTDX Sprite|3=5, 20}} | ||
{{DungeonItem|Whirlwind Wand|Wand|4=3|sprite=MDBag Wand RTDX Sprite|3=12}} | {{DungeonItem|Whirlwind Wand|Wand|4=3|sprite=MDBag Wand RTDX Sprite|3=12}} | ||
| Line 305: | Line 307: | ||
====Sparkling Floor==== | ====Sparkling Floor==== | ||
{{DungeonItem/h| | {{DungeonItem/h|ice}} | ||
{{DungeonItem|Gold Ribbon|Scarf (Mystery Dungeon)|sprite=MDBag Gold Ribbon RTDX Sprite|3=5-6, 12}} | {{DungeonItem|Gold Ribbon|Scarf (Mystery Dungeon)|sprite=MDBag Gold Ribbon RTDX Sprite|3=5-6, 12}} | ||
{{DungeonItem|Sitrus Berry|Berry|sprite=MDBag Sitrus Berry RTDX Sprite|3=5}} | {{DungeonItem|Sitrus Berry|Berry|sprite=MDBag Sitrus Berry RTDX Sprite|3=5}} | ||
{{DungeonItem|Max Elixir|Health drink|sprite=MDBag Max Elixir RTDX Sprite|3=4, 11 | {{DungeonItem|Max Elixir|Health drink|sprite=MDBag Max Elixir RTDX Sprite|3=4, 11-13}} | ||
{{DungeonItem|Carbos|Health drink|sprite=MDBag Carbos RTDX Sprite|3=8}} | |||
{{DungeonItem|Iron|Health drink|sprite=MDBag Iron RTDX Sprite|3=1, 9, 11}} | {{DungeonItem|Iron|Health drink|sprite=MDBag Iron RTDX Sprite|3=1, 9, 11}} | ||
{{DungeonItem|Protein|Health drink|sprite=MDBag Protein RTDX Sprite|3=16}} | {{DungeonItem|Protein|Health drink|sprite=MDBag Protein RTDX Sprite|3=16}} | ||
Revision as of 00:40, 7 September 2023
|
|
|
|
|
|
| ||||||||||||||||||||||||||||||||||||||||||
| ||||||||||||||||||||||||||||||||||||||||||
| ||||||||||||||||||||||||||||||||||||||||||
| ||||||||||||||||||||||||||||||||||||||||||
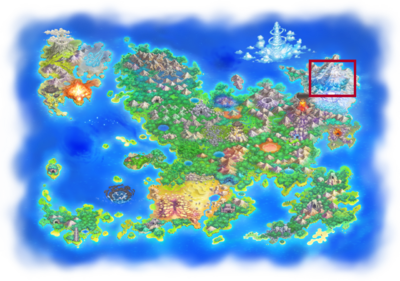
Mt. Freeze (Japanese: 氷雪の霊峰 Sacred Mt. Ice-and-Snow) is a dungeon in Pokémon Mystery Dungeon: Red Rescue Team and Blue Rescue Team and Pokémon Mystery Dungeon: Rescue Team DX. It is located near the Frosty Forest and consists of a total of 19RB/20RTDX floors. The dungeon's first section consists of 15 floors and is followed by Mt. Freeze Peak (Japanese: 氷雪の霊峰 奥地) which comprises the remaining floors. It is the domain of the Ninetales from the Ninetales legend.
Upon approaching this dungeon for the first time, the player has the option to access Snow Path before attempting Mt. Freeze.
Gameplay
Generation III
There is no chance of finding a Monster House or a shop in this dungeon. There is a chance of finding a buried item on Mt. Freeze Peak.
The default weather effect is Snow on floors 9 to 15.
Generation VIII
The default weather effect is Hail on floors 13, 15, 17-18, and 20.
Pokémon encountered
Generation III
Mt. Freeze
| Pokémon | Floors | Levels | Recruit Rate | |
|---|---|---|---|---|
| Pineco | 1-5 | 18 | 9.4% | |
| Swablu | 1-6 | 18 | 7.5% | |
| Shelgon | 1-6 | 19 | -19% | |
| Pupitar | 3-5 | 17 | -19% | |
| Seel | 3-7 | 18 | 3.9% | |
| Vigoroth | 7-11 | 20 | -19% | |
| Zangoose | 7-12 | 18 | 7.2% | |
| Chimecho | 7-12 | 22 | 6.9% | |
| Slaking | 12-15 | 15 | Unrecruitable | |
| Seviper | 13-15 | 19 | 7.2% | |
| Pokémon cannot be recruited the first time this dungeon is cleared. | ||||
Mt. Freeze Peak
| Pokémon | Floors | Levels | Recruit Rate | |
|---|---|---|---|---|
| Glalie | 1-4 | 20 | Unrecruitable | |
Generation VIII
| Pokémon | Floors | Levels | Recruit Rate | |
|---|---|---|---|---|
| Vigoroth | 1-4 | 22 | 10.8% | |
| Seel | 1-5 | 22 | 10.8% | |
| Zangoose | 1-5 | 22 | 10.8% | |
| Pineco | 4-8 | 22 | 10.8% | |
| Pupitar | 6-12 | 30 | 10.8% | |
| Chimecho | 6-12 | 22 | 10.8% | |
| Swablu | 7-12 | 22 | 10.8% | |
| Shelgon | 11-20 | 30 | 10.8% | |
| Slaking | 13-20 | 36 | 10.8% | |
| Seviper | 13-20 | 22 | 10.8% | |
| Glalie | 16-20 | 42 | -2.2% | |
| Fainted Pokémon | ||||
| Venonat | 2-20 | 24 | 100% | |
| Ponyta | 2-20 | 24 | 100% | |
| Hitmonchan | 2-20 | 26 | 100% | |
| Aipom | 2-20 | 24 | 100% | |
| Seedot | 2-20 | 24 | 100% | |
| Surskit | 2-20 | 24 | 100% | |
| Strong Foe | ||||
| Lickilicky | 3-5, 7-8, 11-20 | 22 | Unrecruitable -6.4% | |
| Pokémon cannot be recruited the first time this dungeon is cleared. Shiny Lickilicky can only be recruited with a Friend Bow. | ||||
Items
Generation III
Mt. Freeze
| Item | Floors | |
|---|---|---|
| 4-74 Poké | 1-15F | |
| Heal Ribbon | 1-15F | |
| Pecha Scarf | 1-15F | |
| Power Band | 1-15F | |
| Special Band | 1-15F | |
| Stamina Band | 1-15F | |
| Insomniscope | 1-15F | |
| 3-4 Gravelerock | 1-15F | |
| Iron Thorn | 1-15F | |
| Apple | 1-15F | |
| Cheri Berry | 1-15F | |
| Oran Berry | 1-15F | |
| Pecha Berry | 1-15F | |
| Blast Seed | 1-15F | |
| Reviver Seed | 1-15F | |
| Max Elixir | 1-15F | |
| Black Gummi | 4-15F | |
| Blue Gummi | 1-15F | |
| Brown Gummi | 1-15F | |
| Clear Gummi | 1-15F | |
| Gold Gummi | 1-15F | |
| Gray Gummi | 1-15F | |
| Orange Gummi | 1-15F | |
| Pink Gummi | 1-15F | |
| Purple Gummi | 4-15F | |
| Royal Gummi | 4-15F | |
| Silver Gummi | 1-15F | |
| Sky Gummi | 1-15F | |
| White Gummi | 1-15F | |
| Yellow Gummi | 1-15F | |
| Aerial Ace | 1-15F | |
| Attract | 1-15F | |
| Brick Break | 1-15F | |
| Bullet Seed | 1-15F | |
| Dig | 1-15F | |
| Facade | 1-15F | |
| Frustration | 1-15F | |
| Giga Drain | 1-15F | |
| Hidden Power | 1-15F | |
| Ice Beam | 1-15F | |
| Rest | 1-15F | |
| Return | 1-15F | |
| Roar | 1-15F | |
| Safeguard | 1-15F | |
| Secret Power | 1-15F | |
| Shadow Ball | 1-15F | |
| Shock Wave | 1-15F | |
| Taunt | 1-15F | |
| Thief | 1-15F | |
| Thunderbolt | 1-15F | |
| Torment | 1-15F | |
| Toxic | 1-15F | |
| Link Box | 1-15F | |
Mt. Freeze Peak
| Item | Floors | |
|---|---|---|
| 4-74 Poké | 1-4F | |
| Cheri Berry | 1-4F | |
| Oran Berry | 1-4F | |
| Reviver Seed | 1-4F | |
| Max Elixir | 1-4F | |
| Blue Gummi | 1-4F | |
| Brown Gummi | 1-4F | |
| Clear Gummi | 1-4F | |
| Gold Gummi | 1-4F | |
| Gray Gummi | 1-4F | |
| Orange Gummi | 1-4F | |
| Pink Gummi | 1-4F | |
| Silver Gummi | 1-4F | |
| Sky Gummi | 1-4F | |
| White Gummi | 1-4F | |
| Yellow Gummi | 1-4F | |
Buried items
The buried items appear at Mt. Freeze Peak.
Generation VIII
Mt. Freeze

|
This section is incomplete. Please feel free to edit this section to add missing information and complete it. Reason: needs floor numbers and items |
| Item | Floors | |
|---|---|---|
| 10-96 Poké | 1-20F | |
| Cover Band | 1, 6, 13F | |
| Defense Scarf | 14F | |
| Detect Band | 12F | |
| Joy Ribbon | 12, 18F | |
| Lucky Ribbon | 4F | |
| Mach Ribbon | 8-9, 12, 14F | |
| Nullify Bandanna | 1, 12F | |
| Prosper Ribbon | 3, 20F | |
| Twist Band | 12, 14F | |
| Fickle Specs | 6, 19F | |
| Heavy Rotation Specs | 2, 10, 12, 16F | |
| 3-6 Geo Pebble | 1, 3-8, 10-12, 14-20F | |
| Apple | 1, 4-5, 7-10, 13, 15-17, 19F | |
| Chesto Berry | 1, 3, 14F | |
| Oran Berry | 1-20F | |
| Blast Seed | 5-6, 8-19F | |
| Sleep Seed | 1-3, 6, 8, 13, 15, 18F | |
| Stun Seed | 2, 5, 9-10, 13, 16, 18-20F | |
| Tiny Reviver Seed | 1-2, 4-7, 9-20F | |
| Training Seed | 4-7, 10, 17F | |
| Totter Seed | 5-6, 9-10, 13-14, 16, 18, 20F | |
| Max Ether | 1-20F | |
| Brick Break TM | 14F | |
| Dragon Tail TM | 1F | |
| Explosion TM | 3F | |
| Focus Blast TM | 3F | |
| Hail TM | 5F | |
| Giga Impact TM | 17F | |
| Gyro Ball TM | 11F | |
| Poison Jab TM | 12F | |
| Return TM | 12F | |
| Rock Slide TM | 4F | |
| Sleep Talk TM | 7F | |
| Sludge Bomb TM | 7F | |
| Smart Strike TM | 3F | |
| All Dodge Orb | 5, 7, 9, 14F | |
| All Power-Up Orb | 14, 17-18F | |
| Escape Orb | 2, 12, 16F | |
| Foe-Hold Orb | 10, 14F | |
| Foe-Seal Orb | 5, 7, 19F | |
| Nullify Orb | 3, 8-9, 13, 15, 20F | |
| Quick Orb | 4, 13, 20F | |
| Petrify Orb | 3, 5-6, 20F | |
| Rollcall Orb | 5, 9, 13-14, 18, 20F | |
| Slow Orb | 6, 12F | |
| Slumber Orb | 3, 8, 16-17, 19F | |
| Totter Orb | 2, 7F | |
| Trawl Orb | 17F | |
| 2-4 Confuse Wand | 8, 11, 13, 15, 17-18, 20F | |
| 2-3 Petrify Wand | 6, 8, 12F | |
| 3-5 Slow Wand | 7, 10, 15, 18F | |
| 3 Slumber Wand | 17F | |
| 3-4 Stayaway Wand | 2, 4, 13F | |
| 3-4 Tunnel Wand | 5, 20F | |
| 3 Whirlwind Wand | 12F | |
| Link Box | 1-4, 6-20F | |
Sparkling Floor
| Item | Floors | |
|---|---|---|
| Gold Ribbon | 5-6, 12F | |
| Sitrus Berry | 5F | |
| Max Elixir | 4, 11-13F | |
| Carbos | 8F | |
| Iron | 1, 9, 11F | |
| Protein | 16F | |
| Zinc | 4F | |
Kecleon Shop
| Item | Floors | |
|---|---|---|
| Defense Scarf | 1F | |
| Mach Ribbon | 20F | |
| Power Band | 16F | |
| Apple | 1-2, 4, 10, 13, 20F | |
| Cheri Berry | 1F | |
| Chesto Berry | 1, 4, 10F | |
| Oran Berry | 1-2, 4, 10, 13, 20F | |
| Rawst Berry | 2F | |
| Stun Seed | 20F | |
| Tiny Reviver Seed | 1-2, 4, 13, 16, 20F | |
| Training Seed | 20F | |
| Max Ether | 14, 16, 20F | |
| Foe-Hold Orb | 1, 13F | |
| Foe-Seal Orb | 4F | |
| Nullify Orb | 1F | |
| Revive All Orb | 2, 20F | |
| Rollcall Orb | 20F | |
| Totter Orb | 2F | |
| Wigglytuff Orb | 1, 20F | |
| 4 Slumber Wand | 1, 13F | |
| Link Box | 1-2, 4, 16, 20F | |
Traps encountered
Generation VIII

|
This section is incomplete. Please feel free to edit this section to add missing information and complete it. Reason: needs percentages |
Note: The percentages are calculated from the frequency of traps observed across 10 runs of the dungeon.
| Image | Trap | Floor 1-20 |
|---|---|---|

|
Blast Trap | 11.5 % |

|
Gust Trap | 11.9 % |

|
Hunger Trap | 24.0 % |

|
Slow Trap | 13.5 % |

|
Slumber Trap | 10.9 % |

|
Spin Trap | 16.0 % |

|
Warp Trap | 12.3 % |
Layout
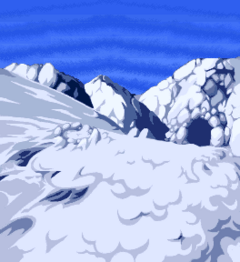
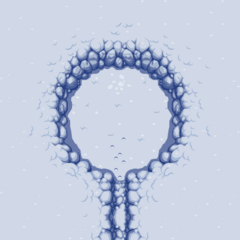
| Interior | Entrance | Summit | |
|---|---|---|---|
| III | 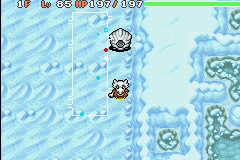
|
|
|
| VIII | 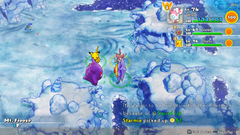
|

|

|
Trivia
- In the original games, there is a clone of Mt. Freeze Peak which ends before summit and has different map coordinates in Blue Rescue Team, used for the Gengar escort mission.
- Despite the name and appearance of this dungeon, of the Pokémon species that appear in this dungeon only one is an Ice-type (Glalie).
In other languages
|
Mt. Freeze
|
Mt. Freeze Peak
| ||||||||||||||||||||||||||||||||||||||||||||
| Locations in the Pokémon world in Pokémon Mystery Dungeon: Red Rescue Team, Blue Rescue Team, and Rescue Team DX |
|---|
| Major locations |
| Friend Areas/Rescue team camps • Team Base • Pokémon Square • Kecleon Shop Kangaskhan Storage • Makuhita Dojo • Whiscash Pond • Luminous Cave • Hill of the Ancients |
| Dungeons |
| Tiny Woods • Thunderwave Cave • Mt. Steel • Sinister Woods • Silent Chasm Mt. Thunder • Great Canyon • Lapis Cave • Rock Path • Mt. Blaze • Snow Path Frosty Forest • Mt. Freeze • Magma Cavern • Sky Tower • Uproar Forest Howling Forest • Stormy Sea • Silver Trench • Meteor Cave • Fiery Field Lightning Field • Northwind Field • Mt. Faraway • Western Cave • Northern Range Pitfall Valley • Buried Relic • Wish Cave • Murky Cave • Desert Region Southern Cavern • Wyvern Hill • Solar Cave • Darknight Relic • Grand Sea Waterfall Pond • Unown Relic • Joyous Tower • Far-Off Sea • Purity Forest Oddity Cave • Remains Island • Marvelous Sea • Fantasy Strait Unknown DungeonRB Illusory GrottoRTDX |

|
This article is part of both Project Locations and Project Sidegames, Bulbapedia projects that, together, aim to write comprehensive articles on the Pokémon Locations and Sidegames, respectively. | 
|

