Viridian City: Difference between revisions
Rockersk08 (talk | contribs) m (→Trivia: Pokémon Anime) |
m (→Main series) |
||
| (339 intermediate revisions by more than 100 users not shown) | |||
| Line 1: | Line 1: | ||
{{Samename|song|Viridian City (song)}} | {{Samename|song|Viridian City (song)}} | ||
{{Samename|chapter in [[Pokémon Zensho]]|PZ09}} | |||
---- | ---- | ||
{{ | {{Town infobox | ||
| | |name=Viridian City | ||
| | |jpname=トキワシティ | ||
| | |jptrans=Tokiwa City | ||
|image= | |image=Viridian City PE.png | ||
|slogan=The | |imageI=Viridian City RBY.png | ||
|imageII=Viridian City GSC.png | |||
|imageIII=Viridian City FRLG.png | |||
|slogan=The City of Evergreen | |||
|region=Kanto | |region=Kanto | ||
|north=2 | |north=Route 2 | ||
|south=1 | |regionnorth=Kanto | ||
|west=22 | |south=Route 1 | ||
|regionsouth=Kanto | |||
|west=Route 22 | |||
|regionwest=Kanto | |||
|mapdesc=A beautiful city that is enveloped in green year-round.{{sup/4|HGSS}}<br>The nature-loving city where flowers bloom all year round.{{sup/7|PE}} | |||
|gym=Viridian Gym | |gym=Viridian Gym | ||
| | |gymno=8{{sup/1|RGBY}}{{sup/3|FRLG}}{{sup/7|PE}} | ||
|leader=Giovanni | |leader=Giovanni | ||
|leadersprite= | |leadersprite=VSGiovanni PE.png{{!}}80x80px | ||
|badge=Earth | |badge=Earth | ||
|gymtype=Ground | |gymtype=Ground | ||
|gymno2=8{{sup/2|GSC}}{{sup/4|HGSS}}{{sup/7|PE}} | |||
|leader2=Blue | |leader2=Blue | ||
|leaderlink2=Blue (game) | |leaderlink2=Blue (game) | ||
|leadersprite2=VSBlue.png{{!}} | |leadersprite2=VSBlue PE.png{{!}}80x80px | ||
| | |gymtype2=Blue | ||
|colordark=40826D | |colordark=40826D | ||
|colormed=6FA090 | |||
|colorlight=9FC0B5 | |colorlight=9FC0B5 | ||
}} | }} | ||
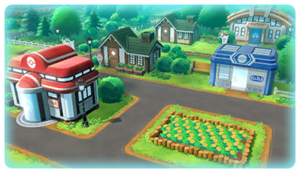
'''Viridian City''' (Japanese: '''トキワシティ''' ''Tokiwa City'') is a small city located in western [[Kanto]]. It is home to the [[Viridian Gym]], which can only be challenged by the {{player}} once they have obtained the [[Badge]]s of the seven other [[Gyms]] of Kanto. In the Kanto-based {{pkmn|games}}, the [[Gym Leader]] is [[Giovanni]], the boss of [[Team Rocket]] and a {{type|Ground}} [[type expert|expert]]. After being defeated, he abandons the Gym and is replaced by {{ga|Blue}}, who has no specialty [[type]]. He is the Gym Leader during the events of the [[Johto]]-based games. | |||
== | ==Geography== | ||
=== | Viridian City is a small city with an [[list of game locations by population|average population]] and three exits. To the north is {{rt|2|Kanto}}, divided into two by [[Viridian Forest]] and leading to [[Pewter City]]. To the south is {{rt|1|Kanto}}, leading to [[Pallet Town]]. To the west is {{rt|22|Kanto}}, leading to the [[Pokémon League Reception Gate]]. | ||
{{main| | |||
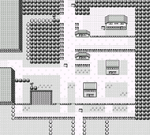
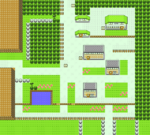
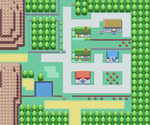
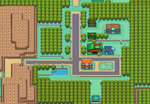
Between the three-year gap of [[Generation I]] and [[Generation II]] (as well as their remakes), the city has changed drastically with the [[Trainer House]] replacing the [[Pokémon academy|Trainers' School]], and becoming known as "the Gateway to Indigo Plateau", although the layout remains largely the same. | |||
In [[Generation VII]] the city's layout is still faithful to the original, but a difference in elevation means that the secluded area on the left is only accessible by [[Secret Technique|chopping down]] the bush above. Compared to it's appearance in Generation III, Viridian City appears more similar to its {{game|HeartGold and SoulSilver|s}} appearance, with dark gray asphalt as opposed to the lighter gray pavement. Additionally, every dirt path is no longer present, and the Gym has been moved further back into the trees, meaning it cannot be walked around as is the case in every other game. | |||
===Overworld=== | |||
{| style="margin:auto; text-align:center; {{roundy|10px}} border:2px solid #40826D; background:#6FA090; font-size:80%" | |||
|- | |||
|style="{{roundy|5px}} border:2px solid #40826D; background:#9FC0B5; width:80px"| [[File:Viridian City RBY.png|150px]] | |||
|style="{{roundy|5px}} border:2px solid #40826D; background:#9FC0B5; width:80px"| [[File:Viridian City GSC.png|150px]] | |||
|style="{{roundy|5px}} border:2px solid #40826D; background:#9FC0B5; width:80px"| [[File:Viridian City FRLG.png|150px]] | |||
|style="{{roundy|5px}} border:2px solid #40826D; background:#9FC0B5; width:80px"| [[File:Viridian City HGSS.png|150px]] | |||
|style="{{roundy|5px}} border:2px solid #40826D; background:#9FC0B5; width:80px"| [[File:Viridian City PE.png|150px]] | |||
|- | |||
|{{color2|000|Generation I}} | |||
|{{color2|000|Generation II}} | |||
|{{color2|000|Generation III}} | |||
|{{color2|000|Generation IV}} | |||
|{{color2|000|Generation VII}} | |||
|- | |||
|} | |||
===[[Environment]]s=== | |||
{| style="margin:auto; text-align:center; {{roundy|2px}} border: 2px solid #40826D; background: #6FA090; font-size:80%" | |||
|- | |||
|style="{{roundy|2px}} border: 2px solid #40826D; background: #9FC0B5; width:80px"| [[File:Battle terrain pond water FRLG.png|250px]] | |||
|style="{{roundy|2px}} border: 2px solid #40826D; background: #9FC0B5; width:80px"| [[File:Battle terrain plain FRLG.png|250px]] | |||
|style="{{roundy|2px}} border: 2px solid #40826D; background: #9FC0B5; width:80px"| [[File:BattleEnvironmentLGPEViridianCity.jpg|250px]] | |||
|- | |||
| {{color2|000|Generation III}} (Surfing) | |||
| {{color2|000|Generation III}} (Fishing) | |||
| {{color2|000|Generation VII}} | |||
|} | |||
==Points of interest== | |||
===Viridian Gym=== | |||
{{main|Viridian Gym}} | |||
The Viridian Gym is the official [[Gym]] of Viridian City. {{pkmn|Trainer}}s who defeat this Gym's Leader receive the {{Badge|Earth}}. The Gym is usually strewn with the same one-way [[spin tile]]s seen in the [[Team Rocket Hideout]], except in Generation II, where the floor is bare of any obstacles. | |||
In [[Generation]]s {{Gen|I}}, {{Gen|III}}, and {{Gen|VII}}, it is based on {{type|Ground}} {{OBP|Pokémon|species}} and the [[Gym Leader]] is [[Giovanni]], the head of [[Team Rocket]]. The Gym is initially locked due to its Leader's absence and will not re-open until the player has collected the other seven [[Badge]]s. | |||
In Generations II, IV, and VII, Team Rocket has disbanded and {{ga|Blue}} takes over as the Gym's Leader. Under Blue's direction, the Gym no longer concentrates on any particular [[type]]. | |||
{| style="margin:auto; text-align:center; {{roundy|10px}} border:2px solid #40826D; background:#6FA090; font-size:80%" | |||
|- | |||
|style="{{roundy|5px}} border:2px solid #40826D; background:#9FC0B5; width:80px"| [[File:Gym RBGY.png]] | |||
|style="{{roundy|5px}} border:2px solid #40826D; background:#9FC0B5; width:80px"| [[File:Viridian Gym exterior GSC.png]] | |||
|style="{{roundy|5px}} border:2px solid #40826D; background:#9FC0B5; width:80px"| [[File:Gym FRLG.png]] | |||
|style="{{roundy|5px}} border:2px solid #40826D; background:#9FC0B5; width:80px"| [[File:Viridian Gym Exterior HGSS.png]] | |||
|style="{{roundy|5px}} border:2px solid #40826D; background:#9FC0B5; width:80px"| [[File:Viridian Gym LGPE.jpg|250px]] | |||
|- | |||
|{{color2|000|Generation I}} | |||
|{{color2|000|Generation II}} | |||
|{{color2|000|Generation III}} | |||
|{{color2|000|Generation IV}} | |||
|{{color2|000|Generation VII}} | |||
|- | |||
|} | |||
===Trainers' School=== | |||
{{main|Pokémon academy}} | |||
In Generations {{gen|I}}, {{gen|III}} and {{gen|VII}}, this school is located in the center of Viridian. It is a place dedicated to teaching the basics of Pokémon to inexperienced Trainers. Before Let's Go Pikachu and Eevee, it was referred to as the Pokémon Academy. | |||
In Generations {{gen|II}} and {{gen|IV}}, this school has been replaced by the [[Trainer House]]. | |||
{| style="margin:auto; text-align:center; {{roundy|10px}} border:2px solid #40826D; background:#6FA090; font-size:80%" | |||
|- | |||
|style="{{roundy|5px}} border:2px solid #40826D; background:#9FC0B5; width:80px"| [[File:Pokémon Academy RBY.png]] | |||
|style="{{roundy|5px}} border:2px solid #40826D; background:#9FC0B5; width:80px"| [[File:Pokémon Academy FRLG.png]] | |||
|style="{{roundy|5px}} border:2px solid #40826D; background:#9FC0B5; width:80px"| [[File:Trainers' School LGPE.jpg|250px]] | |||
|- | |||
| {{color2|000|Generation I}} | |||
| {{color2|000|Generation III}} | |||
| {{color2|000|Generation VII}} | |||
|- | |||
|} | |||
===Trainer House=== | ===Trainer House=== | ||
{{main|Trainer House}} | {{main|Trainer House}} | ||
In Generations {{gen|II}} and {{gen|IV}}, the Trainer House replaces the Trainers' School in the center of Viridian. The first floor is occupied by a handful of people, while the basement is primarily dedicated to a battlefield. In the basement, the {{player}} may battle other Trainers once a day. | |||
In Generation II, the opposing {{pkmn|Trainer}} in the basement will be the last person the player has used [[Mystery Gift]] with, with whatever [[party]] they had when Mystery Gift was used. If the player has never used [[Mystery Gift]] with anyone, the opposing Trainer will be {{ga|Cal}}. | |||
{{ | |||
[[ | In Generation IV, the player will initially only find {{tc|Ace Trainer}} {{ga|Cal}} in the basement. When the player meets another Trainer via the Pokéwalker and re-syncs the Pokéwalker back to their game, the other Trainer will also appear in the basement with their party. Up to 10 additional Trainers may be encountered in this way. Any Pokémon in a Trainer's party above level 50 will have their level reduced to 50. Battles here give no [[experience]] or money, but the player will receive 1 [[Battle Point|BP]] for each victory. | ||
{| style="margin:auto; text-align:center; {{roundy|10px}} border:2px solid #40826D; background:#6FA090; font-size:80%" | |||
|- | |||
|style="{{roundy|5px}} border:2px solid #40826D; background:#9FC0B5; width:80px"| [[File:Trainer House outside GSC.png]] | |||
|style="{{roundy|5px}} border:2px solid #40826D; background:#9FC0B5; width:80px"| [[File:Trainer House outside HGSS.png]] | |||
|- | |||
| {{color2|000|Generation II}} | |||
| {{color2|000|Generation IV}} | |||
|- | |||
|} | |||
===Old Man=== | |||
{{main|Old man (Kanto)}} | |||
In Generation I and III, a grumpy old man blocks the player from progressing to {{rt|2|Kanto}} until he has had his daily coffee (in the Japanese script he is drunk and has passed out), preventing players from wandering past Viridian City until they've delivered [[Parcel|Oak's Parcel]] to [[Professor Oak]]. When returning to the area after delivering Oak's Parcel, he can teach the player how to catch a Pokémon. He will also give the player a [[Teachy TV]] in {{game|FireRed and LeafGreen|s}}, which instructs the player about battling and catching Pokémon through a variety of programs. | |||
He makes an appearance in the same spot in Generation II and IV sequels, declaring that he has had his espresso and that he was once an expert at catching Pokémon, referencing the events three years prior. | |||
In [[Pokémon: Let's Go, Pikachu! and Let's Go, Eevee!]], his role is instead served by [[Jessie]], [[James]], and {{MTR}}. | |||
{| style="margin:auto; text-align:center; {{roundy|2px}} border: 2px solid #40826D; background: #6FA090; font-size:80%;" | |||
|- | |||
|style="{{roundy|2px}} border:2px solid #40826D; background:#9FC0B5; width:80px; height:80px" | [[File:Old man passed out I OD.png]] | |||
|style="{{roundy|2px}} border:2px solid #40826D; background:#9FC0B5; width:80px; height:80px" | [[File:Old man passed out III OD.png]] | |||
|- | |||
|{{color2|000|Generation I}} | |||
|{{color2|000|Generation III}} | |||
|} | |||
===TM man/Move Tutor=== | |||
There is a man on the west side of Viridian City that requires {{m|Cut}} or {{m|Surf}} to access, or [[Secret Technique]] Chop Down in [[Pokémon: Let's Go, Pikachu! and Let's Go, Eevee!]]. | |||
In Generation I, II, and IV, he gives the player a [[TM]] for {{m|Dream Eater}}. In Pokémon: Let's Go, Pikachu! and Let's Go, Eevee!, he gives the player the TM for {{m|Will-O-Wisp}}. In [[Generation III]], he is a [[Move Tutor]] for Dream Eater. | |||
{| style="margin:auto; text-align:center; {{roundy|2px}} border: 2px solid #40826D; background: #6FA090; font-size:80%;" | |||
|- | |||
|style="{{roundy|2px}} border: 2px solid #40826D; background: #9FC0B5; width:80px"| [[File:Viridian City Tutor I.png]] | |||
|style="{{roundy|2px}} border: 2px solid #40826D; background: #9FC0B5; width:80px"| [[File:Viridian City Tutor II.png]] | |||
|style="{{roundy|2px}} border: 2px solid #40826D; background: #9FC0B5; width:80px"| [[File:Viridian City Tutor III.png]] | |||
|style="{{roundy|2px}} border: 2px solid #40826D; background: #9FC0B5; width:80px"| [[File:Viridian City Tutor IV.png]] | |||
|style="{{roundy|2px}} border: 2px solid #40826D; background:#9FC0B5; width:80px; height:80px" | [[File:Viridian City Tutor VII.jpg|250px]] | |||
|- | |||
|{{color2|000|Generation I}} | |||
|{{color2|000|Generation II}} | |||
|{{color2|000|Generation III}} | |||
|{{color2|000|Generation IV}} | |||
|{{color2|000|Generation VII}} | |||
|} | |||
==Poké Mart== | ==Poké Mart== | ||
{| | The [[Poké Mart]] is located south of the [[Viridian Gym]]. In Generation II and IV, it is to the right of the Trainer House. | ||
| | {{shop|Generation I}} | ||
{{shoprow|{{shopitem|Poké Ball (item)|200|5=Poké Ball|display=Poké Ball}}|{{shopitem|Potion|300|note={{sup/1|Y}}}}}} | |||
{{shoprow|{{shopitem|Antidote|100}}|{{shopitem|Paralyze Heal|200|display=Parlyz Heal}}}} | |||
| | {{shoprow|{{shopitem|Burn Heal|250}}}} | ||
| | {{shopfooter|multiple=yes}} | ||
{{ | {{shop|Generation II}} | ||
{{ | {{shoprow|{{shopitem|Ultra Ball|1200}}|{{shopitem|Hyper Potion|1200}}}} | ||
{{ | {{shoprow|{{shopitem|Full Heal|600}}|{{shopitem|Revive|1500}}}} | ||
{{ | {{shoprow|{{shopitem|Antidote|100}}|{{shopitem|Paralyze Heal|200|display=Parlyz Heal}}}} | ||
{{ | {{shoprow|{{shopitem|Awakening|250}}|{{shopitem|Burn Heal|250}}}} | ||
{{ | {{shoprow|{{shopitem|Flower Mail|50|5=None}}}} | ||
{{ | {{shopfooter|multiple=yes}} | ||
{{ | {{shop|Generation III}} | ||
{{ | {{shoprow|{{shopitem|Poké Ball (item)|200|5=Poké Ball|display=Poké Ball}}|{{shopitem|Potion|300}}}} | ||
| | {{shoprow|{{shopitem|Antidote|100}}|{{shopitem|Paralyze Heal|200|display=Parlyz Heal}}}} | ||
{{ | {{shopfooter}} | ||
{{ | {{shop|Lower cashier (Generation IV)}} | ||
{{ | {{shoprow|{{shopitem|Poké Ball (item)|200|5=Poké Ball|display=Poké Ball}}|{{shopitem|Great Ball|600}}}} | ||
{{ | {{shoprow|{{shopitem|Ultra Ball|1200}}|{{shopitem|Potion|300}}}} | ||
{{ | {{shoprow|{{shopitem|Super Potion|700}}|{{shopitem|Hyper Potion|1200}}}} | ||
{{ | {{shoprow|{{shopitem|Max Potion|2500}}|{{shopitem|Full Restore|3000}}}} | ||
{{ | {{shoprow|{{shopitem|Revive|1500}}|{{shopitem|Antidote|100}}}} | ||
{{ | {{shoprow|{{shopitem|Paralyze Heal|200|display=Parlyz Heal}}|{{shopitem|Awakening|250}}}} | ||
{{ | {{shoprow|{{shopitem|Burn Heal|250}}|{{shopitem|Ice Heal|250}}}} | ||
{{ | {{shoprow|{{shopitem|Full Heal|600}}|{{shopitem|Escape Rope|550}}}} | ||
{{ | {{shoprow|{{shopitem|Repel|350}}|{{shopitem|Super Repel|500}}}} | ||
{{ | {{shoprow|{{shopitem|Max Repel|700}}}} | ||
{{ | {{shopfooter|multiple=yes}} | ||
{{ | {{shop|Upper cashier (Generation IV)}} | ||
|} | {{shoprow|{{shopitem|Steel Mail|50}}|{{shopitem|Net Ball|1000}}}} | ||
{{shoprow|{{shopitem|Heal Ball|300}}}} | |||
{{shopfooter|multiple=yes}} | |||
{{shop|Generation VII}} | |||
{{shoprow|{{shopitem|Poké Ball (item)|100|5=Poké Ball|display=Poké Ball}}|{{shopitem|Great Ball|300|note=<sup>1 {{color2|000|Badge}}</sup>}}}} | |||
{{shoprow|{{shopitem|Ultra Ball|500|note=<sup>4 {{color2|000|Badge|Badges}}</sup>}}|{{shopitem|Potion|200}}}} | |||
{{shoprow|{{shopitem|Super Potion|700|note=<sup>2 {{color2|000|Badge|Badges}}</sup>}}|{{shopitem|Hyper Potion|1,500|note=<sup>4 {{color2|000|Badge|Badges}}</sup>}}}} | |||
{{shoprow|{{shopitem|Max Potion|2,500|note=<sup>6 {{color2|000|Badge|Badges}}</sup>}}|{{shopitem|Full Restore|3,000|note=<sup>8 {{color2|000|Badge|Badges}}</sup>}}}} | |||
{{shoprow|{{shopitem|Antidote|200}}|{{shopitem|Burn Heal|300}}}} | |||
{{shoprow|{{shopitem|Ice Heal|100}}|{{shopitem|Awakening|100}}}} | |||
{{shoprow|{{shopitem|Paralyze Heal|300}}|{{shopitem|Full Heal|400|note=<sup>3 {{color2|000|Badge|Badges}}</sup>}}}} | |||
{{shoprow|{{shopitem|Revive|2,000|note=<sup>3 {{color2|000|Badge|Badges}}</sup>}}|{{shopitem|Escape Rope|300|note=<sup>1 {{color2|000|Badge}}</sup>}}}} | |||
{{shoprow|{{shopitem|Repel|400|note=<sup>1 {{color2|000|Badge}}</sup>}}|{{shopitem|Super Repel|700|note=<sup>3 {{color2|000|Badge|Badges}}</sup>}}}} | |||
{{shoprow|{{shopitem|Max Repel|900|note=<sup>5 {{color2|000|Badge|Badges}}</sup>}}|{{shopitem|Lure|400|note=<sup>2 {{color2|000|Badge|Badges}}</sup>}}}} | |||
{{shoprow|{{shopitem|Super Lure|700|note=<sup>4 {{color2|000|Badge|Badges}}</sup>}}|{{shopitem|Max Lure|900|note=<sup>6 {{color2|000|Badge|Badges}}</sup>}}}} | |||
{{shoprow|{{shopitem|X Attack|550|note=<sup>1 {{color2|000|Badge}}</sup>}}|{{shopitem|X Defense|500|note=<sup>1 {{color2|000|Badge}}</sup>}}}} | |||
{{shoprow|{{shopitem|X Sp. Atk|350|note=<sup>1 {{color2|000|Badge}}</sup>}}|{{shopitem|X Sp. Def|350|note=<sup>1 {{color2|000|Badge}}</sup>}}}} | |||
{{shoprow|{{shopitem|X Speed|350|note=<sup>1 {{color2|000|Badge}}</sup>}}|{{shopitem|X Accuracy|950|note=<sup>1 {{color2|000|Badge}}</sup>}}}} | |||
{{shoprow|{{shopitem|Dire Hit|650|note=<sup>1 {{color2|000|Badge}}</sup>}}|{{shopitem|Guard Spec.|700|note=<sup>1 {{color2|000|Badge}}</sup>}}}} | |||
{{shopfooter}} | |||
==Items== | ==Items== | ||
{{Itlisth|road}} | {{Itlisth|road}} | ||
{{ | {{Itemlist|Oak's Parcel|Received from the [[Poké Mart]] clerk|R=yes|B=yes|Y=yes|FR=yes|LG=yes|display=[[Parcel|Oak's Parcel]]|sprite=Bag Parcel Sprite}} | ||
{{ | {{Itemlist|Parcel|Received from the [[Poké Mart]] clerk|LP=yes|LE=yes}} | ||
{{ | {{Itemlist|Potion|On the {{m|cut}}table tree in the northwestern part of the city ''(hidden)''|R=yes|B=yes|Y=yes}} | ||
{{ | {{Itemlist|Potion|West of the {{m|cut}}table tree in the northwestern part of the city|FR=yes|LG=yes}} | ||
{{ | {{Itemlist|Potion|West of the [[Secret Technique|choppable]] tree in the northwestern part of the city ''(hidden)'' (daily)|LP=yes|LE=yes}} | ||
{{ | {{Itemlist|Teachy TV|Received from the {{ka|old man}} who teaches the {{player}} how to catch {{OBP|Pokémon|species}}|FR=yes|LG=yes}} | ||
{{ | {{Itemlist|TM Psychic|Received from the sleeping man in the southwestern part of the city (requires {{m|Cut}} or {{m|Surf}})|R=yes|B=yes|Y=yes|G=yes|S=yes|C=yes|display={{TM|42|Dream Eater}}}} | ||
{{ | {{Itemlist|TM Psychic|Received from the sleeping man in the southwestern part of the city (requires {{m|Cut}} or {{m|Surf}})|HG=yes|SS=yes|display={{TM|85|Dream Eater}}}} | ||
{{ | {{Itemlist|TM Fire VI|Received from the sleeping man in the southwestern part of the city (requires [[Secret Technique|Chop Down]])|LP=yes|LE=yes|display={{TM|11|Will-O-Wisp}}}} | ||
{{ | {{Itemlist|Nugget|Near the trees northeast of the [[Poké Mart]] ''(hidden)''|HG=yes|SS=yes}} | ||
{{Itlistfoot|road}} | {{Itlistfoot|road}} | ||
===Flower Bed=== | |||
{{Itlisth}} | |||
{{Itemlist|Pretty Wing|Infrequently found by some [[walking Pokémon]] from the flower bed east of the [[Pokémon Center]]|LP=yes|LE=yes}} | |||
{{Itlistfoot}} | |||
==Pokémon== | ==Pokémon== | ||
===Generation I=== | ===Generation I=== | ||
{{ | {{catch/header|road|no}} | ||
{{ | {{catch/div|water|Fishing}} | ||
{{ | {{catch/entry1|129|Magikarp|yes|yes|yes|Fish Old|5|100%|type1=water}} | ||
{{ | {{catch/entry1|060|Poliwag|yes|yes|yes|Fish Good|10|50%|type1=water}} | ||
{{ | {{catch/entry1|118|Goldeen|yes|yes|yes|Fish Good|10|50%|type1=water}} | ||
{{ | {{catch/entry1|060|Poliwag|yes|yes|no|Fish Super|15|50%|type1=water}} | ||
{{ | {{catch/entry1|060|Poliwag|no|no|yes|Fish Super|5, 10, 15|100%|type1=water}} | ||
{{ | {{catch/entry1|072|Tentacool|yes|yes|no|Fish Super|15|50%|type1=water|type2=poison}} | ||
{{ | {{catch/footer|road}} | ||
===Generation II=== | ===Generation II=== | ||
{{ | {{catch/header|road|4}} | ||
{{ | {{catch/div|water|Surfing}} | ||
{{ | {{catch/entry2|060|Poliwag|yes|yes|yes|Surf|5-14|all=90%|type1=water}} | ||
{{ | {{catch/entry2|061|Poliwhirl|yes|yes|yes|Surf|10-14|all=10%|type1=water}} | ||
{{ | {{catch/div|water|Fishing}} | ||
{{ | {{catch/entry2|060|Poliwag|yes|yes|yes|Fish Old|10|all=15%|type1=water}} | ||
{{ | {{catch/entry2|129|Magikarp|yes|yes|yes|Fish Old|10|all=85%|type1=water}} | ||
{{ | {{catch/entry2|060|Poliwag|yes|yes|yes|Fish Good|20|all=65%|type1=water}} | ||
{{ | {{catch/entry2|129|Magikarp|yes|yes|yes|Fish Good|20|all=35%|type1=water}} | ||
{{ | {{catch/entry2|060|Poliwag|yes|yes|yes|Fish Super|40|all=80%|type1=water}} | ||
{{catch/entry2|129|Magikarp|yes|yes|yes|Fish Super|40|all=20%|type1=water}} | |||
{{ | {{catch/footer|road}} | ||
===Generation III=== | ===Generation III=== | ||
{{ | {{catch/header|road|no}} | ||
{{ | {{catch/div|water|Surfing}} | ||
{{ | {{catch/entryfl|054|Psyduck|yes|no|Surf|20-40|100%|type1=water}} | ||
{{ | {{catch/entryfl|079|Slowpoke|no|yes|Surf|20-40|100%|type1=water|type2=psychic}} | ||
{{ | {{catch/div|water|Fishing}} | ||
{{ | {{catch/entryfl|129|Magikarp|yes|yes|Fish Old|5|100%|type1=water}} | ||
{{ | {{catch/entryfl|060|Poliwag|yes|yes|Fish Good|5-15|60%|type1=water}} | ||
{{ | {{catch/entryfl|118|Goldeen|yes|yes|Fish Good|5-15|20%|type1=water}} | ||
{{ | {{catch/entryfl|129|Magikarp|yes|yes|Fish Good|5-15|20%|type1=water}} | ||
{{ | {{catch/entryfl|054|Psyduck|yes|no|Fish Super|15-35|5%|type1=water}} | ||
{{ | {{catch/entryfl|060|Poliwag|yes|yes|Fish Super|15-25|40%|type1=water}} | ||
{{ | {{catch/entryfl|061|Poliwhirl|yes|yes|Fish Super|20-30|40%|type1=water}} | ||
{{ | {{catch/entryfl|079|Slowpoke|no|yes|Fish Super|15-35|5%|type1=water|type2=psychic}} | ||
{{ | {{catch/entryfl|130|Gyarados|yes|yes|Fish Super|15-25|15%|type1=water|type2=flying}} | ||
{{catch/footer|road}} | |||
===Generation IV=== | |||
{{catch/header|road|4}} | |||
{{catch/div|water|Surfing}} | |||
{{catch/entryhs|060|Poliwag|yes|yes|Surf|5-10|all=90%|type1=water}} | |||
{{catch/entryhs|061|Poliwhirl|yes|yes|Surf|10|all=10%|type1=water}} | |||
{{catch/div|water|Fishing}} | |||
{{catch/entryhs|060|Poliwag|yes|yes|Fish Old|10|all=15%|type1=water}} | |||
{{catch/entryhs|129|Magikarp|yes|yes|Fish Old|10|all=85%|type1=water}} | |||
{{catch/entryhs|060|Poliwag|yes|yes|Fish Good|20|all=60%|type1=water}} | |||
{{catch/entryhs|129|Magikarp|yes|yes|Fish Good|20|all=40%|type1=water}} | |||
{{catch/entryhs|060|Poliwag|yes|yes|Fish Super|40|all=80%|type1=water}} | |||
{{catch/entryhs|129|Magikarp|yes|yes|Fish Super|40|all=20%|type1=water}} | |||
{{catch/div|road|Headbutt<br/><small>Group A</small>}} | |||
{{catch/entryhs|163|Hoothoot|yes|yes|Headbutt|3-4|all=50%|type1=Normal|type2=Flying|10=k}} | |||
{{catch/entryhs|204|Pineco|yes|yes|Headbutt|3-4|all=30%|type1=Bug|10=k}} | |||
{{catch/entryhs|265|Wurmple|yes|yes|Headbutt|3-4|all=20%|type1=Bug|10=k}} | |||
{{catch/div|road|Headbutt<br/><small>Group B</small>}} | |||
{{catch/entryhs|163|Hoothoot|yes|yes|Headbutt|5-7|all=50%|type1=Normal|type2=Flying|10=k}} | |||
{{catch/entryhs|165|Ledyba|no|yes|Headbutt|5-7|all=30%|type1=Bug|type2=Flying|10=k}} | |||
{{catch/entryhs|167|Spinarak|yes|no|Headbutt|5-7|all=30%|type1=Bug|type2=Poison|10=k}} | |||
{{catch/entryhs|265|Wurmple|yes|yes|Headbutt|5-7|all=20%|type1=Bug|10=k}} | |||
{{catch/footer|road}} | |||
==Trainers== | |||
===Generation VII=== | |||
{{trainerheader|road}} | |||
{{trainerdiv|road|After becoming Champion}} | |||
{{trainerentry/master|VSPsychic Master PE.png{{!}}90px|Psychic|Angelo|063|Abra|♂|70|Psychic|Calm Mind|Ghost|Shadow Ball|Electric|Thunder Wave|36=ユウキ|37=Yūki}} | |||
{{trainerdiv|road}} | |||
{{trainerentry/master|VSPsychic Master PE.png{{!}}90px|Psychic|Anton|096|Drowzee|♂|70|Electric|Thunder Wave|Normal|Headbutt|Psychic|Meditate|36=カイト|37=Kaito}} | |||
{{trainerdiv|road}} | |||
{{trainerentry/master|VSLass Master PE.png{{!}}90px|Lass|Amy|043|Oddish|♀|65|Poison|Sludge Bomb|36=マユカ|37=Mayuka}} | |||
{{trainerdiv|road}} | |||
{{trainerentry/master|VSLass Master PE.png{{!}}90px|Lass|Hana|069|Bellsprout|♀|65|Poison|Poison Jab|Poison|Sludge Bomb|Normal|Growth|36=リナ|37=Rina}} | |||
{{trainerdiv|road}} | |||
{{trainerentry/master|VSYoungster Master PE.png{{!}}90px|Youngster|Ken|052|Meowth|♂|70|Dark|Nasty Plot|Electric|Thunderbolt|Dark|Dark Pulse|36=ナオト|37=Naoto}} | |||
{{trainerfooter|road|PE}} | |||
==Differences between generations== | |||
===Generations I, III, and VII=== | |||
Viridian City's layout is consistent between Generations I, III, and VII. There are no notable differences between the Viridian of Generations I, III, or VII, aside from the larger houses in {{gen|III}}, the 3D graphics in {{gen|VII}}, and some slight repositioning. Trees have become bigger, flowers are more visible, and most other sprites have been upgraded to modern standards. Most of the town's residents remain the same, and will give the player the same information. Items that are given out, however, are different from generation to generation. | |||
In Generation III, the Potion behind the Cut tree is no longer hidden. | |||
In Generation VII, the TM-giving man in the southwest part of town can no longer be reached via the pond to his right and can only be accessed by using the [[Secret Technique]] Chop Down. | |||
===Generation II and IV=== | |||
The differences between the Generation II and IV and Generation I and III games are more noticeable. The [[Pokémon academy|Trainers' School]] seen in Generation III has been replaced with the giant [[Trainer House]], and other buildings were added as well. Within the Trainer House in Generation II, Trainers will battle either {{ga|Cal}}, if the player has never used [[Mystery Gift]] with anyone, or the last player with whom they have used Mystery Gift. In Generation IV, the player may either battle Cal or up to 10 different Trainers met on the Pokéwalker. | |||
==Slogan== | |||
===Generations I, III and VII=== | |||
'''''The Eternally Green Paradise''''' (Japanese: '''トキワは みどり えいえんのいろ''' ''Tokiwa is the color of green eternity.'') | |||
===Generation IV=== | ===Generation IV=== | ||
'''''The City of Evergreen''''' (Japanese: '''えいえんなる みどりの まち''' ''The eternally green town.'') | |||
==Trainer Tips== | ==Trainer Tips== | ||
=== | ===Generation I=== | ||
{{sign|RBY|header}} | |||
{{sign|RBY|title|TRAINER TIPS}} | |||
{{sign|RBY|The battle moves}} | |||
{{sign|RBY|of POKéMON are}} | |||
{{sign|RBY|limited by their}} | |||
{{sign|RBY|POWER POINTs, PP.}} | |||
{{sign|RBY|To replenish PP,}} | |||
{{sign|RBY|rest your tired}} | |||
{{sign|RBY|POKéMON at a}} | |||
{{sign|RBY|POKéMON CENTER!}} | |||
{{sign|RBY|footer}} | |||
{{sign|RBY|header}} | |||
{{sign|RBY|title|TRAINER TIPS}} | |||
{{sign|RBY|Catch POKéMON}} | |||
{{sign|RBY|and expand your}} | |||
{{sign|RBY|collection!}} | |||
{{sign|RBY|The more you have,}} | |||
{{sign|RBY|the easier it is}} | |||
{{sign|RBY|to fight!}} | |||
{{sign|RBY|footer}} | |||
===Generation III=== | |||
{{sign|FRLG|header}} | |||
{{sign|FRLG|title|TRAINER TIPS}} | |||
{{sign|FRLG|The battle moves of POKéMON are}} | |||
{{sign|FRLG|limited by their POWER POINTS, PP.}} | |||
{{sign|FRLG|To replenish PP, rest your tired}} | |||
{{sign|FRLG|POKéMON at a POKéMON CENTER.}} | |||
{{sign|FRLG|footer}} | |||
{{sign|FRLG|header}} | |||
{{sign|FRLG|header | {{sign|FRLG|title|TRAINER TIPS}} | ||
{{sign|FRLG|TRAINER TIPS | {{sign|FRLG|Catch POKéMON and expand your}} | ||
{{sign|FRLG| | {{sign|FRLG|collection.}} | ||
{{sign|FRLG| | {{sign|FRLG|The more you have, the easier it}} | ||
{{sign|FRLG| | {{sign|FRLG|is to battle.}} | ||
{{sign|FRLG| | {{sign|FRLG|footer}} | ||
{{sign|FRLG|footer | |||
===Generation VII=== | |||
If you run out of Poké Balls, you can buy more at a Poké Mart! | |||
==Walking Pokémon quotes== | |||
[[Walking Pokémon]] can have reactions unique to Viridian City. Any quote below where the area says "anywhere" requires interacting with the Pokémon; for more specific areas, the Pokémon reacts automatically when it gets near. | |||
{| class="roundtable" style="margin: auto; text-align: center; background-color: #{{locationcolor/med|road}}; border: 3px solid #{{locationcolor/dark|road}}" | |||
|- | |||
! Games | |||
! Pokémon | |||
! Area | |||
! Quote | |||
|- style="background-color: #FFF" | |||
! {{GameIcon|HG}}{{GameIcon|SS}} | |||
| [[File:Bag Poké Ball Sprite.png]]<br>Any Pokémon | |||
| Anywhere | |||
| "Your Pokémon seems to be smelling a nostalgically familiar scent..." | |||
|- style="background-color: #FFF" | |||
! {{GameIcon|LGP}}{{GameIcon|LGE}} | |||
| [[File:Bag Poké Ball Sprite.png]]<br>Any Pokémon | |||
| Near the flower bed | |||
| "___ is happily staring at the swaying flowers." | |||
|} | |||
==Music== | |||
{| class="roundtable" style="margin:auto; text-align: center; background: #{{locationcolor/med|road}}; border: 3px solid #{{locationcolor/dark|road}}" | |||
|- style="background:#{{locationcolor/light|road}}" | |||
! Games | |||
! Song name | |||
! Composition | |||
! Arrangement | |||
|- style="background:#FFF" | |||
! {{GameIcon|R}}{{GameIcon|Gr}}{{GameIcon|B}}{{GameIcon|Y}} | |||
| [[Pokémon Red & Pokémon Green: Super Music Collection|Pewter City Theme]] | |||
| [[Junichi Masuda]] | |||
| [[Junichi Masuda]] | |||
|- style="background:#FFF" | |||
! {{GameIcon|G}}{{GameIcon|S}}{{GameIcon|C}} | |||
| [[Pokémon HeartGold & Pokémon SoulSilver: Super Music Collection|Pewter City]] | |||
| [[Junichi Masuda]] | |||
| [[Go Ichinose]] | |||
|- style="background:#FFF" | |||
! {{GameIcon|FR}}{{GameIcon|LG}} | |||
| [[Pokémon FireRed & Pokémon LeafGreen: Super Music Collection|Pewter City Theme]] || [[Junichi Masuda]] || [[Go Ichinose]] | |||
|- style="background:#FFF" | |||
! {{GameIcon|HG}}{{GameIcon|SS}} | |||
| [[Pokémon HeartGold & Pokémon SoulSilver: Super Music Collection|Pewter City]] || [[Junichi Masuda]] || [[Takuto Kitsuta]]<br><small>[[GB Sounds]]:</small> [[Go Ichinose]] | |||
|- style="background:#FFF" | |||
! {{GameIcon|LGP}}{{GameIcon|LGE}} | |||
| [[Pokémon: Let's Go, Pikachu! & Pokémon: Let's Go, Eevee! Super Music Collection|Pewter City Theme]] || [[Junichi Masuda]] || [[Shota Kageyama]] | |||
|} | |||
==Development== | |||
===Generation II=== | |||
Although Kanto was planned to return in Gold and Silver since 1997, the [[Pokémon Gold and Silver Spaceworld '97 demo]] reveals that at the time, Kanto was a tiny reconstruction of its original map, as opposed to being far more complete in the final. This included a heavily condensed Viridian City, with the Route 22 Gate leading westwards being the only distinct piece of geography to survive the transition. | |||
{| style="margin:auto; text-align:center; {{roundy|10px}} border:2px solid #40826D; background:#6FA090; font-size:80%" | |||
|- | |||
|style="{{roundy|5px}} border:2px solid #40826D; background:#9FC0B5; width:80px"| [[File:Kanto GS SW97.png|250px]] | |||
|- | |||
| {{color2|000|Pokémon Gold and Silver Spaceworld '97 demo|Spaceworld '97}} Kanto map | |||
|- | |||
|} | |||
==In the spin-off games== | |||
===Pokémon Pinball=== | |||
[[File:Pinball Blue Viridian City.png|thumb|right]] | |||
In {{g|Pinball}}, Viridian City appears on the Blue table; catchable Pokémon include {{p|Bulbasaur}}, {{p|Squirtle}}, {{p|Nidoran♀}}, {{p|Nidoran♂}}, {{p|Poliwag}} and {{p|Tentacool}}. | |||
==In the anime== | ==In the anime== | ||
[[ | ===Main series=== | ||
Viridian City | [[File:Viridian City anime.png|thumb|220px|Viridian City in the {{pkmn|anime}}]] | ||
[[ | ====[[Original series]]==== | ||
Viridian City was first seen briefly at the end of ''[[EP001|Pokémon - I Choose You!]]''. It was then visited in ''[[EP002|Pokémon Emergency!]]'', when [[Ash Ketchum]] took his injured {{AP|Pikachu}} to the [[Pokémon Center]] here. When entering the town, Ash was stopped by Viridian City's [[Officer Jenny]], who found him suspicious, due to the fact he was carrying Pikachu in his arms and not a [[Poké Ball]]. While staying overnight at the Pokémon Center, Ash had his first encounter with the [[Team Rocket trio]]: [[Jessie]], [[James]], and {{MTR}}. Ash and Pikachu foiled their plot to steal all the {{OBP|Pokémon|species}} in the Pokémon Center, thus beginning Team Rocket's obsession with capturing Ash's Pikachu. | |||
Ash and {{ashfr}} arrived in Viridian City in ''[[EP061|The Misty Mermaid]]'', but quickly left for the [[Cerulean Gym]] after they noticed that [[Misty's Horsea]] looked unwell while it was swimming in a local fountain. | |||
They returned to Viridian in ''[[EP063|The Battle of the Badge]]'', and noticed that the Pokémon Center that had exploded at the end of ''Pokémon Emergency!'' has been rebuilt. They found the [[Viridian Gym]], but before Ash could to fight the [[Gym Leader]], {{Gary}} arrived and {{pkmn|battle}}d {{an|Giovanni}} first. After {{TP|Misty|Togepi}} was carried off by a {{p|Fearow}}, Ash and his friends went looking for it, only to find it inside the Gym. They then noticed that Gary and his [[Gary's cheerleaders|entourage]] were badly injured due to {{OBP|Mewtwo|M01}}'s attacks. Giovanni is forced to leave the Gym following an emergency call, and he puts Jessie, James and Meowth in charge. After Ash fought and won a difficult and dangerous battle with Team Rocket, the Gym collapsed due to Togepi blowing up the stands. Ash picked up the {{badge|Earth}} Team Rocket lost. Afterwards, Ash and his friends left. | |||
After the [[Silver Conference]], Viridian was once again revisited, in ''[[EP273|Gotta Catch Ya Later!]]'', only some things had changed. Most notably, the [[Nurse Joy]] who worked at the Viridian Center in ''Pokémon Emergency!'' had retired and {{an|Misty}}'s [[Bicycle|bike]] had been fixed. After a battle with Team Rocket, as well as [[Invincible Pokémon Brothers|a trio of hired thugs]], they left Viridian City. | |||
====''[[Pokémon the Series: Ruby and Sapphire]]''==== | |||
Ash later passed through Viridian on his way home in ''[[AG132|The Scheme Team]]'', after the [[Ever Grande Conference]]. Visiting the site of the rebuilt Viridian Gym, circumstances ended up bringing him to the battlefield for a friendly one-on-one challenge with the temporary Gym Leader, [[Kanto]] [[Elite Four]] member [[Agatha]]. Ash also met [[Scott]] and learned about the {{Gdis|Battle Frontier|III}} from him, becoming interested enough to challenge it. | |||
====Gallery==== | |||
{| style="margin:auto; text-align:center; background: #6FA090; {{roundy}}; border: 3px solid #40826D" | |||
|- style="background:#9FC0B5 " | |||
! style="{{roundytl|5px}}" | {{color2|000|Pokémon Center}} | |||
! style="{{roundytr|5px}}" | {{color2|000|Viridian Gym}} | |||
|- style="background:#FFF" | |||
| [[File:Viridian Pokémon Center.png|x150px]] | |||
| [[File:Viridian Gym AG132.png|x150px]] | |||
|} | |||
===Pokémon Origins=== | |||
[[File:Viridian City PO.png|thumb|250px|Viridian City in [[Pokémon Origins]]]] | |||
Viridian City first appeared in ''[[PO01|File 1: Red]]'', where {{OBP|Red|Origins}} stopped by the local Pokémon Center to heal his {{p|Charmander}}, after having lost a battle against his [[rival]], {{OBP|Blue|Origins}}. He also made a call to [[Professor Oak]] from there before departing to [[Pewter City]]. | |||
Viridian City appeared again in ''[[PO03|File 3: Giovanni]]'', where Red returned there in order to challenge the local Gym Leader, only to find out that not only had Blue already done so, but that the Gym Leader was none other than [[Giovanni]], the Boss of [[Team Rocket]]. Enraged of seeing Giovanni as a Gym Leader, Red challenged him to a battle, not as a Gym Leader, but as the enemy of all Pokémon. Using his specially trained {{p|Rhyhorn}}, Giovanni defeated most of Red's Pokémon with ease, but soon noticed himself getting excited of the battle. When Red sent out his {{TP|Red|Charizard}} to face Giovanni's last Pokémon, {{p|Rhydon}}, Giovanni finally remembered how he had once been like Red, a child enjoying Pokémon battles simply for the fun and excitement of it. Even though Red eventually won the battle, he initially refused to take the Earth Badge, saying he didn't want it from the Boss of Team Rocket. Impressed of Red's attitude, Giovanni then informed {{tc|Team Rocket Grunt|his minions}} that Team Rocket would now be disbanded. After this, Red accepted Giovanni's Badge, and departed Viridian City for Indigo Plateau. Reminded of his past, Giovanni decided to find a new path for himself and his Pokémon, leaving behind his positions as Viridian City's Gym Leader and the Boss of Team Rocket. | |||
===Pokémon Generations=== | |||
[[File:Viridian City PG.png|thumb|250px|Viridian City in [[Pokémon Generations]]]] | |||
Viridian City appeared in ''[[PG02|The Chase]]''. The [[International Police]] raided the Viridian Gym in search of Giovanni, but failed to find him. Giovanni was then seen overlooking Viridian City as he walked away, vowing that Team Rocket would never fall. | |||
{{-}} | |||
==In the manga== | |||
===Pokémon Adventures=== | |||
[[File:Viridian City Adventures.png|thumb|250px|Viridian City in [[Pokémon Adventures]]]] | |||
===={{MangaArc|Red, Green & Blue}}==== | |||
Viridian City first appeared in ''[[PS002|Bulbasaur, Come Home!]]'', where {{adv|Red}} and {{adv|Professor Oak}} were forced to chase some of the Pokémon that Red had accidentally set free from [[Professor Oak's Laboratory]] all the way to [[Pallet Town]]'s neighbor city, including a [[Saur|Bulbasaur]], which the two chased to the abandoned [[Viridian Gym]]. After Red had helped Bulbasaur to defeat a wild {{p|Machoke}} attacking them, Professor Oak chose to give Bulbasaur to Red, along with a [[Pokédex]]. | |||
Viridian City made a brief appearance in ''[[PS023|Make Way For Magmar!]]'', where local citizens were asking questions about the missing [[Gym Leader]]. | |||
Viridian | |||
Viridian City | Red revisited Viridian City in ''[[PS036|Drat That Dratini!]]'' after helping a {{adv|Yellow|young girl}} in [[Viridian Forest]]. Upon hearing rumors about the missing "invincible" Gym Leader, Red decided to check out the Viridian Gym again. At the Gym, he met {{adv|Giovanni}}, learning that not only was he the Viridian City Gym Leader, but also the leader of [[Team Rocket]]. Giovanni then challenged Red to a battle, making a bet with him that should Red lose, he'd come to serve him as his right-hand man. During the battle, Giovanni's {{p|Nidoking}}'s {{m|Earthquake}} caused the Viridian Gym to collapse into ruins. Eventually Red emerged victorious with his [[Pika]] defeating Giovanni's {{p|Nidoqueen}} and knocking the Gym Leader himself unconscious as well. | ||
== | ===={{MangaArc|Gold, Silver & Crystal}}==== | ||
In ''[[PS115|Forretress of Solitude]]'', Red participated in [[Pokémon Association]]'s Gym Leader test for the new Viridian Gym Leader at the reconstructed Viridian Gym. Although he passed the test with flying colors, Red had to turn down the offer, as he had not yet completely recovered from the frostbites he received after being frozen by [[Lorelei]] in the {{MangaArc|Yellow}}. As such, {{adv|Blue}} was appointed as the new Gym Leader instead, after he impressed the Pokémon Association by stopping and {{pkmn2|Caught|capturing}} a group of rampaging [[wild Pokémon]]. | |||
===={{MangaArc|FireRed & LeafGreen}}==== | |||
In ''[[PS287|Secrets from Sneasel]]'', {{adv|Yellow}} arrived in Viridian City to meet Blue at the Gym, but only found his hologram, set there in case for a challenger coming while he was not present. An automated system then brought out Blue's Pokémon, which, even without their Trainer giving them commands, easily defeated Yellow's [[Chuchu]] in a battle. {{adv|Silver}} soon arrived at the site as well, looking for his roots. Unexpectedly, the two were attacked by [[Sird]] and [[Orm]] of Team Rocket, who revealed that Silver was actually Giovanni's long-lost son. This revelation shocked Silver so much that the two Team Rocket members had no trouble in knocking him out and taking him to the [[Team Rocket airship]], with Yellow giving chase. | |||
[[File:Viridian City EToP.png|thumb|left|230px|Viridian City in [[The Electric Tale of Pikachu]]]] | |||
===The Electric Tale of Pikachu=== | |||
Viridian City appeared in ''[[ET01|Pikachu, I See You!]]'', where {{OBP|Ash Ketchum|EToP|Ash}} caught his runaway {{AP|Pikachu|Pikachu (EToP)}} there after it had fled from him on {{rt|1|Kanto}}. Despite Pikachu still being [[Obedience|disobedient]] towards Ash and frequently {{m|Thunder Shock}}ing him, he boasted that since Pikachu were hard to tame, he already had {{Gary}} beat without even trying. Gary, however, soon showed up himself, taunting Ash and showing him that he already had a full [[party|team]] of six Pokémon, while Ash only had his disobedient Pikachu. | |||
===Pokémon Zensho=== | |||
[[File:Viridian City Zensho.png|thumb|250px|Viridian City in [[Pokémon Zensho]]]] | |||
Viridian City first appeared in ''[[PZ02|Pewter City]]'', where {{zensho|Satoshi}} tried to enter the local [[Gym]], only for a {{tc|Camper}} to tell him the Gym was closed. Following the Camper's advice, Satoshi then headed to Viridian Forest in order to reach the nearest city with an open Gym. | |||
After earning seven [[Badge]]s, Satoshi returned to Viridian City in ''[[PZ09|Viridian City]]''. Upon entering the Gym, he was surprised to learn that the Gym Leader was actually [[Giovanni]]. Satoshi eventually won the Gym battle thanks to his {{zensho|Satoshi's Charizard|Charizard}} and gave the Giovanni a package that [[Mr. Fuji]] had given to him prior to him coming to Viridian City, which was revealed to contain the horn of Giovanni's deceased Nidoking. Following this, Giovanni rewarded Satoshi with an {{badge|Earth}}. | |||
{{-}} | |||
==Trivia== | ==Trivia== | ||
* An {{pkmn|anime}} song {{so|Viridian City|of the same name}} is centered on its status as the location of the final [[Gym]] in [[Kanto]]. | |||
*An {{pkmn|anime}} song | * Viridian City is the only first city or town after the [[hometown]] that has a Gym, although the Gym is closed until the player has earned seven [[Badge]]s. | ||
* | * This city is [[List of typos|misspelled]] as "Virdian City" in {{an|Giovanni}}'s character profile in [[Pokémon Puzzle League]]. | ||
* In Pokémon Red, Blue, Yellow, and their remakes, a Viridian City [[Poké Mart]] employee on {{rt|1|Kanto}} gives a [[Potion]] to the player as a free sample. | |||
** In {{game|Red and Blue|s}}, this Poké Mart does not actually sell Potions even though the sample is given to the player, as noted by a customer saying that Potions are out of stock. This changed in {{game|Yellow}}, where the customer says that Potions are finally in stock. | |||
** In [[Pokémon FireRed and LeafGreen Versions|Pokémon FireRed, LeafGreen]], [[Pokémon: Let's Go, Pikachu! and Let's Go, Eevee!|Let's Go, Pikachu!, and Let's Go, Eevee!]], the customer simply says that he needs to buy Potions and explains that they heal Pokémon, instead of commenting about the stock like in previous games. This is a rare instance of Let's Go! dialogue that originated in the Generation III games instead of the Generation I games. | |||
* The English manuals of Pokémon Red and Blue contain the correct list of items sold in this Poké Mart, but this was not updated in the manual of Pokémon Yellow, which still does not include Potion. However, those lists of Poké Mart items were added in the localization; they are not found in the respective Japanese manuals. | |||
== | ===Name origin=== | ||
{| | {| class="roundy" style="background: #6FA090; border: 3px solid #40826D" | ||
|- | |- | ||
! Language | ! Language | ||
! Name | ! Name | ||
! Origin | ! Origin | ||
|- | |- style="background:#FFF" | ||
| Japanese | | Japanese | ||
| トキワシティ Tokiwa City | | トキワシティ ''Tokiwa City'' | ||
| 常磐色 | | From 常磐色 ''tokiwa-iro'' (the green color of {{wp|evergreen}} foliage) | ||
|- | |- style="background:#FFF" | ||
| English | | English, Danish | ||
| Viridian City | | Viridian City | ||
| From ''viridian'' | | From ''{{wp|viridian}}'' (a blue-green color) | ||
|- | |- style="background:#FFF" | ||
| German | |||
| Vertania City | |||
| From ''vert'' (French for green) | |||
|- style="background:#FFF" | |||
|rowspan="2"| Spanish | |||
| Ciudad Verde | |||
| From ''verde'' (green) | |||
|- style="background:#FFF" | |||
| Ciudad Viridian{{tt|*|Latin American dub of AG132, DP036 and HZ001}} | |||
| Same as English name | |||
|- style="background:#FFF" | |||
| French | | French | ||
| Jadielle | | Jadielle | ||
| From ''jade'' | | From ''jade'' (the green color named after the {{wp|jade|mineral}}) | ||
|- | |- style="background:#FFF" | ||
| Italian | |||
| Smeraldopoli | |||
| From ''smeraldo'' (emerald) and the suffix ''-poli'' (city) | |||
|- style="background:#FFF" | |||
| Korean | |||
| 상록시티 ''Sangnok City'' | |||
| From 상록 (常綠) ''sangnok'' (evergreen) | |||
|- style="background:#FFF" | |||
|rowspan="2"| Chinese ({{tt|Mandarin|Taiwan and Mainland China}}) | |||
| 常青市 ''Chángqīng Shì''{{tt|*|Games}} | |||
| From 常青 ''chángqīng'' (evergreen) | |||
|- style="background:#FFF" | |||
| 常磐市 ''Chángpán Shì''{{tt|*|Later anime, Adventures (Ching Win, Jilin Publishing first edition)}}<br>常盤市 / 常盘市 ''Chángpán Shì''{{tt|*|Early anime, Adventures (Jilin Publishing reprint)}} | |||
| From the Japanese name 常磐 ''Tokiwa'' | |||
|- style="background:#FFF" | |||
| Chinese ({{tt|Cantonese|Hong Kong}}) | |||
| 常青市 ''Sèuhngchīng Síh'' | |||
| From 常青 ''sèuhngchīng'' (evergreen) | |||
|- style="background:#FFF" | |||
| Czech | | Czech | ||
| Chromové město | | Chromové město | ||
| '' | | From ''chróm'' (chromium; referring to chrome green) and ''město'' (city, town) | ||
|- | |- style="background:#FFF" | ||
| | | Hungarian | ||
| | | Tengerzöld város | ||
| From | | From ''tengerzöld'' (sea green) | ||
|- | |- style="background:#FFF" | ||
| | | Norwegian | ||
| | | Viridian by{{tt|*|Ruby and Sapphire series}}<br>Byn Viridian{{tt|*|S01}}<br>Veridian City{{tt|*|song}} | ||
| From | | From its English name<br>From its English name<br>Misspelling of English name | ||
|- | |- style="background:#FFF" | ||
| Polish | | Polish | ||
| Wertania | | Wertania{{tt|*|anime}}<br>Viridian City{{tt|*|song}} | ||
| From German | | From its German name<br>Same as English name | ||
|- | |- style="background:#FFF" | ||
| | | Brazilian Portuguese | ||
| | | Cidade de Veridiana{{tt|*|Anime}}<br>Cidade de Viridian{{tt|*|Adventures}}<br>Cidade Viridian{{tt|*|The Official Pokémon Handbook}}<br>Cidade Veridian{{tt|*|The Electric Tale of Pikachu}}<br>Cidade de Veridian{{tt|*|song}} | ||
| | | From its English name | ||
| | |- style="background:#FFF" | ||
| | | Russian | ||
| Cidade de | | Виридиан-Сити ''Viridian-Siti''{{tt|*|Advanced Generation series, Pokémon Ultra Sun and Ultra Moon website}}<br>Вертания ''Vertaniya''{{tt|*|Original series (ORT)}} | ||
| | | Transcription of its English name<br>From its German and Polish names | ||
|- | |- style="background:#FFF" | ||
| | | Swedish | ||
| | | Viridianstaden{{tt|*|anime}}<br>Viridian City{{tt|*|Pokémon TV description}}<br>Byn Viridian{{tt|*|VHS release description}} | ||
| | | From its English name<br>Same as English name<br>From its English name | ||
|- | |- style="background:#FFF" | ||
| | | Vietnamese | ||
| | | Thành phố Tokiwa | ||
| From | | Transcription of its Japanese name | ||
|- | |||
| | |||
| | |||
| | |||
|} | |} | ||
{{-}} | {{-}} | ||
{{Kanto}}<br> | |||
{{Project Cities and Towns notice}} | {{Project Cities and Towns notice}} | ||
[[Category:Kanto locations]] | [[Category:Kanto locations]] | ||
[[Category:Red, Blue and Yellow locations]] | [[Category:Red, Blue and Yellow locations]] | ||
| Line 272: | Line 612: | ||
[[Category:FireRed and LeafGreen locations]] | [[Category:FireRed and LeafGreen locations]] | ||
[[Category:HeartGold and SoulSilver locations]] | [[Category:HeartGold and SoulSilver locations]] | ||
[[Category:Let's Go, Pikachu! and Let's Go, Eevee! locations]] | |||
[[Category:Pokémon Pinball locations]] | |||
[[Category:Cities]] | [[Category:Cities]] | ||
[[de:Vertania City]] | [[de:Vertania City]] | ||
[[es:Ciudad Verde]] | |||
[[fr:Jadielle]] | [[fr:Jadielle]] | ||
[[it:Smeraldopoli]] | |||
[[ja:トキワシティ]] | [[ja:トキワシティ]] | ||
[[ | [[zh:常青市]] | ||
Latest revision as of 01:46, 9 August 2024
- If you were looking for the song, see Viridian City (song).
- If you were looking for the chapter in Pokémon Zensho, see PZ09.
| |||||||||||||||
| |||||||||||||||
Map description
| |||||||||||||||
Viridian City Gym - Kanto Gym #8RGBYFRLGPE
| |||||||||||||||
Viridian City Gym - Kanto Gym #8GSCHGSSPE
| |||||||||||||||
| |||||||||||||||
Location 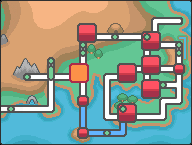 Location of Viridian City in Kanto. | |||||||||||||||
| |||||||||||||||
Viridian City (Japanese: トキワシティ Tokiwa City) is a small city located in western Kanto. It is home to the Viridian Gym, which can only be challenged by the player once they have obtained the Badges of the seven other Gyms of Kanto. In the Kanto-based games, the Gym Leader is Giovanni, the boss of Team Rocket and a Ground-type expert. After being defeated, he abandons the Gym and is replaced by Blue, who has no specialty type. He is the Gym Leader during the events of the Johto-based games.
Geography
Viridian City is a small city with an average population and three exits. To the north is Route 2, divided into two by Viridian Forest and leading to Pewter City. To the south is Route 1, leading to Pallet Town. To the west is Route 22, leading to the Pokémon League Reception Gate.
Between the three-year gap of Generation I and Generation II (as well as their remakes), the city has changed drastically with the Trainer House replacing the Trainers' School, and becoming known as "the Gateway to Indigo Plateau", although the layout remains largely the same.
In Generation VII the city's layout is still faithful to the original, but a difference in elevation means that the secluded area on the left is only accessible by chopping down the bush above. Compared to it's appearance in Generation III, Viridian City appears more similar to its Pokémon HeartGold and SoulSilver appearance, with dark gray asphalt as opposed to the lighter gray pavement. Additionally, every dirt path is no longer present, and the Gym has been moved further back into the trees, meaning it cannot be walked around as is the case in every other game.
Overworld
|
|
|
|

|
| Generation I | Generation II | Generation III | Generation IV | Generation VII |
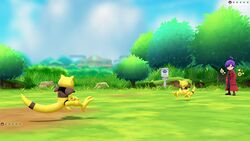
Environments
|
|
|
| Generation III (Surfing) | Generation III (Fishing) | Generation VII |
Points of interest
Viridian Gym
- Main article: Viridian Gym
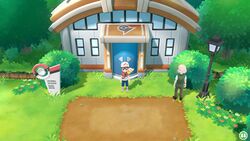
The Viridian Gym is the official Gym of Viridian City. Trainers who defeat this Gym's Leader receive the Earth Badge. The Gym is usually strewn with the same one-way spin tiles seen in the Team Rocket Hideout, except in Generation II, where the floor is bare of any obstacles.
In Generations I, III, and VII, it is based on Ground-type Pokémon and the Gym Leader is Giovanni, the head of Team Rocket. The Gym is initially locked due to its Leader's absence and will not re-open until the player has collected the other seven Badges.
In Generations II, IV, and VII, Team Rocket has disbanded and Blue takes over as the Gym's Leader. Under Blue's direction, the Gym no longer concentrates on any particular type.

|

|

|

|
|
| Generation I | Generation II | Generation III | Generation IV | Generation VII |
Trainers' School
- Main article: Pokémon academy
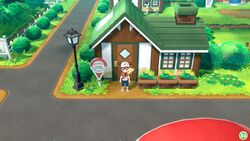
In Generations I, III and VII, this school is located in the center of Viridian. It is a place dedicated to teaching the basics of Pokémon to inexperienced Trainers. Before Let's Go Pikachu and Eevee, it was referred to as the Pokémon Academy.
In Generations II and IV, this school has been replaced by the Trainer House.

|

|
|
| Generation I | Generation III | Generation VII |
Trainer House
- Main article: Trainer House
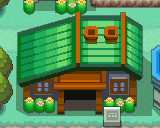
In Generations II and IV, the Trainer House replaces the Trainers' School in the center of Viridian. The first floor is occupied by a handful of people, while the basement is primarily dedicated to a battlefield. In the basement, the player may battle other Trainers once a day.
In Generation II, the opposing Trainer in the basement will be the last person the player has used Mystery Gift with, with whatever party they had when Mystery Gift was used. If the player has never used Mystery Gift with anyone, the opposing Trainer will be Cal.
In Generation IV, the player will initially only find Ace Trainer Cal in the basement. When the player meets another Trainer via the Pokéwalker and re-syncs the Pokéwalker back to their game, the other Trainer will also appear in the basement with their party. Up to 10 additional Trainers may be encountered in this way. Any Pokémon in a Trainer's party above level 50 will have their level reduced to 50. Battles here give no experience or money, but the player will receive 1 BP for each victory.

|
|
| Generation II | Generation IV |
Old Man
- Main article: Old man (Kanto)
In Generation I and III, a grumpy old man blocks the player from progressing to Route 2 until he has had his daily coffee (in the Japanese script he is drunk and has passed out), preventing players from wandering past Viridian City until they've delivered Oak's Parcel to Professor Oak. When returning to the area after delivering Oak's Parcel, he can teach the player how to catch a Pokémon. He will also give the player a Teachy TV in Pokémon FireRed and LeafGreen, which instructs the player about battling and catching Pokémon through a variety of programs.
He makes an appearance in the same spot in Generation II and IV sequels, declaring that he has had his espresso and that he was once an expert at catching Pokémon, referencing the events three years prior.
In Pokémon: Let's Go, Pikachu! and Let's Go, Eevee!, his role is instead served by Jessie, James, and Meowth.
| Generation I | Generation III |
TM man/Move Tutor
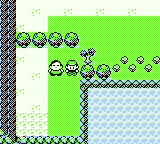
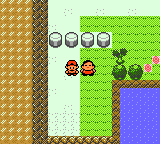
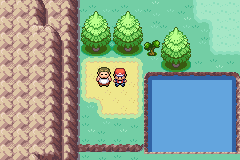
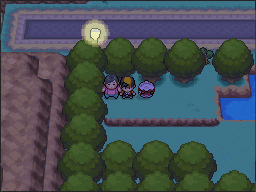
There is a man on the west side of Viridian City that requires Cut or Surf to access, or Secret Technique Chop Down in Pokémon: Let's Go, Pikachu! and Let's Go, Eevee!.
In Generation I, II, and IV, he gives the player a TM for Dream Eater. In Pokémon: Let's Go, Pikachu! and Let's Go, Eevee!, he gives the player the TM for Will-O-Wisp. In Generation III, he is a Move Tutor for Dream Eater.
|
|
|
|

|
| Generation I | Generation II | Generation III | Generation IV | Generation VII |
Poké Mart
The Poké Mart is located south of the Viridian Gym. In Generation II and IV, it is to the right of the Trainer House.
| Generation I | |||||||
|---|---|---|---|---|---|---|---|
|
| ||||||
|
| ||||||
|
|||||||
| Generation II | |||||||
|---|---|---|---|---|---|---|---|
|
| ||||||
|
| ||||||
|
| ||||||
|
| ||||||
|
|||||||
| Generation III | |||||||
|---|---|---|---|---|---|---|---|
|
| ||||||
|
| ||||||
| Lower cashier (Generation IV) | |||||||
|---|---|---|---|---|---|---|---|
|
| ||||||
|
| ||||||
|
| ||||||
|
| ||||||
|
| ||||||
|
| ||||||
|
| ||||||
|
| ||||||
|
| ||||||
|
|||||||
| Upper cashier (Generation IV) | |||||||
|---|---|---|---|---|---|---|---|
|
| ||||||
|
|||||||
| Generation VII | |||||||
|---|---|---|---|---|---|---|---|
|
| ||||||
|
| ||||||
|
| ||||||
|
| ||||||
|
| ||||||
|
| ||||||
|
| ||||||
|
| ||||||
|
| ||||||
|
| ||||||
|
| ||||||
|
| ||||||
|
| ||||||
|
| ||||||
|
| ||||||
Items
| Item | Location | Games | |
|---|---|---|---|
| Oak's Parcel | Received from the Poké Mart clerk | R B Y FR LG | |
| Parcel | Received from the Poké Mart clerk | P E | |
| Potion | On the cuttable tree in the northwestern part of the city (hidden) | R B Y | |
| Potion | West of the cuttable tree in the northwestern part of the city | FR LG | |
| Potion | West of the choppable tree in the northwestern part of the city (hidden) (daily) | P E | |
| Teachy TV | Received from the old man who teaches the player how to catch Pokémon | FR LG | |
| TM42 (Dream Eater) | Received from the sleeping man in the southwestern part of the city (requires Cut or Surf) | R B Y G S C | |
| TM85 (Dream Eater) | Received from the sleeping man in the southwestern part of the city (requires Cut or Surf) | HG SS | |
| TM11 (Will-O-Wisp) | Received from the sleeping man in the southwestern part of the city (requires Chop Down) | P E | |
| Nugget | Near the trees northeast of the Poké Mart (hidden) | HG SS | |
Flower Bed
| Item | Location | Games | |
|---|---|---|---|
| Pretty Wing | Infrequently found by some walking Pokémon from the flower bed east of the Pokémon Center | P E | |
Pokémon
Generation I
| Pokémon | Games | Location | Levels | Rate | |||||||||||
|---|---|---|---|---|---|---|---|---|---|---|---|---|---|---|---|
| Fishing | |||||||||||||||
|
R | B | Y |
|
5 | 100% | |||||||||
|
R | B | Y |
|
10 | 50% | |||||||||
|
R | B | Y |
|
10 | 50% | |||||||||
|
R | B | Y |
|
15 | 50% | |||||||||
|
R | B | Y |
|
5, 10, 15 | 100% | |||||||||
|
R | B | Y |
|
15 | 50% | |||||||||
| A colored background means that the Pokémon can be found in this location in the specified game. A white background with a colored letter means that the Pokémon cannot be found here. | |||||||||||||||
Generation II
| Pokémon | Games | Location | Levels | Rate | |||||||||||
|---|---|---|---|---|---|---|---|---|---|---|---|---|---|---|---|
| Surfing | |||||||||||||||
|
G | S | C |
|
5-14 | 90% | |||||||||
|
G | S | C |
|
10-14 | 10% | |||||||||
| Fishing | |||||||||||||||
|
G | S | C |
|
10 | 15% | |||||||||
|
G | S | C |
|
10 | 85% | |||||||||
|
G | S | C |
|
20 | 65% | |||||||||
|
G | S | C |
|
20 | 35% | |||||||||
|
G | S | C |
|
40 | 80% | |||||||||
|
G | S | C |
|
40 | 20% | |||||||||
| A colored background means that the Pokémon can be found in this location in the specified game. A white background with a colored letter means that the Pokémon cannot be found here. | |||||||||||||||
Generation III
| Pokémon | Games | Location | Levels | Rate | |||||||||||
|---|---|---|---|---|---|---|---|---|---|---|---|---|---|---|---|
| Surfing | |||||||||||||||
|
FR | LG |
|
20-40 | 100% | ||||||||||
|
FR | LG |
|
20-40 | 100% | ||||||||||
| Fishing | |||||||||||||||
|
FR | LG |
|
5 | 100% | ||||||||||
|
FR | LG |
|
5-15 | 60% | ||||||||||
|
FR | LG |
|
5-15 | 20% | ||||||||||
|
FR | LG |
|
5-15 | 20% | ||||||||||
|
FR | LG |
|
15-35 | 5% | ||||||||||
|
FR | LG |
|
15-25 | 40% | ||||||||||
|
FR | LG |
|
20-30 | 40% | ||||||||||
|
FR | LG |
|
15-35 | 5% | ||||||||||
|
FR | LG |
|
15-25 | 15% | ||||||||||
| A colored background means that the Pokémon can be found in this location in the specified game. A white background with a colored letter means that the Pokémon cannot be found here. | |||||||||||||||
Generation IV
| Pokémon | Games | Location | Levels | Rate | |||||||||||
|---|---|---|---|---|---|---|---|---|---|---|---|---|---|---|---|
| Surfing | |||||||||||||||
|
HG | SS |
|
5-10 | 90% | ||||||||||
|
HG | SS |
|
10 | 10% | ||||||||||
| Fishing | |||||||||||||||
|
HG | SS |
|
10 | 15% | ||||||||||
|
HG | SS |
|
10 | 85% | ||||||||||
|
HG | SS |
|
20 | 60% | ||||||||||
|
HG | SS |
|
20 | 40% | ||||||||||
|
HG | SS |
|
40 | 80% | ||||||||||
|
HG | SS |
|
40 | 20% | ||||||||||
| Headbutt Group A | |||||||||||||||
|
HG | SS |
|
3-4 | 50% | ||||||||||
|
HG | SS |
|
3-4 | 30% | ||||||||||
|
HG | SS |
|
3-4 | 20% | ||||||||||
| Headbutt Group B | |||||||||||||||
|
HG | SS |
|
5-7 | 50% | ||||||||||
|
HG | SS |
|
5-7 | 30% | ||||||||||
|
HG | SS |
|
5-7 | 30% | ||||||||||
|
HG | SS |
|
5-7 | 20% | ||||||||||
| A colored background means that the Pokémon can be found in this location in the specified game. A white background with a colored letter means that the Pokémon cannot be found here. | |||||||||||||||
Trainers
Generation VII
| Trainer | Pokémon | |||||||||||||||
|---|---|---|---|---|---|---|---|---|---|---|---|---|---|---|---|---|
| After becoming Champion | ||||||||||||||||
|
| |||||||||||||||
|
| |||||||||||||||
|
| |||||||||||||||
|
| |||||||||||||||
|
| |||||||||||||||
Differences between generations
Generations I, III, and VII
Viridian City's layout is consistent between Generations I, III, and VII. There are no notable differences between the Viridian of Generations I, III, or VII, aside from the larger houses in III, the 3D graphics in VII, and some slight repositioning. Trees have become bigger, flowers are more visible, and most other sprites have been upgraded to modern standards. Most of the town's residents remain the same, and will give the player the same information. Items that are given out, however, are different from generation to generation.
In Generation III, the Potion behind the Cut tree is no longer hidden.
In Generation VII, the TM-giving man in the southwest part of town can no longer be reached via the pond to his right and can only be accessed by using the Secret Technique Chop Down.
Generation II and IV
The differences between the Generation II and IV and Generation I and III games are more noticeable. The Trainers' School seen in Generation III has been replaced with the giant Trainer House, and other buildings were added as well. Within the Trainer House in Generation II, Trainers will battle either Cal, if the player has never used Mystery Gift with anyone, or the last player with whom they have used Mystery Gift. In Generation IV, the player may either battle Cal or up to 10 different Trainers met on the Pokéwalker.
Slogan
Generations I, III and VII
The Eternally Green Paradise (Japanese: トキワは みどり えいえんのいろ Tokiwa is the color of green eternity.)
Generation IV
The City of Evergreen (Japanese: えいえんなる みどりの まち The eternally green town.)
Trainer Tips
Generation I
TRAINER TIPS
The battle moves
of POKéMON are
limited by their
POWER POINTs, PP.
To replenish PP,
rest your tired
POKéMON at a
POKéMON CENTER!
TRAINER TIPS
Catch POKéMON
and expand your
collection!
The more you have,
the easier it is
to fight!
Generation III
Generation VII
If you run out of Poké Balls, you can buy more at a Poké Mart!
Walking Pokémon quotes
Walking Pokémon can have reactions unique to Viridian City. Any quote below where the area says "anywhere" requires interacting with the Pokémon; for more specific areas, the Pokémon reacts automatically when it gets near.
| Games | Pokémon | Area | Quote |
|---|---|---|---|
| HG SS | Any Pokémon |
Anywhere | "Your Pokémon seems to be smelling a nostalgically familiar scent..." |
| P E | Any Pokémon |
Near the flower bed | "___ is happily staring at the swaying flowers." |
Music
| Games | Song name | Composition | Arrangement |
|---|---|---|---|
| R G B Y | Pewter City Theme | Junichi Masuda | Junichi Masuda |
| G S C | Pewter City | Junichi Masuda | Go Ichinose |
| FR LG | Pewter City Theme | Junichi Masuda | Go Ichinose |
| HG SS | Pewter City | Junichi Masuda | Takuto Kitsuta GB Sounds: Go Ichinose |
| P E | Pewter City Theme | Junichi Masuda | Shota Kageyama |
Development
Generation II
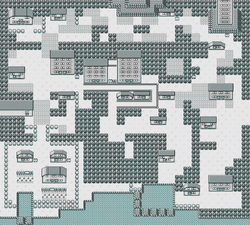
Although Kanto was planned to return in Gold and Silver since 1997, the Pokémon Gold and Silver Spaceworld '97 demo reveals that at the time, Kanto was a tiny reconstruction of its original map, as opposed to being far more complete in the final. This included a heavily condensed Viridian City, with the Route 22 Gate leading westwards being the only distinct piece of geography to survive the transition.
|
| Spaceworld '97 Kanto map |
In the spin-off games
Pokémon Pinball
In Pokémon Pinball, Viridian City appears on the Blue table; catchable Pokémon include Bulbasaur, Squirtle, Nidoran♀, Nidoran♂, Poliwag and Tentacool.
In the anime
Main series

Original series
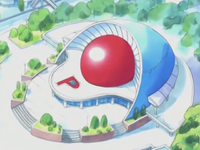
Viridian City was first seen briefly at the end of Pokémon - I Choose You!. It was then visited in Pokémon Emergency!, when Ash Ketchum took his injured Pikachu to the Pokémon Center here. When entering the town, Ash was stopped by Viridian City's Officer Jenny, who found him suspicious, due to the fact he was carrying Pikachu in his arms and not a Poké Ball. While staying overnight at the Pokémon Center, Ash had his first encounter with the Team Rocket trio: Jessie, James, and Meowth. Ash and Pikachu foiled their plot to steal all the Pokémon in the Pokémon Center, thus beginning Team Rocket's obsession with capturing Ash's Pikachu.
Ash and his friends arrived in Viridian City in The Misty Mermaid, but quickly left for the Cerulean Gym after they noticed that Misty's Horsea looked unwell while it was swimming in a local fountain.
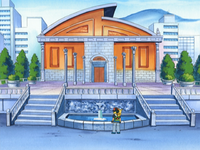
They returned to Viridian in The Battle of the Badge, and noticed that the Pokémon Center that had exploded at the end of Pokémon Emergency! has been rebuilt. They found the Viridian Gym, but before Ash could to fight the Gym Leader, Gary arrived and battled Giovanni first. After Togepi was carried off by a Fearow, Ash and his friends went looking for it, only to find it inside the Gym. They then noticed that Gary and his entourage were badly injured due to Mewtwo's attacks. Giovanni is forced to leave the Gym following an emergency call, and he puts Jessie, James and Meowth in charge. After Ash fought and won a difficult and dangerous battle with Team Rocket, the Gym collapsed due to Togepi blowing up the stands. Ash picked up the Earth Badge Team Rocket lost. Afterwards, Ash and his friends left.
After the Silver Conference, Viridian was once again revisited, in Gotta Catch Ya Later!, only some things had changed. Most notably, the Nurse Joy who worked at the Viridian Center in Pokémon Emergency! had retired and Misty's bike had been fixed. After a battle with Team Rocket, as well as a trio of hired thugs, they left Viridian City.
Pokémon the Series: Ruby and Sapphire
Ash later passed through Viridian on his way home in The Scheme Team, after the Ever Grande Conference. Visiting the site of the rebuilt Viridian Gym, circumstances ended up bringing him to the battlefield for a friendly one-on-one challenge with the temporary Gym Leader, Kanto Elite Four member Agatha. Ash also met Scott and learned about the Battle Frontier from him, becoming interested enough to challenge it.
Gallery
| Pokémon Center | Viridian Gym |
|---|---|
|
|
Pokémon Origins

Viridian City first appeared in File 1: Red, where Red stopped by the local Pokémon Center to heal his Charmander, after having lost a battle against his rival, Blue. He also made a call to Professor Oak from there before departing to Pewter City.
Viridian City appeared again in File 3: Giovanni, where Red returned there in order to challenge the local Gym Leader, only to find out that not only had Blue already done so, but that the Gym Leader was none other than Giovanni, the Boss of Team Rocket. Enraged of seeing Giovanni as a Gym Leader, Red challenged him to a battle, not as a Gym Leader, but as the enemy of all Pokémon. Using his specially trained Rhyhorn, Giovanni defeated most of Red's Pokémon with ease, but soon noticed himself getting excited of the battle. When Red sent out his Charizard to face Giovanni's last Pokémon, Rhydon, Giovanni finally remembered how he had once been like Red, a child enjoying Pokémon battles simply for the fun and excitement of it. Even though Red eventually won the battle, he initially refused to take the Earth Badge, saying he didn't want it from the Boss of Team Rocket. Impressed of Red's attitude, Giovanni then informed his minions that Team Rocket would now be disbanded. After this, Red accepted Giovanni's Badge, and departed Viridian City for Indigo Plateau. Reminded of his past, Giovanni decided to find a new path for himself and his Pokémon, leaving behind his positions as Viridian City's Gym Leader and the Boss of Team Rocket.
Pokémon Generations

Viridian City appeared in The Chase. The International Police raided the Viridian Gym in search of Giovanni, but failed to find him. Giovanni was then seen overlooking Viridian City as he walked away, vowing that Team Rocket would never fall.
In the manga
Pokémon Adventures

Red, Green & Blue arc
Viridian City first appeared in Bulbasaur, Come Home!, where Red and Professor Oak were forced to chase some of the Pokémon that Red had accidentally set free from Professor Oak's Laboratory all the way to Pallet Town's neighbor city, including a Bulbasaur, which the two chased to the abandoned Viridian Gym. After Red had helped Bulbasaur to defeat a wild Machoke attacking them, Professor Oak chose to give Bulbasaur to Red, along with a Pokédex.
Viridian City made a brief appearance in Make Way For Magmar!, where local citizens were asking questions about the missing Gym Leader.
Red revisited Viridian City in Drat That Dratini! after helping a young girl in Viridian Forest. Upon hearing rumors about the missing "invincible" Gym Leader, Red decided to check out the Viridian Gym again. At the Gym, he met Giovanni, learning that not only was he the Viridian City Gym Leader, but also the leader of Team Rocket. Giovanni then challenged Red to a battle, making a bet with him that should Red lose, he'd come to serve him as his right-hand man. During the battle, Giovanni's Nidoking's Earthquake caused the Viridian Gym to collapse into ruins. Eventually Red emerged victorious with his Pika defeating Giovanni's Nidoqueen and knocking the Gym Leader himself unconscious as well.
Gold, Silver & Crystal arc
In Forretress of Solitude, Red participated in Pokémon Association's Gym Leader test for the new Viridian Gym Leader at the reconstructed Viridian Gym. Although he passed the test with flying colors, Red had to turn down the offer, as he had not yet completely recovered from the frostbites he received after being frozen by Lorelei in the Yellow arc. As such, Blue was appointed as the new Gym Leader instead, after he impressed the Pokémon Association by stopping and capturing a group of rampaging wild Pokémon.
FireRed & LeafGreen arc
In Secrets from Sneasel, Yellow arrived in Viridian City to meet Blue at the Gym, but only found his hologram, set there in case for a challenger coming while he was not present. An automated system then brought out Blue's Pokémon, which, even without their Trainer giving them commands, easily defeated Yellow's Chuchu in a battle. Silver soon arrived at the site as well, looking for his roots. Unexpectedly, the two were attacked by Sird and Orm of Team Rocket, who revealed that Silver was actually Giovanni's long-lost son. This revelation shocked Silver so much that the two Team Rocket members had no trouble in knocking him out and taking him to the Team Rocket airship, with Yellow giving chase.
The Electric Tale of Pikachu
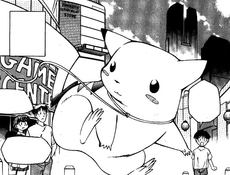
Viridian City appeared in Pikachu, I See You!, where Ash caught his runaway Pikachu there after it had fled from him on Route 1. Despite Pikachu still being disobedient towards Ash and frequently Thunder Shocking him, he boasted that since Pikachu were hard to tame, he already had Gary beat without even trying. Gary, however, soon showed up himself, taunting Ash and showing him that he already had a full team of six Pokémon, while Ash only had his disobedient Pikachu.
Pokémon Zensho

Viridian City first appeared in Pewter City, where Satoshi tried to enter the local Gym, only for a Camper to tell him the Gym was closed. Following the Camper's advice, Satoshi then headed to Viridian Forest in order to reach the nearest city with an open Gym.
After earning seven Badges, Satoshi returned to Viridian City in Viridian City. Upon entering the Gym, he was surprised to learn that the Gym Leader was actually Giovanni. Satoshi eventually won the Gym battle thanks to his Charizard and gave the Giovanni a package that Mr. Fuji had given to him prior to him coming to Viridian City, which was revealed to contain the horn of Giovanni's deceased Nidoking. Following this, Giovanni rewarded Satoshi with an Earth Badge.
Trivia
- An anime song of the same name is centered on its status as the location of the final Gym in Kanto.
- Viridian City is the only first city or town after the hometown that has a Gym, although the Gym is closed until the player has earned seven Badges.
- This city is misspelled as "Virdian City" in Giovanni's character profile in Pokémon Puzzle League.
- In Pokémon Red, Blue, Yellow, and their remakes, a Viridian City Poké Mart employee on Route 1 gives a Potion to the player as a free sample.
- In Pokémon Red and Blue, this Poké Mart does not actually sell Potions even though the sample is given to the player, as noted by a customer saying that Potions are out of stock. This changed in Pokémon Yellow, where the customer says that Potions are finally in stock.
- In Pokémon FireRed, LeafGreen, Let's Go, Pikachu!, and Let's Go, Eevee!, the customer simply says that he needs to buy Potions and explains that they heal Pokémon, instead of commenting about the stock like in previous games. This is a rare instance of Let's Go! dialogue that originated in the Generation III games instead of the Generation I games.
- The English manuals of Pokémon Red and Blue contain the correct list of items sold in this Poké Mart, but this was not updated in the manual of Pokémon Yellow, which still does not include Potion. However, those lists of Poké Mart items were added in the localization; they are not found in the respective Japanese manuals.
Name origin
| Language | Name | Origin |
|---|---|---|
| Japanese | トキワシティ Tokiwa City | From 常磐色 tokiwa-iro (the green color of evergreen foliage) |
| English, Danish | Viridian City | From viridian (a blue-green color) |
| German | Vertania City | From vert (French for green) |
| Spanish | Ciudad Verde | From verde (green) |
| Ciudad Viridian* | Same as English name | |
| French | Jadielle | From jade (the green color named after the mineral) |
| Italian | Smeraldopoli | From smeraldo (emerald) and the suffix -poli (city) |
| Korean | 상록시티 Sangnok City | From 상록 (常綠) sangnok (evergreen) |
| Chinese (Mandarin) | 常青市 Chángqīng Shì* | From 常青 chángqīng (evergreen) |
| 常磐市 Chángpán Shì* 常盤市 / 常盘市 Chángpán Shì* |
From the Japanese name 常磐 Tokiwa | |
| Chinese (Cantonese) | 常青市 Sèuhngchīng Síh | From 常青 sèuhngchīng (evergreen) |
| Czech | Chromové město | From chróm (chromium; referring to chrome green) and město (city, town) |
| Hungarian | Tengerzöld város | From tengerzöld (sea green) |
| Norwegian | Viridian by* Byn Viridian* Veridian City* |
From its English name From its English name Misspelling of English name |
| Polish | Wertania* Viridian City* |
From its German name Same as English name |
| Brazilian Portuguese | Cidade de Veridiana* Cidade de Viridian* Cidade Viridian* Cidade Veridian* Cidade de Veridian* |
From its English name |
| Russian | Виридиан-Сити Viridian-Siti* Вертания Vertaniya* |
Transcription of its English name From its German and Polish names |
| Swedish | Viridianstaden* Viridian City* Byn Viridian* |
From its English name Same as English name From its English name |
| Vietnamese | Thành phố Tokiwa | Transcription of its Japanese name |
| Kanto | ||||||||
|---|---|---|---|---|---|---|---|---|
|
| ||||||||
|

|
This article is part of Project Cities and Towns, a Bulbapedia project that aims to write comprehensive articles on every city and town in the Pokémon world. |
