| Safari Zone
|
|
サファリゾーン
Safari Zone
|
| "Wild Missingno. appeared!"
|
|
|
|
| Map description:
|
An amusement park outside FUCHSIA CITY where many rare POKéMON can be observed in the wild. Catch them in a popular game! FRLG
|
| Location:
|
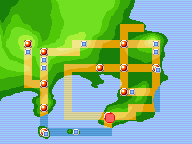
North of Fuchsia City
|
| Region:
|
Kanto
|
| Generations:
|
I, III
|

Location of Safari Zone in Kanto.
|
| Pokémon world locations
|
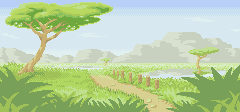
The Kanto Safari Zone (Japanese: サファリゾーン Safari Zone) is a special Pokémon preserve in Kanto where Trainers can enter to capture certain types of Pokémon in. It is owned by Baoba.
For $500, the player will receive 30 Safari Balls. With a large area to cover, Trainers must plan out their destination so as to arrive in time to capture all the Pokémon they want.
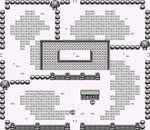
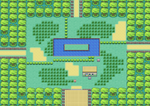
During Generation I and Generation III, however, a sweepstakes is taking place to find a hidden house deep in the Safari Zone, called the Secret House. The winner of the sweepstakes receives HM03 (Surf).
When a wild Pokémon appears, no Pokémon may be sent out to battle it: catching Pokémon here, as in all Safari Zones, requires sheer luck. There are four options in the battle screen: Throw a Safari Ball, throw Bait, throw a Rock, and run away. Throwing Bait makes a Pokémon less likely to run, but makes it harder to catch; while throwing a Rock does the reverse, making it easier to catch but more likely to run. If the player takes too long to catch the Pokémon, it will automatically run away.
In Generation II, the Safari Zone has closed down while Baoba takes a vacation. In the contemporaneous Generation IV games, he has opened another one in Johto. Kanto's Pal Park can instead be found in this location.
Details
As with other Safari Zones, Pokémon are made easier or harder to capture by modifying the Pokémon's catch rate. Pokémon can be in any of three states - angry, eating or neutral - with the angry state making them more likely to run but the eating state making them less likely to.
Generation I
At the start of an encounter, two counters - an "angry counter" and an "eating counter" - are set to 0. Whenever Bait is thrown, the angry counter is reset while the eating counter increases by a random value between 1 and 5 (but to no more than 255). The opposite occurs if a Rock is thrown: the eating counter is reset and the angry counter increases on the same basis. The catch rate is doubled (to no more than 255) whenever a Rock is thrown, but halved (rounded down) whenever Bait is thrown.
At the end of each turn, if either the angry or eating counter is nonzero, it is decreased by 1; if the angry counter is decreased to 0, the modified catch rate resets to the Pokémon's initial catch rate. A random value between 0 and 255 inclusive is generated, and if this is less than half of the Pokémon's Speed rounded down (if the Pokémon is eating), double the Speed (if the Pokémon is in a neutral state), or four times the Speed (if the Pokémon is angry), the Pokémon escapes. A Pokémon will also always escape if its Speed is 128 or more, even if it is eating.
SAFARI GAME
POKéMON-U-CATCH!
Generation III
The Safari Zone mechanics were overhauled to more closely resemble that of the Hoenn Safari Zone. Like it, there is an additional "catch factor" that begins at 100/1275 of the Pokémon's catch rate (rounded down). Each species of Pokémon also has its own "escape rate", unlike in the Hoenn Safari Zone, which is never modified.
Like Generation I, a Pokémon will be angry or eating whenever Bait or Rocks are thrown. If Bait is thrown, it will be "eating" for 2-6 turns, during which the catch factor is halved. If Rocks are thrown, it will be "angry" for 2-6 turns, during which the catch factor is doubled. Being "angry" or "eating" is mutually exclusive, though modifications to the catch factors will stack (reverting to its original value whenever the Pokémon is neither "angry" nor "eating"). Whenever a Safari Ball is thrown, the catch factor is converted back to a catch rate by multiplying by 1275/100 and rounding down.
At the end of a turn, a random number from 0 to 99 is generated, and is compared to 5 times its "modified escape factor": 1275/100 of the escape rate (rounded down), which is doubled if the Pokémon is "angry" or quartered (rounded down) if the Pokémon is "eating". If the random value is less, the Pokémon escapes.
SAFARI ZONE
WARDEN'S HOME
Closing notices
In Generation II, the sign outside the Safari Zone contains a notice about it being closed in that reads:
The WARDEN is
traveling abroad.
Therefore, the
SAFARI ZONE is
closed.
In HeartGold and SoulSilver, the sign informs that since the Safari Zone is closed, the facility houses Pal Park instead.
There's a notice here...
The Safari Zone is closed.
Instead, we have Pal Park.
Items
Pokémon
Generation I
Entrance
| Pokémon
|
Games
|
Location
|
Levels
|
Rate
|
|
|
R
|
B
|
Y
|
|
22
|
25%
|
|
|
R
|
B
|
Y
|
|
14
|
25%
|
|
|
R
|
B
|
Y
|
|
22
|
25%
|
|
|
R
|
B
|
Y
|
|
36
|
15%
|
|
|
R
|
B
|
Y
|
|
24-25
|
20%
|
|
|
R
|
B
|
Y
|
|
24
|
15%
|
|
|
R
|
B
|
Y
|
|
22
|
15%
|
|
|
R
|
B
|
Y
|
|
25
|
15%
|
|
|
R
|
B
|
Y
|
|
20
|
10%
|
|
|
R
|
B
|
Y
|
|
31
|
10%
|
|
|
R
|
B
|
Y
|
|
31
|
5%
|
|
|
R
|
B
|
Y
|
|
23
|
10%
|
|
|
R
|
B
|
Y
|
|
31
|
5%
|
|
|
R
|
B
|
Y
|
|
31
|
10%
|
|
|
R
|
B
|
Y
|
|
30
|
5%
|
|
|
R
|
B
|
Y
|
|
27-32
|
15%
|
|
|
R
|
B
|
Y
|
|
27
|
5%
|
|
|
R
|
B
|
Y
|
|
23
|
4%
|
|
|
R
|
B
|
Y
|
|
23
|
4%
|
|
|
R
|
B
|
Y
|
|
22
|
4%
|
|
|
R
|
B
|
Y
|
|
23
|
1%
|
|
|
R
|
B
|
Y
|
|
7
|
1%
|
| Fishing
|
|
|
R
|
B
|
Y
|
|
5
|
100%
|
|
|
R
|
B
|
Y
|
|
10
|
50%
|
|
|
R
|
B
|
Y
|
|
10
|
50%
|
|
|
R
|
B
|
Y
|
|
5-10
|
70%
|
|
|
R
|
B
|
Y
|
|
15
|
25%
|
|
|
R
|
B
|
Y
|
|
15
|
25%
|
|
|
R
|
B
|
Y
|
|
15
|
25%
|
|
|
R
|
B
|
Y
|
|
15
|
25%
|
|
|
R
|
B
|
Y
|
|
10
|
20%
|
|
|
R
|
B
|
Y
|
|
15
|
10%
|
| A colored background means that the Pokémon can be found in this location in the specified game. A white background with a colored letter means that the Pokémon cannot be found here.
|
Area 1
| Pokémon
|
Games
|
Location
|
Levels
|
Rate
|
|
|
R
|
B
|
Y
|
|
24
|
25%
|
|
|
R
|
B
|
Y
|
|
24
|
5%
|
|
|
R
|
B
|
Y
|
|
21
|
25%
|
|
|
R
|
B
|
Y
|
|
23-25
|
20%
|
|
|
R
|
B
|
Y
|
|
22-26
|
20%
|
|
|
R
|
B
|
Y
|
|
22
|
15%
|
|
|
R
|
B
|
Y
|
|
26
|
15%
|
|
|
R
|
B
|
Y
|
|
33
|
10%
|
|
|
R
|
B
|
Y
|
|
33
|
10%
|
|
|
R
|
B
|
Y
|
|
32
|
10%
|
|
|
R
|
B
|
Y
|
|
24
|
5%
|
|
|
R
|
B
|
Y
|
|
24
|
25%
|
|
|
R
|
B
|
Y
|
|
29
|
15%
|
|
|
R
|
B
|
Y
|
|
19
|
10%
|
|
|
R
|
B
|
Y
|
|
21
|
10%
|
|
|
R
|
B
|
Y
|
|
25
|
5%
|
|
|
R
|
B
|
Y
|
|
24
|
5%
|
|
|
R
|
B
|
Y
|
|
25
|
4%
|
|
|
R
|
B
|
Y
|
|
21
|
4%
|
|
|
R
|
B
|
Y
|
|
28
|
1%
|
|
|
R
|
B
|
Y
|
|
15
|
1%
|
|
|
R
|
B
|
Y
|
|
28
|
1%
|
| Fishing
|
|
|
R
|
B
|
Y
|
|
5
|
100%
|
|
|
R
|
B
|
Y
|
|
10
|
50%
|
|
|
R
|
B
|
Y
|
|
10
|
50%
|
|
|
R
|
B
|
Y
|
|
5-15
|
90%
|
|
|
R
|
B
|
Y
|
|
15
|
25%
|
|
|
R
|
B
|
Y
|
|
15
|
25%
|
|
|
R
|
B
|
Y
|
|
15
|
25%
|
|
|
R
|
B
|
Y
|
|
15
|
25%
|
|
|
R
|
B
|
Y
|
|
15
|
10%
|
| A colored background means that the Pokémon can be found in this location in the specified game. A white background with a colored letter means that the Pokémon cannot be found here.
|
Area 2
| Pokémon
|
Games
|
Location
|
Levels
|
Rate
|
|
|
R
|
B
|
Y
|
|
22
|
25%
|
|
|
R
|
B
|
Y
|
|
36
|
25%
|
|
|
R
|
B
|
Y
|
|
22
|
25%
|
|
|
R
|
B
|
Y
|
|
14
|
15%
|
|
|
R
|
B
|
Y
|
|
25-27
|
20%
|
|
|
R
|
B
|
Y
|
|
20
|
15%
|
|
|
R
|
B
|
Y
|
|
23
|
15%
|
|
|
R
|
B
|
Y
|
|
26
|
15%
|
|
|
R
|
B
|
Y
|
|
25
|
10%
|
|
|
R
|
B
|
Y
|
|
28-33
|
15%
|
|
|
R
|
B
|
Y
|
|
30
|
10%
|
|
|
R
|
B
|
Y
|
|
30
|
5%
|
|
|
R
|
B
|
Y
|
|
30
|
5%
|
|
|
R
|
B
|
Y
|
|
30
|
10%
|
|
|
R
|
B
|
Y
|
|
23
|
10%
|
|
|
R
|
B
|
Y
|
|
32
|
5%
|
|
|
R
|
B
|
Y
|
|
16
|
5%
|
|
|
R
|
B
|
Y
|
|
26
|
4%
|
|
|
R
|
B
|
Y
|
|
25
|
4%
|
|
|
R
|
B
|
Y
|
|
28
|
1%
|
|
|
R
|
B
|
Y
|
|
15
|
1%
|
| Fishing
|
|
|
R
|
B
|
Y
|
|
5
|
100%
|
|
|
R
|
B
|
Y
|
|
10
|
50%
|
|
|
R
|
B
|
Y
|
|
10
|
50%
|
|
|
R
|
B
|
Y
|
|
5-15
|
90%
|
|
|
R
|
B
|
Y
|
|
15
|
25%
|
|
|
R
|
B
|
Y
|
|
15
|
25%
|
|
|
R
|
B
|
Y
|
|
15
|
25%
|
|
|
R
|
B
|
Y
|
|
15
|
25%
|
|
|
R
|
B
|
Y
|
|
15
|
10%
|
| A colored background means that the Pokémon can be found in this location in the specified game. A white background with a colored letter means that the Pokémon cannot be found here.
|
Area 3
| Pokémon
|
Games
|
Location
|
Levels
|
Rate
|
|
|
R
|
B
|
Y
|
|
25
|
25%
|
|
|
R
|
B
|
Y
|
|
25
|
5%
|
|
|
R
|
B
|
Y
|
|
29
|
25%
|
|
|
R
|
B
|
Y
|
|
24-26
|
20%
|
|
|
R
|
B
|
Y
|
|
22-26
|
20%
|
|
|
R
|
B
|
Y
|
|
23
|
15%
|
|
|
R
|
B
|
Y
|
|
26
|
15%
|
|
|
R
|
B
|
Y
|
|
33
|
10%
|
|
|
R
|
B
|
Y
|
|
32
|
10%
|
|
|
R
|
B
|
Y
|
|
33
|
10%
|
|
|
R
|
B
|
Y
|
|
25
|
5%
|
|
|
R
|
B
|
Y
|
|
25
|
25%
|
|
|
R
|
B
|
Y
|
|
21
|
15%
|
|
|
R
|
B
|
Y
|
|
19
|
10%
|
|
|
R
|
B
|
Y
|
|
31
|
5%
|
|
|
R
|
B
|
Y
|
|
24
|
5%
|
|
|
R
|
B
|
Y
|
|
26
|
4%
|
|
|
R
|
B
|
Y
|
|
21
|
10%
|
|
|
R
|
B
|
Y
|
|
25
|
4%
|
|
|
R
|
B
|
Y
|
|
28
|
1%
|
|
|
R
|
B
|
Y
|
|
27
|
1%
|
| Fishing
|
|
|
R
|
B
|
Y
|
|
5
|
100%
|
|
|
R
|
B
|
Y
|
|
10
|
50%
|
|
|
R
|
B
|
Y
|
|
10
|
50%
|
|
|
R
|
B
|
Y
|
|
5-15
|
90%
|
|
|
R
|
B
|
Y
|
|
15
|
25%
|
|
|
R
|
B
|
Y
|
|
15
|
25%
|
|
|
R
|
B
|
Y
|
|
15
|
25%
|
|
|
R
|
B
|
Y
|
|
15
|
25%
|
|
|
R
|
B
|
Y
|
|
15
|
10%
|
| A colored background means that the Pokémon can be found in this location in the specified game. A white background with a colored letter means that the Pokémon cannot be found here.
|
Generation III
Entrance
The entrance is the first area encountered, where the gate to Fuchsia City lies.
| Pokémon
|
Games
|
Location
|
Levels
|
Rate
|
|
|
FR
|
LG
|
|
22
|
20%
|
|
|
FR
|
LG
|
|
22
|
20%
|
|
|
FR
|
LG
|
|
24-25
|
20%
|
|
|
FR
|
LG
|
|
25
|
20%
|
|
|
FR
|
LG
|
|
22
|
15%
|
|
|
FR
|
LG
|
|
31
|
10%
|
|
|
FR
|
LG
|
|
31
|
5%
|
|
|
FR
|
LG
|
|
31
|
5%
|
|
|
FR
|
LG
|
|
31
|
10%
|
|
|
FR
|
LG
|
|
30
|
5%
|
|
|
FR
|
LG
|
|
23
|
4%
|
|
|
FR
|
LG
|
|
23
|
4%
|
|
|
FR
|
LG
|
|
23
|
1%
|
| Surfing
|
|
|
FR
|
LG
|
|
20-40
|
100%
|
|
|
FR
|
LG
|
|
20-40
|
100%
|
| Fishing
|
|
|
FR
|
LG
|
|
5
|
100%
|
|
|
FR
|
LG
|
|
5-15
|
60%
|
|
|
FR
|
LG
|
|
5-15
|
20%
|
|
|
FR
|
LG
|
|
5-15
|
20%
|
|
|
FR
|
LG
|
|
15-25
|
40%
|
|
|
FR
|
LG
|
|
20-30
|
40%
|
|
|
FR
|
LG
|
|
15-25
|
15%
|
|
|
FR
|
LG
|
|
15-35
|
4%
|
|
|
FR
|
LG
|
|
15-35
|
4%
|
|
|
FR
|
LG
|
|
25-35
|
1%
|
| A colored background means that the Pokémon can be found in this location in the specified game. A white background with a colored letter means that the Pokémon cannot be found here.
|
Area 1
Area 1 is to the northeast of the entrance.
| Pokémon
|
Games
|
Location
|
Levels
|
Rate
|
|
|
FR
|
LG
|
|
24
|
20%
|
|
|
FR
|
LG
|
|
24
|
5%
|
|
|
FR
|
LG
|
|
26
|
20%
|
|
|
FR
|
LG
|
|
23-25
|
20%
|
|
|
FR
|
LG
|
|
22
|
15%
|
|
|
FR
|
LG
|
|
33
|
10%
|
|
|
FR
|
LG
|
|
33
|
10%
|
|
|
FR
|
LG
|
|
24
|
5%
|
|
|
FR
|
LG
|
|
24
|
20%
|
|
|
FR
|
LG
|
|
25
|
5%
|
|
|
FR
|
LG
|
|
25
|
4%
|
|
|
FR
|
LG
|
|
23-30
|
1%
|
|
|
FR
|
LG
|
|
28
|
1%
|
| Surfing
|
|
|
FR
|
LG
|
|
20-40
|
100%
|
|
|
FR
|
LG
|
|
20-40
|
100%
|
| Fishing
|
|
|
FR
|
LG
|
|
5
|
100%
|
|
|
FR
|
LG
|
|
5-15
|
60%
|
|
|
FR
|
LG
|
|
5-15
|
20%
|
|
|
FR
|
LG
|
|
5-15
|
20%
|
|
|
FR
|
LG
|
|
15-25
|
40%
|
|
|
FR
|
LG
|
|
20-30
|
40%
|
|
|
FR
|
LG
|
|
15-25
|
15%
|
|
|
FR
|
LG
|
|
15-35
|
4%
|
|
|
FR
|
LG
|
|
15-35
|
4%
|
|
|
FR
|
LG
|
|
25-35
|
1%
|
| A colored background means that the Pokémon can be found in this location in the specified game. A white background with a colored letter means that the Pokémon cannot be found here.
|
Area 2
Area 2 is northwest of the rest house in Area 1.
| Pokémon
|
Games
|
Location
|
Levels
|
Rate
|
|
|
FR
|
LG
|
|
30
|
20%
|
|
|
FR
|
LG
|
|
30
|
20%
|
|
|
FR
|
LG
|
|
25-27
|
20%
|
|
|
FR
|
LG
|
|
26
|
20%
|
|
|
FR
|
LG
|
|
23
|
15%
|
|
|
FR
|
LG
|
|
30
|
10%
|
|
|
FR
|
LG
|
|
30
|
5%
|
|
|
FR
|
LG
|
|
30
|
5%
|
|
|
FR
|
LG
|
|
30
|
10%
|
|
|
FR
|
LG
|
|
32
|
5%
|
|
|
FR
|
LG
|
|
26
|
4%
|
|
|
FR
|
LG
|
|
28
|
1%
|
| Surfing
|
|
|
FR
|
LG
|
|
20-40
|
100%
|
|
|
FR
|
LG
|
|
20-40
|
100%
|
| Fishing
|
|
|
FR
|
LG
|
|
5
|
100%
|
|
|
FR
|
LG
|
|
5-15
|
60%
|
|
|
FR
|
LG
|
|
5-15
|
20%
|
|
|
FR
|
LG
|
|
5-15
|
20%
|
|
|
FR
|
LG
|
|
15-25
|
40%
|
|
|
FR
|
LG
|
|
20-30
|
40%
|
|
|
FR
|
LG
|
|
15-25
|
15%
|
|
|
FR
|
LG
|
|
15-35
|
4%
|
|
|
FR
|
LG
|
|
15-35
|
4%
|
|
|
FR
|
LG
|
|
25-35
|
1%
|
| A colored background means that the Pokémon can be found in this location in the specified game. A white background with a colored letter means that the Pokémon cannot be found here.
|
Area 3
Area 3 is south of the northwestern part of Area 2.
| Pokémon
|
Games
|
Location
|
Levels
|
Rate
|
|
|
FR
|
LG
|
|
22
|
20%
|
|
|
FR
|
LG
|
|
30
|
5%
|
|
|
FR
|
LG
|
|
26
|
20%
|
|
|
FR
|
LG
|
|
25-27
|
20%
|
|
|
FR
|
LG
|
|
23
|
15%
|
|
|
FR
|
LG
|
|
30
|
10%
|
|
|
FR
|
LG
|
|
30
|
10%
|
|
|
FR
|
LG
|
|
30
|
5%
|
|
|
FR
|
LG
|
|
22
|
20%
|
|
|
FR
|
LG
|
|
32
|
5%
|
|
|
FR
|
LG
|
|
25
|
4%
|
|
|
FR
|
LG
|
|
28
|
1%
|
| Surfing
|
|
|
FR
|
LG
|
|
20-40
|
100%
|
|
|
FR
|
LG
|
|
20-40
|
100%
|
| Fishing
|
|
|
FR
|
LG
|
|
5
|
100%
|
|
|
FR
|
LG
|
|
5-15
|
60%
|
|
|
FR
|
LG
|
|
5-15
|
20%
|
|
|
FR
|
LG
|
|
5-15
|
20%
|
|
|
FR
|
LG
|
|
15-25
|
40%
|
|
|
FR
|
LG
|
|
20-30
|
40%
|
|
|
FR
|
LG
|
|
15-25
|
15%
|
|
|
FR
|
LG
|
|
15-35
|
4%
|
|
|
FR
|
LG
|
|
15-35
|
4%
|
|
|
FR
|
LG
|
|
25-35
|
1%
|
| A colored background means that the Pokémon can be found in this location in the specified game. A white background with a colored letter means that the Pokémon cannot be found here.
|
Layout
In the spin-off games
In Pokémon Pinball
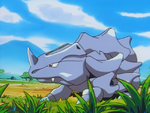
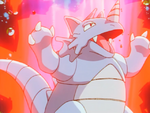
In Pokémon Pinball, the Safari Zone appears on the Red and Blue tables; catchable Pokémon include Nidoran♀, Nidoran♂, Paras, Doduo, Grimer, Rhyhorn, Chansey, Scyther, Pinsir and Tauros.
In the anime
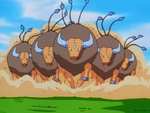
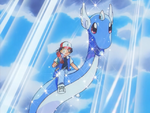
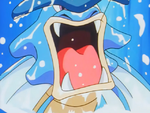
The Kanto Safari Zone appears only once in the anime: in EP035, an episode which aired only in Japan.
In the anime, the Safari Zone is run by a gun-toting warden, Kaiser. Like in the games, Trainers are restricted to only thirty Safari Balls per challenge. It is explained that this is because of too many Trainers capturing all the rarest Pokémon too rapidly and due to searching for the Pokémon Dratini.
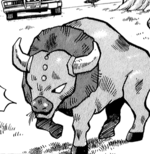
Ash captures thirty Tauros in his Safari challenge.
Pokémon
In the manga
In the Pokémon Adventures manga
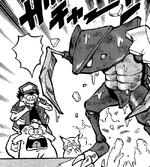
In the Red, Green & Blue arc, Red visits the Safari Zone during Meanwhile... Vileplume!, Long Live the Nidoking! and A Hollow Victreebel. With the help of the two robots Pidgebot1 and Pidgebot2, Red goes through the jungle on a moving wooden plank. When he encounters two Nidoking fighting over a Nidoqueen, Red decided to capture a Nidoking. The Nidoking blocked the Poké Ball with its arm hitting the Nidoqueen straight on the head capturing the Nidoqueen. This made the Nidoking very angry. It began to rampage and crush everything. Red threw Rocks at Nidoking, hurting it badly and making it even angry, but managed to escape.
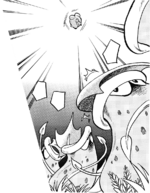
Later, Red was eaten by a Victreebel (using Vine Whip). He was not digested, however; merely tied up for a feast in the near future. This feast would be to celebrate the evolution of Bellsprout and Weepinbell. Red and Pidgebot had an idea to use a Poké Flute to wake the Grass Pokémon up, and distracted them with a Poké Doll before escaping. Unfortunately, they ran straight into the Nidoking from earlier on. Using a caught Victreebel, Red was also able to capture the Nidoking.
Pokémon
Red captures several Pokémon in the Safari Zone. Despite the fact that he was not supposed to bring any regular Poké Balls, Red managed to smuggle one in and catch a Nidoqueen. The others were caught using the custom Safari Balls he was given.
In the Pokémon Pocket Monsters manga
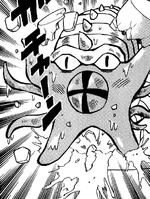
Red and his Pokémon visit the Safari Zone in Rampage At The Safari Zone?!. It ends up being wrecked by Clefairy's destructive powers.
Pokémon
Trivia
- The background music is Evolution (Japanese: 進化).
- The Safari Zone is a location in Generation II, but is very minimally programmed into the game. It can only be accessed by changing the warp pointers when a room is entered; however, when it has been accessed, the area is unmistakably the entrance area, complete with music. It is apparently a leftover from the development builds of Gold and Silver.
- As shown in the video below, in Pokémon Yellow, it is possible to enter the Safari Zone for a discounted price (with a proportionately lower number of Safari Balls) if the player tries to enter with less than $500, and then for free with only a single Safari Ball if the player tries to go back in with $0.
|
|
| This video is not available on Bulbapedia; instead, you can watch the video on YouTube here.
|
In other languages
