Spring Cave: Difference between revisions
Added info to the Pokemon Encountered tables (floors where Ekans and Baltoy can be found & their respective levels). |
No edit summary |
||
| Line 1: | Line 1: | ||
{{DungeonPrevNext|Fortune Ravine|Southern Jungle|3}} | {{DungeonPrevNext|Fortune Ravine|Southern Jungle|3}} | ||
{{dungeon infobox | {{dungeon infobox | ||
| Line 17: | Line 16: | ||
|teamsize={{tt|1|Sunflora only; Loudred joins for Spring Cave Pit boss battle}} | |teamsize={{tt|1|Sunflora only; Loudred joins for Spring Cave Pit boss battle}} | ||
|startlevel=Current | |startlevel=Current | ||
|maintype={{t|Ground}}, <small>{{t|Psychic}}</small>{{tt|*|Spring Cave}}<br>{{t|Ground}}, <small>{{t|Rock}}</small>{{tt|*|Upper Spring Cave}}<br>{{t| | |maintype={{t|Ground}}, <small>{{t|Psychic}}</small>{{tt|*|Spring Cave}}<br>{{t|Ground}}, <small>{{t|Rock}}</small>{{tt|*|Upper Spring Cave}}<br>{{t|Psychic}}, <small>{{t|Rock}}, {{t|Ground}}, {{t|Poison}}</small>{{tt|*|Lower Spring Cave}}<br>{{t|Psychic}}, <small>{{t|Poison}}</small>{{tt|*|Spring Cave Depths}} | ||
|boss={{p|Haunter}}{{tt|*|One at Upper Spring Cave entrance, one at Middle Spring Cave, and three in Spring Cave Pit}} | |boss={{p|Haunter}}{{tt|*|One at Upper Spring Cave entrance, one at Middle Spring Cave, and three in Spring Cave Pit}} | ||
}} | }} | ||
'''Spring Cave''' (Japanese: '''げんせんのどうくつ''' ''Source Cave'') is a [[dungeon]] in {{g|Mystery Dungeon: Explorers of Sky}}. It is exclusive to the third [[Special Episode]], ''[[Today's "Oh My Gosh"]]''. | '''Spring Cave''' (Japanese: '''げんせんのどうくつ''' ''Source Cave'') is a [[dungeon]] in {{g|Mystery Dungeon: Explorers of Sky}}. It is exclusive to the third [[Special Episode]], ''[[Today's "Oh My Gosh"]]''. | ||
There is a relay point between the Lower Spring Cave and the Spring Cave Depths. Spring Cave, Upper Spring Cave, Lower Spring Cave, and Spring Cave Depths have 4 floors each | There is a relay point between the Lower Spring Cave and the Spring Cave Depths. Spring Cave, Upper Spring Cave, Lower Spring Cave, and Spring Cave Depths have 4 floors each. | ||
The music for the area includes [[Magma Cavern]] and Magma Cavern Pit from the first [[Pokémon Mystery Dungeon: Red Rescue Team and Blue Rescue Team|Pokémon Mystery Dungeon]] games as well as a remix of Magma Cavern Pit in the Spring Cave Depths. | The music for the area includes [[Magma Cavern]] and Magma Cavern Pit from the first [[Pokémon Mystery Dungeon: Red Rescue Team and Blue Rescue Team|Pokémon Mystery Dungeon]] games as well as a remix of Magma Cavern Pit in the Spring Cave Depths. | ||
| Line 31: | Line 30: | ||
===Spring Cave=== | ===Spring Cave=== | ||
{{mdloc/h|Ground|psychic}} | {{mdloc/h|Ground|psychic}} | ||
{{mdloc| | {{mdloc|307|Meditite|1-2|14|0}} | ||
{{mdloc| | {{mdloc|104|Cubone|1-4|20|0}} | ||
{{mdloc| | {{mdloc|343|Baltoy|1-4|23|0}} | ||
{{mdloc| | {{mdloc|209|Snubbull|1-4|16|0}} | ||
{{mdloc|328|Trapinch|3|22|0}} | {{mdloc|328|Trapinch|3-4|22|0}} | ||
{{mdloc/f|ground|Since this is a Special Episode, no Pokémon can be recruited.}} | {{mdloc/f|ground|Since this is a Special Episode, no Pokémon can be recruited.}} | ||
===Upper Spring Cave=== | ===Upper Spring Cave=== | ||
{{mdloc/h|Ground}} | {{mdloc/h|Ground}} | ||
{{mdloc| | {{mdloc|093|Haunter|Top|25|0|boss=yes}} | ||
{{mdloc|328|Trapinch|1-2|23|0}} | {{mdloc|328|Trapinch|1-2|23|0}} | ||
{{mdloc|246|Larvitar|1-3|23|0}} | |||
{{mdloc|331|Cacnea|1-4|20|0}} | |||
{{mdloc|413|Wormadam|1-4|27|0|Sand}} | {{mdloc|413|Wormadam|1-4|27|0|Sand}} | ||
{{mdloc|304|Aron|2-4|23|0}} | {{mdloc|304|Aron|2-4|23|0}} | ||
{{mdloc|095|Onix|4|29|0}} | {{mdloc|095|Onix|4|29|0}} | ||
{{mdloc/f|rock|Since this is a Special Episode, no Pokémon can be recruited.}} | {{mdloc/f|rock|Since this is a Special Episode, no Pokémon can be recruited.}} | ||
===Middle Spring Cave=== | ===Middle Spring Cave=== | ||
{{mdloc/h| | {{mdloc/h|ghost}} | ||
{{mdloc|093|Haunter|5|27|0|boss=yes}} | {{mdloc|093|Haunter|5|27|0|boss=yes}} | ||
{{mdloc/f| | {{mdloc/f|poison}} | ||
===Lower Spring Cave=== | ===Lower Spring Cave=== | ||
{{mdloc/h| | {{mdloc/h|psychic|poison}} | ||
{{mdloc|095|Onix|1|30|0}} | {{mdloc|095|Onix|1-2|30|0}} | ||
{{mdloc|046|Paras|1-4|13|0}} | |||
{{mdloc|374|Beldum|1-4|27|0}} | {{mdloc|374|Beldum|1-4|27|0}} | ||
{{mdloc| | {{mdloc|041|Zubat|2-4|16|0}} | ||
{{mdloc| | {{mdloc|023|Ekans|3-4|18|0}} | ||
{{mdloc|408|Cranidos|3-4|27|0}} | {{mdloc|408|Cranidos|3-4|27|0}} | ||
{{mdloc|307|Meditite|4|16|0}} | |||
{{mdloc|343|Baltoy|4|25|0}} | {{mdloc|343|Baltoy|4|25|0}} | ||
{{mdloc/f|ground|Since this is a Special Episode, no Pokémon can be recruited.}} | {{mdloc/f|ground|Since this is a Special Episode, no Pokémon can be recruited.}} | ||
===Spring Cave Depths=== | ===Spring Cave Depths=== | ||
{{mdloc/h|psychic | {{mdloc/h|psychic}} | ||
{{mdloc|046|Paras|1|14|0}} | {{mdloc|046|Paras|1|14|0}} | ||
{{mdloc| | {{mdloc|023|Ekans|1-3|19|0}} | ||
{{mdloc|408|Cranidos|1-3|28|0}} | {{mdloc|408|Cranidos|1-3|28|0}} | ||
{{mdloc|041|Zubat| | {{mdloc|041|Zubat|1-4|16|0}} | ||
{{mdloc|307|Meditite| | {{mdloc|307|Meditite|1-4|17|0}} | ||
{{mdloc|343|Baltoy| | {{mdloc|343|Baltoy|1-4|26|0}} | ||
{{mdloc| | {{mdloc|374|Beldum|1-4|28|0}} | ||
{{mdloc/f|poison|Since this is a Special Episode, no Pokémon can be recruited.}} | {{mdloc/f|poison|Since this is a Special Episode, no Pokémon can be recruited.}} | ||
===Spring Cave Pit=== | ===Spring Cave Pit=== | ||
{{mdloc/h| | {{mdloc/h|ghost}} | ||
{{mdloc|093|Haunter|Pit|29|0|boss=yes}} | {{mdloc|093|Haunter|Pit|29|0|boss=yes}} | ||
{{mdloc/f| | {{mdloc/f|poison|There are three Haunter}} | ||
==Items== | |||
===Ground=== | |||
{{DungeonItem/h|ground}} | |||
{{DungeonItem|Poké|3=All |4=2-200|sprite=MDBag Poké TDS Sprite}} | |||
{{DungeonItem|Insomniscope|Glasses|All |sprite=MDBag Scope TDS Sprite}} | |||
{{DungeonItem|Def. Scarf|Scarf (Mystery Dungeon)|sprite=MDBag Scarf TDS Sprite|All }} | |||
{{DungeonItem|Pecha Scarf|Scarf (Mystery Dungeon)|sprite=MDBag Scarf TDS Sprite|All }} | |||
{{DungeonItem|Persim Band|Scarf (Mystery Dungeon)|sprite=MDBag Scarf TDS Sprite|All }} | |||
{{DungeonItem|Power Band|Scarf (Mystery Dungeon)|sprite=MDBag Scarf TDS Sprite|All }} | |||
{{DungeonItem|Special Band|Scarf (Mystery Dungeon)|sprite=MDBag Scarf TDS Sprite|All }} | |||
{{DungeonItem|Stamina Band|Scarf (Mystery Dungeon)|sprite=MDBag Scarf TDS Sprite|All }} | |||
{{DungeonItem|Zinc Band|Scarf (Mystery Dungeon)|sprite=MDBag Scarf TDS Sprite|All }} | |||
{{DungeonItem|Gravelerock|Gravelerock|All |5}} | |||
{{DungeonItem|Iron Thorn|Iron Thorn|All |4|RTRB TDS}} | |||
{{DungeonItem|Apple|Apple|All }} | |||
{{DungeonItem|Cheri Berry|Cheri Berry|All }} | |||
{{DungeonItem|Chesto Berry|Chesto Berry|All |5=RTRB TDS}} | |||
{{DungeonItem|Oran Berry|Oran Berry|All }} | |||
{{DungeonItem|Pecha Berry|Pecha Berry|All }} | |||
{{DungeonItem|Rawst Berry|Rawst Berry|All }} | |||
{{DungeonItem|Blinker Seed|Seed|All }} | |||
{{DungeonItem|Eyedrop Seed|Seed|All }} | |||
{{DungeonItem|Reviver Seed|Seed|All }} | |||
{{DungeonItem|Totter Seed|Seed|All }} | |||
{{DungeonItem|Max Elixir|Health drink|All |sprite=MDBag Drink TDS Sprite}} | |||
{{DungeonItem|All-Hit Orb|Wonder Orb|All }} | |||
{{DungeonItem|All-Mach Orb|Wonder Orb|All }} | |||
{{DungeonItem|Decoy Orb|Wonder Orb|All }} | |||
{{DungeonItem|Escape Orb|Wonder Orb|All }} | |||
{{DungeonItem|Foe-Fear Orb|Wonder Orb|All }} | |||
{{DungeonItem|Foe-Hold Orb|Wonder Orb|All }} | |||
{{DungeonItem|Foe-Seal Orb|Wonder Orb|All }} | |||
{{DungeonItem|Luminous Orb|Wonder Orb|All }} | |||
{{DungeonItem|Petrify Orb|Wonder Orb|All }} | |||
{{DungeonItem|Quick Orb|Wonder Orb|All }} | |||
{{DungeonItem|Radar Orb|Wonder Orb|All }} | |||
{{DungeonItem|Scanner Orb|Wonder Orb|All }} | |||
{{DungeonItem|Spurn Orb|Wonder Orb|All }} | |||
{{DungeonItem|Sunny Orb|Wonder Orb|All }} | |||
{{DungeonItem|Warp Orb|Wonder Orb|All }} | |||
|} | |||
===Kecleon Shop=== | |||
{{DungeonItem/h|ground}} | |||
{{DungeonItem|Scope Lens|3=B1-B4F, UB1-UB4}} | |||
{{DungeonItem|Def. Scarf|Scarf (Mystery Dungeon)|sprite=MDBag Scarf TDS Sprite|B1-B4F, UB1-UB4}} | |||
{{DungeonItem|Heal Ribbon|Scarf (Mystery Dungeon)|sprite=MDBag Scarf TDS Sprite|B1-B4F, UB1-UB4}} | |||
{{DungeonItem|Patsy Band|Scarf (Mystery Dungeon)|sprite=MDBag Scarf TDS Sprite|B1-B4F, UB1-UB4}} | |||
{{DungeonItem|Persim Band|Scarf (Mystery Dungeon)|sprite=MDBag Scarf TDS Sprite|B1-B4F, UB1-UB4}} | |||
{{DungeonItem|Power Band|Scarf (Mystery Dungeon)|sprite=MDBag Scarf TDS Sprite|B1-B4F, UB1-UB4}} | |||
{{DungeonItem|Special Band|Scarf (Mystery Dungeon)|sprite=MDBag Scarf TDS Sprite|B1-B4F, UB1-UB4}} | |||
{{DungeonItem|Twist Band|Scarf (Mystery Dungeon)|sprite=MDBag Scarf TDS Sprite|B1-B4F, UB1-UB4}} | |||
{{DungeonItem|Zinc Band|Scarf (Mystery Dungeon)|sprite=MDBag Scarf TDS Sprite|B1-B4F, UB1-UB4}} | |||
{{DungeonItem|Big Apple|Apple|B1-B4F, UB1-UB4}} | |||
{{DungeonItem|Cheri Berry|3=B1-B4F, UB1-UB4}} | |||
{{DungeonItem|Chesto Berry|3=B1-B4F, UB1-UB4|5=RTRB TDS}} | |||
{{DungeonItem|Pecha Berry|3=B1-B4F, UB1-UB4}} | |||
{{DungeonItem|Rawst Berry|3=B1-B4F, UB1-UB4}} | |||
{{DungeonItem|Sitrus Berry|3=B1-B4F, UB1-UB4}} | |||
{{DungeonItem|Max Elixir|Health drink|B1-B4F, UB1-UB4|sprite=MDBag Drink TDS Sprite}} | |||
{{DungeonItem|Blinker Seed|Seed|B1-B4F, UB1-UB4}} | |||
{{DungeonItem|Eyedrop Seed|Seed|B1-B4F, UB1-UB4}} | |||
{{DungeonItem|Heal Seed|Seed|B1-B4F, UB1-UB4}} | |||
{{DungeonItem|Hunger Seed|Seed|B1-B4F, UB1-UB4}} | |||
{{DungeonItem|Life Seed|Seed|B1-B4F, UB1-UB4}} | |||
{{DungeonItem|Reviver Seed|Seed|B1-B4F, UB1-UB4}} | |||
{{DungeonItem|Sleep Seed|Seed|B1-B4F, UB1-UB4}} | |||
{{DungeonItem|Stun Seed|Seed|B1-B4F, UB1-UB4}} | |||
{{DungeonItem|Totter Seed|Seed|B1-B4F, UB1-UB4}} | |||
{{DungeonItem|Vile Seed|Seed|B1-B4F, UB1-UB4}} | |||
{{DungeonItem|Violent Seed|Seed|B1-B4F, UB1-UB4}} | |||
{{DungeonItem|Warp Seed|Seed|B1-B4F, UB1-UB4}} | |||
{{DungeonItem|Attract|TM|B1-B4F, UB1-UB4}} | |||
{{DungeonItem|Brine|TM|B1-B4F, UB1-UB4}} | |||
{{DungeonItem|Bullet Seed|TM|B1-B4F, UB1-UB4}} | |||
{{DungeonItem|Calm Mind|TM|B1-B4F, UB1-UB4}} | |||
{{DungeonItem|Dig|TM|B1-B4F, UB1-UB4}} | |||
{{DungeonItem|Embargo|TM|B1-B4F, UB1-UB4}} | |||
{{DungeonItem|False Swipe|TM|B1-B4F, UB1-UB4}} | |||
{{DungeonItem|Flash|TM|B1-B4F, UB1-UB4}} | |||
{{DungeonItem|Giga Drain|TM|B1-B4F, UB1-UB4}} | |||
{{DungeonItem|Giga Impact|TM|B1-B4F, UB1-UB4}} | |||
{{DungeonItem|Hidden Power|TM|B1-B4F, UB1-UB4}} | |||
{{DungeonItem|Hyper Beam|TM|B1-B4F, UB1-UB4}} | |||
{{DungeonItem|Iron Tail|TM|B1-B4F, UB1-UB4}} | |||
{{DungeonItem|Light Screen|TM|B1-B4F, UB1-UB4}} | |||
{{DungeonItem|Payback|TM|B1-B4F, UB1-UB4}} | |||
{{DungeonItem|Poison Jab|TM|B1-B4F, UB1-UB4}} | |||
{{DungeonItem|Recycle|TM|B1-B4F, UB1-UB4}} | |||
{{DungeonItem|Reflect|TM|B1-B4F, UB1-UB4}} | |||
{{DungeonItem|Rest|TM|B1-B4F, UB1-UB4}} | |||
{{DungeonItem|Roar|TM|B1-B4F, UB1-UB4}} | |||
{{DungeonItem|Rock Slide|TM|B1-B4F, UB1-UB4}} | |||
{{DungeonItem|Roost|TM|B1-B4F, UB1-UB4}} | |||
{{DungeonItem|Safeguard|TM|B1-B4F, UB1-UB4}} | |||
{{DungeonItem|Shadow Claw|TM|B1-B4F, UB1-UB4}} | |||
{{DungeonItem|Shock Wave|TM|B1-B4F, UB1-UB4}} | |||
{{DungeonItem|SolarBeam|TM|B1-B4F, UB1-UB4}} | |||
{{DungeonItem|Stealth Rock|TM|B1-B4F, UB1-UB4}} | |||
{{DungeonItem|Steel Wing|TM|B1-B4F, UB1-UB4}} | |||
{{DungeonItem|Swords Dance|TM|B1-B4F, UB1-UB4}} | |||
{{DungeonItem|Thunderbolt|TM|B1-B4F, UB1-UB4}} | |||
{{DungeonItem|Vacuum-Cut|TM|B1-B4F, UB1-UB4}} | |||
{{DungeonItem|Wide Slash|TM|B1-B4F, UB1-UB4}} | |||
{{DungeonItem|All-Hit Orb|Wonder Orb|B1-B4F, UB1-UB4}} | |||
{{DungeonItem|All-Mach Orb|Wonder Orb|B1-B4F, UB1-UB4}} | |||
{{DungeonItem|Decoy Orb|Wonder Orb|B1-B4F, UB1-UB4}} | |||
{{DungeonItem|Foe-Fear Orb|Wonder Orb|B1-B4F, UB1-UB4}} | |||
{{DungeonItem|Foe-Hold Orb|Wonder Orb|B1-B4F, UB1-UB4}} | |||
{{DungeonItem|Foe-Seal Orb|Wonder Orb|B1-B4F, UB1-UB4}} | |||
{{DungeonItem|Hurl Orb|Wonder Orb|B1-B4F, UB1-UB4}} | |||
{{DungeonItem|Luminous Orb|Wonder Orb|B1-B4F, UB1-UB4}} | |||
{{DungeonItem|One-Shot Orb|Wonder Orb|B1-B4F, UB1-UB4}} | |||
{{DungeonItem|Petrify Orb|Wonder Orb|B1-B4F, UB1-UB4}} | |||
{{DungeonItem|Pounce Orb|Wonder Orb|B1-B4F, UB1-UB4}} | |||
{{DungeonItem|Radar Orb|Wonder Orb|B1-B4F, UB1-UB4}} | |||
{{DungeonItem|Scanner Orb|Wonder Orb|B1-B4F, UB1-UB4}} | |||
{{DungeonItem|See-Trap Orb|Wonder Orb|B4F, UB2-UB4}} | |||
{{DungeonItem|Shocker Orb|Wonder Orb|B1-B4F, UB1-UB4}} | |||
{{DungeonItem|Silence Orb|Wonder Orb|B1-B4F, UB1-UB4}} | |||
{{DungeonItem|Slow Orb|Wonder Orb|B1-B4F, UB1-UB4}} | |||
{{DungeonItem|Slumber Orb|Wonder Orb|B1-B4F, UB1-UB4}} | |||
{{DungeonItem|Spurn Orb|Wonder Orb|B1-B4F, UB1-UB4}} | |||
{{DungeonItem|Stairs Orb|Wonder Orb|B1-B4F, UB1-UB4}} | |||
{{DungeonItem|Stayaway Orb|Wonder Orb|B1-B4F, UB1-UB4}} | |||
{{DungeonItem|Totter Orb|Wonder Orb|B1-B4F, UB1-UB4}} | |||
{{DungeonItem|Trapbust Orb|Wonder Orb|B4F, UB2-UB4}} | |||
{{DungeonItem|Warp Orb|Wonder Orb|B1-B4F, UB1-UB4}} | |||
|} | |||
===Monster House=== | |||
{{DungeonItem/h|ground}} | |||
{{DungeonItem|Poké|3=All after B4|4=2-200|sprite=MDBag Poké TDS Sprite}} | |||
{{DungeonItem|Black Gummi|Black Gummi|All after B4}} | |||
{{DungeonItem|Blue Gummi|Blue Gummi|All after B4}} | |||
{{DungeonItem|Brown Gummi|Brown Gummi|All after B4}} | |||
{{DungeonItem|Clear Gummi|Clear Gummi|All after B4}} | |||
{{DungeonItem|Gold Gummi|Gold Gummi|All after B4}} | |||
{{DungeonItem|Grass Gummi|Grass Gummi|All after B4}} | |||
{{DungeonItem|Gray Gummi|Gray Gummi|All after B4}} | |||
{{DungeonItem|Green Gummi|Green Gummi|All after B4}} | |||
{{DungeonItem|Orange Gummi|Orange Gummi|All after B4}} | |||
{{DungeonItem|Pink Gummi|Pink Gummi|All after B4}} | |||
{{DungeonItem|Purple Gummi|Purple Gummi|All after B4}} | |||
{{DungeonItem|Red Gummi|Red Gummi|All after B4}} | |||
{{DungeonItem|Royal Gummi|Royal Gummi|All after B4}} | |||
{{DungeonItem|Silver Gummi|Silver Gummi|All after B4}} | |||
{{DungeonItem|Sky Gummi|Sky Gummi|All after B4}} | |||
{{DungeonItem|White Gummi|White Gummi|All after B4}} | |||
{{DungeonItem|Yellow Gummi|Yellow Gummi|All after B4}} | |||
{{DungeonItem|Aerial Ace|TM|All after B4}} | |||
{{DungeonItem|Attract|TM|All after B4}} | |||
{{DungeonItem|Brick Break|TM|All after B4}} | |||
{{DungeonItem|Brine|TM|All after B4}} | |||
{{DungeonItem|Bullet Seed|TM|All after B4}} | |||
{{DungeonItem|Calm Mind|TM|All after B4}} | |||
{{DungeonItem|Dig|TM|All after B4}} | |||
{{DungeonItem|Dive|TM|All after B4}} | |||
{{DungeonItem|Embargo|TM|All after B4}} | |||
{{DungeonItem|Energy Ball|TM|All after B4}} | |||
{{DungeonItem|Explosion|TM|All after B4}} | |||
{{DungeonItem|False Swipe|TM|All after B4}} | |||
{{DungeonItem|Flash|TM|All after B4}} | |||
{{DungeonItem|Focus Blast|TM|All after B4}} | |||
{{DungeonItem|Focus Punch|TM|All after B4}} | |||
{{DungeonItem|Giga Drain|TM|All after B4}} | |||
{{DungeonItem|Giga Impact|TM|All after B4}} | |||
{{DungeonItem|Hidden Power|TM|All after B4}} | |||
{{DungeonItem|Hyper Beam|TM|All after B4}} | |||
{{DungeonItem|Iron Tail|TM|All after B4}} | |||
{{DungeonItem|Light Screen|TM|All after B4}} | |||
{{DungeonItem|Natural Gift|TM|All after B4}} | |||
{{DungeonItem|Payback|TM|All after B4}} | |||
{{DungeonItem|Poison Jab|TM|All after B4}} | |||
{{DungeonItem|Protect|TM|All after B4}} | |||
{{DungeonItem|Recycle|TM|All after B4}} | |||
{{DungeonItem|Reflect|TM|All after B4}} | |||
{{DungeonItem|Rest|TM|All after B4}} | |||
{{DungeonItem|Roar|TM|All after B4}} | |||
{{DungeonItem|Rock Slide|TM|All after B4}} | |||
{{DungeonItem|Roost|TM|All after B4}} | |||
{{DungeonItem|Safeguard|TM|All after B4}} | |||
{{DungeonItem|Shadow Claw|TM|All after B4}} | |||
{{DungeonItem|Shock Wave|TM|All after B4}} | |||
{{DungeonItem|SolarBeam|TM|All after B4}} | |||
{{DungeonItem|Stealth Rock|TM|All after B4}} | |||
{{DungeonItem|Steel Wing|TM|All after B4}} | |||
{{DungeonItem|Swords Dance|TM|All after B4}} | |||
{{DungeonItem|Taunt|TM|All after B4}} | |||
{{DungeonItem|Thunder Wave|TM|All after B4}} | |||
{{DungeonItem|Thunderbolt|TM|All after B4}} | |||
{{DungeonItem|Torment|TM|All after B4}} | |||
{{DungeonItem|Vacuum-Cut|TM|All after B4}} | |||
{{DungeonItem|Water Pulse|TM|All after B4}} | |||
{{DungeonItem|Wide Slash|TM|All after B4}} | |||
{{DungeonItem|All-Hit Orb|Wonder Orb|All after B4}} | |||
{{DungeonItem|All-Mach Orb|Wonder Orb|All after B4}} | |||
{{DungeonItem|Blowback Orb|Wonder Orb|All after B4}} | |||
{{DungeonItem|Cleanse Orb|Wonder Orb|All after B4}} | |||
{{DungeonItem|Decoy Orb|Wonder Orb|All after B4}} | |||
{{DungeonItem|Evasion Orb|Wonder Orb|All after B4}} | |||
{{DungeonItem|Foe-Fear Orb|Wonder Orb|All after B4}} | |||
{{DungeonItem|Foe-Hold Orb|Wonder Orb|All after B4}} | |||
{{DungeonItem|Foe-Seal Orb|Wonder Orb|All after B4}} | |||
{{DungeonItem|Hurl Orb|Wonder Orb|All after B4}} | |||
{{DungeonItem|Invisify Orb|Wonder Orb|All after B4}} | |||
{{DungeonItem|Itemizer Orb|Wonder Orb|All after B4}} | |||
{{DungeonItem|Luminous Orb|Wonder Orb|All after B4}} | |||
{{DungeonItem|Mug Orb|Wonder Orb|All after B4}} | |||
{{DungeonItem|One-Shot Orb|Wonder Orb|All after B4}} | |||
{{DungeonItem|Petrify Orb|Wonder Orb|All after B4}} | |||
{{DungeonItem|Pounce Orb|Wonder Orb|All after B4}} | |||
{{DungeonItem|Radar Orb|Wonder Orb|All after B4}} | |||
{{DungeonItem|Rebound Orb|Wonder Orb|All after B4}} | |||
{{DungeonItem|Scanner Orb|Wonder Orb|All after B4}} | |||
{{DungeonItem|See-Trap Orb|Wonder Orb|All after B4}} | |||
{{DungeonItem|Silence Orb|Wonder Orb|All after B4}} | |||
{{DungeonItem|Slumber Orb|Wonder Orb|All after B4}} | |||
{{DungeonItem|Snatch Orb|Wonder Orb|All after B4}} | |||
{{DungeonItem|Spurn Orb|Wonder Orb|All after B4}} | |||
{{DungeonItem|Switcher Orb|Wonder Orb|All after B4}} | |||
{{DungeonItem|Totter Orb|Wonder Orb|All after B4}} | |||
{{DungeonItem|Transfer Orb|Wonder Orb|All after B4}} | |||
{{DungeonItem|Trapbust Orb|Wonder Orb|All after B4}} | |||
{{DungeonItem|Trawl Orb|Wonder Orb|All after B4}} | |||
{{DungeonItem|Warp Orb|Wonder Orb|All after B4}} | |||
|} | |||
===Buried items=== | |||
{{DungeonItem/h|ground}} | |||
{{DungeonItem|Poké|3=All |4=2-200|sprite=MDBag Poké TDS Sprite}} | |||
|} | |||
==Traps== | ==Traps== | ||
The amount of traps depends on the floor: | |||
*0 on floor 1 of Spring Cave | |||
*3-6 on floor 2 of Spring Cave | |||
*3-7 on floor 3 of Spring Cave | |||
*4-8 on all later floors | |||
Game will spawn extra in a Monster House. | |||
{| class="roundy" style="text-align: center; background: #{{ground color}}; border: 3px solid #{{psychic color dark}}" | {| class="roundy" style="text-align: center; background: #{{ground color}}; border: 3px solid #{{psychic color dark}}" | ||
|- | |- | ||
! style="background: #{{ground color light}}; {{roundytl|5px}}" | Image | ! style="background: #{{ground color light}}; {{roundytl|5px}}" | Image | ||
! style="background-color: #{{ground color light}}; {{roundytr|5px}}" | | ! style="background-color: #{{ground color light}} |Trap | ||
! style="background-color: #{{ground color light}}; {{roundytr|5px}}" | Appearance % | |||
|- style="background: #FFFFFF" | |- style="background: #FFFFFF" | ||
| align="center"| [[File: | | align="center"| [[File:Gust Trap RTRB TDS.png]] | ||
| align="center"| '''Gust Trap''' | | align="center"| '''Gust Trap''' | ||
| align="center"| 6.25% | |||
|- style="background: #FFFFFF" | |||
|- style="background: #FFFFFF" | |- style="background: #FFFFFF" | ||
| align="center"| [[File: | | align="center"| [[File:Poison Trap RTRB TDS.png]] | ||
| align="center"| '''Poison Trap''' | | align="center"| '''Poison Trap''' | ||
| align="center"| 6.25% | |||
|- style="background: #FFFFFF" | |- style="background: #FFFFFF" | ||
| align="center"| [[File: | |- style="background: #FFFFFF" | ||
| align="center"| [[File:Slow Trap RTRB TDS.png]] | |||
| align="center"| '''Slow Trap''' | | align="center"| '''Slow Trap''' | ||
| align="center"| 6.25% | |||
|- style="background: #FFFFFF" | |- style="background: #FFFFFF" | ||
| align="center"| [[File: | | align="center"| [[File:Slumber Trap RTRB TDS.png]] | ||
| align="center"| '''Slumber Trap''' | | align="center"| '''Slumber Trap''' | ||
| align="center"| 6.25% | |||
|- style="background: #FFFFFF" | |- style="background: #FFFFFF" | ||
| align="center"| [[File: | | align="center"| [[File:Spin Trap RTRB TDS.png]] | ||
| align="center"| '''Spin Trap''' | | align="center"| '''Spin Trap''' | ||
| align="center"| 6.25% | |||
|- style="background: #FFFFFF" | |- style="background: #FFFFFF" | ||
| align="center"| [[File: | |- style="background: #FFFFFF" | ||
| align="center"| [[File:Summon Trap RTRB TDS.png]] | |||
| align="center"| '''Summon Trap''' | | align="center"| '''Summon Trap''' | ||
| align="center"| 6.25% | |||
|- style="background: #FFFFFF" | |- style="background: #FFFFFF" | ||
| align="center"| [[File: | | align="center"| [[File:Trip Trap RTRB TDS.png]] | ||
| align="center"| '''Trip Trap''' | |||
| align="center"| 6.25% | |||
|- style="background: #FFFFFF" | |||
| align="center"| [[File:Warp Trap RTRB TDS.png]] | |||
| align="center"| '''Warp Trap''' | | align="center"| '''Warp Trap''' | ||
| align="center"| 6.25% | |||
|- style="background: #FFFFFF" | |- style="background: #FFFFFF" | ||
| align="center"| [[File: | | align="center"| [[File:Wonder Tile RTRB TDS.png]] | ||
| align="center"| '''Wonder Tile''' | | align="center"| '''Wonder Tile''' | ||
| align="center"| 50% | |||
|- style="background: #FFFFFF" | |||
|} | |||
==Other encounters== | |||
{| style="background: #{{ground color}}; margin-left: 10px; margin-bottom: 10px; {{roundy|10px}} border: 3px solid #{{psychic color dark}}" | |||
|- | |||
! style="background: #{{ground color light}}; {{roundytl|10px}}"| Image | |||
! style="background: #{{ground color light}}" | Encounter | |||
! style="background: #{{ground color light}}" | B1F, B4F | |||
! style="background: #{{ground color light}}" | B2F, B3F | |||
! style="background: #{{ground color light}}" | UB1F | |||
! style="background: #{{ground color light}}" | UB2F | |||
! style="background: #{{ground color light}}" | UB3F, UB4F | |||
! style="background: #{{ground color light}}" | LB1F, LB4F, DB1-DB3F | |||
! style="background: #{{ground color light}}" | LB2F | |||
! style="background: #{{ground color light}}" | LB3F | |||
! style="background: #{{ground color light}}; {{roundytr|5px}}" data-sort-type="number" | DB4F | |||
|- style="background: #FFFFFF" | |- style="background: #FFFFFF" | ||
| align="center"|[[File:Kecleon Carpet RTRB TDS.png]] | |||
| align="center"|'''Kecleon Shop''' | |||
| align="center"| 30% | |||
| align="center"| 50% | |||
| align="center"| 30% | |||
| align="center"| 50% | |||
| align="center"| 10% | |||
| align="center" colspan="4"| 0% | |||
|- style="background: #FFFFFF" | |||
| align="center"|[[File:MDBag Wonder Orb TDS Sprite.png]] | |||
| align="center"|'''Monster House''' | |||
| align="center" colspan="2"|0% | |||
| align="center" colspan="4"|6% | |||
| align="center"|7% | |||
| align="center"|8% | |||
| align="center"|50% | |||
|} | |} | ||
| Line 165: | Line 447: | ||
| style="vertical-align:top;" | | | style="vertical-align:top;" | | ||
''Upper Spring Cave'' | ''Upper Spring Cave'' | ||
{{langtable|color={{ground color | {{langtable|color={{ground color}}|bordercolor={{rock color dark}} | ||
|ja=げんせんのどうくつ じょうそうぶ | |ja=げんせんのどうくつ じょうそうぶ | ||
|fr=Caverne Source - haut | |fr=Caverne Source - haut | ||
| Line 174: | Line 456: | ||
| style="vertical-align:top;" | | | style="vertical-align:top;" | | ||
''Middle Spring Cave'' | ''Middle Spring Cave'' | ||
{{langtable|color={{ | {{langtable|color={{ghost color light}}|bordercolor={{poison color dark}} | ||
|ja=げんせんのどうくつ ちゅうそうぶ | |ja=げんせんのどうくつ ちゅうそうぶ | ||
|fr=Caverne Source - milieu | |fr=Caverne Source - milieu | ||
| Line 183: | Line 465: | ||
| style="vertical-align:top;" | | | style="vertical-align:top;" | | ||
''Lower Spring Cave'' | ''Lower Spring Cave'' | ||
{{langtable|color={{ | {{langtable|color={{psychic color}}|bordercolor={{poison color dark}} | ||
|ja=げんせんのどうくつ かそうぶ | |ja=げんせんのどうくつ かそうぶ | ||
|fr=Caverne Source - bas | |fr=Caverne Source - bas | ||
| Line 201: | Line 483: | ||
| style="vertical-align:top;" | | | style="vertical-align:top;" | | ||
''Spring Cave Pit'' | ''Spring Cave Pit'' | ||
{{langtable|color={{ | {{langtable|color={{ghost color}}|bordercolor={{poison color dark}} | ||
|ja=げんせんのどうくつ おくそこ | |ja=げんせんのどうくつ おくそこ | ||
|fr=Caverne Source - fond | |fr=Caverne Source - fond | ||
Revision as of 17:12, 15 February 2022
|
|
|
| ||||||||||||||||||||||||||||||||||||||||||
| ||||||||||||||||||||||||||||||||||||||||||
| ||||||||||||||||||||||||||||||||||||||||||
| ||||||||||||||||||||||||||||||||||||||||||
Spring Cave (Japanese: げんせんのどうくつ Source Cave) is a dungeon in Pokémon Mystery Dungeon: Explorers of Sky. It is exclusive to the third Special Episode, Today's "Oh My Gosh".
There is a relay point between the Lower Spring Cave and the Spring Cave Depths. Spring Cave, Upper Spring Cave, Lower Spring Cave, and Spring Cave Depths have 4 floors each.
The music for the area includes Magma Cavern and Magma Cavern Pit from the first Pokémon Mystery Dungeon games as well as a remix of Magma Cavern Pit in the Spring Cave Depths.
Spring Cave is southwest to the Hot Spring.
Pokémon encountered
Spring Cave
| Pokémon | Floors | Levels | Recruit Rate | |
|---|---|---|---|---|
| Meditite | 1-2 | 14 | Unrecruitable | |
| Cubone | 1-4 | 20 | Unrecruitable | |
| Baltoy | 1-4 | 23 | Unrecruitable | |
| Snubbull | 1-4 | 16 | Unrecruitable | |
| Trapinch | 3-4 | 22 | Unrecruitable | |
| Since this is a Special Episode, no Pokémon can be recruited. | ||||
Upper Spring Cave
| Pokémon | Floors | Levels | Recruit Rate | |
|---|---|---|---|---|
| Haunter | Top | 25 | Unrecruitable Boss | |
| Trapinch | 1-2 | 23 | Unrecruitable | |
| Larvitar | 1-3 | 23 | Unrecruitable | |
| Cacnea | 1-4 | 20 | Unrecruitable | |
| Wormadam Sandy Cloak |
1-4 | 27 | Unrecruitable | |
| Aron | 2-4 | 23 | Unrecruitable | |
| Onix | 4 | 29 | Unrecruitable | |
| Since this is a Special Episode, no Pokémon can be recruited. | ||||
Middle Spring Cave
| Pokémon | Floors | Levels | Recruit Rate | |
|---|---|---|---|---|
| Haunter | 5 | 27 | Unrecruitable Boss | |
Lower Spring Cave
| Pokémon | Floors | Levels | Recruit Rate | |
|---|---|---|---|---|
| Onix | 1-2 | 30 | Unrecruitable | |
| Paras | 1-4 | 13 | Unrecruitable | |
| Beldum | 1-4 | 27 | Unrecruitable | |
| Zubat | 2-4 | 16 | Unrecruitable | |
| Ekans | 3-4 | 18 | Unrecruitable | |
| Cranidos | 3-4 | 27 | Unrecruitable | |
| Meditite | 4 | 16 | Unrecruitable | |
| Baltoy | 4 | 25 | Unrecruitable | |
| Since this is a Special Episode, no Pokémon can be recruited. | ||||
Spring Cave Depths
| Pokémon | Floors | Levels | Recruit Rate | |
|---|---|---|---|---|
| Paras | 1 | 14 | Unrecruitable | |
| Ekans | 1-3 | 19 | Unrecruitable | |
| Cranidos | 1-3 | 28 | Unrecruitable | |
| Zubat | 1-4 | 16 | Unrecruitable | |
| Meditite | 1-4 | 17 | Unrecruitable | |
| Baltoy | 1-4 | 26 | Unrecruitable | |
| Beldum | 1-4 | 28 | Unrecruitable | |
| Since this is a Special Episode, no Pokémon can be recruited. | ||||
Spring Cave Pit
| Pokémon | Floors | Levels | Recruit Rate | |
|---|---|---|---|---|
| Haunter | Pit | 29 | Unrecruitable Boss | |
| There are three Haunter | ||||
Items
Ground
| Item | Floors | |
|---|---|---|
| 2-200 Poké | AllF | |
| Insomniscope | All F | |
| Def. Scarf | All F | |
| Pecha Scarf | All F | |
| Persim Band | All F | |
| Power Band | All F | |
| Special Band | All F | |
| Stamina Band | All F | |
| Zinc Band | All F | |
| 5 Gravelerock | All F | |
| 4 Iron Thorn | All F | |
| Apple | All F | |
| Cheri Berry | All F | |
| Chesto Berry | All F | |
| Oran Berry | All F | |
| Pecha Berry | All F | |
| Rawst Berry | All F | |
| Blinker Seed | All F | |
| Eyedrop Seed | All F | |
| Reviver Seed | All F | |
| Totter Seed | All F | |
| Max Elixir | All F | |
| All-Hit Orb | All F | |
| All-Mach Orb | All F | |
| Decoy Orb | All F | |
| Escape Orb | All F | |
| Foe-Fear Orb | All F | |
| Foe-Hold Orb | All F | |
| Foe-Seal Orb | All F | |
| Luminous Orb | All F | |
| Petrify Orb | All F | |
| Quick Orb | All F | |
| Radar Orb | All F | |
| Scanner Orb | All F | |
| Spurn Orb | All F | |
| Sunny Orb | All F | |
| Warp Orb | All F | |
Kecleon Shop
| Item | Floors | |
|---|---|---|
| Scope Lens | B1-B4F, UB1-UB4F | |
| Def. Scarf | B1-B4F, UB1-UB4F | |
| Heal Ribbon | B1-B4F, UB1-UB4F | |
| Patsy Band | B1-B4F, UB1-UB4F | |
| Persim Band | B1-B4F, UB1-UB4F | |
| Power Band | B1-B4F, UB1-UB4F | |
| Special Band | B1-B4F, UB1-UB4F | |
| Twist Band | B1-B4F, UB1-UB4F | |
| Zinc Band | B1-B4F, UB1-UB4F | |
| Big Apple | B1-B4F, UB1-UB4F | |
| Cheri Berry | B1-B4F, UB1-UB4F | |
| Chesto Berry | B1-B4F, UB1-UB4F | |
| Pecha Berry | B1-B4F, UB1-UB4F | |
| Rawst Berry | B1-B4F, UB1-UB4F | |
| Sitrus Berry | B1-B4F, UB1-UB4F | |
| Max Elixir | B1-B4F, UB1-UB4F | |
| Blinker Seed | B1-B4F, UB1-UB4F | |
| Eyedrop Seed | B1-B4F, UB1-UB4F | |
| Heal Seed | B1-B4F, UB1-UB4F | |
| Hunger Seed | B1-B4F, UB1-UB4F | |
| Life Seed | B1-B4F, UB1-UB4F | |
| Reviver Seed | B1-B4F, UB1-UB4F | |
| Sleep Seed | B1-B4F, UB1-UB4F | |
| Stun Seed | B1-B4F, UB1-UB4F | |
| Totter Seed | B1-B4F, UB1-UB4F | |
| Vile Seed | B1-B4F, UB1-UB4F | |
| Violent Seed | B1-B4F, UB1-UB4F | |
| Warp Seed | B1-B4F, UB1-UB4F | |
| Attract | B1-B4F, UB1-UB4F | |
| Brine | B1-B4F, UB1-UB4F | |
| Bullet Seed | B1-B4F, UB1-UB4F | |
| Calm Mind | B1-B4F, UB1-UB4F | |
| Dig | B1-B4F, UB1-UB4F | |
| Embargo | B1-B4F, UB1-UB4F | |
| False Swipe | B1-B4F, UB1-UB4F | |
| Flash | B1-B4F, UB1-UB4F | |
| Giga Drain | B1-B4F, UB1-UB4F | |
| Giga Impact | B1-B4F, UB1-UB4F | |
| Hidden Power | B1-B4F, UB1-UB4F | |
| Hyper Beam | B1-B4F, UB1-UB4F | |
| Iron Tail | B1-B4F, UB1-UB4F | |
| Light Screen | B1-B4F, UB1-UB4F | |
| Payback | B1-B4F, UB1-UB4F | |
| Poison Jab | B1-B4F, UB1-UB4F | |
| Recycle | B1-B4F, UB1-UB4F | |
| Reflect | B1-B4F, UB1-UB4F | |
| Rest | B1-B4F, UB1-UB4F | |
| Roar | B1-B4F, UB1-UB4F | |
| Rock Slide | B1-B4F, UB1-UB4F | |
| Roost | B1-B4F, UB1-UB4F | |
| Safeguard | B1-B4F, UB1-UB4F | |
| Shadow Claw | B1-B4F, UB1-UB4F | |
| Shock Wave | B1-B4F, UB1-UB4F | |
| SolarBeam | B1-B4F, UB1-UB4F | |
| Stealth Rock | B1-B4F, UB1-UB4F | |
| Steel Wing | B1-B4F, UB1-UB4F | |
| Swords Dance | B1-B4F, UB1-UB4F | |
| Thunderbolt | B1-B4F, UB1-UB4F | |
| Vacuum-Cut | B1-B4F, UB1-UB4F | |
| Wide Slash | B1-B4F, UB1-UB4F | |
| All-Hit Orb | B1-B4F, UB1-UB4F | |
| All-Mach Orb | B1-B4F, UB1-UB4F | |
| Decoy Orb | B1-B4F, UB1-UB4F | |
| Foe-Fear Orb | B1-B4F, UB1-UB4F | |
| Foe-Hold Orb | B1-B4F, UB1-UB4F | |
| Foe-Seal Orb | B1-B4F, UB1-UB4F | |
| Hurl Orb | B1-B4F, UB1-UB4F | |
| Luminous Orb | B1-B4F, UB1-UB4F | |
| One-Shot Orb | B1-B4F, UB1-UB4F | |
| Petrify Orb | B1-B4F, UB1-UB4F | |
| Pounce Orb | B1-B4F, UB1-UB4F | |
| Radar Orb | B1-B4F, UB1-UB4F | |
| Scanner Orb | B1-B4F, UB1-UB4F | |
| See-Trap Orb | B4F, UB2-UB4F | |
| Shocker Orb | B1-B4F, UB1-UB4F | |
| Silence Orb | B1-B4F, UB1-UB4F | |
| Slow Orb | B1-B4F, UB1-UB4F | |
| Slumber Orb | B1-B4F, UB1-UB4F | |
| Spurn Orb | B1-B4F, UB1-UB4F | |
| Stairs Orb | B1-B4F, UB1-UB4F | |
| Stayaway Orb | B1-B4F, UB1-UB4F | |
| Totter Orb | B1-B4F, UB1-UB4F | |
| Trapbust Orb | B4F, UB2-UB4F | |
| Warp Orb | B1-B4F, UB1-UB4F | |
Monster House
| Item | Floors | |
|---|---|---|
| 2-200 Poké | All after B4F | |
| Black Gummi | All after B4F | |
| Blue Gummi | All after B4F | |
| Brown Gummi | All after B4F | |
| Clear Gummi | All after B4F | |
| Gold Gummi | All after B4F | |
| Grass Gummi | All after B4F | |
| Gray Gummi | All after B4F | |
| Green Gummi | All after B4F | |
| Orange Gummi | All after B4F | |
| Pink Gummi | All after B4F | |
| Purple Gummi | All after B4F | |
| Red Gummi | All after B4F | |
| Royal Gummi | All after B4F | |
| Silver Gummi | All after B4F | |
| Sky Gummi | All after B4F | |
| White Gummi | All after B4F | |
| Yellow Gummi | All after B4F | |
| Aerial Ace | All after B4F | |
| Attract | All after B4F | |
| Brick Break | All after B4F | |
| Brine | All after B4F | |
| Bullet Seed | All after B4F | |
| Calm Mind | All after B4F | |
| Dig | All after B4F | |
| Dive | All after B4F | |
| Embargo | All after B4F | |
| Energy Ball | All after B4F | |
| Explosion | All after B4F | |
| False Swipe | All after B4F | |
| Flash | All after B4F | |
| Focus Blast | All after B4F | |
| Focus Punch | All after B4F | |
| Giga Drain | All after B4F | |
| Giga Impact | All after B4F | |
| Hidden Power | All after B4F | |
| Hyper Beam | All after B4F | |
| Iron Tail | All after B4F | |
| Light Screen | All after B4F | |
| Natural Gift | All after B4F | |
| Payback | All after B4F | |
| Poison Jab | All after B4F | |
| Protect | All after B4F | |
| Recycle | All after B4F | |
| Reflect | All after B4F | |
| Rest | All after B4F | |
| Roar | All after B4F | |
| Rock Slide | All after B4F | |
| Roost | All after B4F | |
| Safeguard | All after B4F | |
| Shadow Claw | All after B4F | |
| Shock Wave | All after B4F | |
| SolarBeam | All after B4F | |
| Stealth Rock | All after B4F | |
| Steel Wing | All after B4F | |
| Swords Dance | All after B4F | |
| Taunt | All after B4F | |
| Thunder Wave | All after B4F | |
| Thunderbolt | All after B4F | |
| Torment | All after B4F | |
| Vacuum-Cut | All after B4F | |
| Water Pulse | All after B4F | |
| Wide Slash | All after B4F | |
| All-Hit Orb | All after B4F | |
| All-Mach Orb | All after B4F | |
| Blowback Orb | All after B4F | |
| Cleanse Orb | All after B4F | |
| Decoy Orb | All after B4F | |
| Evasion Orb | All after B4F | |
| Foe-Fear Orb | All after B4F | |
| Foe-Hold Orb | All after B4F | |
| Foe-Seal Orb | All after B4F | |
| Hurl Orb | All after B4F | |
| Invisify Orb | All after B4F | |
| Itemizer Orb | All after B4F | |
| Luminous Orb | All after B4F | |
| Mug Orb | All after B4F | |
| One-Shot Orb | All after B4F | |
| Petrify Orb | All after B4F | |
| Pounce Orb | All after B4F | |
| Radar Orb | All after B4F | |
| Rebound Orb | All after B4F | |
| Scanner Orb | All after B4F | |
| See-Trap Orb | All after B4F | |
| Silence Orb | All after B4F | |
| Slumber Orb | All after B4F | |
| Snatch Orb | All after B4F | |
| Spurn Orb | All after B4F | |
| Switcher Orb | All after B4F | |
| Totter Orb | All after B4F | |
| Transfer Orb | All after B4F | |
| Trapbust Orb | All after B4F | |
| Trawl Orb | All after B4F | |
| Warp Orb | All after B4F | |
Buried items
| Item | Floors | |
|---|---|---|
| 2-200 Poké | AllF | |
Traps
The amount of traps depends on the floor:
- 0 on floor 1 of Spring Cave
- 3-6 on floor 2 of Spring Cave
- 3-7 on floor 3 of Spring Cave
- 4-8 on all later floors
Game will spawn extra in a Monster House.
| Image | Trap | Appearance % |
|---|---|---|
| Gust Trap | 6.25% | |
| Poison Trap | 6.25% | |
| Slow Trap | 6.25% | |
| Slumber Trap | 6.25% | |
| Spin Trap | 6.25% | |
| Summon Trap | 6.25% | |
| Trip Trap | 6.25% | |
| Warp Trap | 6.25% | |
| Wonder Tile | 50% |
Other encounters
| Image | Encounter | B1F, B4F | B2F, B3F | UB1F | UB2F | UB3F, UB4F | LB1F, LB4F, DB1-DB3F | LB2F | LB3F | DB4F |
|---|---|---|---|---|---|---|---|---|---|---|
| Kecleon Shop | 30% | 50% | 30% | 50% | 10% | 0% | ||||
| Monster House | 0% | 6% | 7% | 8% | 50% | |||||
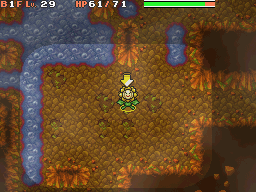
Layout
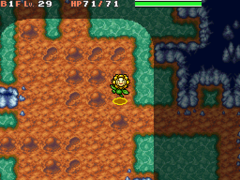
| Upper Spring Cave | Middle Spring Cave | Lower Spring Cave | |
|---|---|---|---|

|
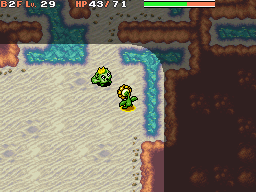
|
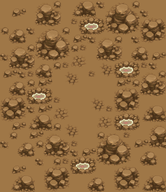
|
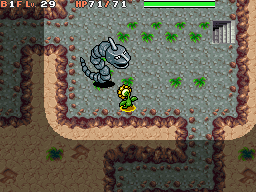
|
| Rest stop | Spring Cave Depths | Spring Cave Pit | |

|
|
|

|
Trivia
- Despite the warnings given in the Special Episode about Sunflora's type disadvantage, not only are there no Fire-type Pokémon found in Spring Cave (aside from two Slugma in a cutscene) but over a third of the Pokémon in this dungeon are weak against Grass-type moves.
- Spring Cave reuses tilesets from main story dungeons: Waterfall Cave, Side Path, Mt. Horn and Steam Cave.
In other languages
|
Spring Cave
|
Upper Spring Cave
|
Middle Spring Cave
|
Lower Spring Cave
|
Spring Cave Depths
|
Spring Cave Pit
| |||||||||||||||||||||||||||||||||||||||||||||||||||||||||||||||||||||||||||||||||||||||||||||||||||||||||||||||||||||||||||||||||

|
This article is part of both Project Locations and Project Sidegames, Bulbapedia projects that, together, aim to write comprehensive articles on the Pokémon Locations and Sidegames, respectively. | 
|
