Appendix:X and Y walkthrough/Section 16: Difference between revisions
m (AWB Bot: relinking pages moved per new MoS guidelines for article titles, replaced: List of clothing (X and Y) → List of clothing in Pokémon X and Y (4)) |
(→Rival Battle: Fixing alignment of Serena/Calem battles, grouped battles for better article flow) Tag: 2017 source edit |
||
| (One intermediate revision by one other user not shown) | |||
| Line 100: | Line 100: | ||
After participating in the Battle Maison, Serena/Calem will battle you once per day; they can be found on the northernmost part of the city. {{DL|Kiloude City|Trainers|Her/His team}} consists of {{p|Meowstic}} at level 66, {{p|Clefable}} at level 68, {{p|Absol}} at level 68, {{p|Altaria}} at level 67, [[Eeveelution|one of Eevee's evolved forms]] at level 66, and her/his third-stage first partner Pokémon at level 70. After you win the battle, she/he gives you an [[Absolite]]. She/He then informs you that [[Professor Sycamore]] may have discovered part of the secret of the Mega Ring and Mega Stones, and is waiting for you at the {{ci|Anistar}} Sundial. | After participating in the Battle Maison, Serena/Calem will battle you once per day; they can be found on the northernmost part of the city. {{DL|Kiloude City|Trainers|Her/His team}} consists of {{p|Meowstic}} at level 66, {{p|Clefable}} at level 68, {{p|Absol}} at level 68, {{p|Altaria}} at level 67, [[Eeveelution|one of Eevee's evolved forms]] at level 66, and her/his third-stage first partner Pokémon at level 70. After you win the battle, she/he gives you an [[Absolite]]. She/He then informs you that [[Professor Sycamore]] may have discovered part of the secret of the Mega Ring and Mega Stones, and is waiting for you at the {{ci|Anistar}} Sundial. | ||
====={{MSP/6|650|Chespin}} If the {{player}} chose {{p|Chespin}}===== | |||
{{MSP/6|650|Chespin}} If the {{player}} chose {{p|Chespin}}: | {| style="margin: auto;" | ||
{{Party/Single | |{{Party/Single | ||
|color={{Y color}} | |color={{Y color}} | ||
|bordercolor={{Y color dark}} | |bordercolor={{Y color dark}} | ||
| Line 182: | Line 182: | ||
|move3=Shadow Ball|move3type=Ghost|move3cat=Special}} | |move3=Shadow Ball|move3type=Ghost|move3cat=Special}} | ||
{{Party/Footer}} | {{Party/Footer}} | ||
|} | |||
{| style="margin: auto;" | |||
{{Party/Single | |{{Party/Single | ||
|color={{ | |color={{X color}} | ||
|bordercolor={{ | |bordercolor={{X color dark}} | ||
|headcolor={{ | |headcolor={{X color light}} | ||
|sprite= | |sprite=VSCalem 2.png | ||
|size=150px | |size=150px | ||
|prize={{pdollar}}7,000 | |prize={{pdollar}}7,000 | ||
|class=Pokémon Trainer | |class=Pokémon Trainer | ||
|classlink=Pokémon Trainer | |classlink=Pokémon Trainer | ||
|name= | |name=Calem | ||
|game=XY | |game=XY | ||
|location=Kiloude City | |location=Kiloude City | ||
| Line 199: | Line 199: | ||
|{{Pokémon/6 | |{{Pokémon/6 | ||
|ndex=678 | |ndex=678 | ||
|spritegender=male | |||
|pokemon=Meowstic | |pokemon=Meowstic | ||
|level=66 | |level=66 | ||
|gender= | |gender=male | ||
|type1=Psychic | |type1=Psychic| | ||
|ability=Keen Eye | |ability=Keen Eye | ||
|move1=Fake Out|move1type=Normal|move1cat=Physical | |move1=Fake Out|move1type=Normal|move1cat=Physical | ||
|move2=Psychic|move2type=Psychic|move2cat=Special | |move2=Psychic|move2type=Psychic|move2cat=Special | ||
|move3= | |move3=Disarming Voice|move3type=Fairy|move3cat=Special | ||
|move4= | |move4=Shadow Ball|move4type=Ghost|move4cat=Special}} | ||
|{{Pokémon/6 | |{{Pokémon/6 | ||
|ndex=036 | |ndex=036 | ||
| Line 221: | Line 221: | ||
|move4=Sing|move4type=Normal|move4cat=Status}} | |move4=Sing|move4type=Normal|move4cat=Status}} | ||
|{{Pokémon/6 | |{{Pokémon/6 | ||
|ndex= | |ndex=135 | ||
|pokemon= | |pokemon=Jolteon | ||
|level=66 | |level=66 | ||
|gender=male | |gender=male | ||
|type1= | |type1=Electric | ||
|ability= | |ability=Volt Absorb | ||
|move1= | |move1=Thunder|move1type=Electric|move1cat=Special | ||
|move2= | |move2=Double Kick|move2type=Fighting|move2cat=Physical | ||
|move3= | |move3=Quick Attack|move3type=Normal|move3cat=Physical}} | ||
{{Party/Div|color={{ | {{Party/Div|color={{X color}}}} | ||
|{{Pokémon/6 | |{{Pokémon/6 | ||
|ndex=359 | |ndex=359 | ||
| Line 247: | Line 247: | ||
|pokemon=Altaria | |pokemon=Altaria | ||
|level=67 | |level=67 | ||
|gender= | |gender=male | ||
|type1=Dragon|type2=Flying | |type1=Dragon|type2=Flying | ||
|ability=Natural Cure | |ability=Natural Cure | ||
| Line 254: | Line 254: | ||
|move3=Confide|move3type=Normal|move3cat=Status}} | |move3=Confide|move3type=Normal|move3cat=Status}} | ||
|{{Pokémon/6 | |{{Pokémon/6 | ||
|ndex= | |ndex=655 | ||
|pokemon= | |pokemon=Delphox | ||
|level=70 | |level=70 | ||
|gender=male | |gender=male | ||
|type1= | |type1=Fire|type2=Psychic | ||
|ability= | |ability=Blaze | ||
|move1= | |move1=Fire Blast|move1type=Fire|move1cat=Special | ||
|move2= | |move2=Psychic|move2type=Psychic|move2cat=Special | ||
|move3= | |move3=Shadow Ball|move3type=Ghost|move3cat=Special}} | ||
{{Party/Footer}} | {{Party/Footer}} | ||
|} | |||
{{MSP/6| | ====={{MSP/6|653|Fennekin}} If the {{player}} chose {{p|Fennekin}}===== | ||
{{Party/Single | {| style="margin: auto;" | ||
|{{Party/Single | |||
|color={{Y color}} | |color={{Y color}} | ||
|bordercolor={{Y color dark}} | |bordercolor={{Y color dark}} | ||
| Line 303: | Line 304: | ||
|move4=Sing|move4type=Normal|move4cat=Status}} | |move4=Sing|move4type=Normal|move4cat=Status}} | ||
|{{Pokémon/6 | |{{Pokémon/6 | ||
|ndex= | |ndex=136 | ||
|pokemon= | |pokemon=Flareon | ||
|level=66 | |level=66 | ||
|gender=male | |gender=male | ||
|type1= | |type1=Fire | ||
|ability= | |ability=Flash Fire | ||
|move1= | |move1=Fire Blast|move1type=Fire|move1cat=Special | ||
|move2= | |move2=Quick Attack|move2type=Normal|move2cat=Physical | ||
|move3= | |move3=Bite|move3type=Dark|move3cat=Physical}} | ||
{{Party/Div|color={{y color}}}} | {{Party/Div|color={{y color}}}} | ||
|{{Pokémon/6 | |{{Pokémon/6 | ||
| Line 336: | Line 337: | ||
|move3=Confide|move3type=Normal|move3cat=Status}} | |move3=Confide|move3type=Normal|move3cat=Status}} | ||
|{{Pokémon/6 | |{{Pokémon/6 | ||
|ndex= | |ndex=658 | ||
|pokemon= | |pokemon=Greninja | ||
|level=70 | |level=70 | ||
|gender=male | |gender=male | ||
|type1= | |type1=Water|type2=Dark | ||
|ability= | |ability=Torrent | ||
|move1= | |move1=Hydro Pump|move1type=Water|move1cat=Special | ||
|move2= | |move2=Dark Pulse|move2type=Dark|move2cat=Special | ||
|move3= | |move3=Ice Beam|move3type=Ice|move3cat=Special}} | ||
{{Party/Footer}} | {{Party/Footer}} | ||
|} | |||
{| style="margin: auto;" | |||
|{{Party/Single | |||
{{Party/Single | |||
|color={{X color}} | |color={{X color}} | ||
|bordercolor={{X color dark}} | |bordercolor={{X color dark}} | ||
| Line 365: | Line 364: | ||
|{{Pokémon/6 | |{{Pokémon/6 | ||
|ndex=678 | |ndex=678 | ||
|pokemon=Meowstic | |||
|spritegender=male | |spritegender=male | ||
|level=66 | |level=66 | ||
|gender=male | |gender=male | ||
| Line 387: | Line 386: | ||
|move4=Sing|move4type=Normal|move4cat=Status}} | |move4=Sing|move4type=Normal|move4cat=Status}} | ||
|{{Pokémon/6 | |{{Pokémon/6 | ||
|ndex= | |ndex=136 | ||
|pokemon= | |pokemon=Flareon | ||
|level=66 | |level=66 | ||
|gender=male | |gender=male | ||
|type1= | |type1=Fire | ||
|ability= | |ability=Flash Fire | ||
|move1= | |move1=Fire Blast|move1type=Fire|move1cat=Special | ||
|move2= | |move2=Quick Attack|move2type=Normal|move2cat=Physical | ||
|move3= | |move3=Bite|move3type=Dark|move3cat=Physical}} | ||
{{Party/Div|color={{X color}}}} | {{Party/Div|color={{X color}}}} | ||
|{{Pokémon/6 | |{{Pokémon/6 | ||
| Line 420: | Line 419: | ||
|move3=Confide|move3type=Normal|move3cat=Status}} | |move3=Confide|move3type=Normal|move3cat=Status}} | ||
|{{Pokémon/6 | |{{Pokémon/6 | ||
|ndex= | |ndex=658 | ||
|pokemon= | |pokemon=Greninja | ||
|level=70 | |level=70 | ||
|gender=male | |gender=male | ||
|type1= | |type1=Water|type2=Dark | ||
|ability= | |ability=Torrent | ||
|move1= | |move1=Hydro Pump|move1type=Water|move1cat=Special | ||
|move2= | |move2=Dark Pulse|move2type=Dark|move2cat=Special | ||
|move3= | |move3=Ice Beam|move3type=Ice|move3cat=Special}} | ||
{{Party/Footer}} | {{Party/Footer}} | ||
|} | |||
{{MSP/6| | ====={{MSP/6|656|Froakie}} If the {{player}} chose {{p|Froakie}}===== | ||
{{Party/Single | {| style="margin: auto;" | ||
|color={{ | |{{Party/Single | ||
|bordercolor={{ | |color={{Y color}} | ||
|headcolor={{ | |bordercolor={{Y color dark}} | ||
|sprite= | |headcolor={{Y color light}} | ||
|sprite=VSSerena 2.png | |||
|size=150px | |size=150px | ||
|prize={{pdollar}}7,000 | |prize={{pdollar}}7,000 | ||
|class=Pokémon Trainer | |class=Pokémon Trainer | ||
|classlink=Pokémon Trainer | |classlink=Pokémon Trainer | ||
|name= | |name=Serena | ||
|game=XY | |game=XY | ||
|location=Kiloude City | |location=Kiloude City | ||
| Line 448: | Line 448: | ||
|ndex=678 | |ndex=678 | ||
|pokemon=Meowstic | |pokemon=Meowstic | ||
|spritegender= | |spritegender=female | ||
|level=66 | |level=66 | ||
|gender= | |gender=female | ||
|type1=Psychic | |type1=Psychic | ||
|ability=Keen Eye | |ability=Keen Eye | ||
|move1=Fake Out|move1type=Normal|move1cat=Physical | |move1=Fake Out|move1type=Normal|move1cat=Physical | ||
|move2=Psychic|move2type=Psychic|move2cat=Special | |move2=Psychic|move2type=Psychic|move2cat=Special | ||
|move3= | |move3=Shadow Ball|move3type=Ghost|move3cat=Special | ||
|move4= | |move4=Disarming Voice|move4type=Fairy|move4cat=Special}} | ||
|{{Pokémon/6 | |{{Pokémon/6 | ||
|ndex=036 | |ndex=036 | ||
| Line 469: | Line 469: | ||
|move4=Sing|move4type=Normal|move4cat=Status}} | |move4=Sing|move4type=Normal|move4cat=Status}} | ||
|{{Pokémon/6 | |{{Pokémon/6 | ||
|ndex= | |ndex=134 | ||
|pokemon= | |pokemon=Vaporeon | ||
|level=66 | |level=66 | ||
|gender=male | |gender=male | ||
|type1= | |type1=Water | ||
|ability= | |ability=Water Absorb | ||
|move1= | |move1=Hydro Pump|move1type=Water|move1cat=Special | ||
|move2= | |move2=Aurora Beam|move2type=Ice|move2cat=Special | ||
|move3= | |move3=Quick Attack|move3type=Normal|move3cat=Physical}} | ||
{{Party/Div|color={{ | {{Party/Div|color={{y color}}}} | ||
|{{Pokémon/6 | |{{Pokémon/6 | ||
|ndex=359 | |ndex=359 | ||
| Line 495: | Line 495: | ||
|pokemon=Altaria | |pokemon=Altaria | ||
|level=67 | |level=67 | ||
|gender= | |gender=female | ||
|type1=Dragon|type2=Flying | |type1=Dragon|type2=Flying | ||
|ability=Natural Cure | |ability=Natural Cure | ||
| Line 502: | Line 502: | ||
|move3=Confide|move3type=Normal|move3cat=Status}} | |move3=Confide|move3type=Normal|move3cat=Status}} | ||
|{{Pokémon/6 | |{{Pokémon/6 | ||
|ndex= | |ndex=652 | ||
|pokemon= | |pokemon=Chesnaught | ||
|level=70 | |level=70 | ||
|gender=male | |gender=male | ||
|type1= | |type1=Grass|type2=Fighting | ||
|ability= | |ability=Overgrow | ||
|move1= | |move1=Wood Hammer|move1type=Grass|move1cat=Physical | ||
|move2= | |move2=Brick Break|move2type=Fighting|move2cat=Physical | ||
|move3= | |move3=Body Slam|move3type=Normal|move3cat=Physical}} | ||
{{Party/Footer}} | {{Party/Footer}} | ||
|} | |||
{| style="margin: auto;" | |||
{{Party/Single | |{{Party/Single | ||
|color={{X color}} | |color={{X color}} | ||
|bordercolor={{X color dark}} | |bordercolor={{X color dark}} | ||
| Line 594: | Line 594: | ||
|move3=Body Slam|move3type=Normal|move3cat=Physical}} | |move3=Body Slam|move3type=Normal|move3cat=Physical}} | ||
{{Party/Footer}} | {{Party/Footer}} | ||
|} | |||
==Anistar City== | ==Anistar City== | ||
| Line 770: | Line 771: | ||
| | | | ||
{{trainerheader|building}} | {{trainerheader|building}} | ||
{{Trainerentry|game=6|VSButler.png{{!}}150px|Butler|Chalmers|4,960|1|628|Braviary|♂|62|None}} | {{Trainerentry|game=6|VSButler.png{{!}}150px|Butler|[[Chalmers]]|4,960|1|628|Braviary|♂|62|None}} | ||
{{trainerfooter|building|6}} | {{trainerfooter|building|6}} | ||
|} | |} | ||
After the battle, Chalmers reveals that he was formerly a Team Flare Admin, and was sent here by his mistress. He asks that you leave at once for [[Hotel Richissime]]'s Royal Suite to meet the impatient woman. | After the battle, [[Chalmers]] reveals that he was formerly a {{tc|Team Flare Admin}}, and was sent here by his mistress. He asks that you leave at once for [[Hotel Richissime]]'s Royal Suite to meet the impatient woman. | ||
====Chapter 5: A Fiery Woman & A Truth Revealed==== | ====Chapter 5: A Fiery Woman & A Truth Revealed==== | ||
Latest revision as of 06:28, 18 September 2024
Vaniville Town
Homecoming
Once the credits have ended, you find yourself back home in Vaniville Town. Go downstairs to catch up with Mom, who informs you that Professor Sycamore is waiting for you in Lumiose Station on North Boulevard.
Time for a Trade
Shauna greets you when you step outside, and asks to trade Pokémon with you. She offers a certain Pokémon that she obtained as an Egg, and accepts any of yours in exchange. This Pokémon has a nickname, a pre-determined Nature, and arrives at level 5.
| Player chose | Shauna offers | ||
|---|---|---|---|
| Chespin | Jolly Froakie "Froabble" | ||
| Fennekin | Adamant Chespin "Chester" | ||
| Froakie | Modest Fennekin "Kinniekins" | ||
Lumiose City
As Champion, you can now dine at Restaurant Le Wow on Hibernal Avenue, and test your skills at the Battle Institute on North Boulevard.
Sycamore Pokémon Lab
Visit the Sycamore Pokémon Lab and speak to the Scientist on the second floor to receive the Poké Radar. This gadget makes it easier to find alternately-colored Pokémon and Pokémon of the same species.
Café Soleil
Stop by Café Soleil to meet with Diantha. She would like to trade Pokémon with you, and offers a level 5 Ralts. This Pokémon has a Modest Nature, and is holding a Gardevoirite. She accepts any Pokémon in exchange.
Lumiose Station
When you step inside Lumiose Station, Sina and Dexio enter just after you. They upgrade your Pokédex one last time, enabling the National Pokédex listing that accounts for all 700+ Pokémon in existence. Once they leave, speak to Professor Sycamore up ahead to receive the TMV Pass. This pass lets you ride the super-high-speed rail to Kiloude City in the southern part of the region. Scan the pass at the orange machine to board the train.
Kiloude City
Though isolated, Kiloude City is a popular destination for Pokémon Trainers. The Battle Maison is located in the center of town, and the Friend Safari stands in the northeast.
| Trainers | |||||||||||||||||||||||||||||
|---|---|---|---|---|---|---|---|---|---|---|---|---|---|---|---|---|---|---|---|---|---|---|---|---|---|---|---|---|---|
| |||||||||||||||||||||||||||||
| Items | ||||||||||||||||||||||||||||||||||||||||||||||||||||
|---|---|---|---|---|---|---|---|---|---|---|---|---|---|---|---|---|---|---|---|---|---|---|---|---|---|---|---|---|---|---|---|---|---|---|---|---|---|---|---|---|---|---|---|---|---|---|---|---|---|---|---|---|
| ||||||||||||||||||||||||||||||||||||||||||||||||||||
Kiloude Station
Before exiting the station, talk to the girl near the train. She asks a question about SwirlixX or SpritzeeY; answer correctly to earn a Max Revive.
When you step outside, you are stopped by a Monsieur. He saw you at the parade, and gives you the Vs. Recorder as thanks for stopping Team Flare.
Pokémon Center
Inside the Pokémon Center is an Ace Trainer called "the Judge". In addition to discerning an individual Pokémon's overall potential, he can also inform you of the stat(s) in which your Pokémon excels and those in which it fares poorly.
Western house
The Ace Trainer in the western house needs some advice. He describes three battle scenarios, and asks how best to approach them. Afterwards, he challenges you to a battle to test these strategies.
Northwest houses
There are two houses side-by-side in the northwest part of town. In the left, one of the women inside will give you TM58 (Sky Drop). In the right, a Punk Girl wants to see a Kyurem, a legendary Pokémon from the far-off Unova region. After seeing the Boundary Pokémon, she rewards you with the DNA Splicers, which allows Kyurem to change forms by merging with certain other Pokémon.
Friend Safari
The Friend Safari is a facility in the northeast part of the city. Inside, Trainers may catch Pokémon that cannot be found normally, including first partner Pokémon. By registering another player's 3DS Friend Code, you can access the Friend Safari that belongs to that friend. Each Friend Code has a certain Pokémon type associated with it, and up to three Pokémon of this type can be found in each Friend Safari. It is impossible to access your own Friend Safari. Every Pokémon found here appears at level 30, has a greater chance of being Shiny, and has at least two IVs of 31. Once you and a friend have been online at the same time, the Pokémon in their Friend Safari may also have their Hidden Ability.
Battle Maison
The Battle Maison is a facility located in the center of town. Challengers fight to earn Battle Points and to increase their current winning streak. Battles conducted here are subject to certain rules that differ from normal battles. The amount of awarded Battles Points varies based on the length of the current winning streak. These points may be redeemed for valuable prizes. Certain Pokémon are ineligible to participate. After reaching both 20 and 50 consecutive victories in each format—Single, Double, Triple, and Rotation—challengers must face one of the Battle Chatelaines. Defeating one of these four sisters on the 50th consecutive victory earns the challenger a commemorative monument located in the building's lobby.
The Northern Hill
There is an Artist in the northwest part of town who is looking for inspiration for her art. Speak to her when dressed in a "colorful" style (male players) or a "feminine" style (female players). She thanks you for the inspiration, and gives you either a Bamboo Sprig Hat or a Sundae Dress.
Rival Battle
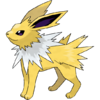
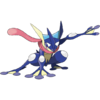
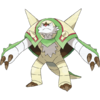
After participating in the Battle Maison, Serena/Calem will battle you once per day; they can be found on the northernmost part of the city. Her/His team consists of Meowstic at level 66, Clefable at level 68, Absol at level 68, Altaria at level 67, one of Eevee's evolved forms at level 66, and her/his third-stage first partner Pokémon at level 70. After you win the battle, she/he gives you an Absolite. She/He then informs you that Professor Sycamore may have discovered part of the secret of the Mega Ring and Mega Stones, and is waiting for you at the Anistar Sundial.
 If the player chose Chespin
| |||||||||||||||||||||||||||||||||||||||||||||||||||||||||||||||||||||||||||||||||||||||||||||||||||||||||||||||||||||||||||||||||||||||||||||||||||||||||||||||||||||||||||||||||||||||||||||||||||||||||||||||||||||||||
 If the player chose Fennekin
| |||||||||||||||||||||||||||||||||||||||||||||||||||||||||||||||||||||||||||||||||||||||||||||||||||||||||||||||||||||||||||||||||||||||||||||||||||||||||||||||||||||||||||||||||||||||||||||||||||||||||||||||||||||||||
| |||||||||||||||||||||||||||||||||||||||||||||||||||||||||||||||||||||||||||||||||||||||||||||||||||||||||||||||||||||||||||||||||||||||||||||||||||||||||||||||||||||||||||||||||||||||||||||||||||||||||||||||||||||||||
 If the player chose Froakie
| |||||||||||||||||||||||||||||||||||||||||||||||||||||||||||||||||||||||||||||||||||||||||||||||||||||||||||||||||||||||||||||||||||||||||||||||||||||||||||||||||||||||||||||||||||||||||||||||||||||||||||||||||||||||||
| |||||||||||||||||||||||||||||||||||||||||||||||||||||||||||||||||||||||||||||||||||||||||||||||||||||||||||||||||||||||||||||||||||||||||||||||||||||||||||||||||||||||||||||||||||||||||||||||||||||||||||||||||||||||||
Anistar City
When you reach the sundial, Sycamore reveals his theory: Mega Stones are stones that were bathed in the light—the energy of the legendary XerneasX / YveltalY—that was fired from the ultimate weapon 3,000 years ago. He claims that it's even possible that Mega Stones were once normal Evolution stones. He then teaches you about the sundial, an object that emits a mysterious light for one hour every day beginning at 8pm. As you were exposed to the legendary Pokémon's energy in Geosenge Town, he then asks that you touch the sundial. Doing so allows you to receive the sundial's power; these two energies combine to upgrade the Mega Ring. From now on, it will react to Mega Stones that are buried nearby, but only during that one-hour window.
|
| ||||||||||||||||||||||||||||||||||||||||||||||||
Lumiose City
After becoming the Champion, defeating Serena/Calem in Kiloude City, and upgrading the Mega Ring in Anistar City, there is one final sidequest to complete. Upon entering Lumiose City, you receive a Holo Clip from someone who wishes to remain anonymous. This person asks you to visit the Looker Bureau, near Rouge Plaza.
Looker Bureau
Chapter 1: This Guy is a Real Looker
This middle-aged detective is impressed with you, the newest Champion and hero who defeated Team Flare. The man, who eventually introduces himself as Looker, asks you to become his assistant to help rid the city of trouble. But as you are still a rookie when it comes to detective work, he instructs you to find five Looker Tickets hidden around the city, and return them to him to prove yourself. As he wants you to succeed, he has left open a notebook on his desk with hints as to the tickets' locations. A group of sparkles in each area signifies a ticket's exact location.
| Hint | Location | |
|---|---|---|
| 1. | In the Pokémon Center next to Magenta Plaza | Near the dressing room |
| 2. | In Centrico Plaza, in the tower illuminating the city | Prism Tower, 1F |
| 3. | On Vernal Avenue, at a shop selling medicines | Herboriste |
| 4. | On North Boulevard, 1F, in a place where people rest | Hotel Richissime lobby |
| 5. | On North Boulevard, 1F, in a place filled with art | Lumiose Museum, 1F |
Chapter 2: In the Back Alleys
For your next assignment, Looker asks that you investigate the back alley on South Boulevard, near Restaurant Le Nah. It seems that several children have been playing here rather than attending to their studies, and their parents are concerned that they may be causing trouble. The kids are protective of their secret base, so you must defeat each of them to reach the end of the alley.
| Trainers | ||||||||||||||||||||||||||||||||||||||||||||||||||||||||||||||||||||||||||||||||
|---|---|---|---|---|---|---|---|---|---|---|---|---|---|---|---|---|---|---|---|---|---|---|---|---|---|---|---|---|---|---|---|---|---|---|---|---|---|---|---|---|---|---|---|---|---|---|---|---|---|---|---|---|---|---|---|---|---|---|---|---|---|---|---|---|---|---|---|---|---|---|---|---|---|---|---|---|---|---|---|---|
| ||||||||||||||||||||||||||||||||||||||||||||||||||||||||||||||||||||||||||||||||
Looker arrives once you defeat them all, and the two of you meet a girl named Emma and an Espurr she has befriended, Mimi. It seems that Emma is an orphan, and lives in this alley with Mimi. Since Looker is staying in a hotel, he invites Emma to live at the Looker Bureau if she becomes his assistant. He asks Mimi if she likes the idea, but the Pokémon is afraid of adults and runs off. Emma was happy about having a place to sleep at night, but as it made Mimi upset, she rejects the offer. Looker asks that you try to befriend Pokémon so that she might reconsider, but you have to find her first. Leave the alley to receive a Holo Clip from Looker; apparently Mimi doesn't like to be petted. There are three alleys on North Boulevard where she may be hiding.
| Possible Location | |
|---|---|
| 1. | Across the street from the Galette Stand |
| 2. | Across the street from Lumiose Station |
| 3. | Next to Café Triste |
When you find Mimi, talk to her. There are several options you can choose from to become the Pokémon's friend; the correct choice is Dance. Choosing a different option causes Mimi to run off, forcing you to look for her again. Reunited with Mimi, Emma agrees to become Looker's assistant, and the pair move into the Looker Bureau.
Chapter 3: Detective, Tourist, Gang
A short time later, Looker asks you via Holo Clip to return to the Looker Bureau. He says that Emma seems stressed out, and worries that his attempt at being her guardian is a burden to her. Suddenly, a woman enters and starts speaking in a foreign language. Looker misunderstands; he thinks she is offended at not being offered any tea, and runs off to find some. Emma and Mimi return, and while Emma converses with the woman, Mimi uses her psychic powers to let you hear their thoughts. It seems that the woman's Pokémon were stolen in Lumiose Station. Emma doesn't want to help, as she believes the Lumiose Gang is involved and does not want a big fight, but Looker runs off anyway. Emma begs you to help him, as he has no Pokémon of his own.
Enter the station and go east to find Looker and a Punk Girl. The gang is upset that Emma stopped hanging out with them after moving into the Looker Bureau, and stole the tourist's Pokémon to force Looker to challenge them. If he wins, they promise to return the stolen Pokémon; if he loses, he and Emma must part ways. Looker cannot accept the challenge as he has no Pokémon, but the gang allows you to fight in his place.
| Trainers | |||||||||||||||||||||||||||||||||||||||||||||||||||||||||||
|---|---|---|---|---|---|---|---|---|---|---|---|---|---|---|---|---|---|---|---|---|---|---|---|---|---|---|---|---|---|---|---|---|---|---|---|---|---|---|---|---|---|---|---|---|---|---|---|---|---|---|---|---|---|---|---|---|---|---|---|
| |||||||||||||||||||||||||||||||||||||||||||||||||||||||||||
Once you defeat them, Emma arrives and forces them to return the Pokémon. The gang agrees to give up their life of crime for honest work. Emma expresses concern about Looker's finances, but he tells her not to worry; however, she decides to look for a part-time job anyway.
Chapter 4: An Unforgivable Crime
Before long, you receive another Holo Clip from Looker. He says that something is wrong, and asks you to visit the Looker Bureau right away. It seems that Emma has frequently been running off on her own recently, and he is worried about her. Just then, you receive a Holo Clip announcement that someone broke into the Lumiose Museum last night and vandalized a painting with graffiti. Looker has an appointment to keep, so he asks you to begin the investigation without him.
Inside, an Artist near the entrance tells you that the damaged painting is located on the third floor. Speak to the museum director inspecting the artwork, then leave the building to receive another Holo Clip announcement. This bulletin states that Poké Ball thefts have been occurring in the back alleys after the thief battles a Trainer, when the victim's guard is down. Immediately after this, Looker calls you back to the Bureau. He plans a sting operation, where you lure the thief into batte while Looker hides in the shadows, ready to capture the culprit when he or she attempts to steal your Pokémon. He directs you to the nearest alley, across the street from the Galette Stand. Talk to the shady woman here to begin the battle.
| Trainers | ||||||||||||||||||||||||||||||||||||||||||||||||||||||||||||||||||||||||||||||||||||||||||||||||||||||||||
|---|---|---|---|---|---|---|---|---|---|---|---|---|---|---|---|---|---|---|---|---|---|---|---|---|---|---|---|---|---|---|---|---|---|---|---|---|---|---|---|---|---|---|---|---|---|---|---|---|---|---|---|---|---|---|---|---|---|---|---|---|---|---|---|---|---|---|---|---|---|---|---|---|---|---|---|---|---|---|---|---|---|---|---|---|---|---|---|---|---|---|---|---|---|---|---|---|---|---|---|---|---|---|---|---|---|---|
| ||||||||||||||||||||||||||||||||||||||||||||||||||||||||||||||||||||||||||||||||||||||||||||||||||||||||||
Afterwards, she reveals herself to be wearing a robotic suit and tries to steal your Pokémon, but Looker intervenes. She runs away, and he says to check the alley near Café Triste before healing your team. When you enter the alley, Looker calls to inform you that he is again ready to provide backup. Talk to the shady little girl to start the battle.
She abandons her disguise again and runs off, leading you to the alley across the street from Lumiose Station. Here you find a Black Belt whose Poké Balls were just stolen. Looker arrives, and the victim says that the thief ran off toward South Boulevard. There is only one alley here, near Restaurant Le Nah; this time, the thief is disguised as a young lady.
After battle, the thief transforms again. Mimi appears suddenly, and approaches the woman in a friendly manner, convincing Looker that the thief is really Emma. He tries to reach out to her, but the thief, who calls herself Essentia, injures him when he tries to protect Mimi. Essentia seems to malfunction, and runs off again.
Back in the office, Looker says that he will visit the hospital and tells you to take the day off. Once you leave, he asks Mimi to give you something. He then reveals that the hospital visit is merely a cover story, as he will instead be seeking help from an unpleasant source, as he believes that Emma was turned into Essentia by "that man".
A short time later, you receive a call from Emma, who asks that you meet her at the Looker Bureau. She wants to see Looker, but hearing that he's in the hospital, realizes that she would need more money to get there. She claims that she has to be somewhere, and runs off. Just then, a Butler enters. He has a request for you, but asks to verify your strength first.
| Trainers | |||||||||||||||||
|---|---|---|---|---|---|---|---|---|---|---|---|---|---|---|---|---|---|
| |||||||||||||||||
After the battle, Chalmers reveals that he was formerly a Team Flare Admin, and was sent here by his mistress. He asks that you leave at once for Hotel Richissime's Royal Suite to meet the impatient woman.
Chapter 5: A Fiery Woman & A Truth Revealed
Inside the hotel, take the elevator up to 5F. Go south and enter the western room to meet Malva, the Elite Four's Fire-type specialist. Before revealing the reason she brought you here, she challenges you to battle.
| |||||||||||||||||||||||||||||||||||||||||||||||
Afterwards, she reveals that Essentia really is Emma. The suit she wears is called the Expansion Suit, and was created by Dr. Xerosic of Team Flare. Malva was once part of Team Flare as well, but Xerosic's projects don't sit well with her. She wants you to make him disappear; doing so will prevent him from further tarnishing Team Flare's name and stop Emma from being forced to commit crimes as Essentia. She tells you to find him at Lysandre Café, but to prepare well or you may face death.
Malva is already there when you arrive, and asks that you follow her. In the hideout's main room, she enters a password at the elevator that allows you to reach a hidden floor with the same layout as this one. When you leave the elevator, you are challenged by Scientist Sonia.
| Trainers | ||||||||||||||||||||||||||||||||||||||||||||||||||||||||||||||||||||||||||||||||||||||||||||||||||||||||||||||||||||
|---|---|---|---|---|---|---|---|---|---|---|---|---|---|---|---|---|---|---|---|---|---|---|---|---|---|---|---|---|---|---|---|---|---|---|---|---|---|---|---|---|---|---|---|---|---|---|---|---|---|---|---|---|---|---|---|---|---|---|---|---|---|---|---|---|---|---|---|---|---|---|---|---|---|---|---|---|---|---|---|---|---|---|---|---|---|---|---|---|---|---|---|---|---|---|---|---|---|---|---|---|---|---|---|---|---|---|---|---|---|---|---|---|---|---|---|---|
| ||||||||||||||||||||||||||||||||||||||||||||||||||||||||||||||||||||||||||||||||||||||||||||||||||||||||||||||||||||
Navigate your way around the floor, battling the Lumiose Gang Members who are here as part-time security guards as you go. After defeating Gang Member Nix, he leads you into the room he was guarding. There are several stolen Poké Balls scattered on the floor, and several bookcases line the walls. Inspect these bookcases to find Xerosic's notes about the Expansion Suit. His research claims that the suit enhances physical power, hacks into Poké Balls, disguises the wearer, and allows someone to control the wearer remotely. The other notes describe his experiment; Emma inadvertently responded to his ad for part-time work, though she didn't understand his research. Xerosic tried teaching her how to be a Pokémon Trainer, but his Pokémon only wanted to play with her. He tested the suit by having Essentia break into the museum and deface the painting. The final set of notes claim that he had her steal Poké Balls to test out the Poké Ball Jack's capabilities, but when Essentia ran into you, there was a glitch in the remote control function.
After reading all five volumes, talk to Nix. A bell rings, signaling the end of his shift. He leaves, but when you head for the door, Xerosic appears. He wonders about suppressing Emma's spirit to avoid another glitch, but thinks it would put too much of a strain on her mind. He realizes that you are the one who interfered with his trials, and intends to make you his next test subject. He calls Essentia, and orders her to battle you. As she can't grow tired while wearing the suit, he orders her to attack again and again, in an attempt to wear you down.
| ||||||||||||||||||||||||||||||||||||||||||||||||||||||||||||||||||||||||||||||||||
| |||||||||||||||||||||||||||||||||||||||||||||||||||||||||||||||||||||||||||||||||||||||||||||||||||||||||||||||||||
| |||||||||||||||||||||||||||||||||||||||||||||
After the third battle, Looker and Mimi enter. The detective can't get through to Emma, but Mimi is able to break Xerosic's control over her, causing the suit to malfunction. The doctor tells her to keep battling.
| ||||||||||||||||||||||||||||||||||||||||||||||||||||||||||||||||||||||||||||||||||
After another defeat, Xerosic turns off the remote control function. Emma wakes up, unaware of anything that had just happened. He tells her that the testing is over, so her part-time job has come to an end. Looker tells Emma to get ready to go to dinner with the two of you.
Later, Looker takes Xerosic back to the office. The doctor admits that he alone is responsible for Essentia's crimes, and will not resist arrest. But as Emma has grown to like Xerosic, Looker invites him to dinner before having to arrest him and reveal the truth to Emma.
Final Chapter: Here's Lookin' at You, Kid
A short time later, Emma calls you back to the office, as she has big news. She believes that Looker is finally leaving the hospital, and wanted everyone here for his return. Mimi enters soon after with a letter from the detective. In it, he confesses his true role as a member of the International Police, and now that the case is closed, he must leave the Kalos region behind. He bestows upon you his cherished codename, "Looker", and tells Emma and Mimi that he purchased the entire building, so they can live here rent-free from now on. Emma is in shock, and leaves the building to find him, with Mimi right behind her. When you try to follow, Punk Guy Nix enters and asks what is going on. He tells you that he just ran into the detective at the Lumiose Museum.
Climb to the third floor, where the museum director tells you that "the police officer" just left. Head back outside to receive a Holo Clip from Emma. She just got a call from Xerosic, who is with Looker in Lysandre Café. Inside, Xerosic again concedes his defeat. Looker names Emma as the new head of the Looker Bureau, and the doctor gives her the Expansion Suit—with remote control function removed—and his Pokémon to help her keep the peace. Looker leads Xerosic away to catch their train, and the chapter ends.
Epilogue
Emma, as Essentia, can be battled once every Tuesday, Thursday, and Saturday in the Looker Bureau.
| ||||||||||||||||||||||||||||||||||||||||||||||||||||||||||||||||||||||||||||||||||
|
X and Y walkthrough |
|

|
This article is part of Project Walkthroughs, a Bulbapedia project that aims to write comprehensive step-by-step guides on each Pokémon game. |


