Bonemerang (move): Difference between revisions
No edit summary |
No edit summary |
||
| (176 intermediate revisions by 82 users not shown) | |||
| Line 1: | Line 1: | ||
{{MoveInfobox| | {{MoveInfobox | ||
n=155 | | |n=155 | ||
name=Bonemerang | | |name=Bonemerang | ||
jname=ホネブーメラン | | |jname=ホネブーメラン | ||
jtrans=Bone Boomerang | | |jtrans=Bone Boomerang | ||
jtranslit=Hone Būmeran | |jtranslit=Hone Būmeran | ||
|gameimage=Bonemerang VIII.png | |||
gameimage=Bonemerang.png | | |gameimagewidth=300 | ||
type=Ground | | |type=Ground | ||
damagecategory=Physical | | |damagecategory=Physical | ||
basepp=10 | | |basepp=10 | ||
maxpp=16 | | |maxpp=16 | ||
power=50 | | |power=50 | ||
accuracy=90 | |accuracy=90 | ||
|gen=I | |||
gen=I | | |category=Tough | ||
category=Tough | | |appeal=4 | ||
appeal=4 | | |jam=0 | ||
jam=0 | | |cdesc=A highly appealing move. | ||
cdesc=A highly appealing move. | | |appealsc=2 | ||
appealsc=2 | | |scdesc=Allows performance of the same move twice in a row. | ||
scdesc=Allows performance of the same move twice in a row. | | |appeal6=2 | ||
|jam6=1 | |||
touches=no | | |cdesc6=Badly startles Pokémon that used a move of the same type. | ||
protect=yes | | |touches=no | ||
magiccoat=no | | |protect=yes | ||
snatch=no | | |magiccoat=no | ||
mirrormove=yes | | |snatch=no | ||
kingsrock=yes | |mirrormove=yes | ||
|kingsrock=yes | |||
|sound=no | |||
|target=anyadjacent | |||
target=anyadjacent | }} | ||
'''Bonemerang''' (Japanese: '''ホネブーメラン''' ''Bone Boomerang'') is a damage-dealing {{type|Ground}} [[multistrike move]] introduced in [[Generation I]]. It is one of the [[signature move]]s of {{p|Cubone}} and {{p|Marowak}}. | |||
'''Bonemerang''' (Japanese: '''ホネブーメラン''' ''Bone Boomerang'') is a damage-dealing {{ | |||
==Effect== | ==Effect== | ||
=== | ===Generation I=== | ||
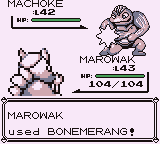
Bonemerang inflicts damage, | Bonemerang inflicts damage, hitting the target twice per use. Although only the first strike can be a [[critical hit]], the second one will deal the same amount of damage. | ||
Bonemerang will end immediately if the first strike breaks a {{OBP|substitute|doll}}. {{m|Bide}} will only acknowledge the second strike of this move. | |||
===Generation II=== | |||
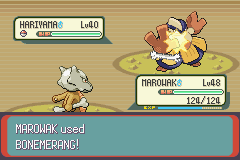
Each strike now does damage independently, consequently enabling either of them to be critical. Bonemerang will now hit again if the first strike breaks a substitute. | |||
If the user is holding a [[King's Rock]], the final strike has a chance to cause the opponent to [[flinch]]. | |||
===Generations III and IV=== | |||
If the user is holding a [[King's Rock]] or [[Razor Fang]], each consecutive hit has an equal chance to cause the opponent to [[flinch]]. | |||
Bonemerang can be used as the first move of a [[Contest combination|Pokémon Contest combination]], causing {{m|Bone Club}} and {{m|Bone Rush}} to score double the normal appeal if used in the next turn. It can also be used to finish a combination, with the user gaining 4 bonus appeal points if {{m|Bone Club}} or {{m|Bone Rush}} was used in the previous turn. | |||
===Generations V to VII=== | |||
If a [[Focus Sash]] activates before the last strike is dealt, the following strike will cause the defending Pokémon to faint. A [[Focus Band]] can still activate repeatedly to prevent fainting, but each chance is independent. {{a|Sturdy}} will activate with each hit if the defending Pokémon has a maximum HP of 1. | |||
If the target has {{a|Weak Armor}} or {{a|Stamina}}, each strike will activate it. | |||
===Generation VIII=== | |||
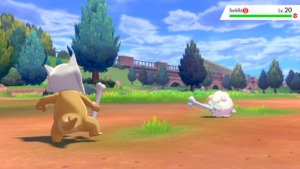
In Versions 1.0 to 1.1.1 of {{g|Sword and Shield}}, Bonemerang could not be selected in a battle. Starting with Version 1.2.0, it can be selected and functions as it did in previous generations. | |||
=== | ===Generation IX=== | ||
Bonemerang cannot be selected in a battle. | |||
== | ==Description== | ||
{{movedesc|Ground}} | |||
{{movedescentry|{{gameabbrevss|Stad}}|A boomerang made of bone is thrown to inflict damage twice -- on the way out and on its return.}} | |||
{{movedescentry|{{gameabbrevss|Stad2}}|A boomerang made of bone is thrown to inflict damage twice, on the way out and on return.}} | |||
{{movedescentry|{{gameabbrev2|GSC}}|An attack that strikes twice.}} | |||
{{movedescentry|{{gameabbrev3|RSE}}{{gameabbrevss|Colo}}{{gameabbrevss|XD}}|Throws a bone boomerang that strikes twice.}} | |||
{{movedescentry|{{gameabbrev3|FRLG}}|The user throws a bone that hits the foe once, then once again on return.}} | |||
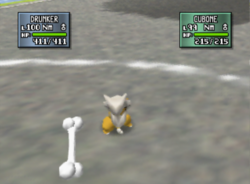
{{movedescentry|{{gameabbrev4|DPPtHGSS}}{{gameabbrevss|PBR}}|The user throws the bone it holds. The bone loops to hit the foe twice, coming and going.}} | |||
{{movedescentry|{{gameabbrev5|BWB2W2}}<br>{{gameabbrev6|XYORAS}}|The user throws the bone it holds. The bone loops to hit the target twice, coming and going.}} | |||
{{movedescentry|{{gameabbrev7|SMUSUMPE}}<br>{{gameabbrev8|SwShBDSPLA}}|The user throws the bone it holds. The bone loops around to hit the target twice—coming and going.}} | |||
{{movedescentry|{{gameabbrev9|SV}}|The user throws the bone it holds. The bone loops around to damage the target twice—coming and going.}} | |||
|} | |||
|}{{left clear}} | |||
==Learnset== | ==Learnset== | ||
===By [[Level|leveling up]]=== | ===By [[Level|leveling up]]=== | ||
{{ | {{Movehead/Games|Ground|g7=2|g8=2|g9=none}} | ||
{{Moveentry/ | {{Moveentry/10|0104|Cubone|type=Ground|1|Monster|Monster|43|25|25|21|21|21|21|26|48|40|STAB='''}} | ||
{{Moveentry/ | {{Moveentry/10|0105|Marowak|type=Ground|1|Monster|Monster|48|25|25|21|21|21|21|26|48|48|STAB='''}} | ||
{{ | {{Moveentry/10|0105|formsig=A|Marowak|type=Fire|type2=Ghost|1|Monster|Monster|form=Alolan Form|||||||21|26|48}} | ||
{{Movefoot|Ground|10}} | |||
==In other games== | |||
===[[Pokémon Mystery Dungeon series]]=== | |||
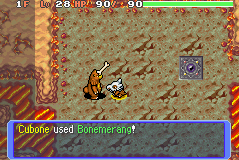
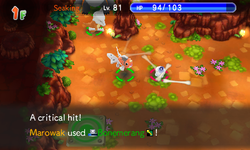
Bonemerang strikes the enemy twice. Prior to {{pkmn|Super Mystery Dungeon}}, if a Pokémon faints from the first projectile, the second projectile will be able to hit a new target. | |||
{{MDMoveheader|type=ground}} | |||
{{MDMoveRow|game=RB|pow=10|pp=14|acc=87%|range=10 tiles away|target=All|cuts=Yes}} | |||
{{MDMoveRow|game=TDS|pow=10|pp=14|acc=66%|range=10 tiles away|target=All|cuts=Yes}} | |||
{{MDMoveRow|game=BSL|pow=10|pp=14|acc=66%|range=10 tiles away|target=All|cuts=Yes}} | |||
{{MDMoveRow|game=SMD|pow=2|powmax=50|pp=12|ppmax=30|acc=80%|accmax=98%|range=10 tiles away (piercing)|target=Enemy|cuts=Yes}} | |||
{{MDMovefoot|type=ground|RB=yes|TDS=yes|BSL=yes|SMD=yes|RTDX=yes}} | |||
==={{g|Rumble Rush}}=== | |||
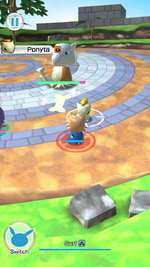
{{RumbleRushPhysicalAttack|move=Bonemerang|type=Ground | |||
|stars=5 | |||
|pow=45.9619 (Hit 1), 52.30148 (Hit 2) | |||
|charge=0.58 seconds (Hit 1), 0.66 | |||
|range=Shoot | |||
|hits=1 | |||
|projectiles=1 | |||
|crit=1.5 | |||
|effect=None}} | |||
===[[Monopoly: Pokémon Kanto Edition|Monopoly: Pokémon Exclusive Kanto Edition]]=== | |||
In the exclusive edition of Monopoly: Pokémon Kanto Edition, Bonemerang is the [[Monopoly: Pokémon Kanto Edition#Power Cards|Power Card]] belonging to {{p|Cubone}}. Once per game, the player using Cubone may force an opponent to pay double the rent on one of their properties when they land on it. | |||
===Description=== | |||
{{movedesc|Ground}} | |||
{{movedescentry|{{gameabbrevmd|RB}}|Strikes the target twice, even at a distance.}} | |||
{{movedescentry|{{gameabbrevmd|TDS}}|Inflicts damage on the target using 2 attacks in a single turn, even at a distance.}} | |||
{{movedescentry|{{gameabbrevmd|BSL}}|{{tt|はなれたポケモンに 2かいれんぞくで ダメージを あたえる|Inflicts damage on the target using 2 attacks in a single turn, even at a distance}}}} | |||
{{movedescentry|{{gameabbrevmd|GTI}}|[[File:IconKanji2MD.png]]UNUSED}} | |||
{{movedescentry|{{gameabbrevmd|SMD}}|It even damages faraway Pokémon 2 times in a row.}} | |||
{{movedescentry|{{gameabbrevmd|RTDX}}|It damages even faraway Pokémon 2 times in a row.}} | |||
{{movedescentry|[[Monopoly: Pokémon Kanto Edition|Monopoly: Pokémon Exclusive Kanto Edition]]|The Bonemarangs{{sic}} strike twice! When an opponent lands on one of your properties, they have to pay double the rent due.}} | |||
|} | |||
|}{{left clear}} | |||
==In the anime== | ==In the anime== | ||
{{moveanime|type=ground|exp=yes|gen=The user throws the bone it holds. The bone loops to | ===Main series=== | ||
{{movep|type=ground|ms=104|pkmn=Cubone|method=Cubone throws the bone that it is holding. The bone hits the opponent once, then returns to Cubone.}} | {{moveanime|type=ground|exp=yes|gen=The user throws the bone it holds like a boomerang. The bone loops around to damage the target twice—coming and going.|image1=Gavin Marowak Bonemerang.png|image1p=Marowak|image2=Alvin Cubone Bonemerang.png|image2p=Alvin's Cubone|image3=Giselle Cubone Bonemerang.png|image3p=Giselle's Cubone|image4=Kiawe Marowak Bonemerang.png|image4p=Alolan Marowak}} | ||
{{movep|type=ground|ms=104|pkmn=Cubone|method=Cubone throws the bone that it is holding. The bone hits the opponent once, then returns to Cubone. Sometimes, the bone glows white when the attack is being used.}} | |||
{{movemid|type=ground|user=Giselle|user1=Giselle's Cubone|startcode=EP009|startname=The School of Hard Knocks|notes=Debut}} | {{movemid|type=ground|user=Giselle|user1=Giselle's Cubone|startcode=EP009|startname=The School of Hard Knocks|notes=Debut}} | ||
{{movemid|type=ground|user=Alvin|user1=Alvin's Cubone|startcode=XY137|startname=Battling With a Clean Slate!}} | |||
{{movep|type=ground|ms=105|pkmn=Marowak|method=Marowak throws the bone that it is holding. The bone hits the opponent once, loops around, and then hits the opponent again.}} | {{movep|type=ground|ms=105|pkmn=Marowak|method=Marowak throws the bone that it is holding. The bone hits the opponent once, loops around, and then hits the opponent again.}} | ||
{{movemid|type=ground|user=Otoshi|user1=Otoshi's Marowak|startcode=EP073|startname=Bad to the Bone}} | {{movemid|type=ground|user=Otoshi|user1=Otoshi's Marowak|startcode=EP073|startname=Bad to the Bone}} | ||
| Line 63: | Line 132: | ||
{{movemid|type=ground|user=Gavin|user1=Gavin's Marowak|startcode=AG127|startname=From Brags to Riches}} | {{movemid|type=ground|user=Gavin|user1=Gavin's Marowak|startcode=AG127|startname=From Brags to Riches}} | ||
{{movemid|type=ground|user=Oriba|user1=Oriba's Marowak|startcode=AG176|startname=The Ole' Berate and Switch!}} | {{movemid|type=ground|user=Oriba|user1=Oriba's Marowak|startcode=AG176|startname=The Ole' Berate and Switch!}} | ||
{{ | {{movemid|type=ground|user=Jeffrey|user1=Jeffrey's Marowak|startcode=DP008|startname=Gymbaliar!}} | ||
{{movep|type=ground|ms=105A|pkmn=Marowak|method=Alolan Marowak throws the bone that it is holding. The bone hits the opponent once, then returns to Alolan Marowak.}} | |||
{{movebtm|type=ground|user=Kiawe's Marowak|startcode=SM053|startname=Rescuing the Unwilling!}} | |||
===Pokémon Origins=== | |||
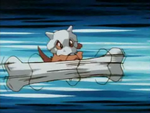
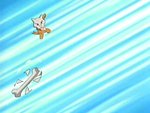
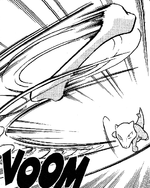
{{moveanime|type=ground|exp=yes|gen=The user throws the bone it holds like a boomerang.|image1=Cubone Bonemerang 1 PO.png|image1p=Cubone|image2=Cubone Bonemerang 2 PO.png|image2p=Bone thrown}} | |||
{{movep|type=ground|ms=104|pkmn=Cubone|method=Cubone throws the bone that it is holding at the opponent. The bone then returns to Cubone.}} | |||
{{movebtm|type=ground|user=Reina|user1=Reina's Cubone|startcode=PO02|startname=File 2: Cubone|notes=Debut}} | |||
==In the manga== | ==In the manga== | ||
===Pokémon Adventures=== | ===Pokémon Adventures=== | ||
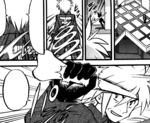
{{movemanga|type=ground|exp=yes|gen=The user throws a bone like a boomerang at the opponent.| | {{movemanga|type=ground|exp=yes|gen=The user throws a bone like a boomerang at the opponent.|image3=Miles Marowak Bonemerang.png|image3p=Marowak|image1=Bonee Bonemerang.png|image1p=Cubone|image2=Riley Lucario Bonemerang Adventures.png|image2p=Lucario}} | ||
{{movep|type=ground|ms=105|pkmn=Marowak|method=Marowak throws its bone like a boomerang at the opponent. The bone always comes back to it.}} | {{movep|type=ground|ms=105|pkmn=Marowak|method=Marowak throws its bone like a boomerang at the opponent. The bone always comes back to it.}} | ||
{{movemid|type=ground|user= | {{movemid|type=ground|user=Miles (Adventures)|user1=Miles's Marowak|startcode=PS046|startname=Whacked by Marowak!|notes=Debut}} | ||
{{movep|type=ground|ms=104|pkmn=Cubone|method=Cubone throws the bone | {{movep|type=ground|ms=104|pkmn=Cubone|method=Cubone throws the bone it's holding like a boomerang at the opponent. The bone always comes back to it.}} | ||
{{movemid|type=ground|user= | {{movemid|type=ground|user=Bonee|user1=Crystal's Bonee|startcode=PS120|startname=Surrounded by Staryu}} | ||
{{movep|type=ground|ms=448|pkmn=Lucario|method=Lucario waves its arm and | {{movep|type=ground|ms=448|pkmn=Lucario|method=Lucario waves its arm and throws a bone at the opponent like a boomerang.}} | ||
{{movebtmManga|type=ground|user=Riley's Lucario|startcode=PS418|startname= | {{movebtmManga|type=ground|user=Riley's Lucario|startcode=PS418|startname=Deprogramming Porygon-Z|notes=Lucario {{color2|000|Manga move errors|cannot legally learn}} Bonemerang}} | ||
==In other generations== | ==In other generations== | ||
{{Movegen| | ===Core series games=== | ||
type=Ground| | {{Movegen | ||
genI=Bonemerang I| | |type=Ground | ||
genII=Bonemerang II| | |genI=Bonemerang I | ||
genIII=Bonemerang III| | |genII=Bonemerang II | ||
genIV=Bonemerang IV | |genIII=Bonemerang III | ||
|genIV=Bonemerang IV | |||
}} | }} | ||
{{Movegen| | {{Movegen | ||
type=Ground| | |type=Ground | ||
|genV=Bonemerang V | |||
|genVI=Bonemerang VI | |||
|genVII=Bonemerang VII | |||
}} | }} | ||
== | ===Side series games=== | ||
{{Movegen | |||
|type=Ground | |||
|Stad=Bonemerang Stad | |||
|Stad2=Bonemerang Stad2 | |||
|Colo=Bonemerang Colo | |||
|XD=Bonemerang XD | |||
}} | |||
{{Movegen | |||
|type=Ground | |||
|PBR=Bonemerang PBR | |||
}} | |||
===Spin-off series games=== | |||
{{Movegen | |||
|type=Ground | |||
|PMDRB=Bonemerang PMD RB | |||
|PSMD=Bonemerang PSMD | |||
}} | |||
==In other languages== | ==In other languages== | ||
{{Langtable|color={{ground color}}|bordercolor={{ground color dark}} | {{Langtable|color={{ground color}}|bordercolor={{ground color dark}} | ||
|zh_cmn=骨頭回力鏢 ''Gútou Huílìbiāo'' | |zh_yue=骨頭回力鏢 ''{{tt|Gwāttàuh Wùihlihkbīu|Bone Boomerang}}'' | ||
|da=Knogleboomerang | |zh_cmn=骨頭回力鏢 / 骨头回力镖 ''{{tt|Gútou Huílìbiāo|Bone Boomerang}}'' | ||
|nl= | |cs=Bumerang | ||
|da=Benmerang<!--source: Danish version of The Official Pokémon Handbook--><br>Knogleboomerang | |||
|nl=Boemerang | |||
|fi=Luumerangi | |fi=Luumerangi | ||
|fr=Osmerang | |fr=Osmerang | ||
|de=Knochmerang | |de=Knochmerang | ||
|el=Οστέϊνος Ανακλητής | |el=Οστέϊνος Ανακλητής ''Ostéinos Anaklitís'' | ||
|it=Ossomerang | |it=Ossomerang | ||
|ko=뼈다귀부메랑 '' | |ko=뼈다귀부메랑 ''{{tt|Ppyeodagwibumerang|Bone boomerang}}'' | ||
|pt_br=Ossomerangue | |pl=Kościorang<!--{{tt|*|Diamond and Pearl series onwards}}<br>Latająca Kość/Powracająca Kość{{tt|*|EP108}}<br>Bumerang{{tt|*|EP073}}<br>Atak {{tt|Bonemerang|Left untranslated}} {{tt|*|EP009}}--> | ||
|pt_eu=Vaivém do Osso | |pt_br=Ossomerangue (anime, TCG, manga)<br>Osso Bumerangue (The Official Pokémon Handbook) | ||
|sr=Kost | |pt_eu=Vaivém do Osso ([[EP009]])<br>Bomerangue de Osso ([[EP073]]; Orange Islands; Diamond and Pearl)<br>Ossomerangue (Advanced Battle) | ||
|ro=Bumerangul | |||
|sr=Kost bumerang | |||
|es_eu=Huesomerang | |es_eu=Huesomerang | ||
|es_la=Huesorang}} | |es_la=Boomerang ([[EP009]], [[AG176]])<br>Hueso Boomerang ([[EP073]], [[AG127]])<br>Huesomerang ([[EP108]])<br>Huesorang ([[DP008]]) | ||
|sv=Benrang{{tt|*|EP073}}<br>Bonemerang{{tt|*|EP009}} | |||
|vi=Bumêrăng Xưong | |||
}} | |||
{{-}} | {{-}} | ||
{{Project Moves and Abilities notice}} | {{Project Moves and Abilities notice}} | ||
[[Category: | [[Category:Signature moves]] | ||
[[Category:Multistrike moves]] | |||
[[Category:Moves that can jam]] | |||
[[Category:Moves in Pokémon: Let's Go, Pikachu! and Let's Go, Eevee!]] | |||
[[Category:Moves usable in Pokémon Sword and Shield]] | |||
[[de:Knochmerang]] | [[de:Knochmerang]] | ||
[[es:Huesomerang]] | [[es:Huesomerang]] | ||
[[fr:Osmerang]] | [[fr:Osmerang]] | ||
[[it:Ossomerang | [[it:Ossomerang]] | ||
[[ja:ホネブーメラン]] | [[ja:ホネブーメラン]] | ||
[[ | [[zh:骨头回力镖(招式)]] | ||
Latest revision as of 20:24, 27 July 2024
| Bonemerang ホネブーメラン Bone Boomerang | ||||||||||||
| ||||||||||||
Range
| ||||||||||||
Availability
| ||||||||||||
| ||||||||||||
| ||||||||||||
| ||||||||||||
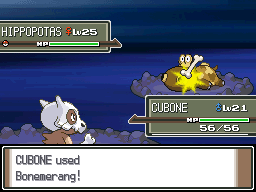
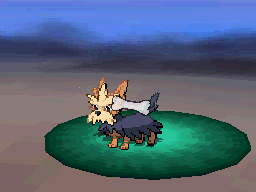
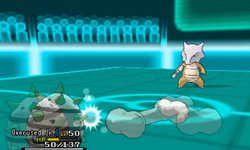
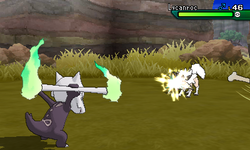
Bonemerang (Japanese: ホネブーメラン Bone Boomerang) is a damage-dealing Ground-type multistrike move introduced in Generation I. It is one of the signature moves of Cubone and Marowak.
Effect
Generation I
Bonemerang inflicts damage, hitting the target twice per use. Although only the first strike can be a critical hit, the second one will deal the same amount of damage.
Bonemerang will end immediately if the first strike breaks a substitute. Bide will only acknowledge the second strike of this move.
Generation II
Each strike now does damage independently, consequently enabling either of them to be critical. Bonemerang will now hit again if the first strike breaks a substitute.
If the user is holding a King's Rock, the final strike has a chance to cause the opponent to flinch.
Generations III and IV
If the user is holding a King's Rock or Razor Fang, each consecutive hit has an equal chance to cause the opponent to flinch.
Bonemerang can be used as the first move of a Pokémon Contest combination, causing Bone Club and Bone Rush to score double the normal appeal if used in the next turn. It can also be used to finish a combination, with the user gaining 4 bonus appeal points if Bone Club or Bone Rush was used in the previous turn.
Generations V to VII
If a Focus Sash activates before the last strike is dealt, the following strike will cause the defending Pokémon to faint. A Focus Band can still activate repeatedly to prevent fainting, but each chance is independent. Sturdy will activate with each hit if the defending Pokémon has a maximum HP of 1.
If the target has Weak Armor or Stamina, each strike will activate it.
Generation VIII
In Versions 1.0 to 1.1.1 of Pokémon Sword and Shield, Bonemerang could not be selected in a battle. Starting with Version 1.2.0, it can be selected and functions as it did in previous generations.
Generation IX
Bonemerang cannot be selected in a battle.
Description
|
Learnset
By leveling up
| # | Pokémon | Types | Egg Groups | Level | |||||||||||||||||||||||||||||||||||||||||||||||||||||||||||||||||||||||||||||||||||||||||||||||||||||
|---|---|---|---|---|---|---|---|---|---|---|---|---|---|---|---|---|---|---|---|---|---|---|---|---|---|---|---|---|---|---|---|---|---|---|---|---|---|---|---|---|---|---|---|---|---|---|---|---|---|---|---|---|---|---|---|---|---|---|---|---|---|---|---|---|---|---|---|---|---|---|---|---|---|---|---|---|---|---|---|---|---|---|---|---|---|---|---|---|---|---|---|---|---|---|---|---|---|---|---|---|---|---|---|---|---|
| I | II | III | IV | V | VI | VII | VIII | ||||||||||||||||||||||||||||||||||||||||||||||||||||||||||||||||||||||||||||||||||||||||||||||||||
| 0104 | 
|
Monster | 43 | 25 | 25 | 21 | 21 | 21 | 21 | 26 | 48 | 40 | |||||||||||||||||||||||||||||||||||||||||||||||||||||||||||||||||||||||||||||||||||||||||||||
| 0105 | 
|
Monster | 48 | 25 | 25 | 21 | 21 | 21 | 21 | 26 | 48 | 48 | |||||||||||||||||||||||||||||||||||||||||||||||||||||||||||||||||||||||||||||||||||||||||||||
| 0105 | 
|
Marowak
Alolan Form |
Monster | 21 | 26 | 48 | |||||||||||||||||||||||||||||||||||||||||||||||||||||||||||||||||||||||||||||||||||||||||||||||||||
| Bold indicates a Pokémon gains STAB from this move. Italics indicates a Pokémon whose evolution or alternate form receives STAB from this move. A dash (−) indicates a Pokémon cannot learn the move by the designated method. An empty cell indicates a Pokémon that is unavailable in that game/generation. | |||||||||||||||||||||||||||||||||||||||||||||||||||||||||||||||||||||||||||||||||||||||||||||||||||||||||
In other games
Pokémon Mystery Dungeon series
Bonemerang strikes the enemy twice. Prior to Super Mystery Dungeon, if a Pokémon faints from the first projectile, the second projectile will be able to hit a new target.
| ||||||||||||||||||||||||||||||||||||||||||||||||||||||||||||
Pokémon Rumble Rush
Monopoly: Pokémon Exclusive Kanto Edition
In the exclusive edition of Monopoly: Pokémon Kanto Edition, Bonemerang is the Power Card belonging to Cubone. Once per game, the player using Cubone may force an opponent to pay double the rent on one of their properties when they land on it.
Description
|
In the anime
Main series
| The user throws the bone it holds like a boomerang. The bone loops around to damage the target twice—coming and going. | |||
| Pokémon | Method | ||
|---|---|---|---|
| User | First Used In | Notes | |

|
Cubone throws the bone that it is holding. The bone hits the opponent once, then returns to Cubone. Sometimes, the bone glows white when the attack is being used. | ||
| Giselle's Cubone | The School of Hard Knocks | Debut | |
| Alvin's Cubone | Battling With a Clean Slate! | None | |

|
Marowak throws the bone that it is holding. The bone hits the opponent once, loops around, and then hits the opponent again. | ||
| Otoshi's Marowak | Bad to the Bone | None | |
| Luana's Marowak | Pokémon Double Trouble | None | |
| Gavin's Marowak | From Brags to Riches | None | |
| Oriba's Marowak | The Ole' Berate and Switch! | None | |
| Jeffrey's Marowak | Gymbaliar! | None | |

|
Alolan Marowak throws the bone that it is holding. The bone hits the opponent once, then returns to Alolan Marowak. | ||
| Kiawe's Marowak | Rescuing the Unwilling! | None | |
Pokémon Origins
| The user throws the bone it holds like a boomerang. | |||
| Pokémon | Method | ||
|---|---|---|---|
| User | First Used In | Notes | |

|
Cubone throws the bone that it is holding at the opponent. The bone then returns to Cubone. | ||
| Reina's Cubone | File 2: Cubone | Debut | |
In the manga
Pokémon Adventures
| The user throws a bone like a boomerang at the opponent. | |||
| Pokémon | Method | ||
|---|---|---|---|
| User | First Chapter Used In | Notes | |

|
Marowak throws its bone like a boomerang at the opponent. The bone always comes back to it. | ||
| Miles's Marowak | Whacked by Marowak! | Debut | |

|
Cubone throws the bone it's holding like a boomerang at the opponent. The bone always comes back to it. | ||
| Crystal's Bonee | Surrounded by Staryu | None | |

|
Lucario waves its arm and throws a bone at the opponent like a boomerang. | ||
| Riley's Lucario | Deprogramming Porygon-Z | Lucario cannot legally learn Bonemerang | |
In other generations
Core series games
Side series games
Spin-off series games
In other languages
| |||||||||||||||||||||||||||||||||||||||||||||||||||||||||||||||

|
This article is part of Project Moves and Abilities, a Bulbapedia project that aims to write comprehensive articles on two related aspects of the Pokémon games. |
- Moves
- Moves that can target any adjacent Pokémon
- Ground-type moves
- Tough moves
- Physical moves
- Generation I moves
- Moves in Pokémon Mystery Dungeon: Rescue Team DX
- Moves in Pokémon Rumble Rush
- Signature moves
- Multistrike moves
- Moves that can jam
- Moves in Pokémon: Let's Go, Pikachu! and Let's Go, Eevee!
- Moves usable in Pokémon Sword and Shield
