Kanto Route 1: Difference between revisions
m (→Generation IV: Ndex order.) |
m (Text replacement - "=I Choose You!=" to "=''I Choose You!''=") |
||
| (30 intermediate revisions by 17 users not shown) | |||
| Line 1: | Line 1: | ||
{{Route infobox | {{Route infobox | ||
|number=1 | |number=1 | ||
|generation=1 | |generation=1 | ||
|image=Kanto Route 1 | |image=Kanto Route 1 PE.png | ||
|imageI=Kanto Route 1 RBY.png | |imageI=Kanto Route 1 RBY.png | ||
|imageII=Kanto Route 1 GSC.png | |imageII=Kanto Route 1 GSC.png | ||
| Line 26: | Line 24: | ||
Heading south from Viridian City, Trainers can either hop down ledges to completely avoid any contact with wild {{OBP|Pokémon|species}} on their way to Pallet Town or they can travel through the grass patches, the required path for northbound travel. Following the grass-lined path, the route turns east then south as it enters the first patch. After a small break, the path of the route enters another patch of grass as the route turns west. Route 1 then makes an "S", turning to the south, then to the east before returning south and west, passing through the third grassy area. The path then juts south, entering another patch before curving to the east then to the south as it enters Pallet. | Heading south from Viridian City, Trainers can either hop down ledges to completely avoid any contact with wild {{OBP|Pokémon|species}} on their way to Pallet Town or they can travel through the grass patches, the required path for northbound travel. Following the grass-lined path, the route turns east then south as it enters the first patch. After a small break, the path of the route enters another patch of grass as the route turns west. Route 1 then makes an "S", turning to the south, then to the east before returning south and west, passing through the third grassy area. The path then juts south, entering another patch before curving to the east then to the south as it enters Pallet. | ||
There are no opponent Trainers on this route in Generations {{Gen|I}} and {{Gen|III}}. In [[Generation II]], two Trainers appear, while in [[Generation IV]] four Trainers are on the route. A [[Bitter Berry]] grows here in Generation II, while a [[Black Apricorn|Blk Apricorn]] does so in Generation IV. The Poké Mart employee is not present in Generations II and IV. | There are no opponent Trainers on this route in Generations {{Gen|I}} and {{Gen|III}}. In [[Generation II]], two Trainers appear, while in [[Generation IV]], four Trainers are on the route. In [[Generation VII]], there is one Trainer here, although he cannot be challenged before delivering the [[Parcel]] to [[Professor Oak]]. A [[Bitter Berry]] grows here in Generation II, while a [[Black Apricorn|Blk Apricorn]] does so in Generation IV. The Poké Mart employee is not present in Generations II and IV. | ||
==Items== | ==Items== | ||
| Line 56: | Line 54: | ||
{{catch/entry2|016|Pidgey|yes|yes|yes|Grass|2-4|45%|45%|0%|type1=normal|type2=flying|11=k}} | {{catch/entry2|016|Pidgey|yes|yes|yes|Grass|2-4|45%|45%|0%|type1=normal|type2=flying|11=k}} | ||
{{catch/entry2|019|Rattata|yes|yes|yes|Grass|2|30%|30%|0%|type1=normal|11=k}} | {{catch/entry2|019|Rattata|yes|yes|yes|Grass|2|30%|30%|0%|type1=normal|11=k}} | ||
{{catch/entry2|019|Rattata|yes|yes|no|Grass|2 | {{catch/entry2|019|Rattata|yes|yes|no|Grass|2, 3, 6|0%|0%|55%|type1=normal|11=k}} | ||
{{catch/entry2|019|Rattata|no|no|yes|Grass|2-3|0%|0%|50%|type1=normal|11=k}} | {{catch/entry2|019|Rattata|no|no|yes|Grass|2-3|0%|0%|50%|type1=normal|11=k}} | ||
{{catch/entry2|020|Raticate|no|no|yes|Grass|6|0%|0%|5%|type1=normal|11=k}} | {{catch/entry2|020|Raticate|no|no|yes|Grass|6|0%|0%|5%|type1=normal|11=k}} | ||
| Line 74: | Line 72: | ||
{{catch/entryhs|016|Pidgey|yes|yes|Grass|2-4|45%|45%|0%|type1=normal|type2=flying}} | {{catch/entryhs|016|Pidgey|yes|yes|Grass|2-4|45%|45%|0%|type1=normal|type2=flying}} | ||
{{catch/entryhs|019|Rattata|yes|yes|Grass|2|30%|30%|0%|type1=normal}} | {{catch/entryhs|019|Rattata|yes|yes|Grass|2|30%|30%|0%|type1=normal}} | ||
{{catch/entryhs|019|Rattata|yes|yes|Grass|2-6|0%|0%|55%|type1=normal}} | {{catch/entryhs|019|Rattata|yes|yes|Grass|2-3, 6|0%|0%|55%|type1=normal}} | ||
{{catch/entryhs|161|Sentret|yes|yes|Grass|3|20%|20%|0%|type1=normal}} | {{catch/entryhs|161|Sentret|yes|yes|Grass|3|20%|20%|0%|type1=normal}} | ||
{{catch/entryhs|162|Furret|yes|yes|Grass|6|5%|5%|0%|type1=normal}} | {{catch/entryhs|162|Furret|yes|yes|Grass|6|5%|5%|0%|type1=normal}} | ||
{{catch/entryhs|163|Hoothoot|yes|yes|Grass|2-4|0%|0%|45%|type1=normal|type2=flying}} | {{catch/entryhs|163|Hoothoot|yes|yes|Grass|2-4|0%|0%|45%|type1=normal|type2=flying}} | ||
{{catch/div|land|Headbutt}} | {{catch/div|land|Headbutt<br/><small>Group A</small>}} | ||
{{catch/entryhs|163|Hoothoot|yes|yes|Headbutt|2-3|all=50%|type1=Normal|type2=Flying|10=k}} | {{catch/entryhs|163|Hoothoot|yes|yes|Headbutt|2-3|all=50%|type1=Normal|type2=Flying|10=k}} | ||
{{catch/entryhs|163|Hoothoot|yes|yes|Headbutt|5-6|all= | {{catch/entryhs|204|Pineco|yes|yes|Headbutt|2-3|all=30%|type1=Bug|10=k}} | ||
{{catch/entryhs|265|Wurmple|yes|yes|Headbutt|2-3|all=20%|type1=Bug|10=k}} | |||
{{catch/div|land|Headbutt<br/><small>Group B</small>}} | |||
{{catch/entryhs|163|Hoothoot|yes|yes|Headbutt|5-6|all=50%|type1=Normal|type2=Flying|10=k}} | |||
{{catch/entryhs|165|Ledyba|no|yes|Headbutt|5-6|all=30%|type1=Bug|type2=Flying|10=k}} | {{catch/entryhs|165|Ledyba|no|yes|Headbutt|5-6|all=30%|type1=Bug|type2=Flying|10=k}} | ||
{{catch/entryhs|167|Spinarak|yes|no|Headbutt|5-6|all=30%|type1=Bug|type2=Poison|10=k}} | {{catch/entryhs|167|Spinarak|yes|no|Headbutt|5-6|all=30%|type1=Bug|type2=Poison|10=k}} | ||
{{catch/entryhs|265|Wurmple|yes|yes|Headbutt|5-6|all=20%|type1=Bug|10=k}} | {{catch/entryhs|265|Wurmple|yes|yes|Headbutt|5-6|all=20%|type1=Bug|10=k}} | ||
{{catch/div|land|Swarm}} | {{catch/div|land|Swarm}} | ||
| Line 117: | Line 117: | ||
{{Trainerdiv}} | {{Trainerdiv}} | ||
{{Trainerentry|Spr GS Cooltrainer F.png|Cooltrainer|Quinn|1824|2|002|Ivysaur|♂|38|None|121|Starmie||38|None|36=アイコ|37=Aiko}} | {{Trainerentry|Spr GS Cooltrainer F.png|Cooltrainer|Quinn|1824|2|002|Ivysaur|♂|38|None|121|Starmie||38|None|36=アイコ|37=Aiko}} | ||
{{trainerfooter|land|2}} | {{trainerfooter|land|2}} | ||
| Line 134: | Line 133: | ||
{{trainerheader|land}} | {{trainerheader|land}} | ||
{{trainerdiv|land|After delivering Professor Oak's Parcel}} | {{trainerdiv|land|After delivering Professor Oak's Parcel}} | ||
{{Trainerentry|VSYoungster PE.png{{!}}90px|Youngster|Ronny|60<br/>3 {{i|Poké Ball}}s|1|019|Rattata|♂|3|None|36=タイチ|37=Taichi}} | {{Trainerentry|VSYoungster PE.png{{!}}90px|game=PE|Youngster|Ronny|60<br/>3 {{i|Poké Ball}}s|1|019|Rattata|♂|3|None|36=タイチ|37=Taichi}} | ||
{{trainerfooter|land|PE}} | {{trainerfooter|land|PE}} | ||
==Differences among generations== | ==Differences among generations== | ||
[[File:Kanto Route 1 HGSS.png|thumb|200px|Route 1 in {{game|HeartGold and SoulSilver|s}}]] | |||
===Generation I and III=== | ===Generation I and III=== | ||
The [[route]] layout in Generations {{Gen|I}} and {{Gen|III}} are identical | The [[route]] layout in Generations {{Gen|I}} and {{Gen|III}} are nearly identical, however, the Generation I version has grassy patches to both the east and the west of the route itself. By using the [[Cheating|walk anywhere]] glitch, {{pkmn|Trainer}}s can enter the grass, but the game will freeze as the area contains no walkable data nor data for wild Pokémon. | ||
Apart from this, most aesthetic features have been enhanced. Trees have become bigger, flowers are more visible, and most other sprites have been upgraded to Generation III standards. | Apart from this, most aesthetic features have been enhanced. Trees have become bigger, flowers are more visible, and most other sprites have been upgraded to Generation III standards. | ||
| Line 156: | Line 156: | ||
There is a male {{tc|Ace Trainer}} just south of the photographer, as well as another female {{tc|Ace Trainer}}, with Pokémon similar to the other Cooltrainer in Generation II. Route 1 makes the "S", turning to the south, then to the east before returning south and west, passing through the third grassy area. The path then juts south, entering another patch before curving to the east then to the south as it enters Pallet Town. | There is a male {{tc|Ace Trainer}} just south of the photographer, as well as another female {{tc|Ace Trainer}}, with Pokémon similar to the other Cooltrainer in Generation II. Route 1 makes the "S", turning to the south, then to the east before returning south and west, passing through the third grassy area. The path then juts south, entering another patch before curving to the east then to the south as it enters Pallet Town. | ||
===Generation VII=== | |||
The route remains mostly unchanged compared to previous generations. Only notable differences are the presence of a {{tc|Youngster}}, who will battle the player once [[Professor Oak]]'s [[Parcel]] has been delivered; a [[Berry]] bush in the northeast corner; and the inclusion of {{p|Oddish}}{{sup/7|P}}/{{p|Bellsprout}}{{sup/7|E}} into the selection of catchable Pokémon. | |||
==Music== | |||
{| class="roundtable" style="margin:auto; text-align: center; background: #{{locationcolor/med|road}}; border: 3px solid #{{locationcolor/dark|road}}" | |||
|- style="background:#{{locationcolor/light|road}}" | |||
! Games | |||
! Song name | |||
! Composition | |||
! Arrangement | |||
|- style="background:#FFF" | |||
! {{GameIcon|R}}{{GameIcon|Gr}}{{GameIcon|B}}{{GameIcon|Y}} | |||
| [[Pokémon Red & Pokémon Green: Super Music Collection|Road to Viridian City: Leaving Pallet Town]] | |||
| [[Junichi Masuda]] | |||
| [[Junichi Masuda]] | |||
|- style="background:#FFF" | |||
! {{GameIcon|G}}{{GameIcon|S}}{{GameIcon|C}} | |||
| [[Pokémon HeartGold & Pokémon SoulSilver: Super Music Collection|Route 1]] | |||
| [[Junichi Masuda]] | |||
| [[Go Ichinose]] | |||
|- style="background:#FFF" | |||
! {{GameIcon|FR}}{{GameIcon|LG}} | |||
| [[Pokémon FireRed & Pokémon LeafGreen: Super Music Collection|Road to Viridian City: Leaving Pallet Town]] || [[Junichi Masuda]] || [[Go Ichinose]] | |||
|- style="background:#FFF" | |||
! {{GameIcon|HG}}{{GameIcon|SS}} | |||
| [[Pokémon HeartGold & Pokémon SoulSilver: Super Music Collection|Route 1]] || [[Junichi Masuda]] || [[Takuto Kitsuta]]<br><small>[[GB Sounds]]:</small> [[Go Ichinose]] | |||
|- style="background:#FFF" | |||
! {{GameIcon|LGP}}{{GameIcon|LGE}} | |||
| [[Pokémon: Let's Go, Pikachu! & Pokémon: Let's Go, Eevee! Super Music Collection|Road to Viridian City: Leaving Pallet Town]] || [[Junichi Masuda]] || [[Shota Kageyama]] | |||
|} | |||
==In the anime== | ==In the anime== | ||
| Line 161: | Line 192: | ||
[[File:Kanto Route 1 anime.png|250px|thumb|left|Route 1 in the {{pkmn|anime}}]] | [[File:Kanto Route 1 anime.png|250px|thumb|left|Route 1 in the {{pkmn|anime}}]] | ||
[[File:Kanto Route 1 overview SM.png|250px|thumb|Route 1 overview in the anime]] | [[File:Kanto Route 1 overview SM.png|250px|thumb|Route 1 overview in the anime]] | ||
====[[Original series]]==== | |||
Route 1 was introduced in ''[[EP001|Pokémon - I Choose You!]]''. {{Ash}}, who had just received his {{AP|Pikachu}} and was still trying to get a handle on the rebellious Pokémon, set off on his journey, beginning with Route 1. He first found a {{p|Pidgey}} and was eager to {{pkmn2|caught|catch}} it, but Pikachu didn't want to help him and instead ran up a tree. Frustrated, Ash decided to try to catch the Pidgey without Pikachu's help. He threw a {{i|Poké Ball}} at it, but the Pidgey broke out easily and fled. Ash turned and saw a {{p|Rattata}} digging through his bag. | Route 1 was introduced in ''[[EP001|Pokémon - I Choose You!]]''. {{Ash}}, who had just received his {{AP|Pikachu}} and was still trying to get a handle on the rebellious Pokémon, set off on his journey, beginning with Route 1. He first found a {{p|Pidgey}} and was eager to {{pkmn2|caught|catch}} it, but Pikachu didn't want to help him and instead ran up a tree. Frustrated, Ash decided to try to catch the Pidgey without Pikachu's help. He threw a {{i|Poké Ball}} at it, but the Pidgey broke out easily and fled. Ash turned and saw a {{p|Rattata}} digging through his bag. | ||
| Line 169: | Line 201: | ||
After jumping in the river, narrowly evading an attack from a {{p|Magikarp}} and {{p|Gyarados}}, Ash and Pikachu met {{an|Misty}}, who was [[fishing]] for {{t|Water}} Pokémon. He stole her [[Bicycle|bike]], putting the injured Pikachu in its basket, and rode away, promising that he would bring it back someday. They were attacked once again by the Spearow, but Pikachu used a massive electrical attack to take out the entire flock. Once the storm cleared, Ash and Pikachu both rose from where they were knocked back on the ground, exhausted but victorious. Ash looked up and saw {{an|Ho-Oh|an unknown Pokémon}} majestically flying through the sky, over the rainbow that had been left after the storm, but his Pokédex could not identify the species. | After jumping in the river, narrowly evading an attack from a {{p|Magikarp}} and {{p|Gyarados}}, Ash and Pikachu met {{an|Misty}}, who was [[fishing]] for {{t|Water}} Pokémon. He stole her [[Bicycle|bike]], putting the injured Pikachu in its basket, and rode away, promising that he would bring it back someday. They were attacked once again by the Spearow, but Pikachu used a massive electrical attack to take out the entire flock. Once the storm cleared, Ash and Pikachu both rose from where they were knocked back on the ground, exhausted but victorious. Ash looked up and saw {{an|Ho-Oh|an unknown Pokémon}} majestically flying through the sky, over the rainbow that had been left after the storm, but his Pokédex could not identify the species. | ||
====''[[Pokémon the Series: Black & White]]''==== | |||
Route 1 was also briefly seen in ''[[BW142|The Dream Continues!]]'' while Ash and [[Alexa]] passed it on their way to Pallet Town. | Route 1 was also briefly seen in ''[[BW142|The Dream Continues!]]'' while Ash and [[Alexa]] passed it on their way to Pallet Town. | ||
{{-}} | {{-}} | ||
====Pokémon==== | ====Pokémon==== | ||
{| style="width: 100%" | {| style="width: 100%" | ||
| Line 189: | Line 223: | ||
|} | |} | ||
===I Choose You!=== | ===''I Choose You!''=== | ||
Route 1 appeared in the opening of ''[[M20|I Choose You!]]''. [[Ash Ketchum (M20)|Ash]] left [[Pallet Town]] via this route at the start of his journey, with his newly obtained, disobedient | Route 1 appeared in the opening of ''[[M20|I Choose You!]]''. [[Ash Ketchum (M20)|Ash]] left [[Pallet Town]] via this route at the start of his journey, with his newly obtained, disobedient [[Ash's Pikachu (M20)|Pikachu]]. Ash and Pikachu were attacked by a large flock of {{p|Spearow}} and attempted to escape in the midst of a rainstorm, culminating in Pikachu unleashing a powerful {{m|Thunderbolt}} on the Spearow, knocking himself and his Trainer out in the process. Ash and Pikachu woke up after the storm had passed to see {{p|Ho-Oh}} flying overhead, dropping a [[Rainbow Wing]] as it flew. Ash picked up the feather and proclaimed to Pikachu that they would meet it again someday. | ||
====Pokémon==== | ====Pokémon==== | ||
| Line 220: | Line 254: | ||
[[File:Kanto Route 1 Adventures.png|thumb|250px|Route 1 in [[Pokémon Adventures]]]] | [[File:Kanto Route 1 Adventures.png|thumb|250px|Route 1 in [[Pokémon Adventures]]]] | ||
===Pokémon Adventures=== | ===Pokémon Adventures=== | ||
===={{ | ===={{MangaArc|Red, Green & Blue}}==== | ||
Route 1 made a brief appearance in ''[[PS002|Bulbasaur, Come Home!]]''. After {{adv|Red}} had accidentally let loose some {{OBP|Pokémon|species}} that {{adv|Professor Oak}} was keeping in his {{TP|Professor Oak|Laboratory}}, he and Professor Oak were forced to pursue them, with some of them having escaped all the way to Route 1 and [[Viridian City]]. | Route 1 made a brief appearance in ''[[PS002|Bulbasaur, Come Home!]]''. After {{adv|Red}} had accidentally let loose some {{OBP|Pokémon|species}} that {{adv|Professor Oak}} was keeping in his {{TP|Professor Oak|Laboratory}}, he and Professor Oak were forced to pursue them, with some of them having escaped all the way to Route 1 and [[Viridian City]]. | ||
{{-}} | {{-}} | ||
==Trivia== | ==Trivia== | ||
* In [[Generation I]], if a player currently on Route 1 opens the [[Town Map]], pressing up will apparently do nothing at first, as the selection will go from Route 1 (the current place) to Route 1 again due to [[List of glitches in Generation I#Town Map selection oversight|an oversight]]. The player will need to press up twice to select the next place, which is [[Viridian City]]. Similarly, a player in the {{ka|Power Plant}} will need to press down twice to go to the previous place in the Town Map. | |||
* A remix of the theme on this [[route]] was used in [[Super Smash Bros. Brawl]]. It can also be found in [[Super Smash Bros. for Nintendo 3DS and Wii U]] and [[Super Smash Bros. Ultimate]]. | * A remix of the theme on this [[route]] was used in [[Super Smash Bros. Brawl]]. It can also be found in [[Super Smash Bros. for Nintendo 3DS and Wii U]] and [[Super Smash Bros. Ultimate]]. | ||
* In Generations II and IV, the remixed music track for this Route starts from the notes at the last few seconds of the original track's music. | * In Generations II and IV, the remixed music track for this Route starts from the notes at the last few seconds of the original track's music. | ||
* The ''[[Primo|Poké Dude]] Show'' that airs on the [[Teachy TV]] is filmed here. | * The ''[[Primo|Poké Dude]] Show'' that airs on the [[Teachy TV]] is filmed here. | ||
{{-}} | {{-}} | ||
Latest revision as of 20:50, 4 September 2024
| |||||||||||||
| |||||||||||||
Map description
| |||||||||||||
Connecting locations
| |||||||||||||
Location  Location of Route 1 in Kanto. | |||||||||||||
| |||||||||||||
Pokémon world routes
| |||||||||||||
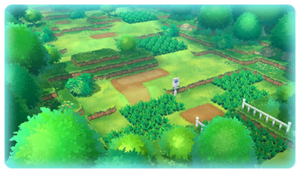
Route 1 (Japanese: 1番道路 Route 1) is a route located in western Kanto. It connects Pallet Town in the south to Viridian City in the north.
Route description
Heading north from Pallet Town, Trainers must make their way around a large but very primitive route, that will become their very first route they will explore on their journey. The route is riddled with large patches of tall grass, and ledges that contour from far east to all to the far west, blocking off most of the route making it hard to travel north, only to have small gaps by which the road has been broken into it.
From the narrow "gateway" into Route 1, the route will make its way west as a ledge will block the road, however patches of tall grass be found by traveling east. After traveling north past the gap in the ledge, there will be a small clearing, where a man working for a Poké Mart can be found giving out a free Potion to Trainers. Heading away from the small clearing, the route makes its way eastern, and creates an "S" shapes as it winds around tall ground, as well as long ledges. Route 1 then travels northerly through two consecutive patches of tall grass, one larger than the other. It then finishes off by curving westerly, and then north as it enters Viridian City.
Heading south from Viridian City, Trainers can either hop down ledges to completely avoid any contact with wild Pokémon on their way to Pallet Town or they can travel through the grass patches, the required path for northbound travel. Following the grass-lined path, the route turns east then south as it enters the first patch. After a small break, the path of the route enters another patch of grass as the route turns west. Route 1 then makes an "S", turning to the south, then to the east before returning south and west, passing through the third grassy area. The path then juts south, entering another patch before curving to the east then to the south as it enters Pallet.
There are no opponent Trainers on this route in Generations I and III. In Generation II, two Trainers appear, while in Generation IV, four Trainers are on the route. In Generation VII, there is one Trainer here, although he cannot be challenged before delivering the Parcel to Professor Oak. A Bitter Berry grows here in Generation II, while a Blk Apricorn does so in Generation IV. The Poké Mart employee is not present in Generations II and IV.
Items
| Item | Location | Games | |
|---|---|---|---|
| Potion | From the Viridian Poké Mart employee | R B Y FR LG | |
| Potion | From the Viridian Poké Mart employee after delivering Oak's Parcel | P E | |
| Bitter Berry | South of the first ledge on the west side of the route (daily) | G S C | |
| Blk Apricorn | South of the first ledge on the west side of the route (daily) | HG SS | |
Berry plant
| Item | Location | Games | |
|---|---|---|---|
| Razz Berry | Sometimes found by the player's walking Pokémon from the bush in the northeast corner of the route | P E | |
Pokémon
Generation I
| Pokémon | Games | Location | Levels | Rate | |||||||||||
|---|---|---|---|---|---|---|---|---|---|---|---|---|---|---|---|
|
R | B | Y |
|
2-5 | 50% | |||||||||
|
R | B | Y |
|
2-7 | 70% | |||||||||
|
R | B | Y |
|
2-4 | 50% | |||||||||
|
R | B | Y |
|
2-4 | 30% | |||||||||
| Attacking Oak | |||||||||||||||
|
R | B | Y |
|
5 | One | |||||||||
| A colored background means that the Pokémon can be found in this location in the specified game. A white background with a colored letter means that the Pokémon cannot be found here. | |||||||||||||||
Generation II
| Pokémon | Games | Location | Levels | Rate | |||||||||||
|---|---|---|---|---|---|---|---|---|---|---|---|---|---|---|---|
|
G | S | C |
|
2-4 | 45% | 45% | 0% | |||||||
|
G | S | C |
|
2 | 30% | 30% | 0% | |||||||
|
G | S | C |
|
2, 3, 6 | 0% | 0% | 55% | |||||||
|
G | S | C |
|
2-3 | 0% | 0% | 50% | |||||||
|
G | S | C |
|
6 | 0% | 0% | 5% | |||||||
|
G | S | C |
|
3 | 20% | 20% | 0% | |||||||
|
G | S | C |
|
6 | 5% | 5% | 0% | |||||||
|
G | S | C |
|
2-4 | 0% | 0% | 45% | |||||||
| A colored background means that the Pokémon can be found in this location in the specified game. A white background with a colored letter means that the Pokémon cannot be found here. | |||||||||||||||
Generation III
| Pokémon | Games | Location | Levels | Rate | |||||||||||
|---|---|---|---|---|---|---|---|---|---|---|---|---|---|---|---|
|
FR | LG |
|
2-5 | 50% | ||||||||||
|
FR | LG |
|
2-4 | 50% | ||||||||||
| A colored background means that the Pokémon can be found in this location in the specified game. A white background with a colored letter means that the Pokémon cannot be found here. | |||||||||||||||
Generation IV
| Pokémon | Games | Location | Levels | Rate | |||||||||||
|---|---|---|---|---|---|---|---|---|---|---|---|---|---|---|---|
|
HG | SS |
|
2-4 | 45% | 45% | 0% | ||||||||
|
HG | SS |
|
2 | 30% | 30% | 0% | ||||||||
|
HG | SS |
|
2-3, 6 | 0% | 0% | 55% | ||||||||
|
HG | SS |
|
3 | 20% | 20% | 0% | ||||||||
|
HG | SS |
|
6 | 5% | 5% | 0% | ||||||||
|
HG | SS |
|
2-4 | 0% | 0% | 45% | ||||||||
| Headbutt Group A | |||||||||||||||
|
HG | SS |
|
2-3 | 50% | ||||||||||
|
HG | SS |
|
2-3 | 30% | ||||||||||
|
HG | SS |
|
2-3 | 20% | ||||||||||
| Headbutt Group B | |||||||||||||||
|
HG | SS |
|
5-6 | 50% | ||||||||||
|
HG | SS |
|
5-6 | 30% | ||||||||||
|
HG | SS |
|
5-6 | 30% | ||||||||||
|
HG | SS |
|
5-6 | 20% | ||||||||||
| Swarm | |||||||||||||||
|
HG | SS |
|
2 | 40% | ||||||||||
| Special Pokémon | |||||||||||||||
|
HG | SS |
|
2 | 20% | ||||||||||
|
HG | SS |
|
3 | 20% | ||||||||||
|
HG | SS |
|
2-3 | 40% | ||||||||||
| A colored background means that the Pokémon can be found in this location in the specified game. A white background with a colored letter means that the Pokémon cannot be found here. | |||||||||||||||
Generation VII
| Pokémon | Games | Location | Levels | Rate | |||||||||||
|---|---|---|---|---|---|---|---|---|---|---|---|---|---|---|---|
|
P | E |
|
3-4 | 40% | ||||||||||
|
P | E |
|
3-4 | 30% | ||||||||||
|
P | E |
|
3-4 | 30% | ||||||||||
|
P | E |
|
3-4 | 30% | ||||||||||
| While riding a Flying Pokémon After becoming Champion | |||||||||||||||
|
P | E |
|
3-56 | 60% | ||||||||||
|
P | E |
|
3-56 | 35% | ||||||||||
|
P | E |
|
3-56 | 5% | ||||||||||
| Rare Spawns | |||||||||||||||
|
P | E |
|
3-56 | - | ||||||||||
|
P | E |
|
3-56 | - | ||||||||||
|
P | E |
|
3-56 | - | ||||||||||
|
P | E |
|
3-56 | - | ||||||||||
|
P | E |
|
3-56 | - | ||||||||||
| A colored background means that the Pokémon can be found in this location in the specified game. A white background with a colored letter means that the Pokémon cannot be found here. | |||||||||||||||
Trainers
Generation II
| Trainer | Pokémon | |||||||||||
|---|---|---|---|---|---|---|---|---|---|---|---|---|
|
| |||||||||||
| ||||||||||||
| ||||||||||||
|
| |||||||||||
| ||||||||||||
| Trainers with a telephone symbol by their names will give their Pokégear number to the player, and may call or be called for a rematch with higher-level Pokémon. | ||||||||||||
Generation IV
| Trainer | Pokémon | |||||||||||
|---|---|---|---|---|---|---|---|---|---|---|---|---|
|
| |||||||||||
| ||||||||||||
|
| |||||||||||
| ||||||||||||
| ||||||||||||
|
| |||||||||||
| ||||||||||||
|
| |||||||||||
| ||||||||||||
| Trainers with a telephone symbol by their names will give their Pokégear number to the player, and may call or be called for a rematch with higher-level Pokémon. | ||||||||||||
Generation VII
| Trainer | Pokémon | |||||||||
|---|---|---|---|---|---|---|---|---|---|---|
| After delivering Professor Oak's Parcel | ||||||||||
|
| |||||||||
Differences among generations

Generation I and III
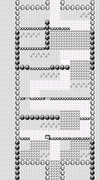
The route layout in Generations I and III are nearly identical, however, the Generation I version has grassy patches to both the east and the west of the route itself. By using the walk anywhere glitch, Trainers can enter the grass, but the game will freeze as the area contains no walkable data nor data for wild Pokémon.
Apart from this, most aesthetic features have been enhanced. Trees have become bigger, flowers are more visible, and most other sprites have been upgraded to Generation III standards.
Generation II
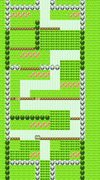
The route remains mostly the same apart from a few minor changes to the gameplay. Heading south from Viridian City, Trainers can either hop down ledges to completely avoid any contact with wild Pokémon (which now include Sentret, Furret and Hoothoot) on their way to Pallet Town, or alternatively travel through the patches of grass.
On their way down, there are two other Trainers waiting for battle. One can found near the northern side of the route, while the other can be found in the near the middle in the clearing. He has replaced the Viridian Poké Mart employee who gives away Potions, however there is a Bitter Berry tree that sprouted along the northwest portion of the route. Lastly, the grass patches outside of the route have been removed but the spacing between the route and the surrounding forest still remains.
Generation IV
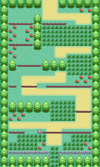
Other than graphical updates, the basic layout remains the same as previous generations, but the route is no longer flat, due to hills being added to give feeling of depth to the route. Heading south from Viridian City, a gate has been added between the route and Viridian City, in order for the game to load the different tilesets used between the areas.
The Bitter Berry tree has been changed into a Blk Apricorn tree, which can be found between the two ledges located on the northwestern side of the route. By traveling east, Trainers are able to battle a Schoolboy, and by jumping off the ledge and heading east, another Schoolboy can be challenged, with Pokémon similar to the other Schoolboy in Generation II.
By jumping down the ledge and going through the tall grass, the route soon turns into the clearing. Like in Generation II, the Viridian Poké Mart employee is no longer present and is replaced by a Trainer. On Mondays, Tuesdays, and Saturdays there is a photographer here, who will take a picture of the player and their party.
There is a male Ace Trainer just south of the photographer, as well as another female Ace Trainer, with Pokémon similar to the other Cooltrainer in Generation II. Route 1 makes the "S", turning to the south, then to the east before returning south and west, passing through the third grassy area. The path then juts south, entering another patch before curving to the east then to the south as it enters Pallet Town.
Generation VII
The route remains mostly unchanged compared to previous generations. Only notable differences are the presence of a Youngster, who will battle the player once Professor Oak's Parcel has been delivered; a Berry bush in the northeast corner; and the inclusion of OddishP/BellsproutE into the selection of catchable Pokémon.
Music
In the anime
Main series
Original series
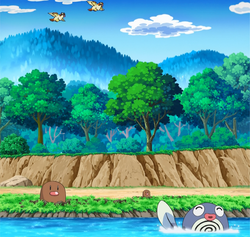
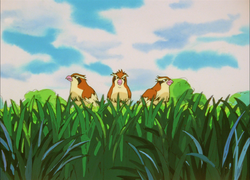
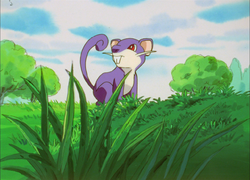
Route 1 was introduced in Pokémon - I Choose You!. Ash, who had just received his Pikachu and was still trying to get a handle on the rebellious Pokémon, set off on his journey, beginning with Route 1. He first found a Pidgey and was eager to catch it, but Pikachu didn't want to help him and instead ran up a tree. Frustrated, Ash decided to try to catch the Pidgey without Pikachu's help. He threw a Poké Ball at it, but the Pidgey broke out easily and fled. Ash turned and saw a Rattata digging through his bag.
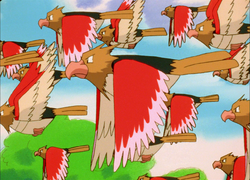
Ash turned and saw a group of Pidgey in the field; he threw a rock at them, which only scared them away. However, he saw another bird Pokémon in the field, mistook it for another Pidgey, and threw another rock at it, which hit it in the back of its head. When it turned to look at him, however, he realized that he actually hit a Spearow. The Spearow swooped several times to attack him and Pikachu.
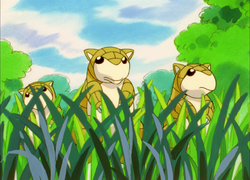
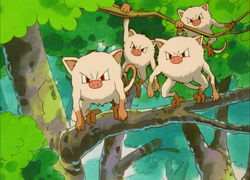
As the Spearow chased Ash and Pikachu, two herds of Pokémon that do not appear on this route in the games were seen: Mankey and Sandshrew.
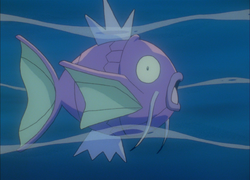
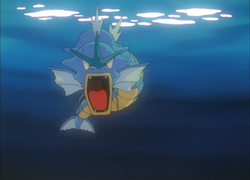
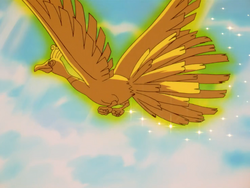
After jumping in the river, narrowly evading an attack from a Magikarp and Gyarados, Ash and Pikachu met Misty, who was fishing for Water Pokémon. He stole her bike, putting the injured Pikachu in its basket, and rode away, promising that he would bring it back someday. They were attacked once again by the Spearow, but Pikachu used a massive electrical attack to take out the entire flock. Once the storm cleared, Ash and Pikachu both rose from where they were knocked back on the ground, exhausted but victorious. Ash looked up and saw an unknown Pokémon majestically flying through the sky, over the rainbow that had been left after the storm, but his Pokédex could not identify the species.
Pokémon the Series: Black & White
Route 1 was also briefly seen in The Dream Continues! while Ash and Alexa passed it on their way to Pallet Town.
Pokémon
 Pidgey |
 Rattata |
 Spearow (multiple) |
 Sandshrew |
 Diglett |
 Mankey (multiple) |
 Poliwag |
 Magikarp |
 Gyarados |
 Ho-Oh |
I Choose You!
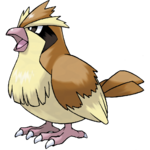
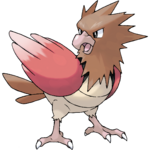
Route 1 appeared in the opening of I Choose You!. Ash left Pallet Town via this route at the start of his journey, with his newly obtained, disobedient Pikachu. Ash and Pikachu were attacked by a large flock of Spearow and attempted to escape in the midst of a rainstorm, culminating in Pikachu unleashing a powerful Thunderbolt on the Spearow, knocking himself and his Trainer out in the process. Ash and Pikachu woke up after the storm had passed to see Ho-Oh flying overhead, dropping a Rainbow Wing as it flew. Ash picked up the feather and proclaimed to Pikachu that they would meet it again someday.
Pokémon
 Pidgey |
 Spearow (multiple) |
 Gyarados |
 Ho-Oh |
Pokémon Origins

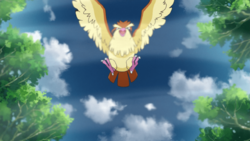
Route 1 appeared in File 1: Red, where Red was seen traveling through it on his way to Viridian City. Soon after entering the Route, he encountered a wild Pidgey, and tried to catch it, but it got away. After a short while, he got the hang of catching Pokémon, and caught multiple different species, including a Spearow, Caterpie, and Pidgey.
Along the way, he encountered a Youngster, who challenged him to a battle with his Nidoran♀. Not knowing other Trainer's Pokémon couldn't be caught, Red tried to throw a Poké Ball at Nidoran♀, only to have it bounce off. The Youngster, however, agreed to tell Red where he could find a Nidoran of his own. Shortly before arriving in Viridian City, Red encountered Blue, who challenged him to a battle. Due to Blue's Squirtle having a type advantage over Red's Charmander, Blue easily won the battle. Afterwards, Red met Brock, who, having watched the battle, suggested Red that he should start challenging the Gym Leaders in order to learn how to battle.
Pokémon
 Pidgey |
 Rattata |
 Spearow |
 Caterpie |
In the manga
Pokémon Adventures
Red, Green & Blue arc
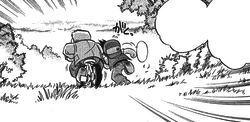
Route 1 made a brief appearance in Bulbasaur, Come Home!. After Red had accidentally let loose some Pokémon that Professor Oak was keeping in his Laboratory, he and Professor Oak were forced to pursue them, with some of them having escaped all the way to Route 1 and Viridian City.
Trivia
- In Generation I, if a player currently on Route 1 opens the Town Map, pressing up will apparently do nothing at first, as the selection will go from Route 1 (the current place) to Route 1 again due to an oversight. The player will need to press up twice to select the next place, which is Viridian City. Similarly, a player in the Power Plant will need to press down twice to go to the previous place in the Town Map.
- A remix of the theme on this route was used in Super Smash Bros. Brawl. It can also be found in Super Smash Bros. for Nintendo 3DS and Wii U and Super Smash Bros. Ultimate.
- In Generations II and IV, the remixed music track for this Route starts from the notes at the last few seconds of the original track's music.
- The Poké Dude Show that airs on the Teachy TV is filmed here.
| Kanto | ||||||||
|---|---|---|---|---|---|---|---|---|
|
| ||||||||
|

|
This article is part of Project Routes, a Bulbapedia project that aims to write comprehensive articles on every route in the Pokémon world. |
