Appendix:Sword and Shield walkthrough/Section 2: Difference between revisions
(Tidied up rival battle section for improved browsing experience on mobile) Tag: 2017 source edit |
|||
| (11 intermediate revisions by 4 users not shown) | |||
| Line 1: | Line 1: | ||
==Route 1== | ==Route 1== | ||
Now that you have a | [[File:Galar_Route_1_SwSh.png|thumb|right|Galar Route 1]] | ||
Now that you have a Pokémon, you can explore the tall grass on the right side of the route towards Wedgehurst. The main path is blocked by {{p|Wooloo}}, so you will now have to take the detour around through tall grass, where there are plenty of wild Pokémon available. You already have five [[Poké Ball]]s, so you will have the option to catch any of these Pokémon should you wish. | |||
{| class="expandable" align="center" style="background: #{{shield color light}}; {{roundy}}; border: 5px solid #{{sword color light}};" | |||
{| class="expandable" align="center" style="background: #{{ | |||
|- align="center" | |- align="center" | ||
! Available Pokémon | ! Available Pokémon | ||
| Line 10: | Line 9: | ||
| | | | ||
{{catch/header/8|land|no}} | {{catch/header/8|land|no}} | ||
{{catch/div|land|[[Random encounter]]s}} | |||
{{catch/entry8|010|Caterpie|yes|yes|Grass|2-5|15%|type1=Bug}} | {{catch/entry8|010|Caterpie|yes|yes|Grass|2-5|15%|type1=Bug}} | ||
{{catch/entry8|163|Hoothoot|yes|yes|Grass|2-5|5%|type1=Normal|type2=Flying}} | {{catch/entry8|163|Hoothoot|yes|yes|Grass|2-5|5%|type1=Normal|type2=Flying}} | ||
| Line 15: | Line 15: | ||
{{catch/entry8|819|Skwovet|yes|yes|Grass|2-5|40%|type1=Normal}} | {{catch/entry8|819|Skwovet|yes|yes|Grass|2-5|40%|type1=Normal}} | ||
{{catch/entry8|824|Blipbug|yes|yes|Grass|2-5|30%|type1=Bug}} | {{catch/entry8|824|Blipbug|yes|yes|Grass|2-5|30%|type1=Bug}} | ||
{{catch/ | {{catch/div|land|[[Symbol encounter|Visible encounters]]}} | ||
| | |||
{{catch/entry8|819|Skwovet|yes|yes|Grass|3-6|50%|type1=Normal}} | {{catch/entry8|819|Skwovet|yes|yes|Grass|3-6|50%|type1=Normal}} | ||
{{catch/entry8|821|Rookidee|yes|yes|Grass|3-6|30%|type1=Flying}} | {{catch/entry8|821|Rookidee|yes|yes|Grass|3-6|30%|type1=Flying}} | ||
| Line 31: | Line 22: | ||
{{catch/footer|land}} | {{catch/footer|land}} | ||
|} | |} | ||
{| class="expandable" align="center" style="background: #{{shield color light}}; {{roundy}} border: 5px solid #{{sword color light}};" | |||
{| class="expandable" align="center" style="background: #{{shield color}}; {{roundy | |||
|- align="center" | |- align="center" | ||
! Items | ! Items | ||
| Line 43: | Line 32: | ||
{{Itlistfoot}} | {{Itlistfoot}} | ||
|} | |} | ||
Head straight north through this route to Wedgehurst when you are done. | |||
Head straight to Wedgehurst | |||
==Wedgehurst== | ==Wedgehurst== | ||
[[File:Wedgehurst_SwSh.png|thumb|right|Wedgehurst]] | |||
Upon reaching Wedgehurst, you'll meet up with [[Leon]] for a visit to the Pokémon Research Lab situated on the town's east side. Inside the lab, you'll meet [[Sonia]], a childhood companion of Leon and the assistant, as well as granddaughter, of [[Professor Magnolia]]. It's at this point that you'll receive the indispensable [[Pokédex]]. Sonia will task you with a visit to her grandmother's residence across Route 2. | |||
After you leave the | After you leave the lab and head further through Wedgehurst, Hop will offer to show you around the Pokémon Center. Feel free to decline his tutorial if you're already well-versed in the mechanics of Pokémon Centers. There are three stations within Galar Pokémon Centers. On the left is a [[Move Tutor]] who will rate nicknames, and help with remembering or forgetting a move. In the center is the healing station and on the right is a [[Poké Mart]]. | ||
After exiting the Pokémon Center for the first time speak with the girl on the right to register your birthdate and have your fortune told. | |||
{| class="expandable" align="center" style="background: #{{shield color light}}; {{roundy}} border: 5px solid #{{sword color light}};" | |||
{| class="expandable" align="center" style="background: #{{shield color}}; {{roundy | |||
|- align="center" | |- align="center" | ||
! Items | ! Items | ||
| Line 63: | Line 49: | ||
{{Itlisth}} | {{Itlisth}} | ||
{{itemlist|Potion|From a man after leaving the Pokémon Research Lab|Sw=yes|Sh=yes|display=[[Potion]]}} | {{itemlist|Potion|From a man after leaving the Pokémon Research Lab|Sw=yes|Sh=yes|display=[[Potion]]}} | ||
{{itemlist|Rare Candy|On the right, next to the Pokémon Research Lab|Sw=yes|Sh= | {{itemlist|Rare Candy|On the right, next to the Pokémon Research Lab|Sw=yes|Sh=yes|display=[[Rare Candy]]}} | ||
{{itemlist|Poké Doll|Next to the Boutique|Sw=yes|Sh=yes|display=[[Poké Doll]]}} | {{itemlist|Poké Doll|Next to the Boutique|Sw=yes|Sh=yes|display=[[Poké Doll]]}} | ||
{{itemlist|Revive|Shining point next to rock when leaving Wedgehurst|Sw=unconf|Sh=yes|display=[[Revive]]}} | |||
{{Itlistfoot}} | {{Itlistfoot}} | ||
|} | |} | ||
==Route 2== | ==Route 2== | ||
Moving on to Route 2, you will meet with Hop before a patch of tall grass. If you haven't already caught a Pokémon, Leon will step in and provide a tutorial on how to catch one.This will be skipped however, if you have already captured a Pokémon on Route 1. Leon will also gift you with 20 Poké Balls. You can catch a slew of new Pokémon here, and there are three novice trainers along the way who will challenge you to a battle. | |||
{| class="expandable" align="center" style="background: #{{shield color}}; {{roundy | {| class="expandable" align="center" style="background: #{{shield color light}}; {{roundy}} border: 5px solid #{{sword color light}};" | ||
|- align="center" | |- align="center" | ||
! Trainers | ! Trainers | ||
|- | |- | ||
| | | | ||
{{trainerheader|land}} | {{trainerheader|land}} | ||
{{trainerentry|game=8|VSYoungster SwSh.png{{!}}150px|Youngster|Jake|360|1|819|Skwovet|♂|6|None|36=ゲン|37=Gen}} | {{trainerentry|game=8|VSYoungster SwSh.png{{!}}150px|Youngster|Jake|360|1|819|Skwovet|♂|6|None|36=ゲン|37=Gen}} | ||
| Line 85: | Line 72: | ||
|} | |} | ||
{| class="expandable" align="center" style="background: #{{shield color light}}; {{roundy}}; border: 5px solid #{{sword color light}};" | |||
{| class="expandable" align="center" style="background: #{{shield color}}; {{roundy | |||
|- align="center" | |- align="center" | ||
! Available Pokémon | ! Available Pokémon | ||
| Line 94: | Line 78: | ||
| | | | ||
{{catch/header/8|land|no}} | {{catch/header/8|land|no}} | ||
{{catch/div|land|[[Random encounter]]s}} | |||
{{catch/entry8|163|Hoothoot|yes|yes|Grass|4-6|5%|type1=Normal|type2=Flying}} | {{catch/entry8|163|Hoothoot|yes|yes|Grass|4-6|5%|type1=Normal|type2=Flying}} | ||
{{catch/entry8|270|Lotad|no|yes|Grass|4-6|20%|type1=Water|type2=Grass}} | {{catch/entry8|270|Lotad|no|yes|Grass|4-6|20%|type1=Water|type2=Grass}} | ||
| Line 104: | Line 90: | ||
{{catch/entry8|833|Chewtle|yes|yes|Fishing|4-6|15%|type1=Water}} | {{catch/entry8|833|Chewtle|yes|yes|Fishing|4-6|15%|type1=Water}} | ||
{{catch/entry8|846|Arrokuda|yes|yes|Fishing|4-6|5%|type1=Water}} | {{catch/entry8|846|Arrokuda|yes|yes|Fishing|4-6|5%|type1=Water}} | ||
{{catch/ | {{catch/div|land|[[Symbol encounter|Visible encounters]]}} | ||
| | |||
{{catch/entry8|263G|Zigzagoon|yes|yes|Grass|5-7|2%|type1=Dark|type2=Normal|form=Galarian Form}} | {{catch/entry8|263G|Zigzagoon|yes|yes|Grass|5-7|2%|type1=Dark|type2=Normal|form=Galarian Form}} | ||
{{catch/entry8|819|Skwovet|yes|yes|Grass|5-7|38%|type1=Normal}} | {{catch/entry8|819|Skwovet|yes|yes|Grass|5-7|38%|type1=Normal}} | ||
| Line 120: | Line 97: | ||
{{catch/entry8|833|Chewtle|yes|yes|Grass|5-7|10%|type1=Water}} | {{catch/entry8|833|Chewtle|yes|yes|Grass|5-7|10%|type1=Water}} | ||
{{catch/entry8|835|Yamper|yes|yes|Grass|5-7|5%|type1=Electric}} | {{catch/entry8|835|Yamper|yes|yes|Grass|5-7|5%|type1=Electric}} | ||
{{catch/ | {{catch/div|land|[[Wanderer]]s}} | ||
| | |||
{{catch/entry8|833|Chewtle|yes|yes|Wanderer|8|One|type1=Water}} | {{catch/entry8|833|Chewtle|yes|yes|Wanderer|8|One|type1=Water}} | ||
{{catch/entry8|835|Yamper|yes|yes|Wanderer|8|One|type1=Electric}} | {{catch/entry8|835|Yamper|yes|yes|Wanderer|8|One|type1=Electric}} | ||
{{catch/footer|land | {{catch/footer|land}} | ||
|} | |} | ||
{| class="expandable" align="center" style="background: #{{shield color light}}; {{roundy}} border: 5px solid #{{sword color light}};" | |||
{| class="expandable" align="center" style="background: #{{shield color}}; {{roundy | |||
|- align="center" | |- align="center" | ||
! Items | ! Items | ||
| Line 149: | Line 114: | ||
{{itemlist|Potion|Next to the [[Trainer Tips]] sign|Sw=yes|Sh=yes|display=[[Potion]] ×2}} | {{itemlist|Potion|Next to the [[Trainer Tips]] sign|Sw=yes|Sh=yes|display=[[Potion]] ×2}} | ||
{{itemlist|Repel|East of the grass patch in front of [[Professor Magnolia]]'s house, on a dirt patch ''(hidden)''|Sw=yes|Sh=yes}} | {{itemlist|Repel|East of the grass patch in front of [[Professor Magnolia]]'s house, on a dirt patch ''(hidden)''|Sw=yes|Sh=yes}} | ||
{{itemlist|Great Ball|On the west side of Professor Magnolia's house, at the back of her garden|Sw=yes|Sh=yes}} | |||
{{itemlist|Fresh Water|In a pot in front of Professor Magnolia's eastern crop plot ''(hidden)''|Sw=yes|Sh=yes}} | |||
{{itemlist|TM Dark VI|Behind Professor Magnolia's house, at the end of a long passageway|Sw=yes|Sh=yes|display={{TM|57|Payback}}}} | |||
{{itemlist|Endorsement|From Leon after battling [[Hop]]|Sw=yes|Sh=yes}} | |||
{{itemlist|Wishing Star|From Hop after battling him|Sw=yes|Sh=yes}} | |||
{{itemlist|Dynamax Band|From Professor Magnolia, after obtaining the Wishing Star|Sw=yes|Sh=yes}} | |||
{{itemlist|Choice Band|East of the bridge near Professor Magnolia's house (requires an upgraded [[Rotom Bike]])|Sw=yes|Sh=yes}} | |||
{{itemlist|Rare Candy|On the island in the lake ''(hidden, approximately 40% chance to reappear each day)'' (requires an upgraded [[Rotom Bike]])|Sw=yes|Sh=yes}} | |||
{{itemlist|PP Max|On the island in the lake (requires an upgraded [[Rotom Bike]])|Sw=yes|Sh=yes}} | |||
{{itemlist|Prism Scale|In water at the north part of the lake ''(hidden)'' (requires an upgraded [[Rotom Bike]])|Sw=yes|Sh=yes}} | |||
{{itemlist|Max Ether|In the northwest corner of the lake ''(hidden)'' (requires an upgraded [[Rotom Bike]])|Sw=yes|Sh=yes}} | |||
{{itemlist|TM Psychic VI|In the northwest corner of the lake (requires an upgraded [[Rotom Bike]])|Sw=yes|Sh=yes|display={{TM|69|Psycho Cut}}}} | |||
{{itemlist|Psychic Seed|On a riverbank south of Professor Magnolia's house (requires an upgraded [[Rotom Bike]])|Sw=yes|Sh=yes}} | |||
{{itemlist|Water Stone|At the end of the river south of Professor Magnolia's house ''(hidden)'' (requires an upgraded [[Rotom Bike]])|Sw=yes|Sh=yes}} | |||
{{Itlistfoot}} | {{Itlistfoot}} | ||
|} | |} | ||
Head north east through the route when you're done to reach Professor Magnolia's house. | |||
{{MSP/8|810|Grookey}} If the {{player}} chose {{p|Grookey}}: | === Magnolia's House === | ||
{{Party/Single | After your arrival at Professor Magnolia's house, Leon expresses his reservations about endorsing you and Hop for the [[Galar League|Gym Challenge]]. Magnolia encourages him to endorse both you and Hop, and Leon proposes the two of you battle to prove your worthiness. Head outside to battle Hop. | ||
==== {{MSP/8|810|Grookey}} If the {{player}} chose {{p|Grookey}}==== | |||
{| style="margin: auto;" | |||
|{{Party/Single | |||
|color={{sword color}} | |color={{sword color}} | ||
|headcolor={{sword color light}} | |headcolor={{sword color light}} | ||
| Line 200: | Line 181: | ||
|move3=Water Gun|move3type=Water|move3cat=Special}} | |move3=Water Gun|move3type=Water|move3cat=Special}} | ||
{{Party/Footer}} | {{Party/Footer}} | ||
|} | |||
{{MSP/8|813|Scorbunny}} If the {{player}} chose {{p|Scorbunny}}: | ===={{MSP/8|813|Scorbunny}} If the {{player}} chose {{p|Scorbunny}}==== | ||
{{Party/Single | {| style="margin: auto;" | ||
|{{Party/Single | |||
|color={{sword color}} | |color={{sword color}} | ||
|headcolor={{sword color light}} | |headcolor={{sword color light}} | ||
| Line 246: | Line 228: | ||
|move3=Branch Poke|move3type=Grass|move3cat=Physical}} | |move3=Branch Poke|move3type=Grass|move3cat=Physical}} | ||
{{Party/Footer}} | {{Party/Footer}} | ||
|} | |||
{{MSP/8|816|Sobble}} If the {{player}} chose {{p|Sobble}}: | ===={{MSP/8|816|Sobble}} If the {{player}} chose {{p|Sobble}}==== | ||
{{Party/Single | {| style="margin: auto;" | ||
|{{Party/Single | |||
|color={{sword color}} | |color={{sword color}} | ||
|headcolor={{sword color light}} | |headcolor={{sword color light}} | ||
| Line 292: | Line 275: | ||
|move3=Ember|move3type=Fire|move3cat=Special}} | |move3=Ember|move3type=Fire|move3cat=Special}} | ||
{{Party/Footer}} | {{Party/Footer}} | ||
|} | |||
Afterwards, you are both endorsed by Leon, and a pair of Wishing Stars will drop from the sky. Magnolia will take both of these and use them for [[Dynamax Band]]s that she will gift to you the next morning. After receiving these, head back south to Wedgehurst to continue your journey. | |||
== | ==Wedgehurst (Return Visit)== | ||
When you get to Wedgehurst, head straight to the station in the south west of the town. | |||
===Wedgehurst Station=== | |||
There is another [[Poké Mart]] in the station that is identical to the one in the [[ | When you head into the station, your mom will stop you to give you the [[Camping Gear]] before you continue. There is another [[Poké Mart]] in the station that is identical to the one in the [[Pokémon Centre]]. Once you receive this, head onto the train to continue your journey into the [[Wild Area]]. | ||
{| class="expandable" align="center" style="background: #{{shield color}}; {{roundy | {| class="expandable" align="center" style="background: #{{shield color light}}; {{roundy}} border: 5px solid #{{sword color light}};" | ||
|- align="center" | |- align="center" | ||
! Items | ! Items | ||
| Line 320: | Line 291: | ||
| | | | ||
{{Itlisth}} | {{Itlisth}} | ||
{{itemlist| Revive|Near the rock on the right at the top of the stairs on Route | {{itemlist|Revive|Near the rock on the right at the top of the stairs on Route 2 (after the bridge but before entering town)''(hidden)''|Sw=yes|Sh=yes}} | ||
{{itemlist|TM Normal VI|From Hop in front of Wedgehurst Station, after battling him on Route 2|Sw=yes|Sh=yes|display={{TM|40|Swift}}}} | {{itemlist|TM Normal VI|From Hop in front of Wedgehurst Station, after battling him on Route 2|Sw=yes|Sh=yes|display={{TM|40|Swift}}}} | ||
{{itemlist|Camping Gear|From {{gal|Mum}} in Wedgehurst Station, before departing on a train for the first time|Sw=yes|Sh=yes}} | {{itemlist|Camping Gear|From {{gal|Mum}} in Wedgehurst Station, before departing on a train for the first time|Sw=yes|Sh=yes}} | ||
{{Itlistfoot|road}} | {{Itlistfoot|road}} | ||
|} | |} | ||
{{WalkthroughPrevNext | {{WalkthroughPrevNext | ||
|game=Sword | |game=Sword | ||
Latest revision as of 01:23, 3 September 2024
Route 1
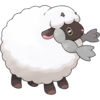
Now that you have a Pokémon, you can explore the tall grass on the right side of the route towards Wedgehurst. The main path is blocked by Wooloo, so you will now have to take the detour around through tall grass, where there are plenty of wild Pokémon available. You already have five Poké Balls, so you will have the option to catch any of these Pokémon should you wish.
| Available Pokémon | ||||||||||||||||||||||||||||||||||||||||||||||||||||||||||||||||||||||||||||||||||||||||||||||||||||||||||||||||||||||||||||||||||||||||||||||||||||||||||||||||||||||||||||||||||||||||
|---|---|---|---|---|---|---|---|---|---|---|---|---|---|---|---|---|---|---|---|---|---|---|---|---|---|---|---|---|---|---|---|---|---|---|---|---|---|---|---|---|---|---|---|---|---|---|---|---|---|---|---|---|---|---|---|---|---|---|---|---|---|---|---|---|---|---|---|---|---|---|---|---|---|---|---|---|---|---|---|---|---|---|---|---|---|---|---|---|---|---|---|---|---|---|---|---|---|---|---|---|---|---|---|---|---|---|---|---|---|---|---|---|---|---|---|---|---|---|---|---|---|---|---|---|---|---|---|---|---|---|---|---|---|---|---|---|---|---|---|---|---|---|---|---|---|---|---|---|---|---|---|---|---|---|---|---|---|---|---|---|---|---|---|---|---|---|---|---|---|---|---|---|---|---|---|---|---|---|---|---|---|---|---|---|
| ||||||||||||||||||||||||||||||||||||||||||||||||||||||||||||||||||||||||||||||||||||||||||||||||||||||||||||||||||||||||||||||||||||||||||||||||||||||||||||||||||||||||||||||||||||||||
| Items | ||||||||||||||||
|---|---|---|---|---|---|---|---|---|---|---|---|---|---|---|---|---|
| ||||||||||||||||
Head straight north through this route to Wedgehurst when you are done.
Wedgehurst
Upon reaching Wedgehurst, you'll meet up with Leon for a visit to the Pokémon Research Lab situated on the town's east side. Inside the lab, you'll meet Sonia, a childhood companion of Leon and the assistant, as well as granddaughter, of Professor Magnolia. It's at this point that you'll receive the indispensable Pokédex. Sonia will task you with a visit to her grandmother's residence across Route 2.
After you leave the lab and head further through Wedgehurst, Hop will offer to show you around the Pokémon Center. Feel free to decline his tutorial if you're already well-versed in the mechanics of Pokémon Centers. There are three stations within Galar Pokémon Centers. On the left is a Move Tutor who will rate nicknames, and help with remembering or forgetting a move. In the center is the healing station and on the right is a Poké Mart.
After exiting the Pokémon Center for the first time speak with the girl on the right to register your birthdate and have your fortune told.
| Items | ||||||||||||||||||||||||
|---|---|---|---|---|---|---|---|---|---|---|---|---|---|---|---|---|---|---|---|---|---|---|---|---|
| ||||||||||||||||||||||||
Route 2
Moving on to Route 2, you will meet with Hop before a patch of tall grass. If you haven't already caught a Pokémon, Leon will step in and provide a tutorial on how to catch one.This will be skipped however, if you have already captured a Pokémon on Route 1. Leon will also gift you with 20 Poké Balls. You can catch a slew of new Pokémon here, and there are three novice trainers along the way who will challenge you to a battle.
| Trainers | |||||||||||||||||||||||||||||||||||||||||||||||||||||
|---|---|---|---|---|---|---|---|---|---|---|---|---|---|---|---|---|---|---|---|---|---|---|---|---|---|---|---|---|---|---|---|---|---|---|---|---|---|---|---|---|---|---|---|---|---|---|---|---|---|---|---|---|---|
| |||||||||||||||||||||||||||||||||||||||||||||||||||||
| Available Pokémon | ||||||||||||||||||||||||||||||||||||||||||||||||||||||||||||||||||||||||||||||||||||||||||||||||||||||||||||||||||||||||||||||||||||||||||||||||||||||||||||||||||||||||||||||||||||||||||||||||||||||||||||||||||||||||||||||||||||||||||||||||||||||||||||||||||||||||||||||||||||||||||||||||||||||||||||||||||||||||||||||||||||||
|---|---|---|---|---|---|---|---|---|---|---|---|---|---|---|---|---|---|---|---|---|---|---|---|---|---|---|---|---|---|---|---|---|---|---|---|---|---|---|---|---|---|---|---|---|---|---|---|---|---|---|---|---|---|---|---|---|---|---|---|---|---|---|---|---|---|---|---|---|---|---|---|---|---|---|---|---|---|---|---|---|---|---|---|---|---|---|---|---|---|---|---|---|---|---|---|---|---|---|---|---|---|---|---|---|---|---|---|---|---|---|---|---|---|---|---|---|---|---|---|---|---|---|---|---|---|---|---|---|---|---|---|---|---|---|---|---|---|---|---|---|---|---|---|---|---|---|---|---|---|---|---|---|---|---|---|---|---|---|---|---|---|---|---|---|---|---|---|---|---|---|---|---|---|---|---|---|---|---|---|---|---|---|---|---|---|---|---|---|---|---|---|---|---|---|---|---|---|---|---|---|---|---|---|---|---|---|---|---|---|---|---|---|---|---|---|---|---|---|---|---|---|---|---|---|---|---|---|---|---|---|---|---|---|---|---|---|---|---|---|---|---|---|---|---|---|---|---|---|---|---|---|---|---|---|---|---|---|---|---|---|---|---|---|---|---|---|---|---|---|---|---|---|---|---|---|---|---|---|---|---|---|---|---|---|---|---|---|---|---|---|---|---|---|---|---|---|---|---|---|---|---|---|---|---|---|---|---|---|---|---|---|---|---|---|---|---|---|---|---|---|---|---|---|---|---|---|
| ||||||||||||||||||||||||||||||||||||||||||||||||||||||||||||||||||||||||||||||||||||||||||||||||||||||||||||||||||||||||||||||||||||||||||||||||||||||||||||||||||||||||||||||||||||||||||||||||||||||||||||||||||||||||||||||||||||||||||||||||||||||||||||||||||||||||||||||||||||||||||||||||||||||||||||||||||||||||||||||||||||||
| Items | ||||||||||||||||||||||||||||||||||||||||||||||||||||||||||||||||||||||||||||
|---|---|---|---|---|---|---|---|---|---|---|---|---|---|---|---|---|---|---|---|---|---|---|---|---|---|---|---|---|---|---|---|---|---|---|---|---|---|---|---|---|---|---|---|---|---|---|---|---|---|---|---|---|---|---|---|---|---|---|---|---|---|---|---|---|---|---|---|---|---|---|---|---|---|---|---|---|
| ||||||||||||||||||||||||||||||||||||||||||||||||||||||||||||||||||||||||||||
Head north east through the route when you're done to reach Professor Magnolia's house.
Magnolia's House
After your arrival at Professor Magnolia's house, Leon expresses his reservations about endorsing you and Hop for the Gym Challenge. Magnolia encourages him to endorse both you and Hop, and Leon proposes the two of you battle to prove your worthiness. Head outside to battle Hop.
 If the player chose Grookey
| ||||||||||||||||||||||||||||||||||||||||||||||||||||||||||||||||||||||||||||||||||||||||||||||||||||||||||||||||||||
 If the player chose Scorbunny
| ||||||||||||||||||||||||||||||||||||||||||||||||||||||||||||||||||||||||||||||||||||||||||||||||||||||||||||||||||||
 If the player chose Sobble
| ||||||||||||||||||||||||||||||||||||||||||||||||||||||||||||||||||||||||||||||||||||||||||||||||||||||||||||||||||||
Afterwards, you are both endorsed by Leon, and a pair of Wishing Stars will drop from the sky. Magnolia will take both of these and use them for Dynamax Bands that she will gift to you the next morning. After receiving these, head back south to Wedgehurst to continue your journey.
Wedgehurst (Return Visit)
When you get to Wedgehurst, head straight to the station in the south west of the town.
Wedgehurst Station
When you head into the station, your mom will stop you to give you the Camping Gear before you continue. There is another Poké Mart in the station that is identical to the one in the Pokémon Centre. Once you receive this, head onto the train to continue your journey into the Wild Area.
| Items | ||||||||||||||||||||
|---|---|---|---|---|---|---|---|---|---|---|---|---|---|---|---|---|---|---|---|---|
| ||||||||||||||||||||
|
Sword and Shield walkthrough |
|

|
This article is part of Project Walkthroughs, a Bulbapedia project that aims to write comprehensive step-by-step guides on each Pokémon game. |


