Appendix:Black 2 and White 2 walkthrough/Section 3: Difference between revisions
m (updated link) |
mNo edit summary Tag: Manual revert |
||
| (5 intermediate revisions by 2 users not shown) | |||
| Line 38: | Line 38: | ||
|- | |- | ||
| | | | ||
{{trainerheader| | {{trainerheader|road}} | ||
{{Trainerentry|Spr B2W2 Youngster.png|Youngster|Masahiro|{{tt|208|192 in Easy Mode, 224 in Challenge Mode}}|1|506|Lillipup|♂|{{tt|13|12 in Easy Mode, 14 in Challenge Mode}}|None}} | {{Trainerentry|Spr B2W2 Youngster.png|Youngster|Masahiro|{{tt|208|192 in Easy Mode, 224 in Challenge Mode}}|1|506|Lillipup|♂|{{tt|13|12 in Easy Mode, 14 in Challenge Mode}}|None}} | ||
{{Trainerentry|Spr B2W2 Worker.png|Worker|Mitchell|{{tt|480|440 in Easy Mode, 520 in Challenge Mode}}|2|504|Patrat|♂|{{tt|12|12 in Easy Mode, 13 in Challenge Mode}}|None|239|Elekid|♂|{{tt|12|12 in Easy Mode, 13 in Challenge Mode}}|None}} | {{Trainerentry|Spr B2W2 Worker.png|Worker|Mitchell|{{tt|480|440 in Easy Mode, 520 in Challenge Mode}}|2|504|Patrat|♂|{{tt|12|12 in Easy Mode, 13 in Challenge Mode}}|None|239|Elekid|♂|{{tt|12|12 in Easy Mode, 13 in Challenge Mode}}|None}} | ||
| Line 45: | Line 45: | ||
{{Trainerentry|Spr B2W2 Worker.png|Worker|Isaac|{{tt|480|440 in Easy Mode, 520 in Challenge Mode}}|2|240|Magby|♂|{{tt|12|11 in Easy Mode, 13 in Challenge Mode}}|None|109|Koffing|♂|{{tt|12|11 in Easy Mode, 13 in Challenge Mode}}|None}} | {{Trainerentry|Spr B2W2 Worker.png|Worker|Isaac|{{tt|480|440 in Easy Mode, 520 in Challenge Mode}}|2|240|Magby|♂|{{tt|12|11 in Easy Mode, 13 in Challenge Mode}}|None|109|Koffing|♂|{{tt|12|11 in Easy Mode, 13 in Challenge Mode}}|None}} | ||
{{Trainerentry|Spr B2W2 Lass.png|Lass|Daya|{{tt|208|192 in Easy Mode, 224 in Challenge Mode}}|1|527|Woobat|♀|{{tt|13|12 in Easy Mode, 14 in Challenge Mode}}|None}} | {{Trainerentry|Spr B2W2 Lass.png|Lass|Daya|{{tt|208|192 in Easy Mode, 224 in Challenge Mode}}|1|527|Woobat|♀|{{tt|13|12 in Easy Mode, 14 in Challenge Mode}}|None}} | ||
{{trainerfooter| | {{trainerfooter|road|5}} | ||
|} | |} | ||
{| class="expandable" align="center" style="background: #{{locationcolor/med|road}}; {{roundy}}; border: 5px solid #{{locationcolor/light|road}};" | {| class="expandable" align="center" style="background: #{{locationcolor/med|road}}; {{roundy}}; border: 5px solid #{{locationcolor/light|road}};" | ||
| Line 63: | Line 63: | ||
{{catch/entry5-2|239|Elekid|no|yes|Grass|10-12|all=15%|type1=Electric}} | {{catch/entry5-2|239|Elekid|no|yes|Grass|10-12|all=15%|type1=Electric}} | ||
{{catch/entry5-2|240|Magby|yes|no|Grass|10-12|all=15%|type1=Fire}} | {{catch/entry5-2|240|Magby|yes|no|Grass|10-12|all=15%|type1=Fire}} | ||
{{catch/div| | {{catch/div|road|Rustling grass}} | ||
{{catch/entry5-2|531|Audino|yes|yes|Grass|10-13|all=100%|type1=Normal}} | {{catch/entry5-2|531|Audino|yes|yes|Grass|10-13|all=100%|type1=Normal}} | ||
{{catch/footer|road}} | {{catch/footer|road}} | ||
| Line 79: | Line 79: | ||
{{catch/entry5-2|109|Koffing|yes|yes|Grass|10-13|all=15%|type1=Poison}} | {{catch/entry5-2|109|Koffing|yes|yes|Grass|10-13|all=15%|type1=Poison}} | ||
{{catch/entry5-2|504|Patrat|yes|yes|Grass|10-13|all=15%|type1=Normal}} | {{catch/entry5-2|504|Patrat|yes|yes|Grass|10-13|all=15%|type1=Normal}} | ||
{{catch/div| | {{catch/div|road|Rustling grass}} | ||
{{catch/entry5-2|531|Audino|yes|yes|Grass|10-13|all=100%|type1=Normal}} | {{catch/entry5-2|531|Audino|yes|yes|Grass|10-13|all=100%|type1=Normal}} | ||
{{catch/div| | {{catch/div|road|Dark grass}} | ||
{{catch/entry5-2|081|Magnemite|yes|yes|Dark|11-13|all=25%|type1=Electric|type2=Steel}} | {{catch/entry5-2|081|Magnemite|yes|yes|Dark|11-13|all=25%|type1=Electric|type2=Steel}} | ||
{{catch/entry5-2|239|Elekid|no|yes|Dark|11-13|all=25%|type1=Electric}} | {{catch/entry5-2|239|Elekid|no|yes|Dark|11-13|all=25%|type1=Electric}} | ||
Latest revision as of 03:26, 15 July 2024
Virbank City
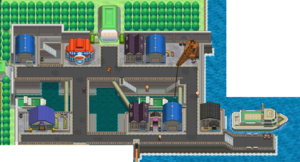
Virbank City is an industrial port city often covered by clouds and smoke. The multi-level city uses bridges and stairways to allow residents to move about, and valuable items can be found in these passageways. Upon arriving in the city, Mom calls on the Xtransceiver to check in, and suggests that you visit the Virbank Complex at night for a nice view.
| Items | ||||||||||||||||||||||||||||||||||||||||||||||||||||||||||||||||||||||||||||||
|---|---|---|---|---|---|---|---|---|---|---|---|---|---|---|---|---|---|---|---|---|---|---|---|---|---|---|---|---|---|---|---|---|---|---|---|---|---|---|---|---|---|---|---|---|---|---|---|---|---|---|---|---|---|---|---|---|---|---|---|---|---|---|---|---|---|---|---|---|---|---|---|---|---|---|---|---|---|---|
| ||||||||||||||||||||||||||||||||||||||||||||||||||||||||||||||||||||||||||||||
When you approach the Pokémon Center, you see the local Gym Leader, Roxie, arguing with her father. Pop Roxie usually ferries people to Castelia City and back with his ship docked at the pier, but has decided to become an actor at Pokéstar Studios. This is the only link from here to Castelia, and Roxie tells him that his selfishness will keep people from getting where they need to go. He won't listen, and leaves for the studios; Roxie heads for the Gym in a huff.
Virbank Complex
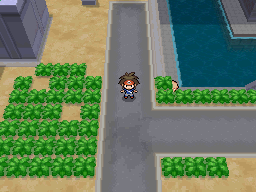
Virbank Complex is an industrial zone with a large crane and many storage tanks. The raised walkways allow the workers to avoid the tall grass below. The tanks and towers are lit up beautifully at night. If you catch a Magnemite here, its metal body will prevent it from getting poisoned at the Gym.
| Trainers | ||||||||||||||||||||||||||||||||||||||||||||||||||||||||||||||||||||||||||||||||||||||||||||||||||||
|---|---|---|---|---|---|---|---|---|---|---|---|---|---|---|---|---|---|---|---|---|---|---|---|---|---|---|---|---|---|---|---|---|---|---|---|---|---|---|---|---|---|---|---|---|---|---|---|---|---|---|---|---|---|---|---|---|---|---|---|---|---|---|---|---|---|---|---|---|---|---|---|---|---|---|---|---|---|---|---|---|---|---|---|---|---|---|---|---|---|---|---|---|---|---|---|---|---|---|---|---|
| ||||||||||||||||||||||||||||||||||||||||||||||||||||||||||||||||||||||||||||||||||||||||||||||||||||
| Available Pokémon | ||||||||||||||||||||||||||||||||||||||||||||||||||||||||||||||||||||||||||||||||||||||||||||||||||||||||||||||||||||||||||||||||||||||||||||||||||||||||||||||||||||||||||||||||||||||||||||||||||||||||||||||||||||||||||||||||||||||||||||||||||||||||||||||||||||||||||||||||||||||||||||||||||||||||||||||||||||||||||||||||||||||||||||||||||||||||||||||||||||||||||||||||||||||||||||||||||||||||||||||||||||||||||||||||||||||||
|---|---|---|---|---|---|---|---|---|---|---|---|---|---|---|---|---|---|---|---|---|---|---|---|---|---|---|---|---|---|---|---|---|---|---|---|---|---|---|---|---|---|---|---|---|---|---|---|---|---|---|---|---|---|---|---|---|---|---|---|---|---|---|---|---|---|---|---|---|---|---|---|---|---|---|---|---|---|---|---|---|---|---|---|---|---|---|---|---|---|---|---|---|---|---|---|---|---|---|---|---|---|---|---|---|---|---|---|---|---|---|---|---|---|---|---|---|---|---|---|---|---|---|---|---|---|---|---|---|---|---|---|---|---|---|---|---|---|---|---|---|---|---|---|---|---|---|---|---|---|---|---|---|---|---|---|---|---|---|---|---|---|---|---|---|---|---|---|---|---|---|---|---|---|---|---|---|---|---|---|---|---|---|---|---|---|---|---|---|---|---|---|---|---|---|---|---|---|---|---|---|---|---|---|---|---|---|---|---|---|---|---|---|---|---|---|---|---|---|---|---|---|---|---|---|---|---|---|---|---|---|---|---|---|---|---|---|---|---|---|---|---|---|---|---|---|---|---|---|---|---|---|---|---|---|---|---|---|---|---|---|---|---|---|---|---|---|---|---|---|---|---|---|---|---|---|---|---|---|---|---|---|---|---|---|---|---|---|---|---|---|---|---|---|---|---|---|---|---|---|---|---|---|---|---|---|---|---|---|---|---|---|---|---|---|---|---|---|---|---|---|---|---|---|---|---|---|---|---|---|---|---|---|---|---|---|---|---|---|---|---|---|---|---|---|---|---|---|---|---|---|---|---|---|---|---|---|---|---|---|---|---|---|---|---|---|---|---|---|---|---|---|---|---|---|---|---|---|---|---|---|---|---|---|---|---|---|---|---|---|---|---|---|---|---|---|---|---|---|---|---|---|---|---|---|---|---|---|---|---|---|---|---|---|---|---|---|---|---|---|---|---|---|---|---|
| ||||||||||||||||||||||||||||||||||||||||||||||||||||||||||||||||||||||||||||||||||||||||||||||||||||||||||||||||||||||||||||||||||||||||||||||||||||||||||||||||||||||||||||||||||||||||||||||||||||||||||||||||||||||||||||||||||||||||||||||||||||||||||||||||||||||||||||||||||||||||||||||||||||||||||||||||||||||||||||||||||||||||||||||||||||||||||||||||||||||||||||||||||||||||||||||||||||||||||||||||||||||||||||||||||||||||
| Items | |||||||||||||||||||||||||||||||||||||||||||||||||||||||||||
|---|---|---|---|---|---|---|---|---|---|---|---|---|---|---|---|---|---|---|---|---|---|---|---|---|---|---|---|---|---|---|---|---|---|---|---|---|---|---|---|---|---|---|---|---|---|---|---|---|---|---|---|---|---|---|---|---|---|---|---|
| |||||||||||||||||||||||||||||||||||||||||||||||||||||||||||
There is an X Accuracy in the outer grass patch, and the Roughneck down the stairway to the east will offer to swap his Great Ball for your Poké Ball once a day. Follow the path behind him to find a Silk Scarf.
Just inside the complex itself, the man near the tree has a favor to ask. He needs to get his three new Workers fired up, so you need to battle each of them. Follow the path southward and climb the stairway to the left. Take the raised walkways to the southeast to find Worker Isaac, and TM46 (Thief) nearby. Turn around and go north to meet Worker Mitchell, then head west. Jump down from the northwest walkway to reach Worker Nathan. With the three defeated, talk to their boss again to get TM94 (Rock Smash) as thanks.
There is a Scientist talking to himself near the tower in the northeast. Speak to him, and he runs off to the smokestack in the southwest. Talk to him again and he moves to the clearing in the south. Speak to him here to get an Ether.
Virbank Gym
|
||||
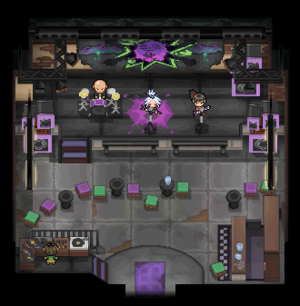
The interior of the Virbank Gym is designed like a rock club. Roxie and her bandmates specialize in Poison-type Pokémon, so be sure to bring some Antidotes! Psychic- and Ground-type attacks are the most useful, but Fire- and Flying-type moves are also effective against Venipede and Whirlipede. The band is playing so loud that Roxie can't hear you challenge her, so defeat Nicky and Billy Jo to stop the music.
Roxie's Whirlipede has the Poison Point Ability, which poisons your Pokémon after launching a direct attack. Use an Antidote quickly, because its Venoshock attack inflicts serious damage to poisoned opponents!
Defeated, Roxie awards you the Toxic Badge, which makes Pokémon up to level 30 obey. She also gives you TM09 (Venoshock) as a prize.
Stepping down from the stage, you are approached by a man who turns out to be a scout from Pokéstar Studios on the north side of town. Roxie overhears your conversation, and heads off to find her father.
Pokéstar Studios
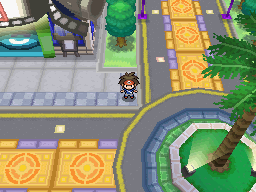
Pokéstar Studios is a facility where you and your Pokémon can become movie stars! The movies are produced in the high-tech studio to the left, and the theater to the right can show up to eight movies at a time. The plaza holds some unique items, like a mini model of the Royal Unova and a model of Skyarrow Bridge in 1/144 scale. There's even a Harlequin who sells portraits of high-ranking stars.
| Items | ||||||||||||
|---|---|---|---|---|---|---|---|---|---|---|---|---|
| ||||||||||||
Outside the gate, the scout introduces you to the boss of the studios, a man named Stu Deeoh. Then he gives a quick tour of the facilities. Pop Roxie is inside the theater, having just filmed his first movie. The scout asks you to see his movie to get a feel for how things work, but the movie isn't very good and the audience is not impressed. Disappointed, the captain returns to Virbank City. The scout invites you to the studio, where you costar with famous actor and former Icirrus Gym Leader, Brycen. Follow the scenario to complete the movie and you may unlock new scenarios.
Shooting a Movie
To act in a movie, talk to the assistant director in the Studio lobby to select a script. Your costar is usually a rental Pokémon, but after achieving a happy ending you can costar with your own Pokémon. Follow the script for a successful shoot. The words and Pokémon attacks that you choose determine the movie's plot. Completed movies are screened right away inside the Theater, and there is nothing else to do at this point, so just sit back and enjoy. After watching a movie once, you can stop it on later viewings with the B Button. Pay attention to reviews on the Theater's monitor; as your movies become more successful, your Star Rank will rise and you'll earn more fans, who may give you items. You'll get better items with a higher Star Rank.
Each of your Pokémon have their own Star Rank, as well. As their Star Rank goes up, so does the Box Office Gross for that movie. Star Pokémon will display their own special effects in battle.
| Type of Ending | Your Star Rank | Your Pokémon's Star Rank |
|---|---|---|
| Happy | Improves slightly | Improves moderately |
| Sad | Improves very slightly | Decreases |
| Strange | Improves greatly | Pokémon becomes a Star |
Completing all 40 movies with happy endings will earn you a bronze statue in the plaza and access to the Studio's VIP Room, but this may not be so easy. Achieving a good ending requires the correct lines, but seemingly good lines are often wrong. Each of the five directors (Sergeo, Takashi, John, Sydney, and David) has their own preferences, so try to act out what they would like best. There are nearly two dozen Medals to earn here, as well.
Virbank City
Team Plasma Appears
With the Virbank Gym defeated, your next stop is Castelia City. Head southeast to the pier to find Roxie and Hugh confronting a few members of Team Plasma. Your friends take on the other Grunts, so talk to the one in the center to begin the battle.
| Trainers | |||||||||||||||||
|---|---|---|---|---|---|---|---|---|---|---|---|---|---|---|---|---|---|
| |||||||||||||||||
After suffering a sound defeat, the three Plasma Grunts run away as fast as they can. Before running off in pursuit, Roxie gives you HM01 (Cut) as thanks for your help. She asks the two of you to search Route 20, and Hugh runs off.
The Team Plasma grunt is waiting by the tall grass in Route 20.
Route 20
Climb up the stairway in the center of the route and go south. The Plasma Grunt is hiding out in a small clearing just off the main path.
| Trainers | |||||||||||||||||
|---|---|---|---|---|---|---|---|---|---|---|---|---|---|---|---|---|---|
| |||||||||||||||||
Before running off, she asks aloud why she ran inland, as she needs to get to the coast. Just then Hugh shows up, with news that Team Plasma is traveling in some kind of ship. Return to Virbank and head for the pier.
Virbank City
Pop Roxie has returned to the docks after his movie didn't do very well. He is feeling discouraged, but Roxie cheers him up, and he decides to return to his job as captain. Enter the building to find Hugh standing at the counter. He asks if you are headed to Castelia too, and the two of you board the ship for the big city.
|
Black 2 and White 2 walkthrough |
|

|
This article is part of Project Walkthroughs, a Bulbapedia project that aims to write comprehensive step-by-step guides on each Pokémon game. |


