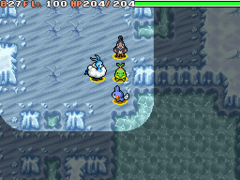
Final Maze: Difference between revisions
No edit summary |
m (→Gameplay) |
||
| (85 intermediate revisions by 44 users not shown) | |||
| Line 1: | Line 1: | ||
{{DungeonPrevNext|Zero Isle | {{DungeonPrevNext|Zero Isle South|None|2|Inferno Cave}} | ||
{{ | {{dungeon infobox | ||
|colorscheme=MD Time | |||
|bordercolorscheme=MD Darkness | |||
|name=Final Maze | |name=Final Maze | ||
|jname=さいごのま | |jname={{tt|さいごのま|Saigo no Ma}} | ||
|jtrans=Final Chamber | |jtrans=Final Chamber | ||
|image=Final Maze TDS.png | |||
|recruitable=Yes | |recruitable=Yes | ||
|floors=48 | |floors=48 | ||
|rest=No | |||
|traps=No | |||
|monsterhouses=No | |||
|items=0 | |items=0 | ||
|money=Allowed | |money=Allowed | ||
| Line 13: | Line 19: | ||
|boss=None | |boss=None | ||
}} | }} | ||
'''Final Maze''' (Japanese: '''さいごのま''' ''Final Chamber'') is a dungeon in | '''Final Maze''' (Japanese: '''さいごのま''' ''Final Chamber'') is a dungeon in {{g|Mystery Dungeon: Explorers of Time and Explorers of Darkness}} as well as {{g|Mystery Dungeon: Explorers of Sky}}. It has 48 floors and no relay point. It is unlocked after graduation and can only be entered through the [[Marowak Dojo]], and upon entering the dungeon, all of their items in the Treasure Bag will be lost. | ||
==Gameplay== | |||
Like other Marowak Dojo mazes, the player is not allowed to bring any items. Items have to be deposited into [[Kangaskhan Storage]] before entering, or they will be lost forever. Unlike the other mazes of the dojo, the player will lose some items should they faint; additionally, Pokémon can be recruited here. The player cannot be rescued if knocked out here; for purposes of [[Treasure Box]]es, all floors are ranked E. | |||
After clearing the maze, Marowak will give the player a Brown Bow | There's 1-4 items on each floor and 3-5 starting enemies. Unlike other postgame dungeons, there are no traps to be found here - the game will simply spawn 2 to 4 Wonder Tiles. This dungeon contains all 88 [[TM]]s present in Explorers of Time, Darkness and Sky, including the otherwise rarely seen {{m|Dream Eater}} TM. In Explorers of Time and Darkness, this is also the only place where the player can find [[HM]]s. | ||
Floors 1 through 29 are medium-sized with 3-9 rooms, while floors 30 through 48 are large-sized with 3-12 rooms. | |||
There is light darkness in this dungeon. There is water on floors 21 through 24, 26 through 39 and 41 through 43, as well as floors 46 and 48. There is lava present on floor 40. | |||
In Explorers of Time and Darkness, after the [[Marine Resort]]'s location is revealed, the player will encounter {{p|Jirachi}}, {{p|Suicune}}, and {{p|Moltres}} at B23F, B29F, and B40F respectively. In Explorers of Sky, all three of them have been removed from the dungeon and placed in different locations. | |||
After clearing the maze, Marowak will give the player a [[Scarf (Mystery Dungeon)#Brown Bow|Brown Bow]] as a holdable item, which supposedly once belonged to his grandfather. | |||
{{left clear}} | {{left clear}} | ||
==Pokémon encountered== | |||
Each time player enters a floor, only 14 of the following species that can be found on a given floor will be chosen. The unpicked Pokémon's spawn rate will be added to whichever picked Pokémon is next in the National Dex order, going back to the beginning if needed. | |||
{{mdloc/h|MD Time}} | |||
{{mdloc|066|Machop|B1-B48|40, 45, 50|8.2}} | |||
{{mdloc|081|Magnemite|B1-B48|40, 45, 50|8.2}} | |||
{{mdloc|084|Doduo|B1-B48|40, 45, 50|6.4}} | |||
{{mdloc|138|Omanyte|B1-B48|40, 45, 50|6.4}} | |||
{{mdloc|140|Kabuto|B1-B48|40, 45, 50|6.4}} | |||
{{mdloc|167|Spinarak|B1-B48|40, 45, 50|6.4}} | |||
{{mdloc|179|Mareep|B1-B48|40, 45, 50|8.2}} | |||
{{mdloc|200|Misdreavus|B1-B48|40, 45, 50|8.2}} | |||
{{mdloc|220|Swinub|B1-B48|40, 45, 50|8.2}} | |||
{{mdloc|228|Houndour|B1-B48|40, 45, 50|8.2}} | |||
{{mdloc|231|Phanpy|B1-B48|40, 45, 50|8.2}} | |||
{{mdloc|240|Magby|B1-B48|40, 45, 50|8.2}} | |||
{{mdloc|261|Poochyena|B1-B48|40, 45, 50|8.2}} | |||
{{mdloc|285|Shroomish|B1-B48|40, 45, 50|6.4}} | |||
{{mdloc|303|Mawile|B1-B48|40, 45, 50|6.4}} | |||
{{mdloc|307|Meditite|B1-B48|40, 45, 50|5.5}} | |||
{{mdloc|371|Bagon|B1-B48|40, 45, 50|6.4}} | |||
{{mdloc|397|Staravia|B1-B48|40, 45, 50|8.2}} | |||
{{mdloc|451|Skorupi|B1-B48|40, 45, 50|8.2}} | |||
{{mdloc|455|Carnivine|B1-B48|40, 45, 50|8.2}} | |||
{{mdloc|385|Jirachi|B23|game=timeanddarkness|45|-12}} | |||
{{mdloc|245|Suicune|B29|game=timeanddarkness|45|30}} | |||
{{mdloc|146|Moltres|B40|game=timeanddarkness|45|30}} | |||
{{mdloc/f|MD Darkness}} | |||
==Items== | |||
{{DungeonItem/h|MD Time}} | |||
{{DungeonItem|Poké|4=2-40|sprite=MDBag Poké TDS Sprite|3=B1-B48}} | |||
{{DungeonItem|Apple|sprite=MDBag Apple TDS Sprite|3=B1-B48}} | |||
{{DungeonItem|Blue Gummi|Blue Gummi|B1-B48|{{sup/md|t}}{{sup/md|s}}}} | |||
{{DungeonItem|Brown Gummi|Brown Gummi|B1-B48|{{sup/md|t}}{{sup/md|s}}}} | |||
{{DungeonItem|Grass Gummi|Grass Gummi|B1-B48|{{sup/md|t}}{{sup/md|s}}}} | |||
{{DungeonItem|Green Gummi|Green Gummi|B1-B48|{{sup/md|t}}{{sup/md|s}}}} | |||
{{DungeonItem|Orange Gummi|Orange Gummi|B1-B48|{{sup/md|t}}{{sup/md|s}}}} | |||
{{DungeonItem|Silver Gummi|Silver Gummi|B1-B48|{{sup/md|t}}{{sup/md|s}}}} | |||
{{DungeonItem|Sky Gummi|Sky Gummi|B1-B48|{{sup/md|t}}{{sup/md|s}}}} | |||
{{DungeonItem|White Gummi|White Gummi|B1-B48|{{sup/md|t}}{{sup/md|s}}}} | |||
{{DungeonItem|Black Gummi|Black Gummi|B1-B48|{{sup/md|d}}{{sup/md|s}}}} | |||
{{DungeonItem|Clear Gummi|Clear Gummi|B1-B48|{{sup/md|d}}{{sup/md|s}}}} | |||
{{DungeonItem|Gold Gummi|Gold Gummi|B1-B48|{{sup/md|d}}{{sup/md|s}}}} | |||
{{DungeonItem|Gray Gummi|Gray Gummi|B1-B48|{{sup/md|d}}{{sup/md|s}}}} | |||
{{DungeonItem|Pink Gummi|Pink Gummi|B1-B48|{{sup/md|d}}{{sup/md|s}}}} | |||
{{DungeonItem|Purple Gummi|Purple Gummi|B1-B48|{{sup/md|d}}{{sup/md|s}}}} | |||
{{DungeonItem|Red Gummi|Red Gummi|B1-B48|{{sup/md|d}}{{sup/md|s}}}} | |||
{{DungeonItem|Royal Gummi|Royal Gummi|B1-B48|{{sup/md|d}}{{sup/md|s}}}} | |||
{{DungeonItem|Yellow Gummi|Yellow Gummi|B1-B48|{{sup/md|d}}{{sup/md|s}}}} | |||
{{DungeonItem|Cheri Berry|3=B1-B48}} | |||
{{DungeonItem|Chesto Berry|3=B1-B48|5=RTRB TDS}} | |||
{{DungeonItem|Oran Berry|3=B1-B48}} | |||
{{DungeonItem|Pecha Berry|3=B1-B48}} | |||
{{DungeonItem|Rawst Berry|3=B1-B48}} | |||
{{DungeonItem|Max Elixir|Health drink|B1-B48|sprite=MDBag Drink TDS Sprite}} | |||
{{DungeonItem|Blast Seed|Seed|B1-B48}} | |||
{{DungeonItem|Blinker Seed|Seed|B1-B48|{{sup/md|d}}{{sup/md|s}}}} | |||
{{DungeonItem|Heal Seed|Seed|B1-B48}} | |||
{{DungeonItem|Pure Seed|Seed|B1-B48}} | |||
{{DungeonItem|Reviver Seed|Seed|B1-B48}} | |||
{{DungeonItem|Sleep Seed|Seed|B1-B48}} | |||
{{DungeonItem|Stun Seed|Seed|B1-B48|{{sup/md|t}}{{sup/md|s}}}} | |||
{{DungeonItem|Totter Seed|Seed|B1-B48|{{sup/md|d}}{{sup/md|s}}}} | |||
{{DungeonItem|Violent Seed|Seed|B1-B48|{{sup/md|d}}{{sup/md|s}}}} | |||
{{DungeonItem|Warp Seed|Seed|B1-B48|{{sup/md|t}}{{sup/md|s}}}} | |||
{{DungeonItem|X-Eye Seed|Seed|B1-B48|{{sup/md|d}}{{sup/md|s}}}} | |||
{{DungeonItem|All-Hit Orb|Wonder Orb|B1-B48|{{sup/md|d}}{{sup/md|s}}}} | |||
{{DungeonItem|All-Mach Orb|Wonder Orb|B1-B48|{{sup/md|t}}{{sup/md|s}}}} | |||
{{DungeonItem|Blowback Orb|Wonder Orb|B1-B48|{{sup/md|t}}{{sup/md|s}}}} | |||
{{DungeonItem|Cleanse Orb|Wonder Orb|B1-B48}} | |||
{{DungeonItem|Decoy Orb|Wonder Orb|B1-B48|{{sup/md|d}}{{sup/md|s}}}} | |||
{{DungeonItem|Escape Orb|Wonder Orb|B1-B48}} | |||
{{DungeonItem|Evasion Orb|Wonder Orb|B1-B48|{{sup/md|t}}{{sup/md|s}}}} | |||
{{DungeonItem|Foe-Fear Orb|Wonder Orb|B1-B48|{{sup/md|d}}{{sup/md|s}}}} | |||
{{DungeonItem|Foe-Hold Orb|Wonder Orb|B1-B48|{{sup/md|t}}{{sup/md|s}}}} | |||
{{DungeonItem|Foe-Seal Orb|Wonder Orb|B1-B48|{{sup/md|d}}{{sup/md|s}}}} | |||
{{DungeonItem|Lob Orb|Wonder Orb|B1-B48|{{sup/md|t}}{{sup/md|s}}}} | |||
{{DungeonItem|Mug Orb|Wonder Orb|B1-B48|{{sup/md|d}}{{sup/md|s}}}} | |||
{{DungeonItem|One-Shot Orb|Wonder Orb|B1-B48|{{sup/md|t}}{{sup/md|s}}}} | |||
{{DungeonItem|Petrify Orb|Wonder Orb|B1-B48|{{sup/md|t}}{{sup/md|s}}}} | |||
{{DungeonItem|Rebound Orb|Wonder Orb|B1-B48|{{sup/md|d}}{{sup/md|s}}}} | |||
{{DungeonItem|See-Trap Orb|Wonder Orb|B1-B48|{{sup/md|d}}{{sup/md|s}}}} | |||
{{DungeonItem|Slow Orb|Wonder Orb|B1-B48|{{sup/md|t}}{{sup/md|s}}}} | |||
{{DungeonItem|Slumber Orb|Wonder Orb|B1-B48|{{sup/md|d}}{{sup/md|s}}}} | |||
{{DungeonItem|Spurn Orb|Wonder Orb|B1-B48|{{sup/md|d}}{{sup/md|s}}}} | |||
{{DungeonItem|Stayaway Orb|Wonder Orb|B1-B48|{{sup/md|d}}{{sup/md|s}}}} | |||
{{DungeonItem|Switcher Orb|Wonder Orb|B1-B48|{{sup/md|t}}{{sup/md|s}}}} | |||
{{DungeonItem|Totter Orb|Wonder Orb|B1-B48|{{sup/md|d}}{{sup/md|s}}}} | |||
{{DungeonItem|Transfer Orb|Wonder Orb|B1-B48|{{sup/md|d}}{{sup/md|s}}}} | |||
{{DungeonItem|Warp Orb|Wonder Orb|B1-B48|{{sup/md|t}}{{sup/md|s}}}} | |||
{{DungeonItem|Aerial Ace|TM|B1-B48|{{sup/md|d}}{{sup/md|s}}}} | |||
{{DungeonItem|Attract|TM|B1-B48|{{sup/md|t}}{{sup/md|s}}}} | |||
{{DungeonItem|Avalanche|TM|B1-B48|{{sup/md|t}}{{sup/md|s}}}} | |||
{{DungeonItem|Blizzard|TM|B1-B48|{{sup/md|t}}{{sup/md|s}}}} | |||
{{DungeonItem|Brick Break|TM|B1-B48|{{sup/md|d}}{{sup/md|s}}}} | |||
{{DungeonItem|Brine|TM|B1-B48}} | |||
{{DungeonItem|Bulk Up|TM|B1-B48|{{sup/md|d}}{{sup/md|s}}}} | |||
{{DungeonItem|Bullet Seed|TM|B1-B48|{{sup/md|t}}{{sup/md|s}}}} | |||
{{DungeonItem|Calm Mind|TM|B1-B48|{{sup/md|t}}{{sup/md|s}}}} | |||
{{DungeonItem|Captivate|TM|B1-B48|{{sup/md|d}}{{sup/md|s}}}} | |||
{{DungeonItem|Charge Beam|TM|B1-B48|{{sup/md|t}}{{sup/md|s}}}} | |||
{{DungeonItem|Dark Pulse|TM|B1-B48|{{sup/md|t}}{{sup/md|s}}}} | |||
{{DungeonItem|Dig|TM|B1-B48}} | |||
{{DungeonItem|Dive|TM|B1-B48|{{sup/md|d}}{{sup/md|s}}}} | |||
{{DungeonItem|Dragon Claw|TM|B1-B48|{{sup/md|d}}{{sup/md|s}}}} | |||
{{DungeonItem|Dragon Pulse|TM|B1-B48|{{sup/md|t}}{{sup/md|s}}}} | |||
{{DungeonItem|Drain Punch|TM|B1-B48|{{sup/md|d}}{{sup/md|s}}}} | |||
{{DungeonItem|Dream Eater|TM|B1-B48|{{sup/md|d}}{{sup/md|s}}}} | |||
{{DungeonItem|Earthquake|TM|B1-B48|{{sup/md|d}}{{sup/md|s}}}} | |||
{{DungeonItem|Embargo|TM|B1-B48}} | |||
{{DungeonItem|Endure|TM|B1-B48|{{sup/md|d}}{{sup/md|s}}}} | |||
{{DungeonItem|Energy Ball|TM|B1-B48|{{sup/md|d}}{{sup/md|s}}}} | |||
{{DungeonItem|Explosion|TM|B1-B48|{{sup/md|d}}{{sup/md|s}}}} | |||
{{DungeonItem|Facade|TM|B1-B48}} | |||
{{DungeonItem|False Swipe|TM|B1-B48|{{sup/md|t}}{{sup/md|s}}}} | |||
{{DungeonItem|Fire Blast|TM|B1-B48}} | |||
{{DungeonItem|Flamethrower|TM|B1-B48}} | |||
{{DungeonItem|Flash|TM|B1-B48|{{sup/md|t}}{{sup/md|s}}}} | |||
{{DungeonItem|Flash Cannon|TM|B1-B48|{{sup/md|t}}{{sup/md|s}}}} | |||
{{DungeonItem|Fling|TM|B1-B48|{{sup/md|t}}{{sup/md|s}}}} | |||
{{DungeonItem|Focus Blast|TM|B1-B48|{{sup/md|d}}{{sup/md|s}}}} | |||
{{DungeonItem|Focus Punch|TM|B1-B48|{{sup/md|d}}{{sup/md|s}}}} | |||
{{DungeonItem|Frustration|TM|B1-B48|{{sup/md|d}}{{sup/md|s}}}} | |||
{{DungeonItem|Giga Drain|TM|B1-B48|{{sup/md|t}}{{sup/md|s}}}} | |||
{{DungeonItem|Giga Impact|TM|B1-B48}} | |||
{{DungeonItem|Grass Knot|TM|B1-B48|{{sup/md|t}}{{sup/md|s}}}} | |||
{{DungeonItem|Gyro Ball|TM|B1-B48|{{sup/md|d}}{{sup/md|s}}}} | |||
{{DungeonItem|Hidden Power|TM|B1-B48}} | |||
{{DungeonItem|Hyper Beam|TM|B1-B48}} | |||
{{DungeonItem|Ice Beam|TM|B1-B48|{{sup/md|t}}{{sup/md|s}}}} | |||
{{DungeonItem|Iron Tail|TM|B1-B48|{{sup/md|t}}{{sup/md|s}}}} | |||
{{DungeonItem|Light Screen|TM|B1-B48|{{sup/md|t}}{{sup/md|s}}}} | |||
{{DungeonItem|Natural Gift|TM|B1-B48|{{sup/md|d}}{{sup/md|s}}}} | |||
{{DungeonItem|Overheat|TM|B1-B48}} | |||
{{DungeonItem|Payback|TM|B1-B48}} | |||
{{DungeonItem|Pluck|TM|B1-B48|{{sup/md|t}}{{sup/md|s}}}} | |||
{{DungeonItem|Poison Jab|TM|B1-B48}} | |||
{{DungeonItem|Protect|TM|B1-B48|{{sup/md|d}}{{sup/md|s}}}} | |||
{{DungeonItem|Psych Up|TM|B1-B48}} | |||
{{DungeonItem|Psychic|TM|B1-B48|{{sup/md|t}}{{sup/md|s}}}} | |||
{{DungeonItem|Recycle|TM|B1-B48|{{sup/md|t}}{{sup/md|s}}}} | |||
{{DungeonItem|Reflect|TM|B1-B48|{{sup/md|t}}{{sup/md|s}}}} | |||
{{DungeonItem|Rest|TM|B1-B48|{{sup/md|t}}{{sup/md|s}}}} | |||
{{DungeonItem|Return|TM|B1-B48|{{sup/md|t}}{{sup/md|s}}}} | |||
{{DungeonItem|Roar|TM|B1-B48|{{sup/md|t}}{{sup/md|s}}}} | |||
{{DungeonItem|Rock Polish|TM|B1-B48|{{sup/md|d}}{{sup/md|s}}}} | |||
{{DungeonItem|Rock Slide|TM|B1-B48|{{sup/md|t}}{{sup/md|s}}}} | |||
{{DungeonItem|Roost|TM|B1-B48}} | |||
{{DungeonItem|Safeguard|TM|B1-B48|{{sup/md|t}}{{sup/md|s}}}} | |||
{{DungeonItem|Secret Power|TM|B1-B48}} | |||
{{DungeonItem|Shadow Ball|TM|B1-B48|{{sup/md|d}}{{sup/md|s}}}} | |||
{{DungeonItem|Shadow Claw|TM|B1-B48|{{sup/md|t}}{{sup/md|s}}}} | |||
{{DungeonItem|Shock Wave|TM|B1-B48}} | |||
{{DungeonItem|Silver Wind|TM|B1-B48|{{sup/md|t}}{{sup/md|s}}}} | |||
{{DungeonItem|Skill Swap|TM|B1-B48|{{sup/md|t}}{{sup/md|s}}}} | |||
{{DungeonItem|Sleep Talk|TM|B1-B48}} | |||
{{DungeonItem|Sludge Bomb|TM|B1-B48|{{sup/md|d}}{{sup/md|s}}}} | |||
{{DungeonItem|SolarBeam|TM|B1-B48|{{sup/md|t}}{{sup/md|s}}}} | |||
{{DungeonItem|Stealth Rock|TM|B1-B48}} | |||
{{DungeonItem|Steel Wing|TM|B1-B48|{{sup/md|t}}{{sup/md|s}}}} | |||
{{DungeonItem|Stone Edge|TM|B1-B48|{{sup/md|t}}{{sup/md|s}}}} | |||
{{DungeonItem|Substitute|TM|B1-B48|{{sup/md|d}}{{sup/md|s}}}} | |||
{{DungeonItem|Swagger|TM|B1-B48|{{sup/md|d}}{{sup/md|s}}}} | |||
{{DungeonItem|Swords Dance|TM|B1-B48}} | |||
{{DungeonItem|Taunt|TM|B1-B48|{{sup/md|d}}{{sup/md|s}}}} | |||
{{DungeonItem|Thief|TM|B1-B48|{{sup/md|d}}{{sup/md|s}}}} | |||
{{DungeonItem|Thunder|TM|B1-B48}} | |||
{{DungeonItem|Thunder Wave|TM|B1-B48|{{sup/md|d}}{{sup/md|s}}}} | |||
{{DungeonItem|Thunderbolt|TM|B1-B48}} | |||
{{DungeonItem|Torment|TM|B1-B48|{{sup/md|d}}{{sup/md|s}}}} | |||
{{DungeonItem|Toxic|TM|B1-B48|{{sup/md|d}}{{sup/md|s}}}} | |||
{{DungeonItem|Trick Room|TM|B1-B48|{{sup/md|d}}{{sup/md|s}}}} | |||
{{DungeonItem|U-turn|TM|B1-B48|{{sup/md|d}}{{sup/md|s}}}} | |||
{{DungeonItem|Vacuum-Cut|TM|B1-B48}} | |||
{{DungeonItem|Water Pulse|TM|B1-B48|{{sup/md|d}}{{sup/md|s}}}} | |||
{{DungeonItem|Wide Slash|TM|B1-B48|{{sup/md|t}}{{sup/md|s}}}} | |||
{{DungeonItem|Will-O-Wisp|TM|B1-B48|{{sup/md|d}}{{sup/md|s}}}} | |||
{{DungeonItem|X-Scissor|TM|B1-B48}} | |||
{{DungeonItem|Cut|HM|B1-B48}} | |||
{{DungeonItem|Defog|HM|B1-B48}} | |||
{{DungeonItem|Fly|HM|B1-B48}} | |||
{{DungeonItem|Rock Smash|HM|B1-B48}} | |||
{{DungeonItem|Rock Climb|HM|B1-B48}} | |||
{{DungeonItem|Strength|HM|B1-B48}} | |||
{{DungeonItem|Surf|HM|B1-B48}} | |||
{{DungeonItem|Waterfall|HM|B1-B48}} | |||
{{DungeonItem|Link Box|3=B1-B48}} | |||
|} | |||
==Layout== | |||
{| class="roundy" style="margin:auto; background: #000; border: 3px solid #{{MD time color}}" | |||
|- | |||
! style="background:#{{MD darkness color light}}; {{roundytl|5px}} | Entrance | |||
! style="background:#{{MD darkness color light}}; {{roundytr|5px}} | Jirachi tileset | |||
|- style="text-align:center;" | |||
| [[File:Final Maze entrance TDS.png|x192px]] | |||
| [[File:Final Maze Jirachi TDS.png]] | |||
|- | |||
! style="background:#{{MD darkness color light}} | Suicune tileset | |||
! style="background:#{{MD darkness color light}} | Moltres tileset | |||
|- style="text-align:center;" | |||
| [[File:Final Maze Suicune TDS.png]] | |||
| [[File:Final Maze Moltres TDS.png]] | |||
|- | |||
| colspan="2" style="background:#{{MD darkness color light}}; {{roundybottom|5px}}" | | |||
|} | |||
==Trivia== | ==Trivia== | ||
*All of the Pokémon encountered in the Final Maze appear in the Dojo's various mazes (with the obvious exception of the aforementioned | * All of the Pokémon encountered in the Final Maze appear in the Dojo's various mazes (with the obvious exception of the aforementioned Legendary Pokémon). Therefore, the Final Maze could be considered a "spawning ground" of sorts. | ||
* As items cannot be taken in to the Final Maze, this is the only dungeon in {{g|Mystery Dungeon: Explorers of Time and Explorers of Darkness|Mystery Dungeon: Explorers of Time and Darkness}} where the [[Mystery Part]] and [[Secret Slab]] are not required to encounter its wandering Legendary Pokémon. | |||
* The BGM was changed from Time and Darkness to Sky, along with the other changes. | |||
* Although the dungeon's Legendary Pokémon were moved to new locations in {{g|Mystery Dungeon: Explorers of Sky}}, the associated tilesets for their floors were kept for unknown reasons. | |||
** B23F of this dungeon uses a tileset that is unused in [[Pokémon Mystery Dungeon: Red Rescue Team and Blue Rescue Team]]. Back then, it was the original intended tileset for [[Purity Forest]]. | |||
==In other languages== | |||
{{langtable|color={{MD Time color}}|bordercolor={{MD Darkness color light}} | |||
|fr=Dédale Ultime | |||
|de=Abschlusstraining | |||
|it=Dedalo Finale | |||
|ko=마지막 방 ''Majimak Bang'' | |||
|es=Dojo Final | |||
}} | |||
{{-}} | {{-}} | ||
{{ | {{PMD2 locations}} | ||
[[Category:Pokémon Mystery Dungeon | {{DoubleProjectTag|Locations|Sidegames}} | ||
[[Category:Pokémon Mystery Dungeon: Explorers of Time and Explorers of Darkness locations]] | |||
[[Category:Pokémon Mystery Dungeon: Explorers of Sky locations]] | |||
[[Category: Dungeons containing Legendary or Mythical Pokémon|4]] | |||
[[de:Abschlusstraining]] | [[de:Abschlusstraining]] | ||
[[fr:Dédale Ultime]] | |||
[[it:Dedalo Finale]] | |||
[[ja:さいごのま]] | [[ja:さいごのま]] | ||
[[zh:最后之间]] | |||
Latest revision as of 10:13, 8 July 2024
|
|
| ||
|
| ||||||||||||||||||||||||||||||||||||||||||
| ||||||||||||||||||||||||||||||||||||||||||
| ||||||||||||||||||||||||||||||||||||||||||
| ||||||||||||||||||||||||||||||||||||||||||
Final Maze (Japanese: さいごのま Final Chamber) is a dungeon in Pokémon Mystery Dungeon: Explorers of Time and Explorers of Darkness as well as Pokémon Mystery Dungeon: Explorers of Sky. It has 48 floors and no relay point. It is unlocked after graduation and can only be entered through the Marowak Dojo, and upon entering the dungeon, all of their items in the Treasure Bag will be lost.
Gameplay
Like other Marowak Dojo mazes, the player is not allowed to bring any items. Items have to be deposited into Kangaskhan Storage before entering, or they will be lost forever. Unlike the other mazes of the dojo, the player will lose some items should they faint; additionally, Pokémon can be recruited here. The player cannot be rescued if knocked out here; for purposes of Treasure Boxes, all floors are ranked E.
There's 1-4 items on each floor and 3-5 starting enemies. Unlike other postgame dungeons, there are no traps to be found here - the game will simply spawn 2 to 4 Wonder Tiles. This dungeon contains all 88 TMs present in Explorers of Time, Darkness and Sky, including the otherwise rarely seen Dream Eater TM. In Explorers of Time and Darkness, this is also the only place where the player can find HMs.
Floors 1 through 29 are medium-sized with 3-9 rooms, while floors 30 through 48 are large-sized with 3-12 rooms.
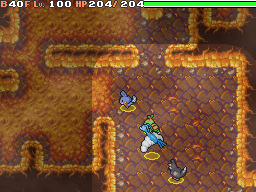
There is light darkness in this dungeon. There is water on floors 21 through 24, 26 through 39 and 41 through 43, as well as floors 46 and 48. There is lava present on floor 40.
In Explorers of Time and Darkness, after the Marine Resort's location is revealed, the player will encounter Jirachi, Suicune, and Moltres at B23F, B29F, and B40F respectively. In Explorers of Sky, all three of them have been removed from the dungeon and placed in different locations.
After clearing the maze, Marowak will give the player a Brown Bow as a holdable item, which supposedly once belonged to his grandfather.
Pokémon encountered
Each time player enters a floor, only 14 of the following species that can be found on a given floor will be chosen. The unpicked Pokémon's spawn rate will be added to whichever picked Pokémon is next in the National Dex order, going back to the beginning if needed.
| Pokémon | Floors | Levels | Recruit Rate | |
|---|---|---|---|---|
| Machop | B1-B48 | 40, 45, 50 | 8.2% | |
| Magnemite | B1-B48 | 40, 45, 50 | 8.2% | |
| Doduo | B1-B48 | 40, 45, 50 | 6.4% | |
| Omanyte | B1-B48 | 40, 45, 50 | 6.4% | |
| Kabuto | B1-B48 | 40, 45, 50 | 6.4% | |
| Spinarak | B1-B48 | 40, 45, 50 | 6.4% | |
| Mareep | B1-B48 | 40, 45, 50 | 8.2% | |
| Misdreavus | B1-B48 | 40, 45, 50 | 8.2% | |
| Swinub | B1-B48 | 40, 45, 50 | 8.2% | |
| Houndour | B1-B48 | 40, 45, 50 | 8.2% | |
| Phanpy | B1-B48 | 40, 45, 50 | 8.2% | |
| Magby | B1-B48 | 40, 45, 50 | 8.2% | |
| Poochyena | B1-B48 | 40, 45, 50 | 8.2% | |
| Shroomish | B1-B48 | 40, 45, 50 | 6.4% | |
| Mawile | B1-B48 | 40, 45, 50 | 6.4% | |
| Meditite | B1-B48 | 40, 45, 50 | 5.5% | |
| Bagon | B1-B48 | 40, 45, 50 | 6.4% | |
| Staravia | B1-B48 | 40, 45, 50 | 8.2% | |
| Skorupi | B1-B48 | 40, 45, 50 | 8.2% | |
| Carnivine | B1-B48 | 40, 45, 50 | 8.2% | |
| Jirachi | B23 TD | 45 | -12% | |
| Suicune | B29 TD | 45 | 30% | |
| Moltres | B40 TD | 45 | 30% | |
Items
Layout
| Entrance | Jirachi tileset |
|---|---|
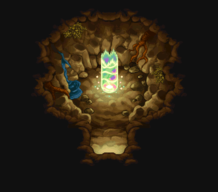
|
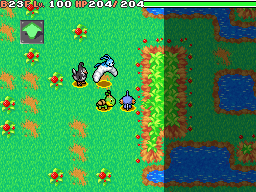
|
| Suicune tileset | Moltres tileset |
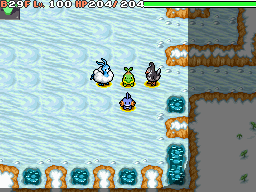
|
|
Trivia
- All of the Pokémon encountered in the Final Maze appear in the Dojo's various mazes (with the obvious exception of the aforementioned Legendary Pokémon). Therefore, the Final Maze could be considered a "spawning ground" of sorts.
- As items cannot be taken in to the Final Maze, this is the only dungeon in Pokémon Mystery Dungeon: Explorers of Time and Explorers of Darkness where the Mystery Part and Secret Slab are not required to encounter its wandering Legendary Pokémon.
- The BGM was changed from Time and Darkness to Sky, along with the other changes.
- Although the dungeon's Legendary Pokémon were moved to new locations in Pokémon Mystery Dungeon: Explorers of Sky, the associated tilesets for their floors were kept for unknown reasons.
- B23F of this dungeon uses a tileset that is unused in Pokémon Mystery Dungeon: Red Rescue Team and Blue Rescue Team. Back then, it was the original intended tileset for Purity Forest.
In other languages
| |||||||||||||||||||||

|
This article is part of both Project Locations and Project Sidegames, Bulbapedia projects that, together, aim to write comprehensive articles on the Pokémon Locations and Sidegames, respectively. | 
|
