From Bulbapedia, the community-driven Pokémon encyclopedia.
Route 1
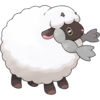
Now that you have a Starter Pokémon, you can now explore the tall grass on the side of the route. The main path is blocked by Wooloo, so you will now have to take the detour around to the tall grass, where there are plenty of wild Pokémon available. You already have five Poké Balls, so you will have the option to catch any of these Pokémon if you so wish.
Pokémon
| Available Pokémon
|
| Pokémon
|
Games
|
Location
|
Levels
|
Rate
|
|
|
Sw
|
Sh
|
|
2-5
|
15%
|
|
|
Sw
|
Sh
|
|
2-5
|
5%
|
|
|
Sw
|
Sh
|
|
2-5
|
10%
|
|
|
Sw
|
Sh
|
|
2-5
|
40%
|
|
|
Sw
|
Sh
|
|
2-5
|
30%
|
| A colored background means that the Pokémon can be found in this location in the specified game. A white background with a colored letter means that the Pokémon cannot be found here.
|
|
| Available Pokémon
|
| Pokémon
|
Games
|
Location
|
Levels
|
Rate
|
|
|
Sw
|
Sh
|
|
3-6
|
50%
|
|
|
Sw
|
Sh
|
|
3-6
|
30%
|
|
|
Sw
|
Sh
|
|
3-6
|
5%
|
|
|
Sw
|
Sh
|
|
3-6
|
15%
|
| A colored background means that the Pokémon can be found in this location in the specified game. A white background with a colored letter means that the Pokémon cannot be found here.
|
|
Items
| Items
|
| Item
|
Location
|
Games
|

|
Potion
|
South side of the route, between two fields of grass
|
Sw Sh
|

|
Paralyze Heal ×2
|
East side of the route, in the clearing against the rock wall among a field of grass
|
Sw Sh
|
|
|
|
Head straight to Wedgehurst across this route when you are done.
Wedgehurst
You are now at Wedgehurst for a second time. This time, you will meet with Leon to go to the Pokémon Research Lab on the east side of town, upon his request. In the lab, you will meet up with Sonia, an old childhood friend of Leon and Professor Magnolia's assistant as well as granddaughter. You will obtain the Pokédex here. She will ask you to visit her grandmother at her home across Route 2.
After you leave the Lab and head further down Wedgehurst, Hop will offer to show you around the Pokémon Center. You can turn down his tutorial if you are already familiar with the Pokémon Center concept.
Items
| Items
|
| Item
|
Location
|
Games
|

|
Potion
|
From a man after leaving the Pokémon Research Lab
|
Sw Sh
|

|
Poké Doll
|
Next to the Boutique
|
Sw Sh
|

|
Rare Candy
|
Next to the Pokémon Research Lab on the right
|
Sw
|
|
|
|
Route 2
Now upon your first step to Route 2, you will meet with Hop before a patch of tall grass. If you haven't already caught a Pokémon, Leon will step in and provide a tutorial on how to catch a Pokémon: the game will skip this, however, if you have already captured a Pokémon on Route 1. Leon will also gift you with 20 Poké Balls. You can catch a slew of new Pokémon here, and there are three novice Trainers along the way who will challenge you to a battle.
| Trainers
|
| Trainer
|
Pokémon
|
|
|
|
|
|

|
|
|
Lass Lauren
リコ Riko
Reward: $504
|
|
|
|
|
|
|
|
|
|
|
|
|
|
Pokémon
Wedgehurst side
| Available Pokémon
|
| Pokémon
|
Games
|
Location
|
Levels
|
Rate
|
|
|
Sw
|
Sh
|
|
4-6
|
5%
|
|
|
Sw
|
Sh
|
|
4-6
|
20%
|
|
|
Sw
|
Sh
|
|
4-6
|
20%
|
|
|
Sw
|
Sh
|
|
4-6
|
10%
|
|
|
Sw
|
Sh
|
|
4-6
|
25%
|
|
|
Sw
|
Sh
|
|
4-6
|
40%
|
| Fishing
|
|
|
Sw
|
Sh
|
|
4-6
|
80%
|
|
|
Sw
|
Sh
|
|
4-6
|
15%
|
|
|
Sw
|
Sh
|
|
4-6
|
5%
|
| A colored background means that the Pokémon can be found in this location in the specified game. A white background with a colored letter means that the Pokémon cannot be found here.
|
|
| Available Pokémon
|
| Pokémon
|
Games
|
Location
|
Levels
|
Rate
|
|
|
Sw
|
Sh
|
|
5-7
|
2%
|
|
|
Sw
|
Sh
|
|
5-7
|
38%
|
|
|
Sw
|
Sh
|
|
5-7
|
30%
|
|
|
Sw
|
Sh
|
|
5-7
|
15%
|
|
|
Sw
|
Sh
|
|
5-7
|
10%
|
|
|
Sw
|
Sh
|
|
5-7
|
5%
|
| A colored background means that the Pokémon can be found in this location in the specified game. A white background with a colored letter means that the Pokémon cannot be found here.
|
|
- Chewtle appears in the middle of the route, on the open path before the Trainer Tips sign. It does not respawn.
- Yamper appears in the middle of the route, on the open path just past the Trainer Tips sign. It does not respawn.
| Available Pokémon
|
| Pokémon
|
Games
|
Location
|
Levels
|
Rate
|
|
|
Sw
|
Sh
|
Wanderer
|
8
|
One
|
|
|
Sw
|
Sh
|
Wanderer
|
8
|
One
|
| A colored background means that the Pokémon can be found in this location in the specified game. A white background with a colored letter means that the Pokémon cannot be found here.
|
|
Items
Magnolia's Lab
Now you and Hop will have arrived at Professor Magnolia's lab. After a brief conversation, in which Leon expresses his reservations about endorsing you and Hop for the Gym Challenge, Magnolia encourages him to endorse both you and Hop, after which he proposes you and Hop have a battle. So head out to the local Battle Court, and you will have a battle with Hop to prove your worthiness for the Gym Challenge. Afterwards, both of you are endorsed by Leon, but then a pair of Wishing Stars will drop from the sky. Magnolia will take both of these. Sonia will arrive and all of you will participate in dinner for the evening.
 If the player chose Grookey:

|
|
Reward: $640
|
|
|
|
|
|
 If the player chose Scorbunny:

|
|
Reward: $640
|
|
|
|
|
|
 If the player chose Sobble:

|
|
Reward: $640
|
|
|
|
|
|
Wild Area Station
The next morning, Magnolia will grant both you and Hop Dynamax Bands that allow your Pokémon to Dynamax. Both of you will run back to Wedgehurst Station along the way. As both of you head into the station, both your mum and Hop's mum will stop you to give both of you Camping Gear before heading out into the Wild Area.
| Items
|
| Item
|
Location
|
Games
|

|
TM40 (Swift)
|
From Hop in front of Wedgehurst Station, after battling him on Route 2
|
Sw Sh
|

|
Camping Gear
|
From Mum in Wedgehurst Station, before departing on a train for the first time
|
Sw Sh
|
|
|
|
 If the player chose Scorbunny:


