From Bulbapedia, the community-driven Pokémon encyclopedia.
Meetup Spot
| Available Pokémon
|
| Pokémon
|
Games
|
Location
|
Levels
|
Rate
|
| Gift Pokémon
|
|
|
Sw
|
Sh
|
|
10
|
One
|
|
|
Sw
|
Sh
|
|
10
|
One
|
| A colored background means that the Pokémon can be found in this location in the specified game. A white background with a colored letter means that the Pokémon cannot be found here.
|
|
Wild Area Station
When you first get off the train, Hop will immediately notice that you're in the Wild Area, and not your intended destination of Motostoke. A railway attendant will inform you and Hop that the train is unable to continue to Motostoke due to a flock of Wooloo blocking the tracks! Far from unfortunate, this gives you an excellent opportunity to familiarise yourself with the wild area as you make your way to Motostoke on foot.
Before heading off, if you have save data from Pokémon: Let's Go, Pikachu! or Let's Go, Eevee! you can receive a Pikachu or Eevee with Gigantamax Factor from the two people standing to the left of the train gates. You can also collect 5 Poké Dolls from the trainer with the backpack to the left of the exit. Be sure to stock up on pokéballs from the station shop if needed before exiting the station and heading north to meet Hop in the Wild Area!
Wild Area South
| Trainers
|
| Trainer
|
Pokémon
|
| Before earning the Fire Badge
|
|
|
|
|
|
|
|
|
|
|
As you enter the Wild Area, you will stop to quickly talk to Sonia and Hop. Here, Sonia will give you the Pokémon Box Link which will allow you to access the Pokémon stored in your boxes at any time through the menu. While your next goal is to head to Motostoke, there are a few things to investigate in the Wild Area on your way. Broadly, the Wild Area is divided into a south section (where you are now) and a north section (to which you don't have access at the moment).
Pokémon encounters in the Wild Area work a bit differently to those in the normal routes, as Pokémon with a wide range of levels can be found here from the beginning of the game. Regular encounters can be found within the grass, but stronger Pokémon will also be found wandering outside of the grass. At the moment, you can only catch Pokémon up to level 20 so feel free to run from battles with these stronger Pokémon until you have a few more badges. Keep in mind you can always use a Poké Doll to end a battle if you aren't able to run.
Also found in the Wild Area are Pokémon Dens, which glow red with a beam of light. Here you can battle a Dynamaxed Pokémon alongside a team of three other trainers (either other players, or NPCs). Some strong and rare Pokémon can be found in these, so it may be worth investigating! With no badges collected, you will be limited to 1-star raid dens which contain weaker or less rare Pokémon, but as you progress you will be given the chance to battle and catch stronger and stronger Pokémon.
While in the Wild Area, you will also come across Berry Trees which you can shake for a chance to get a variety of berries. The more you shake though, the greater chance of disturbing a wild Pokémon from within the tree and forcing you into battle.
There are many locations in the Wild Area that you now have access to that this guide won't cover, so feel free to explore to your heart's content. Once you're finished, head east then north through Rolling Fields and East Lake Axewell to continue on to Motostoke through the large gateway in the north.
Rolling Fields
East Lake Axewell

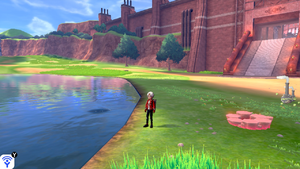
East Lake Axewell, showing the entrance to Motostoke in the background


