Pokémon Mansion (Kanto): Difference between revisions
Doctorhook (talk | contribs) m (→Generation III) |
Galarian Guy (talk | contribs) No edit summary |
||
| (190 intermediate revisions by 67 users not shown) | |||
| Line 1: | Line 1: | ||
{{Infobox location | {{Infobox location | ||
|image= | |image=Pokémon Mansion Exterior LGPE.png | ||
|image_size= | |image_size=300 | ||
|type= | |type=ruins | ||
|mapdesc=A decrepit, burned-down mansion on Cinnabar Island. It got its name because a famous Pokémon researcher lived there. | |||
|location_name=Pokémon Mansion | |location_name=Pokémon Mansion | ||
|japanese_name= | |japanese_name=ポケモン{{tt|屋敷|やしき}} | ||
|translated_name=Pokémon Mansion | |translated_name=Pokémon Mansion | ||
|location= [[Cinnabar Island]] | |location=[[Cinnabar Island]] | ||
|region=Kanto | |region=Kanto | ||
|generation={{Gen|I}}, {{Gen|III}} | |generation={{Gen|I}}, {{Gen|III}}, {{Gen|VII}} | ||
|map= | |map=Kanto Cinnabar Island Map.png | ||
}} | }} | ||
The '''Pokémon Mansion''' (Japanese: ''' | The '''Pokémon Mansion''' (Japanese: '''ポケモン{{ruby|屋敷|やしき}}''' ''Pokémon Mansion''), shortened to '''{{PK}}{{MN}} Mansion''' on the [[Generation I]] [[Town Map]], is an abandonded mansion located on [[Cinnabar Island]]. It is the former home of a researcher of Pokémon, and is implied to be the place where {{p|Mewtwo}} was created. | ||
==In the games== | |||
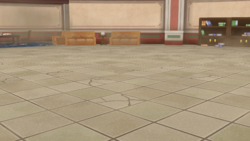
[[File:FL Pokemon Mansion.png|thumb|240px|Location preview of Pokémon Mansion in {{game|FireRed and LeafGreen|s}}]] | |||
In [[Generation]]s {{gen|I}}, {{gen|III}}, and {{gen|VII}}, the {{player}} has to enter the mansion and find the {{ka|Secret Key}} at its basement to access the [[Cinnabar Gym|Cinnabar Island Gym]]. The abandoned building is full of {{tc|Burglar}}s and {{tc|Scientist}}s, looting whatever valuable they can find. | |||
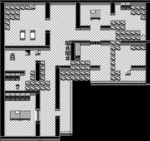
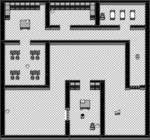
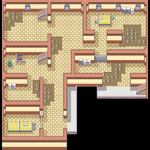
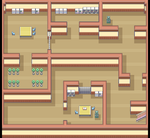
The Pokémon Mansion has four different floors. | The Pokémon Mansion has four different floors. Doors can be unlocked in the mansion by pressing switches hidden in statues scattered around the building. In Generations I and III, there is a balcony on 3F with two possible points to jump down from, with the eastern one leading back to 2F and the western one leading to 1F and allowing the player to access B1F, while in Generation VII, the western balcony is the only possible way down, and it is utilized by climbing down a ladder instead of jumping. In Generation VII only, there are beds at the basement, which the player can rest in, fully healing their entire [[party]]. In Generations I and III, there is an exit at the southeast corner of 1F, which transports the player back to the front door of the mansion, while in Generation VII, it is replaced by a one-way [[warp tile|warp panel]] that serves the same purpose. | ||
Amongst the rubble and wreckage | Amongst the rubble and wreckage are journal entries written by the scientist who obtained a {{p|Mew}} and cloned it to create {{p|Mewtwo}}. In Generation VII, there are also multiple glass containers likely used during said cloning process at the basement, the largest one of which shows signs of having been beaten on over and over from the inside. | ||
The Pokémon Mansion, along with most other buildings on Cinnabar Island, is destroyed in the eruption of the Cinnabar Island volcano prior to the events of Generations {{gen|II}} and {{gen|IV}}, and as such, it no longer exists. | |||
==Journal quotes== | ==Journal quotes== | ||
{{main|Pokémon Mansion journals}} | {{main|Pokémon Mansion journals}} | ||
A series of journal entries are scattered around the mansion. They appear to have been written by [[ | A series of journal entries are scattered around the mansion. They appear to have been written by [[Mr. Fuji]] and detail the birth of Mewtwo. | ||
==Items== | ==Items== | ||
{{itlisth|ruins}} | |||
{{Itemlist|Escape Rope|1F, in-between the row of pillars in the north area of the floor|R=yes|B=yes|Y=yes|FR=yes|LG=yes}} | |||
{{Itemlist|Carbos|1F, near the stairs to B1F|R=yes|B=yes|Y=yes|FR=yes|LG=yes}} | |||
{{Itemlist|Moon Stone|1F, on the fifth pillar northeast of the entrance ''(hidden)''|R=yes|B=yes|Y=yes}} | |||
{{Itemlist|Moon Stone|1F, one square north and three squares west of the base of the northwesternmost pillar from the entrance ''(hidden)''|FR=yes|LG=yes}} | |||
{{Itemlist|Protein|1F, southeast of the [[Escape Rope]]|FR=yes|LG=yes}} | |||
{{Itemlist/6|Health Candy|Mighty Candy|Tough Candy|Smart Candy|Courage Candy|Quick Candy| | |||
*1F, near the third pillar north from the entrance, on the east side of the hall ''(hidden)'' (daily) (item determined randomly) | |||
*2F, near the ladder in the southeast area of the floor, accessible from the southernmost stairs on 3F ''(hidden)'' (daily) (item determined randomly) | |||
*3F, on the fallen bookshelf in the southwest area of the floor ''(hidden)'' (daily) (item determined randomly) | |||
*B1F, between two rest beds, on the eastern dresser with a lamp ''(hidden)'' (daily) (item determined randomly) | |||
*B1F, southwest of the rest beds, on the eastern dresser with a lamp ''(hidden)'' (daily) (item determined randomly) | |||
*B1F, in the northern room containing bookshelves, on a pile of books near the western wall ''(hidden)'' (daily) (item determined randomly) | |||
*B1F, in the west area of the floor, next to the southwestern tank ''(hidden)'' (daily) (item determined randomly) | |||
*B1F, southwestern corner of the floor, in the middle of the eastern bookshelf ''(hidden)'' (daily) (item determined randomly)|LP=yes|LE=yes}} | |||
{{Itemlist|Max Repel|1F, in the southwest corner of the northwest room|LP=yes|LE=yes}} | |||
{{Itemlist|Max Elixir|1F, in the room south of the row of pillars|LP=yes|LE=yes}} | |||
{{Itemlist|Max Lure|1F, under a table on the east side of the floor|LP=yes|LE=yes}} | |||
{{Itemlist|Silver Razz Berry|1F, north of the ladder from 3F|LP=yes|LE=yes|display=[[Silver Razz Berry]] ×5}} | |||
{{Itemlist|Fire Stone|1F, southwest of the stairs to B1F|LP=yes|LE=yes}} | |||
{{Itemlist|Calcium|2F, in the northeast area of the floor|R=yes|B=yes|Y=yes|FR=yes|LG=yes}} | |||
{{Itemlist|HP Up|2F, in the east area of the floor, accessible from the southernmost stairs on 3F|FR=yes|LG=yes}} | |||
{{Itemlist|Zinc|2F, on the balcony|FR=yes|LG=yes}} | |||
{{Itemlist|Max Ether|2F, in the room south of the stairs from 1F|LP=yes|LE=yes}} | |||
{{Itemlist|Max Revive|2F, in the northeast area of the floor|LP=yes|LE=yes}} | |||
{{Itemlist|Ultra Ball|2F, on the balcony|LP=yes|LE=yes|display=[[Ultra Ball]] ×3}} | |||
{{Itemlist|PP Up|2F, in the southwest room|LP=yes|LE=yes}} | |||
{{Itemlist|Escape Rope|2F, in the north area of the floor|LP=yes|LE=yes}} | |||
{{Itemlist|TM Rock VI|2F, reward for defeating {{tc|Coach Trainer}} Rita|LP=yes|LE=yes|display={{TM|22|Rock Slide}}}} | |||
{{Itemlist|Hyper Potion|2F, in the east area of the floor, accessible from the southernmost stairs on 3F|LP=yes|LE=yes}} | |||
{{Itemlist|Max Potion|3F, in the southwest area of the floor|R=yes|B=yes|Y=yes|FR=yes|LG=yes}} | |||
{{Itemlist|Iron|3F, in the northeast area of the floor|R=yes|B=yes|Y=yes|FR=yes|LG=yes}} | |||
{{Itemlist|Max Revive|3F, seven squares north of the southwest corner of the floor, on the rubble ''(hidden)''|R=yes|B=yes|Y=yes}} | |||
{{Itemlist|Rare Candy|3F, far east of {{tc|Scientist}} Braydon, at the end of the path ''(hidden)''|FR=yes|LG=yes}} | |||
{{Itemlist|Rare Candy| | |||
*3F, in the southwest area of the floor | |||
*B1F, in the northern area of the floor|LP=yes|LE=yes|display=[[Rare Candy]] ×2}} | |||
{{Itemlist|Full Heal|3F, in the middle north area of the floor|LP=yes|LE=yes}} | |||
{{Itemlist|TM Dark VI|3F, in the northeast area of the floor|LP=yes|LE=yes|display={{TM|21|Foul Play}}}} | |||
{{Itemlist|X Accuracy|3F, far east of {{tc|Scientist}} Braydon, at the end of the path|LP=yes|LE=yes}} | |||
{{Itemlist|Full Restore|B1F, in the southwest area of the floor|R=yes|B=yes|Y=yes|FR=yes|LG=yes}} | |||
{{Itemlist|Secret Key|B1F, in the west area of the floor|R=yes|B=yes|Y=yes|LP=yes|LE=yes|display={{ka|Secret Key}}}} | |||
{{Itemlist|Rare Candy| | |||
*B1F, in the northern area of the floor | |||
*B1F, in the northwest corner of the area with the {{ka|Secret Key}} ''(hidden)'' ''([[Broken hidden items|broken]]''{{sup/1|RG}}'')''|R=yes|B=yes|Y=yes|display=[[Rare Candy]] ×2}} | |||
{{Itemlist|TM Grass|B1F, in the northwest area of the floor|R=yes|B=yes|Y=yes|display={{TM|22|SolarBeam}}}} | |||
{{Itemlist|TM Ice|B1F, east of the southernmost statue|R=yes|B=yes|Y=yes|display={{TM|14|Blizzard}}}} | |||
{{Itemlist|Elixir|B1F, eight squares east of the northeastern statue ''(hidden)''|FR=yes|LG=yes}} | |||
{{Itemlist|TM Ice|B1F, in the northern area of the floor|FR=yes|LG=yes|display={{TM|14|Blizzard}}}} | |||
{{Itemlist|Secret Key III|B1F, in the northwest area of the floor|FR=yes|LG=yes|display={{ka|Secret Key}}}} | |||
{{Itemlist|TM Grass|B1F, in the west area of the floor|FR=yes|LG=yes|display={{TM|22|SolarBeam}}}} | |||
{{Itemlist|TM Poison VI|B1F, near the southernmost statue|LP=yes|LE=yes|display={{TM|52|Sludge Bomb}}}} | |||
{{Itemlist|Max Potion|B1F, in the southwest area of the floor|LP=yes|LE=yes}} | |||
{{Itemlist|Max Elixir|B1F, in the northwest area of the floor|LP=yes|LE=yes}} | |||
{{itlistfoot|ruins}} | |||
==Pokémon== | |||
===Generation I=== | ===Generation I=== | ||
{{catch/header|ruins|no}} | |||
{{catch/div|ruins|1F}} | |||
{{catch/entry1|019|Rattata|no|no|yes|1F|34, 37|35%|type1=Normal}} | |||
{{catch/entry1|020|Raticate|no|no|yes|1F|34, 37|25%|type1=Normal}} | |||
{{catch/entry1|037|Vulpix|no|yes|no|1F|34|10%|type1=Fire}} | |||
{{catch/entry1|058|Growlithe|yes|no|no|1F|34|10%|type1=Fire}} | |||
{{catch/entry1|058|Growlithe|no|no|yes|1F|26, 30, 34, 38|20%|type1=Fire}} | |||
{{catch/entry1|077|Ponyta|yes|yes|no|1F|28, 30, 32, 34|40%|type1=Fire}} | |||
{{catch/entry1|088|Grimer|yes|no|no|1F|30|5%|type1=Poison}} | |||
{{catch/entry1|088|Grimer|no|yes|no|1F|30, 32|40%|type1=Poison}} | |||
{{catch/entry1|088|Grimer|no|no|yes|1F|23, 26|20%|type1=Poison}} | |||
{{catch/entry1|089|Muk|yes|no|no|1F|39|1%|type1=Poison}} | |||
{{catch/entry1|089|Muk|no|yes|no|1F|37|4%|type1=Poison}} | |||
{{catch/entry1|109|Koffing|yes|no|no|1F|30, 32|40%|type1=Poison}} | |||
{{catch/entry1|109|Koffing|no|yes|no|1F|30|5%|type1=Poison}} | |||
{{catch/entry1|110|Weezing|yes|no|no|1F|37|4%|type1=Poison}} | |||
{{catch/entry1|110|Weezing|no|yes|no|1F|39|1%|type1=Poison}} | |||
{{catch/div|ruins|2F}} | |||
{{catch/entry1|019|Rattata|no|no|yes|2F|37, 40|35%|type1=Normal}} | |||
{{catch/entry1|020|Raticate|no|no|yes|2F|37, 40|25%|type1=Normal}} | |||
{{catch/entry1|037|Vulpix|no|yes|no|2F|32|25%|type1=Fire}} | |||
{{catch/entry1|058|Growlithe|yes|no|no|2F|32|25%|type1=Fire}} | |||
{{catch/entry1|077|Ponyta|yes|yes|no|2F|28, 30, 32|25%|type1=Fire}} | |||
{{catch/entry1|088|Grimer|yes|no|no|2F|30|5%|type1=Poison}} | |||
{{catch/entry1|088|Grimer|no|yes|no|2F|30, 34|40%|type1=Poison}} | |||
{{catch/entry1|088|Grimer|no|no|yes|2F|26, 29, 32, 35|35%|type1=Poison}} | |||
{{catch/entry1|089|Muk|yes|no|no|2F|37|1%|type1=Poison}} | |||
{{catch/entry1|089|Muk|no|yes|no|2F|39|4%|type1=Poison}} | |||
{{catch/entry1|089|Muk|no|no|yes|2F|35, 38|5%|type1=Poison}} | |||
{{catch/entry1|109|Koffing|yes|no|no|2F|30, 34|40%|type1=Poison}} | |||
{{catch/entry1|109|Koffing|no|yes|no|2F|30|5%|type1=Poison}} | |||
{{catch/entry1|110|Weezing|yes|no|no|2F|39|4%|type1=Poison}} | |||
{{catch/entry1|110|Weezing|no|yes|no|2F|37|1%|type1=Poison}} | |||
{{catch/div|ruins|3F}} | |||
{{catch/entry1|019|Rattata|no|no|yes|3F|40, 43|35%|type1=Normal}} | |||
{{catch/entry1|020|Raticate|no|no|yes|3F|40, 43|25%|type1=Normal}} | |||
{{catch/entry1|037|Vulpix|no|yes|no|3F|33|15%|type1=Fire}} | |||
{{catch/entry1|058|Growlithe|yes|no|no|3F|33|15%|type1=Fire}} | |||
{{catch/entry1|077|Ponyta|yes|no|no|3F|32, 34, 36|24%|type1=Fire}} | |||
{{catch/entry1|077|Ponyta|no|yes|no|3F|32, 36|14%|type1=Fire}} | |||
{{catch/entry1|088|Grimer|yes|no|no|3F|34|5%|type1=Poison}} | |||
{{catch/entry1|088|Grimer|no|yes|no|3F|31, 35|40%|type1=Poison}} | |||
{{catch/entry1|088|Grimer|no|no|yes|3F|32, 35, 38|35%|type1=Poison}} | |||
{{catch/entry1|089|Muk|yes|no|no|3F|42|1%|type1=Poison}} | |||
{{catch/entry1|089|Muk|no|yes|no|3F|38, 40|15%|type1=Poison}} | |||
{{catch/entry1|089|Muk|no|no|yes|3F|38, 41|5%|type1=Poison}} | |||
{{catch/entry1|109|Koffing|yes|no|no|3F|31, 35|40%|type1=Poison}} | |||
{{catch/entry1|109|Koffing|no|yes|no|3F|34|5%|type1=Poison}} | |||
{{catch/entry1|110|Weezing|yes|no|no|3F|38, 40|15%|type1=Poison}} | |||
{{catch/entry1|110|Weezing|no|yes|no|3F|42|1%|type1=Poison}} | |||
{{catch/entry1|126|Magmar|no|yes|no|3F|34|10%|type1=Fire}} | |||
{{catch/div|ruins|B1F}} | |||
{{catch/entry1|020|Raticate|no|no|yes|B1F|37, 40, 43, 46|40%|type1=Normal}} | |||
{{catch/entry1|037|Vulpix|no|yes|no|B1F|35|15%|type1=Fire}} | |||
{{catch/entry1|058|Growlithe|yes|no|no|B1F|35|15%|type1=Fire}} | |||
{{catch/entry1|077|Ponyta|yes|yes|no|B1F|32, 34|15%|type1=Fire}} | |||
{{catch/entry1|088|Grimer|yes|no|no|B1F|35|5%|type1=Poison}} | |||
{{catch/entry1|088|Grimer|no|yes|no|B1F|31, 33|50%|type1=Poison}} | |||
{{catch/entry1|088|Grimer|no|no|yes|B1F|35, 38|40%|type1=Poison}} | |||
{{catch/entry1|089|Muk|yes|no|no|B1F|42|1%|type1=Poison}} | |||
{{catch/entry1|089|Muk|no|yes|no|B1F|40|10%|type1=Poison}} | |||
{{catch/entry1|089|Muk|no|no|yes|B1F|41|10%|type1=Poison}} | |||
{{catch/entry1|109|Koffing|yes|no|no|B1F|31, 33|50%|type1=Poison}} | |||
{{catch/entry1|109|Koffing|no|yes|no|B1F|35|5%|type1=Poison}} | |||
{{catch/entry1|110|Weezing|yes|no|no|B1F|40, 42|14%|type1=Poison}} | |||
{{catch/entry1|110|Weezing|no|yes|no|B1F|42|1%|type1=Poison}} | |||
{{catch/entry1|126|Magmar|no|yes|no|B1F|38|4%|type1=Fire}} | |||
{{catch/entry1|132|Ditto|no|no|yes|B1F|12, 18, 24|10%|type1=Normal}} | |||
{{catch/footer|ruins}} | |||
===Generation III=== | ===Generation III=== | ||
{{catch/header|ruins|no}} | |||
{{catch/div|ruins|1F-3F}} | |||
{{catch/entryfl|019|Rattata|yes|yes|1F-3F|26, 28|15%|type1=Normal}} | |||
{{catch/entryfl|020|Raticate|yes|yes|1F-3F|32, 36|30%|type1=Normal}} | |||
{{catch/entryfl|037|Vulpix|no|yes|1F-3F|30, 32|15%|type1=Fire}} | |||
{{catch/entryfl|058|Growlithe|yes|no|1F-3F|30, 32|15%|type1=Fire}} | |||
{{catch/entryfl|088|Grimer|yes|no|1F-3F|28|5%|type1=Poison}} | |||
{{catch/entryfl|088|Grimer|no|yes|1F-3F|28, 30|30%|type1=Poison}} | |||
{{catch/entryfl|089|Muk|no|yes|1F-3F|32|5%|type1=Poison}} | |||
{{catch/entryfl|109|Koffing|yes|no|1F-3F|28, 30|30%|type1=Poison}} | |||
{{catch/entryfl|109|Koffing|no|yes|1F-3F|28|5%|type1=Poison}} | |||
{{catch/entryfl|110|Weezing|yes|no|1F-3F|32|5%|type1=Poison}} | |||
{{catch/div|ruins|B1F}} | |||
{{catch/entryfl|019|Rattata|yes|yes|B1F|26|5%|type1=Normal}} | |||
{{catch/entryfl|020|Raticate|yes|yes|B1F|34, 38|30%|type1=Normal}} | |||
{{catch/entryfl|037|Vulpix|no|yes|B1F|30, 32|15%|type1=Fire}} | |||
{{catch/entryfl|058|Growlithe|yes|no|B1F|30, 32|15%|type1=Fire}} | |||
{{catch/entryfl|088|Grimer|yes|no|B1F|28|5%|type1=Poison}} | |||
{{catch/entryfl|088|Grimer|no|yes|B1F|28, 30|30%|type1=Poison}} | |||
{{catch/entryfl|089|Muk|no|yes|B1F|34|5%|type1=Poison}} | |||
{{catch/entryfl|109|Koffing|yes|no|B1F|28, 30|30%|type1=Poison}} | |||
{{catch/entryfl|109|Koffing|no|yes|B1F|28|5%|type1=Poison}} | |||
{{catch/entryfl|110|Weezing|yes|no|B1F|34|5%|type1=Poison}} | |||
{{catch/entryfl|132|Ditto|yes|yes|B1F|30|10%|type1=Normal}} | |||
{{catch/footer|ruins}} | |||
===Generation VII=== | |||
{{Catch/header|ruins|no}} | |||
{{Catch/div|ruins|1F-3F}} | |||
{{Catch/entrype|019|Rattata|yes|yes|1F-3F|39-44|20%|type1=Normal}} | |||
{{Catch/entrype|020|Raticate|yes|yes|1F-3F|39-44|20%|type1=Normal}} | |||
{{Catch/entrype|088|Grimer|yes|no|1F-3F|39-44|40%|type1=Poison}} | |||
{{Catch/entrype|089|Muk|yes|no|1F-3F|39-44|5%|type1=Poison}} | |||
{{Catch/entrype|109|Koffing|no|yes|1F-3F|39-44|40%|type1=Poison}} | |||
{{Catch/entrype|110|Weezing|no|yes|1F-3F|39-44|5%|type1=Poison}} | |||
{{Catch/entrype|126|Magmar|yes|yes|1F-3F|39-44|14%|type1=Fire}} | |||
{{Catch/entrype|132|Ditto|yes|yes|1F-3F|39-44|1%|type1=Normal}} | |||
{{Catch/div|ruins|B1F}} | |||
{{Catch/entrype|019|Rattata|yes|yes|B1F|39-44|20%|type1=Normal}} | |||
{{Catch/entrype|020|Raticate|yes|yes|B1F|39-44|20%|type1=Normal}} | |||
{{Catch/entrype|088|Grimer|yes|no|B1F|39-44|30%|type1=Poison}} | |||
{{Catch/entrype|089|Muk|yes|no|B1F|39-44|10%|type1=Poison}} | |||
{{Catch/entrype|109|Koffing|no|yes|B1F|39-44|30%|type1=Poison}} | |||
{{Catch/entrype|110|Weezing|no|yes|B1F|39-44|10%|type1=Poison}} | |||
{{Catch/entrype|126|Magmar|yes|yes|B1F|39-44|10%|type1=Fire}} | |||
{{Catch/entrype|132|Ditto|yes|yes|B1F|39-44|10%|type1=Normal}} | |||
{{catch/div|ruins|Rare Spawns}} | |||
{{Catch/entrype|113|Chansey|yes|yes|B1F-3F|39-44|-}} | |||
{{Catch/footer|ruins|2}} | |||
==Trainers== | ==Trainers== | ||
===Generation I=== | ===Generation I=== | ||
{{trainerheader| | {{trainerheader|ruins}} | ||
{{trainerentry| | {{trainerentry|Spr RG Burglar.png|game=1|Burglar||3060|2|004|Charmander||34|None|005|Charmeleon||34|None|}} | ||
{{trainerdiv|ruins}} | |||
{{trainerentry|Spr RG Burglar.png|game=1|Burglar||3420|1|038|Ninetales||38|None|}} | |||
{{trainerdiv| | {{trainerdiv|ruins}} | ||
{{trainerentry| | {{trainerentry|Spr RG Scientist.png|game=1|Scientist||1650|3|081|Magnemite||33|None|082|Magneton||33|None|100|Voltorb||33|None|}} | ||
{{trainerdiv| | {{trainerdiv|ruins}} | ||
{{trainerentry| | {{trainerentry|Spr RG Scientist.png|game=1|Scientist||1450|2|101|Electrode||29|None|110|Weezing||29|None|}} | ||
{{trainerdiv| | {{trainerdiv|ruins}} | ||
{{trainerentry| | {{trainerentry|Spr RG Burglar.png|game=1|Burglar||3060|2|058|Growlithe||34|None|077|Ponyta||34|None|}} | ||
{{trainerdiv| | {{trainerdiv|ruins}} | ||
{{trainerentry| | {{trainerentry|Spr RG Scientist.png|game=1|Scientist||1700|2|081|Magnemite||34|None|101|Electrode||34|None|}} | ||
{{trainerfooter| | {{trainerfooter|ruins|1}} | ||
===Generation III=== | ===Generation III=== | ||
{{trainerheader| | {{trainerheader|ruins}} | ||
{{trainerentry| | {{trainerentry|Spr FRLG Youngster.png|Youngster|Johnson|544|3|023|Ekans|♂|33|None|023|Ekans|♂|33|None|020|Raticate|♂|34|None|36=ユウリ|37=Yūri}} | ||
{{trainerdiv| | {{trainerdiv|ruins}} | ||
{{trainerentry| | {{trainerentry|Spr FRLG Burglar.png|Burglar|Arnie|2992|2|004|Charmander|♂|34|None|005|Charmeleon|♂|34|None|36=トヨジ|37=Toyoji}} | ||
{{trainerdiv|ruins}} | |||
{{trainerentry|Spr FRLG Burglar.png|Burglar|Simon|3344|1|038|Ninetales|♀|38|None|36=ヤスノブ|37=Yasunobu}} | |||
{{trainerdiv| | {{trainerdiv|ruins}} | ||
{{trainerentry| | {{trainerentry|Spr FRLG Scientist.png|Scientist|Braydon|1584|3|081|Magnemite||33|None|082|Magneton||33|None|100|Voltorb||33|None|36=アオバ|37=Aoba}} | ||
{{trainerdiv| | {{trainerdiv|ruins}} | ||
{{trainerentry| | {{trainerentry|Spr FRLG Scientist.png|Scientist|Ted|1392|2|101|Electrode||29|None|110|Weezing|♂|29|None|36=ノブヒサ|37=Nobuhisa}} | ||
{{trainerdiv| | {{trainerdiv|ruins}} | ||
{{trainerentry| | {{trainerentry|Spr FRLG Burglar.png|Burglar|Lewis|2992|2|058|Growlithe|♂|34|None|077|Ponyta|♂|34|None|36=エイタ|37=Eita}} | ||
{{trainerdiv| | {{trainerdiv|ruins}} | ||
{{trainerentry| | {{trainerentry|Spr FRLG Scientist.png|Scientist|Ivan|1632|2|081|Magnemite||34|None|101|Electrode||34|None|36=ヨシタカ|37=Yoshitaka}} | ||
{{trainerfooter| | {{trainerfooter|ruins|FRLG}} | ||
===Generation VII=== | |||
===Generation | {{trainerheader|ruins}} | ||
{{trainerentry|VSBurglar PE.png{{!}}90px|game=PE|Burglar|Arnie|3,520<br>3 {{i|Poké Ball}}s|1|078|Rapidash|♀|44|None|36=トヨジ|37=Toyoji}} | |||
{{ | {{trainerdiv|ruins}} | ||
{{ | {{trainerentry|VSCoach Trainer F PE.png{{!}}90px|game=PE|Coach Trainer|Rita|4,700|3|075|Graveler|♂|46|None|051|Dugtrio|♂|46|None|062|Poliwrath|♀|47|None|36=ヨシカ|37=Yoshika}} | ||
{{ | {{trainerdiv|ruins}} | ||
{{trainerentry|VSBurglar PE.png{{!}}90px|game=PE|Burglar|Simon|3,520<br>3 {{i|Poké Ball}}s|2|126|Magmar|♂|44|None|089|Muk|♂|44|None|36=ヤスノブ|37=Yasunobu}} | |||
{{trainerdiv|ruins}} | |||
{{ | {{trainerentry|VSScientist PE.png{{!}}90px|game=PE|Scientist|Braydon|2,700|3|110|Weezing|♂|45|None|082|Magneton||45|None|126|Magmar|♀|45|None|36=アオバ|37=Aoba}} | ||
{{trainerdiv|ruins}} | |||
{{trainerentry|VSAce Trainer M PE.png{{!}}90px|game=PE|Ace Trainer|Louis|4,600<br>5 [[Ultra Ball]]s|2|099|Kingler|♂|45|None|057|Primeape|♂|46|None|36=クニヒコ|37=Kunihiko}} | |||
{{ | {{trainerdiv|ruins}} | ||
{{ | {{trainerentry|VSScientist PE.png{{!}}90px|game=PE|Scientist|Ted|2,700|2|101|Electrode||45|None|089|Muk|♂|45|None|36=ノブヒサ|37=Nobuhisa}} | ||
{{ | {{trainerdiv|ruins}} | ||
{{trainerentry|VSBurglar PE.png{{!}}90px|game=PE|Burglar|Lewis|3,520<br>3 {{i|Poké Ball}}s|4|109|Koffing|♂|44|None|109|Koffing|♂|44|None|109|Koffing|♂|44|None|110|Weezing|♂|44|None|36=エイタ|37=Eita}} | |||
{{trainerdiv|ruins}} | |||
{{trainerentry|VSScientist PE.png{{!}}90px|game=PE|Scientist|Ivan|2,700|1|125|Electabuzz|♂|45|None|36=ヨシタカ|37=Yoshitaka}} | |||
{{trainerdiv|ruins|After becoming Champion}} | |||
{{trainerentry/master|VSAce Trainer M Master PE.png{{!}}90px|Ace Trainer|Jace|126|Magmar|♂|75|Poison|Toxic|Ghost|Confuse Ray|Psychic|Psychic|Fire|Fire Spin|36=シュンスケ|37=Shunsuke}} | |||
{{trainerdiv|ruins}} | |||
{{trainerentry/master|VSScientist Master PE.png{{!}}90px|Scientist|Gordon|089|Muk|♂|75|Ice|Haze|Rock|Rock Slide|Electric|Thunder Punch|36=マサミ|37=Masami}} | |||
{{trainerfooter|ruins|PE}} | |||
{{ | |||
{{ | |||
{{ | |||
{{ | |||
{{ | |||
{{ | |||
{{ | |||
{{ | |||
{{ | |||
{{ | |||
= | |||
{{ | |||
{{ | |||
{{ | |||
{{ | |||
{{ | |||
{{ | |||
{{ | |||
{{ | |||
{{ | |||
{{ | |||
{{ | |||
{{ | |||
{{ | |||
{{ | |||
{{ | |||
{{ | |||
{{ | |||
== | ==Gallery== | ||
==== | ===Inside design=== | ||
{{ | {| class="roundy" style="margin:auto; background: #000; border: 3px solid #{{locationcolor/dark|ruins}}" | ||
|- | |||
{{ | ! style="background:#{{locationcolor/light|ruins}}; {{roundytl|5px}}" | Version | ||
{{ | ! style="background:#{{locationcolor/light|ruins}}" | 1F | ||
{{ | ! style="background:#{{locationcolor/light|ruins}}" | 2F | ||
{{ | ! style="background:#{{locationcolor/light|ruins}}" | 3F | ||
{{ | ! style="background:#{{locationcolor/light|ruins}}; {{roundytr|5px}}" | B1F | ||
{{ | |- | ||
{{ | ! style="background:#{{red color}}" | {{color2|000|Pokémon Red and Blue Versions|Red}} | ||
{{ | | rowspan="3" | [[File:Pokémon Mansion 1F RBY.png|150px]] | ||
{{ | | rowspan="3" | [[File:Pokémon Mansion 2F RBY.png|150px]] | ||
| rowspan="3" | [[File:Pokémon Mansion 3F RBY.png|150px]] | |||
= | | rowspan="3" | [[File:Pokémon Mansion B1F RBY.png|150px]] | ||
|- | |||
! style="background:#{{blue color}}" | {{color2|FFF|Pokémon Red and Blue Versions|Blue}} | |||
|- | |||
{{ | ! style="background:#{{yellow color}}" | {{color2|000|Pokémon Yellow Version|Yellow}} | ||
{{ | |- | ||
! style="background:#{{firered color}}" | {{color2|000|Pokémon FireRed and LeafGreen Versions|FireRed}} | |||
{{ | | rowspan="2" | [[File:Pokémon Mansion 1F FRLG.png|150px]] | ||
{{ | | rowspan="2" | [[File:Pokémon Mansion 2F FRLG.png|150px]] | ||
| rowspan="2" | [[File:Pokémon Mansion 3F FRLG.png|150px]] | |||
{{ | | rowspan="2" | [[File:Pokémon Mansion B1F FRLG.png|150px]] | ||
{{ | |||
|- | |- | ||
! style="background:#{{ | ! style="background:#{{leafgreen color}}" | {{color2|000|Pokémon FireRed and LeafGreen Versions|LeafGreen}} | ||
|- | |- | ||
! | ! style="background:#{{Let's Go Pikachu color}}" | {{color2|000|Pokémon Let's Go, Pikachu! and Let's Go, Eevee!|Let's Go, Pikachu!}} | ||
| rowspan="2" | [[File:Pokémon Mansion 1F LGPE.png|150px]] | |||
| rowspan="2" | [[File:Pokémon Mansion 2F LGPE.png|150px]] | |||
| rowspan="2" | [[File:Pokémon Mansion 3F LGPE.png|150px]] | |||
| rowspan="2" | [[File:Pokémon Mansion B1F LGPE.png|150px]] | |||
|- | |- | ||
! | ! style="background:#{{Let's Go Eevee color}}" | {{color2|000|Pokémon Let's Go, Pikachu! and Let's Go, Eevee!|Let's Go, Eevee!}} | ||
|- | |- | ||
| colspan="5" style="background:#{{locationcolor/light|ruins}}; {{roundybottom|5px}}" | | |||
| | |} | ||
| | |||
| | ===Outside design=== | ||
| | {{Mapgen | ||
|hv=v | |||
|colordark={{locationcolor/dark|ruins}} | |||
|colorlight={{locationcolor/light|ruins}} | |||
|genI=Pokémon Mansion RBY.png | |||
|sizeI=96px | |||
|genIII=Pokémon Mansion FRLG.png | |||
|sizeIII=112px | |||
|genVII=Pokémon Mansion Exterior LGPE.png | |||
|sizeVII=250px | |||
}} | |||
===[[Environment]]s=== | |||
{| style="margin:auto; text-align:center; {{roundy|5px}} border: 2px solid #{{locationcolor/dark|ruins}}; background: #{{locationcolor/med|ruins}}; font-size:80%" | |||
|- | |- | ||
! | <!--|style="{{roundy|5px}} border: 2px solid #{{locationcolor/dark|ruins}}; background: #{{locationcolor/light|ruins}}; overflow:hidden; width:80px"| [[File:BattleEnvironmentFRLGPokemonMansion.png|250px]]--> | ||
|style="{{roundy|5px}} border: 2px solid #{{locationcolor/dark|ruins}}; background: #{{locationcolor/light|ruins}}; overflow:hidden; width:80px"| [[File:BattleEnvironmentLGPEPokemonMansion.png|250px]] | |||
|- | |- | ||
| | <!--| {{color2|000|Generation III}}--> | ||
| {{color2|000|Generation VII}} | |||
|} | |} | ||
==Walking Pokémon quotes== | |||
[[Walking Pokémon]] can have reactions unique to Pokémon Mansion. | |||
{| class="roundy" style="margin: auto; text-align: center; background-color: #{{locationcolor/med|ruins}}; border: 3px solid #{{locationcolor/dark|ruins}}" | |||
|- style="background-color: #{{locationcolor/light|ruins}}" | |||
! Games | |||
! Pokémon | |||
! Area | |||
! Quote | |||
|- style="background-color: #FFF" | |||
! {{GameIcon|LGP}}{{GameIcon|LGE}} | |||
| [[File:150MSPE.png]]<br>{{p|Mewtwo}} | |||
| B1F | |||
| ''"Mewtwo seems to be pondering things"'' | |||
|- style="background-color: #{{locationcolor/light|ruins}}" | |||
! colspan="4" | Can happen automatically | |||
|- style="background-color: #FFF" | |||
! {{GameIcon|LGP}}{{GameIcon|LGE}} | |||
| [[File:150MSPE.png]]<br>{{p|Mewtwo}} | |||
| '''B1F'''<br><small>Near the cloning machine</small> | |||
| ''"Mewtwo is staring ahead at the large machine..."<br>"Mewtwo is staring quietly at the large machine..."'' | |||
|} | |||
==In the anime== | |||
[[File:Pokémon Mansion PO.png|thumb|250px|The Pokémon Mansion in [[Pokémon Origins]]]] | |||
===Pokémon Origins=== | |||
{{OBP|Red|Origins}} was seen visiting the Pokémon Mansion in ''[[PO03|File 3: Giovanni]]''. The mansion used to be full of different kinds of Pokémon, but was now just an old, abandoned house. While exploring the mansion, Red found a journal describing the discovery of {{p|Mew|a new species of Pokémon}}. | |||
The Pokémon Mansion was also referenced in ''[[PO04|File 4: Charizard]]'', where Red recalled reading the entries in the journal, leading to him identifying the Pokémon {{OBP|Blue|Origins}} had recently fought against and lost to as {{p|Mewtwo}}, possibly created in the very same mansion Red visited and found the journal from. | |||
{{-}} | |||
==In the manga== | |||
[[File:Kanto Pokémon Mansion Adventures.png|thumb|220px|The Pokémon Mansion in [[Pokémon Adventures]]]] | |||
===Pokémon Adventures=== | |||
===={{MangaArc|Red, Green & Blue}}==== | |||
In Pokémon Adventures, instead of being burned-down and deserted, the Pokémon Mansion appears to be well-kept and habitable. It made a brief appearance in ''[[PS026|Holy Moltres]]'', where multiple {{tc|Team Rocket Grunt}}s were seen raiding the building, searching for clues of [[Blaine]]'s whereabouts in order to find and punish him for leaving [[Team Rocket]]. | |||
{{-}} | |||
==Trivia== | |||
[[File:Pokémon Mansion Lab B1F LGPE.png|thumb|240px|The four cloning tanks]] | |||
* Some of the [[wild Pokémon]] found here in [[Generation I]] were moved to [[One Island]] in [[Generation III]], such as {{p|Ponyta}} and {{p|Magmar}}. In [[Generation VII]], due to the [[Sevii Islands]] being inaccessible, Magmar is available in here once again. | |||
* In Generation VII, a cloning laboratory is added to the west side of the basement. If the player brings a {{p|Mew}} or {{p|Mewtwo}} along as the [[walking Pokémon]] to the laboratory, it will stop next to the largest glass container and stare quietly at it. | |||
** Additionally, the room just south of the large glass container holds four smaller cloning tanks, possibly alluding to {{OBP|Mewtwo|M01}}'s companions from [[The Uncut Story of Mewtwo's Origin]]. | |||
* In Generation I, it is possible to get stuck on 3F. This happens if the {{player}} stands on the east side of the table in the southwestern room and the {{tc|Burglar}} with a {{p|Ninetales}} then challenges them to a battle. After the battle, the player will be stuck in a corner, the Burglar blocking the way. If the player [[save]]s after this and doesn't have an [[Escape Rope]] or a Pokémon with {{m|Dig}}, the only way to escape is to [[black out]] by fighting wild Pokémon. The layout was changed in FireRed and LeafGreen, and it is no longer possible to get trapped. | |||
{{youtubevid|yyNHg5JHyAw|channel/UCgRR_pDt6bGC1jEUgyVfmiQ|name=Uber Dragon|Red|Blue}} | |||
==In other languages== | ==In other languages== | ||
{{langtable|color={{locationcolor/light|ruins}}|bordercolor={{locationcolor/dark|ruins}}\ | |||
|zh_yue=寶可夢屋 ''{{tt|Pokémon Ūk|Pokémon House}}'' {{tt|*|Games}}<br>寵物小精靈屋 ''{{tt|Chúngmaht Síujīnglìhng Ūk|Pokémon House}}'' {{tt|*|Manga}} | |||
* '' | |zh_cmn=寶可夢屋 / 宝可梦屋 ''{{tt|Pokémon Wū|Pokémon House}}'' {{tt|*|Games, Manga (mainland China new Jilin edition)}}<br>神奇寶貝屋 / 神奇宝贝屋 ''{{tt|Shénqí Bǎobèi Wū|Pokémon House}}'' {{tt|*|Manga (Taiwan and mainland China old Jilin edition)}}<br>宠物小精灵大院 ''{{tt|Chǒngwù Xiǎojīnglíng Dàyuàn|Pocket Monster Mansion}}'' {{tt|*|Manga (mainland China Light Industry Press edition)}} | ||
|cs=Pokémoní vila | |||
|fr=Manoir Pokémon | |||
{{Kanto}} | |de=Pokémon-Villa ({{gen|VII}})<br>Pokémon-Haus ({{gen|I}}-{{gen|III}}) | ||
|it=Villa Pokémon | |||
|ko=포켓몬저택 ''Pokémon Jeotaek'' | |||
|pt_br=Mansão Pokémon | |||
|es=Mansión Pokémon | |||
|vi=Dinh thự Pokémon}} | |||
{{Kanto}}<br/> | |||
{{Project Locations notice}} | {{Project Locations notice}} | ||
[[Category:Kanto locations]] | [[Category:Kanto locations]] | ||
[[Category:Red, Blue and Yellow locations]] | [[Category:Red, Blue and Yellow locations]] | ||
[[Category:FireRed and LeafGreen locations]] | [[Category:FireRed and LeafGreen locations]] | ||
[[Category:Let's Go, Pikachu! and Let's Go, Eevee! locations]] | |||
[[Category:Abandoned buildings]] | [[Category:Abandoned buildings]] | ||
[[Category:Mansions]] | |||
[[de:Pokémon- | [[de:Pokémon-Villa]] | ||
[[es:Mansión Pokémon (Kanto)]] | |||
[[fr:Manoir Pokémon (Kanto)]] | [[fr:Manoir Pokémon (Kanto)]] | ||
[[it:Villa Pokémon (Kanto)]] | |||
[[ja:ポケモンやしき (カントー地方)]] | [[ja:ポケモンやしき (カントー地方)]] | ||
[[zh:宝可梦屋]] | |||
Latest revision as of 13:48, 12 April 2024
| ||||
| ||||
| Map description: | A decrepit, burned-down mansion on Cinnabar Island. It got its name because a famous Pokémon researcher lived there. | |||
|---|---|---|---|---|
| Location: | Cinnabar Island | |||
| Region: | Kanto | |||
| Generations: | I, III, VII | |||
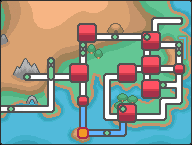 Location of Pokémon Mansion in Kanto. | ||||
| Pokémon world locations | ||||
The Pokémon Mansion (Japanese: ポケモン屋敷 Pokémon Mansion), shortened to PKMN Mansion on the Generation I Town Map, is an abandonded mansion located on Cinnabar Island. It is the former home of a researcher of Pokémon, and is implied to be the place where Mewtwo was created.
In the games

In Generations I, III, and VII, the player has to enter the mansion and find the Secret Key at its basement to access the Cinnabar Island Gym. The abandoned building is full of Burglars and Scientists, looting whatever valuable they can find.
The Pokémon Mansion has four different floors. Doors can be unlocked in the mansion by pressing switches hidden in statues scattered around the building. In Generations I and III, there is a balcony on 3F with two possible points to jump down from, with the eastern one leading back to 2F and the western one leading to 1F and allowing the player to access B1F, while in Generation VII, the western balcony is the only possible way down, and it is utilized by climbing down a ladder instead of jumping. In Generation VII only, there are beds at the basement, which the player can rest in, fully healing their entire party. In Generations I and III, there is an exit at the southeast corner of 1F, which transports the player back to the front door of the mansion, while in Generation VII, it is replaced by a one-way warp panel that serves the same purpose.
Amongst the rubble and wreckage are journal entries written by the scientist who obtained a Mew and cloned it to create Mewtwo. In Generation VII, there are also multiple glass containers likely used during said cloning process at the basement, the largest one of which shows signs of having been beaten on over and over from the inside.
The Pokémon Mansion, along with most other buildings on Cinnabar Island, is destroyed in the eruption of the Cinnabar Island volcano prior to the events of Generations II and IV, and as such, it no longer exists.
Journal quotes
- Main article: Pokémon Mansion journals
A series of journal entries are scattered around the mansion. They appear to have been written by Mr. Fuji and detail the birth of Mewtwo.
Items
| Item | Location | Games | |
|---|---|---|---|
| Escape Rope | 1F, in-between the row of pillars in the north area of the floor | R B Y FR LG | |
| Carbos | 1F, near the stairs to B1F | R B Y FR LG | |
| Moon Stone | 1F, on the fifth pillar northeast of the entrance (hidden) | R B Y | |
| Moon Stone | 1F, one square north and three squares west of the base of the northwesternmost pillar from the entrance (hidden) | FR LG | |
| Protein | 1F, southeast of the Escape Rope | FR LG | |
| Health Candy |
|
P E | |
| Mighty Candy | |||
| Tough Candy | |||
| Smart Candy | |||
| Courage Candy | |||
| Quick Candy | |||
| Max Repel | 1F, in the southwest corner of the northwest room | P E | |
| Max Elixir | 1F, in the room south of the row of pillars | P E | |
| Max Lure | 1F, under a table on the east side of the floor | P E | |
| Silver Razz Berry ×5 | 1F, north of the ladder from 3F | P E | |
| Fire Stone | 1F, southwest of the stairs to B1F | P E | |
| Calcium | 2F, in the northeast area of the floor | R B Y FR LG | |
| HP Up | 2F, in the east area of the floor, accessible from the southernmost stairs on 3F | FR LG | |
| Zinc | 2F, on the balcony | FR LG | |
| Max Ether | 2F, in the room south of the stairs from 1F | P E | |
| Max Revive | 2F, in the northeast area of the floor | P E | |
| Ultra Ball ×3 | 2F, on the balcony | P E | |
| PP Up | 2F, in the southwest room | P E | |
| Escape Rope | 2F, in the north area of the floor | P E | |
| TM22 (Rock Slide) | 2F, reward for defeating Coach Trainer Rita | P E | |
| Hyper Potion | 2F, in the east area of the floor, accessible from the southernmost stairs on 3F | P E | |
| Max Potion | 3F, in the southwest area of the floor | R B Y FR LG | |
| Iron | 3F, in the northeast area of the floor | R B Y FR LG | |
| Max Revive | 3F, seven squares north of the southwest corner of the floor, on the rubble (hidden) | R B Y | |
| Rare Candy | 3F, far east of Scientist Braydon, at the end of the path (hidden) | FR LG | |
| Rare Candy ×2 |
|
P E | |
| Full Heal | 3F, in the middle north area of the floor | P E | |
| TM21 (Foul Play) | 3F, in the northeast area of the floor | P E | |
| X Accuracy | 3F, far east of Scientist Braydon, at the end of the path | P E | |
| Full Restore | B1F, in the southwest area of the floor | R B Y FR LG | |
| Secret Key | B1F, in the west area of the floor | R B Y P E | |
| Rare Candy ×2 |
|
R B Y | |
| TM22 (SolarBeam) | B1F, in the northwest area of the floor | R B Y | |
| TM14 (Blizzard) | B1F, east of the southernmost statue | R B Y | |
| Elixir | B1F, eight squares east of the northeastern statue (hidden) | FR LG | |
| TM14 (Blizzard) | B1F, in the northern area of the floor | FR LG | |
| Secret Key | B1F, in the northwest area of the floor | FR LG | |
| TM22 (SolarBeam) | B1F, in the west area of the floor | FR LG | |
| TM52 (Sludge Bomb) | B1F, near the southernmost statue | P E | |
| Max Potion | B1F, in the southwest area of the floor | P E | |
| Max Elixir | B1F, in the northwest area of the floor | P E | |
Pokémon
Generation I
| Pokémon | Games | Location | Levels | Rate | |||||||||||
|---|---|---|---|---|---|---|---|---|---|---|---|---|---|---|---|
| 1F | |||||||||||||||
|
R | B | Y |
|
34, 37 | 35% | |||||||||
|
R | B | Y |
|
34, 37 | 25% | |||||||||
|
R | B | Y |
|
34 | 10% | |||||||||
|
R | B | Y |
|
34 | 10% | |||||||||
|
R | B | Y |
|
26, 30, 34, 38 | 20% | |||||||||
|
R | B | Y |
|
28, 30, 32, 34 | 40% | |||||||||
|
R | B | Y |
|
30 | 5% | |||||||||
|
R | B | Y |
|
30, 32 | 40% | |||||||||
|
R | B | Y |
|
23, 26 | 20% | |||||||||
|
R | B | Y |
|
39 | 1% | |||||||||
|
R | B | Y |
|
37 | 4% | |||||||||
|
R | B | Y |
|
30, 32 | 40% | |||||||||
|
R | B | Y |
|
30 | 5% | |||||||||
|
R | B | Y |
|
37 | 4% | |||||||||
|
R | B | Y |
|
39 | 1% | |||||||||
| 2F | |||||||||||||||
|
R | B | Y |
|
37, 40 | 35% | |||||||||
|
R | B | Y |
|
37, 40 | 25% | |||||||||
|
R | B | Y |
|
32 | 25% | |||||||||
|
R | B | Y |
|
32 | 25% | |||||||||
|
R | B | Y |
|
28, 30, 32 | 25% | |||||||||
|
R | B | Y |
|
30 | 5% | |||||||||
|
R | B | Y |
|
30, 34 | 40% | |||||||||
|
R | B | Y |
|
26, 29, 32, 35 | 35% | |||||||||
|
R | B | Y |
|
37 | 1% | |||||||||
|
R | B | Y |
|
39 | 4% | |||||||||
|
R | B | Y |
|
35, 38 | 5% | |||||||||
|
R | B | Y |
|
30, 34 | 40% | |||||||||
|
R | B | Y |
|
30 | 5% | |||||||||
|
R | B | Y |
|
39 | 4% | |||||||||
|
R | B | Y |
|
37 | 1% | |||||||||
| 3F | |||||||||||||||
|
R | B | Y |
|
40, 43 | 35% | |||||||||
|
R | B | Y |
|
40, 43 | 25% | |||||||||
|
R | B | Y |
|
33 | 15% | |||||||||
|
R | B | Y |
|
33 | 15% | |||||||||
|
R | B | Y |
|
32, 34, 36 | 24% | |||||||||
|
R | B | Y |
|
32, 36 | 14% | |||||||||
|
R | B | Y |
|
34 | 5% | |||||||||
|
R | B | Y |
|
31, 35 | 40% | |||||||||
|
R | B | Y |
|
32, 35, 38 | 35% | |||||||||
|
R | B | Y |
|
42 | 1% | |||||||||
|
R | B | Y |
|
38, 40 | 15% | |||||||||
|
R | B | Y |
|
38, 41 | 5% | |||||||||
|
R | B | Y |
|
31, 35 | 40% | |||||||||
|
R | B | Y |
|
34 | 5% | |||||||||
|
R | B | Y |
|
38, 40 | 15% | |||||||||
|
R | B | Y |
|
42 | 1% | |||||||||
|
R | B | Y |
|
34 | 10% | |||||||||
| B1F | |||||||||||||||
|
R | B | Y |
|
37, 40, 43, 46 | 40% | |||||||||
|
R | B | Y |
|
35 | 15% | |||||||||
|
R | B | Y |
|
35 | 15% | |||||||||
|
R | B | Y |
|
32, 34 | 15% | |||||||||
|
R | B | Y |
|
35 | 5% | |||||||||
|
R | B | Y |
|
31, 33 | 50% | |||||||||
|
R | B | Y |
|
35, 38 | 40% | |||||||||
|
R | B | Y |
|
42 | 1% | |||||||||
|
R | B | Y |
|
40 | 10% | |||||||||
|
R | B | Y |
|
41 | 10% | |||||||||
|
R | B | Y |
|
31, 33 | 50% | |||||||||
|
R | B | Y |
|
35 | 5% | |||||||||
|
R | B | Y |
|
40, 42 | 14% | |||||||||
|
R | B | Y |
|
42 | 1% | |||||||||
|
R | B | Y |
|
38 | 4% | |||||||||
|
R | B | Y |
|
12, 18, 24 | 10% | |||||||||
| A colored background means that the Pokémon can be found in this location in the specified game. A white background with a colored letter means that the Pokémon cannot be found here. | |||||||||||||||
Generation III
| Pokémon | Games | Location | Levels | Rate | |||||||||||
|---|---|---|---|---|---|---|---|---|---|---|---|---|---|---|---|
| 1F-3F | |||||||||||||||
|
FR | LG |
|
26, 28 | 15% | ||||||||||
|
FR | LG |
|
32, 36 | 30% | ||||||||||
|
FR | LG |
|
30, 32 | 15% | ||||||||||
|
FR | LG |
|
30, 32 | 15% | ||||||||||
|
FR | LG |
|
28 | 5% | ||||||||||
|
FR | LG |
|
28, 30 | 30% | ||||||||||
|
FR | LG |
|
32 | 5% | ||||||||||
|
FR | LG |
|
28, 30 | 30% | ||||||||||
|
FR | LG |
|
28 | 5% | ||||||||||
|
FR | LG |
|
32 | 5% | ||||||||||
| B1F | |||||||||||||||
|
FR | LG |
|
26 | 5% | ||||||||||
|
FR | LG |
|
34, 38 | 30% | ||||||||||
|
FR | LG |
|
30, 32 | 15% | ||||||||||
|
FR | LG |
|
30, 32 | 15% | ||||||||||
|
FR | LG |
|
28 | 5% | ||||||||||
|
FR | LG |
|
28, 30 | 30% | ||||||||||
|
FR | LG |
|
34 | 5% | ||||||||||
|
FR | LG |
|
28, 30 | 30% | ||||||||||
|
FR | LG |
|
28 | 5% | ||||||||||
|
FR | LG |
|
34 | 5% | ||||||||||
|
FR | LG |
|
30 | 10% | ||||||||||
| A colored background means that the Pokémon can be found in this location in the specified game. A white background with a colored letter means that the Pokémon cannot be found here. | |||||||||||||||
Generation VII
| Pokémon | Games | Location | Levels | Rate | |||||||||||
|---|---|---|---|---|---|---|---|---|---|---|---|---|---|---|---|
| 1F-3F | |||||||||||||||
|
P | E |
|
39-44 | 20% | ||||||||||
|
P | E |
|
39-44 | 20% | ||||||||||
|
P | E |
|
39-44 | 40% | ||||||||||
|
P | E |
|
39-44 | 5% | ||||||||||
|
P | E |
|
39-44 | 40% | ||||||||||
|
P | E |
|
39-44 | 5% | ||||||||||
|
P | E |
|
39-44 | 14% | ||||||||||
|
P | E |
|
39-44 | 1% | ||||||||||
| B1F | |||||||||||||||
|
P | E |
|
39-44 | 20% | ||||||||||
|
P | E |
|
39-44 | 20% | ||||||||||
|
P | E |
|
39-44 | 30% | ||||||||||
|
P | E |
|
39-44 | 10% | ||||||||||
|
P | E |
|
39-44 | 30% | ||||||||||
|
P | E |
|
39-44 | 10% | ||||||||||
|
P | E |
|
39-44 | 10% | ||||||||||
|
P | E |
|
39-44 | 10% | ||||||||||
| Rare Spawns | |||||||||||||||
|
P | E |
|
39-44 | - | ||||||||||
| A colored background means that the Pokémon can be found in this location in the specified game. A white background with a colored letter means that the Pokémon cannot be found here. | |||||||||||||||
Trainers
Generation I
| Trainer | Pokémon | |||||||||
|---|---|---|---|---|---|---|---|---|---|---|
|
| |||||||||
| ||||||||||
|
| |||||||||
|
| |||||||||
| ||||||||||
| ||||||||||
|
| |||||||||
| ||||||||||
|
| |||||||||
| ||||||||||
|
| |||||||||
| ||||||||||
Generation III
| Trainer | Pokémon | |||||||||||
|---|---|---|---|---|---|---|---|---|---|---|---|---|
|
| |||||||||||
| ||||||||||||
| ||||||||||||
|
| |||||||||||
| ||||||||||||
|
| |||||||||||
|
| |||||||||||
| ||||||||||||
| ||||||||||||
|
| |||||||||||
| ||||||||||||
|
| |||||||||||
| ||||||||||||
|
| |||||||||||
| ||||||||||||
| Trainers with a Vs. Seeker by their names, when alerted for a rematch using the item, may use higher-level Pokémon. | ||||||||||||
Generation VII
| Trainer | Pokémon | |||||||||||||||
|---|---|---|---|---|---|---|---|---|---|---|---|---|---|---|---|---|
|
| |||||||||||||||
|
| |||||||||||||||
| ||||||||||||||||
| ||||||||||||||||
|
| |||||||||||||||
| ||||||||||||||||
|
| |||||||||||||||
| ||||||||||||||||
| ||||||||||||||||
|
| |||||||||||||||
| ||||||||||||||||
|
| |||||||||||||||
| ||||||||||||||||
|
| |||||||||||||||
| ||||||||||||||||
| ||||||||||||||||
| ||||||||||||||||
|
| |||||||||||||||
| After becoming Champion | ||||||||||||||||
|
| |||||||||||||||
|
| |||||||||||||||
Gallery
Inside design
| Version | 1F | 2F | 3F | B1F |
|---|---|---|---|---|
| Red | 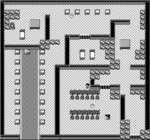
|
|

|
|
| Blue | ||||
| Yellow | ||||
| FireRed | 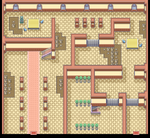
|
|

|
|
| LeafGreen | ||||
| Let's Go, Pikachu! | 
|

|

|

|
| Let's Go, Eevee! | ||||
Outside design
|
Environments
| Generation VII |
Walking Pokémon quotes
Walking Pokémon can have reactions unique to Pokémon Mansion.
| Games | Pokémon | Area | Quote |
|---|---|---|---|
| P E |  Mewtwo |
B1F | "Mewtwo seems to be pondering things" |
| Can happen automatically | |||
| P E |  Mewtwo |
B1F Near the cloning machine |
"Mewtwo is staring ahead at the large machine..." "Mewtwo is staring quietly at the large machine..." |
In the anime

Pokémon Origins
Red was seen visiting the Pokémon Mansion in File 3: Giovanni. The mansion used to be full of different kinds of Pokémon, but was now just an old, abandoned house. While exploring the mansion, Red found a journal describing the discovery of a new species of Pokémon.
The Pokémon Mansion was also referenced in File 4: Charizard, where Red recalled reading the entries in the journal, leading to him identifying the Pokémon Blue had recently fought against and lost to as Mewtwo, possibly created in the very same mansion Red visited and found the journal from.
In the manga

Pokémon Adventures
Red, Green & Blue arc
In Pokémon Adventures, instead of being burned-down and deserted, the Pokémon Mansion appears to be well-kept and habitable. It made a brief appearance in Holy Moltres, where multiple Team Rocket Grunts were seen raiding the building, searching for clues of Blaine's whereabouts in order to find and punish him for leaving Team Rocket.
Trivia
- Some of the wild Pokémon found here in Generation I were moved to One Island in Generation III, such as Ponyta and Magmar. In Generation VII, due to the Sevii Islands being inaccessible, Magmar is available in here once again.
- In Generation VII, a cloning laboratory is added to the west side of the basement. If the player brings a Mew or Mewtwo along as the walking Pokémon to the laboratory, it will stop next to the largest glass container and stare quietly at it.
- Additionally, the room just south of the large glass container holds four smaller cloning tanks, possibly alluding to Mewtwo's companions from The Uncut Story of Mewtwo's Origin.
- In Generation I, it is possible to get stuck on 3F. This happens if the player stands on the east side of the table in the southwestern room and the Burglar with a Ninetales then challenges them to a battle. After the battle, the player will be stuck in a corner, the Burglar blocking the way. If the player saves after this and doesn't have an Escape Rope or a Pokémon with Dig, the only way to escape is to black out by fighting wild Pokémon. The layout was changed in FireRed and LeafGreen, and it is no longer possible to get trapped.
| |
| This video is not available on Bulbapedia; instead, you can watch the video on YouTube here. | |
In other languages
| |||||||||||||||||||||||||||||||||||
| Kanto | ||||||||
|---|---|---|---|---|---|---|---|---|
|
| ||||||||
|

|
This article is part of Project Locations, a Bulbapedia project that aims to write comprehensive articles on every location in the Pokémon world. |


