|
|
| Line 591: |
Line 591: |
|
| |
|
| {{m|Fly}} allows you to instantly revisit any city or town you've previously explored. In addition, it can also be used to return to any route or other special location, like [[Rusturf Tunnel]] or [[Mt. Chimney]]! The only catch to Flying back to a route is that you must have reached the next city or town first. That means you can't Fly to Routes {{rtn|120|Hoenn}} or {{rtn|121|Hoenn}} until you've visited [[Lilycove City]]. While Fly can be used by selecting the appropriate party member, it can also be used by opening the {{DL|PokéNav Plus|AreaNav}} app and tapping the desired location. | | {{m|Fly}} allows you to instantly revisit any city or town you've previously explored. In addition, it can also be used to return to any route or other special location, like [[Rusturf Tunnel]] or [[Mt. Chimney]]! The only catch to Flying back to a route is that you must have reached the next city or town first. That means you can't Fly to Routes {{rtn|120|Hoenn}} or {{rtn|121|Hoenn}} until you've visited [[Lilycove City]]. While Fly can be used by selecting the appropriate party member, it can also be used by opening the {{DL|PokéNav Plus|AreaNav}} app and tapping the desired location. |
|
| |
| ==Route 120==
| |
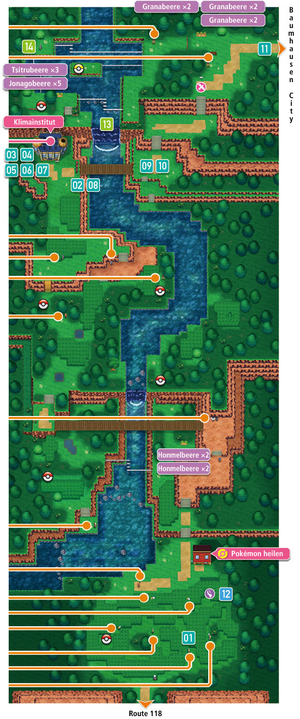
| [[File:Hoenn Route 120 ORAS.png|thumb|Route 120]]
| |
|
| |
| The lengthy {{rt|120|Hoenn}} runs east from [[Fortree City]] to {{rt|121|Hoenn}}. The long grass makes great cover for Pokémon capable of camouflaging themselves. Two separate ruins, [[Scorched Slab]] and the [[Ancient Tomb]], are located here.
| |
|
| |
| {| class="expandable" style="margin: auto; background: #{{locationcolor/med|forest}}; {{roundy}}; border: 5px solid #{{locationcolor/light|forest}};"
| |
| |- align="center"
| |
| ! Trainers
| |
| |-
| |
| |
| |
| {{trainerheader|forest}}
| |
| {{trainerentry|VSParasol Lady.png{{!}}150px|Parasol Lady|Clarissa|1,056|2|118|Goldeen|♀|31||119|Seaking|♀|33|}}
| |
| {{trainerdiv|forest}}
| |
| {{trainerentry|VSBird Keeper.png{{!}}150px|Bird Keeper|Robert|1,360|1|333|Swablu|♂|34||38=Nav}}
| |
| {{catch/div|forest|Return trip}}
| |
| {{trainerentry|VSBird Keeper.png{{!}}150px|Bird Keeper|Colin|1,280|2|277|Swellow|♂|32||178|Xatu|♂|32|}}
| |
| {{trainerdiv|forest}}
| |
| {{trainerentry|VSNinja Boy.png{{!}}150px|Ninja Boy|Tsunao|496|3|109|Koffing|♂|29||109|Koffing|♂|30||109|Koffing|♂|31|}}
| |
| {{trainerdiv|forest}}
| |
| {{trainerentry|VSParasol Lady.png{{!}}150px|Parasol Lady|Angelica|1,088|1|351|Castform|♀|34|}}
| |
| {{trainerdiv|forest}}
| |
| {{trainerentry|VSAce Trainer F ORAS.png{{!}}150px|Ace Trainer|Jennifer|2,160|1|350|Milotic|♀|36|}}
| |
| {{trainerdiv|forest}}
| |
| {{trainerentry|VSBug Maniac.png{{!}}150px|Bug Maniac|Brandon|952|1|284|Masquerain|♂|34||38=Nav}}
| |
| {{trainerdiv|forest}}
| |
| {{trainerentry|VSStreet Thug.png{{!}}150px|Street Thug|Gomez|1,088|1|332|Cacturne|♂|34||38=Nav}}
| |
| {{trainerdiv|forest}}
| |
| {{trainerentry|VSDelinquent.png{{!}}150px|Delinquent|Sharlene|1,088|1|319|Sharpedo|♀|34||38=Nav}}
| |
| {{trainerdiv|forest}}
| |
| {{trainerentry|VSNinja Boy.png{{!}}150px|Ninja Boy|Keigo|480|2|291|Ninjask|♂|32||109|Koffing|♂|30|}}
| |
| {{trainerdiv|forest}}
| |
| {{trainerentry|VSRuin Maniac.png{{!}}150px|Ruin Maniac|Chip|896|2|343|Baltoy||32||299|Nosepass|♂|32|}}
| |
| {{trainerdiv|forest}}
| |
| {{trainerentry|VSPokémon Ranger M ORAS.png{{!}}150px|Pokémon Ranger|Carlos|1,980|2|274|Nuzleaf|♂|33||310|Manectric|♂|33|}}
| |
| {{trainerdiv|forest}}
| |
| {{trainerentry|VSPokémon Ranger F ORAS.png{{!}}150px|Pokémon Ranger|Jenna|1,980|2|271|Lombre|♀|33||326|Grumpig|♀|33|}}
| |
| {{catch/div|forest|Rematch}}
| |
| {{trainerentry|VSBird Keeper.png{{!}}150px|Bird Keeper|Robert|1,640<br><small>After acquiring the {{badge|Mind}}</small>|1|334|Altaria|♂|41|}}
| |
| {{trainerentry|VSBird Keeper.png{{!}}150px|Bird Keeper|Robert|1,720<br><small>After acquiring the {{badge|Rain}}</small>|2|022|Fearow|♂|43||334|Altaria|♂|43|}}
| |
| {{trainerentry|VSBird Keeper.png{{!}}150px|Bird Keeper|Robert|1,960<br><small>After entering the [[Hall of Fame]]</small>|3|022|Fearow|♂|47||334|Altaria|♂|48||398|Staraptor|♂|49|}}
| |
| {{trainerdiv|forest}}
| |
| {{trainerentry|VSBug Maniac.png{{!}}150px|Bug Maniac|Brandon|1,092<br><small>After acquiring the {{badge|Mind}}</small>|2|284|Masquerain|♂|39||127|Pinsir|♂|39|}}
| |
| {{trainerentry|VSBug Maniac.png{{!}}150px|Bug Maniac|Brandon|1,204<br><small>After acquiring the {{badge|Rain}}</small>|2|284|Masquerain|♂|43||127|Pinsir|♂|43|}}
| |
| {{trainerentry|VSBug Maniac.png{{!}}150px|Bug Maniac|Brandon|1,316<br><small>After entering the [[Hall of Fame]]</small>|4|284|Masquerain|♂|47||402|Kricketune|♂|47||127|Pinsir|♂|47||416|Vespiquen|♀|47|}}
| |
| {{trainerdiv|forest}}
| |
| {{trainerentry|VSStreet Thug.png{{!}}150px|Street Thug|Gomez|1,312<br><small>After acquiring the {{badge|Mind}}</small>|1|332|Cacturne|♂|41|}}
| |
| {{trainerentry|VSStreet Thug.png{{!}}150px|Street Thug|Gomez|1,376<br><small>After acquiring the {{badge|Rain}}</small>|2|198|Murkrow|♂|43||332|Cacturne|♂|43|}}
| |
| {{trainerentry|VSStreet Thug.png{{!}}150px|Street Thug|Gomez|1,536<br><small>After entering the [[Hall of Fame]]</small>|3|229|Houndoom|♂|48||332|Cacturne|♂|48||430|Honchkrow|♂|48|}}
| |
| {{trainerdiv|forest}}
| |
| {{trainerentry|VSDelinquent.png{{!}}150px|Delinquent|Sharlene|1,312<br><small>After acquiring the {{badge|Mind}}</small>|1|319|Sharpedo|♀|41|}}
| |
| {{trainerentry|VSDelinquent.png{{!}}150px|Delinquent|Sharlene|1,376<br><small>After acquiring the {{badge|Rain}}</small>|2|319|Sharpedo|♀|43||215|Sneasel|♀|43|}}
| |
| {{trainerentry|VSDelinquent.png{{!}}150px|Delinquent|Sharlene|1,568<br><small>After entering the [[Hall of Fame]]</small>|2|319|Sharpedo|♀|49||461|Weavile|♀|49|}}
| |
| {{trainerfooter|forest|3}}
| |
| |}
| |
| {| class="expandable" style="margin: auto; background: #{{locationcolor/med|forest}}; {{roundy}}; border: 5px solid #{{locationcolor/light|forest}};"
| |
| |- align="center"
| |
| ! Available Pokémon
| |
| |-
| |
| |
| |
| {{Catch/header|forest|no}}
| |
| {{Catch/entryoras|044|Gloom|yes|yes|Tall grass|24-27|40%|type1=Grass|type2=Poison}}
| |
| {{Catch/entryoras|264|Linoone|yes|yes|Tall grass|24-27|40%|type1=Normal}}
| |
| {{Catch/entryoras|357|Tropius|yes|yes|Tall grass|27|10%|type1=Grass|type2=Flying}}
| |
| {{Catch/entryoras|352|Kecleon|yes|yes|Tall grass|27|5%|type1=Normal}}
| |
| {{Catch/entryoras|359|Absol|yes|yes|Tall grass|27|5%|type1=Dark}}
| |
| {{Catch/div|forest|{{color2|000|Horde Encounter}}}}
| |
| {{Catch/entryoras|043|Oddish|yes|yes|Horde Encounter|13|60%|type1=Grass|type2=Poison}}
| |
| {{Catch/entryoras|183|Marill|yes|yes|Horde Encounter|13|35%|type1=Water|type2=Fairy}}
| |
| {{Catch/entryoras|352|Kecleon|yes|yes|Horde Encounter|13|5%|type1=Normal}}
| |
| {{Catch/div|water|Surfing}}
| |
| {{Catch/entryoras|184|Azumarill|yes|yes|Surf|20, 25, 30|66%|type1=Water|type2=Fairy}}
| |
| {{Catch/entryoras|283|Surskit|yes|yes|Surf|20|30%|type1=Bug|type2=Water}}
| |
| {{Catch/entryoras|284|Masquerain|yes|yes|Surf|25|4%|type1=Bug|type2=Flying}}
| |
| {{Catch/div|water|Fishing (North, Southeast lakes)}}
| |
| {{Catch/entryoras|129|Magikarp|yes|yes|Fish Old|10, 15|65%|type1=Water}}
| |
| {{Catch/entryoras|072|Tentacool|yes|yes|Fish Old|5|35%|type1=Water|type2=Poison}}
| |
| {{Catch/entryoras|129|Magikarp|yes|yes|Fish Good|25|60%|type1=Water}}
| |
| {{Catch/entryoras|072|Tentacool|yes|yes|Fish Good|25|35%|type1=Water|type2=Poison}}
| |
| {{Catch/entryoras|339|Barboach|yes|yes|Fish Good|25|5%|type1=Water|type2=Ground}}
| |
| {{Catch/div|water|Fishing (Southwest pond)}}
| |
| {{Catch/entryoras|129|Magikarp|yes|yes|Fish Old|10, 15|65%|type1=Water}}
| |
| {{Catch/entryoras|118|Goldeen|yes|yes|Fish Old|5|35%|type1=Water}}
| |
| {{Catch/entryoras|129|Magikarp|yes|yes|Fish Good|25|60%|type1=Water}}
| |
| {{Catch/entryoras|118|Goldeen|yes|yes|Fish Good|25|35%|type1=Water}}
| |
| {{Catch/entryoras|339|Barboach|yes|yes|Fish Good|25|5%|type1=Water|type2=Ground}}
| |
| {{Catch/div|forest|Special}}
| |
| {{Catch/entryoras|352|Kecleon|yes|yes|Special|30|{{tt|Three|Requires Devon Scope}}|type1=Normal}}
| |
| {{Catch/footer|forest}}
| |
| |}
| |
| {| class="expandable" style="margin: auto; background: #{{locationcolor/med|forest}}; {{roundy}}; border: 5px solid #{{locationcolor/light|forest}};"
| |
| |- align="center"
| |
| ! Items
| |
| |-
| |
| |
| |
| {{itlisth|forest}}
| |
| {{itemlist|Rare Candy|Dead-end path north of Parasol Lady Clarissa (hidden, requires {{m|Cut}})|OR=yes|AS=yes|display={{DL|Vitamin|Rare Candy}}}}
| |
| {{itemlist|Revive|Clearing in the northernmost patch of long grass (hidden)|OR=yes|AS=yes|display={{DL|Revive|Revive}}}}
| |
| {{itemlist|Nest Ball|North edge of the northern lake|OR=yes|AS=yes|display={{ball|Nest}}}}
| |
| {{itemlist|Devon Scope|From [[Steven]] on the north bridge, after battling Kecleon|OR=yes|AS=yes|display={{key|VI|Devon Scope}}}}
| |
| |- style="background: #FFFFFF;"
| |
| | align="center" | {{bag|Sceptilite}}<br><br>{{bag|Blazikenite}}<br><br>{{bag|Swampertite}}
| |
| | align="center" | {{DL|Mega Stone|Sceptilite}}<br>or<br>{{DL|Mega Stone|Blazikenite}}<br>or<br>{{DL|Mega Stone|Swampertite}}
| |
| | align="left" | From Steven after battling Kecleon, if your starter was {{p|Treecko}}, {{p|Torchic}}, or {{p|Mudkip}}, respectively
| |
| | align="center" | '''<span style="background: #{{omega ruby color}}">{{color2|000|Pokémon Omega Ruby and Alpha Sapphire| OR }}</span><span style="background: #{{alpha sapphire color}}">{{color2|000|Pokémon Omega Ruby and Alpha Sapphire| AS }}</span>'''
| |
| {{catch/div|forest|Return trip}}
| |
| {{itemlist|Aspear Berry|Soft soil patch, northeast of the puddle-laden area (requires {{m|Cut}})|OR=yes|AS=yes|display=[[Aspear Berry]] ×4}}
| |
| {{itemlist|Wepear Berry|Soft soil patch, northeast of the puddle-laden area (requires {{m|Cut}})|OR=yes|AS=yes|display=[[Wepear Berry]] ×4}}
| |
| {{itemlist|Pinap Berry|Soft soil patch, northeast of the puddle-laden area (requires {{m|Cut}})|OR=yes|AS=yes|display=[[Pinap Berry]] ×4}}
| |
| {{itemlist|Zinc|Northwest corner of the grass maze (hidden)|OR=yes|AS=yes|display={{DL|Vitamin|Zinc}}}}
| |
| {{itemlist|Nugget|Southwest corner of the grass maze|OR=yes|AS=yes|display={{DL|Valuable item|Nugget}}}}
| |
| {{itemlist|Nanab Berry|
| |
| * Soft soil patch near the southwest pond (×4)
| |
| * Soft soil patch northwest of the Ancient Tomb (×6)|OR=yes|AS=yes|display=[[Nanab Berry]] ×10}}
| |
| {{itemlist|Razz Berry|
| |
| * Soft soil patch near the southwest pond (×4)
| |
| * Soft soil patch northwest of the Ancient Tomb (×6)|OR=yes|AS=yes|display=[[Razz Berry]] ×10}}
| |
| {{itemlist|Pecha Berry|
| |
| * Soft soil patch near the southwest pond (×6)
| |
| * Soft soil patch northwest of the Ancient Tomb (×6)|OR=yes|AS=yes|display=[[Pecha Berry]] ×12}}
| |
| {{itemlist|Revive|North of the Ancient Tomb|OR=yes|AS=yes|display={{DL|Revive|Revive}}}}
| |
| {{itemlist|Full Heal|South side of the southwest pond (requires {{m|Surf}})|OR=yes|AS=yes|display={{DL|Status ailment healing item|Full Heal}}}}
| |
| {{itemlist|Rare Candy|South side of the southwest pond (hidden, requires {{m|Surf}})|OR=yes|AS=yes|display={{DL|Vitamin|Rare Candy}}}}
| |
| {{itemlist|Light Ball|North side of the southernmost grass patch|OR=yes|AS=yes|display={{DL|Stat-enhancing item|Light Ball}}}}
| |
| {{itemlist|Full Restore|Occasionally received after defeating Bird Keeper Robert in a rematch|OR=yes|AS=yes|display={{DL|Potion|Full Restore}}}}
| |
| {{itemlist|Dusk Ball|Occasionally received after defeating Street Thug Gomez in a rematch|OR=yes|AS=yes|display={{ball|Dusk}}}}
| |
| {{itlistfoot|forest}}
| |
| |}
| |
|
| |
|
| |
| ===Gabby and Ty===
| |
| After defeating the news team on {{rt|118|Hoenn}}, [[Gabby and Ty]] can now be found in the northeast corner of the route. Accept their challenge and give them another great interview afterwards!
| |
|
| |
| ===Scorched Slab===
| |
| [[Scorched Slab]] is a cave in the middle of the north lake. It is said to be the hiding place of an elusive {{type|Fire}} Pokémon. While it's possible to explore the area now, and claim items like {{TM|11|Sunny Day}}, other treasures can't be obtained until later.
| |
|
| |
| ===Ancient Tomb===
| |
| The unusual arrangement of stones on the southwest plateau is known as the [[Ancient Tomb]]. It is believed to mark the resting place of a legendary Pokémon. But with the entrance sealed, you won't be able to investigate until later.
| |
|
| |
|
|
| |
|
This is the Bulbapedia walkthrough for Pokémon Omega Ruby and Alpha Sapphire.
These pages follow the remade Nintendo 3DS iteration, not Pokémon Ruby and Sapphire. The guide for those games can be found here.
Route 119
Known for its sweltering heat and sudden rainfalls, the spacious Route 119 runs north from Route 118 to Fortree City. The area is filled with patches of tall grass, which hide Trainer and wild Pokémon alike. The extreme weather conditions make this an ideal setting for the Weather Institute, located on the north end of this tropical rainforest.
| Trainers
|
| Trainer
|
Pokémon
|
|
|
|
|
|
|
|
|
|
|
|
|
|
|
|
|
|
|
|
|
|
|
|
|
|
|
|
|
|
|
|
|
|
|
|
|
|
|
|
|
|
|
|
|
|
|
|
|
|
|
|
|
|
|
|
|
|
|
|
|
|
|
|
|
|
|
|
|
|
|
|
| Requires Surf
|
|
|
|
|
|
|
|
| Requires Surf, Waterfall, Acro Bike
|
|
|
|
|
|
| Rematch
|
|
|
|
|
|
|
|
|
|
|
|
|
|
|
|
|
|
|
|
|
|
|
|
|
|
|
|
|
|
|
|
|
|
|
|
|
|
|
|
|
|
|
|
|
|
|
|
|
|
|
|
|
|
|
|
|
|
|
|
|
|
|
|
|
|
|
| Trainers with a PokéNav by their names will be registered in the Trainer's Eyes or Match Call function after the first battle, and may have a rematch with the player with higher-level Pokémon.
|
|
| Available Pokémon
|
| Pokémon
|
Games
|
Location
|
Levels
|
Rate
|
|
|
OR
|
AS
|
|
22-25
|
40%
|
|
|
OR
|
AS
|
|
22-25
|
40%
|
|
|
OR
|
AS
|
|
23, 25
|
15%
|
|
|
OR
|
AS
|
|
25
|
5%
|
| Horde Encounter
|
|
|
OR
|
AS
|

|
Horde Encounter
|
|
12
|
100%
|
| Surfing
|
|
|
OR
|
AS
|
|
20, 25
|
65%
|
|
|
OR
|
AS
|
|
20
|
30%
|
|
|
OR
|
AS
|
|
25, 30
|
5%
|
| Fishing
|
|
|
OR
|
AS
|
|
10
|
60%
|
|
|
OR
|
AS
|
|
5
|
35%
|
|
|
OR
|
AS
|
|
15
|
5%
|
|
|
OR
|
AS
|
|
25
|
60%
|
|
|
OR
|
AS
|
|
25
|
35%
|
|
|
OR
|
AS
|
|
25
|
5%
|
| Special Pokémon
|
|
|
OR
|
AS
|
|
15
|
100%
|
|
|
OR
|
AS
|
|
25
|
100%
|
| A colored background means that the Pokémon can be found in this location in the specified game. A white background with a colored letter means that the Pokémon cannot be found here.
|
|
| Items
|
| Item
|
Location
|
Games
|

|
Max Repel
|
Southwest part of the southernmost patch of long grass
|
OR AS
|

|
Full Heal
|
Southernmost long grass patch, south of a clearing near Pokémon Ranger Catherine (hidden)
|
OR AS
|

|
Zinc
|
Northwest of Fisherman Eugene on the river's southern end (requires Surf)
|
OR AS
|

|
Hondew Berry ×4
|
Soft soil patch near the southern bridge
|
OR AS
|

|
Calcium
|
Pathway to a Secret Spot, west of the lower waterfall (hidden, requires Acro Bike)
|
OR AS
|

|
PP Max
|
Northwest of Pokémon Ranger Jackson, near a muddy slope
|
OR AS
|

|
Elixir
|
East of the muddy slope, near Ninja Boy Takashi
|
OR AS
|

|
HM02 (Fly)
|
From May/Brendan outside Fortree City, after being defeated
|
OR AS
|

|
Max Ether
|
Tiny strip of land at the base of the upper waterfall (hidden, requires Surf)
|
OR AS
|

|
Ultra Ball
|
Patch of long grass east of the river, northeast of the lower waterfall (hidden, requires Surf)
|
OR AS
|

|
Leaf Stone
|
Atop the lower waterfall, to the east (requires Surf)
|
OR AS
|

|
Pomeg Berry ×6
|
Soft soil patch near Fortree City
|
OR AS
|

|
Timer Ball
|
Occasionally received from Pokémon Ranger Catherine after defeating her in a rematch
|
OR AS
|
| Return trip
|

|
Rare Candy
|
Northwest of the upper waterfall (requires Surf, Waterfall, Acro Bike)
|
OR AS
|

|
TM62 (Acrobatics)
|
Tiny island north of the upper waterfall (requires Surf, Waterfall, Acro Bike)
|
OR AS
|

|
Leppa Berry ×5
|
Soft soil patch atop the upper waterfall (requires Surf, Waterfall, Acro Bike)
|
OR AS
|

|
Sitrus Berry ×3
|
Soft soil patch atop the upper waterfall (requires Surf, Waterfall, Acro Bike)
|
OR AS
|

|
Venusaurite
|
Southernmost patch of long grass, after catching or defeating GroudonOR/KyogreAS
|
OR AS
|
|
|
|
The Mimic Circle
A handful of Trainers in the southernmost patch of long grass like to copy the movements of any Trainer passing by, collectively earning them the "Mimic Circle" nickname. They move when you do, so outmaneuver them to pin them down and start battling. Each one remains in a certain area, which gives you a chance to corner them.
Rest Stop
A small cabin stands beyond the patch of long grass. Speak to the kind woman inside, and she'll let you and your Pokémon take a quick break to restore their health.
Weather Institute
Located on the north end of the route, the Weather Institute is a high-tech facility used to study and research the intricacies of weather patterns across Hoenn. This research seems to have attracted the attention of Team MagmaOR/Team AquaAS, as several Grunts have been stationed outside.
| Available Pokémon
|
| Pokémon
|
Games
|
Location
|
Levels
|
Rate
|
| Gift Pokémon
|
|
|
OR
|
AS
|

|
Gift
|
|
30
|
One
|
| A colored background means that the Pokémon can be found in this location in the specified game. A white background with a colored letter means that the Pokémon cannot be found here.
|
|
| Items
|
| Item
|
Location
|
Games
|

|
Mystic Water
|
Held by Castform
|
OR AS
|

|
Rocky Helmet
|
From a Scientist near the Vending Machine, after defeating Team MagmaOR/Team AquaAS
|
OR AS
|

|
Icy Rock
|
From the receptionist, after defeating Team MagmaOR/Team AquaAS or receiving a Damp Rock
|
OR AS
|

|
Smooth Rock
|
From the receptionist, after receiving an Icy Rock
|
OR AS
|

|
Heat Rock
|
From the receptionist, after receiving a Smooth Rock
|
OR AS
|

|
Damp Rock
|
From the receptionist, after receiving a Heat Rock
|
OR AS
|
|
|
|
Rest and Restore Health
Visit the back room to find some Team MagmaOR/Team AquaAS Grunts searching the place. Before battling them, head to the northwest room to find some comfy beds and rest your Pokémon before continuing on. There is also a PC here in case you should need to reorganize your team.
Looking for Answers
When you reach the second floor, you find the source of the disturbance: Magma Admin TabithaOR/Aqua Admin ShellyAS is harassing the researchers! Having doubts about his/her leader's plans, the Admin is here to have some questions answered. After looking through some research papers about extreme weather conditions from thousands of years ago, TabithaOR/ShellyAS learns that his/her leader's plan to awaken the super-ancient Pokémon will bring about the same dramatic conditions across the region, and seems pretty shaken up by this. Seeking a reprieve from his/her misgivings, he/she drags you into battle!
VS Tabitha

|
|
Reward: $3,200
|
|
|
|
|
|
|
VS Shelly

|
|
Reward: $3,200
|
|
|
|
|
|
|
The Next Step
After his/her defeat, the Admin reveals a bit more about the team's plans, including that the Leader is headed for Mt. Pyre, before he/she and the Grunts leave the building. As thanks for your help, one of the researchers even rewards you with a new Pokémon, Castform, which changes its type and appearance based on the current weather.
The researchers then reveal that the cataclysmic weather conditions thousands of years ago were triggered by the two super-ancient Pokémon. When Groudon and Kyogre absorbed the abundant natural energy of the young planet, they were able to regain terrible, primal powers that they had lost, through a process known as Primal Reversion. It seems that Team MagmaOR/Team AquaAS plans to harness these powers to achieve their own destructive goals.
As you leave, speak to the Scientist in the lobby to receive a Rocky Helmet. Speak to the receptionist as well to get an Icy Rock as a souvenir. Visit her on three subsequent days to receive either a Smooth Rock, Heat Rock, or Damp Rock each day.
Rival Battle 3
Leave the building and cross the upper bridge. May/Brendan catches up to you when you reach the nearest stairway. Your friend notices the Mega Bracelet around your wrist and wastes no time challenging you to a battle!

|
|
Reward: $1,320
|
|
|
|
|
|
|

|
|
Reward: $1,320
|
|
|
|
|
|
|
 Player chose Mudkip

|
|
Reward: $1,320
|
|
|
|
|
|
|
Once you defeat her/him, your friend rewards you with HM02 (Fly). It's a strong move in battle and even more useful when used in the field, though you'll need to win the Gym Badge from the next city first. She/He then runs off, leaving you to continue on to Fortree City.
Fortree City
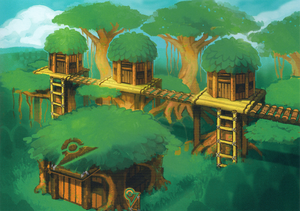
Fortree City is located in an old-growth forest with many towering trees. These ancient arbors are so large that the residents were able to build cozy homes among their branches. The Fortree Gym can be found in the heart of the city, and the Secret Base Guild stands in the southeast part of town.
| Available Pokémon
|
| Pokémon
|
Games
|
Location
|
Levels
|
Rate
|
| Special Pokémon
|
|
|
OR
|
AS
|
|
30
|
One
|
| A colored background means that the Pokémon can be found in this location in the specified game. A white background with a colored letter means that the Pokémon cannot be found here.
|
|
Secret Base Guild
Climb the ladder near the Poké Mart and head east across the rope bridge to reach the Secret Base Guild. Head inside to catch up with Aarune, who gives you a Proclamation to use in your base and tells you all about secret teams. Using this Decoration lets you choose the type of battles that take place in your Secret Base. If you haven't yet formed a team, he recommends doing so by inviting some Secret Pals to your Secret Base. After that, your team will be ranked here based on the number of flags collected from other player's bases. Reaching higher ranks will unlock more special skills for your Secret Pals, and reaching Platinum Rank lets your Secret Pals use two skills per day. Higher ranks also earn you more rewards from Aarune.
The Guild features two shops that offer Decorations for your Secret Base. The Lass sells chairs and desks, while the Schoolkid offers tricky items like warp panels. Each shop's inventory grows as your rank rises.
Aarune can be found here from this point on, and may be challenged to a Single Battle once per day.

|
|
Reward: $1,380
|
|
|
|
|
|
|
Catch Sight of Steven
Descend the ladder near the Secret Base Guild, and go west then north to catch a glimpse of Steven. He heads off for Route 120 to the east, apparently searching for a certain Pokémon.
Running Errands
Speak to the Pokémon Breeder in the northeast house to see his Wingull fly off on an errand. Return later to see if it's successful!
Reveal Your Hidden Power
The north-northwest house belongs to a pair of old women. Speak to the one on the left to take her quiz. She holds a coin in her hand, and asks in which one you think it's hidden. Guess correctly three times in a row to receive TM10 (Hidden Power)! This unique attack is listed as a Normal-type move, but its type varies depending on the Pokémon using it. Talk to the old woman on the right to learn the type of Hidden Power your party members would have.
Time for a Trade
The little girl in the northwest house wants a Spinda. If you happened to catch one on Route 113, she'll give you her Skitty in return. Skitty arrives holding a Magost Berry.
Route 120
With an invisible object blocking the Gym, there's nothing else to do in the city. Go east to Route 120 to catch up to Steven on the northern bridge. It seems that another unseen object blocks the way forward, but luckily Steven has a way to solve this mystery. He lets you try on the Devon Scope, a high-tech piece of eyewear that reveals invisible objects. Sure enough, they reveal a Kecleon in front of you; catch or defeat the Pokémon to clear the bridge. Pleased with your actions, Steven allows you to keep the device. He also hands you a Mega Stone that's perfect for your starter Pokémon—Sceptilite, Blazikenite, or Swampertite—so now your very first partner can Mega Evolve during battle! With the Devon Scope in hand, you can chase off the Kecleon outside the Gym, so head back into town to win your next Badge!
Fortree City
Fortree Gym
Fortree City Pokémon Gym
Leader: Winona
The bird user taking flight into the world.
The Fortree Gym specializes in Flying-type Pokémon, which take serious damage from Electric, Rock, and Ice moves. The Gym is fairly straightforward, with ramps leading up to the Gym Leader's lofty perch. The only obstacles are turnstiles, some of which can only be spun in certain directions. Pass through the first two turnstiles to reach Bird Keeper Jared, and Picnicker Kylee beyond him. Approach the third turnstile from the west to spin it, then loop back around to take the newly-cleared path. Go west, climb the ramp, and head north to reach the fourth turnstile and Camper Terrell. Battle Bird Keeper Will and proceed to the east wall. Go north through the fifth turnstile to reach Bird Keeper Bran, then head south through the sixth turnstile to return to the fifth. As it's already been moved once, you must return it to its original position by spinning it clockwise before you can pass through again. Pass by Bird Keeper Bran a second time and climb the ramp to reach the Gym Leader.
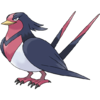
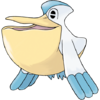
Winona starts off with Swellow, which tends to lead with Double Team to raise its evasiveness. This can become increasingly problematic, so use super-effective moves to defeat it quickly. Her Pelipper takes massive damage from Electric attacks. Rock moves are also effective, but Rock Pokémon should be wary of its Water Pulse. Skarmory has several resistances and a high physical Defense, which may rise even higher due to Steel Wing. Sand Attack makes it harder to hit, while Aerial Ace's perfect accuracy lets it reliably land a hit. Due to its Dragon typing, her Altaria takes only normal damage from Electric moves. Rock moves will be more effective, and Ice moves are greater still. It can target unsuspecting Electric types with Earthquake and restore its health with Roost, which cancels its Flying type for one turn. While its Special Defense is higher, Cotton Guard gives it a staggering 150% Defense boost for every use, so Special moves are the better option.
Fortree Gym

|
|

|
|
Reward: $4,200
|
|
|
|
|
|
|
|
|
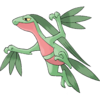
Upon her defeat, Winona awards you the Feather Badge, which ensures obedience from all Pokémon up to level 70 and enables the use of Fly in the field. She also hands out TM19 (Roost) as a prize.
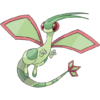
Fly allows you to instantly revisit any city or town you've previously explored. In addition, it can also be used to return to any route or other special location, like Rusturf Tunnel or Mt. Chimney! The only catch to Flying back to a route is that you must have reached the next city or town first. That means you can't Fly to Routes 120 or 121 until you've visited Lilycove City. While Fly can be used by selecting the appropriate party member, it can also be used by opening the AreaNav app and tapping the desired location.
 Player chose Treecko
 Player chose Torchic
 Player chose Mudkip
