|
|
| Line 30: |
Line 30: |
| |} | | |} |
|
| |
|
| When you go to [[Iron Island]], you might want a [[party]] only contains five Pokémon, because you can receive a [[Pokémon Egg]] toward the end of the maze. Use the [[Dowsing Machine]] on your [[Pokétch]] to find a hidden [[Star Piece]] that you can exchange at [[Fuego Ironworks]] for colored [[shard]]s. Interior [[Star Piece]]s will regenerate each day. | | When you go to [[Iron Island]], you might want a [[party]] that only contains five Pokémon, because you can receive a [[Pokémon Egg]] toward the end of the maze. Use the [[Dowsing Machine]] on your [[Pokétch]] to find a hidden [[Star Piece]] that you can exchange at [[Fuego Ironworks]] for colored [[shard]]s. Interior [[Star Piece]]s will regenerate each day. |
|
| |
|
| At the entrance to the mine you'll meet a man named [[Riley]], who will give you {{HM|04|Strength}}. He mentions he is training inside and proposes you join him. While receiving the HM is the only required part of your mission here, you'll find some good items, get valuable training, and {{p|Riolu|an extremely rare Pokémon}} if you explore the whole mine. | | At the entrance to the mine you'll meet a man named [[Riley]], who will give you {{HM|04|Strength}}. He mentions he is training inside and proposes you join him. While receiving the HM is the only required part of your mission here, you'll find some good items, get valuable training, and {{p|Riolu|an extremely rare Pokémon}} if you explore the whole mine. |
Iron Island
Outside
| Available Pokémon (Outside)
|
| Pokémon
|
Games
|
Location
|
Levels
|
Rate
|
| Surfing
|
|
|
D
|
P
|
Pt
|
|
20-30
|
30%
|
|
|
D
|
P
|
Pt
|
|
20-40
|
1%
|
|
|
D
|
P
|
Pt
|
|
20-30
|
60%
|
|
|
D
|
P
|
Pt
|
|
20-40
|
9%
|
| Fishing
|
|
|
D
|
P
|
Pt
|
|
3-15
|
100%
|
|
|
D
|
P
|
Pt
|
|
10-25
|
65%
|
|
|
D
|
P
|
Pt
|
|
10-25
|
35%
|
| A colored background means that the Pokémon can be found in this location in the specified game. A white background with a colored letter means that the Pokémon cannot be found here.
|
|
When you go to Iron Island, you might want a party that only contains five Pokémon, because you can receive a Pokémon Egg toward the end of the maze. Use the Dowsing Machine on your Pokétch to find a hidden Star Piece that you can exchange at Fuego Ironworks for colored shards. Interior Star Pieces will regenerate each day.
At the entrance to the mine you'll meet a man named Riley, who will give you HM04 (Strength). He mentions he is training inside and proposes you join him. While receiving the HM is the only required part of your mission here, you'll find some good items, get valuable training, and an extremely rare Pokémon if you explore the whole mine.
1F
| Available Pokémon (1F)
|
| Pokémon
|
Games
|
Location
|
Levels
|
Rate
|
|
|
D
|
P
|
Pt
|
|
30
|
10%
|
|
|
D
|
P
|
Pt
|
|
32
|
10%
|
|
|
D
|
P
|
Pt
|
|
30-32
|
35%
|
|
|
D
|
P
|
Pt
|
|
31-33
|
35%
|
|
|
D
|
P
|
Pt
|
|
31,33
|
10%
|
| A colored background means that the Pokémon can be found in this location in the specified game. A white background with a colored letter means that the Pokémon cannot be found here.
|
|
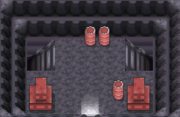
Riley will team up with you further on, but you're on your own for the first portion of Iron Island's mine. From the entrance room, first go down the stairs leading left.
B1F
| Available Pokémon (B1F)
|
| Pokémon
|
Games
|
Location
|
Levels
|
Rate
|
|
|
D
|
P
|
Pt
|
|
30,32
|
20%
|
|
|
D
|
P
|
Pt
|
|
30-33
|
70%
|
|
|
D
|
P
|
Pt
|
|
31,33
|
10%
|
| Special Pokémon
|
|
|
D
|
P
|
Pt
|
|
30-31
|
8%
|
|
|
D
|
P
|
Pt
|
|
30-31
|
8%
|
| A colored background means that the Pokémon can be found in this location in the specified game. A white background with a colored letter means that the Pokémon cannot be found here.
|
|
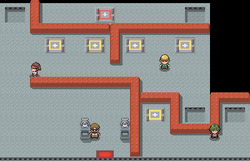
In the west side of B1F there are just two items and a single Trainer. One of these items is the Protector which can evolve Rhydon into Rhyperior if it is held while traded. Afterwards, return to 1F and this time use the right-hand stairs to reach the east side of B1F.
On the right-hand side of B1F, you will again face one Trainer and find some more items, including another hidden Star Piece. Make sure to keep an eye on your bearings here since it is easy to get lost in this maze. You need to stay on the correct path to find the items and get to the small elevator that will take you down to B2F. Once again, there are two pathways. Since Riley can be found by taking the left stairs, let's go right first so afterwards Riley can heal your team.
B2F
| Available Pokémon (B2F)
|
| Pokémon
|
Games
|
Location
|
Levels
|
Rate
|
| B2F Left
|
|
|
D
|
P
|
Pt
|
|
31,33
|
20%
|
|
|
D
|
P
|
Pt
|
|
31-34
|
50%
|
|
|
D
|
P
|
Pt
|
|
32
|
20%
|
|
|
D
|
P
|
Pt
|
|
33,35
|
10%
|
| Gift Pokémon
|
|
|
D
|
P
|
Pt
|
|
1
|
One
|
| Special Pokémon
|
|
|
D
|
P
|
Pt
|
|
31-32
|
8%
|
|
|
D
|
P
|
Pt
|
|
31-32
|
8%
|
| A colored background means that the Pokémon can be found in this location in the specified game. A white background with a colored letter means that the Pokémon cannot be found here.
|
|
| Items (B2F)
|
| Item
|
Location
|
Games
|

|
Elixir
|
East of Worker Noel
|
Pt
|

|
TM23 (Iron Tail)
|
In western half of pit south-east of Worker Braden
|
Pt
|

|
Star Piece
|
Hidden in eastern half of pit south-east of Worker Braden
|
Pt
|

|
Dusk Ball
|
North-west corner of B2F (left) beside two steel drums
|
Pt
|

|
Magnet
|
South-west of Max Potion
|
Pt
|

|
Max Potion
|
South-west of Dusk Ball near two small rocks
|
Pt
|

|
Star Piece
|
Hidden on the raised platform South of Worker Brendon and Worker Quentin
|
Pt
|

|
HP Up
|
Just north of the two Galactic Grunts
|
Pt
|

|
Ultra Ball
|
North-east of Black Belt Kendal and Battle Girl Tyler
|
Pt
|

|
Iron Plate
|
Hidden in pit in south-east corner of B2F (left)
|
Pt
|

|
Star Piece
|
Hidden on small rock right of Ace Trainer Jonah and Ace Trainer Brenda
|
Pt
|

|
Red Shard
|
Just north-east of Worker Brendon and Worker Quentin
|
Pt
|
|
|
|
In B2F's east side you will face two Trainers, and also find TM23 (Iron Tail). If you follow the path that leads to the other side of where the TM was found and use your Dowsing Machine, you will find yet another hidden Star Piece.
Once you reach the left side of B2F, Riley will team up with you to investigate the mystery of a disturbance here in the mine. Just like Cheryl and Mira, he will heal your team after every battle, and double battles will also occur in the wild. Therefore, you should train as much as possible while he is with you.

|
|
Reward: None
|
|
|
|
|
|
|
Remember, like all Multi Battle situations, two wild Pokémon will appear at once and you can't catch a wild Pokémon unless you knock the other out. Since the Trainers in this room are positioned to where you could face them in a Double Battle, do not waste the opportunity to do so, if you wish.
Just like B1F's east room, B2F's west room is also a maze so make sure to get your bearings for collecting items or facing Trainers. Your final target is the pair of Galactic Grunts in the south area of the room - be warned, Riley will leave after you face them. After defeating Workers Brendon and Quentin head southwest and follow the path to reach a ledge above them and then use the Dowsing Machine to find a fourth hidden Star Piece. Also in the southeastern area down some small stairs, the Dowsing Machine will reveal a hidden item, the Iron Plate.
After getting past the somewhat tricky Ace Trainer duo Jonah and Brenda, you'll find the Galactic Grunts - the disturbance in the cave.
After you defeat the grunts, Riley will thank you for your help and will give you a Pokémon Egg containing Riolu, Lucario's pre-evolution. As long as you remembered to only bring five Pokémon with you, there should be no problem; if not, you'll have to return to Canalave City first to empty a slot in your team and then backtrack to get the Egg.
All that's left is taking the elevator down and entering the final room.
Final Area
| Available Pokémon (Final Area)
|
| Pokémon
|
Games
|
Location
|
Levels
|
Rate
|
| B2F Left
|
|
|
D
|
P
|
Pt
|
|
31,33
|
20%
|
|
|
D
|
P
|
Pt
|
|
31-34
|
50%
|
|
|
D
|
P
|
Pt
|
|
32-33,35
|
30%
|
| Special Pokémon
|
|
|
D
|
P
|
Pt
|
|
31-32
|
8%
|
|
|
D
|
P
|
Pt
|
|
31-32
|
8%
|
| A colored background means that the Pokémon can be found in this location in the specified game. A white background with a colored letter means that the Pokémon cannot be found here.
|
|
Use the elevator here to go back up to ground level and you'll find the Shiny Stone, for evolving Togetic into Togekiss or Roselia into Roserade. Since you can only get one of these the regular way, you'll have to raise a Pokémon that has Pickup as far as Level 41 to have a chance of getting another Shiny Stone.
Also, you'll find the entrance to the Iron Ruins, which will become a shrine to Registeel if you have an event Regigigas. If not, it will be an empty room where you can find a Metal Coat. Even if you do have the event Regigigas, you won't be able to face Registeel until you have the National Pokédex.
Leave Iron Island and return to Canalave City to earn your Mine Badge if you haven't done so or to enter the Canalave Library if you already have the badge.
Canalave Gym
Be aware that the toughest Pokémon you'll face here is Level 41. The layout of the Canalave Gym is a maze consisting of multiple elevator platforms. As you may already know, it specializes in Steel-types. You'll want Fire-, Ground-, and/or Fighting-type attacks on your Pokémon. Many of the Pokémon in this gym are part Ground or Rock, so Water-type attacks (such as Surf) are also useful. Steel-types resist attacks of almost every other type, and are completely immune to Poison-type moves. Also, most of the Pokémon in this Gym have high Defense, so Special moves will do the most damage to them.
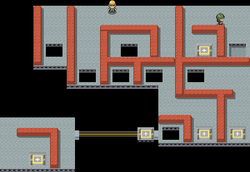
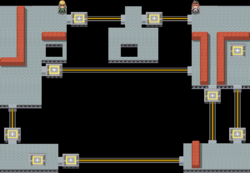
To deal with the maze, first head to the easternmost elevator out of the set of four you'll find on 1F. Then, take the elevator south of you on 2F to reach the southeast area of 1F. The next one will take you back up to 2F. Then, use the moving lift hooked up to a wire to get across the ledge. Take the regular elevator there to reach 3F, where you will find more moving lifts to take you across the wires. First, use the moving lift north of you to reach the north area of 3F with two moving lifts side-by side. Take the northern lift and then keep following the path that will take you back down to 2F. Another elevator will take you to the northern area of the 1F. There, an elevator with a red outline will take you up to 4F where Byron, the Gym Leader and the father of Oreburgh City Gym Leader Roark is.
Byron starts by sending out Magneton, whose weak Sp. Defense makes it vulnerable to moves like Fire Blast. Also, a Ground-type move like Earthquake could easily take it out in one hit due to its Steel/Electric typing. Beware of Flash Cannon if your Earthquake user is part Rock-type. Metal Sound will harshly lower your Pokémon's Special Defense, causing Thunderbolt, Tri Attack, and Flash Cannon to do even more damage, so be careful. It's best to use Special attacks on Byron's Steelix because of its high Defense stat. It will dispose of Fire-types with Earthquake unless you have a Fire-type strong and fast enough to take it out in one hit. Ground Pokémon, on the other hand, must watch out for Ice Fang. Don't worry too much about Steelix's Flash Cannon, as its Special Attack isn't the best. The last Pokémon you'll face is Bastiodon, which is high-leveled but can easily be defeated by a powerful Fighting- or Ground-type attack due to it's type combo of Rock/Steel. Be sure to take it out in one hit (which isn't too hard), or your Pokémon will be on the receiving end of Metal Burst, which does 1.5 times the damage your previous attack did to Bastiodon. Stone Edge poses a threat to Fire-types, and Iron Defense will sharply raise Bastiodon's already high Defense stat. Taunt will only allow your Pokémon to use attacking moves, which shouldn't be much of a concern. Get Bastiodon out of your way as quickly as possible, and you'll have saved your team some pain and earned yourself the Mine Badge without too much trouble!
Once you defeat Byron, he will give you the Mine Badge, which causes all traded Pokémon up to Level 70 obey you without question and allows for Strength to be used outside of battle. He'll also give you TM91 (Flash Cannon), a Steel-type Special attack that occasionally lowers the enemy's Special Defense stat.
When you step out the door, your rival Barry will be there waiting for you. After congratulating you on getting the Mine Badge, he asks you to come with him to the Canalave Library. You can meet them there, but he will stop you if you haven't been to Iron Island to pick up HM04 (Strength).
Canalave City
Head to Canalave Library where your rival is still waiting. Speak to him there, then head in the building and go up to the 3F. It turns out that Professor Rowan is there with his assistant Lucas/Dawn and wanted you to be part of this conversation. Rowan explains that during his exploration of Pokémon evolution, he learned of the Lake guardians that might shed some light on the mystery of evolution he is trying to solve. He is therefore going to investigate the lakes where these three guardians live, and while he is going with his assistant to Lake Verity, you will go to Lake Valor, and Barry is going to Lake Acuity. Just then a tremor goes off, and you'll learn there was an explosion at Lake Valor, and so the group then separates to head to each of their destinations. You can go to yours immediately, but some extra training at Iron Island, as your rival suggests, may be helpful. Additionally, since you now have six badges and can use Strength, you can backtrack for items you couldn't get before in places such as the basement at Oreburgh Gate.
Oreburgh Gate (optional)
Now that you can use Strength, you can pick up a few items that were not accessible before.
Lake Valor
| Items (first visit only)
|
| Item
|
Location
|
Games
|

|
HP Up
|
In the northwest while the lake is dry (hidden)
|
Pt
|
|
|
|
Turns out Team Galactic is responsible for the tremors due to using a large bomb to dry out Lake Valor to find the cavern where Azelf sleeps. You won't be able to find any wild Pokémon while the lake is in this condition. Time to face some Galactic Grunts.
Once you get past them and enter the Valor Cavern, you'll find it is too late. Azelf has been taken by Team Galactic. Instead you will have to face the leader of this unit, Commander Saturn.

|
|
Reward: $3200
|
|
|
|
|
|
Saturn's Golbat can easily be knocked out with an Electric or Rock-type move. His Bronzor should be no problem with a Fire-type special move just like in the Canalave Gym. His star Pokémon is a Toxicroak. It takes a 4× weakness to a Psychic-type. If you do use a Psychic-type make sure it is gifted in Speed, like Espeon or Kadabra, since a slower Psychic-type may have trouble with Toxicroak's Faint Attack, a Dark-type move. Toxicroak is also weak to Ground and Flying.
After the battle Saturn will gloat how pointless it is to stand up to Team Galactic and mentions that Commander Mars should have caught the guardian at Lake Verity by now before leaving. It is time to head to Lake Verity, so make sure to have your team ready before flying back to Twinleaf Town and then heading to Lake Verity.


