Movable boulder: Difference between revisions
From Bulbapedia, the community-driven Pokémon encyclopedia.
Jump to navigationJump to search
(→Sevii Islands: Tanoby Key) |
m (→Sevii Islands) |
||
| Line 137: | Line 137: | ||
| A [[Full Restore]] | | A [[Full Restore]] | ||
|- | |- | ||
| colspan="2" | [[Sevault Canyon]] | | colspan="2" style="background: #FFF;" | [[Sevault Canyon]] | ||
| style="background: #FFF; text-align: left;" | Amid the three large rocks in the center (×2) | | style="background: #FFF; text-align: left;" | Amid the three large rocks in the center (×2) | ||
| style="background: #FFF; text-align: left;" | A [[King's Rock]] (also requires breaking some [[breakable rock]]s) | | style="background: #FFF; text-align: left;" | A [[King's Rock]] (also requires breaking some [[breakable rock]]s) | ||
Revision as of 06:45, 26 June 2023
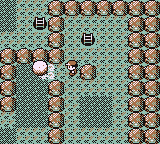
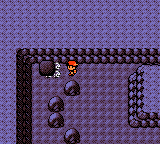
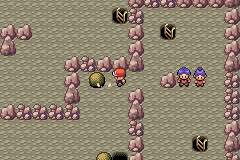
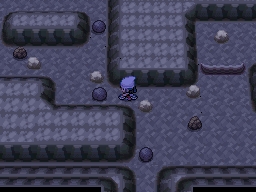
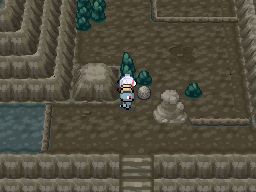
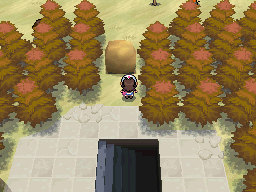
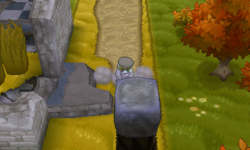
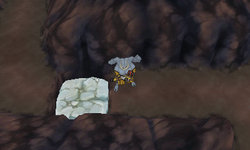
Movable boulders are a type of obstacle appearing in many core series games, commonly found in caves. The player must use the help of a Pokémon to move them around.
Boulders appear in Generations I to VII and Pokémon Brilliant Diamond and Shining Pearl. In Generations I to VI and Pokémon Brilliant Diamond and Shining Pearl, they can be moved using the field move Strength. In Pokémon Sun, Moon, Ultra Sun, and Ultra Moon, they can be moved using the Ride Pokémon Machamp Shove. In Pokémon: Let's Go, Pikachu! and Let's Go, Eevee!, they can be moved using the Secret Technique Strong Push.
Areas with movable boulders

|
This section is incomplete. Please feel free to edit this section to add missing information and complete it. Reason: Detailed locations and notes for Hoenn, Sinnoh, Unova, Kalos, and Alola |
Kanto
| Location | Games | Provides access to | ||
|---|---|---|---|---|
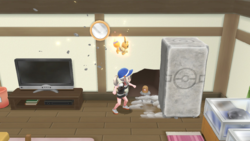
| Fuchsia City | Inside the Safari Zone Warden's house | RBYFRLGPE | A Rare CandyRBYFRLG A Diglett that gives away one Nugget per dayPE | |
| Seafoam Islands | 1F | In the center | The eastern area of B3F (pushing both down a series of holes stems the currents on B3F) | |
| In the northeast | ||||
| B3F | In the southwest (×4) | The northwestern area of B4F (pushing two down holes stems the currents on B4F) | ||
| B1F | West of the eastern exit (×3) | HGSS | A Grip Claw The rest of the cave | |
| East of the western exit | The rest of the cave | |||
| East of the southwestern ladder to B2F | A shortcut from B2F to this floor | |||
| North of the southwestern ladder to B2F | ||||
| B3F | West of the ice in the northeast | An Ultra Ball on B4F (part of an ice puzzle) | ||
| Victory Road | 1F | In the southwestRBYFRLG/southeastPE | RBYFRLGPE | The northern area (pushing onto a switch lowers the barrier) |
| In the northeast | A Rare CandyRBYFRLG A Leaf StonePE TM43 (Sky Attack)RBY TM02 (Dragon Claw)FRLG TM56 (Stealth Rock)PE | |||
| In the west | A shortcut from the northern area to the southern area | |||
| 2F | In the southwest | The southeastern area (pushing onto a switch lowers the western barrier) | ||
| East of the ladder to 1F | A shortcut from the northwestern area to the southwestern area | |||
| 3F | In the northeastRBYFRLG/northwestPE | The southwestern area (pushing onto a switch lowers the barrier) | ||
| In the center | A shortcut from the southern area to the northern area | |||
| In the east of the southern area | A ladder to 3F on 2F (pushing down a hole and onto a switch lowers the eastern barrier on 2F) | |||
| In the east | A shortcut from the eastern area to the southern area | |||
| 1F | North of the entrance | HGSS | The rest of the cave | |
| At the start of the northern rocky path south of the ladder to 2F | A Max Revive | |||
| At the start of the southern rocky path south of the ladder to 2F | An empty dead-end | |||
| 2F | North of the ladder to 1F | A shortcut from 3F | ||
| Amid the stairs in the northeast | A Full Restore A ladder to 3F | |||
Sevii Islands
| Location | Provides access to | ||
|---|---|---|---|
| Mt. Ember | Exterior | West of the entrance (×2) | The rest of the mountainside |
| East of the path to the summit (×3) | A Fire Stone (also requires breaking some breakable rocks) | ||
| Summit | Amid the rocks (×4) | Moltres | |
| B2F (north) |
Amid the rocks (×3) | The ladder to B3F | |
| B3F | Amid the rocks east of the ladder to 2F | The rest of the floor | |
| On the central path | The ladder to B4F | ||
| Amid the rocks in the east (×2) | A ladder to 2F (a shortcut back to the entrance) | ||
| Ruin Valley | In the southeast (×3) | A Sun Stone | |
| In the southwest (×2) | An HP Up | ||
| In the northwest of the raised section (×3) | A Full Restore | ||
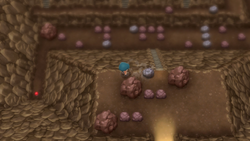
| Sevault Canyon | Amid the three large rocks in the center (×2) | A King's Rock (also requires breaking some breakable rocks) | |
| Tanoby Key | In the middle (×7) | The Unown in the Tanoby Chambers | |
Johto
| Location | Games | Provides access to | ||
|---|---|---|---|---|
| Union Cave | B1F (north) |
On the southern path in the northwest (requires crossing some water) | GSCHGSS | The exit to the southwestern area of the Ruins of Alph |
| Slowpoke Well | B1F | In the northwest | Some water The ladder to B2F (also requires crossing some water) A Full HealHGSS (also requires crossing some water) | |
| Burned Tower | B1F | In the northeast | GSC | TM20 (Endure) |
| South of the central pit (×3) | HGSS | TM12 (Taunt) (also requires breaking some breakable rocks if taking the southern path) | ||
| West of the southeastern pillar (×2) | ||||
| The Cianwood Gym | Between the rocks (×3) | GSC | Blackbelt Lung Gym Leader Chuck | |
| Directly beside Chuck | N/A (no free space to be pushed into) | |||
| Ice Path | B1F (north) |
Amid the rocks (×4) | GSCHGSS | The ladder to B3F on B2F (pushing all four down holes allows the ice puzzle on B2F to be completed) |
| B1F (south) |
West of the ice | HGSS | An Iron (part of an ice puzzle) | |
| The Blackthorn Gym | 2F | Amid the maze (×3) | GSC | Gym Leader Clair on 1F (pushing all three down holes forms bridges over the lava on 1F) |
Hoenn
| Location | Games | |
|---|---|---|
| Trick House | Puzzle 4 | RSEORAS |
| Fiery Path | ||
| Shoal Cave | ||
| Seafloor Cavern | ||
| Victory Road | ||
| Mirage Cave (north of Fortree City) |
ORAS | |
Sinnoh
| Location | Games |
|---|---|
| Wayward Cave | DPBDSP |
| Oreburgh Gate | DPPtBDSP |
| Mount Coronet | |
| Route 211 | |
| Victory Road | |
| Snowpoint Temple | |
| Stark Mountain | |
| Distortion World | Pt |
Unova
Kalos
| Location | Provides access to | ||
|---|---|---|---|
| Connecting Cave | Across from the Cyllage City exit | TM40 (Aerial Ace) | |
| In the center of the northern branch | The rest of the cave (from the Cyllage City exit) | ||
| In the passage connecting the northern and southern branches | The southern branch (from the northern branch) | ||
| Route 8 | Upper section | South of the central patch of tall grass | A Water Stone |
| Route 10 | North of the Cyllage City exit (x2) | A hidden Revive (on the southwesternmost menhir) | |
| TM73 (Thunder Wave) | |||
| Reflection Cave | 1F | South of the Shalour City exit | A shortcut to the southern cavern |
| Route 16 | South of the Route 15 exit | The rest of the route | |
| Down the stairs west of the long grass | The western portion of the route | ||
| Beyond the patch of yellow flowers south of the Fishing Shack | A Fist Plate A hidden Rare Candy (on the rock at the end of the path) | ||
| Route 19 | In the very north (requires crossing some water) | A Toxic Plate | |
| Route 21 | Beyond the patch of red flowers east of the central stairs | Veteran Louis The home of a Move Tutor who teaches Draco Meteor A patch of purple flowers A hidden Pearl String (in the bare patch among the purple flowers) Some water, which crossing provides access to:
| |
| In the southwestern portion (x5) (requires cutting down three cuttable plants and crossing some water) | A Rare Candy TM22 (Solar Beam) | ||
| Route 22 | In the southern portion (x3) (requires descending a waterfall) | TM26 (Earthquake) A hidden Max Elixir (in the bush on the west side of the southeasternmost hole) | |
| Victory Road | Inside 1 | East of the pond (accessible from Outside 3, after the second cave) | A shortcut from after the second cave back to the first cave |
| Inside 2 | North of the stepping stones | Brains & Brawn Arman and Hugo A Rare Candy (via the northwestern exit of the cave) The northeastern exit of the cave leading to Outside 3 | |
| Outside 3 | Along the wall south of the exit from the second cave (x2) | A hidden Revive (on the westernmost rock) Access to a shortcut back through to the first cave | |
| A shortcut from southwestern exit of the third cave to after the second cave | |||
| Inside 3 | West of the exit from the third cave | A shortcut from the end of the third cave back to the southwestern exit of the third cave | |
Alola
| Location | Games |
|---|---|
| Ten Carat Hill | SM |
| Diglett's Tunnel | SMUSUM |
| Lush Jungle | |
| Ruins of Life | |
| Ruins of Abundance | |
| Ruins of Hope | |
| Vast Poni Canyon | |
| Mount Lanakila | USUM |
| Sandy Cave | |
| Ultra Desert |
Gallery
Boulders

|
This section is incomplete. Please feel free to edit this section to add missing information and complete it. Reason: Ripped models from Gen. VII and BDSP |
| RBY |
GSC |
RSE |
FRLG |
DPPtHGSS File:G4 Strength.png |
BWB2W2 File:Gen5 Strength.png |
XYORAS |
