Appendix:Platinum walkthrough/Section 15: Difference between revisions
Jskylinegtr (talk | contribs) |
Pale Prism (talk | contribs) m (→Move Tutor) |
||
| (19 intermediate revisions by 13 users not shown) | |||
| Line 1: | Line 1: | ||
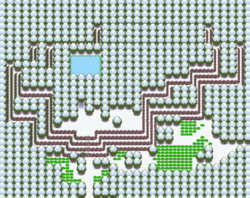
==Acuity Lakefront== | |||
==Acuity Lakefront | |||
[[File:Acuity Lakefront Pt.png|thumb|left|250px|Acuity Lakefront]] | [[File:Acuity Lakefront Pt.png|thumb|left|250px|Acuity Lakefront]] | ||
{| class="expandable" align="center" style="background: #{{platinum color}}; {{roundy|10px}}; border: 5px solid #{{platinum color light}};" | {| class="expandable" align="center" style="background: #{{platinum color}}; {{roundy|10px}}; border: 5px solid #{{platinum color light}};" | ||
| Line 257: | Line 12: | ||
{{catch/entry4|459|Snover|no|no|yes|Grass|32-35|40%|40%|0%|type1=ice|type2=grass}} | {{catch/entry4|459|Snover|no|no|yes|Grass|32-35|40%|40%|0%|type1=ice|type2=grass}} | ||
{{catch/entry4|459|Snover|no|no|yes|Grass|33-35|0%|0%|30%|type1=ice|type2=grass}} | {{catch/entry4|459|Snover|no|no|yes|Grass|33-35|0%|0%|30%|type1=ice|type2=grass}} | ||
{{catch/footer|snow}} | {{catch/footer|snow}} | ||
|} | |} | ||
| Line 266: | Line 19: | ||
|- | |- | ||
|{{itlisth|snow}} | |{{itlisth|snow}} | ||
{{itemlist|Ultra Ball|North-east corner of the lakefront|Pt=yes | {{itemlist|Ultra Ball|North-east corner of the lakefront|Pt=yes}} | ||
{{itlistfoot|snow}} | {{itlistfoot|snow}} | ||
|} | |} | ||
Follow the path to reach the | Follow the path in [[Acuity Lakefront]] to reach the [[Lake Acuity]]'s entrance, and you'll see your rival {{ga|Barry}} there. He tells you that to climb the slope that leads to Lake Acuity, you will need to win the Badge at the [[Snowpoint Gym]]. After he leaves, head east to Snowpoint City. | ||
==Snowpoint City== | ==Snowpoint City== | ||
[[File:Snowpoint City Pt.png|thumb|275px|Snowpoint City]] | [[File:Snowpoint City Pt.png|thumb|275px|Snowpoint City]] | ||
Snowpoint City has a few attractions, the main ones of interest to you on your first visit will be the Gym and possibly the [[Move Tutor]]. | [[Snowpoint City]] has a few attractions, the main ones of interest to you on your first visit will be the Gym and possibly the [[Move Tutor]]. | ||
{| class="expandable" align="center" style="background: #{{platinum color}}; {{roundy|10px}}; border: 5px solid #{{platinum color light}};" | {| class="expandable" align="center" style="background: #{{platinum color}}; {{roundy|10px}}; border: 5px solid #{{platinum color light}};" | ||
| Line 283: | Line 35: | ||
|- | |- | ||
|{{itlisth|snow}} | |{{itlisth|snow}} | ||
{{itemlist|Ultra Ball|Next to the crane|Pt=yes | {{itemlist|Ultra Ball|Next to the crane|Pt=yes}} | ||
{{itemlist|Rare Candy|East of the Gym ''(hidden)''|Pt=yes | {{itemlist|Rare Candy|East of the Gym ''(hidden)''|Pt=yes}} | ||
{{Itemlist|Everstone|Held by {{p|Haunter| | {{Itemlist|Everstone|Held by {{p|Haunter|Gaspar}}|Pt=yes}} | ||
{{itlistfoot|snow}} | {{itlistfoot|snow}} | ||
|} | |} | ||
===Move Tutor=== | ===Move Tutor=== | ||
Located in the upper right hand corner house is the Move Tutor where much like the one on {{rt|212}} you can trade him shards in exchange for learning new moves if that Pokémon you want to teach it to is compatible. | Located in the upper right hand corner house is the Move Tutor where much like the one on {{rt|212|Sinnoh}} you can trade him shards in exchange for learning new moves if that Pokémon you want to teach it to is compatible. | ||
{{tutormv/header|platinum|shard|no|disp=Snowpoint City}} | {{tutormv/header|platinum|shard|no|disp=Snowpoint City}} | ||
| Line 305: | Line 57: | ||
===In-game trade=== | ===In-game trade=== | ||
In the upper left hand house is a girl who will trade a {{p|Haunter}} named Gaspar that will hold an {{ | In the upper left hand house is a girl who will trade a {{p|Haunter}} named Gaspar that will hold an [[Everstone]] (which prevents it from evolving into {{p|Gengar}}) in exchange for a {{p|Medicham}}. | ||
==Snowpoint Gym== | ==Snowpoint Gym== | ||
[[File:Snowpoint Gym Pt.png|thumb|left|275px|Snowpoint Gym]] | [[File:Snowpoint Gym Pt.png|thumb|left|275px|Snowpoint Gym]] | ||
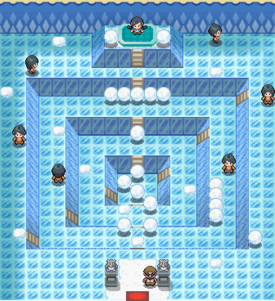
The secret to the puzzle of the Gym is to smash the snowballs on the ground is to slide in from above at a fast enough speed to smash them. Your main goal is that from the entrance, head straight to reach the Gym Leader, but only after you've smashed the snowballs that were in the way. Just slide around the Gym and predict which areas you need to slide down to smash those snowballs | The secret to the puzzle of the Gym is to smash the snowballs on the ground is to slide in from above at a fast enough speed to smash them. Your main goal is that from the entrance, head straight to reach the Gym Leader, but only after you've smashed the snowballs that were in the way. Just slide around the Gym and predict which areas you need to slide down to smash those snowballs. Of course it will take some time to experiment until all the necessary snowballs are gone. You do not have to face all of the Gym Trainers in this Gym. | ||
Candice's {{p|Sneasel}} is easily handeled by {{type|Fighting}}s (though Fighting Pokémon must watch out for {{m|Aerial Ace}}), and her {{p|Abomasnow}} is easily beaten by a {{type|Fire}}. While {{p|Piloswine}} can hit hard, it is slow and has six different weaknesses. Her {{p|Froslass}} can be a bit of a problem, especially if Abomasnow's {{a|Snow Warning}} already activated, since {{weather|Hail}} {{a|Snow Cloak|raises Froslass's evasion}} and causes {{m|Blizzard}} to never miss. Froslass is weak to Fire, {{t|Rock}}, {{t|Ghost}}, {{t|Dark}}, so take it out with one of those types (or any strong attack) before it goes out of control with {{m|Double Team}} or Blizzard. | |||
{| align="center" | {| align="center" | ||
| Line 349: | Line 92: | ||
{{Trainerfooter|ice|1}} | {{Trainerfooter|ice|1}} | ||
|} | |} | ||
{{Party/Single|color={{ice color}}|bordercolor={{ice color dark}}|headcolor={{ice color light}} | {{Party/Single|color={{ice color}}|bordercolor={{ice color dark}}|headcolor={{ice color light}} | ||
| Line 359: | Line 101: | ||
|location=Snowpoint Gym | |location=Snowpoint Gym | ||
|pokemon=4}} | |pokemon=4}} | ||
|{{Pokémon/4|game=Platinum|ndex=215|pokemon=Sneasel | |||
|ability=Keen Eye|level=40|gender=female|spritegender=female|type1=Dark|type2=Ice | |||
|move1=Aerial Ace|move1type=Flying|move1cat=Physical | |||
|move2=Faint Attack|move2type=Dark|move2cat=Physical | |||
|move3=Ice Shard|move3type=Ice|move3cat=Physical | |||
|move4=Slash|move4type=Normal|move4cat=Physical}} | |||
|{{Pokémon/4|game=Platinum|ndex=221|pokemon=Piloswine | |{{Pokémon/4|game=Platinum|ndex=221|pokemon=Piloswine | ||
|ability=Oblivious|level=40|gender=female|spritegender=female|type1=Ice|type2=Ground | |ability=Oblivious|level=40|gender=female|spritegender=female|type1=Ice|type2=Ground | ||
| Line 365: | Line 113: | ||
|move3=Stone Edge|move3type=Rock|move3cat=Physical | |move3=Stone Edge|move3type=Rock|move3cat=Physical | ||
|move4=Hail|move4type=Ice|move4cat=Status}} | |move4=Hail|move4type=Ice|move4cat=Status}} | ||
{{Party/Div|color={{ice color}}}} | {{Party/Div|color={{ice color}}}} | ||
|{{Pokémon/4|game=Platinum|ndex=460|pokemon=Abomasnow | |{{Pokémon/4|game=Platinum|ndex=460|pokemon=Abomasnow | ||
| Line 388: | Line 130: | ||
|} | |} | ||
Once you've beaten Candice you will receive the Icicle Badge that will will allow you to use Rock Climb outside of battle as well as {{TM|72|Avalanche}} that while it causes your Pokémon to usually move last, it's power will double if that Pokémon was struck by a damaging move first. | Once you've beaten Candice you will receive the Icicle Badge that will will allow you to use Rock Climb outside of battle as well as {{TM|72|Avalanche}} that while it causes your Pokémon to usually [[priority|move last]], it's power will double if that Pokémon was struck by a damaging move first. | ||
==Now that you can use Rock Climb (optional)== | |||
Now that have access to the move {{m|Rock Climb}} in the field, we can gain access to some items and fight some trainers around the region. | |||
===Route 208=== | |||
{| class="expandable" align="center" style="background: #{{platinum color}}; {{roundy|10px}}; border: 5px solid #{{platinum color light}};" | |||
|- align="center" | |||
! Items | |||
|- | |||
|{{itlisth|mountain}} | |||
{{Itemlist|Star Piece|Northwest of Hiker Alexander (requires {{m|Rock Smash}} and {{m|Rock Climb}}) ''(hidden)''|Pt=yes}} | |||
{{itlistfoot|mountain}} | |||
|} | |||
{| class="expandable" align="center" style="background: #{{platinum color}}; {{roundy|10px}}; border: 5px solid #{{platinum color light}};" | |||
|- align="center" | |||
! Trainers | |||
|- | |||
| | |||
{{Trainerheader|road}} | |||
{{Trainerentry|Spr DP Fisherman.png|Fisherman|Cody|1056|2|339|Barboach|♂|33|None|130|Gyarados|♂|33|None|36=テルマサ|37=Terumasa}} | |||
{{Trainerentry|Spr DP Hiker.png|Hiker|Alexander|1280|2|075|Graveler|♂|38|None|476|Probopass|♂|40|None|36=クマオ|37=Kumao}} | |||
{{Trainerfooter|road}} | |||
|} | |||
===Veilstone City=== | |||
{| class="expandable" align="center" style="background: #{{platinum color}}; {{roundy|10px}}; border: 5px solid #{{platinum color light}};" | |||
|- align="center" | |||
! Items | |||
|- | |||
|{{itlisth|mountain}} | |||
{{Itemlist|Full Incense|On a platform east of the gym (requires {{m|Rock Climb}})|Pt=yes}} | |||
{{itlistfoot|mountain}} | |||
|} | |||
===Valor Lakefront=== | |||
{| class="expandable" align="center" style="background: #{{platinum color}}; {{roundy|10px}}; border: 5px solid #{{platinum color light}};" | |||
|- align="center" | |||
! Items | |||
|- | |||
|{{itlisth|mountain}} | |||
{{Itemlist|Sun Stone|At the top of the climbable ledges in the east of Hotel Grand Lake (requires {{m|Rock Climb}}) ''(hidden)''|Pt=yes}} | |||
{{Itemlist|TM Psychic VI|To the left of the house of the woman who lost her [[Suite Key]], accessed from next to the westernmost house (requires {{m|Rock Climb}})|Pt=yes|display={{TM|85|Dream Eater}}}} | |||
{{Itemlist|Iron|To the left of the house of the woman who lost her Suite Key (requires {{m|Rock Climb}})|Pt=yes}} | |||
{{itlistfoot|mountain}} | |||
|} | |||
===Route 213=== | |||
{| class="expandable" align="center" style="background: #{{platinum color}}; {{roundy|10px}}; border: 5px solid #{{platinum color light}};" | |||
|- align="center" | |||
! Items | |||
|- | |||
|{{itlisth|mountain}} | |||
{{Itemlist|Protein|East of the Hotel Grand Lake southern entrance (requires {{m|Rock Climb}})|Pt=yes}} | |||
{{Itemlist|TM Normal VI|Up in the highest mountain looking at the beach (requires {{m|Rock Climb}})|Pt=yes|display={{TM|05|Roar}}}} | |||
{{Itemlist|HP Up|Up in the highest mountain looking at the beach (requires {{m|Rock Climb}}) ''(hidden)''|Pt=yes}} | |||
{{Itemlist|None|sprite=Dppt poketch {{#ifexpr: ({{#time: H}} mod 2) = 0|m|f}}|From a {{tc|Rich Boy}} inside a bungalow to the northeast of the hotel entrance (requires {{m|Rock Climb}})|Pt=yes|display={{DL|Pokétch|Coin Toss}}}} | |||
{{Itemlist|Max Revive|Inside a trash can in the bungalow to the northeast of the hotel entrance (requires {{m|Rock Climb}}) ''(hidden)''|Pt=yes}} | |||
{{itlistfoot|mountain}} | |||
|} | |||
===Route 210 (North)=== | |||
{| class="expandable" align="center" style="background: #{{platinum color}}; {{roundy|10px}}; border: 5px solid #{{platinum color light}};" | |||
|- align="center" | |||
! Items | |||
|- | |||
|{{itlisth|mountain}} | |||
{{Itemlist|Shiny Stone|South of the pit between the climbable rocks (requires {{m|Rock Climb}}) ''(hidden)''|Pt=yes}} | |||
{{Itemlist|Zinc|Ledge south of Dragon Tamer Patrick (requires {{m|Rock Climb}})|Pt=yes}} | |||
{{itlistfoot|mountain}} | |||
|} | |||
{| class="expandable" align="center" style="background: #{{platinum color}}; {{roundy}}; border: 5px solid #{{platinum color light}};" | |||
|- align="center" | |||
! Trainers | |||
|- | |||
| | |||
{{trainerheader}} | |||
{{Trainerentry|Spr DP Dragon Tamer.png|Dragon Tamer|Patrick|1088<br><small>Requires {{m|Rock Climb}}</small>|1|443|Gible|♂|34|36=リュウヘイ|37=Ryūhei|38=Vs. Seeker}} | |||
{{Trainerfooter|land}} | |||
|} | |||
===Route 211 (East)=== | |||
{| class="expandable" align="center" style="background: #{{platinum color}}; {{roundy|10px}}; border: 5px solid #{{platinum color light}};" | |||
|- align="center" | |||
! Items | |||
|- | |||
|{{itlisth|mountain}} | |||
{{Itemlist|TM Psychic VI|At the highest hill of the eastern part of the route (requires {{m|Rock Climb}} and {{m|Rock Smash}})|Pt=yes|display={{TM|29|Psychic}}}} | |||
{{Itemlist|Calcium|On the same hill as {{TM|29|Psychic}} (requires {{m|Rock Climb}} and {{m|Rock Smash}}) ''(hidden)''|Pt=yes}} | |||
{{itlistfoot|mountain}} | |||
|} | |||
===Route 216=== | |||
{| class="expandable" align="center" style="background: #{{platinum color}}; {{roundy|10px}}; border: 5px solid #{{platinum color light}};" | |||
|- align="center" | |||
! Items | |||
|- | |||
|{{itlisth|mountain}} | |||
{{Itemlist|Mental Herb|In the center of the snowy ledge (requires {{m|Rock Climb}})|Pt=yes}} | |||
{{Itemlist|HP Up|Northeast of the Mental Herb (requires {{m|Rock Climb}})|Pt=yes}} | |||
{{Itemlist|Max Potion|South of Skier Andrea (requires {{m|Rock Climb}})|Pt=yes}} | |||
{{Itemlist|TM Ice VI|East of Skier Andrea (requires {{m|Rock Climb}})|Pt=yes|display={{TM|13|Ice Beam}}}} | |||
{{itlistfoot|mountain}} | |||
|} | |||
{| class="expandable" align="center" style="background: #{{platinum color}}; {{roundy|10px}}; border: 5px solid #{{platinum color light}};" | |||
|- align="center" | |||
! Trainers | |||
|- | |||
| | |||
{{Trainerheader|road}} | |||
{{Trainerentry|Spr DP Black Belt.png|Black Belt|Philip|960|1|067|Machoke|♂|40|None|36=ダンジ|37=Danji|38=Vs. Seeker}} | |||
{{Trainerdiv|snow}} | |||
{{Trainerentry|Spr DP Skier M.png|Skier|Bradley|1152|3|361|Snorunt|♂|36|None|220|Swinub|♂|36|None|459|Snover|♂|36|None|36=フジヤ|37=Fujiya}} | |||
{{Trainerdiv|snow}} | |||
{{Trainerentry|Spr DP Skier F.png|Skier|Kaitlyn|1216|2|220|Swinub|♀|36|None|459|Snover|♀|38|None|36=ナツキ|37=Natsuki}} | |||
{{Trainerdiv|snow}} | |||
{{Trainerentry|Spr DP Skier F.png|Skier|Andrea|1248|1|459|Snover|♀|39|None|36=アイミ|37=Aimi|38=Vs. Seeker}} | |||
{{Trainerfooter|road}} | |||
|} | |||
==Acuity Lakefront== | |||
{| class="expandable" align="center" style="background: #{{platinum color}}; {{roundy|10px}}; border: 5px solid #{{platinum color light}};" | |||
|- align="center" | |||
! Items | |||
|- | |||
|{{itlisth|snow}} | |||
{{Itemlist|Reaper Cloth|Near the entrance to Lake Acuity (requires {{m|Rock Climb}})|Pt=yes}} | |||
{{itlistfoot|snow}} | |||
|} | |||
[[File:Acuity Lakefront Pt.png|right|thumb|180px|Acuity Lakefront]] | |||
Now that you have the Icicle Badge, you can climb the walls that have the bits of rock in them with {{m|Rock Climb}}. Pick up the [[Reaper Cloth]] before entering [[Lake Acuity]]. | |||
==Lake Acuity== | |||
[[File:Lake Acuity Pt.png|thumb|left|180px|Lake Acuity]] | |||
{| class="expandable" align="center" style="background: #{{platinum color}}; {{roundy|10px}}; border: 5px solid #{{platinum color light}};" | |||
|- align="center" | |||
! Available Pokémon | |||
|- | |||
|{{Catch/header|snow}} | |||
{{Catch/entry4|054|Psyduck|no|no|yes|Grass|38|all=5%|type1=water}} | |||
{{Catch/entry4|055|Golduck|no|no|yes|Grass|39-40|all=15%|type1=water}} | |||
{{Catch/entry4|215|Sneasel|no|no|yes|Grass|41|all=10%|type1=dark|type2=ice}} | |||
{{Catch/entry4|361|Snorunt|no|no|yes|Grass|39-40|0%|0%|20%|type1=ice}} | |||
{{Catch/entry4|400|Bibarel|no|no|yes|Grass|39-40|all=25%|type2=water}} | |||
{{Catch/entry4|459|Snover|no|no|yes|Grass|38-41|45%|45%|0%|type1=grass|type2=ice}} | |||
{{Catch/entry4|459|Snover|no|no|yes|Grass|38,41|0%|0%|25%|type1=grass|type2=ice}} | |||
{{Catch/div|lake|Surfing}} | |||
{{Catch/entry4|054|Psyduck|no|no|yes|Surf|20-30|all=90%|type1=water}} | |||
{{Catch/entry4|055|Golduck|no|no|yes|Surf|20-40|all=10%|type1=water}} | |||
{{Catch/div|lake|Fishing}} | |||
{{Catch/entry4|129|Magikarp|no|no|yes|Fish Old|3-15|all=100%|type1=water}} | |||
{{Catch/entry4|118|Goldeen|no|no|yes|Fish Good|15-20|all=30%|type1=water}} | |||
{{Catch/entry4|119|Seaking|no|no|yes|Fish Good|25-35|all=5%|type1=water}} | |||
{{Catch/entry4|129|Magikarp|no|no|yes|Fish Good|10-25|all=65%|type1=water}} | |||
{{Catch/entry4|119|Seaking|no|no|yes|Fish Super|30-55|all=35%|type1=water}} | |||
{{Catch/entry4|130|Gyarados|no|no|yes|Fish Super|30-55|all=65%|type1=water|type2=flying}} | |||
{{Catch/footer|snow}} | |||
|} | |||
{| class="expandable" align="center" style="background: #{{platinum color}}; {{roundy|10px}}; border: 5px solid #{{platinum color light}};" | |||
|- align="center" | |||
! Items | |||
|- | |||
|{{itlisth|Lake}} | |||
{{Itemlist|TM Ice|At northwest corner of tall grass in the northeast part of the lake (requires {{m|Surf}})|Pt=yes|display={{TM|14|Blizzard}}}} | |||
{{itlistfoot|Lake}} | |||
|} | |||
When you arrive at [[Lake Acuity]], Galactic [[Commander]] [[Jupiter]] has already defeated {{ga|Barry}} and caught {{p|Uxie}}. She leaves while stating that Barry is a weak Trainer. Barry, though upset, states his desire to become stronger. {{m|Surf}} across the lake to the patch of grass in the northeastern corner, where you can pick up {{TM|14|Blizzard}}. | |||
Now {{m|Fly}} back to [[Veilstone City]] and make sure you're ready for a lot of fighting. It's time to raid [[Team Galactic]]'s Headquarters! | |||
==Veilstone City== | |||
[[File:Veilstone City DP.png|left|thumb|180px|Veilstone City]] | |||
[[File:Team Galactic HQ Pt.png|right|thumb|180px|Team Galactic HQ]] | |||
Head towards the [[Team Galactic HQ]] in the northeast corner of [[Veilstone City]] and talk to the lone grunt there, who is angry at you since his {{p|Clefairy}} was taken away after you defeated him before. He claims ignorance about a {{si|Storage Key}} and runs away. Luckily, [[Looker]] shows up and states he has the Storage Key with him. He suggests that it is best to enter the HQ through the [[Team Galactic HQ|Galactic Warehouse]] you were at before. Make sure to select a well-balanced team for this mission, as you are going to need it. | |||
===Galactic Warehouse=== | |||
[[File:Galactic Warehouse exterior DP.png|left|thumb|180px|Galactic Warehouse exterior]] | |||
[[File:Galactic Warehouse B1F DP.png|right|thumb|350px|Galactic Warehouse B1F]] | |||
{| class="expandable" align="center" style="background: #{{platinum color}}; {{roundy|10px}}; border: 5px solid #{{platinum color light}};" | |||
|- align="center" | |||
! Items | |||
|- | |||
|{{itlisth|building}} | |||
{{Itemlist|Dusk Stone|Behind the locked door that required the {{si|Storage Key}}|Pt=yes}} | |||
{{Itemlist|Zinc|Downstairs near the entrance, down a fork in the hallway|Pt=yes}} | |||
{{Itemlist|TM Poison|Southeast of the Galactic Key|Pt=yes|display={{TM|36|Sludge Bomb}}}} | |||
{{Itemlist|Galactic Key|Downstairs near the entrance, behind the locked door|Pt=yes}} | |||
{{itlistfoot|building}} | |||
|} | |||
{| class="expandable" align="center" style="background: #{{platinum color}}; {{roundy|10px}}; border: 5px solid #{{platinum color light}};" | |||
|- align="center" | |||
! Team Galactic | |||
|- | |||
| {{trainerheader|building}} | |||
{{trainerdiv|building}} | |||
{{trainerentry|Spr DP Galactic Grunt M.png|Galactic Grunt||1640|1|042|Golbat|♂|41||}} | |||
{{trainerdiv|building}} | |||
{{trainerentry|Spr DP Galactic Grunt M.png|Galactic Grunt||1600|2|228|Houndour|♂|38||198|Murkrow|♂|40||}} | |||
{{trainerfooter|building}} | |||
|} | |||
Head to the metal doors you saw before and Looker will arrive and open them for you. Once that is done, continue down the stairs to the basement of the warehouse. This bottom floor connects to the Team Galactic HQ. Follow the hallway east to the stairs at the end, battling the two grunts. | |||
===Team Galactic HQ=== | |||
[[File:Galactic HQ 1F Pt.png|thumb|300px|Galactic HQ 1F]] | |||
{| class="expandable" align="center" style="background: #{{platinum color}}; {{roundy|10px}}; border: 5px solid #{{platinum color light}};" | |||
|- align="center" | |||
! Items | |||
|- | |||
|{{itlisth|building}} | |||
{{Itemlist|TM Dark|At the first pair of warp panels, take the right|Pt=yes|display={{TM|49|Snatch}}}} | |||
{{itemlist|Dubious Disc|1F; in the room that connects to the warehouse through the locked door, between two seats at the table|Pt=yes}} | |||
{{itemlist|Rare Candy|In the hallway leading up to TM21, by a machine ''(hidden)''|Pt=yes}} | |||
{{Itemlist|TM Normal|Behind the locked door in the generator room|Pt=yes|display={{TM|21|Frustration}}}} | |||
{{itemlist|Green Shard|From the first pair of Galactic Grunts, go east and take the top warp pad|Pt=yes}} | |||
{{itemlist|Max Potion|In the room with the Green Shard, in a box ''(hidden)''|Pt=yes}} | |||
{{itemlist|Max Revive|From the first pair of Galactic Grunts, go east and take the bottom warp pad|Pt=yes}} | |||
{{itemlist|Poké Doll|In the bed on the right in the nap room ''(hidden)''|Pt=yes}} | |||
{{itemlist|Nugget|Near three warp panels after battling a duo of grunts ''(hidden)''|Pt=yes}} | |||
{{itemlist|Protein|In a room where three warp pads are located near each other, the right pad leads to the room with the Protein|Pt=yes}} | |||
{{itemlist|Max Elixir|In a room where three warp pads are located near each other, the middle pad leads to the room with the Max Elixir|Pt=yes}} | |||
{{itemlist|Elixir|In a room with two tables and a Max Elixir, in a crate in the southwest corner ''(hidden)''|Pt=yes}} | |||
{{itemlist|Master Ball|Received from [[Cyrus]] after defeating him|Pt=yes}} | |||
{{itemlist|Razor Claw|In the room to the east of the one where [[Cyrus]] awaits ''(hidden)''|Pt=yes}} | |||
{{itemlist|Full Restore|After leaving [[Cyrus]]'s office, in the room with the green fluid machines|Pt=yes}} | |||
{{itemlist|PP Up|Among boxes to the right of the doorway of the easternmost door at the entrance ''(hidden)''|Pt=yes}} | |||
{{itlistfoot|building}} | |||
|} | |||
{| class="expandable" align="center" style="background: #{{platinum color}}; {{roundy|10px}}; border: 5px solid #{{platinum color light}};" | |||
|- align="center" | |||
! Team Galactic | |||
|- | |||
|{{trainerheader|building}} | |||
{{trainerdiv|building|These Trainers are accessible by going through the {{color2|fff|Galactic Warehouse}}}} | |||
{{trainerentry|Spr DP Galactic Grunt F.png|Galactic Grunt||1640|1|431|Glameow|♀|41||}} | |||
{{trainerdiv|building}} | |||
{{trainerentry|Spr DP Galactic Grunt M.png|Galactic Grunt||1560|3|431|Glameow|♀|37||198|Murkrow|♂|38||453|Croagunk|♂|39||}} | |||
{{trainerdiv|building}} | |||
{{trainerentry|Spr DP Scientist.png|Scientist|Fredrick|1920|2|281|Kirlia|♂|40||064|Kadabra|♂|40||}} | |||
{{trainerdiv|building}} | |||
{{trainerentry|Spr DP Galactic Grunt M.png|Galactic Grunt||1640|1|434|Stunky|♂|41||}} | |||
{{trainerdiv|building}} | |||
{{trainerentry|Spr DP Galactic Grunt M.png|Galactic Grunt||1560|2|198|Murkrow|♂|39||434|Stunky|♂|39||}} | |||
{{trainerdiv|building|These Trainers are accessible by going through the door next to the reception}} | |||
{{trainerentry|Spr DP Galactic Grunt M.png|Galactic Grunt||1520|2|042|Golbat|♂|40||042|Golbat|♂|38||}} | |||
{{trainerentry|Spr DP Galactic Grunt F.png|Galactic Grunt||1560|2|042|Golbat|♀|39||228|Houndour|♀|39||}} | |||
{{trainerdiv|building}} | |||
{{trainerentry|Spr DP Scientist.png|Scientist|Darrius|2016|1|233|Porygon2||42||}} | |||
{{trainerdiv|building}} | |||
{{trainerentry|Spr DP Galactic Grunt M.png|Galactic Grunt||1600|2|434|Stunky|♂|38||453|Croagunk|♂|40||}} | |||
{{trainerentry|Spr DP Galactic Grunt F.png|Galactic Grunt||1520|3|453|Croagunk|♀|38||434|Stunky|♀|38||431|Glameow|♀|38||}} | |||
{{trainerfooter|building|1}} | |||
|} | |||
====1F==== | |||
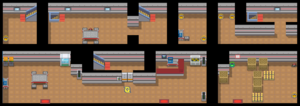
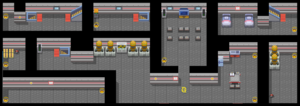
Once up the stairs, you'll arrive in the very upper right-hand corner of 1F. After defeating the Galactic Grunt there, use the right [[warp panel]] to enter a closed-off area where you will find {{TM|49|Snatch}}. Step back onto the panel from whence you came. Afterwards, use the left warp panel to go up to 2F. | |||
====2F==== | |||
[[File:Galactic HQ 2F Pt.png|thumb|left|300px|Galactic HQ 2F]] | |||
From here, use the nearby warp panel to return to 1F. | |||
====1F==== | |||
Ignore the grunt to the right and take the panel to the left, go down the stairs and defeat the {{tc|Scientist}}, grab the [[Dubious Disc]], take the second set of stairs to the left and keep going west. | |||
===Galactic Warehouse=== | |||
Grab the [[Galactic Key]], which will allow you to open the locked steel doors, and you will meet a Galactic Grunt who mentions that [[Cyrus]] is having a meeting. You can get to it by entering the HQ's main building from Veilstone and using the Galactic Key. You can unlock the nearby door which will allow you to head back easily to the Warehouse's entrance, but let's make a little side trip by backtracking to 2F. Use the stairs to access 3F. | |||
===Team Galactic HQ=== | |||
====3F==== | |||
[[File:Galactic HQ 3F Pt.png|thumb|200px|Galactic HQ 3F]] | |||
Defeat the Galactic Grunts and then open the locked door to find {{TM|21|Frustration}}. Now head back to the Galactic Warehouse and leave there to return to Veilstone City. It is now time to enter the main building. | |||
===Team Galactic HQ (main building)=== | |||
====1F==== | |||
Use your new Galactic Key to open the locked door and head up to 2F. | |||
====2F==== | |||
You should now be in the middle area of 2F. Simply fight the grunts and then use each of the warp panels. This will earn you two items. Afterwards, use the warp panel that is located by the TVs to reach the meeting hall, where Cyrus is. | |||
====Meeting Hall==== | |||
[[File:Galactic_HQ_Hall_Pt.png|thumb|left|180px|Galactic Meeting Hall]] | |||
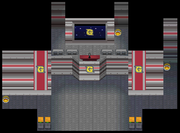
You will meet up with Looker here and listen to Cyrus giving his speech about how the world is incomplete and the fact that he now has the power to create a new one for Team Galactic's benefit. After he and the grunts leave, Looker leaves to investigate this further. Follow in the direction he went to find another warp panel that will take you to a new area of 2F. | |||
====2F==== | |||
You'll be in the upper-right area of 2F where there are some beds to rest your Pokémon team. Hidden in the right-hand bed is a [[Poké Doll]]. Climb the stairs to 3F. | |||
====3F==== | |||
After dealing with two Galactic Grunts you'll find three warp panels here. The upper right one takes you to an area where you can find a [[Protein]]. The upper left will get you a [[Max Elixir]], and the lower left is the one you'll need to proceed to an area with stairs up to 4F. | |||
====4F==== | |||
[[File:Galactic HQ 4F Pt.png|thumb|250px|Galactic HQ 4F]] | |||
This is where Cyrus's office is located. After you open the locked door, Cyrus will greet you and mention that the new world is actually only for him, since he feels his underlings are just as flawed as the rest of the world. Finding you interesting, he'll challenge you to a battle. | |||
{{Party/Single | |||
|color={{silver color}} | |||
|headcolor={{silver color light}} | |||
|bordercolor={{dark color}} | |||
|sprite=Spr Pt Cyrus.png | |||
|prize={{Pdollar}}8280 | |||
|class=Galactic Boss | |||
|name={{color2|000000|Cyrus}} | |||
|game=Pt | |||
|location=Team Galactic HQ | |||
|pokemon=3}} | |||
|{{Pokémon/4 | |||
|game=Platinum | |||
|ndex=215 m | |||
|pokemon=Sneasel | |||
|gender=male | |||
|level=44 | |||
|ability=Inner Focus | |||
|type1=Dark|type2=Ice | |||
|move1=Screech|move1type=Normal|move1cat=Status | |||
|move2=Ice Punch|move2type=Ice|move2cat=Physical | |||
|move3=Slash|move3type=Normal|move3cat=Physical | |||
|move4=Quick Attack|move4type=Normal|move4cat=Physical}} | |||
|{{Pokémon/4 | |||
|game=Platinum | |||
|ndex=169 | |||
|pokemon=Crobat | |||
|gender=male | |||
|level=44 | |||
|ability=Inner Focus | |||
|type1=Poison|type2=Flying | |||
|move1=Air Cutter|move1type=Flying|move1cat=Special | |||
|move2=Poison Fang|move2type=Poison|move2cat=Physical | |||
|move3=Supersonic|move3type=Normal|move3cat=Status | |||
|move4=Bite|move4type=Dark|move4cat=Physical}} | |||
|{{Pokémon/4 | |||
|game=Platinum | |||
|ndex=430 | |||
|pokemon=Honchkrow | |||
|gender=male | |||
|level=46 | |||
|held=Sitrus Berry | |||
|ability=Insomnia | |||
|type1=Dark|type2=Flying | |||
|move1=Night Shade|move1type=Ghost|move1cat=Special | |||
|move2=Faint Attack|move2type=Dark|move2cat=Physical | |||
|move3=Drill Peck|move3type=Flying|move3cat=Physical | |||
|move4=Astonish|move4type=Ghost|move4cat=Physical}} | |||
{{Party/Footer}} | |||
His team is the same as the previous, except that two of his Pokémon have evolved. His first Pokémon, {{p|Sneasel}}, is easily vulnerable to {{type|Fighting}}s. His other two {{p|Crobat}} and {{p|Honchkrow}} both are {{type|Flying}} and should be easily vulnerable to {{t|Rock}}, {{t|Ice}} and {{type|Electric}}s. Just remember that Crobat is the faster of the two and may try to confuse your Pokémon with {{m|Supersonic}}, and Honchkrow possesses better physical attack moves that could KO your Pokémon if you are not careful. | |||
[[File:Galactic HQ lake trio room DPPt.png|left|thumb|180px|Lake Trio room]] | |||
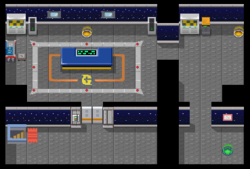
Afterwards, Cyrus will give you a [[Master Ball]] and then leave. He mentions that if you want to save the [[Lake Trio|Lake Pokémon]], you should use the nearby warp panel to get to them. Use that warp panel and you will reach a hallway. At the end is where the Lake Trio are being held. Once you reach that room, where they are, you can overhear a conversation between [[Charon]] and [[Saturn]] about how Charon is happy with the new world Cyrus will create. Talk to Saturn and he'll challenge you to a battle since, unlike Cyrus, he will not let you roam freely and interfere with their plans. | |||
{{Party/Single | |||
|color={{silver color}} | |||
|bordercolor={{dark color}} | |||
|headcolor=8BB2FF | |||
|class=Commander | |||
|name={{color2|000000|Saturn}} | |||
|sprite=Spr DP Saturn.png | |||
|game=Pt | |||
|location=Team Galactic HQ | |||
|prize={{pdollar}}3520 | |||
|pokemon=3}} | |||
|{{Pokémon/4 | |||
|game=Platinum | |||
|pokemon=Golbat | |||
|type1=Poison|type2=Flying | |||
|ndex=042 | |||
|level=42 | |||
|gender=female | |||
|spritegender=female | |||
|ability=Inner Focus | |||
|move1=Bite|move1type=Dark|move1cat=Physical | |||
|move2=Air Cutter|move2type=Flying|move2cat=Special | |||
|move3=Poison Fang|move3type=Poison|move3cat=Physical | |||
|move4=Confuse Ray|move4type=Ghost|move4cat=Status}} | |||
|{{Pokémon/4 | |||
|game=Platinum | |||
|pokemon=Toxicroak | |||
|type1=Poison | |||
|type2=Fighting | |||
|ndex=454 f | |||
|level=44 | |||
|ability=Anticipation | |||
|held=Sitrus Berry | |||
|gender=female | |||
|move1=Brick Break|move1type=Fighting|move1cat=Physical | |||
|move2=Faint Attack|move2type=Dark|move2cat=Physical | |||
|move3=X-Scissor|move3type=Bug|move3cat=Physical | |||
|move4=Poison Jab|move4type=Poison|move4cat=Physical}} | |||
|{{Pokémon/4 | |||
|pokemon=Bronzor | |||
|game=Platinum | |||
|ndex=436 | |||
|level=42 | |||
|type1=Steel | |||
|type2=Psychic | |||
|ability=Levitate | |||
|move1=Extrasensory|move1type=Psychic|move1cat=Special | |||
|move2=Gyro Ball|move2type=Steel|move2cat=Physical | |||
|move3=Confuse Ray|move3type=Ghost|move3cat=Status | |||
|move4=Shadow Ball|move4type=Ghost|move4cat=Special}} | |||
{{Party/Footer}} | |||
Saturn's team is the same as before but at higher levels, so the same tactics you used at [[Lake Valor]] should work here. Once you defeat him, Saturn will let you press the switch that will set {{p|Azelf}}, {{p|Mesprit}}, and {{p|Uxie}} free. He mentions that Cyrus crafted a special [[Red Chain]] for capturing something on [[Mt. Coronet]]. | |||
Return to Cyrus's office and a new pathway will have opened up with a warp panel that will take you to the green warp panel just inside one of the main doors of the Galactic HQ. Take it, exit the building, and heal up at the Pokémon Center. | |||
Your biggest quest now awaits you. You will need a strong Pokémon team with the HM moves {{m|Surf}}, {{m|Strength}}, {{m|Rock Smash}}, and {{m|Rock Climb}}. You should stock up on [[Super Repel]]s, [[Moomoo Milk]]s, [[Revive]]s, and maybe a few [[Lava Cookie]]s. | |||
Once you are prepared, your next destination is to enter Mt. Coronet from the south entrance. You can either {{m|Fly}} to [[Oreburgh City]] and head north, or [[Hearthome City]] and head west, but the path from Oreburgh is faster. | |||
{{WalkthroughPrevNext | | {{WalkthroughPrevNext | | ||
game=Platinum | | game=Platinum | | ||
| Line 398: | Line 547: | ||
prevsection=14 | | prevsection=14 | | ||
nextsection=16 | | nextsection=16 | | ||
prevname= | prevname=Lake Verity to Route 217| | ||
nextname= | nextname=Mt. Coronet (south) | ||
}} | }} | ||
{{Project Walkthroughs notice}} | {{Project Walkthroughs notice}} | ||
[[Category:Platinum walkthrough]] | [[Category:Platinum walkthrough]] | ||
Latest revision as of 05:34, 9 June 2024
Acuity Lakefront
| Available Pokémon | |||||||||||||||||||||||||||||||||||||||||||||||||||||||||||||||||||||||||||||||||||||||||||||||||||||||||||||||||||||||||||||
|---|---|---|---|---|---|---|---|---|---|---|---|---|---|---|---|---|---|---|---|---|---|---|---|---|---|---|---|---|---|---|---|---|---|---|---|---|---|---|---|---|---|---|---|---|---|---|---|---|---|---|---|---|---|---|---|---|---|---|---|---|---|---|---|---|---|---|---|---|---|---|---|---|---|---|---|---|---|---|---|---|---|---|---|---|---|---|---|---|---|---|---|---|---|---|---|---|---|---|---|---|---|---|---|---|---|---|---|---|---|---|---|---|---|---|---|---|---|---|---|---|---|---|---|---|---|
| |||||||||||||||||||||||||||||||||||||||||||||||||||||||||||||||||||||||||||||||||||||||||||||||||||||||||||||||||||||||||||||
| Items | ||||||||||||
|---|---|---|---|---|---|---|---|---|---|---|---|---|
| ||||||||||||
Follow the path in Acuity Lakefront to reach the Lake Acuity's entrance, and you'll see your rival Barry there. He tells you that to climb the slope that leads to Lake Acuity, you will need to win the Badge at the Snowpoint Gym. After he leaves, head east to Snowpoint City.
Snowpoint City
Snowpoint City has a few attractions, the main ones of interest to you on your first visit will be the Gym and possibly the Move Tutor.
| Items | ||||||||||||||||||||
|---|---|---|---|---|---|---|---|---|---|---|---|---|---|---|---|---|---|---|---|---|
| ||||||||||||||||||||
Move Tutor
Located in the upper right hand corner house is the Move Tutor where much like the one on Route 212 you can trade him shards in exchange for learning new moves if that Pokémon you want to teach it to is compatible.
| ||||||||||||||||||||||||||||||||||||||||||||||||||||||||||||||||||||||
In-game trade
In the upper left hand house is a girl who will trade a Haunter named Gaspar that will hold an Everstone (which prevents it from evolving into Gengar) in exchange for a Medicham.
Snowpoint Gym
The secret to the puzzle of the Gym is to smash the snowballs on the ground is to slide in from above at a fast enough speed to smash them. Your main goal is that from the entrance, head straight to reach the Gym Leader, but only after you've smashed the snowballs that were in the way. Just slide around the Gym and predict which areas you need to slide down to smash those snowballs. Of course it will take some time to experiment until all the necessary snowballs are gone. You do not have to face all of the Gym Trainers in this Gym.
Candice's Sneasel is easily handeled by Fighting-types (though Fighting Pokémon must watch out for Aerial Ace), and her Abomasnow is easily beaten by a Fire-type. While Piloswine can hit hard, it is slow and has six different weaknesses. Her Froslass can be a bit of a problem, especially if Abomasnow's Snow Warning already activated, since Hail raises Froslass's evasion and causes Blizzard to never miss. Froslass is weak to Fire, Rock, Ghost, Dark, so take it out with one of those types (or any strong attack) before it goes out of control with Double Team or Blizzard.
| ||||||||||||||||||||||||||||||||||||||||||||||||||||||||||||||||||||||||||||||||||||||||||||||||||||||||||||||||||||||||||||||||||||||||||||||||||||||||||||||||||||||||||||||||||||||||||||||||||||||||||||||||||||||||||||||||||||||||||||||||||||||||||||||||||||||||||||||||||||||||||||
Once you've beaten Candice you will receive the Icicle Badge that will will allow you to use Rock Climb outside of battle as well as TM72 (Avalanche) that while it causes your Pokémon to usually move last, it's power will double if that Pokémon was struck by a damaging move first.
Now that you can use Rock Climb (optional)
Now that have access to the move Rock Climb in the field, we can gain access to some items and fight some trainers around the region.
Route 208
| Items | ||||||||||||
|---|---|---|---|---|---|---|---|---|---|---|---|---|
| ||||||||||||
| Trainers | ||||||||||||||||||||||||||||||||||||||||||
|---|---|---|---|---|---|---|---|---|---|---|---|---|---|---|---|---|---|---|---|---|---|---|---|---|---|---|---|---|---|---|---|---|---|---|---|---|---|---|---|---|---|---|
| ||||||||||||||||||||||||||||||||||||||||||
Veilstone City
| Items | ||||||||||||
|---|---|---|---|---|---|---|---|---|---|---|---|---|
| ||||||||||||
Valor Lakefront
| Items | ||||||||||||||||||||
|---|---|---|---|---|---|---|---|---|---|---|---|---|---|---|---|---|---|---|---|---|
| ||||||||||||||||||||
Route 213
| Items | ||||||||||||||||||||||||||||
|---|---|---|---|---|---|---|---|---|---|---|---|---|---|---|---|---|---|---|---|---|---|---|---|---|---|---|---|---|
| ||||||||||||||||||||||||||||
Route 210 (North)
| Items | ||||||||||||||||
|---|---|---|---|---|---|---|---|---|---|---|---|---|---|---|---|---|
| ||||||||||||||||
| Trainers | |||||||||||||||||
|---|---|---|---|---|---|---|---|---|---|---|---|---|---|---|---|---|---|
| |||||||||||||||||
Route 211 (East)
| Items | ||||||||||||||||
|---|---|---|---|---|---|---|---|---|---|---|---|---|---|---|---|---|
| ||||||||||||||||
Route 216
| Items | ||||||||||||||||||||||||
|---|---|---|---|---|---|---|---|---|---|---|---|---|---|---|---|---|---|---|---|---|---|---|---|---|
| ||||||||||||||||||||||||
| Trainers | ||||||||||||||||||||||||||||||||||||||||||||||||||||||||||||||||||||||||||||||||
|---|---|---|---|---|---|---|---|---|---|---|---|---|---|---|---|---|---|---|---|---|---|---|---|---|---|---|---|---|---|---|---|---|---|---|---|---|---|---|---|---|---|---|---|---|---|---|---|---|---|---|---|---|---|---|---|---|---|---|---|---|---|---|---|---|---|---|---|---|---|---|---|---|---|---|---|---|---|---|---|---|
| ||||||||||||||||||||||||||||||||||||||||||||||||||||||||||||||||||||||||||||||||
Acuity Lakefront
| Items | ||||||||||||
|---|---|---|---|---|---|---|---|---|---|---|---|---|
| ||||||||||||
Now that you have the Icicle Badge, you can climb the walls that have the bits of rock in them with Rock Climb. Pick up the Reaper Cloth before entering Lake Acuity.
Lake Acuity
| Available Pokémon | |||||||||||||||||||||||||||||||||||||||||||||||||||||||||||||||||||||||||||||||||||||||||||||||||||||||||||||||||||||||||||||||||||||||||||||||||||||||||||||||||||||||||||||||||||||||||||||||||||||||||||||||||||||||||||||||||||||||||||||||||||||||||||||||||||||||||||||||||||||||||||||||||||||||||||
|---|---|---|---|---|---|---|---|---|---|---|---|---|---|---|---|---|---|---|---|---|---|---|---|---|---|---|---|---|---|---|---|---|---|---|---|---|---|---|---|---|---|---|---|---|---|---|---|---|---|---|---|---|---|---|---|---|---|---|---|---|---|---|---|---|---|---|---|---|---|---|---|---|---|---|---|---|---|---|---|---|---|---|---|---|---|---|---|---|---|---|---|---|---|---|---|---|---|---|---|---|---|---|---|---|---|---|---|---|---|---|---|---|---|---|---|---|---|---|---|---|---|---|---|---|---|---|---|---|---|---|---|---|---|---|---|---|---|---|---|---|---|---|---|---|---|---|---|---|---|---|---|---|---|---|---|---|---|---|---|---|---|---|---|---|---|---|---|---|---|---|---|---|---|---|---|---|---|---|---|---|---|---|---|---|---|---|---|---|---|---|---|---|---|---|---|---|---|---|---|---|---|---|---|---|---|---|---|---|---|---|---|---|---|---|---|---|---|---|---|---|---|---|---|---|---|---|---|---|---|---|---|---|---|---|---|---|---|---|---|---|---|---|---|---|---|---|---|---|---|---|---|---|---|---|---|---|---|---|---|---|---|---|---|---|---|---|---|---|---|---|---|---|---|---|---|---|---|---|---|---|---|---|---|---|---|---|---|---|---|---|---|---|---|---|---|---|---|---|---|
| |||||||||||||||||||||||||||||||||||||||||||||||||||||||||||||||||||||||||||||||||||||||||||||||||||||||||||||||||||||||||||||||||||||||||||||||||||||||||||||||||||||||||||||||||||||||||||||||||||||||||||||||||||||||||||||||||||||||||||||||||||||||||||||||||||||||||||||||||||||||||||||||||||||||||||
| Items | ||||||||||||
|---|---|---|---|---|---|---|---|---|---|---|---|---|
| ||||||||||||
When you arrive at Lake Acuity, Galactic Commander Jupiter has already defeated Barry and caught Uxie. She leaves while stating that Barry is a weak Trainer. Barry, though upset, states his desire to become stronger. Surf across the lake to the patch of grass in the northeastern corner, where you can pick up TM14 (Blizzard).
Now Fly back to Veilstone City and make sure you're ready for a lot of fighting. It's time to raid Team Galactic's Headquarters!
Veilstone City
Head towards the Team Galactic HQ in the northeast corner of Veilstone City and talk to the lone grunt there, who is angry at you since his Clefairy was taken away after you defeated him before. He claims ignorance about a Storage Key and runs away. Luckily, Looker shows up and states he has the Storage Key with him. He suggests that it is best to enter the HQ through the Galactic Warehouse you were at before. Make sure to select a well-balanced team for this mission, as you are going to need it.
Galactic Warehouse
| Items | ||||||||||||||||||||||||
|---|---|---|---|---|---|---|---|---|---|---|---|---|---|---|---|---|---|---|---|---|---|---|---|---|
| ||||||||||||||||||||||||
| Team Galactic | ||||||||||||||||||||||||||||||||||||||||
|---|---|---|---|---|---|---|---|---|---|---|---|---|---|---|---|---|---|---|---|---|---|---|---|---|---|---|---|---|---|---|---|---|---|---|---|---|---|---|---|---|
| ||||||||||||||||||||||||||||||||||||||||
Head to the metal doors you saw before and Looker will arrive and open them for you. Once that is done, continue down the stairs to the basement of the warehouse. This bottom floor connects to the Team Galactic HQ. Follow the hallway east to the stairs at the end, battling the two grunts.
Team Galactic HQ
| Items | ||||||||||||||||||||||||||||||||||||||||||||||||||||||||||||||||||||||||
|---|---|---|---|---|---|---|---|---|---|---|---|---|---|---|---|---|---|---|---|---|---|---|---|---|---|---|---|---|---|---|---|---|---|---|---|---|---|---|---|---|---|---|---|---|---|---|---|---|---|---|---|---|---|---|---|---|---|---|---|---|---|---|---|---|---|---|---|---|---|---|---|---|
| ||||||||||||||||||||||||||||||||||||||||||||||||||||||||||||||||||||||||
| Team Galactic | ||||||||||||||||||||||||||||||||||||||||||||||||||||||||||||||||||||||||||||||||||||||||||||||||||||||||||||||||||||||||||||||||||||||||||||||||||||||||||||||||||||||||||||||||||||||||||||||||||||||||||||
|---|---|---|---|---|---|---|---|---|---|---|---|---|---|---|---|---|---|---|---|---|---|---|---|---|---|---|---|---|---|---|---|---|---|---|---|---|---|---|---|---|---|---|---|---|---|---|---|---|---|---|---|---|---|---|---|---|---|---|---|---|---|---|---|---|---|---|---|---|---|---|---|---|---|---|---|---|---|---|---|---|---|---|---|---|---|---|---|---|---|---|---|---|---|---|---|---|---|---|---|---|---|---|---|---|---|---|---|---|---|---|---|---|---|---|---|---|---|---|---|---|---|---|---|---|---|---|---|---|---|---|---|---|---|---|---|---|---|---|---|---|---|---|---|---|---|---|---|---|---|---|---|---|---|---|---|---|---|---|---|---|---|---|---|---|---|---|---|---|---|---|---|---|---|---|---|---|---|---|---|---|---|---|---|---|---|---|---|---|---|---|---|---|---|---|---|---|---|---|---|---|---|---|---|---|
| ||||||||||||||||||||||||||||||||||||||||||||||||||||||||||||||||||||||||||||||||||||||||||||||||||||||||||||||||||||||||||||||||||||||||||||||||||||||||||||||||||||||||||||||||||||||||||||||||||||||||||||
1F
Once up the stairs, you'll arrive in the very upper right-hand corner of 1F. After defeating the Galactic Grunt there, use the right warp panel to enter a closed-off area where you will find TM49 (Snatch). Step back onto the panel from whence you came. Afterwards, use the left warp panel to go up to 2F.
2F
From here, use the nearby warp panel to return to 1F.
1F
Ignore the grunt to the right and take the panel to the left, go down the stairs and defeat the Scientist, grab the Dubious Disc, take the second set of stairs to the left and keep going west.
Galactic Warehouse
Grab the Galactic Key, which will allow you to open the locked steel doors, and you will meet a Galactic Grunt who mentions that Cyrus is having a meeting. You can get to it by entering the HQ's main building from Veilstone and using the Galactic Key. You can unlock the nearby door which will allow you to head back easily to the Warehouse's entrance, but let's make a little side trip by backtracking to 2F. Use the stairs to access 3F.
Team Galactic HQ
3F
Defeat the Galactic Grunts and then open the locked door to find TM21 (Frustration). Now head back to the Galactic Warehouse and leave there to return to Veilstone City. It is now time to enter the main building.
Team Galactic HQ (main building)
1F
Use your new Galactic Key to open the locked door and head up to 2F.
2F
You should now be in the middle area of 2F. Simply fight the grunts and then use each of the warp panels. This will earn you two items. Afterwards, use the warp panel that is located by the TVs to reach the meeting hall, where Cyrus is.
Meeting Hall
You will meet up with Looker here and listen to Cyrus giving his speech about how the world is incomplete and the fact that he now has the power to create a new one for Team Galactic's benefit. After he and the grunts leave, Looker leaves to investigate this further. Follow in the direction he went to find another warp panel that will take you to a new area of 2F.
2F
You'll be in the upper-right area of 2F where there are some beds to rest your Pokémon team. Hidden in the right-hand bed is a Poké Doll. Climb the stairs to 3F.
3F
After dealing with two Galactic Grunts you'll find three warp panels here. The upper right one takes you to an area where you can find a Protein. The upper left will get you a Max Elixir, and the lower left is the one you'll need to proceed to an area with stairs up to 4F.
4F
This is where Cyrus's office is located. After you open the locked door, Cyrus will greet you and mention that the new world is actually only for him, since he feels his underlings are just as flawed as the rest of the world. Finding you interesting, he'll challenge you to a battle.
|
||||||||||||||||||||||||||||||||||||||||||||||||||||||||||||||||||||||||||||||||||||||||||||||||||||||||||
| ||||||||||||||||||||||||||||||||||||||||||||||||||||||||||||||||||||||||||||||||||||||||||||||||||||||||||
His team is the same as the previous, except that two of his Pokémon have evolved. His first Pokémon, Sneasel, is easily vulnerable to Fighting-types. His other two Crobat and Honchkrow both are Flying-type and should be easily vulnerable to Rock, Ice and Electric-types. Just remember that Crobat is the faster of the two and may try to confuse your Pokémon with Supersonic, and Honchkrow possesses better physical attack moves that could KO your Pokémon if you are not careful.
Afterwards, Cyrus will give you a Master Ball and then leave. He mentions that if you want to save the Lake Pokémon, you should use the nearby warp panel to get to them. Use that warp panel and you will reach a hallway. At the end is where the Lake Trio are being held. Once you reach that room, where they are, you can overhear a conversation between Charon and Saturn about how Charon is happy with the new world Cyrus will create. Talk to Saturn and he'll challenge you to a battle since, unlike Cyrus, he will not let you roam freely and interfere with their plans.
|
||||||||||||||||||||||||||||||||||||||||||||||||||||||||||||||||||||||||||||||||||||||||||||||||||||||||||
| ||||||||||||||||||||||||||||||||||||||||||||||||||||||||||||||||||||||||||||||||||||||||||||||||||||||||||
Saturn's team is the same as before but at higher levels, so the same tactics you used at Lake Valor should work here. Once you defeat him, Saturn will let you press the switch that will set Azelf, Mesprit, and Uxie free. He mentions that Cyrus crafted a special Red Chain for capturing something on Mt. Coronet.
Return to Cyrus's office and a new pathway will have opened up with a warp panel that will take you to the green warp panel just inside one of the main doors of the Galactic HQ. Take it, exit the building, and heal up at the Pokémon Center.
Your biggest quest now awaits you. You will need a strong Pokémon team with the HM moves Surf, Strength, Rock Smash, and Rock Climb. You should stock up on Super Repels, Moomoo Milks, Revives, and maybe a few Lava Cookies.
Once you are prepared, your next destination is to enter Mt. Coronet from the south entrance. You can either Fly to Oreburgh City and head north, or Hearthome City and head west, but the path from Oreburgh is faster.
|
Platinum walkthrough |
|

|
This article is part of Project Walkthroughs, a Bulbapedia project that aims to write comprehensive step-by-step guides on each Pokémon game. |
