Appendix:Black and White walkthrough/Section 9: Difference between revisions
Pale Prism (talk | contribs) m (→Aha's Pep Quiz) |
|||
| (4 intermediate revisions by 2 users not shown) | |||
| Line 5: | Line 5: | ||
|- align="center" | |- align="center" | ||
! Trainers | ! Trainers | ||
|- | |- | ||
| | | | ||
{| class="expandable" align="center" style="background: #{{white color}}; {{roundy}}; border: 5px solid #{{black color}};" | {| class="expandable" align="center" style="background: #{{white color}}; {{roundy}}; border: 5px solid #{{black color}};" | ||
|- align="center" | |- align="center" | ||
! Normal Trainers | ! Normal Trainers | ||
|- | |- | ||
| | | | ||
{{trainerheader|mountain}} | {{trainerheader|mountain}} | ||
{{catch/div|mountain|Outside the entrance}} | {{catch/div|mountain|Outside the entrance}} | ||
| Line 36: | Line 36: | ||
|- align="center" | |- align="center" | ||
! Season-dependent | ! Season-dependent | ||
|- | |- | ||
| | | | ||
{{trainerheader|mountain}} | {{trainerheader|mountain}} | ||
{{catch/div|mountain|Spring, Summer, Autumn only}} | {{catch/div|mountain|Spring, Summer, Autumn only}} | ||
| Line 53: | Line 53: | ||
|- align="center" | |- align="center" | ||
! Available Pokémon | ! Available Pokémon | ||
|- | |- | ||
| | | | ||
{{catch/header|mountain|seasons=yes}} | {{catch/header|mountain|seasons=yes}} | ||
{{catch/div|mountain|1F, 2F, 3F, B1F}} | {{catch/div|mountain|1F, 2F, 3F, B1F}} | ||
| Line 75: | Line 75: | ||
|- align="center" | |- align="center" | ||
! Items | ! Items | ||
|- | |- | ||
| | | | ||
{{itlisth|mountain}} | {{itlisth|mountain}} | ||
{{catch/div|mountain|3F}} | {{catch/div|mountain|3F}} | ||
| Line 101: | Line 101: | ||
{{Itemlist|Metal Coat|1F; in the interior's southeast cave|Bl=yes|W=yes}} | {{Itemlist|Metal Coat|1F; in the interior's southeast cave|Bl=yes|W=yes}} | ||
{{Itemlist|TM Normal|1F; in the northeast tunnel, west of {{tc|Ace Trainer}} Jordan|Bl=yes|W=yes|display={{TM|90|Substitute}}}} | {{Itemlist|TM Normal|1F; in the northeast tunnel, west of {{tc|Ace Trainer}} Jordan|Bl=yes|W=yes|display={{TM|90|Substitute}}}} | ||
{{Itemlist|Stardust|1F; Main floor, in the north (hidden)|Bl=yes|W=yes}} | |||
{{Itemlist|Iron|1F; Main floor, in the northeast (hidden)|Bl=yes|W=yes}} | |||
{{Itemlist|Rare Candy|1F; Main floor, in the east (hidden)|Bl=yes|W=yes}} | |||
{{itlistfoot|mountain}} | {{itlistfoot|mountain}} | ||
|} | |} | ||
| Line 106: | Line 109: | ||
|- align="center" | |- align="center" | ||
! Layout | ! Layout | ||
|- | |- | ||
| | | | ||
{| class="roundy" style="margin:auto; background: #000; border: 3px solid #{{locationcolor/dark|mountain}}" | {| class="roundy" style="margin:auto; background: #000; border: 3px solid #{{locationcolor/dark|mountain}}" | ||
|- | |- | ||
| Line 124: | Line 127: | ||
! style="background:#{{white color}}" | {{color2|000|Pokémon Black and White Versions|White}} | ! style="background:#{{white color}}" | {{color2|000|Pokémon Black and White Versions|White}} | ||
|- | |- | ||
| colspan="5" style="background:#{{locationcolor/light|mountain}}; {{roundybottom|5px}}" | | | colspan="5" style="background:#{{locationcolor/light|mountain}}; {{roundybottom|5px}}" | | ||
|} | |} | ||
{| class="roundy" style="margin:auto; background: #000; border: 3px solid #{{locationcolor/dark|mountain}}" | {| class="roundy" style="margin:auto; background: #000; border: 3px solid #{{locationcolor/dark|mountain}}" | ||
| Line 138: | Line 141: | ||
! style="background:#{{white color}}" | {{color2|000|Pokémon Black and White Versions|White}} | ! style="background:#{{white color}}" | {{color2|000|Pokémon Black and White Versions|White}} | ||
|- | |- | ||
| colspan="3" style="background:#{{locationcolor/light|mountain}}; {{roundybottom|5px}}" | | | colspan="3" style="background:#{{locationcolor/light|mountain}}; {{roundybottom|5px}}" | | ||
|} | |} | ||
|} | |} | ||
| Line 146: | Line 149: | ||
| '''Spring, Summer, Autumn''' | | '''Spring, Summer, Autumn''' | ||
|- | |- | ||
| | | | ||
===3F=== | ===3F=== | ||
Near the entrance, you run into [[Clay]], who is checking up on the mines. He is concerned because he hasn't seen [[Team Plasma]] lately, and doesn't know the location of their base. He leaves, and [[Cheren]] heads deeper into the mountain. | Near the entrance, you run into [[Clay]], who is checking up on the mines. He is concerned because he hasn't seen [[Team Plasma]] lately, and doesn't know the location of their base. He leaves, and [[Cheren]] heads deeper into the mountain. | ||
| Line 158: | Line 161: | ||
Go west to find an [[Ultra Ball]], then head south past {{tc|Black Belt}} Teppei and (the hidden) {{tc|Worker}} Rich to reach the interior floor. | Go west to find an [[Ultra Ball]], then head south past {{tc|Black Belt}} Teppei and (the hidden) {{tc|Worker}} Rich to reach the interior floor. | ||
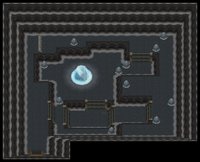
Outside is an empty rest house, a conveniently | Outside is an empty rest house, a conveniently placed vending machine, and two bulldozers. Head south and enter the lowest area. Climb down the staircase to the deepest part of the mountain. The damp cave houses a large [[Ice Rock|ice-covered rock]], and {{TM|91|Flash Cannon}} to the northeast. Climb back up to the central area, and step through the northeast doorway. | ||
Soon you find [[Cheren]] arguing with a [[Team Plasma|Plasma]] grunt. Then a second enters, and tells the first that "that item" has been found, and they should go to the tower. They disappear in a flash, leaving you to take the exit to [[Icirrus City]]. | Soon you find [[Cheren]] arguing with a [[Team Plasma|Plasma]] grunt. Then a second enters, and tells the first that "that item" has been found, and they should go to the tower. They disappear in a flash, leaving you to take the exit to [[Icirrus City]]. | ||
| Line 166: | Line 169: | ||
| '''Winter''' | | '''Winter''' | ||
|- | |- | ||
| | | | ||
===3F=== | ===3F=== | ||
Near the entrance, you run into [[Clay]], who is checking up on the mines. He is concerned because he hasn't seen [[Team Plasma]] lately, and doesn't know the location of their base. He leaves, and [[Cheren]] heads deeper into the mountain. | Near the entrance, you run into [[Clay]], who is checking up on the mines. He is concerned because he hasn't seen [[Team Plasma]] lately, and doesn't know the location of their base. He leaves, and [[Cheren]] heads deeper into the mountain. | ||
| Line 191: | Line 194: | ||
|- align="center" | |- align="center" | ||
! Available Pokémon | ! Available Pokémon | ||
|- | |- | ||
| | | | ||
{{catch/header|{{#switch: {{#time: F}}|April|August|December=snow|land}}|seasons=yes}} | {{catch/header|{{#switch: {{#time: F}}|April|August|December=snow|land}}|seasons=yes}} | ||
{{catch/div|lake|Puddles}} | {{catch/div|lake|Puddles}} | ||
| Line 208: | Line 211: | ||
|- align="center" | |- align="center" | ||
! Items | ! Items | ||
|- | |- | ||
| | | | ||
{{itlisth|ice}} | {{itlisth|ice}} | ||
{{Itemlist|TM Ice|Poké Mart, {{pdollar}}70,000|Bl=yes|W=yes|display={{TM|14|Blizzard}}}} | {{Itemlist|TM Ice|Poké Mart, {{pdollar}}70,000|Bl=yes|W=yes|display={{TM|14|Blizzard}}}} | ||
| Line 244: | Line 247: | ||
! style="background: #{{ice color light}}; {{roundytr|5px}};" | Price | ! style="background: #{{ice color light}}; {{roundytr|5px}};" | Price | ||
|- align="center" style="background: #FFF; spacing: 5px;" | |- align="center" style="background: #FFF; spacing: 5px;" | ||
| | | | ||
| All [[Shard]]s and [[Gem]]s | | All [[Shard]]s and [[Gem]]s | ||
| {{pdollar}}200 | | {{pdollar}}200 | ||
| Line 307: | Line 310: | ||
===Aha's Pep Quiz=== | ===Aha's Pep Quiz=== | ||
The home of Aha, Wye, and Ditoh is east of the Gym. The mother, Wye, pulls you into the game the moment you step inside. The father, Aha, will ask you a question, while Wye gives hints to the answer. A correct answer will earn you an [[Antidote]], while an incorrect one will get you a [[Paralyze|Parlyz Heal]] instead. You can take the quiz once per day. | The home of Aha, Wye, and Ditoh is east of the Gym. The mother, Wye, pulls you into the game the moment you step inside. The father, Aha, will ask you a question, while Wye gives hints to the answer. A correct answer will earn you an [[Antidote]], while an incorrect one will get you a [[Paralyze Heal|Parlyz Heal]] instead. You can take the quiz once per day. | ||
===Icirrus Gym=== | ===Icirrus Gym=== | ||
| Line 319: | Line 322: | ||
{| align="center" | {| align="center" | ||
|- align="center" valign="top" | |- align="center" valign="top" | ||
| | | | ||
{| align="center" style="background: #{{ice color}}; {{roundy}}; border: 5px solid #{{ice color light}};" | {| align="center" style="background: #{{ice color}}; {{roundy}}; border: 5px solid #{{ice color light}};" | ||
|- align="center" | |- align="center" | ||
! Icirrus Gym <br> [[Image:Freeze Badge.png|35px|The Freeze Badge]] <br><br> | ! Icirrus Gym <br> [[Image:Freeze Badge.png|35px|The Freeze Badge]] <br><br> | ||
|- | |- | ||
| | | | ||
{| align="center" class="expandable" style="background: #{{ice color}}; {{roundy}}; border: 5px solid #{{ice color light}};" | {| align="center" class="expandable" style="background: #{{ice color}}; {{roundy}}; border: 5px solid #{{ice color light}};" | ||
|- align="center" | |- align="center" | ||
! Trainers | ! Trainers | ||
|- | |- | ||
| | | | ||
{{trainerheader|ice}} | {{trainerheader|ice}} | ||
{{trainerentry|Spr BW Black Belt.png|Black Belt|Grant|1120|3|613|Cubchoo|♂|35|None|615|Cryogonal||35|None|613|Cubchoo|♂|35|None}} | {{trainerentry|Spr BW Black Belt.png|Black Belt|Grant|1120|3|613|Cubchoo|♂|35|None|615|Cryogonal||35|None|613|Cubchoo|♂|35|None}} | ||
| Line 413: | Line 416: | ||
|- align="center" | |- align="center" | ||
! Trainers | ! Trainers | ||
|- | |- | ||
| | | | ||
{| class="expandable" align="center" style="background: #{{white color}}; {{roundy}}; border: 5px solid #{{black color}};" | {| class="expandable" align="center" style="background: #{{white color}}; {{roundy}}; border: 5px solid #{{black color}};" | ||
|- align="center" | |- align="center" | ||
! Outside | ! Outside | ||
|- | |- | ||
| | | | ||
{{trainerheader|{{#switch: {{#time: F}}|April|August|December=snow|forest}}}} | {{trainerheader|{{#switch: {{#time: F}}|April|August|December=snow|forest}}}} | ||
{{trainerentry|Spr BW Ace Trainer M.png|Ace Trainer|Jesse|2160|2|583|Vanillish|♂|36|None|596|Galvantula|♂|36|None}} | {{trainerentry|Spr BW Ace Trainer M.png|Ace Trainer|Jesse|2160|2|583|Vanillish|♂|36|None|596|Galvantula|♂|36|None}} | ||
| Line 429: | Line 432: | ||
|- align="center" | |- align="center" | ||
! Inside | ! Inside | ||
|- | |- | ||
| | | | ||
{{trainerheader|ruins}} | {{trainerheader|ruins}} | ||
{{catch/div|ruins|4F}} | {{catch/div|ruins|4F}} | ||
| Line 456: | Line 459: | ||
|- align="center" | |- align="center" | ||
! Available Pokémon | ! Available Pokémon | ||
|- | |- | ||
| | | | ||
{| class="expandable" align="center" style="background: #{{white color}}; {{roundy}}; border: 5px solid #{{black color}};" | {| class="expandable" align="center" style="background: #{{white color}}; {{roundy}}; border: 5px solid #{{black color}};" | ||
|- align="center" | |- align="center" | ||
! Entrance | ! Entrance | ||
|- | |- | ||
| | | | ||
{{catch/header|{{#switch: {{#time: F}}|April|August|December=snow|forest}}|seasons=yes}} | {{catch/header|{{#switch: {{#time: F}}|April|August|December=snow|forest}}|seasons=yes}} | ||
{{catch/entry5|520|Tranquill|yes|yes|no|Grass|30-32|30%|30%|30%|-|type1=Normal|type2=Flying}} | {{catch/entry5|520|Tranquill|yes|yes|no|Grass|30-32|30%|30%|30%|-|type1=Normal|type2=Flying}} | ||
| Line 487: | Line 490: | ||
|- align="center" | |- align="center" | ||
! Outside | ! Outside | ||
|- | |- | ||
| | | | ||
{{catch/header|{{#switch: {{#time: F}}|April|August|December=snow|forest}}|seasons=yes}} | {{catch/header|{{#switch: {{#time: F}}|April|August|December=snow|forest}}|seasons=yes}} | ||
{{catch/entry5|520|Tranquill|yes|yes|no|Grass|31-32|30%|30%|30%|-|type1=Normal|type2=Flying}} | {{catch/entry5|520|Tranquill|yes|yes|no|Grass|31-32|30%|30%|30%|-|type1=Normal|type2=Flying}} | ||
| Line 524: | Line 527: | ||
|- align="center" | |- align="center" | ||
! Inside | ! Inside | ||
|- | |- | ||
| | | | ||
{{catch/header|ruins|seasons=yes}} | {{catch/header|ruins|seasons=yes}} | ||
{{catch/entry5|622|Golett|yes|yes|no|1F|30-32|all=50%|type1=Ground|type2=Ghost}} | {{catch/entry5|622|Golett|yes|yes|no|1F|30-32|all=50%|type1=Ground|type2=Ghost}} | ||
| Line 537: | Line 540: | ||
|- align="center" | |- align="center" | ||
! Items | ! Items | ||
|- | |- | ||
| | | | ||
{{itlisth|ruins}} | {{itlisth|ruins}} | ||
{{catch/div|forest|Entrance}} | {{catch/div|forest|Entrance}} | ||
| Line 566: | Line 569: | ||
====4F==== | ====4F==== | ||
When you reach the fourth floor, [[Brycen]] and [[Cheren]] are holding off a large group of [[Team Plasma]] members. Brycen tells you to go on ahead while they keep the criminals busy. Head to the next floor and put a hurting on the five Plasma grunts that try to stop you. | When you reach the fourth floor, [[Brycen]] and [[Cheren]] are holding off a large group of [[Team Plasma]] members. Brycen tells you to go on ahead while they keep the criminals busy. Head to the next floor and put a hurting on the five Plasma grunts that try to stop you. Grab the Dragon Fang in the northeast corner, and take the exit to the north. | ||
====5F==== | ====5F==== | ||
Latest revision as of 23:03, 13 June 2024
Twist Mountain
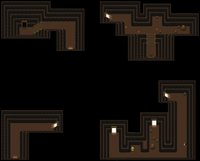
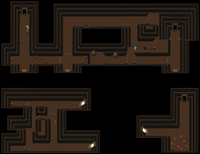
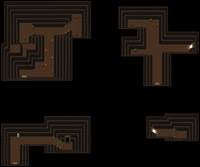
Twist Mountain is a mountain rich in valuable minerals, and the multitude of tunnels make it easy for Workers to extract them from the surrounding rock. The tunnels are spread out over four floors, but you cannot explore the entire area on your first visit. The mountain is prone to heavy snow in the winter months, blocking some tunnels and revealing others.
| [show]Trainers |
|---|
| [show]Available Pokémon |
|---|
| [show]Items |
|---|
| [show]Layout |
|---|
| [show]Spring, Summer, Autumn |
| [show]Winter |
Icirrus City
When you step out of the mountain, Cedric Juniper comes to talk to you. According to him, the Dragonspiral Tower is the oldest building in Unova. Stories claim that it is where legendary Pokémon came to life, or where they remain in deep slumber. He leaves to investigate the tower, north of the city.
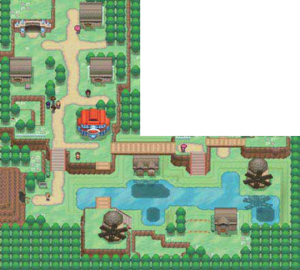
Icirrus City's wetlands occupy the area to the south, while the buildings are situated on higher, stable ground. The Pokémon Fan Club is located here, and you can win prizes for answering Aha's quizzes.
| [show]Available Pokémon |
|---|
| [show]Items |
|---|
The ore collector
The old gentleman in the Pokémon Center is interested in collecting any stones, gems, and minerals you might have, and is willing to pay double the normal price for them.
| Items | [show]Price | |
|---|---|---|
Pokémon Fan Club
Talk to the chairman and show him a well-trained Pokémon to get an item. Depending on the number of levels grown, you can obtain up to three different items. A Pokémon that has grown 25-49 levels will earn you an Exp. Share, 50-98 levels will get you a Cleanse Tag, and a Pokémon that's grown 99 levels will earn you a King's Rock.
The girl in the Fan Club will offer to check your Pokémon's mood. Choose a Pokémon to show her, and she will tell you how friendly it is toward you.
Aha's Pep Quiz
The home of Aha, Wye, and Ditoh is east of the Gym. The mother, Wye, pulls you into the game the moment you step inside. The father, Aha, will ask you a question, while Wye gives hints to the answer. A correct answer will earn you an Antidote, while an incorrect one will get you a Parlyz Heal instead. You can take the quiz once per day.
Icirrus Gym
|
||||
The Icirrus Gym specializes in the Ice-type. Every Pokémon in the Gym is a pure Ice-type, and can be melted with Fire moves, shattered with Fighting attacks, or smashed into dust with Rock and Steel moves. TM moves like Brick Break or Flash Cannon are good to use here.
Go north from the entrance to curved spinner, which redirects you to the blue tile to the west. Slide to the right and battle Black Belt Grant. Step on the red switch to rotate the spinner, then bounce off of it again to reach the northeast. Fight Battle Girl Miriam, then slide east over the first jump. Battle Black Belt Kendrew and slide east, north, east, and north again to reach Battle Girl Mikiko. Head southeast and loop around to the spinner, which redirects you to the blue tile in the southeast corner. Go north to step on the switch, pass by Mikiko again, and bounce off of the spinner to reach the northwest. Slide west over the jump to fight Battle Girl Chandra, then bounce off of the spinner twice. Go north to fight Black Belt Thomas, rotate the spinner, and slide north. Brycen waits at the top of the staircase.
|
Brycen awards you the Freeze Badge, which that all Pokémon up to level 80 will obey you. He also gives you TM79 (Frost Breath) as a prize. Take the slide to the left for a shortcut to the entrance.
Outside, Cheren and Bianca are waiting for you. While they're talking, Brycen exits the Gym and confronts the Shadow Triad, who claim that Ghetsis wants you to visit Dragonspiral Tower before disappearing again. Follow Brycen and Cheren north to reach the tower.
Dragonspiral Tower
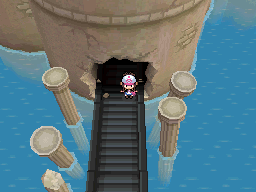
Dragonspiral Tower is said to be the oldest structure in the Unova region. Stories claim that the legendary dragon is waiting on the top floor for the person who pursues truths or ideals.
Cedric Juniper is waiting at the entrance to the tower. Bianca introduces herself, and he tells you that he saw Brycen and Cheren chase after a large group of Team Plasma members that broke through the tower wall. Juniper gives you an Old Gateau to help you climb the tower.
| [show]Trainers |
|---|
| [show]Available Pokémon |
|---|
| [show]Items |
|---|
2F
On the first floor, you can hear something on a rampage further up the tower. The second floor is littered with broken columns; these act as a bridge if you don't have a Pokémon with Strength. Don't miss the Hyper Potion and the Stardust.
3F
The third floor is covered with one-way launch ramps. Jump to the south, then take the middle ramp west, then north to reach a Shiny Stone. Go south and take the southernmost ramp west to the winding staircase.
4F
When you reach the fourth floor, Brycen and Cheren are holding off a large group of Team Plasma members. Brycen tells you to go on ahead while they keep the criminals busy. Head to the next floor and put a hurting on the five Plasma grunts that try to stop you. Grab the Dragon Fang in the northeast corner, and take the exit to the north.
5F
The fifth floor is made up of four large circular paths around the central column. Head to the right to find a Star Piece, then a Stardust. Walk around the column and jump the ramp to reach a Revive, then go left to reach the stairs.
6F
When you reach the sixth floor, you hear more of the rampage above. Giallo of the Seven Sages is standing here, speaking to four of the grunts. He commands them to attack, and you have to defeat all four in a row before you can advance.
7F
On the top floor, N is befriending the legendary Pokémon ZekromB / ReshiramW. The dragon recognizes N as a hero. N tells you that if you want to stop him, you must become a hero as well. He tells you to look for the other dragon, and flies off with his new ally.
When you return to the entrance, Alder arrives. He tells you that the Relic Castle may hold a clue about the other legendary dragon. Fly back to Nimbasa City, and trek through Route 4 to reach the desert.
|
Black and White walkthrough |
|

|
This article is part of Project Walkthroughs, a Bulbapedia project that aims to write comprehensive step-by-step guides on each Pokémon game. |


