Pokémon Tower: Difference between revisions
(→Differences among generations: um... who put Crystal only? Both of these channels are on the Kanto Radio in Gold and Silver as well.) |
m (→Intro) |
||
| (237 intermediate revisions by 89 users not shown) | |||
| Line 1: | Line 1: | ||
{{search|location|the Mystery Dungeon mechanic|Pokémon Tower (Mystery Dungeon)}} | |||
{{Infobox location | {{Infobox location | ||
|image= | |image=Lavender Tower Exterior LGPE.png | ||
|image_size= | |image_size=300 | ||
|type= | |type=ghost | ||
|mapdesc=A tower that houses the graves of countless <sc>Pok</sc>é<sc>mon</sc>. Many people visit it daily to pay their respects to the fallen.{{sup/3|FRLG}} | |||
|slogan=Becalm the Spirits of Pokémon | |||
|location_name=Pokémon Tower | |location_name=Pokémon Tower | ||
|japanese_name=ポケモンタワー | |japanese_name=ポケモンタワー | ||
| Line 9: | Line 12: | ||
|location=[[Lavender Town]] | |location=[[Lavender Town]] | ||
|region=Kanto | |region=Kanto | ||
|generation={{Gen|I}}, {{Gen|III}}, | |generation={{Gen|I}}, {{Gen|II}}, {{Gen|III}}, {{Gen|IV}}, {{Gen|VII}} | ||
|map=Kanto Lavender Town Map.png | |map=Kanto Lavender Town Map.png | ||
}} | }} | ||
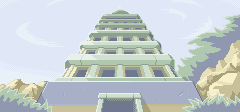
The '''Pokémon Tower''' (Japanese: '''ポケモンタワー''' ''Pokémon Tower'') is a seven-story tower located in [[Lavender Town]] in the [[Kanto]] [[region]]. It is a burial ground for Pokémon. | |||
The | ==Role== | ||
[[File:FL Pokemon Tower.png|thumb|240px|Location Preview of Pokémon Tower in Generation III]] | |||
The Pokémon Tower houses hundreds of graves of deceased {{OBP|Pokémon|species}} in all of its seven floors. Many people visit the building daily to pay their respects to the fallen. On all floors other than the first two, though, the possibility of being attacked by [[wild Pokémon]] is present. In [[Generation II|Generations II]] and {{gen|IV}}, the tower was converted into the '''Lavender Radio Tower''', undergoing a similar transformation to the [[Kanto Power Plant]] to the north. | |||
Aside from graves, the tower is home to wild {{p|Cubone}} as well as many {{type|Ghost}} Pokémon. In [[Generation I|Generations I]], {{gen|III}}, and {{gen|VII}}, [[Team Rocket]] tried to steal the Cubone to sell their valuable skulls. In the process, a mother {{p|Marowak}} that was protecting her Cubone child was killed. The ghost of the {{OBP|Marowak|ghost|mother Marowak}} haunted the tower until the player was able to knock it out{{sup/1|RBY}}{{sup/3|FRLG}}/her child climbed the tower and reunited with her{{sup/7|PE}}, setting her spirit free. [[Mr. Fuji]] attempted to confront the poachers, but ended up being taken hostage himself and required the help of the player to be released. As a show of gratitude, Mr. Fuji gives the player the [[Poké Flute]]. | |||
{{ | The wild Pokémon in the tower appear disguised as {{OBP|ghost|Pokémon Tower}}s, although their disguise can be revealed by using a [[Silph Scope]]. Any Pokémon who attempts to fight a ghost that has not been revealed by the [[Silph Scope]] will be "too scared to move." In Generation VII, the ghosts are not battled normally; touching one instead returns the player to the first floor of the tower. | ||
{{ | |||
{{ | A special spot on the fifth floor has been made into a wild Pokémon-free healing area. In the Generation I games, the Channeler next to it mentions it is related to white magic. This was removed in the later games. | ||
{{ | |||
{{ | In Generation I, it is possible to exploit {{DL|List of battle glitches in Generation I|Ghost Marowak bypassing|an oversight}} that allows the {{player}} to skip the sequence with the ghost Marowak by using a [[Poké Doll]], making it possible to progress without obtaining the [[Silph Scope]] first. | ||
{{ | |||
{{ | ==Slogans== | ||
===As Pokémon Tower=== | |||
"May the Souls of Pokémon Rest Easy"{{sup/1|RBY}}, "Becalm the Spirits of Pokémon"{{sup/3|FRLG}}{{sup/7|PE}} | |||
===As Radio Tower=== | |||
"Your Favorite Programs On-Air Around the Clock!"{{sup/2|GSC}}, "Your Best-Loved Shows On-Air Around the Clock!"{{sup/4|HGSS}} | |||
==Items== | ==Items== | ||
{{itlisth| | {{itlisth|ghost}} | ||
{{Itemlist| | {{Itemlist|Clothing Trunk|1F, from the old lady|LP=yes|LE=yes|display={{DL|List of clothing in Pokémon: Let's Go, Pikachu! and Let's Go, Eevee!|Formal Set}}}} | ||
{{Itemlist| | {{itemlist|X Attack|2F, northeast of staircase to 3F|LP=yes|LE=yes}} | ||
{{Itemlist| | {{Itemlist|Elixir|2F, southwest corner|LP=yes|LE=yes}} | ||
{{Itemlist| | {{Itemlist|Pearl|2F, on the easternmost tombstone against the southern wall ''(hidden)'' (daily)|LP=yes|LE=yes|display={{i|Pearl}}}} | ||
{{Itemlist| | {{Itemlist|Candy Yellow|2F, reward for defeating {{tc|Coach Trainer}} Holly|LP=yes|display={{DL|Candy|Pikachu Candy}} ×5}} | ||
{{Itemlist| | {{Itemlist|Candy Brown|2F, reward for defeating {{tc|Coach Trainer}} Holly|LE=yes|display={{DL|Candy|Eevee Candy}} ×5}} | ||
{{Itemlist| | {{Itemlist|Escape Rope|3F, in the north area of the floor|R=yes|B=yes|Y=yes|FR=yes|LG=yes}} | ||
{{Itemlist| | {{Itemlist|Awakening|3F, against the northern wall|LP=yes|LE=yes}} | ||
{{Itemlist| | {{Itemlist|Super Potion|3F, in the middle of the floor|LP=yes|LE=yes}} | ||
{{Itemlist| | {{Itemlist|Star Piece|3F, in the northeast corner of the floor ''(hidden)'' (daily)|LP=yes|LE=yes}} | ||
{{Itemlist| | {{Itemlist|Elixir|4F, southeast of the center of the floor|R=yes|B=yes|Y=yes|FR=yes|LG=yes}} | ||
{{Itemlist| | {{Itemlist|Escape Rope|4F, in the middle of a ring of tombstones near the stairs to 3F|LP=yes|LE=yes}} | ||
{{Itemlist|Soothe Bell| | {{Itemlist|Full Heal|4F, north of the stairs to 3F|LP=yes|LE=yes}} | ||
{{itlistfoot| | {{Itemlist|Awakening|4F, southwest of the center of the floor|R=yes|B=yes|Y=yes|FR=yes|LG=yes}} | ||
{{Itemlist|TM Psychic VI|4F, southwest of the center of the floor|LP=yes|LE=yes|display={{TM|04|Teleport}}}} | |||
{{Itemlist|Super Potion|4F, in the northeast corner of the floor ''(hidden)'' (daily)|LP=yes|LE=yes}} | |||
{{Itemlist|HP Up|4F, in the south area of the floor|R=yes|B=yes|Y=yes}} | |||
{{Itemlist|Great Ball|4F, in the south area of the floor|FR=yes|LG=yes}} | |||
{{Itemlist|Elixer|sprite=Bag Elixir Sprite|5F, one square east and three squares south of the west staircase ''(hidden)''|R=yes|B=yes|Y=yes|display=[[Elixir|Elixer]]}} | |||
{{Itemlist|Big Mushroom|5F, one square north and four squares west of {{tc|Channeler}} Ruth ''(hidden)''|FR=yes|LG=yes}} | |||
{{Itemlist|Cleanse Tag|5F, in the center of the healing area|FR=yes|LG=yes}} | |||
{{Itemlist|Nugget|5F, in the southwest area of the floor|R=yes|B=yes|Y=yes|FR=yes|LG=yes}} | |||
{{Itemlist|Nugget|5F, in the northwest corner|LP=yes|LE=yes}} | |||
{{Itemlist|Ice Stone|5F, in the southwest corner|LP=yes|LE=yes}} | |||
{{Itemlist|Big Pearl|5F, on the tombstone in the southeast corner ''(hidden)'' (daily)|LP=yes|LE=yes}} | |||
{{Itemlist|X Accuracy|6F, southwest of the stairs to 5F|R=yes|B=yes|Y=yes|FR=yes|LG=yes}} | |||
{{Itemlist|Revive|6F, south of the stairs to 5F|LP=yes|LE=yes}} | |||
{{Itemlist|Ultra Ball|6F, north of the stairs to 5F|LP=yes|LE=yes|display=[[Ultra Ball]] ×3}} | |||
{{Itemlist|Hyper Potion|6F, in the northwest corner|LP=yes|LE=yes}} | |||
{{Itemlist|PP Up|6F, in a corner on the wall, south of the northwest corner ''(hidden)'' (daily)|LP=yes|LE=yes}} | |||
{{Itemlist|Rare Candy|6F, in the west area of the floor|R=yes|B=yes|Y=yes|FR=yes|LG=yes}} | |||
{{Itemlist|Rare Candy|6F, west of the stairs to 7F (requires [[Silph Scope]])|LP=yes|LE=yes}} | |||
{{Itemlist|Soothe Bell|7F, where [[Mr. Fuji]] was standing ''({{tt|hidden|Requires using the Itemfinder on the spot, causing the item to be automatically obtained}})'' (requires [[Silph Scope]])|FR=yes|LG=yes}} | |||
{{Itemlist|None|sprite=Pokégear Icon|Gift from the radio station manager after restoring power|G=yes|S=yes|C=yes|HG=yes|SS=yes|display=[[Pokégear#Radio|EXPN Card]]}} | |||
{{itlistfoot|ghost}} | |||
===Walking Pokémon=== | |||
{{itlisth|ghost}} | |||
{{Itemlist|Pearl|display={{i|Pearl}}|4F, Infrequently found by the {{player}}'s {{pkmn2|walking}} {{type|Ghost}} Pokémon near the stairs to 3F |LP=yes|LE=yes}} | |||
{{itlistfoot|ghost}} | |||
==Pokémon== | ==Pokémon== | ||
===Generation I=== | ===Generation I=== | ||
{{catch/header| | {{catch/header|ghost|no}} | ||
{{Catch/div| | {{Catch/div|ghost|3F}} | ||
{{catch/entry1|092|Gastly|yes|yes|no|3F|18-24|90%|type1=ghost|type2=poison}} | {{catch/entry1|092|Gastly|yes|yes|no|3F|18-24|90%|type1=ghost|type2=poison}} | ||
{{catch/entry1|092|Gastly|no|no|yes|3F|18-25|95%|type1=ghost|type2=poison}} | {{catch/entry1|092|Gastly|no|no|yes|3F|18-25|95%|type1=ghost|type2=poison}} | ||
{{catch/entry1|093|Haunter|yes|yes|no|3F|25|1%|type1=ghost|type2=poison}} | {{catch/entry1|093|Haunter|yes|yes|no|3F|25|1%|type1=ghost|type2=poison}} | ||
{{catch/entry1|093|Haunter|no|no|yes|3F|20 | {{catch/entry1|093|Haunter|no|no|yes|3F|20, 25|5%|type1=ghost|type2=poison}} | ||
{{Catch/div| | {{catch/entry1|104|Cubone|yes|yes|no|3F|20, 22|9%|type1=ground}} | ||
{{Catch/div|ghost|4F}} | |||
{{catch/entry1|092|Gastly|yes|yes|no|4F|18-24|86%|type1=ghost|type2=poison}} | {{catch/entry1|092|Gastly|yes|yes|no|4F|18-24|86%|type1=ghost|type2=poison}} | ||
{{catch/entry1|092|Gastly|no|no|yes|4F|18-25|95%|type1=ghost|type2=poison}} | {{catch/entry1|092|Gastly|no|no|yes|4F|18-25|95%|type1=ghost|type2=poison}} | ||
{{catch/entry1|093|Haunter|yes|yes|no|4F|25|5%|type1=ghost|type2=poison}} | {{catch/entry1|093|Haunter|yes|yes|no|4F|25|5%|type1=ghost|type2=poison}} | ||
{{catch/entry1|093|Haunter|no|no|yes|4F|20 | {{catch/entry1|093|Haunter|no|no|yes|4F|20, 25|5%|type1=ghost|type2=poison}} | ||
{{Catch/div| | {{catch/entry1|104|Cubone|yes|yes|no|4F|20, 22|9%|type1=ground}} | ||
{{Catch/div|ghost|5F}} | |||
{{catch/entry1|092|Gastly|yes|yes|no|5F|18-24|86%|type1=ghost|type2=poison}} | {{catch/entry1|092|Gastly|yes|yes|no|5F|18-24|86%|type1=ghost|type2=poison}} | ||
{{catch/entry1|092|Gastly|no|no|yes|5F|21-27|90%|type1=ghost|type2=poison}} | {{catch/entry1|092|Gastly|no|no|yes|5F|21-27|90%|type1=ghost|type2=poison}} | ||
{{catch/entry1|104|Cubone|yes|yes|no|5F|20 | {{catch/entry1|093|Haunter|yes|yes|no|5F|25|5%|type1=ghost|type2=poison}} | ||
{{catch/entry1|093|Haunter|no|no|yes|5F|22, 27|5%|type1=ghost|type2=poison}} | |||
{{catch/entry1|104|Cubone|yes|yes|no|5F|20, 22|9%|type1=ground}} | |||
{{catch/entry1|104|Cubone|no|no|yes|5F|20|5%|type1=ground}} | {{catch/entry1|104|Cubone|no|no|yes|5F|20|5%|type1=ground}} | ||
{{Catch/div|ghost|6F}} | |||
{{catch/entry1|092|Gastly|yes|yes|no|6F|19-24|85%|type1=ghost|type2=poison}} | |||
{{Catch/div| | |||
{{catch/entry1|092|Gastly|yes|yes|no|6F| | |||
{{catch/entry1|092|Gastly|no|no|yes|6F|21-27|90%|type1=ghost|type2=poison}} | {{catch/entry1|092|Gastly|no|no|yes|6F|21-27|90%|type1=ghost|type2=poison}} | ||
{{catch/entry1|104|Cubone|yes|yes|no|6F| | {{catch/entry1|093|Haunter|yes|yes|no|6F|26, 28|6%|type1=ghost|type2=poison}} | ||
{{catch/entry1|093|Haunter|no|no|yes|6F|22, 27|5%|type1=ghost|type2=poison}} | |||
{{catch/entry1|104|Cubone|yes|yes|no|6F|22, 24|9%|type1=ground}} | |||
{{catch/entry1|104|Cubone|no|no|yes|6F|20|5%|type1=ground}} | {{catch/entry1|104|Cubone|no|no|yes|6F|20|5%|type1=ground}} | ||
{{Catch/div|ghost|7F}} | |||
{{Catch/div| | |||
{{catch/entry1|092|Gastly|yes|yes|no|7F|20-24|75%|type1=ghost|type2=poison}} | {{catch/entry1|092|Gastly|yes|yes|no|7F|20-24|75%|type1=ghost|type2=poison}} | ||
{{catch/entry1|092|Gastly|no|no|yes|7F|23-29|90%|type1=ghost|type2=poison}} | {{catch/entry1|092|Gastly|no|no|yes|7F|23-29|90%|type1=ghost|type2=poison}} | ||
{{catch/entry1|093|Haunter|yes|yes|no|7F|28 | {{catch/entry1|093|Haunter|yes|yes|no|7F|28, 30|15%|type1=ghost|type2=poison}} | ||
{{catch/entry1|093|Haunter|no|no|yes|7F|24 | {{catch/entry1|093|Haunter|no|no|yes|7F|24, 29|5%|type1=ghost|type2=poison}} | ||
{{catch/entry1|104|Cubone|yes|yes|no|7F|22 | {{catch/entry1|104|Cubone|yes|yes|no|7F|22, 24|10%|type1=ground}} | ||
{{catch/entry1|104|Cubone|no|no|yes|7F|24|5%|type1=ground}} | {{catch/entry1|104|Cubone|no|no|yes|7F|24|5%|type1=ground}} | ||
{{catch/footer|ghost}} | |||
{{catch/footer| | |||
===Generation III=== | ===Generation III=== | ||
{{catch/header| | {{catch/header|ghost|no}} | ||
{{Catch/div| | {{Catch/div|ghost|3F}} | ||
{{catch/entryfl|092|Gastly|yes|yes|3F|13-19|90%|type1=ghost|type2=poison}} | {{catch/entryfl|092|Gastly|yes|yes|3F|13-19|90%|type1=ghost|type2=poison}} | ||
{{catch/entryfl|093|Haunter|yes|yes|3F|20|1%|type1=ghost|type2=poison}} | {{catch/entryfl|093|Haunter|yes|yes|3F|20|1%|type1=ghost|type2=poison}} | ||
{{catch/entryfl|104|Cubone|yes|yes|3F|15, 17|9%|type1=ground}} | |||
{{Catch/div|ghost|4F-5F}} | |||
{{catch/entryfl|104|Cubone|yes|yes| | {{catch/entryfl|092|Gastly|yes|yes|4F-5F|13-19|86%|type1=ghost|type2=poison}} | ||
{{catch/entryfl|093|Haunter|yes|yes|4F-5F|20|5%|type1=ghost|type2=poison}} | |||
{{Catch/div| | {{catch/entryfl|104|Cubone|yes|yes|4F-5F|15, 17|9%|type1=ground}} | ||
{{catch/entryfl|092|Gastly|yes|yes|4F|13-19|86%|type1=ghost|type2=poison}} | {{Catch/div|ghost|6F}} | ||
{{catch/entryfl| | {{catch/entryfl|092|Gastly|yes|yes|6F|14-19|85%|type1=ghost|type2=poison}} | ||
{{catch/entryfl| | {{catch/entryfl|093|Haunter|yes|yes|6F|21, 23|6%|type1=ghost|type2=poison}} | ||
{{Catch/div| | {{catch/entryfl|104|Cubone|yes|yes|6F|17, 19|9%|type1=ground}} | ||
{{catch/entryfl|092|Gastly|yes|yes|6F| | {{Catch/div|ghost|7F}} | ||
{{catch/entryfl| | |||
{{catch/entryfl| | |||
{{Catch/div| | |||
{{catch/entryfl|092|Gastly|yes|yes|7F|15-19|75%|type1=ghost|type2=poison}} | {{catch/entryfl|092|Gastly|yes|yes|7F|15-19|75%|type1=ghost|type2=poison}} | ||
{{catch/entryfl|093|Haunter|yes|yes|7F|23 | {{catch/entryfl|093|Haunter|yes|yes|7F|23, 25|15%|type1=ghost|type2=poison}} | ||
{{catch/entryfl|104|Cubone|yes|yes|7F|17 | {{catch/entryfl|104|Cubone|yes|yes|7F|17, 19|10%|type1=ground}} | ||
{{catch/div| | {{catch/footer|ghost}} | ||
{{catch/ | |||
{{ | ===Generation VII=== | ||
{{Catch/header|ghost|no}} | |||
{{Catch/div|ghost|3F-4F}} | |||
{{Catch/entrype|041|Zubat|yes|yes|3F-4F|27-32|5%|type1=Poison|type2=Flying}} | |||
{{Catch/entrype|042|Golbat|yes|yes|3F-4F|27-32|5%|type1=Poison|type2=Flying}} | |||
{{Catch/entrype|092|Gastly|yes|yes|3F-4F|27-32|75%|type1=Ghost|type2=Poison}} | |||
{{Catch/entrype|093|Haunter|yes|yes|3F-4F|27-32|5%|type1=Ghost|type2=Poison}} | |||
{{Catch/entrype|104|Cubone|yes|yes|3F-4F|27-32|10%|type1=Ground}} | |||
{{Catch/div|ghost|5F-6F}} | |||
{{Catch/entrype|041|Zubat|yes|yes|5F-6F|27-32|5%|type1=Poison|type2=Flying}} | |||
{{Catch/entrype|042|Golbat|yes|yes|5F-6F|27-32|5%|type1=Poison|type2=Flying}} | |||
{{Catch/entrype|092|Gastly|yes|yes|5F-6F|27-32|70%|type1=Ghost|type2=Poison}} | |||
{{Catch/entrype|093|Haunter|yes|yes|5F-6F|27-32|10%|type1=Ghost|type2=Poison}} | |||
{{Catch/entrype|104|Cubone|yes|yes|5F-6F|27-32|10%|type1=Ground}} | |||
{{catch/div|ghost|Rare Spawns}} | |||
{{Catch/entrype|113|Chansey|yes|yes|3F-6F|27-32|-}} | |||
{{Catch/footer|ghost|2}} | |||
==Special encounters== | |||
===Generation I=== | |||
A {{OBP|ghost|Pokémon Tower}} is encountered on 6F as part of the story. The [[Silph Scope]] must be in the bag in order to reveal its identity as a {{OBP|Marowak|ghost}}. [[Poké Ball]]s can be thrown, but will always fail. It must be defeated in order to progress. If run from, it respawns immediately without leaving the area. | |||
If a [[Poké Doll]] is used to flee from battle, the game will consider it defeated, allowing access to 7F. | |||
{| | |||
!Red, Green, and Blue | |||
!Yellow | |||
|- style="vertical-align:top" | |||
|{{Pokémon/1 | |||
|game=Blue | |||
|ndex=105 | |||
|pokemon=Marowak | |||
|level=30 | |||
|type1=Ground | |||
|move1=Bone Club|move1type=Ground | |||
|move2=Growl|move2type=Normal | |||
|move3=Leer|move3type=Normal | |||
|move4=Focus Energy|move4type=Normal}} | |||
|{{Pokémon/1 | |||
|game=Yellow | |||
|ndex=105 | |||
|pokemon=Marowak | |||
|level=30 | |||
|type1=Ground | |||
|move1=Bone Club|move1type=Ground | |||
|move2=Tail Whip|move2type=Normal | |||
|move3=Headbutt|move3type=Normal | |||
|move4=Leer|move4type=Normal}} | |||
|} | |||
===Generation III=== | |||
A {{OBP|ghost|Pokémon Tower}} is encountered on 6F as part of the story. The [[Silph Scope]] must be in the bag in order to reveal its identity as a {{OBP|Marowak|ghost}}. [[Poké Ball]]s can be thrown, but will always fail. It must be defeated in order to progress. If run from, it respawns immediately without leaving the area. | |||
{| | |||
|- style="vertical-align:top" | |||
|{{Pokémon/3 | |||
|game=FireRed | |||
|ndex=105 | |||
|pokemon=Marowak | |||
|gender=female | |||
|level=30 | |||
|type1=Ground | |||
|ability=Rock Head | |||
|ability2=Lightningrod | |||
|move1=Headbutt|move1type=Normal | |||
|move2=Leer|move2type=Normal | |||
|move3=Focus Energy|move3type=Normal | |||
|move4=Bonemerang|move4type=Ground}} | |||
|} | |||
==Trainers== | ==Trainers== | ||
===Generation I=== | ===Generation I=== | ||
====2F==== | ====2F==== | ||
====={{ | ====={{game|Red and Blue|s}}===== | ||
{{MSP|001|Bulbasaur}} If the {{player}} chose {{p|Bulbasaur}}: | Blue has one [[Potion]] per Pokémon, using it 12.5% of the time if their HP falls below 20%. | ||
{{ | |||
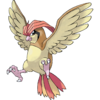
{{MSP/3|001|Bulbasaur}} If the {{player}} chose {{p|Bulbasaur}}: | |||
{{Party/Single | |||
|color={{blue color}} | |color={{blue color}} | ||
|headcolor={{blue color light}} | |headcolor={{blue color light}} | ||
|bordercolor={{ | |bordercolor={{green color dark}} | ||
|sprite=Spr RG Blue 2.png | |sprite=Spr RG Blue 2.png | ||
|prize={{ | |prize={{PDollar}}1625 | ||
|name={{color2| | |name={{color2|000|Blue (game)|Blue}} | ||
|game=RGB | |game=RGB | ||
|location=Pokémon Tower | |location=Pokémon Tower | ||
|pokemon=5 | |pokemon=5}} | ||
| | |{{Pokémon/1 | ||
|game=Blue | |game=Blue | ||
|ndex=017 | |ndex=017 | ||
| Line 136: | Line 235: | ||
|move3=Quick Attack|move3type=Normal | |move3=Quick Attack|move3type=Normal | ||
|move4=Whirlwind|move4type=Normal}} | |move4=Whirlwind|move4type=Normal}} | ||
| | |{{Pokémon/1 | ||
|game=Blue | |game=Blue | ||
|ndex=102 | |ndex=102 | ||
| Line 144: | Line 243: | ||
|move1=Barrage|move1type=Normal | |move1=Barrage|move1type=Normal | ||
|move2=Hypnosis|move2type=Psychic}} | |move2=Hypnosis|move2type=Psychic}} | ||
| | |{{Pokémon/1 | ||
|game=Blue | |game=Blue | ||
|ndex=130 | |ndex=130 | ||
| Line 154: | Line 253: | ||
|move3=Bite|move3type=Normal | |move3=Bite|move3type=Normal | ||
|move4=Hydro Pump|move4type=Water}} | |move4=Hydro Pump|move4type=Water}} | ||
| | {{Party/Div|color={{blue color}}}} | ||
| style="margin:auto" |{{Pokémon/1 | |||
|game=Blue | |game=Blue | ||
|ndex=064 | |ndex=064 | ||
| Line 163: | Line 263: | ||
|move2=Confusion|move2type=Psychic | |move2=Confusion|move2type=Psychic | ||
|move3=Disable|move3type=Normal}} | |move3=Disable|move3type=Normal}} | ||
| | | style="margin:auto" |{{Pokémon/1 | ||
|game=Blue | |game=Blue | ||
|ndex=005 | |ndex=005 | ||
| Line 173: | Line 273: | ||
|move3=Leer|move3type=Normal | |move3=Leer|move3type=Normal | ||
|move4=Rage|move4type=Normal}} | |move4=Rage|move4type=Normal}} | ||
}} | {{Party/Footer}} | ||
{{MSP|004|Charmander}} If the {{player}} chose {{p|Charmander}}: | {{MSP/3|004|Charmander}} If the {{player}} chose {{p|Charmander}}: | ||
{{ | {{Party/Single | ||
|color={{blue color}} | |color={{blue color}} | ||
|headcolor={{blue color light}} | |headcolor={{blue color light}} | ||
|bordercolor={{ | |bordercolor={{green color dark}} | ||
|sprite=Spr RG Blue 2.png | |sprite=Spr RG Blue 2.png | ||
|prize={{ | |prize={{PDollar}}1625 | ||
|name={{color2| | |name={{color2|000|Blue (game)|Blue}} | ||
|game=RGB | |game=RGB | ||
|location=Pokémon Tower | |location=Pokémon Tower | ||
|pokemon=5 | |pokemon=5}} | ||
| | |{{Pokémon/1 | ||
|game=Blue | |game=Blue | ||
|ndex=017 | |ndex=017 | ||
| Line 196: | Line 296: | ||
|move3=Quick Attack|move3type=Normal | |move3=Quick Attack|move3type=Normal | ||
|move4=Whirlwind|move4type=Normal}} | |move4=Whirlwind|move4type=Normal}} | ||
| | |{{Pokémon/1 | ||
|game=Blue | |game=Blue | ||
|ndex=058 | |ndex=058 | ||
| Line 205: | Line 305: | ||
|move2=Roar|move2type=Normal | |move2=Roar|move2type=Normal | ||
|move3=Ember|move3type=Fire}} | |move3=Ember|move3type=Fire}} | ||
| | |{{Pokémon/1 | ||
|game=Blue | |game=Blue | ||
|ndex=102 | |ndex=102 | ||
| Line 213: | Line 313: | ||
|move1=Barrage|move1type=Normal | |move1=Barrage|move1type=Normal | ||
|move2=Hypnosis|move2type=Psychic}} | |move2=Hypnosis|move2type=Psychic}} | ||
| | {{Party/Div|color={{blue color}}}} | ||
| style="margin:auto" |{{Pokémon/1 | |||
|game=Blue | |game=Blue | ||
|ndex=064 | |ndex=064 | ||
| Line 222: | Line 323: | ||
|move2=Confusion|move2type=Psychic | |move2=Confusion|move2type=Psychic | ||
|move3=Disable|move3type=Normal}} | |move3=Disable|move3type=Normal}} | ||
| | | style="margin:auto" |{{Pokémon/1 | ||
|game=Blue | |game=Blue | ||
|ndex=008 | |ndex=008 | ||
| Line 232: | Line 333: | ||
|move3=Water Gun|move3type=Water | |move3=Water Gun|move3type=Water | ||
|move4=Bite|move4type=Normal}} | |move4=Bite|move4type=Normal}} | ||
}} | {{Party/Footer}} | ||
{{MSP|007|Squirtle}} If the {{player}} chose {{p|Squirtle}}: | {{MSP/3|007|Squirtle}} If the {{player}} chose {{p|Squirtle}}: | ||
{{ | {{Party/Single | ||
|color={{blue color}} | |color={{blue color}} | ||
|headcolor={{blue color light}} | |headcolor={{blue color light}} | ||
|bordercolor={{ | |bordercolor={{green color dark}} | ||
|sprite=Spr RG Blue 2.png | |sprite=Spr RG Blue 2.png | ||
|prize={{ | |prize={{PDollar}}1625 | ||
|name={{color2| | |name={{color2|000|Blue (game)|Blue}} | ||
|game=RGB | |game=RGB | ||
|location=Pokémon Tower | |location=Pokémon Tower | ||
|pokemon=5 | |pokemon=5}} | ||
| | |{{Pokémon/1 | ||
|game=Blue | |game=Blue | ||
|ndex=017 | |ndex=017 | ||
| Line 255: | Line 356: | ||
|move3=Quick Attack|move3type=Normal | |move3=Quick Attack|move3type=Normal | ||
|move4=Whirlwind|move4type=Normal}} | |move4=Whirlwind|move4type=Normal}} | ||
| | |{{Pokémon/1 | ||
|game=Blue | |game=Blue | ||
|ndex=130 | |ndex=130 | ||
| Line 266: | Line 367: | ||
|move3=Bite|move3type=Normal | |move3=Bite|move3type=Normal | ||
|move4=Hydro Pump|move4type=Water}} | |move4=Hydro Pump|move4type=Water}} | ||
| | |{{Pokémon/1 | ||
|game=Blue | |game=Blue | ||
|ndex=058 | |ndex=058 | ||
| Line 275: | Line 376: | ||
|move2=Roar|move2type=Normal | |move2=Roar|move2type=Normal | ||
|move3=Ember|move3type=Fire}} | |move3=Ember|move3type=Fire}} | ||
| | {{Party/Div|color={{blue color}}}} | ||
| style="margin:auto" |{{Pokémon/1 | |||
|game=Blue | |game=Blue | ||
|ndex=064 | |ndex=064 | ||
| Line 284: | Line 386: | ||
|move2=Confusion|move2type=Psychic | |move2=Confusion|move2type=Psychic | ||
|move3=Disable|move3type=Normal}} | |move3=Disable|move3type=Normal}} | ||
| | | style="margin:auto" |{{Pokémon/1 | ||
|game=Blue | |game=Blue | ||
|ndex=002 | |ndex=002 | ||
| Line 294: | Line 396: | ||
|move3=Vine Whip|move3type=Grass | |move3=Vine Whip|move3type=Grass | ||
|move4=PoisonPowder|move4type=Poison}} | |move4=PoisonPowder|move4type=Poison}} | ||
}} | {{Party/Footer}} | ||
====={{game|Yellow}}===== | |||
Blue has one [[Potion]] per Pokémon, using it 12.5% of the time if their HP falls below 20%. | |||
{{MSP/3|134|Vaporeon}} If {{p|Eevee}} will evolve into {{p|Vaporeon}}: | |||
{{MSP|134|Vaporeon}} If {{p|Eevee}} will evolve into {{p|Vaporeon}}: | {{Party/Single | ||
{{ | |||
|color={{blue color}} | |color={{blue color}} | ||
|headcolor={{blue color light}} | |headcolor={{blue color light}} | ||
|bordercolor={{ | |bordercolor={{green color dark}} | ||
|sprite=Spr Y Blue 2.png | |sprite=Spr Y Blue 2.png | ||
|prize={{ | |prize={{PDollar}}1625 | ||
|name={{color2| | |name={{color2|000|Blue (game)|Blue}} | ||
|game=Y | |game=Y | ||
|location=Pokémon Tower | |location=Pokémon Tower | ||
|pokemon=5 | |pokemon=5}} | ||
| | |{{Pokémon/1 | ||
|game=Yellow | |game=Yellow | ||
|ndex=022 | |ndex=022 | ||
| Line 318: | Line 422: | ||
|move3=Leer|move3type=Normal | |move3=Leer|move3type=Normal | ||
|move4=Fury Attack|move4type=Normal}} | |move4=Fury Attack|move4type=Normal}} | ||
| | |{{Pokémon/1 | ||
|game=Yellow | |game=Yellow | ||
|ndex=027 | |ndex=027 | ||
| Line 327: | Line 431: | ||
|move2=Sand-Attack|move2type=Normal | |move2=Sand-Attack|move2type=Normal | ||
|move3=Slash|move3type=Normal}} | |move3=Slash|move3type=Normal}} | ||
| | |{{Pokémon/1 | ||
|game=Yellow | |game=Yellow | ||
|ndex=037 | |ndex=037 | ||
|pokemon=Vulpix | |pokemon=Vulpix | ||
|level=23 | |level=23 | ||
|type1=Fire | |type1=Fire | ||
|move1=Ember|move1type=Fire | |move1=Ember|move1type=Fire | ||
| Line 339: | Line 441: | ||
|move3=Quick Attack|move3type=Normal | |move3=Quick Attack|move3type=Normal | ||
|move4=Roar|move4type=Normal}} | |move4=Roar|move4type=Normal}} | ||
| | {{Party/Div|color={{blue color}}}} | ||
| style="margin:auto" |{{Pokémon/1 | |||
|game=Yellow | |game=Yellow | ||
|ndex=081 | |ndex=081 | ||
| Line 347: | Line 450: | ||
|move1=Tackle|move1type=Normal | |move1=Tackle|move1type=Normal | ||
|move2=SonicBoom|move2type=Normal}} | |move2=SonicBoom|move2type=Normal}} | ||
| | | style="margin:auto" |{{Pokémon/1 | ||
|game=Yellow | |game=Yellow | ||
|ndex=133 | |ndex=133 | ||
| Line 357: | Line 460: | ||
|move3=Sand-Attack|move3type=Normal | |move3=Sand-Attack|move3type=Normal | ||
|move4=Growl|move4type=Normal}} | |move4=Growl|move4type=Normal}} | ||
}} | {{Party/Footer}} | ||
{{MSP|135|Jolteon}} If {{p|Eevee}} will evolve into {{p|Jolteon}}: | {{MSP/3|135|Jolteon}} If {{p|Eevee}} will evolve into {{p|Jolteon}}: | ||
{{ | {{Party/Single | ||
|color={{blue color}} | |color={{blue color}} | ||
|headcolor={{blue color light}} | |headcolor={{blue color light}} | ||
|bordercolor={{ | |bordercolor={{green color dark}} | ||
|sprite=Spr Y Blue 2.png | |sprite=Spr Y Blue 2.png | ||
|prize={{ | |prize={{PDollar}}1625 | ||
|name={{color2| | |name={{color2|000|Blue (game)|Blue}} | ||
|game=Y | |game=Y | ||
|location=Pokémon Tower | |location=Pokémon Tower | ||
|pokemon=5 | |pokemon=5}} | ||
| | |{{Pokémon/1 | ||
|game=Yellow | |game=Yellow | ||
|ndex=022 | |ndex=022 | ||
| Line 379: | Line 482: | ||
|move2=Growl|move2type=Normal | |move2=Growl|move2type=Normal | ||
|move3=Leer|move3type=Normal | |move3=Leer|move3type=Normal | ||
|move4=Fury Attack|move4type | |move4=Fury Attack|move4type=Normal}} | ||
|{{Pokémon/1 | |||
| | |||
|game=Yellow | |game=Yellow | ||
|ndex=090 | |ndex=090 | ||
| Line 399: | Line 492: | ||
|move2=Withdraw|move2type=Water | |move2=Withdraw|move2type=Water | ||
|move3=Supersonic|move3type=Normal | |move3=Supersonic|move3type=Normal | ||
|move4=Clamp|move4type=Water | |move4=Clamp|move4type=Water}} | ||
}} | |{{Pokémon/1 | ||
| | |||
|game=Yellow | |game=Yellow | ||
|ndex=037 | |ndex=037 | ||
|pokemon=Vulpix | |pokemon=Vulpix | ||
|level=22 | |level=22 | ||
|type1=Fire | |type1=Fire | ||
|move1=Ember|move1type=Fire | |move1=Ember|move1type=Fire | ||
|move2=Tail Whip|move2type=Normal | |move2=Tail Whip|move2type=Normal | ||
|move3=Quick Attack|move3type=Normal | |move3=Quick Attack|move3type=Normal | ||
|move4=Roar|move4type=Normal | |move4=Roar|move4type=Normal}} | ||
}} | {{Party/Div|color={{blue color}}}} | ||
| | | style="margin:auto" |{{Pokémon/1 | ||
|game=Yellow | |||
|ndex=027 | |||
|pokemon=Sandshrew | |||
|level=20 | |||
|type1=Ground | |||
|move1=Scratch|move1type=Normal | |||
|move2=Sand-Attack|move2type=Normal | |||
|move3=Slash|move3type=Normal}} | |||
| style="margin:auto" |{{Pokémon/1 | |||
|game=Yellow | |game=Yellow | ||
|ndex=133 | |ndex=133 | ||
| Line 424: | Line 523: | ||
|move3=Sand-Attack|move3type=Normal | |move3=Sand-Attack|move3type=Normal | ||
|move4=Growl|move4type=Normal}} | |move4=Growl|move4type=Normal}} | ||
}} | {{Party/Footer}} | ||
{{MSP|136|Flareon}} If {{p|Eevee}} will evolve into {{p|Flareon}}: | {{MSP/3|136|Flareon}} If {{p|Eevee}} will evolve into {{p|Flareon}}: | ||
{{ | {{Party/Single | ||
|color={{blue color}} | |color={{blue color}} | ||
|headcolor={{blue color light}} | |headcolor={{blue color light}} | ||
|bordercolor={{ | |bordercolor={{green color dark}} | ||
|sprite=Spr Y Blue 2.png | |sprite=Spr Y Blue 2.png | ||
|prize={{ | |prize={{PDollar}}1625 | ||
|name={{color2| | |name={{color2|000|Blue (game)|Blue}} | ||
|game=Y | |game=Y | ||
|location=Pokémon Tower | |location=Pokémon Tower | ||
|pokemon=5 | |pokemon=5}} | ||
| | |{{Pokémon/1 | ||
|game=Yellow | |game=Yellow | ||
|ndex=022 | |ndex=022 | ||
| Line 447: | Line 546: | ||
|move3=Leer|move3type=Normal | |move3=Leer|move3type=Normal | ||
|move4=Fury Attack|move4type=Normal}} | |move4=Fury Attack|move4type=Normal}} | ||
| | |{{Pokémon/1 | ||
|game=Yellow | |game=Yellow | ||
|ndex=027 | |ndex=027 | ||
| Line 456: | Line 555: | ||
|move2=Sand-Attack|move2type=Normal | |move2=Sand-Attack|move2type=Normal | ||
|move3=Slash|move3type=Normal}} | |move3=Slash|move3type=Normal}} | ||
| | |{{Pokémon/1 | ||
|game=Yellow | |game=Yellow | ||
|ndex=081 | |ndex=081 | ||
| Line 466: | Line 565: | ||
|move2=SonicBoom | |move2=SonicBoom | ||
|move2type=Normal}} | |move2type=Normal}} | ||
| | {{Party/Div|color={{blue color}}}} | ||
| style="margin:auto" |{{Pokémon/1 | |||
|game=Yellow | |game=Yellow | ||
|ndex=090 | |ndex=090 | ||
| Line 476: | Line 576: | ||
|move3=Supersonic|move3type=Normal | |move3=Supersonic|move3type=Normal | ||
|move4=Clamp|move4type=Water}} | |move4=Clamp|move4type=Water}} | ||
| | | style="margin:auto" |{{Pokémon/1 | ||
|game=Yellow | |game=Yellow | ||
|ndex=133 | |ndex=133 | ||
| Line 486: | Line 586: | ||
|move3=Sand-Attack|move3type=Normal | |move3=Sand-Attack|move3type=Normal | ||
|move4=Growl|move4type=Normal}} | |move4=Growl|move4type=Normal}} | ||
}} | {{Party/Footer}} | ||
====3F==== | ====3F==== | ||
{{trainerheader| | {{trainerheader|ghost}} | ||
{{trainerentry|Spr RG Channeler.png|Channeler||690|1|092|Gastly||23|||}} | {{trainerentry|Spr RG Channeler.png|game=1|Channeler||690|1|092|Gastly||23|||}} | ||
{{trainerentry|Spr RG Channeler.png|Channeler||660|1|092|Gastly||22|||}} | {{trainerdiv|ghost}} | ||
{{trainerentry|Spr RG Channeler.png|Channeler||720|1|092|Gastly||24|||}} | {{trainerentry|Spr RG Channeler.png|game=1|Channeler||660|1|092|Gastly||22|||}} | ||
{{trainerfooter| | {{trainerdiv|ghost}} | ||
{{trainerentry|Spr RG Channeler.png|game=1|Channeler||720|1|092|Gastly||24|||}} | |||
{{trainerfooter|ghost|1}} | |||
====4F==== | ====4F==== | ||
{{trainerheader| | {{trainerheader|ghost}} | ||
{{trainerentry|Spr RG Channeler.png|Channeler||690|2|092|Gastly||23||092|Gastly||23|||}} | {{trainerentry|Spr RG Channeler.png|game=1|Channeler||690|2|092|Gastly||23||092|Gastly||23|||}} | ||
{{trainerentry|Spr RG Channeler.png|Channeler||660|1|092|Gastly||22|||}} | {{trainerdiv|ghost}} | ||
{{trainerentry|Spr RG Channeler.png|Channeler||720|1|092|Gastly||24|||}} | {{trainerentry|Spr RG Channeler.png|game=1|Channeler||660|1|092|Gastly||22|||}} | ||
{{trainerfooter| | {{trainerdiv|ghost}} | ||
{{trainerentry|Spr RG Channeler.png|game=1|Channeler||720|1|092|Gastly||24|||}} | |||
{{trainerfooter|ghost|1}} | |||
====5F==== | ====5F==== | ||
{{trainerheader| | {{trainerheader|ghost}} | ||
{{trainerentry|Spr RG Channeler.png|Channeler||660|1|092|Gastly||22|||}} | {{trainerentry|Spr RG Channeler.png|game=1|Channeler||660|1|092|Gastly||22|||}} | ||
{{trainerentry|Spr RG Channeler.png|Channeler||690|1|093|Haunter||23|||}} | {{trainerdiv|ghost}} | ||
{{trainerentry|Spr RG Channeler.png|Channeler||720|1|092|Gastly||24|||}} | {{trainerentry|Spr RG Channeler.png|game=1|Channeler||690|1|093|Haunter||23|||}} | ||
{{trainerentry|Spr RG Channeler.png|Channeler||660|1|093|Haunter||22|||}} | {{trainerdiv|ghost}} | ||
{{trainerfooter| | {{trainerentry|Spr RG Channeler.png|game=1|Channeler||720|1|092|Gastly||24|||}} | ||
{{trainerdiv|ghost}} | |||
{{trainerentry|Spr RG Channeler.png|game=1|Channeler||660|1|093|Haunter||22|||}} | |||
{{trainerfooter|ghost|1}} | |||
====6F==== | ====6F==== | ||
{{trainerheader| | {{trainerheader|ghost}} | ||
{{trainerentry|Spr RG Channeler.png|Channeler||660|3|092|Gastly||22||092|Gastly||22||092|Gastly||22|||}} | {{trainerentry|Spr RG Channeler.png|game=1|Channeler||660|3|092|Gastly||22||092|Gastly||22||092|Gastly||22|||}} | ||
{{trainerentry|Spr RG Channeler.png|Channeler||720|1|092|Gastly||24|||}} | {{trainerdiv|ghost}} | ||
{{trainerentry|Spr RG Channeler.png|Channeler||720|1|092|Gastly||24|||}} | {{trainerentry|Spr RG Channeler.png|game=1|Channeler||720|1|092|Gastly||24|||}} | ||
{{trainerfooter| | {{trainerdiv|ghost}} | ||
{{trainerentry|Spr RG Channeler.png|game=1|Channeler||720|1|092|Gastly||24|||}} | |||
{{trainerfooter|ghost|1}} | |||
====7F==== | ====7F==== | ||
{{trainerheader| | ====={{game|Red and Blue|s}}===== | ||
{{trainerentry|Spr RG Rocket.png|Rocket||750|3|041|Zubat||25||041|Zubat||25||042|Golbat||25|||}} | {{trainerheader|ghost}} | ||
{{trainerentry|Spr RG Rocket.png|Rocket||780|2|109|Koffing||26||096|Drowzee||26|||}} | {{trainerentry|Spr RG Rocket.png|game=1|Rocket||750|3|041|Zubat||25||041|Zubat||25||042|Golbat||25|||}} | ||
{{trainerentry|Spr RG Rocket.png|Rocket||690|4|041|Zubat||23||019|Rattata||23||020|Raticate||23||041|Zubat||23|||}} | {{trainerdiv|ghost}} | ||
{{trainerfooter| | {{trainerentry|Spr RG Rocket.png|game=1|Rocket||780|2|109|Koffing||26||096|Drowzee||26|||}} | ||
{{trainerdiv|ghost}} | |||
{{trainerentry|Spr RG Rocket.png|game=1|Rocket||690|4|041|Zubat||23||019|Rattata||23||020|Raticate||23||041|Zubat||23|||}} | |||
{{trainerfooter|ghost|1}} | |||
====={{ | ====={{game|Yellow}}===== | ||
{{Party|color= | {{Party/Single | ||
|color=666 | |||
|bordercolor=C00 | |||
|headcolor=CCC | |||
|sprite=Spr Y Jessie James.png | |sprite=Spr Y Jessie James.png | ||
|prize={{ | |prize={{PDollar}}810 | ||
|name={{color2| | |name={{color2|000|Team Rocket trio|Rocket}} | ||
|game=Y | |game=Y | ||
|location=Pokémon Tower | |location=Pokémon Tower | ||
|pokemon=3 | |pokemon=3}} | ||
| | |{{Pokémon/1 | ||
|game=Yellow | |||
|ndex=052 | |||
|pokemon=Meowth | |||
|level=27 | |||
|type1=Normal | |||
|move1=Growl|move1type=Normal | |||
|move2=Bite|move2type=Normal | |||
|move3=Pay Day|move3type=Normal | |||
|move4=Screech|move4type=Normal}} | |||
|{{Pokémon/1 | |||
|game=Yellow | |game=Yellow | ||
|ndex=024 | |ndex=024 | ||
| Line 538: | Line 663: | ||
|level=27 | |level=27 | ||
|type1=Poison | |type1=Poison | ||
|move1= | |move1=Leer|move1type=Normal | ||
|move2= | |move2=Poison Sting|move2type=Poison | ||
|move3= | |move3=Bite|move3type=Normal | ||
|move4=Glare|move4type=Normal}} | |move4=Glare|move4type=Normal}} | ||
| | |{{Pokémon/1 | ||
|game=Yellow | |game=Yellow | ||
|ndex=110 | |ndex=110 | ||
| Line 561: | Line 676: | ||
|move2=Smog|move2type=Poison | |move2=Smog|move2type=Poison | ||
|move3=Sludge|move3type=Poison}} | |move3=Sludge|move3type=Poison}} | ||
}} | {{Party/Footer}} | ||
===Generation III=== | ===Generation III=== | ||
====2F==== | ====2F==== | ||
{{MSP|001|Bulbasaur}} If the {{player}} chose {{p|Bulbasaur}}: | {{MSP/3|001|Bulbasaur}} If the {{player}} chose {{p|Bulbasaur}}: | ||
{{ | {{Party/Single | ||
|color={{blue color}} | |color={{blue color}} | ||
|headcolor={{blue color light}} | |headcolor={{blue color light}} | ||
|bordercolor={{ | |bordercolor={{green color dark}} | ||
|sprite=Spr FRLG Blue 2.png | |sprite=Spr FRLG Blue 2.png | ||
|prize={{ | |prize={{PDollar}}900 | ||
|class=Rival | |class=Rival | ||
|name={{color2| | |classlink=Rival | ||
|name={{color2|000|Blue (game)|Blue}} | |||
|game=FRLG | |game=FRLG | ||
|location=Pokémon Tower | |location=Pokémon Tower | ||
|pokemon=5 | |pokemon=5}} | ||
| | |{{Pokémon/3 | ||
|game=FireRed | |game=FireRed | ||
|ndex=017 | |ndex=017 | ||
|pokemon=Pidgeotto | |pokemon=Pidgeotto | ||
|gender=male | |||
|level=25 | |level=25 | ||
|ability=Keen Eye | |ability=Keen Eye | ||
| Line 588: | Line 705: | ||
|move3=Quick Attack|move3type=Normal | |move3=Quick Attack|move3type=Normal | ||
|move4=Whirlwind|move4type=Normal}} | |move4=Whirlwind|move4type=Normal}} | ||
| | |{{Pokémon/3 | ||
|game=FireRed | |game=FireRed | ||
|ndex=064 | |ndex=064 | ||
|pokemon=Kadabra | |pokemon=Kadabra | ||
|gender=male | |||
|level=20 | |level=20 | ||
|ability= | |ability=Synchronize | ||
|type1=Psychic | |type1=Psychic | ||
|move1=Teleport|move1type=Psychic | |move1=Teleport|move1type=Psychic | ||
| Line 599: | Line 717: | ||
|move3=Disable|move3type=Normal | |move3=Disable|move3type=Normal | ||
|move4=Kinesis|move4type=Psychic}} | |move4=Kinesis|move4type=Psychic}} | ||
| | |{{Pokémon/3 | ||
|game=FireRed | |game=FireRed | ||
|ndex=102 | |ndex=102 | ||
|pokemon=Exeggcute | |pokemon=Exeggcute | ||
|gender= | |gender=male | ||
|level=23 | |level=23 | ||
|ability=Chlorophyll | |ability=Chlorophyll | ||
|type1=Grass|type2=Psychic | |type1=Grass|type2=Psychic | ||
|move1= | |move1=Reflect|move1type=Psychic | ||
|move2=Hypnosis|move2type=Psychic | |move2=Hypnosis|move2type=Psychic | ||
|move3=Leech Seed|move3type=Grass | |move3=Leech Seed|move3type=Grass | ||
|move4=Confusion|move4type=Psychic}} | |move4=Confusion|move4type=Psychic}} | ||
| | {{Party/Div|color={{blue color}}}} | ||
| style="margin:auto" |{{Pokémon/3 | |||
|game=FireRed | |game=FireRed | ||
|ndex=130 | |ndex=130 | ||
|pokemon=Gyarados | |pokemon=Gyarados | ||
|gender= | |gender=male | ||
|level=22 | |level=22 | ||
|ability=Intimidate | |ability=Intimidate | ||
|type1=Water|type2=Flying | |type1=Water|type2=Flying | ||
|move1=Thrash|move1type=Normal | |move1=Thrash|move1type=Normal | ||
|move2= | |move2=Bite|move2type=Dark}} | ||
| style="margin:auto" |{{Pokémon/3 | |||
| | |||
|game=FireRed | |game=FireRed | ||
|ndex=005 | |ndex=005 | ||
|pokemon=Charmeleon | |pokemon=Charmeleon | ||
|gender=male | |||
|level=25 | |level=25 | ||
|ability=Blaze | |ability=Blaze | ||
|type1=Fire | |type1=Fire | ||
|move1= | |move1=SmokeScreen|move1type=Normal | ||
|move2= | |move2=Growl|move2type=Normal | ||
|move3= | |move3=Ember|move3type=Fire | ||
|move4= | |move4=Metal Claw|move4type=Steel}} | ||
}} | {{Party/Footer}} | ||
{{MSP|004|Charmander}} If the {{player}} chose {{p|Charmander}}: | {{MSP/3|004|Charmander}} If the {{player}} chose {{p|Charmander}}: | ||
{{ | {{Party/Single | ||
|color={{blue color}} | |color={{blue color}} | ||
|headcolor={{blue color light}} | |headcolor={{blue color light}} | ||
|bordercolor={{ | |bordercolor={{green color dark}} | ||
|sprite=Spr FRLG Blue 2.png | |sprite=Spr FRLG Blue 2.png | ||
|prize={{ | |prize={{PDollar}}900 | ||
|class=Rival | |class=Rival | ||
|name={{color2| | |classlink=Rival | ||
|name={{color2|000|Blue (game)|Blue}} | |||
|game=FRLG | |game=FRLG | ||
|location=Pokémon Tower | |location=Pokémon Tower | ||
|pokemon=5 | |pokemon=5}} | ||
| | |{{Pokémon/3 | ||
|game=FireRed | |game=FireRed | ||
|ndex=017 | |ndex=017 | ||
|pokemon=Pidgeotto | |pokemon=Pidgeotto | ||
|gender=male | |||
|level=25 | |level=25 | ||
|ability=Keen Eye | |ability=Keen Eye | ||
| Line 658: | Line 779: | ||
|move3=Quick Attack|move3type=Normal | |move3=Quick Attack|move3type=Normal | ||
|move4=Whirlwind|move4type=Normal}} | |move4=Whirlwind|move4type=Normal}} | ||
| | |{{Pokémon/3 | ||
|game=FireRed | |game=FireRed | ||
|ndex=064 | |ndex=064 | ||
|pokemon=Kadabra | |pokemon=Kadabra | ||
|gender=male | |||
|level=20 | |level=20 | ||
|ability= | |ability=Synchronize | ||
|type1=Psychic | |type1=Psychic | ||
|move1=Teleport|move1type=Psychic | |move1=Teleport|move1type=Psychic | ||
| Line 669: | Line 791: | ||
|move3=Disable|move3type=Normal | |move3=Disable|move3type=Normal | ||
|move4=Kinesis|move4type=Psychic}} | |move4=Kinesis|move4type=Psychic}} | ||
| | |{{Pokémon/3 | ||
|game=FireRed | |game=FireRed | ||
|ndex=058 | |ndex=058 | ||
|pokemon=Growlithe | |pokemon=Growlithe | ||
|gender= | |gender=male | ||
|level=23 | |level=23 | ||
|ability=Intimidate | |ability=Intimidate | ||
|type1=Fire | |type1=Fire | ||
|move1= | |move1=Odor Sleuth|move1type=Normal | ||
|move2=Roar|move2type=Normal | |move2=Roar|move2type=Normal | ||
|move3=Ember|move3type=Fire | |move3=Ember|move3type=Fire | ||
|move4=Leer|move4type=Normal}} | |move4=Leer|move4type=Normal}} | ||
| | {{Party/Div|color={{blue color}}}} | ||
| style="margin:auto" |{{Pokémon/3 | |||
|game=FireRed | |game=FireRed | ||
|ndex=102 | |ndex=102 | ||
|pokemon=Exeggcute | |pokemon=Exeggcute | ||
|gender= | |gender=male | ||
|level=22 | |level=22 | ||
|ability=Chlorophyll | |ability=Chlorophyll | ||
|type1=Grass|type2=Psychic | |type1=Grass|type2=Psychic | ||
|move1= | |move1=Reflect|move1type=Psychic | ||
|move2=Hypnosis|move2type=Psychic | |move2=Hypnosis|move2type=Psychic | ||
|move3=Leech Seed|move3type=Grass | |move3=Leech Seed|move3type=Grass | ||
|move4=Confusion|move4type=Psychic}} | |move4=Confusion|move4type=Psychic}} | ||
| | | style="margin:auto" |{{Pokémon/3 | ||
|game=FireRed | |game=FireRed | ||
|ndex=008 | |ndex=008 | ||
|pokemon=Wartortle | |pokemon=Wartortle | ||
|gender=male | |||
|level=25 | |level=25 | ||
|ability=Torrent | |ability=Torrent | ||
|type1=Water | |type1=Water | ||
|move1= | |move1=Withdraw|move1type=Water | ||
|move2= | |move2=Rapid Spin|move2type=Normal | ||
|move3=Water Gun|move3type=Water | |move3=Water Gun|move3type=Water | ||
|move4=Bite|move4type=Dark}} | |move4=Bite|move4type=Dark}} | ||
}} | {{Party/Footer}} | ||
{{MSP|007|Squirtle}}If the {{player}} chose {{p|Squirtle}}: | {{MSP/3|007|Squirtle}}If the {{player}} chose {{p|Squirtle}}: | ||
{{ | {{Party/Single | ||
|color={{blue color}} | |color={{blue color}} | ||
|headcolor={{blue color light}} | |headcolor={{blue color light}} | ||
|bordercolor={{ | |bordercolor={{green color dark}} | ||
|sprite=Spr FRLG Blue 2.png | |sprite=Spr FRLG Blue 2.png | ||
|prize={{ | |prize={{PDollar}}900 | ||
|class=Rival | |class=Rival | ||
|name={{color2| | |classlink=Rival | ||
|name={{color2|000|Blue (game)|Blue}} | |||
|game=FRLG | |game=FRLG | ||
|location=Pokémon Tower | |location=Pokémon Tower | ||
|pokemon=5 | |pokemon=5}} | ||
| | |{{Pokémon/3 | ||
|game=FireRed | |game=FireRed | ||
|ndex=017 | |ndex=017 | ||
|pokemon=Pidgeotto | |pokemon=Pidgeotto | ||
|gender=male | |||
|level=25 | |level=25 | ||
|ability=Keen Eye | |ability=Keen Eye | ||
| Line 729: | Line 855: | ||
|move3=Quick Attack|move3type=Normal | |move3=Quick Attack|move3type=Normal | ||
|move4=Whirlwind|move4type=Normal}} | |move4=Whirlwind|move4type=Normal}} | ||
| | |{{Pokémon/3 | ||
|game=FireRed | |game=FireRed | ||
|ndex=064 | |ndex=064 | ||
|pokemon=Kadabra | |pokemon=Kadabra | ||
|gender=male | |||
|level=20 | |level=20 | ||
|ability=Synchronize | |ability=Synchronize | ||
| Line 740: | Line 867: | ||
|move3=Disable|move3type=Normal | |move3=Disable|move3type=Normal | ||
|move4=Kinesis|move4type=Psychic}} | |move4=Kinesis|move4type=Psychic}} | ||
| | |{{Pokémon/3 | ||
|game=FireRed | |game=FireRed | ||
|ndex=130 | |ndex=130 | ||
|pokemon=Gyarados | |pokemon=Gyarados | ||
|gender= | |gender=male | ||
|level=23 | |level=23 | ||
|ability=Intimidate | |ability=Intimidate | ||
|type1=Water|type2=Flying | |type1=Water|type2=Flying | ||
|move1=Thrash|move1type=Normal | |move1=Thrash|move1type=Normal | ||
|move2= | |move2=Bite|move2type=Dark}} | ||
| | {{Party/Div|color={{blue color}}}} | ||
| | | style="margin:auto" |{{Pokémon/3 | ||
|game=FireRed | |game=FireRed | ||
|ndex=058 | |ndex=058 | ||
|pokemon=Growlithe | |pokemon=Growlithe | ||
|gender= | |gender=male | ||
|level=22 | |level=22 | ||
|ability=Intimidate | |ability=Intimidate | ||
|type1=Fire | |type1=Fire | ||
|move1= | |move1=Odor Sleuth|move1type=Normal | ||
|move2=Roar|move2type=Normal | |move2=Roar|move2type=Normal | ||
|move3=Ember|move3type=Fire}} | |move3=Ember|move3type=Fire | ||
| | |move4=Leer|move4type=Normal}} | ||
| style="margin:auto" |{{Pokémon/3 | |||
|game=FireRed | |game=FireRed | ||
|ndex=002 | |ndex=002 | ||
|pokemon=Ivysaur | |pokemon=Ivysaur | ||
|gender=male | |||
|level=25 | |level=25 | ||
|ability=Overgrow | |ability=Overgrow | ||
|type1=Grass | |type1=Grass | ||
|type2=Poison | |type2=Poison | ||
|move1= | |move1=Sleep Powder|move1type=Grass | ||
|move2= | |move2=Vine Whip|move2type=Grass | ||
|move3= | |move3=Razor Leaf|move3type=Grass | ||
|move4=PoisonPowder|move4type=Poison}} | |move4=PoisonPowder|move4type=Poison}} | ||
}} | {{Party/Footer}} | ||
====3F==== | ====3F==== | ||
{{trainerheader| | {{trainerheader|ghost}} | ||
{{trainerentry|Spr FRLG Channeler.png|Channeler|Hope|736|1|092|Gastly|♀|23|None|36=アイリ|37=Airi}} | {{trainerentry|Spr FRLG Channeler.png|Channeler|Hope|736|1|092|Gastly|♀|23|None|36=アイリ|37=Airi}} | ||
{{trainerdiv| | {{trainerdiv|ghost}} | ||
{{trainerentry|Spr FRLG Channeler.png|Channeler|Patricia|704|1|092|Gastly|♀|22|None|36=コトネ|37=Kotone}} | {{trainerentry|Spr FRLG Channeler.png|Channeler|Patricia|704|1|092|Gastly|♀|22|None|36=コトネ|37=Kotone}} | ||
{{trainerdiv| | {{trainerdiv|ghost}} | ||
{{trainerentry|Spr FRLG Channeler.png|Channeler|Carly|768|1|092|Gastly|♀|24|None|36=トミコ|37=Tomiko}} | {{trainerentry|Spr FRLG Channeler.png|Channeler|Carly|768|1|092|Gastly|♀|24|None|36=トミコ|37=Tomiko}} | ||
{{trainerfooter| | {{trainerfooter|ghost|FRLG}} | ||
====4F==== | ====4F==== | ||
{{trainerheader| | {{trainerheader|ghost}} | ||
{{trainerentry|Spr FRLG Channeler.png|Channeler|Laurel|736|2|092|Gastly|♀|23|None|092|Gastly|♀|23|None|36=ソノコ|37=Sonoko}} | {{trainerentry|Spr FRLG Channeler.png|Channeler|Laurel|736|2|092|Gastly|♀|23|None|092|Gastly|♀|23|None|36=ソノコ|37=Sonoko}} | ||
{{trainerdiv| | {{trainerdiv|ghost}} | ||
{{trainerentry|Spr FRLG Channeler.png|Channeler|Jody|704|1|092|Gastly|♀|22|None|36=サユリ|37=Sayuri}} | {{trainerentry|Spr FRLG Channeler.png|Channeler|Jody|704|1|092|Gastly|♀|22|None|36=サユリ|37=Sayuri}} | ||
{{trainerdiv| | {{trainerdiv|ghost}} | ||
{{trainerentry|Spr FRLG Channeler.png|Channeler|Paula|768|1|092|Gastly|♀|24|None|36=ヒイナ|37=Hiina}} | {{trainerentry|Spr FRLG Channeler.png|Channeler|Paula|768|1|092|Gastly|♀|24|None|36=ヒイナ|37=Hiina}} | ||
{{trainerfooter| | {{trainerfooter|ghost|FRLG}} | ||
====5F==== | ====5F==== | ||
{{trainerheader| | {{trainerheader|ghost}} | ||
{{trainerentry|Spr FRLG Channeler.png|Channeler|Ruth|704|1|092|Gastly|♀|22|None|36=ヒトエ|37=Hitoe}} | {{trainerentry|Spr FRLG Channeler.png|Channeler|Ruth|704|1|092|Gastly|♀|22|None|36=ヒトエ|37=Hitoe}} | ||
{{trainerdiv| | {{trainerdiv|ghost}} | ||
{{trainerentry|Spr FRLG Channeler.png|Channeler|Tammy|736|1|093|Haunter|♀|23|None|36=ミコト|37=Mikoto}} | {{trainerentry|Spr FRLG Channeler.png|Channeler|Tammy|736|1|093|Haunter|♀|23|None|36=ミコト|37=Mikoto}} | ||
{{trainerdiv| | {{trainerdiv|ghost}} | ||
{{trainerentry|Spr FRLG Channeler.png|Channeler|Karina|768|1|092|Gastly|♀|24|None|36=カヨコ|37=Kayoko}} | {{trainerentry|Spr FRLG Channeler.png|Channeler|Karina|768|1|092|Gastly|♀|24|None|36=カヨコ|37=Kayoko}} | ||
{{trainerdiv| | {{trainerdiv|ghost}} | ||
{{trainerentry|Spr FRLG Channeler.png|Channeler|Janae|704|1|092|Gastly|♀|22|None|36=シズル|37=Shizuru}} | {{trainerentry|Spr FRLG Channeler.png|Channeler|Janae|704|1|092|Gastly|♀|22|None|36=シズル|37=Shizuru}} | ||
{{trainerfooter| | {{trainerfooter|ghost|FRLG}} | ||
====6F==== | ====6F==== | ||
{{trainerheader| | {{trainerheader|ghost}} | ||
{{trainerentry|Spr FRLG Channeler.png|Channeler|Angelica|704|3|092|Gastly|♀|22|None|092|Gastly|♀|22|None|092|Gastly|♀|22|None|36=ウキエ|37=Ukie}} | {{trainerentry|Spr FRLG Channeler.png|Channeler|Angelica|704|3|092|Gastly|♀|22|None|092|Gastly|♀|22|None|092|Gastly|♀|22|None|36=ウキエ|37=Ukie}} | ||
{{trainerdiv| | {{trainerdiv|ghost}} | ||
{{trainerentry|Spr FRLG Channeler.png|Channeler|Jennifer|768|1|092|Gastly|♀|24|None|36=ヤエコ|37=Yaeko}} | {{trainerentry|Spr FRLG Channeler.png|Channeler|Jennifer|768|1|092|Gastly|♀|24|None|36=ヤエコ|37=Yaeko}} | ||
{{trainerdiv| | {{trainerdiv|ghost}} | ||
{{trainerentry|Spr FRLG Channeler.png|Channeler|Emilia|768|1|092|Gastly|♀|24|None|36=サワコ|37=Sawako}} | {{trainerentry|Spr FRLG Channeler.png|Channeler|Emilia|768|1|092|Gastly|♀|24|None|36=サワコ|37=Sawako}} | ||
{{trainerfooter| | {{trainerfooter|ghost|FRLG}} | ||
====7F==== | ====7F==== | ||
{{trainerheader| | {{trainerheader|ghost}} | ||
{{trainerentry|Spr FRLG Team Rocket Grunt M.png|Team Rocket| | {{trainerentry|Spr FRLG Team Rocket Grunt M.png|Team Rocket Grunt||800|3|041|Zubat|♂|25||041|Zubat|♂|25||042|Golbat|♂|25||}} | ||
{{trainerdiv| | {{trainerdiv|ghost}} | ||
{{trainerentry|Spr FRLG Team Rocket Grunt M.png|Team Rocket| | {{trainerentry|Spr FRLG Team Rocket Grunt M.png|Team Rocket Grunt||832|2|109|Koffing|♂|26||096|Drowzee|♂|26|None|}} | ||
{{trainerdiv| | {{trainerdiv|ghost}} | ||
{{trainerentry|Spr FRLG Team Rocket Grunt M.png|Team Rocket| | {{trainerentry|Spr FRLG Team Rocket Grunt M.png|Team Rocket Grunt||736|4|041|Zubat|♂|23||019|Rattata|♂|23|None|020|Raticate|♂|23||041|Zubat|♂|23||}} | ||
{{trainerfooter| | {{trainerfooter|ghost|FRLG}} | ||
===Generation VII=== | |||
====2F==== | |||
{{MSP/PE|025Pa|Pikachu}} In [[Pokémon: Let's Go, Pikachu! and Let's Go, Eevee!|Let's Go, Pikachu!]]: | |||
{{Party/Single | |||
|color={{green color light}} | |||
|headcolor={{black color light}} | |||
|bordercolor={{black color dark}} | |||
|sprite=VSTrace.png | |||
|size=x90px | |||
|prize={{PDollar}}2,240 | |||
|class=Pokémon Trainer | |||
|classlink=Pokémon Trainer | |||
|name={{color2|000|Trace (game)|Trace}} | |||
|game=LGP | |||
|location=Pokémon Tower | |||
|pokemon=3}} | |||
|{{Pokémon/7/LG | |||
|ndex=017 | |||
|pokemon=Pidgeotto | |||
|level=27 | |||
|gender=male | |||
|type1=Normal|type2=Flying | |||
|move1=Quick Attack|move1type=Normal|move1cat=Physical | |||
|move2=Wing Attack|move2type=Flying|move2cat=Physical | |||
|move3=Sand Attack|move3type=Ground|move3cat=Status}} | |||
|{{Pokémon/7/LG | |||
|ndex=044 | |||
|pokemon=Gloom | |||
|level=27 | |||
|gender=female | |||
|type1=Grass|type2=Poison | |||
|move1=Razor Leaf|move1type=Grass|move1cat=Physical | |||
|move2=Sleep Powder|move2type=Grass|move2cat=Status | |||
|move3=Acid|move3type=Poison|move3cat=Special}} | |||
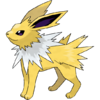
|{{Pokémon/7/LG | |||
|ndex=135 | |||
|pokemon=Jolteon | |||
|level=28 | |||
|gender=male | |||
|type1=Electric | |||
|move1=Thunder Shock|move1type=Electric|move1cat=Special | |||
|move2=Quick Attack|move2type=Normal|move2cat=Physical | |||
|move3=Pin Missile|move3type=Bug|move3cat=Physical}} | |||
{{Party/Footer}} | |||
{{MSP/PE|133Pa|Eevee|PE}} In [[Pokémon: Let's Go, Pikachu! and Let's Go, Eevee!|Let's Go, Eevee!]]: | |||
{{Party/Single | |||
|color={{green color light}} | |||
|headcolor={{black color light}} | |||
|bordercolor={{black color dark}} | |||
|sprite=VSTrace.png | |||
|size=x90px | |||
|prize={{PDollar}}2,240 | |||
|class=Pokémon Trainer | |||
|classlink=Pokémon Trainer | |||
|name={{color2|000|Trace (game)|Trace}} | |||
|game=LGE | |||
|location=Pokémon Tower | |||
|pokemon=3}} | |||
|{{Pokémon/7/LG | |||
|ndex=017 | |||
|pokemon=Pidgeotto | |||
|level=27 | |||
|gender=male | |||
|type1=Normal|type2=Flying | |||
|move1=Quick Attack|move1type=Normal|move1cat=Physical | |||
|move2=Wing Attack|move2type=Flying|move2cat=Physical | |||
|move3=Sand Attack|move3type=Ground|move3cat=Status}} | |||
|{{Pokémon/7/LG | |||
|ndex=044 | |||
|pokemon=Gloom | |||
|level=27 | |||
|gender=female | |||
|type1=Grass|type2=Poison | |||
|move1=Razor Leaf|move1type=Grass|move1cat=Physical | |||
|move2=Sleep Powder|move2type=Grass|move2cat=Status | |||
|move3=Acid|move3type=Poison|move3cat=Special}} | |||
|{{Pokémon/7/LG | |||
|ndex=026 | |||
|pokemon=Raichu | |||
|level=28 | |||
|gender=male | |||
|type1=Electric | |||
|move1=Thunder Shock|move1type=Electric|move1cat=Special | |||
|move2=Quick Attack|move2type=Normal|move2cat=Physical | |||
|move3=Thunder Punch|move3type=Electric|move3cat=Physical}} | |||
{{Party/Footer}} | |||
{{-}} | |||
{{trainerheader|ghost}} | |||
{{trainerentry|VSCoach Trainer F PE.png{{!}}90px|game=PE|Coach Trainer|Holly|2,800|1|074|Geodude|♀|28|None|36=ヘシマ|37=Heshima}} | |||
{{trainerfooter|ghost|PE}} | |||
====3F==== | |||
{{trainerheader|ghost}} | |||
{{Trainerentry|VSChanneler PE.png{{!}}90px|game=PE|Channeler|Hope|1,000<br/>3 {{i|Poké Ball}}s|1|092|Gastly|♂|25|None|36=アイリ|37=Airi}} | |||
{{trainerdiv|ghost}} | |||
{{trainerentry|VSChanneler PE.png{{!}}90px|game=PE|Channeler|Patricia|1,000<br/>3 {{i|Poké Ball}}s|2|092|Gastly|♀|25|None|092|Gastly|♂|25|None|36=コトネ|37=Kotone}} | |||
{{trainerdiv|ghost}} | |||
{{trainerentry|VSChanneler PE.png{{!}}90px|game=PE|Channeler|Carly|1,000<br/>3 {{i|Poké Ball}}s|1|092|Gastly|♀|25|None|36=トミコ|37=Tomiko}} | |||
{{trainerfooter|ghost|PE}} | |||
====4F==== | |||
{{trainerheader|ghost}} | |||
{{trainerentry|VSChanneler PE.png{{!}}90px|game=PE|Channeler|Laurel|1,000<br/>3 {{i|Poké Ball}}s|1|093|Haunter|♀|25|None|36=ソノコ|37=Sonoko}} | |||
{{trainerdiv|ghost}} | |||
{{trainerentry|VSChanneler PE.png{{!}}90px|game=PE|Channeler|Jody|1,000<br/>3 {{i|Poké Ball}}s|2|092|Gastly|♀|25|None|093|Haunter|♀|25|None|36=サオリ|37=Saori}} | |||
{{trainerdiv|ghost}} | |||
{{trainerentry|VSChanneler PE.png{{!}}90px|game=PE|Channeler|Paula|1,000<br/>3 {{i|Poké Ball}}s|2|092|Gastly|♂|25|None|092|Gastly|♀|25|None|36=ヒイナ|37=Hiina}} | |||
{{trainerdiv|ghost|After becoming Champion}} | |||
{{trainerentry/master|VSLass Master PE.png{{!}}90px|game=PE|Lass|Hazel|131|Lapras|♀|75|Grass|Solar Beam|Electric|Thunderbolt|Ghost|Confuse Ray|36=アヤナ|37=Ayana}} | |||
{{trainerfooter|ghost|PE}} | |||
====5F==== | |||
{{trainerheader|ghost}} | |||
{{trainerentry|VSChanneler PE.png{{!}}90px|game=PE|Channeler|Ruth|1,000<br/>3 {{i|Poké Ball}}s|1|093|Haunter|♀|25|None|36=ヒトエ|37=Hitoe}} | |||
{{trainerdiv|ghost}} | |||
{{trainerentry|VSChanneler PE.png{{!}}90px|game=PE|Channeler|Tammy|1,000<br/>3 {{i|Poké Ball}}s|3|093|Haunter|♀|25|None|092|Gastly|♀|25|None|092|Gastly|♂|25|None|36=ミコト|37=Mikoto}} | |||
{{trainerdiv|ghost}} | |||
{{trainerentry|VSChanneler PE.png{{!}}90px|game=PE|Channeler|Karina|1,000<br/>3 {{i|Poké Ball}}s|2|093|Haunter|♂|25|None|092|Gastly|♀|25|None|36=カヨコ|37=Kayoko}} | |||
{{trainerdiv|ghost}} | |||
{{trainerentry|VSChanneler PE.png{{!}}90px|game=PE|Channeler|Janae|1,000<br/>3 {{i|Poké Ball}}s|4|092|Gastly|♂|25|None|092|Gastly|♂|25|None|092|Gastly|♂|25|None|092|Gastly|♀|25|None|36=シズル|37=Shizuru}} | |||
{{trainerdiv|ghost|After becoming Champion}} | |||
{{trainerentry/master|VSPsychic Master PE.png{{!}}90px|game=PE|Psychic|Vlad|097|Hypno|♂|75|Psychic|Hypnosis|Dark|Nasty Plot|Ghost|Shadow Ball|36=タツジ|37=Tatsuji}} | |||
{{trainerfooter|ghost|PE}} | |||
====6F==== | |||
{{trainerheader|ghost}} | |||
{{trainerentry|VSChanneler PE.png{{!}}90px|game=PE|Channeler|Emilia|1,280<br/>3 {{i|Poké Ball}}s|3|093|Haunter|♀|32|None|093|Haunter|♂|32|None|093|Haunter|♀|32|None|36=サワコ|37=Sawako}} | |||
{{trainerdiv|ghost}} | |||
{{trainerentry|VSChanneler PE.png{{!}}90px|game=PE|Channeler|Angelica|1,000<br/>3 {{i|Poké Ball}}s|3|092|Gastly|♀|25|None|093|Haunter|♀|25|None|092|Gastly|♂|25|None|36=ウキエ|37=Ukie}} | |||
{{trainerdiv|ghost}} | |||
{{trainerentry|VSChanneler PE.png{{!}}90px|game=PE|Channeler|Jennifer|1,000<br/>3 {{i|Poké Ball}}s|1|093|Haunter|♀|25|None|36=ヤエコ|37=Yaeko}} | |||
{{trainerdiv|ghost|After becoming Champion}} | |||
{{trainerentry/master|VSLass Master PE.png{{!}}90px|game=PE|Lass|Charlotte|026|Raichu|♀|75|Normal|Headbutt|Normal|Double Team|Normal|Hyper Beam|36=マイコ|37=Maiko}} | |||
{{trainerfooter|ghost|PE}} | |||
====7F==== | |||
{{Party/Tag | |||
|color=666 | |||
|bordercolor=C00 | |||
|headcolor=CCC | |||
|color1=EE8BCD | |||
|headcolor1=F5BCE2 | |||
|bordercolor1=E44EB2 | |||
|color2=8BB2FF | |||
|headcolor2=CCDDFF | |||
|bordercolor2=4D88FF | |||
|class=Team Rocket | |||
|classlink=Team Rocket | |||
|sprite=VSJessie PE.png | |||
|size=90px | |||
|class2=Team Rocket | |||
|classlink2=Team Rocket | |||
|sprite2=VSJames PE.png | |||
|size2=90px | |||
|prize={{Pdollar}}3,264 | |||
|name={{color2|000|Jessie}} | |||
|name2={{color2|000|James}} | |||
|game=PE | |||
|location=Pokémon Tower | |||
|pokemon1=1 | |||
|pokemon2=1}} | |||
| style="margin:auto" |{{Pokémon/7/LG | |||
|game=PE | |||
|ndex=024 | |||
|pokemon=Arbok | |||
|gender=male | |||
|level=34 | |||
|type1=Poison | |||
|move1=Poison Jab|move1type=Poison|move1cat=Physical | |||
|move2=Glare|move2type=Normal|move2cat=Status | |||
|move3=Crunch|move3type=Dark|move3cat=Physical}} | |||
{{Party/Div|color=8BB2FF}} | |||
| style="margin:auto" |{{Pokémon/7/LG | |||
|game=PE | |||
|ndex=110 | |||
|pokemon=Weezing | |||
|gender=male | |||
|level=34 | |||
|type1=Poison | |||
|move1=Dark Pulse|move1type=Dark|move1cat=Special | |||
|move2=Sludge Bomb|move2type=Poison|move2cat=Special}} | |||
{{Party/Footer}} | |||
{{-}} | |||
{{trainerheader|ghost}} | |||
{{trainerdiv|ghost|After becoming Champion}} | |||
{{trainerentry/master|VSLass Master PE.png{{!}}90px|game=PE|Lass|Emily|070|Weepinbell|♀|70|Poison|Poison Jab|Poison|Sludge Bomb|Normal|Growth|36=ノリコ|37=Noriko}} | |||
{{trainerfooter|ghost|PE}} | |||
==Differences among generations== | ==Differences among generations== | ||
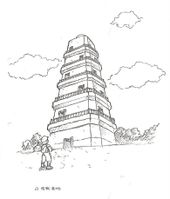
[[File:Capsule Monsters Tower.jpg|170px|thumb|Concept art]] | [[File:Capsule Monsters Tower.jpg|170px|thumb|Concept art]] | ||
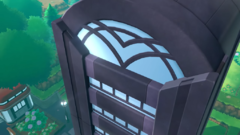
In [[Generation II]] and {{gen|IV}} | [[File:Pokémon Tower PE.png|thumb|left|240px|The top of Pokémon Tower in Generation VII]] | ||
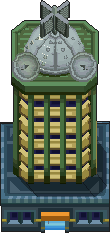
In [[Generation II]] and {{gen|IV}}, the tower was converted into the '''Lavender Radio Tower''', broadcasting music and radio programs, including the [[Poké Flute]] channel, to the radios and [[Pokégear]] of Kanto. Unlike the [[Goldenrod Radio Tower]] in [[Goldenrod City]], only one floor, the ground floor, is open to the public as a result of [[Team Rocket]]'s infiltration of the Goldenrod Tower. The stairs in [[Generation II]] lead down into a basement instead of up into the tower, but the player is blocked by a guard. | |||
After restoring power to Kanto by fixing the generator at the [[Power Plant]], Trainers can receive the {{DL|Pokégear|Radio|EXPN Card}} from the manager of the tower, allowing Pokégears to tune into the Poké Flute channel, which can be used to move {{p|Snorlax}} from its slumber in front of [[Diglett's Cave]] in [[Vermilion City]]. | After restoring power to Kanto by fixing the generator at the [[Kanto Power Plant]], Trainers can receive the {{DL|Pokégear|Radio|EXPN Card}} from the manager of the tower, allowing Pokégears to tune into the Poké Flute channel, which can be used to move {{p|Snorlax}} from its slumber in front of [[Diglett's Cave]] in [[Vermilion City]]. | ||
To compensate for the loss of the burial site, the graves were moved to a small building, the House of Memories, known as the Soul House in Generation II, at the south end of the town. Most of them were placed in secret chambers that only Mr. Fuji knows about. | To compensate for the loss of the burial site, the graves were moved to a small building, the House of Memories, known as the Soul House in Generation II, at the south end of the town. Most of them were placed in secret chambers that only Mr. Fuji knows about. | ||
There is {{weather|fog}} here in [[Generation III]], but it has no in-battle effect. This is because fog was not used as a {{cat|game mechanics|game mechanic}} until Generation IV. | |||
{| class="roundy" style="background: #{{ | |||
In [[Generation VII]], several changes were made to the layout. The reception desk on the ground floor has been moved to the upper-right corner, with the rest of the floor space being populated with tables and couches for visitors of the graveyard to use. The upper floors are filled with a ghostly purple mist. | |||
{{main|Radio}} | |||
{| class="roundy" style="background:#{{kanto color}}; border:3px solid #{{kanto color dark}}" colspan=6 cellspacing="2" cellpadding="4" | |||
|- | |- | ||
! width=15% style="background: #{{ | ! width=15% style="background:#{{kanto color light}}; {{roundytl|5px}}" | Program | ||
! width=10% style="background: #{{ | ! width=10% style="background:#{{kanto color light}}" | Host(s) | ||
! width=10% style="background: #{{ | ! width=10% style="background:#{{kanto color light}}" | Channel ([[Pokégear|PG]]) | ||
! width=45% style="background: #{{ | ! width=45% style="background:#{{kanto color light}}" | Description | ||
! width=10% style="background: #{{ | ! width=10% style="background:#{{kanto color light}}" | EXPN Card? | ||
! width=10% style="background: #{{ | ! width=10% style="background:#{{kanto color light}}; {{roundytr|5px}}" | Games | ||
|- style="background: #FFF | |- style="background:#FFF" | ||
| | | Poké Flute | ||
| (no DJ) | | (no DJ) | ||
| 20 | | 20 | ||
| Plays Poké Flute music. Used to awaken {{p|Snorlax}}. | | Plays [[Poké Flute]] music. Used to awaken {{p|Snorlax}}. | ||
| Yes | | Yes | ||
| | | {{gameabbrev2|GSC}} | ||
|- style="background: #FFF | |- style="background:#FFF" | ||
| Let's All Sing | |||
| {{DL|DJ|Fern}} | | {{DL|DJ|Fern}} | ||
| 18.5 | | 18.5 | ||
| Broadcasts music, either a march or a lullaby. | | Broadcasts music, either a march or a lullaby. | ||
| {{v2|Crystal}} only | | {{v2|Crystal}} only | ||
| | | {{gameabbrev2|C}} | ||
|- style="background: #FFF;" | |- | ||
| | | style="background:#FFF; {{roundybl|5px}}" | Places and People | ||
| {{DL|DJ|Lily}} | | style="background:#FFF" | {{DL|DJ|Lily}} | ||
| 16.5 | | style="background:#FFF" | 16.5 | ||
| Talk show discussing [[Kanto]] locations or Trainers the player has faced. | | style="background:#FFF" | Talk show discussing [[Kanto]] locations or Trainers the player has faced. | ||
| {{v2|Crystal}} only{{tt|*|Only applies for the Pokégear. Does not apply for the radios in Kanto houses.}} | | style="background:#FFF" | {{v2|Crystal}} only{{tt|*|Only applies for the Pokégear. Does not apply for the radios in Kanto houses.}} | ||
| | | style="background:#FFF; {{roundybr|5px}}" | {{gameabbrev2|C}} | ||
|} | |} | ||
==Layout== | ==Layout== | ||
===Inside design=== | ===Inside design=== | ||
{| | ====Generations I and III==== | ||
{| class="roundy" style="margin:auto; background:#000; border:3px solid #{{locationcolor/dark|ghost}}" | |||
|- | |||
! style="background:#{{locationcolor/light|ghost}}; {{roundytl|5px}}" | Version | |||
! style="background:#{{locationcolor/light|ghost}}" | 1F | |||
! style="background:#{{locationcolor/light|ghost}}" | 2F | |||
! style="background:#{{locationcolor/light|ghost}}" | 3F | |||
! style="background:#{{locationcolor/light|ghost}}" | 4F | |||
! style="background:#{{locationcolor/light|ghost}}" | 5F | |||
! style="background:#{{locationcolor/light|ghost}}" | 6F | |||
! style="background:#{{locationcolor/light|ghost}}; {{roundytr|5px}}" | 7F | |||
|- | |- | ||
! style="background:#{{red color}}" | {{color2|000|Pokémon Red and Blue Versions|Red}} | ! style="background:#{{red color}}" | {{color2|000|Pokémon Red and Blue Versions|Red}} | ||
| rowspan="3" | [[File:Pokémon Tower 1F RBY.png|100px]] | | rowspan="3" | [[File:Pokémon Tower 1F RBY.png|100px]] | ||
| Line 885: | Line 1,211: | ||
| rowspan="3" | [[File:Pokémon Tower 7F RBY.png|100px]] | | rowspan="3" | [[File:Pokémon Tower 7F RBY.png|100px]] | ||
|- | |- | ||
! style="background:#{{blue color}}" | {{color2| | ! style="background:#{{blue color}}" | {{color2|FFF|Pokémon Red and Blue Versions|Blue}} | ||
|- | |- | ||
! style="background:#{{yellow color}}" | {{color2|000|Pokémon Yellow Version|Yellow}} | ! style="background:#{{yellow color}}" | {{color2|000|Pokémon Yellow Version|Yellow}} | ||
| Line 900: | Line 1,226: | ||
! style="background:#{{leafgreen color}}" | {{color2|000|Pokémon FireRed and LeafGreen Versions|LeafGreen}} | ! style="background:#{{leafgreen color}}" | {{color2|000|Pokémon FireRed and LeafGreen Versions|LeafGreen}} | ||
|- | |- | ||
| colspan="8" style="background:#{{ | |- | ||
! style="background:#{{Let's Go Pikachu color}}" | {{color2|000|Pokémon Let's Go, Pikachu! and Let's Go, Eevee!|Let's Go, Pikachu!}} | |||
| rowspan="2" | [[File:Pokémon Tower 1F LGPE.png|100px]] | |||
| rowspan="2" | [[File:Pokémon Tower 2F LGPE.png|100px]] | |||
| rowspan="2" | [[File:Pokémon Tower 3F LGPE.png|100px]] | |||
| rowspan="2" | [[File:Pokémon Tower 4F LGPE.png|100px]] | |||
| rowspan="2" | [[File:Pokémon Tower 5F LGPE.png|100px]] | |||
| rowspan="2" | [[File:Pokémon Tower 6F LGPE.png|100px]] | |||
| rowspan="2" | [[File:Pokémon Tower 7F LGPE.png|100px]] | |||
|- | |||
! style="background:#{{Let's Go Eevee color}}" | {{color2|000|Pokémon Let's Go, Pikachu! and Let's Go, Eevee!|Let's Go, Eevee!}} | |||
|- | |||
| colspan="8" style="background:#{{locationcolor/light|ghost}}; {{roundybottom|5px}}" | | |||
|} | |} | ||
====Generations II and IV==== | |||
{| class="roundy" style="margin:auto; background:#000; border:3px solid #{{locationcolor/dark|building}}" | |||
|- | |||
! style="background:#{{locationcolor/light|building}}; {{roundytl|5px}}" | Version | |||
! style="background:#{{locationcolor/light|building}}; {{roundytr|5px}}" | 1F | |||
|- | |||
! style="background:#{{gold color}}" | {{color2|000|Pokémon Gold and Silver Versions|Gold}} | |||
| rowspan="3" | [[File:Lavender Radio Tower 1F GSC.png|240px]] | |||
|- | |||
! style="background:#{{silver color}}" | {{color2|000|Pokémon Gold and Silver Versions|Silver}} | |||
|- | |||
! style="background:#{{crystal color}}" | {{color2|000|Pokémon Crystal Version|Crystal}} | |||
|- | |||
! style="background:#{{heartgold color}}" | {{color2|000|Pokémon HeartGold and SoulSilver Versions|HeartGold}} | |||
| rowspan="2" | [[File:Lavender Radio Tower 1F HGSS.png|240px]] | |||
|- | |||
! style="background:#{{soulsilver color}}" | {{color2|000|Pokémon HeartGold and SoulSilver Versions|SoulSilver}} | |||
|- | |||
| colspan="2" style="background:#{{locationcolor/light|building}}; {{roundybottom|5px}}" | | |||
|} | |||
===Outside design=== | |||
{{Mapgen | |||
|hv=v | |||
|colordark={{locationcolor/dark|building}} | |||
|colorlight={{locationcolor/light|ghost}} | |||
|genI=Pokémon Tower RBY.png | |||
|sizeI=96px | |||
|genII=Lavender Radio Tower GSC.png | |||
|sizeII=94px | |||
|genIII=Pokémon Tower FRLG.png | |||
|sizeIII=110px | |||
|genIV=Lavender Radio Tower HGSS.png | |||
|sizeIV=110px | |||
}} | |||
==In the anime== | ==In the anime== | ||
[[File:Pokémon Tower anime.png|thumb| | ===Main series=== | ||
The Pokémon Tower appeared in ''[[EP023|The Tower of Terror]]''. It is depicted as a decrepit mansion rather than a graveyard as it is in the games. | [[File:Pokémon Tower anime.png|thumb|200px|The Pokémon Tower in the {{pkmn|anime}}]] | ||
====[[Original series]]==== | |||
The Pokémon Tower appeared in ''[[EP023|The Tower of Terror]]''. It is depicted as a decrepit mansion rather than a graveyard as it is in the {{pkmn|games}}. | |||
{{Ash}} visited the tower after losing his [[Gym]] {{pkmn|battle}} against [[Sabrina]], and being advised by [[Sabrina's father]] to go to Lavender Town to catch himself a Ghost Pokémon in order to defeat Sabrina's {{t|Psychic}} Pokémon. {{an|Misty}} and {{an|Brock}} quickly got scared of the seemingly inexplicable events happening inside of the tower, and left Ash to conduct his search alone. He finally encountered {{TP|Sabrina|Haunter}} and {{p|Gengar}}, two of the three residents of the tower. He tried to battle them, but soon found out that they were more interested in physical comedy than battling. As their comedy routine didn't work on Ash, the ghosts got sad and sank through the floor in depression. Ash tried to dive after them, but only ended up hitting the floor, causing an old chandelier to fall on him and {{AP|Pikachu}}, killing them. Haunter then turned Ash and Pikachu into ghosts, and the two had some fun with the three ghosts, including playing some pranks with Brock and Misty, before eventually returning to their bodies. However, Haunter had enjoyed its time with Ash so much that it decided to follow him to [[Saffron City]]. | |||
Unbeknownst by Ash and {{ashfr}}, {{TRT}} had also been hiding in the tower, seeking for a chance to steal Pikachu. Their plans were foiled, however, due to breaking floors and the pranks of the Ghost Pokémon. Ash even mistook their noises in the basement for the Ghost Pokémon, and had his Pikachu and {{AP|Charmander}} attack them, eventually even throwing a [[Poké Ball]] at [[Jessie]]'s face. At the end of the episode, the Team Rocket trio was seen tied up in {{p|Gastly}}, Haunter, and Gengar's carousel, forcing them to stay with the Ghost Pokémon for a while. | |||
The exterior of the tower looks significantly smaller than what the game depicts it to be. It has a two horn-like objects protruding from the side of the tower, a balcony that appears to be a mouth and two eye-like windows on the very top of it, giving it a demonic appearance. There are also several other balconies and windows on the building. | The exterior of the tower looks significantly smaller than what the game depicts it to be. It has a two horn-like objects protruding from the side of the tower, a balcony that appears to be a mouth and two eye-like windows on the very top of it, giving it a demonic appearance. There are also several other balconies and windows on the building. | ||
The floors seem to be unstable as [[James]] falls through to the lower floor due to a single step, although it took the weight of the entire | The floors seem to be unstable as [[James]] falls through to the lower floor due to a single step, although it took the weight of the entire Team Rocket trio to break through the lower floor to the basement. The tower appears to have numerous rooms including a nursery, a dining room, and the aforementioned basement. | ||
===Pokémon=== | ====Pokémon==== | ||
{| style="float:left; width:100%" | |||
|- | |||
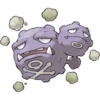
| {{ActivePoké|Pokémon Tower|Gastly|Pokémon Tower Gastly.png|ghost|poison|link=no}} | |||
| {{ActivePoké|Pokémon Tower|Gengar|Pokémon Tower Gengar.png|ghost|poison|link=no}} | |||
| | |||
|} | |||
{{-}} | |||
{| | ====Pokémon previously seen at the Pokémon Tower==== | ||
{| width="100%" | |||
|- | |- | ||
| {{ActivePoké|Sabrina|Haunter|Sabrina Haunter.png|ghost|poison}} | |||
| {{ActivePoké|Sabrina|Haunter| | | | ||
| | |||
|} | |} | ||
{{ | {{-}} | ||
===Pokémon Origins=== | |||
[[File:Pokémon Tower PO.png|thumb|250px|The Pokémon Tower in [[Pokémon Origins]]]] | |||
The Pokémon Tower first appeared in ''[[PO02|File 2: Cubone]]'', playing a similar role as in {{game|Red and Blue|s}}. | |||
Once {{OBP|Red|Origins}} arrived in Lavender Town, he soon heard rumors about a [[Ghosts in the Pokémon world|ghost]] that has been appearing in the Pokémon Tower, where people go to pay their respects to their deceased Pokémon. While visiting the {{DL|Lavender Town|Lavender Volunteer Pokémon House|Pokémon House}}, Red learned that Team Rocket had recently invided the tower and made its top floor their base. Upon hearing that Mr. Fuji had been taken hostage by Team Rocket when he had tried to convince them to leave, Red decided to go to the Pokémon Tower and save Mr. Fuji. {{OBP|Blue|Origins}} overheard the conversation and decided to defeat Team Rocket and save Mr. Fuji himself, so that ''he'' would be the revered hero of Lavender Town. | |||
Red | Initially, Blue believed that the ghost rumors were set up by Team Rocket to scare unwanted visitors away, but when he reached the sixth floor, he found himself attacked by a real ghost, and ran away in scare. His scream was heard by the Team Rocket members on the top floor, and one of them went to check it out. Blue soon bumped into Red, who had also come to the tower. As the ghost followed them, Red refused to run away, and sent his {{TP|Red|Charmeleon}} to battle the ghost. During the battle, Blue managed to sneak past the ghost and make his way to the upper floors, where he encountered the {{tc|Team Rocket Grunt}} with the [[Silph Scope]]. He quickly defeated the Grunt with his {{p|Wartortle}}, snatched the Silph Scope, and rushed it to Red, who had found his attacks being useless against the ghost. With the Silph Scope, Red discovered that the ghost was actually the spirit of {{OBP|Marowak|ghost}}, a Pokémon that had been killed by Team Rocket. Before the battle could go on, [[Reina]] arrived with {{p|Cubone}}, Marowak's child. Seeing her child once again, Marowak finally found peace, and departed to the afterlife. Red then made his way to the top floor, where he battled one of the Team Rocket Grunt's with his {{p|Jolteon}}. With the help of Cubone, Jolteon was able to beat the Grunt's {{p|Koffing}}, forcing the Rockets to retreat in defeat. Mr. Fuji was then rescued, and the tower was opened to the public once again. | ||
The Pokémon Tower made a brief cameo appearance in ''[[PO04|File 4: Charizard]]'' during an overview of Lavender Town. | |||
====Pokémon==== | ====Pokémon==== | ||
{| | {| style="float:left; width:100%" | ||
|- | |- | ||
| {{ | | {{ActivePoké|Pokémon Tower|Marowak|Silph Scope Marowak PO.png|ground|nick=Marowak (ghost)}} ♀ | ||
| | | | ||
|} | |} | ||
{{ | {{-}} | ||
==In the manga== | |||
===Pokémon Adventures=== | |||
[[File:Pokémon Tower Adventures.png|thumb|200px|Pokémon Tower in [[Pokémon Adventures]]]] | |||
===={{MangaArc|Red, Green & Blue}}==== | |||
The Pokémon Tower appeared in ''[[PS013|Sigh for Psyduck]]'' and ''[[PS014|That Awful Arbok!]]''. When {{adv|Red}} had come to Lavender Town, he found out from [[Mr. Fuji]] that there are stories of Pokémon ghosts that appear from the tower. After learning that {{adv|Blue}} had gone inside and not returned for two weeks, Red decided to investigate the area. | |||
==== | Upon entering, Red was attacked by various zombie Pokémon that were being controlled by a mysterious purple fog. In addition, he discovered that Blue and his {{TP|Blue|Charmeleon}} were also being controlled by the fog. Once he figured out that the fog was actually a {{p|Gastly}}, Red managed to free Blue and Charmeleon upon defeating the culprit. The Gastly's owner was subsequently revealed to be [[Koga]], a [[Gym Leader]] working for [[Team Rocket]], who had taken over the tower as a base for the organization. The tower was damaged when Koga's {{p|Arbok}} kept using {{m|Acid}} to attack Red and Blue, but was repaired by the townspeople after Koga was defeated and driven off. | ||
{| | ====Pokémon==== | ||
{| style="float:left; width:100px" | |||
|- | |- | ||
| {{InactivePoké|Pokémon Tower|Psyduck|Pokémon Tower Psyduck Adventures.png|water|link=no}} (zombie) | | {{InactivePoké|Pokémon Tower|Psyduck|Pokémon Tower Psyduck Adventures.png|water|link=no}} (zombie) | ||
| {{InactivePoké|Pokémon Tower|Lickitung|Pokémon Tower Lickitung Slowbro Adventures.png|normal|link=no}} (multiple zombies) | | {{InactivePoké|Pokémon Tower|Lickitung|Pokémon Tower Lickitung Slowbro Adventures.png|normal|link=no}} (multiple; zombies) | ||
| {{InactivePoké|Pokémon Tower|Slowbro|Pokémon Tower Lickitung Slowbro Adventures.png|water|psychic|link=no}} (multiple zombies) | | {{InactivePoké|Pokémon Tower|Slowbro|Pokémon Tower Lickitung Slowbro Adventures.png|water|psychic|link=no}} (multiple; zombies) | ||
| {{InactivePoké|Pokémon Tower|Tangela|Pokémon Tower Tangela Slowpoke Adventures.png|grass|link=no}} (multiple zombies) | | {{InactivePoké|Pokémon Tower|Tangela|Pokémon Tower Tangela Slowpoke Adventures.png|grass|link=no}} (multiple; zombies) | ||
|- | |||
| {{InactivePoké|Pokémon Tower|Slowpoke|Pokémon Tower Tangela Slowpoke Adventures.png|water|psychic|link=no}} (multiple; zombies) | |||
| {{InactivePoké|Koga|Gastly|Koga Gastly Adventures.png|ghost|poison|link=no}} | |||
| {{InactivePoké|Koga|Arbok|Koga Arbok Acid Adventures.png|poison|link=no}} | |||
|}{{left clear}} | |||
===The Electric Tale of Pikachu=== | |||
[[File:Pokémon Tower EToP.png|thumb|250px|Pokémon Tower in [[The Electric Tale of Pikachu]]]] | |||
The Pokémon Tower appeared in ''[[ET04|Haunting My Dreams]]''. It was the home to a group of {{p|Gastly}} and their leader, a {{pkmn2|giant}} {{p|Haunter}} called the [[Black Fog]]. After the Black Fog had sucked out [[Sabrina]]'s soul with its {{m|Dream Eater}} attack, {{OBP|Ash Ketchum|EToP|Ash}} led a group of {{pkmn|Trainer}}s to [[Lavender Town]], their plan being to capture the Black Fog in a giant [[Poké Ball]]. Although the capture initially seemed successful, the Black Fog escaped by using {{m|Explosion}} to destroy the capture device from the inside. This act, however, left it severely weakened and vulnerable to regular Poké Balls. With this advantage on his side, Ash chased the Black Fog into the tower and managed to corner it, attempting to catch the giant [[Pokémon category|Gas Pokémon]] with an [[Ultra Ball]]. However, just before the ball could make contact with the Black Fog, it used {{m|Self-Destruct}}, killing itself and collapsing the tower. With its death, Sabrina recovered and {{m|teleport}}ed to the site. It was then revealed that past people had treated the Black Fog as a god, and, having gotten used to this treatment, it had chosen to kill itself rather than be caught by a human. Ash, though, was left saddened for having wasted all of his allowance on the Ultra Ball that he had just lost. | |||
====Pokémon==== | |||
{| style="float:left; width:100px" | |||
|- | |- | ||
| {{InactivePoké|Pokémon Tower| | | {{InactivePoké|Pokémon Tower|Gastly|Gastly EToP.png|ghost|poison|link=no}} (multiple) | ||
|} | | {{InactivePoké|Pokémon Tower|Haunter|Black Fog.png|ghost|poison|nick=Black Fog}} | ||
{{left clear}} | |}{{left clear}} | ||
=== | ===Magical Pokémon Journey=== | ||
[[File:Pokemon Tower MPJ.png|thumb | [[File:Pokemon Tower MPJ.png|thumb|250px|Pokémon Tower in [[Magical Pokémon Journey]]]] | ||
The Pokémon Tower debuted in ''[[PPPB14|Raichu's Best Friend]]''. When {{MPJ|Pikachu}} and his friend see a picture that they took, they spot a | The Pokémon Tower debuted in ''[[PPPB14|Raichu's Best Friend]]''. When {{MPJ|Pikachu}} and his friend see a picture that they took, they spot a [[Ghosts in the Pokémon world|ghost]] within the picture. Afterwards, the ghost returns and switches to her human form. The ghost turns out to be a girl named {{MPJ|Sandy}} who wants the group to do a favor for her and find her [[Sandy's Raichu|friend]]. Sandy sends the group to the Pokémon Tower in order to find her Raichu. | ||
Once the group enters the tower, they are bombarded by many | Once the group enters the tower, they are bombarded by many {{OBP|ghost|Pokémon Tower}}s of the deceased Pokémon within the tower. | ||
====Pokémon==== | ====Pokémon==== | ||
{| | {| style="float:left; width:100px" | ||
|- | |- | ||
| {{InactivePoké|Sandy|Raichu| | | {{InactivePoké|Sandy|Raichu|Sandy Raichu.png|size=120px|electric}} ♂ | ||
| {{InactivePoké|Pokémon Tower|Psyduck| | | {{InactivePoké|Pokémon Tower|Psyduck|Pokémon Tower spirits MPJ.png|water|link=no}} (multiple) | ||
| {{InactivePoké|Pokémon Tower|Golbat| | | {{InactivePoké|Pokémon Tower|Golbat|Pokémon Tower spirits MPJ.png|poison|flying|link=no}} | ||
| {{InactivePoké|Pokémon Tower| | | {{InactivePoké|Pokémon Tower|Charmander|Pokémon Tower spirits MPJ.png|fire|link=no}} | ||
|- | |||
| {{InactivePoké|Pokémon Tower|Poliwag|Pokémon Tower spirits MPJ.png|water|link=no}} | |||
| {{InactivePoké|Pokémon Tower|Victreebel|Pokémon Tower spirits MPJ.png|grass|poison|link=no}} | |||
| {{InactivePoké|Pokémon Tower|Ninetales|Pokémon Tower spirits MPJ.png|fire|link=no}} | |||
| {{InactivePoké|Pokémon Tower|Growlithe|Pokémon Tower spirits MPJ.png|fire|link=no}} | |||
|}{{left clear}} | |||
===Pokémon Zensho=== | |||
[[File:Pokémon Tower Zensho.png|thumb|150px|Pokémon Tower in [[Pokémon Zensho]]]] | |||
The Pokémon Tower appeared in [[PZ05]]. After visiting the {{DL|Lavender Town|Lavender Volunteer Pokémon House|Pokémon House}} and learning how [[Mr. Fuji]] had gone into the tower several days earlier but not returned, {{zensho|Satoshi}} tried to enter it, but was scared away by the {{OBP|ghost|Pokémon Tower}}s inside. He then witnessed two {{tc|Team Rocket Grunt}}s exiting the tower and overheard them talking about the [[Silph Scope]]. As such, he decided to follow them. | |||
After having managed to snatch himself a Silph Scope from [[Team Rocket Hideout|Team Rocket's hideout]] in [[Celadon City]], Satoshi returned to the Pokémon Tower, now being able to identify the ghosts inside as {{type|Ghost}} Pokémon. At the top floor, he found Mr. Fuji, who was being held hostage by [[Giovanni]] and a pair of Team Rocket Grunts. Giovanni summoned the spirit of his dead {{p|Machamp}} to attack Satoshi, but another ghost suddenly appeared and defeated Machamp, driving [[Team Rocket]] off. With Team Rocket gone, Mr. Fuji was able to calm the ghost's spirit, revealing that it was actually a {{OBP|Marowak|ghost}} killed by Team Rocket, which was now able to peacefully depart into the afterlife. As thanks for saving him, Mr. Fuji gave Satoshi the [[Poké Flute]] that Team Rocket had been after. | |||
====Pokémon==== | |||
{| style="float:left; width:100px" | |||
|- | |- | ||
| {{InactivePoké|Pokémon Tower| | | {{InactivePoké|Pokémon Tower|Gastly|Pokémon Tower Gastly Gengar Zensho.png|ghost|poison|link=no}} | ||
| {{InactivePoké|Pokémon Tower| | | {{InactivePoké|Pokémon Tower|Gengar|Pokémon Tower Gastly Gengar Zensho.png|ghost|poison|link=no}} | ||
| {{InactivePoké|Pokémon Tower| | | {{InactivePoké|Giovanni|Machamp|Giovanni Machamp Zensho.png|fighting|link=no}} | ||
| {{ | | {{InactivePoké|Pokémon Tower|Marowak|Marowak ghost Zensho.png|ground|nick=Marowak (ghost)}} | ||
|} | |}{{left clear}} | ||
{{ | |||
==In the TCG== | |||
This listing is of cards mentioning and/or featuring the Pokémon Tower in the {{pkmn|Trading Card Game|Pokémon Trading Card Game}}. | |||
{{cardlist/header|Related cards|Trainer|char=yes}} | |||
{{cardlist/entry|cardname={{TCG ID|Wizards Promo|Pokémon Tower|42}}|type=Trainer|type2=Stadium|enset=Wizards Black Star Promos|ennum=42|jpsetlink=Vending Machine cards|jpset=Expansion Sheet 3|jprarity=Uncommon}} | |||
{{cardlist/entry|cardname={{TCG ID|Team Up|Lavender Town|147}}|type=Stadium|enset=Team Up|enrarity=Uncommon|ennum=147/181|jpset=Tag Bolt|jprarity=Uncommon|jpnum=90/95}} | |||
{{cardlist/footer|Trainer}} | |||
==In the magazines== | |||
[[File:Pokémon Tower - Pokémon Power.png|thumb|250px|News about the Pokémon Tower<br>(''{{OBP|Pokémon Power|magazine}}'' magazine)]] | |||
===''Pokémon Power''=== | |||
In ''{{OBP|Pokémon Power|magazine}}'' (issue 2, page 3), it is said that visitors have reported seeing ghosts in the Pokémon Tower these days. This article also makes a reference to the TV show ''{{wp|The X-Files}}'' by mentioning that the government has sent special agents Mulder and Scully to investigate the Pokémon Tower. | |||
{{-}} | |||
==Trivia== | ==Trivia== | ||
* | * The song for the Pokémon Tower was briefly arranged for the song [[Ghost Dive (song)|Ghost Dive]]. | ||
* In [[Generation I]] only, the player will be unable to defeat the {{tc|Channeler}}s and reach the end of the Pokémon Tower if there are no available moves (with [[PP]] remaining) that can damage {{type|Ghost}} Pokémon, either directly or indirectly such as via {{status|confusion}}. This is due to the fact that in this generation, Ghost-type Pokémon are immune to {{m|Struggle}} (being a {{type|Normal}} move) and all opposing Pokémon have infinite PP. This applies to the battle against [[Agatha]] at the [[Indigo Plateau]] as well. | |||
** In particular, it is not possible to win those battles with a team consisting of {{p|Caterpie}}, {{p|Metapod}}, and/or {{p|Magikarp}}. If no moves are learned from [[TM]]s or from other games, then a total of 26{{sup/1|RB}} or 25{{sup/1|Y}} Pokémon species would be unable to win: the three previously mentioned, as well as {{p|Abra}}, {{p|Voltorb}}, {{p|Electrode}}, {{p|Pinsir}}, {{p|Scyther}}{{sup/1|RB}}, all the pure {{type|Normal}} Pokémon other than {{p|Ditto}} and {{p|Porygon}}, and all the pure {{type|Fighting}} Pokémon other than {{p|Hitmonchan}}. | |||
==In other languages== | ==In other languages== | ||
{{langtable|color={{ghost | {{langtable|color={{locationcolor/light|ghost}}|bordercolor={{locationcolor/dark|ghost}} | ||
|de | |zh_yue=寶可夢塔 ''{{tt|Pokémon Taap|Pokémon Tower}}'' {{tt|*|Games}}<br>寵物小精靈的魔塔 ''{{tt|Chúngmaht Síujīnglìhng-dīk Mōtaap|Pocket Monster Haunted Tower}}'' {{tt|*|Adventures}}<br>寵物小精靈塔 ''{{tt|Chúngmaht Síujīnglìhng Taap|Pocket Monster Tower}}'' {{tt|*|Zensho}}<br>小精靈高塔 ''{{tt|Síujīnglìhng-dīk Mōtaap|Pokémon High Tower}}'' {{tt|*|Anime}} | ||
| | |zh_cmn=寶可夢塔 / 宝可梦塔 ''{{tt|Pokémon Tǎ|Pokémon Tower}}'' {{tt|*|Games}}<br>神奇寶貝的靈骨塔 / 神奇宝贝的灵骨塔 ''{{tt|Shénqíbǎobèi-de Línggǔtǎ|Pokémon Spirit Bone Tower}}'' {{tt|*|Adventures (Taiwan & Mainland China (old Jilin edition))}}<br>神奇寶貝塔 / 神奇宝贝塔 ''{{tt|Shénqíbǎobèi Tǎ|Pokémon Tower}}'' {{tt|*|Anime & Zensho (Taiwan), Guidebook (Mainland China (21st Century Publishing Group))}}<br>宝可梦的灵骨塔 ''{{tt|Pokémon-de Línggǔtǎ|Pokémon Spirit Bone Tower}}'' {{tt|*|Adventures (Mainland China (new Jilin edition))}}<br>宠物小精灵的灵骨塔 ''{{tt|Chǒngwùxiǎojīnglíng-de Línggǔtǎ|Pocket Monster Spirit Bone Tower}}'' {{tt|*|Adventures (Mainland China (Light Industry Press edition))}}<br>宠物小精灵塔 ''{{tt|Chǒngwùxiǎojīnglíng Tǎ|Pocket Monster Tower}}'' {{tt|*|Pokédex (Mainland China (21st Century Publishing Group)) & Anime (Mainland China)}}<br>小精灵塔 ''{{tt|Xiǎojīnglíng Tǎ|Pokémon Tower}}'' {{tt|*|Let's Find Pokémon! (Mainland China) & Anime (Mainland China)}} | ||
|da=Pokémon-tårnet<!--source: Danish version of The Official Pokémon Handbook--> | |||
|fi=Pokémon-torni | |fi=Pokémon-torni | ||
|fr=Tour Pokémon | |fr=Tour Pokémon | ||
|de=Pokémon-Turm | |||
|it=Torre Pokémon | |it=Torre Pokémon | ||
|ko=포켓몬타워 ''Pokémon Tower'' | |||
|no=Pokémontårnet | |||
|pl=Wieża Pokémonów | |||
|tr=Pokémon Kulesi | |||
|pt=Torre Pokémon | |||
|es=Torre Pokémon | |||
|sv=Pokémon-tornet | |||
|vi=Tháp Pokémon | |||
}} | }} | ||
==See also== | |||
* [[Goldenrod Radio Tower]] | |||
{{Burial ground}} | {{Burial ground}} | ||
{{Kanto}}<br> | {{Kanto}}<br> | ||
{{Project Locations notice}} | {{Project Locations notice}} | ||
[[Category:Red, Blue and Yellow locations]] | [[Category:Red, Blue and Yellow locations]] | ||
[[Category:Gold, Silver and Crystal locations]] | [[Category:Gold, Silver and Crystal locations]] | ||
[[Category:FireRed and LeafGreen locations]] | [[Category:FireRed and LeafGreen locations]] | ||
[[Category:HeartGold and SoulSilver locations]] | [[Category:HeartGold and SoulSilver locations]] | ||
[[Category:Let's Go, Pikachu! and Let's Go, Eevee! locations]] | |||
[[Category:Towers]] | [[Category:Towers]] | ||
[[Category:Monuments]] | [[Category:Monuments]] | ||
[[Category:Offices]] | |||
[[Category:Pokémon world media]] | [[Category:Pokémon world media]] | ||
[[de:Pokémon-Turm]] | [[de:Pokémon-Turm]] | ||
[[es:Torre Pokémon]] | |||
[[fr:Tour Pokémon]] | [[fr:Tour Pokémon]] | ||
[[it:Torre Pokémon]] | |||
[[ja:ポケモンタワー]] | [[ja:ポケモンタワー]] | ||
[[zh:宝可梦塔]] | |||
Latest revision as of 13:36, 12 September 2024
- This article is about the location. For the Mystery Dungeon mechanic, see Pokémon Tower (Mystery Dungeon).
| |||||
| |||||
| Map description: | A tower that houses the graves of countless Pokémon. Many people visit it daily to pay their respects to the fallen.FRLG | ||||
|---|---|---|---|---|---|
| Location: | Lavender Town | ||||
| Region: | Kanto | ||||
| Generations: | I, II, III, IV, VII | ||||
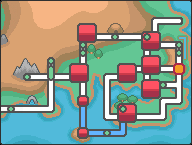 Location of Pokémon Tower in Kanto. | |||||
| Pokémon world locations | |||||
The Pokémon Tower (Japanese: ポケモンタワー Pokémon Tower) is a seven-story tower located in Lavender Town in the Kanto region. It is a burial ground for Pokémon.
Role
The Pokémon Tower houses hundreds of graves of deceased Pokémon in all of its seven floors. Many people visit the building daily to pay their respects to the fallen. On all floors other than the first two, though, the possibility of being attacked by wild Pokémon is present. In Generations II and IV, the tower was converted into the Lavender Radio Tower, undergoing a similar transformation to the Kanto Power Plant to the north.
Aside from graves, the tower is home to wild Cubone as well as many Ghost-type Pokémon. In Generations I, III, and VII, Team Rocket tried to steal the Cubone to sell their valuable skulls. In the process, a mother Marowak that was protecting her Cubone child was killed. The ghost of the mother Marowak haunted the tower until the player was able to knock it outRBYFRLG/her child climbed the tower and reunited with herPE, setting her spirit free. Mr. Fuji attempted to confront the poachers, but ended up being taken hostage himself and required the help of the player to be released. As a show of gratitude, Mr. Fuji gives the player the Poké Flute.
The wild Pokémon in the tower appear disguised as ghosts, although their disguise can be revealed by using a Silph Scope. Any Pokémon who attempts to fight a ghost that has not been revealed by the Silph Scope will be "too scared to move." In Generation VII, the ghosts are not battled normally; touching one instead returns the player to the first floor of the tower.
A special spot on the fifth floor has been made into a wild Pokémon-free healing area. In the Generation I games, the Channeler next to it mentions it is related to white magic. This was removed in the later games.
In Generation I, it is possible to exploit an oversight that allows the player to skip the sequence with the ghost Marowak by using a Poké Doll, making it possible to progress without obtaining the Silph Scope first.
Slogans
As Pokémon Tower
"May the Souls of Pokémon Rest Easy"RBY, "Becalm the Spirits of Pokémon"FRLGPE
As Radio Tower
"Your Favorite Programs On-Air Around the Clock!"GSC, "Your Best-Loved Shows On-Air Around the Clock!"HGSS
Items
| Item | Location | Games | |
|---|---|---|---|
| Formal Set | 1F, from the old lady | P E | |
| X Attack | 2F, northeast of staircase to 3F | P E | |
| Elixir | 2F, southwest corner | P E | |
| Pearl | 2F, on the easternmost tombstone against the southern wall (hidden) (daily) | P E | |
| Pikachu Candy ×5 | 2F, reward for defeating Coach Trainer Holly | P | |
| Eevee Candy ×5 | 2F, reward for defeating Coach Trainer Holly | E | |
| Escape Rope | 3F, in the north area of the floor | R B Y FR LG | |
| Awakening | 3F, against the northern wall | P E | |
| Super Potion | 3F, in the middle of the floor | P E | |
| Star Piece | 3F, in the northeast corner of the floor (hidden) (daily) | P E | |
| Elixir | 4F, southeast of the center of the floor | R B Y FR LG | |
| Escape Rope | 4F, in the middle of a ring of tombstones near the stairs to 3F | P E | |
| Full Heal | 4F, north of the stairs to 3F | P E | |
| Awakening | 4F, southwest of the center of the floor | R B Y FR LG | |
| TM04 (Teleport) | 4F, southwest of the center of the floor | P E | |
| Super Potion | 4F, in the northeast corner of the floor (hidden) (daily) | P E | |
| HP Up | 4F, in the south area of the floor | R B Y | |
| Great Ball | 4F, in the south area of the floor | FR LG | |
| Elixer | 5F, one square east and three squares south of the west staircase (hidden) | R B Y | |
| Big Mushroom | 5F, one square north and four squares west of Channeler Ruth (hidden) | FR LG | |
| Cleanse Tag | 5F, in the center of the healing area | FR LG | |
| Nugget | 5F, in the southwest area of the floor | R B Y FR LG | |
| Nugget | 5F, in the northwest corner | P E | |
| Ice Stone | 5F, in the southwest corner | P E | |
| Big Pearl | 5F, on the tombstone in the southeast corner (hidden) (daily) | P E | |
| X Accuracy | 6F, southwest of the stairs to 5F | R B Y FR LG | |
| Revive | 6F, south of the stairs to 5F | P E | |
| Ultra Ball ×3 | 6F, north of the stairs to 5F | P E | |
| Hyper Potion | 6F, in the northwest corner | P E | |
| PP Up | 6F, in a corner on the wall, south of the northwest corner (hidden) (daily) | P E | |
| Rare Candy | 6F, in the west area of the floor | R B Y FR LG | |
| Rare Candy | 6F, west of the stairs to 7F (requires Silph Scope) | P E | |
| Soothe Bell | 7F, where Mr. Fuji was standing (hidden) (requires Silph Scope) | FR LG | |
| EXPN Card | Gift from the radio station manager after restoring power | G S C HG SS | |
Walking Pokémon
| Item | Location | Games | |
|---|---|---|---|
| Pearl | 4F, Infrequently found by the player's walking Ghost-type Pokémon near the stairs to 3F | P E | |
Pokémon
Generation I
| Pokémon | Games | Location | Levels | Rate | |||||||||||
|---|---|---|---|---|---|---|---|---|---|---|---|---|---|---|---|
| 3F | |||||||||||||||
|
R | B | Y |
|
18-24 | 90% | |||||||||
|
R | B | Y |
|
18-25 | 95% | |||||||||
|
R | B | Y |
|
25 | 1% | |||||||||
|
R | B | Y |
|
20, 25 | 5% | |||||||||
|
R | B | Y |
|
20, 22 | 9% | |||||||||
| 4F | |||||||||||||||
|
R | B | Y |
|
18-24 | 86% | |||||||||
|
R | B | Y |
|
18-25 | 95% | |||||||||
|
R | B | Y |
|
25 | 5% | |||||||||
|
R | B | Y |
|
20, 25 | 5% | |||||||||
|
R | B | Y |
|
20, 22 | 9% | |||||||||
| 5F | |||||||||||||||
|
R | B | Y |
|
18-24 | 86% | |||||||||
|
R | B | Y |
|
21-27 | 90% | |||||||||
|
R | B | Y |
|
25 | 5% | |||||||||
|
R | B | Y |
|
22, 27 | 5% | |||||||||
|
R | B | Y |
|
20, 22 | 9% | |||||||||
|
R | B | Y |
|
20 | 5% | |||||||||
| 6F | |||||||||||||||
|
R | B | Y |
|
19-24 | 85% | |||||||||
|
R | B | Y |
|
21-27 | 90% | |||||||||
|
R | B | Y |
|
26, 28 | 6% | |||||||||
|
R | B | Y |
|
22, 27 | 5% | |||||||||
|
R | B | Y |
|
22, 24 | 9% | |||||||||
|
R | B | Y |
|
20 | 5% | |||||||||
| 7F | |||||||||||||||
|
R | B | Y |
|
20-24 | 75% | |||||||||
|
R | B | Y |
|
23-29 | 90% | |||||||||
|
R | B | Y |
|
28, 30 | 15% | |||||||||
|
R | B | Y |
|
24, 29 | 5% | |||||||||
|
R | B | Y |
|
22, 24 | 10% | |||||||||
|
R | B | Y |
|
24 | 5% | |||||||||
| A colored background means that the Pokémon can be found in this location in the specified game. A white background with a colored letter means that the Pokémon cannot be found here. | |||||||||||||||
Generation III
| Pokémon | Games | Location | Levels | Rate | |||||||||||
|---|---|---|---|---|---|---|---|---|---|---|---|---|---|---|---|
| 3F | |||||||||||||||
|
FR | LG |
|
13-19 | 90% | ||||||||||
|
FR | LG |
|
20 | 1% | ||||||||||
|
FR | LG |
|
15, 17 | 9% | ||||||||||
| 4F-5F | |||||||||||||||
|
FR | LG |
|
13-19 | 86% | ||||||||||
|
FR | LG |
|
20 | 5% | ||||||||||
|
FR | LG |
|
15, 17 | 9% | ||||||||||
| 6F | |||||||||||||||
|
FR | LG |
|
14-19 | 85% | ||||||||||
|
FR | LG |
|
21, 23 | 6% | ||||||||||
|
FR | LG |
|
17, 19 | 9% | ||||||||||
| 7F | |||||||||||||||
|
FR | LG |
|
15-19 | 75% | ||||||||||
|
FR | LG |
|
23, 25 | 15% | ||||||||||
|
FR | LG |
|
17, 19 | 10% | ||||||||||
| A colored background means that the Pokémon can be found in this location in the specified game. A white background with a colored letter means that the Pokémon cannot be found here. | |||||||||||||||
Generation VII
| Pokémon | Games | Location | Levels | Rate | |||||||||||
|---|---|---|---|---|---|---|---|---|---|---|---|---|---|---|---|
| 3F-4F | |||||||||||||||
|
P | E |
|
27-32 | 5% | ||||||||||
|
P | E |
|
27-32 | 5% | ||||||||||
|
P | E |
|
27-32 | 75% | ||||||||||
|
P | E |
|
27-32 | 5% | ||||||||||
|
P | E |
|
27-32 | 10% | ||||||||||
| 5F-6F | |||||||||||||||
|
P | E |
|
27-32 | 5% | ||||||||||
|
P | E |
|
27-32 | 5% | ||||||||||
|
P | E |
|
27-32 | 70% | ||||||||||
|
P | E |
|
27-32 | 10% | ||||||||||
|
P | E |
|
27-32 | 10% | ||||||||||
| Rare Spawns | |||||||||||||||
|
P | E |
|
27-32 | - | ||||||||||
| A colored background means that the Pokémon can be found in this location in the specified game. A white background with a colored letter means that the Pokémon cannot be found here. | |||||||||||||||
Special encounters
Generation I
A ghost is encountered on 6F as part of the story. The Silph Scope must be in the bag in order to reveal its identity as a Marowak. Poké Balls can be thrown, but will always fail. It must be defeated in order to progress. If run from, it respawns immediately without leaving the area.
If a Poké Doll is used to flee from battle, the game will consider it defeated, allowing access to 7F.
| Red, Green, and Blue | Yellow | ||||||||||||||||||||||||||||||||||||||||
|---|---|---|---|---|---|---|---|---|---|---|---|---|---|---|---|---|---|---|---|---|---|---|---|---|---|---|---|---|---|---|---|---|---|---|---|---|---|---|---|---|---|
|
| ||||||||||||||||||||||||||||||||||||||||
Generation III
A ghost is encountered on 6F as part of the story. The Silph Scope must be in the bag in order to reveal its identity as a Marowak. Poké Balls can be thrown, but will always fail. It must be defeated in order to progress. If run from, it respawns immediately without leaving the area.
| ||||||||||||||||||||||||
Trainers
Generation I
2F
Pokémon Red and Blue
Blue has one Potion per Pokémon, using it 12.5% of the time if their HP falls below 20%.
![]() If the player chose Bulbasaur:
If the player chose Bulbasaur:
|
|||||||||||||||||||||||||||||||||||||||||||||||||||||||||||||||||||||||||||||||||||||||||||||||||||||||||||||||||||||||||
| |||||||||||||||||||||||||||||||||||||||||||||||||||||||||||||||||||||||||||||||||||||||||||||||||||||||||||||||||||||||||
![]() If the player chose Charmander:
If the player chose Charmander:
|
||||||||||||||||||||||||||||||||||||||||||||||||||||||||||||||||||||||||||||||||||||||||||||||||||||||||||||||||||||||||||
| ||||||||||||||||||||||||||||||||||||||||||||||||||||||||||||||||||||||||||||||||||||||||||||||||||||||||||||||||||||||||||
|
||||||||||||||||||||||||||||||||||||||||||||||||||||||||||||||||||||||||||||||||||||||||||||||||||||||||||||||||||||||
| ||||||||||||||||||||||||||||||||||||||||||||||||||||||||||||||||||||||||||||||||||||||||||||||||||||||||||||||||||||||
Pokémon Yellow
Blue has one Potion per Pokémon, using it 12.5% of the time if their HP falls below 20%.
![]() If Eevee will evolve into Vaporeon:
If Eevee will evolve into Vaporeon:
|
|||||||||||||||||||||||||||||||||||||||||||||||||||||||||||||||||||||||||||||||||||||||||||||||||||||||||||||||||||||
| |||||||||||||||||||||||||||||||||||||||||||||||||||||||||||||||||||||||||||||||||||||||||||||||||||||||||||||||||||||
![]() If Eevee will evolve into Jolteon:
If Eevee will evolve into Jolteon:
|
|||||||||||||||||||||||||||||||||||||||||||||||||||||||||||||||||||||||||||||||||||||||||||||||||||||||||||||||
| |||||||||||||||||||||||||||||||||||||||||||||||||||||||||||||||||||||||||||||||||||||||||||||||||||||||||||||||
![]() If Eevee will evolve into Flareon:
If Eevee will evolve into Flareon:
|
|||||||||||||||||||||||||||||||||||||||||||||||||||||||||||||||||||||||||||||||||||||||||||||||||||||||||||||||||||||
| |||||||||||||||||||||||||||||||||||||||||||||||||||||||||||||||||||||||||||||||||||||||||||||||||||||||||||||||||||||
3F
| Trainer | Pokémon | |||||||||
|---|---|---|---|---|---|---|---|---|---|---|
|
| |||||||||
|
| |||||||||
|
| |||||||||
4F
| Trainer | Pokémon | |||||||||
|---|---|---|---|---|---|---|---|---|---|---|
|
| |||||||||
| ||||||||||
|
| |||||||||
|
| |||||||||
5F
| Trainer | Pokémon | |||||||||
|---|---|---|---|---|---|---|---|---|---|---|
|
| |||||||||
|
| |||||||||
|
| |||||||||
|
| |||||||||
6F
| Trainer | Pokémon | |||||||||
|---|---|---|---|---|---|---|---|---|---|---|
|
| |||||||||
| ||||||||||
| ||||||||||
|
| |||||||||
|
| |||||||||
7F
Pokémon Red and Blue
| Trainer | Pokémon | |||||||||
|---|---|---|---|---|---|---|---|---|---|---|
|
| |||||||||
| ||||||||||
| ||||||||||
|
| |||||||||
| ||||||||||
|
| |||||||||
| ||||||||||
| ||||||||||
| ||||||||||
Pokémon Yellow
|
|||||||||||||||||||||||||||||||||||||||||||||||||||||||||||||||||||
| |||||||||||||||||||||||||||||||||||||||||||||||||||||||||||||||||||
Generation III
2F
![]() If the player chose Bulbasaur:
If the player chose Bulbasaur:
|
||||||||||||||||||||||||||||||||||||||||||||||||||||||||||||||||||||||||||||||||||||||||||||||||||||||||||||||||||||||||||||||||||||||||||
| ||||||||||||||||||||||||||||||||||||||||||||||||||||||||||||||||||||||||||||||||||||||||||||||||||||||||||||||||||||||||||||||||||||||||||
![]() If the player chose Charmander:
If the player chose Charmander:
|
||||||||||||||||||||||||||||||||||||||||||||||||||||||||||||||||||||||||||||||||||||||||||||||||||||||||||||||||||||||||||||||||||
| ||||||||||||||||||||||||||||||||||||||||||||||||||||||||||||||||||||||||||||||||||||||||||||||||||||||||||||||||||||||||||||||||||
|
||||||||||||||||||||||||||||||||||||||||||||||||||||||||||||||||||||||||||||||||||||||||||||||||||||||||||||||||||||||||||||||||||||||||||
| ||||||||||||||||||||||||||||||||||||||||||||||||||||||||||||||||||||||||||||||||||||||||||||||||||||||||||||||||||||||||||||||||||||||||||
3F
| Trainer | Pokémon | |||||||||||
|---|---|---|---|---|---|---|---|---|---|---|---|---|
|
| |||||||||||
|
| |||||||||||
|
| |||||||||||
| Trainers with a Vs. Seeker by their names, when alerted for a rematch using the item, may use higher-level Pokémon. | ||||||||||||
4F
| Trainer | Pokémon | |||||||||||
|---|---|---|---|---|---|---|---|---|---|---|---|---|
|
| |||||||||||
| ||||||||||||
|
| |||||||||||
|
| |||||||||||
| Trainers with a Vs. Seeker by their names, when alerted for a rematch using the item, may use higher-level Pokémon. | ||||||||||||
5F
| Trainer | Pokémon | |||||||||||
|---|---|---|---|---|---|---|---|---|---|---|---|---|
|
| |||||||||||
|
| |||||||||||
|
| |||||||||||
|
| |||||||||||
| Trainers with a Vs. Seeker by their names, when alerted for a rematch using the item, may use higher-level Pokémon. | ||||||||||||
6F
| Trainer | Pokémon | |||||||||||
|---|---|---|---|---|---|---|---|---|---|---|---|---|
|
| |||||||||||
| ||||||||||||
| ||||||||||||
|
| |||||||||||
|
| |||||||||||
| Trainers with a Vs. Seeker by their names, when alerted for a rematch using the item, may use higher-level Pokémon. | ||||||||||||
7F
| Trainer | Pokémon | |||||||||||
|---|---|---|---|---|---|---|---|---|---|---|---|---|
|
| |||||||||||
| ||||||||||||
| ||||||||||||
|
| |||||||||||
| ||||||||||||
|
| |||||||||||
| ||||||||||||
| ||||||||||||
| ||||||||||||
| Trainers with a Vs. Seeker by their names, when alerted for a rematch using the item, may use higher-level Pokémon. | ||||||||||||
Generation VII
2F
|
|||||||||||||||||||||||||||||||||||||||||||||||||||||||||||||||||||||||||||||||||||||||||||||||
| |||||||||||||||||||||||||||||||||||||||||||||||||||||||||||||||||||||||||||||||||||||||||||||||
 In Let's Go, Eevee!:
|
|||||||||||||||||||||||||||||||||||||||||||||||||||||||||||||||||||||||||||||||||||||||||||||||
| |||||||||||||||||||||||||||||||||||||||||||||||||||||||||||||||||||||||||||||||||||||||||||||||
| Trainer | Pokémon | |||||||||
|---|---|---|---|---|---|---|---|---|---|---|
|
| |||||||||
3F
| Trainer | Pokémon | |||||||||
|---|---|---|---|---|---|---|---|---|---|---|
|
| |||||||||
|
| |||||||||
| ||||||||||
|
| |||||||||
4F
| Trainer | Pokémon | |||||||||||||||
|---|---|---|---|---|---|---|---|---|---|---|---|---|---|---|---|---|
|
| |||||||||||||||
|
| |||||||||||||||
| ||||||||||||||||
|
| |||||||||||||||
| ||||||||||||||||
| After becoming Champion | ||||||||||||||||
|
| |||||||||||||||
5F
| Trainer | Pokémon | |||||||||||||||
|---|---|---|---|---|---|---|---|---|---|---|---|---|---|---|---|---|
|
| |||||||||||||||
|
| |||||||||||||||
| ||||||||||||||||
| ||||||||||||||||
|
| |||||||||||||||
| ||||||||||||||||
|
| |||||||||||||||
| ||||||||||||||||
| ||||||||||||||||
| ||||||||||||||||
| After becoming Champion | ||||||||||||||||
|
| |||||||||||||||
6F
| Trainer | Pokémon | |||||||||||||||
|---|---|---|---|---|---|---|---|---|---|---|---|---|---|---|---|---|
|
| |||||||||||||||
| ||||||||||||||||
| ||||||||||||||||
|
| |||||||||||||||
| ||||||||||||||||
| ||||||||||||||||
|
| |||||||||||||||
| After becoming Champion | ||||||||||||||||
|
| |||||||||||||||
7F
|
||||||||||||||||||||||||||||||||||||||||||||||||||||||||||||||
| ||||||||||||||||||||||||||||||||||||||||||||||||||||||||||||||
| Trainer | Pokémon | |||||||||||||||
|---|---|---|---|---|---|---|---|---|---|---|---|---|---|---|---|---|
| After becoming Champion | ||||||||||||||||
|
| |||||||||||||||
Differences among generations
In Generation II and IV, the tower was converted into the Lavender Radio Tower, broadcasting music and radio programs, including the Poké Flute channel, to the radios and Pokégear of Kanto. Unlike the Goldenrod Radio Tower in Goldenrod City, only one floor, the ground floor, is open to the public as a result of Team Rocket's infiltration of the Goldenrod Tower. The stairs in Generation II lead down into a basement instead of up into the tower, but the player is blocked by a guard.
After restoring power to Kanto by fixing the generator at the Kanto Power Plant, Trainers can receive the EXPN Card from the manager of the tower, allowing Pokégears to tune into the Poké Flute channel, which can be used to move Snorlax from its slumber in front of Diglett's Cave in Vermilion City.
To compensate for the loss of the burial site, the graves were moved to a small building, the House of Memories, known as the Soul House in Generation II, at the south end of the town. Most of them were placed in secret chambers that only Mr. Fuji knows about.
There is fog here in Generation III, but it has no in-battle effect. This is because fog was not used as a game mechanic until Generation IV.
In Generation VII, several changes were made to the layout. The reception desk on the ground floor has been moved to the upper-right corner, with the rest of the floor space being populated with tables and couches for visitors of the graveyard to use. The upper floors are filled with a ghostly purple mist.
- Main article: Radio
| Program | Host(s) | Channel (PG) | Description | EXPN Card? | Games |
|---|---|---|---|---|---|
| Poké Flute | (no DJ) | 20 | Plays Poké Flute music. Used to awaken Snorlax. | Yes | GSC |
| Let's All Sing | Fern | 18.5 | Broadcasts music, either a march or a lullaby. | Crystal only | C |
| Places and People | Lily | 16.5 | Talk show discussing Kanto locations or Trainers the player has faced. | Crystal only* | C |
Layout
Inside design
Generations I and III
| Version | 1F | 2F | 3F | 4F | 5F | 6F | 7F |
|---|---|---|---|---|---|---|---|
| Red | 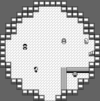
|
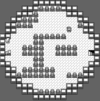
|
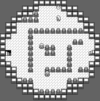
|
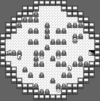
|
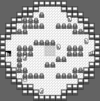
|
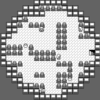
|
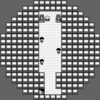
|
| Blue | |||||||
| Yellow | |||||||
| FireRed | 
|

|

|

|

|

|

|
| LeafGreen | |||||||
| Let's Go, Pikachu! | 
|

|

|

|

|

|

|
| Let's Go, Eevee! | |||||||
Generations II and IV
| Version | 1F |
|---|---|
| Gold | 
|
| Silver | |
| Crystal | |
| HeartGold | 
|
| SoulSilver | |
Outside design
|
In the anime
Main series
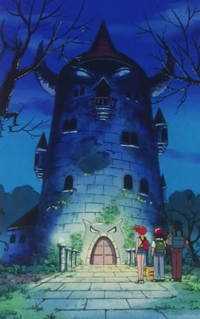
Original series
The Pokémon Tower appeared in The Tower of Terror. It is depicted as a decrepit mansion rather than a graveyard as it is in the games.
Ash visited the tower after losing his Gym battle against Sabrina, and being advised by Sabrina's father to go to Lavender Town to catch himself a Ghost Pokémon in order to defeat Sabrina's Psychic Pokémon. Misty and Brock quickly got scared of the seemingly inexplicable events happening inside of the tower, and left Ash to conduct his search alone. He finally encountered Haunter and Gengar, two of the three residents of the tower. He tried to battle them, but soon found out that they were more interested in physical comedy than battling. As their comedy routine didn't work on Ash, the ghosts got sad and sank through the floor in depression. Ash tried to dive after them, but only ended up hitting the floor, causing an old chandelier to fall on him and Pikachu, killing them. Haunter then turned Ash and Pikachu into ghosts, and the two had some fun with the three ghosts, including playing some pranks with Brock and Misty, before eventually returning to their bodies. However, Haunter had enjoyed its time with Ash so much that it decided to follow him to Saffron City.
Unbeknownst by Ash and his friends, Team Rocket had also been hiding in the tower, seeking for a chance to steal Pikachu. Their plans were foiled, however, due to breaking floors and the pranks of the Ghost Pokémon. Ash even mistook their noises in the basement for the Ghost Pokémon, and had his Pikachu and Charmander attack them, eventually even throwing a Poké Ball at Jessie's face. At the end of the episode, the Team Rocket trio was seen tied up in Gastly, Haunter, and Gengar's carousel, forcing them to stay with the Ghost Pokémon for a while.
The exterior of the tower looks significantly smaller than what the game depicts it to be. It has a two horn-like objects protruding from the side of the tower, a balcony that appears to be a mouth and two eye-like windows on the very top of it, giving it a demonic appearance. There are also several other balconies and windows on the building.
The floors seem to be unstable as James falls through to the lower floor due to a single step, although it took the weight of the entire Team Rocket trio to break through the lower floor to the basement. The tower appears to have numerous rooms including a nursery, a dining room, and the aforementioned basement.
Pokémon
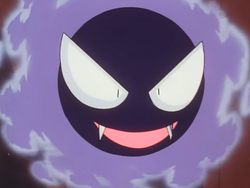 Gastly |
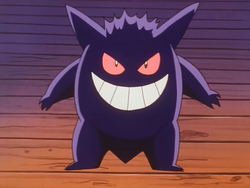 Gengar |
Pokémon previously seen at the Pokémon Tower
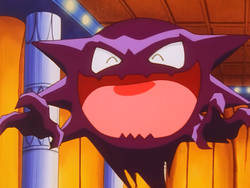 Haunter |
Pokémon Origins
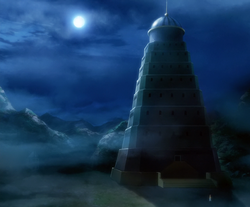
The Pokémon Tower first appeared in File 2: Cubone, playing a similar role as in Pokémon Red and Blue.
Once Red arrived in Lavender Town, he soon heard rumors about a ghost that has been appearing in the Pokémon Tower, where people go to pay their respects to their deceased Pokémon. While visiting the Pokémon House, Red learned that Team Rocket had recently invided the tower and made its top floor their base. Upon hearing that Mr. Fuji had been taken hostage by Team Rocket when he had tried to convince them to leave, Red decided to go to the Pokémon Tower and save Mr. Fuji. Blue overheard the conversation and decided to defeat Team Rocket and save Mr. Fuji himself, so that he would be the revered hero of Lavender Town.
Initially, Blue believed that the ghost rumors were set up by Team Rocket to scare unwanted visitors away, but when he reached the sixth floor, he found himself attacked by a real ghost, and ran away in scare. His scream was heard by the Team Rocket members on the top floor, and one of them went to check it out. Blue soon bumped into Red, who had also come to the tower. As the ghost followed them, Red refused to run away, and sent his Charmeleon to battle the ghost. During the battle, Blue managed to sneak past the ghost and make his way to the upper floors, where he encountered the Team Rocket Grunt with the Silph Scope. He quickly defeated the Grunt with his Wartortle, snatched the Silph Scope, and rushed it to Red, who had found his attacks being useless against the ghost. With the Silph Scope, Red discovered that the ghost was actually the spirit of Marowak, a Pokémon that had been killed by Team Rocket. Before the battle could go on, Reina arrived with Cubone, Marowak's child. Seeing her child once again, Marowak finally found peace, and departed to the afterlife. Red then made his way to the top floor, where he battled one of the Team Rocket Grunt's with his Jolteon. With the help of Cubone, Jolteon was able to beat the Grunt's Koffing, forcing the Rockets to retreat in defeat. Mr. Fuji was then rescued, and the tower was opened to the public once again.
The Pokémon Tower made a brief cameo appearance in File 4: Charizard during an overview of Lavender Town.
Pokémon
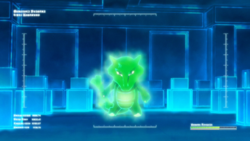 Marowak (ghost) ♀ |
In the manga
Pokémon Adventures

Red, Green & Blue arc
The Pokémon Tower appeared in Sigh for Psyduck and That Awful Arbok!. When Red had come to Lavender Town, he found out from Mr. Fuji that there are stories of Pokémon ghosts that appear from the tower. After learning that Blue had gone inside and not returned for two weeks, Red decided to investigate the area.
Upon entering, Red was attacked by various zombie Pokémon that were being controlled by a mysterious purple fog. In addition, he discovered that Blue and his Charmeleon were also being controlled by the fog. Once he figured out that the fog was actually a Gastly, Red managed to free Blue and Charmeleon upon defeating the culprit. The Gastly's owner was subsequently revealed to be Koga, a Gym Leader working for Team Rocket, who had taken over the tower as a base for the organization. The tower was damaged when Koga's Arbok kept using Acid to attack Red and Blue, but was repaired by the townspeople after Koga was defeated and driven off.
Pokémon
 Psyduck (zombie) |
 Lickitung (multiple; zombies) |
 Slowbro (multiple; zombies) |
 Tangela (multiple; zombies) |
 Slowpoke (multiple; zombies) |
 Gastly |
 Arbok |
The Electric Tale of Pikachu
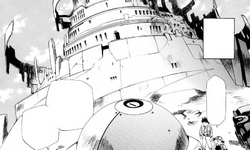
The Pokémon Tower appeared in Haunting My Dreams. It was the home to a group of Gastly and their leader, a giant Haunter called the Black Fog. After the Black Fog had sucked out Sabrina's soul with its Dream Eater attack, Ash led a group of Trainers to Lavender Town, their plan being to capture the Black Fog in a giant Poké Ball. Although the capture initially seemed successful, the Black Fog escaped by using Explosion to destroy the capture device from the inside. This act, however, left it severely weakened and vulnerable to regular Poké Balls. With this advantage on his side, Ash chased the Black Fog into the tower and managed to corner it, attempting to catch the giant Gas Pokémon with an Ultra Ball. However, just before the ball could make contact with the Black Fog, it used Self-Destruct, killing itself and collapsing the tower. With its death, Sabrina recovered and teleported to the site. It was then revealed that past people had treated the Black Fog as a god, and, having gotten used to this treatment, it had chosen to kill itself rather than be caught by a human. Ash, though, was left saddened for having wasted all of his allowance on the Ultra Ball that he had just lost.
Pokémon
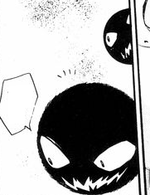 Gastly (multiple) |
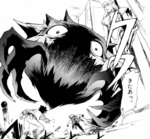 Black Fog |
Magical Pokémon Journey

The Pokémon Tower debuted in Raichu's Best Friend. When Pikachu and his friend see a picture that they took, they spot a ghost within the picture. Afterwards, the ghost returns and switches to her human form. The ghost turns out to be a girl named Sandy who wants the group to do a favor for her and find her friend. Sandy sends the group to the Pokémon Tower in order to find her Raichu.
Once the group enters the tower, they are bombarded by many ghosts of the deceased Pokémon within the tower.
Pokémon
 Raichu ♂ |
 Psyduck (multiple) |
 Golbat |
 Charmander |
 Poliwag |
 Victreebel |
 Ninetales |
 Growlithe |
Pokémon Zensho

The Pokémon Tower appeared in PZ05. After visiting the Pokémon House and learning how Mr. Fuji had gone into the tower several days earlier but not returned, Satoshi tried to enter it, but was scared away by the ghosts inside. He then witnessed two Team Rocket Grunts exiting the tower and overheard them talking about the Silph Scope. As such, he decided to follow them.
After having managed to snatch himself a Silph Scope from Team Rocket's hideout in Celadon City, Satoshi returned to the Pokémon Tower, now being able to identify the ghosts inside as Ghost-type Pokémon. At the top floor, he found Mr. Fuji, who was being held hostage by Giovanni and a pair of Team Rocket Grunts. Giovanni summoned the spirit of his dead Machamp to attack Satoshi, but another ghost suddenly appeared and defeated Machamp, driving Team Rocket off. With Team Rocket gone, Mr. Fuji was able to calm the ghost's spirit, revealing that it was actually a Marowak killed by Team Rocket, which was now able to peacefully depart into the afterlife. As thanks for saving him, Mr. Fuji gave Satoshi the Poké Flute that Team Rocket had been after.
Pokémon
 Gastly |
 Gengar |
 Machamp |
 Marowak (ghost) |
In the TCG
This listing is of cards mentioning and/or featuring the Pokémon Tower in the Pokémon Trading Card Game.
| Related cards Cards listed with a blue background are only legal to use in the current Expanded format. Cards listed with a green background are legal to use in both the current Standard and Expanded formats. | |||||||
|---|---|---|---|---|---|---|---|
| Card | Type | English Expansion |
Rarity | # | Japanese Expansion |
Rarity | # |
| Pokémon Tower | T [St] | Wizards Black Star Promos | 42 | Expansion Sheet 3 | |||
| Lavender Town | St | Team Up | 147/181 | Tag Bolt | 90/95 | ||
In the magazines
Pokémon Power
In Pokémon Power (issue 2, page 3), it is said that visitors have reported seeing ghosts in the Pokémon Tower these days. This article also makes a reference to the TV show The X-Files by mentioning that the government has sent special agents Mulder and Scully to investigate the Pokémon Tower.
Trivia
- The song for the Pokémon Tower was briefly arranged for the song Ghost Dive.
- In Generation I only, the player will be unable to defeat the Channelers and reach the end of the Pokémon Tower if there are no available moves (with PP remaining) that can damage Ghost-type Pokémon, either directly or indirectly such as via confusion. This is due to the fact that in this generation, Ghost-type Pokémon are immune to Struggle (being a Normal-type move) and all opposing Pokémon have infinite PP. This applies to the battle against Agatha at the Indigo Plateau as well.
- In particular, it is not possible to win those battles with a team consisting of Caterpie, Metapod, and/or Magikarp. If no moves are learned from TMs or from other games, then a total of 26RB or 25Y Pokémon species would be unable to win: the three previously mentioned, as well as Abra, Voltorb, Electrode, Pinsir, ScytherRB, all the pure Normal-type Pokémon other than Ditto and Porygon, and all the pure Fighting-type Pokémon other than Hitmonchan.
In other languages
| ||||||||||||||||||||||||||||||||||||||||||||||||||
See also
|
| |||||
| Kanto | ||||||||
|---|---|---|---|---|---|---|---|---|
|
| ||||||||
|

|
This article is part of Project Locations, a Bulbapedia project that aims to write comprehensive articles on every location in the Pokémon world. |

