Appendix:Sun and Moon walkthrough/Section 20
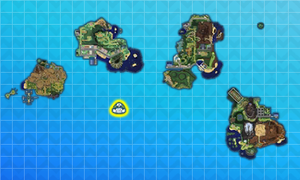
Aether Paradise
The three Trainers reach the island without incident, but it is strangely quiet. Gladion warns you and Hau to stay alert. Hau is confused why Lillie would be here, but Gladion is adamant that she will be. If you need to visit another island to prepare, you can speak to the Aether Foundation Employee near Gladion's ship.
| Trainers | ||||||||||||||||||||||||||||||||||||||||||||||||||||||||||||||||||||||||||||||||||||||||||||||||||||||||||||||||||||||||||||||||||||||||||||||||||||||||||||||||||||||||||||||||||||||||||||||||||||||||||||||||||||||||||||||||||||||||||||||||||||||||||||||||||||||||||||||||||||||||||
|---|---|---|---|---|---|---|---|---|---|---|---|---|---|---|---|---|---|---|---|---|---|---|---|---|---|---|---|---|---|---|---|---|---|---|---|---|---|---|---|---|---|---|---|---|---|---|---|---|---|---|---|---|---|---|---|---|---|---|---|---|---|---|---|---|---|---|---|---|---|---|---|---|---|---|---|---|---|---|---|---|---|---|---|---|---|---|---|---|---|---|---|---|---|---|---|---|---|---|---|---|---|---|---|---|---|---|---|---|---|---|---|---|---|---|---|---|---|---|---|---|---|---|---|---|---|---|---|---|---|---|---|---|---|---|---|---|---|---|---|---|---|---|---|---|---|---|---|---|---|---|---|---|---|---|---|---|---|---|---|---|---|---|---|---|---|---|---|---|---|---|---|---|---|---|---|---|---|---|---|---|---|---|---|---|---|---|---|---|---|---|---|---|---|---|---|---|---|---|---|---|---|---|---|---|---|---|---|---|---|---|---|---|---|---|---|---|---|---|---|---|---|---|---|---|---|---|---|---|---|---|---|---|---|---|---|---|---|---|---|---|---|---|---|---|---|---|---|---|---|---|---|---|---|---|---|---|---|---|---|---|---|---|---|---|---|---|---|---|---|---|---|---|---|---|---|---|---|---|---|---|---|---|
| ||||||||||||||||||||||||||||||||||||||||||||||||||||||||||||||||||||||||||||||||||||||||||||||||||||||||||||||||||||||||||||||||||||||||||||||||||||||||||||||||||||||||||||||||||||||||||||||||||||||||||||||||||||||||||||||||||||||||||||||||||||||||||||||||||||||||||||||||||||||||||
| Items | |||||||||||||||||||||||||||||||||||||||||||||||||||||||||||||||||||||||
|---|---|---|---|---|---|---|---|---|---|---|---|---|---|---|---|---|---|---|---|---|---|---|---|---|---|---|---|---|---|---|---|---|---|---|---|---|---|---|---|---|---|---|---|---|---|---|---|---|---|---|---|---|---|---|---|---|---|---|---|---|---|---|---|---|---|---|---|---|---|---|---|
| |||||||||||||||||||||||||||||||||||||||||||||||||||||||||||||||||||||||
B1F: Docks
Go northwest from Gladion's ship to battle five Aether Foundation Employees among the storage crates. Pass by the elevator in the middle of the room to collect every item, then return there to meet Hau and Gladion. Approach the elevator control panel and Gladion attempts to activate it, but as he suspected, travel to the lower levels is restricted for outsiders. There is no choice but to go to the upper level instead.
1F: Entrance
Immediately upon reaching the next floor, the group is confronted by Faba. He refuses to give up any information, so defeat him quickly to continue on.
| |||||||||||||||||||||||||||||||||||||||||||||
After the battle, Gladion tells Faba that he knows why he is here. Faba relents, saying that Cosmog might be downstairs, where he has heard of certain experiments being conducted. Faba uses the elevator control panel to clear travel to the lower floor. Gladion asks if you are ready; if you say no, you can walk southward and speak to the receptionist behind the counter to heal your Pokémon first. As the elevator descends, a smile appears on Faba's face.
B2F: Secret Labs
On the lower floor, Gladion reveals that there are two labs ahead in the hallway to the east. He'll check out the first one, Secret Lab A. That leaves you and Hau to investigate Secret Lab B at the end of the hallway. Hau gives you some words of encouragement and a Max Revive.
Enter the hallway to find yourself ambushed by three of Aether's researchers. Defeat each of them and the third one reveals that Cosmog is the key to opening the Ultra Wormhole. Continue down the hallway to find Gladion, who has just cleared the first lab. Enter the second room and Hau enters right after you. This attracts the attention of a pair of Aether employees, who challenge you both to a Double Battle. Even defeated, they refuse to give up the location of Lillie or Cosmog, so Hau suggests splitting up to look for clues.
A report on the bookcase talks about Ultra Wormholes and the different dimensions that lie beyond them, and even the existence of Pokémon-like life known as Ultra Beasts. A document on the computer reveals that Cosmog is believed to be a type of Ultra Beast from another dimension named Ultra Space. When under enough stress, it can open Ultra Wormholes to escape its suffering. The Aether Foundation seems to be working on a device to manipulate these wormholes. When Hau learns that Cosmog is an Ultra Beast, he excitedly runs off to tell Gladion. Report your findings to Gladion in the hallway, then follow him and Hau back to the elevator.
1F: Entrance
Upon returning to 1F, the three Trainers are confronted by three more Aether Employees. Now that you have learned the truth about Aether, Faba has sent them to make you disappear. Take them on in a Double Battle with Hau while Gladion fights the other one. Defeated, the three run off before you are approached by Wicke. She heals everyone's Pokémon and reveals that Lillie is likely with the president, Lusamine, but that the doors have been locked. Gladion rushes off with Hau close behind. Follow them northward to find Faba blocking the door with another group of Employees. He let you three reach the lower floor to buy time to gather more staff to fight you. As Faba has the door key, Hau points out that he could have stayed away and the three Trainers would have been stuck anyway. Faba orders his Employees to attack, so you and Gladion team up in this Multi Battle.
VS Faba
Undeterred by his henchmen's defeat, Faba stands ready to block your advance with another Employee at his side. He draws you and Hau into another Multi Battle. The Branch Chief prefers Psychic-type Pokémon, so Ghost-, Bug-, and Dark-type attacks are best.
| ||||||||||||||||||||||||||||||||||||||||||||||||||||||||||||||||||||||||||||||||||||||||||||||||||||||||||||||||||||||||||||||||||||||||||||||||||||||||||||||
Once Faba and his underling are defeated, head through the door to the north.
Exterior
This part of the island features a courtyard on the way to Lusamine's mansion. There are Team Skull Grunts everywhere; it seems that the Aether Foundation has been sponsoring their criminal activities. Gladion rushes past them to the mansion where he is confronted by Guzma. Defeat the two Grunts to chase after him. By the time you reach the mansion, Gladion has been defeated. It is up to you to take Guzma down!
VS Guzma
| |||||||||||||||||||||||||||||||||||||||||||||||||||||||||||||||||||||||||||||||||||||||||||||||||||||||||||||||||||||||||||||||||||||||||||||||||||||||||||
Defeated, Guzma grudgingly steps aside, allowing you to enter the mansion.
Lusamine's Mansion
Entry Hall
The four side doors are blocked with metal bars. Collect the Zygarde Cell and continue northward.
Lusamine's Room
In the next room, you find Lillie confronting Lusamine. The conversation between mother and daughter gets heated, as Lillie is made to feel weak and worthless as a Trainer as she pleads with Lusamine not to go through with her plan. Lusamine intends to use Cosmog's power to open an Ultra Wormhole to summon something that she calls her "sweet beast", and doing so will likely cause Nebby to die. Undeterred, she disappears through a teleporter. Lillie begs for your help, so step on the warp tile to follow Lusamine.
Trophy Room
Lillie follows you to Lusamine's trophy room, where you find the president surrounded by her "private collection"—a group of cryogenically-frozen Pokémon that she intends to preserve here for eternity. She wonders aloud how her beast might react in this strange new world, saying that she will let it express all its fury on the Alola region! Just then, Hau and Gladion appear through the teleporter. Gladion tries to reason with Lusamine, but it is no use. She feels betrayed by her children for having taken her Cosmog and Type: Null from her. She picks up the crate that holds Nebby and uses its power to force open an Ultra Wormhole, causing a jellyfish-like creature to fall through it!
A cutscene shows dark clouds spreading over the region as several other wormholes and other life-forms appear. On Melemele Island, Hala is confronted by a large, bug-like creature as Tapu Koko steps in to aid him. Seeing the other guardians in flight, he realizes that the other islands must be threatened as well.
Guzma appears in the trophy room, and Lusamine orders him to deal with the group of Trainers. Gladion rushes ahead to stop the jellyfish creature, as his Type: Null was made to be a beast-killer. He tells Hau to deal with Guzma, leaving you to stop Lusamine.
VS Lusamine
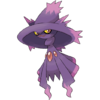
Lusamine's team includes several different types so there is little overlap in weaknesses; however, both her Lilligant and Bewear are vulnerable to Flying-type attacks. Poison and Steel moves are best to deal with Clefable, while Mismagius takes extra damage from Ghost and Dark moves. Take down Milotic with Grass and Electric attacks, and avoid using contact moves with Bewear because of its Fluffy Ability.
| ||||||||||||||||||||||||||||||||||||||||||||||||||||||||||||||||||||||||||||||||||||||||||||||||||||||||||||||||||||||||||||||||||||||||||||||||||||||||||||||||||||||||||||||||||||||||
By the time the battle is over, the Ultra Wormhole has begun to disappear, and the jellyfish creature flickers in and out of view. Lusamine intends to catch the creature so she and Guzma follow it, disappearing through the rift. The wormhole closes, giving Lillie a chance to check on Nebby; it's not moving, and appears to have changed forms. Gladion leads the way back through the teleporter.
Lusamine's Room
In the previous room, the group is met by Wicke. Gladion explains the recent events, and wonders if it is possible to reach the other worlds alongside Alola's Legendary Pokémon. Wicke has prepared beds in the residential quarters, so the Trainers take the opportunity to rest and regroup.
The next day, leave the mansion to meet up with Lillie. Gladion appears shortly after, and hands Lillie something he found downstairs: the Moon FluteS / Sun FluteM. When played together, these two instruments are said to call the Legendary Pokémon. Gladion gives you a Master Ball, and asks you to help Lillie while he stays to clean up Aether Paradise. Hau catches up to the group, and Gladion offers to get everyone to the next island.
|
Sun and Moon walkthrough |
|

|
This article is part of Project Walkthroughs, a Bulbapedia project that aims to write comprehensive step-by-step guides on each Pokémon game. |

