Appendix:Omega Ruby and Alpha Sapphire walkthrough/Section 17: Difference between revisions
(Created page with "{{WalkthroughNotice|ORAS}} ==Route 126== thumb|Route 126 thumb|left|Route 126 (underwater) The...") Tag: bad formatting |
m (→Sootopolis Gym) |
||
| (18 intermediate revisions by 12 users not shown) | |||
| Line 12: | Line 12: | ||
| | | | ||
{{trainerheader|ocean}} | {{trainerheader|ocean}} | ||
{{ | {{Trainerentry|game=6|VSTriathlete Swimmer.png{{!}}150px|Triathlete|Denzel|1,560|1|184|Azumarill|♂|39|}} | ||
{{trainerdiv|ocean}} | {{trainerdiv|ocean}} | ||
{{ | {{Trainerentry|game=6|VSSwimmer M VI.png{{!}}150px|Swimmer ♂|Barry|624|1|130|Gyarados|♂|39|}} | ||
{{trainerdiv|ocean}} | {{trainerdiv|ocean}} | ||
{{ | {{Trainerentry|game=6|VSSwimmer F ORAS.png{{!}}150px|Swimmer ♀|Brenda|624|1|272|Ludicolo|♀|39|}} | ||
{{trainerdiv|ocean}} | {{trainerdiv|ocean}} | ||
{{ | {{Trainerentry|game=6|VSAce Trainer M ORAS.png{{!}}150px|Ace Trainer|Leopold|2,340|2|329|Vibrava|♂|39||112|Rhydon|♂|39|}} | ||
{{trainerdiv|ocean}} | {{trainerdiv|ocean}} | ||
{{ | {{Trainerentry|game=6|VSAce Trainer F ORAS.png{{!}}150px|Ace Trainer|Harriet|2,460|1|169|Crobat|♀|41|}} | ||
{{trainerdiv|ocean}} | {{trainerdiv|ocean}} | ||
{{ | {{Trainerentry|game=6|VSSwimmer M VI.png{{!}}150px|Swimmer ♂|Dean|592|3|320|Wailmer|♂|35||120|Staryu||36||055|Golduck|♂|37|}} | ||
{{catch/div|ocean|Requires {{mcolor|Dive|000}}}} | {{catch/div|ocean|Requires {{mcolor|Dive|000}}}} | ||
{{ | {{Trainerentry|game=6|VSSwimmer F ORAS.png{{!}}150px|Swimmer ♀|Nikki|608|2|370|Luvdisc|♀|36||073|Tentacruel|♀|38|}} | ||
{{trainerdiv|ocean}} | {{trainerdiv|ocean}} | ||
{{ | {{Trainerentry|game=6|VSScuba Diver.png{{!}}150px|Scuba Diver|Yutaka|1,560|2|279|Pelipper|♂|39||171|Lanturn|♂|39|}} | ||
{{trainerdiv|underwater}} | {{trainerdiv|underwater}} | ||
{{ | {{Trainerentry|game=6|VSScuba Diver.png{{!}}150px|Scuba Diver|Tristan|1,640|1|321|Wailord|♂|41|}} | ||
{{trainerdiv|underwater}} | {{trainerdiv|underwater}} | ||
{{ | {{Trainerentry|game=6|VSFree Diver.png{{!}}150px|Free Diver|Jillian|1,640|1|184|Azumarill|♀|41|}} | ||
{{trainerfooter|ocean|3}} | {{trainerfooter|ocean|3}} | ||
|} | |} | ||
| Line 76: | Line 76: | ||
| | | | ||
{{itlisth|ocean}} | {{itlisth|ocean}} | ||
{{itemlist|Green Shard|Northwest island, accessed via the north side of the Sootopolis trench (requires {{m|Dive}})|OR=yes|AS=yes | {{itemlist|Green Shard|Northwest island, accessed via the north side of the Sootopolis trench (requires {{m|Dive}})|OR=yes|AS=yes}} | ||
{{catch/div|underwater|Underwater}} | {{catch/div|underwater|Underwater}} | ||
{{itemlist|Heart Scale|Northern area, bare patch in the seaweed (hidden)|OR=yes|AS=yes | {{itemlist|Heart Scale|Northern area, bare patch in the seaweed (hidden)|OR=yes|AS=yes}} | ||
{{itemlist|Ultra Ball|Northern area, southeast of the northwest Dive spot that leads to the northwest island (hidden)|OR=yes|AS=yes | {{itemlist|Ultra Ball|Northern area, southeast of the northwest Dive spot that leads to the northwest island (hidden)|OR=yes|AS=yes}} | ||
{{itemlist|Mind Plate|Main area, near a group of {{p|Luvdisc}} in a dead-end to the north then west of the crater (hidden)|OR=yes|AS=yes | {{itemlist|Mind Plate|Main area, near a group of {{p|Luvdisc}} in a dead-end to the north then west of the crater (hidden)|OR=yes|AS=yes}} | ||
{{itemlist|Big Pearl|Main area; Bare spot in the seaweed patch north-northwest of the crater, west of Scuba Diver Tristan (hidden)|OR=yes|AS=yes | {{itemlist|Big Pearl|Main area; Bare spot in the seaweed patch north-northwest of the crater, west of Scuba Diver Tristan (hidden)|OR=yes|AS=yes}} | ||
{{itemlist|Blue Shard|Main area, north of the western Dive spot that leads to Swimmer ♀ Nikki (hidden)|OR=yes|AS=yes | {{itemlist|Blue Shard|Main area, north of the western Dive spot that leads to Swimmer ♀ Nikki (hidden)|OR=yes|AS=yes}} | ||
{{itemlist|Pearl|Main area; Bare spot in the seaweed patch on the crater's southwest side, south of Scuba Diver Yutaka (hidden)|OR=yes|AS=yes|display={{ | {{itemlist|Pearl|Main area; Bare spot in the seaweed patch on the crater's southwest side, south of Scuba Diver Yutaka (hidden)|OR=yes|AS=yes|display={{i|Pearl}}}} | ||
{{itemlist|Stardust|Main area, bare spot in the seaweed just west of the Sootopolis entrance (hidden)|OR=yes|AS=yes | {{itemlist|Stardust|Main area, bare spot in the seaweed just west of the Sootopolis entrance (hidden)|OR=yes|AS=yes}} | ||
{{itemlist|Iron|Main area, bare spot in the seaweed just east of the Sootopolis entrance (hidden)|OR=yes|AS=yes | {{itemlist|Iron|Main area, bare spot in the seaweed just east of the Sootopolis entrance (hidden)|OR=yes|AS=yes}} | ||
{{itemlist|Yellow Shard|Main area, bare spot in the seaweed patch east-southeast of the crater (hidden)|OR=yes|AS=yes | {{itemlist|Yellow Shard|Main area, bare spot in the seaweed patch east-southeast of the crater (hidden)|OR=yes|AS=yes}} | ||
{{itlistfoot|ocean}} | {{itlistfoot|ocean}} | ||
|} | |} | ||
| Line 120: | Line 120: | ||
| | | | ||
{{itlisth|water}} | {{itlisth|water}} | ||
{{itemlist|Protein|Behind the house to the southeast of the Pokémon Center (hidden)|OR=yes|AS=yes | {{itemlist|Protein|Behind the house to the southeast of the Pokémon Center (hidden)|OR=yes|AS=yes}} | ||
{{itemlist|Super Potion|North of Kiri on the southwest shore (hidden)|OR=yes|AS=yes | {{itemlist|Super Potion|North of Kiri on the southwest shore (hidden)|OR=yes|AS=yes}} | ||
{{itemlist|TM Bug|From a Collector in the Poké Mart after answering his question with "[[Lisia]]"|OR=yes|AS=yes|display={{TM|83|Infestation}}}} | {{itemlist|TM Bug|From a Collector in the Poké Mart after answering his question with "[[Lisia]]"|OR=yes|AS=yes|display={{TM|83|Infestation}}}} | ||
{{itemlist|Magma Suit|From Maxie before entering the Cave of Origin|OR=yes | {{itemlist|Magma Suit|From Maxie before entering the Cave of Origin|OR=yes}} | ||
{{itemlist|Aqua Suit|From Archie before entering the Cave of Origin|AS=yes | {{itemlist|Aqua Suit|From Archie before entering the Cave of Origin|AS=yes}} | ||
{{catch/div|water|After clearing the Cave of Origin}} | {{catch/div|water|After clearing the Cave of Origin}} | ||
{{itemlist|Red Orb | {{itemlist|Red Orb|From Maxie, after capturing or defeating {{p|Groudon}}|OR=yes}} | ||
{{itemlist|Blue Orb | {{itemlist|Blue Orb|From Archie, after capturing or defeating {{p|Kyogre}}|AS=yes}} | ||
{{itemlist|Eon Flute|From Steven outside the Cave of Origin|OR=yes|AS=yes | {{itemlist|Eon Flute|From Steven outside the Cave of Origin|OR=yes|AS=yes}} | ||
{{itemlist|Sablenite|East of the upper island with the large tree|OR=yes|AS=yes | {{itemlist|Sablenite|East of the upper island with the large tree|OR=yes|AS=yes}} | ||
{{itemlist|TM Fighting|From the Black Belt in the northwest house|OR=yes|AS=yes|display={{TM|31|Brick Break}}}} | {{itemlist|TM Fighting|From the Black Belt in the northwest house|OR=yes|AS=yes|display={{TM|31|Brick Break}}}} | ||
{{itemlist|None|From the girl in the house east of the Pokémon Center|OR=yes|AS=yes|display={{DL|Decoration|Super-Secret Base|Wailmer Doll}}|sprite=Doll Wailmer III}} | {{itemlist|None|From the girl in the house east of the Pokémon Center|OR=yes|AS=yes|display={{DL|Decoration|Super-Secret Base|Wailmer Doll}}|sprite=Doll Wailmer III}} | ||
{{itemlist|Max Elixir|House northeast of the Pokémon Center; | {{itemlist|Max Elixir|House northeast of the Pokémon Center; | ||
* From the Fisherman if shown a {{p|Barboach}} with an [[Affection]] level of at least four (×1) | * From the Fisherman if shown a {{p|Barboach}} with an [[Affection]] level of at least four (×1) | ||
* From the Hiker if shown a {{p|Shroomish}} with an [[Affection]] level of at least four (×1)|OR=yes|AS=yes|display= | * From the Hiker if shown a {{p|Shroomish}} with an [[Affection]] level of at least four (×1)|OR=yes|AS=yes|display=[[Max Elixir]] ×2}} | ||
{{catch/div|water|After defeating the Sootopolis Gym}} | {{catch/div|water|After defeating the Sootopolis Gym}} | ||
{{itemlist|HM Water|From Wallace upon his defeat|OR=yes|AS=yes|display={{HM|07|Waterfall}}}} | {{itemlist|HM Water|From Wallace upon his defeat|OR=yes|AS=yes|display={{HM|07|Waterfall}}}} | ||
| Line 145: | Line 145: | ||
====Catch Up with Steven==== | ====Catch Up with Steven==== | ||
Surf westward past the Gym to a grassy shore. Climb the north stairway and continue north until you run into {{steven}} talking with another man. The man introduces himself as [[Wallace]], Sootopolis Gym Leader and protector of the [[Cave of Origin]]. Seeing your | Surf westward past the Gym to a grassy shore. Climb the north stairway and continue north until you run into {{steven}} talking with another man. The man introduces himself as [[Wallace]], Sootopolis Gym Leader and protector of the [[Cave of Origin]]. Seeing your [[Blue Orb]]{{sup/6|OR}}/[[Red Orb]]{{sup/6|AS}}, he asks that you follow him. He leads you and Steven to the cave entrance, where you find [[Maxie]], [[Archie]], and [[Tabitha]]{{sup/6|OR}}/[[Shelly]]{{sup/6|AS}}. They've been waiting for you, and Tabitha{{sup/6|OR}}/Shelly{{sup/6|AS}} gives you the [[Magma Suit]]{{sup/6|OR}}/[[Aqua Suit]]{{sup/6|AS}}, a suit made by the villainous team to protect the wearer from the elements. Wallace assures the group that the Orb you hold will protect you and your Pokémon, and that together with the suit you just received, it will finally become possible to stand up to the forces of nature. Even {{ga|May}}/{{ga|Brendan}} shows up to wish you luck! | ||
====Cave of Origin==== | ====Cave of Origin==== | ||
| Line 172: | Line 172: | ||
| | | | ||
{{itlisth|cave}} | {{itlisth|cave}} | ||
{{itemlist|X Attack|1F, northeast of the south exit (hidden)|OR=yes|AS=yes | {{itemlist|X Attack|1F, northeast of the south exit (hidden)|OR=yes|AS=yes}} | ||
{{itemlist|Revive|B1F, near the north stairway (hidden)|OR=yes|AS=yes | {{itemlist|Revive|B1F, near the north stairway (hidden)|OR=yes|AS=yes}} | ||
{{itlistfoot|cave}} | {{itlistfoot|cave}} | ||
|} | |} | ||
| Line 182: | Line 182: | ||
=====1F===== | =====1F===== | ||
Dowse to find a hidden | Dowse to find a hidden [[X Attack]] near the entrance, then head in a clockwise direction to reach the stairs in the northeast. | ||
=====B1F===== | =====B1F===== | ||
Inspect the nearby area to find a | Inspect the nearby area to find a [[Revive]], then continue on to the stairs in the southwest. | ||
=====B2F===== | =====B2F===== | ||
| Line 200: | Line 200: | ||
======VS Groudon{{sup/6|OR}}====== | ======VS Groudon{{sup/6|OR}}====== | ||
[[File:Precipice Blades.png|thumb|Primal Groudon using Precipice Blades]] | [[File:Precipice Blades ORAS.png|thumb|Primal Groudon using Precipice Blades]] | ||
Primal Groudon's {{a|Desolate Land}} Ability summons extremely harsh sunlight for as long as it remains in battle. This strengthens all {{t|Fire}} moves and evaporates all {{t|Water}} moves. Unlike other weather-affecting tactics, Desolate Land can't be overridden by most other Abilities or moves. In addition to its new Ability, Primal Groudon also receives a new move—{{m|Precipice Blades}}, a {{type|Ground}} physical attack. Summoning vast power, Primal Groudon's {{stat|Attack}}, {{stat|Defense}}, and {{stat|Special Attack}} have all increased, making it an incredibly formidable opponent. Its type has changed as well, from {{t|Ground}} to {{2t|Ground|Fire}}; this combined with its Ability leaves it vulnerable only to Ground moves. Bring it down before all of [[Hoenn]] goes up in flames! | Primal Groudon's {{a|Desolate Land}} Ability summons extremely harsh sunlight for as long as it remains in battle. This strengthens all {{t|Fire}} moves and evaporates all {{t|Water}} moves. Unlike other weather-affecting tactics, Desolate Land can't be overridden by most other Abilities or moves. In addition to its new Ability, Primal Groudon also receives a new move—{{m|Precipice Blades}}, a {{type|Ground}} physical attack. Summoning vast power, Primal Groudon's {{stat|Attack}}, {{stat|Defense}}, and {{stat|Special Attack}} have all increased, making it an incredibly formidable opponent. Its type has changed as well, from {{t|Ground}} to {{2t|Ground|Fire}}; this combined with its Ability leaves it vulnerable only to Ground moves, unless you use a {{p|Psyduck}} or {{p|Golduck}} with the {{a|Cloud Nine}} ability. Bring it down before all of [[Hoenn]] goes up in flames! | ||
{| style="margin: auto;" | {| style="margin: auto;" | ||
| Line 217: | Line 217: | ||
}} | }} | ||
|} | |} | ||
======VS Kyogre{{sup/6|AS}}====== | ======VS Kyogre{{sup/6|AS}}====== | ||
[[File:Origin Pulse.png|thumb|Primal Kyogre using Origin Pulse]] | [[File:Origin Pulse ORAS.png|thumb|Primal Kyogre using Origin Pulse]] | ||
Primal Kyogre's {{a|Primordial Sea}} Ability summons heavy rain for as long as it remains in battle. This strengthens all {{t|Water}} moves and douses all {{t|Fire}} moves. Unlike other weather-affecting tactics, Primordial Sea can't be overridden by most other Abilities or moves. In addition to its new Ability, Primal Kyogre also receives a new move—{{m|Origin Pulse}}, a Water-type special attack. Summoning vast power, Primal Kyogre's {{stat|Attack}}, {{stat|Special Attack}}, and {{stat|Special Defense}} have all increased, making it an incredibly formidable opponent. Its type remains the same, leaving it vulnerable to {{t|Grass}} and {{t|Electric}} moves. Bring it down before all of [[Hoenn]] falls beneath the waves! | Primal Kyogre's {{a|Primordial Sea}} Ability summons heavy rain for as long as it remains in battle. This strengthens all {{t|Water}} moves and douses all {{t|Fire}} moves. Unlike other weather-affecting tactics, Primordial Sea can't be overridden by most other Abilities or moves. In addition to its new Ability, Primal Kyogre also receives a new move—{{m|Origin Pulse}}, a Water-type special attack. Summoning vast power, Primal Kyogre's {{stat|Attack}}, {{stat|Special Attack}}, and {{stat|Special Defense}} have all increased, making it an incredibly formidable opponent. Its type remains the same, leaving it vulnerable to {{t|Grass}} and {{t|Electric}} moves. Bring it down before all of [[Hoenn]] falls beneath the waves! | ||
| Line 242: | Line 241: | ||
With the super-ancient Pokémon's rampage put to an end, the remaining energy released within the Cave of Origin spills out as a beam of green light rising into the atmosphere. The skies quickly clear and the climate returns to normal as you emerge from the cave. Amazed by your success, Maxie{{sup/6|OR}}/Archie{{sup/6|AS}} can't help but wish that he'd never bothered the slumbering Pokémon. Seeing how well you handle the Blue Orb{{sup/6|OR}}/Red Orb{{sup/6|AS}}, he gives you the other to keep as well. If you managed to catch it, giving the super-ancient Pokémon the same-colored Orb to hold allows it to unleash its [[Primal Reversion]] during battle! | With the super-ancient Pokémon's rampage put to an end, the remaining energy released within the Cave of Origin spills out as a beam of green light rising into the atmosphere. The skies quickly clear and the climate returns to normal as you emerge from the cave. Amazed by your success, Maxie{{sup/6|OR}}/Archie{{sup/6|AS}} can't help but wish that he'd never bothered the slumbering Pokémon. Seeing how well you handle the Blue Orb{{sup/6|OR}}/Red Orb{{sup/6|AS}}, he gives you the other to keep as well. If you managed to catch it, giving the super-ancient Pokémon the same-colored Orb to hold allows it to unleash its [[Primal Reversion]] during battle! | ||
[[Team Magma]] and [[Team Aqua]] depart, leaving you, {{steven}}, and {{ga|May}}/{{ga|Brendan}} to catch up. Proud of all you've accomplished, Steven gives you a great gift: the | [[Team Magma]] and [[Team Aqua]] depart, leaving you, {{steven}}, and {{ga|May}}/{{ga|Brendan}} to catch up. Proud of all you've accomplished, Steven gives you a great gift: the [[Eon Flute]]. With this, you can summon {{p|Latios}}{{sup/6|OR}}/{{p|Latias}}{{sup/6|AS}} and [[Soaring in the sky|Soar]] through Hoenn's skies. Steven suggests doing just that, as the region has now been enriched by the great energy released from the Cave of Origin. May/Brendan can't believe how far you've come, and is happy to have shared so many adventures with you. | ||
=====Soaring in the Sky===== | =====Soaring in the Sky===== | ||
| Line 259: | Line 258: | ||
! style="background: #{{alpha sapphire color light}}; {{roundytr|5px}};" | Location | ! style="background: #{{alpha sapphire color light}}; {{roundytr|5px}};" | Location | ||
|- style="background: #FFF;" | |- style="background: #FFF;" | ||
| {{bag|Mewtwonite X}} || | | {{bag|Mewtwonite X}} || [[Mewtwonite X]] || [[Littleroot Town]] | ||
|- style="background: #FFF;" | |- style="background: #FFF;" | ||
| {{bag|Scizorite}} || | | {{bag|Scizorite}} || [[Scizorite]] || [[Petalburg Woods]] | ||
|- style="background: #FFF;" | |- style="background: #FFF;" | ||
| {{bag|Charizardite X}} || | | {{bag|Charizardite X}} || [[Charizardite X]] || [[Fiery Path]] | ||
|- style="background: #FFF;" | |- style="background: #FFF;" | ||
| {{bag|Tyranitarite}} || | | {{bag|Tyranitarite}} || [[Tyranitarite]] || [[Jagged Pass]] | ||
|- style="background: #FFF;" | |- style="background: #FFF;" | ||
| {{bag|Houndoominite}} || | | {{bag|Houndoominite}} || [[Houndoominite]] || [[Lavaridge Town]] | ||
|- style="background: #FFF;" | |- style="background: #FFF;" | ||
| {{bag|Aerodactylite}} || | | {{bag|Aerodactylite}} || [[Aerodactylite]] || [[Meteor Falls]] | ||
|- | |- | ||
| colspan="3" style="background: #{{alpha sapphire color light}}; {{roundybottom|5px}};" | | | colspan="3" style="background: #{{alpha sapphire color light}}; {{roundybottom|5px}};" | | ||
| Line 279: | Line 278: | ||
! style="background: #{{alpha sapphire color light}}; {{roundytr|5px}};" | Location | ! style="background: #{{alpha sapphire color light}}; {{roundytr|5px}};" | Location | ||
|- style="background: #FFF;" | |- style="background: #FFF;" | ||
| {{bag|Venusaurite}} || | | {{bag|Venusaurite}} || [[Venusaurite]] || {{rt|119|Hoenn}} | ||
|- style="background: #FFF;" | |- style="background: #FFF;" | ||
| {{bag|Abomasite}} || | | {{bag|Abomasite}} || [[Abomasite]] || {{rt|123|Hoenn}} (Berry fields) | ||
|- style="background: #FFF;" | |- style="background: #FFF;" | ||
| {{bag|Ampharosite}} || | | {{bag|Ampharosite}} || [[Ampharosite]] || [[New Mauville]] | ||
|- style="background: #FFF;" | |- style="background: #FFF;" | ||
| {{bag|Kangaskhanite}} || | | {{bag|Kangaskhanite}} || [[Kangaskhanite]] || [[Pacifidlog Town]] | ||
|- style="background: #FFF;" | |- style="background: #FFF;" | ||
| {{bag|Charizardite Y}} || | | {{bag|Charizardite Y}} || [[Charizardite Y]] || [[Scorched Slab]] | ||
|- style="background: #FFF;" | |- style="background: #FFF;" | ||
| {{bag|Mewtwonite Y}} || | | {{bag|Mewtwonite Y}} || [[Mewtwonite Y]] || [[Ever Grande City|Pokémon League]] | ||
|- | |- | ||
| colspan="3" style="background: #{{alpha sapphire color light}}; {{roundybottom|5px}};" | | | colspan="3" style="background: #{{alpha sapphire color light}}; {{roundybottom|5px}};" | | ||
| Line 295: | Line 294: | ||
|} | |} | ||
A Stone Seller will also appear on {{rt|114|Hoenn}}, southeast of the Route 114 sign who will sell you five items. Two of these items are important as they are the remaining Mega Stones for the other two Hoenn Starter Pokémon that you did not receive from [[Professor Birch]] earlier that are sold at {{PDollar}}1,500 each (sold as Withered Tree, Fading Fire, or Ebbing Tide). | |||
====Sootopolis Gym==== | ====Sootopolis Gym==== | ||
| Line 304: | Line 304: | ||
{{sign|RS|footer}} | {{sign|RS|footer}} | ||
The [[Sootopolis Gym]] | The [[Sootopolis Gym]] specializes in {{type|Water}} Pokémon. {{t|Grass}}- and {{type|Electric}} moves are best here, while {{t|Fire}}, {{t|Ground}}, and {{t|Rock}} Pokémon may struggle. The Gym features three platforms where each icy tile must be traversed once in order to reveal the next stairway. Walking over an ice tile once cracks it; passing by a second time shatters it, leaving you to fall to the Gym's watery underbelly where plenty of Trainers await. | ||
The first puzzle is a 5×5 grid of ice. Starting on the south-central tile, move →2, ↑4, ←1, ↓3, ←1, ↑2, ←1, ↓3, ←1, ↑4, and →2. This reveals the first stairway. | The first puzzle is a 5×5 grid of ice. Starting on the south-central tile, move →2, ↑4, ←1, ↓3, ←1, ↑2, ←1, ↓3, ←1, ↑4, and →2. This reveals the first stairway. | ||
| Line 312: | Line 312: | ||
The final puzzle is a 7×15 grid, with a trio of 3×3 platforms. Starting on the south-central tile, move ←7, ↑6, →6, ↓1, ←5, ↓4, →4, ↑3, →1 onto the middle platform, ↓3, →2, ↓1, →1, ↑4, ←2 onto the middle platform, ↑1, →6, ↓4, ←3, ↓1, →4, ↑6, and ←7. This reveals the stairway to the Gym Leader. | The final puzzle is a 7×15 grid, with a trio of 3×3 platforms. Starting on the south-central tile, move ←7, ↑6, →6, ↓1, ←5, ↓4, →4, ↑3, →1 onto the middle platform, ↓3, →2, ↓1, →1, ↑4, ←2 onto the middle platform, ↑1, →6, ↓4, ←3, ↓1, →4, ↑6, and ←7. This reveals the stairway to the Gym Leader. | ||
[[Wallace]] leads with his {{p|Luvdisc}}; not much of a threat, but it may still confuse its target with {{m|Sweet Kiss}}, and further hinder male targets with {{m|Attract}}. As a {{2t|Water|Ground}} Pokémon, his {{p|Whiscash}} is only vulnerable to Grass moves; its {{m|Mud Sport}} weakens Electric moves for a few turns, while {{m|Earthquake}} packs a punch. {{p|Sealeo}}'s {{2t|Water|Ice}} typing gives it additional weaknesses to {{t|Fighting}} and {{t|Rock}} moves; {{m|Waterfall}} and {{m|Body Slam}} deal damage while {{m|Encore}} forces the target to repeat its previous move. His {{p|Seaking}} is | [[Wallace]] leads with his {{p|Luvdisc}}; not much of a threat, but it may still confuse its target with {{m|Sweet Kiss}}, and further hinder male targets with {{m|Attract}}. As a {{2t|Water|Ground}} Pokémon, his {{p|Whiscash}} is only vulnerable to Grass moves; its {{m|Mud Sport}} weakens Electric moves for a few turns, while {{m|Earthquake}} packs a punch. {{p|Sealeo}}'s {{2t|Water|Ice}} typing gives it additional weaknesses to {{t|Fighting}} and {{t|Rock}} moves; {{m|Waterfall}} and {{m|Body Slam}} deal damage while {{m|Encore}} forces the target to repeat its previous move. His {{p|Seaking}} is somewhat dangerous, if its target is Level 44 or less, when {{m|Horn Drill}} may score a [[OHKO|one-hit knockout]]. Also, {{m|Rain Dance}} combined with {{m|Waterfall}} can deal a suprisingly lot of damage. Finally, his {{p|Milotic}} can deal heavy damage with {{m|Hydro Pump}}, and use {{m|Ice Beam}} to deal with Grass types other than the {{p|Lotad}} family; use powerful moves to defeat it quickly, before it can regain health with {{m|Recover}}. | ||
{| align="center" | {| align="center" | ||
| Line 320: | Line 320: | ||
|- align="center" | |- align="center" | ||
! Sootopolis Gym<br>[[File:Rain Badge.png|35px|The Rain Badge]]<br><br> | ! Sootopolis Gym<br>[[File:Rain Badge.png|35px|The Rain Badge]]<br><br> | ||
|- | |- | ||
| | | | ||
{| align="center" class="expandable" style="background: #{{water color}}; {{roundy}}; border: 5px solid #{{water color light}};" | {| align="center" class="expandable" style="background: #{{water color}}; {{roundy}}; border: 5px solid #{{water color light}};" | ||
|- align="center" | |- align="center" | ||
! Trainers | ! Trainers | ||
|- | |- | ||
| | | | ||
{{Trainerheader|water}} | {{Trainerheader|water}} | ||
{{catch/div|water|1F}} | {{catch/div|water|1F}} | ||
{{Trainerentry|VSPoké Fan F ORAS.png{{!}}150px|Poké Fan|Marissa|2,752|1|184|Azumarill|♀|43|}} | {{Trainerentry|game=6|VSPoké Fan F ORAS.png{{!}}150px|Poké Fan|Marissa|2,752|1|184|Azumarill|♀|43|}} | ||
{{Trainerdiv|water}} | {{Trainerdiv|water}} | ||
{{Trainerentry|VSLass ORAS.png{{!}}150px|Lass|Crissy|656|2|370|Luvdisc|♀|39||117|Seadra|♀|41|}} | {{Trainerentry|game=6|VSLass ORAS.png{{!}}150px|Lass|Crissy|656|2|370|Luvdisc|♀|39||117|Seadra|♀|41|}} | ||
{{catch/div|water|B1F}} | {{catch/div|water|B1F}} | ||
{{Trainerentry|VSBeauty ORAS.png{{!}}150px|Beauty|Olivia|2,408|1|121|Starmie||43|}} | {{Trainerentry|game=6|VSBeauty ORAS.png{{!}}150px|Beauty|Olivia|2,408|1|121|Starmie||43|}} | ||
{{Trainerdiv|water}} | {{Trainerdiv|water}} | ||
{{Trainerentry|VSLady ORAS.png{{!}}150px|Lady|Brianna|4,920|2|366|Clamperl|♀|41||222|Corsola|♀|41|}} | {{Trainerentry|game=6|VSLady ORAS.png{{!}}150px|Lady|Brianna|4,920|2|366|Clamperl|♀|41||222|Corsola|♀|41|}} | ||
{{Trainerdiv|water}} | {{Trainerdiv|water}} | ||
{{Trainerentry|VSBeauty ORAS.png{{!}}150px|Beauty|Connie|2,408|1|367|Huntail|♀|43|}} | {{Trainerentry|game=6|VSBeauty ORAS.png{{!}}150px|Beauty|Connie|2,408|1|367|Huntail|♀|43|}} | ||
{{Trainerdiv|water}} | {{Trainerdiv|water}} | ||
{{Trainerentry|VSBeauty ORAS.png{{!}}150px|Beauty|Bridget|2,408|1|368|Gorebyss|♀|43|}} | {{Trainerentry|game=6|VSBeauty ORAS.png{{!}}150px|Beauty|Bridget|2,408|1|368|Gorebyss|♀|43|}} | ||
{{Trainerdiv|water}} | {{Trainerdiv|water}} | ||
{{Trainerentry|VSBeauty ORAS.png{{!}}150px|Beauty|Tiffany|2,296|2|055|Golduck|♀|41||321|Wailord|♀|41|}} | {{Trainerentry|game=6|VSBeauty ORAS.png{{!}}150px|Beauty|Tiffany|2,296|2|055|Golduck|♀|41||321|Wailord|♀|41|}} | ||
{{Trainerdiv|water}} | {{Trainerdiv|water}} | ||
{{Trainerentry|VSLass ORAS.png{{!}}150px|Lass|Andrea|672|1|272|Ludicolo|♀|42|}} | {{Trainerentry|game=6|VSLass ORAS.png{{!}}150px|Lass|Andrea|672|1|272|Ludicolo|♀|42|}} | ||
{{Trainerfooter|water|I}} | {{Trainerfooter|water|I}} | ||
|} | |} | ||
| Line 413: | Line 413: | ||
Defeated, Wallace awards you the {{badge|Rain}}, which ensures obedience from all Pokémon. He also gives you {{HM|05|Waterfall}} as a prize. With all eight Badges, your next destination is the | Defeated, Wallace awards you the {{badge|Rain}}, which ensures obedience from all Pokémon. He also gives you {{HM|05|Waterfall}} as a prize. With all eight Badges, your next destination is the [[Pokémon League]] in [[Ever Grande City]] to the southeast. But first, consider exploring Hoenn's remaining areas, including {{rt|129|Hoenn}} and beyond. In addition, Wallace suggests visiting {{prof|Birch}} back in {{to|Littleroot}}, as he's heard a rumor that the professor has created {{DL|National Pokédex|Pokémon Omega Ruby and Alpha Sapphire|a more powerful Pokédex}}. | ||
Latest revision as of 14:58, 4 December 2023
These pages follow the remade Nintendo 3DS iteration, not Pokémon Ruby and Sapphire. The guide for those games can be found here.
Route 126
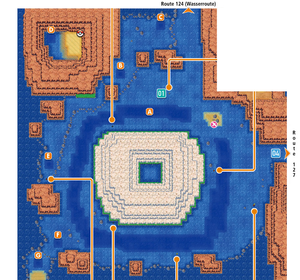
The waters of Route 126 surround a massive crater, inside of which lies Sootopolis City. There's no way to reach the city from the surface, so the entrance must be hidden beneath the waves.
| Trainers | |||||||||||||||||||||||||||||||||||||||||||||||||||||||||||||||||||||||||||||||||||||||||||||||||||||||||||||||||||||||||||||||||||||||||||||||||||||||||||||||||||||||||||||||||||||||||||||||||||
|---|---|---|---|---|---|---|---|---|---|---|---|---|---|---|---|---|---|---|---|---|---|---|---|---|---|---|---|---|---|---|---|---|---|---|---|---|---|---|---|---|---|---|---|---|---|---|---|---|---|---|---|---|---|---|---|---|---|---|---|---|---|---|---|---|---|---|---|---|---|---|---|---|---|---|---|---|---|---|---|---|---|---|---|---|---|---|---|---|---|---|---|---|---|---|---|---|---|---|---|---|---|---|---|---|---|---|---|---|---|---|---|---|---|---|---|---|---|---|---|---|---|---|---|---|---|---|---|---|---|---|---|---|---|---|---|---|---|---|---|---|---|---|---|---|---|---|---|---|---|---|---|---|---|---|---|---|---|---|---|---|---|---|---|---|---|---|---|---|---|---|---|---|---|---|---|---|---|---|---|---|---|---|---|---|---|---|---|---|---|---|---|---|---|---|---|
| |||||||||||||||||||||||||||||||||||||||||||||||||||||||||||||||||||||||||||||||||||||||||||||||||||||||||||||||||||||||||||||||||||||||||||||||||||||||||||||||||||||||||||||||||||||||||||||||||||
| Available Pokémon | |||||||||||||||||||||||||||||||||||||||||||||||||||||||||||||||||||||||||||||||||||||||||||||||||||||||||||||||||||||||||||||||||||||||||||||||||||||||||||||||||||||||||||||||||||||||||||||||||||||||||||||||||||||||||||||||||||||||||||||||||||||||||||||||||||||||||||||||||||||||||||||||||||||||||||||||||||
|---|---|---|---|---|---|---|---|---|---|---|---|---|---|---|---|---|---|---|---|---|---|---|---|---|---|---|---|---|---|---|---|---|---|---|---|---|---|---|---|---|---|---|---|---|---|---|---|---|---|---|---|---|---|---|---|---|---|---|---|---|---|---|---|---|---|---|---|---|---|---|---|---|---|---|---|---|---|---|---|---|---|---|---|---|---|---|---|---|---|---|---|---|---|---|---|---|---|---|---|---|---|---|---|---|---|---|---|---|---|---|---|---|---|---|---|---|---|---|---|---|---|---|---|---|---|---|---|---|---|---|---|---|---|---|---|---|---|---|---|---|---|---|---|---|---|---|---|---|---|---|---|---|---|---|---|---|---|---|---|---|---|---|---|---|---|---|---|---|---|---|---|---|---|---|---|---|---|---|---|---|---|---|---|---|---|---|---|---|---|---|---|---|---|---|---|---|---|---|---|---|---|---|---|---|---|---|---|---|---|---|---|---|---|---|---|---|---|---|---|---|---|---|---|---|---|---|---|---|---|---|---|---|---|---|---|---|---|---|---|---|---|---|---|---|---|---|---|---|---|---|---|---|---|---|---|---|---|---|---|---|---|---|---|---|---|---|---|---|---|---|---|---|---|---|---|---|---|---|---|---|---|---|---|---|---|---|---|---|---|---|---|---|---|---|---|---|---|---|---|---|---|---|---|---|---|---|---|
| |||||||||||||||||||||||||||||||||||||||||||||||||||||||||||||||||||||||||||||||||||||||||||||||||||||||||||||||||||||||||||||||||||||||||||||||||||||||||||||||||||||||||||||||||||||||||||||||||||||||||||||||||||||||||||||||||||||||||||||||||||||||||||||||||||||||||||||||||||||||||||||||||||||||||||||||||||
| Items | |||||||||||||||||||||||||||||||||||||||||||||||||||||||||||||||
|---|---|---|---|---|---|---|---|---|---|---|---|---|---|---|---|---|---|---|---|---|---|---|---|---|---|---|---|---|---|---|---|---|---|---|---|---|---|---|---|---|---|---|---|---|---|---|---|---|---|---|---|---|---|---|---|---|---|---|---|---|---|---|---|
| |||||||||||||||||||||||||||||||||||||||||||||||||||||||||||||||
Secret Islet
Secret Islet is a small island with a single tree on the southwest edge of Route 126. It can only be reached by Diving southwest of the main trench and surfacing on its sandy shore. The island is one of three locations that serious Secret Base enthusiasts seek out, as a base's layout tends to be better the farther away it is from civilization. There are no Trainers, wild Pokémon, or items here.
Sootopolis City
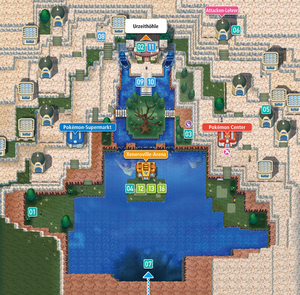
Sootopolis City rises from the crater of a great meteoroid crash and can only be reached by sea or sky. The final Gym in the Hoenn League is located here, but there are more urgent matters to attend to first. With Hoenn's weather becoming increasingly oppressive, you must race to the Cave of Origin and stop the super-ancient Pokémon from achieving Primal Reversion and obtaining the vast power that's sure to come with it!
| Available Pokémon | |||||||||||||||||||||||||||||||||||||||||||||||||||||||||||||||||||||||||||||||||||||||||||||||||||||||||||||||||||||||||||||||||||||||||||||
|---|---|---|---|---|---|---|---|---|---|---|---|---|---|---|---|---|---|---|---|---|---|---|---|---|---|---|---|---|---|---|---|---|---|---|---|---|---|---|---|---|---|---|---|---|---|---|---|---|---|---|---|---|---|---|---|---|---|---|---|---|---|---|---|---|---|---|---|---|---|---|---|---|---|---|---|---|---|---|---|---|---|---|---|---|---|---|---|---|---|---|---|---|---|---|---|---|---|---|---|---|---|---|---|---|---|---|---|---|---|---|---|---|---|---|---|---|---|---|---|---|---|---|---|---|---|---|---|---|---|---|---|---|---|---|---|---|---|---|---|---|---|
| |||||||||||||||||||||||||||||||||||||||||||||||||||||||||||||||||||||||||||||||||||||||||||||||||||||||||||||||||||||||||||||||||||||||||||||
| Items | ||||||||||||||||||||||||||||||||||||||||||||||||||||||||||||||||||||||||||||||||||||||||||
|---|---|---|---|---|---|---|---|---|---|---|---|---|---|---|---|---|---|---|---|---|---|---|---|---|---|---|---|---|---|---|---|---|---|---|---|---|---|---|---|---|---|---|---|---|---|---|---|---|---|---|---|---|---|---|---|---|---|---|---|---|---|---|---|---|---|---|---|---|---|---|---|---|---|---|---|---|---|---|---|---|---|---|---|---|---|---|---|---|---|---|
| ||||||||||||||||||||||||||||||||||||||||||||||||||||||||||||||||||||||||||||||||||||||||||
Rest Up
The recent shift in weather has frightened all of the city's residents, and they've all taken shelter inside their homes. Their doors are locked tight, so you can't visit with most of the locals right now. The Sootopolis Gym, on an island near the crater entrance, is also closed, so instead Surf eastward to reach the Pokémon Center and rest up for the trial ahead.
Catch Up with Steven
Surf westward past the Gym to a grassy shore. Climb the north stairway and continue north until you run into Steven talking with another man. The man introduces himself as Wallace, Sootopolis Gym Leader and protector of the Cave of Origin. Seeing your Blue OrbOR/Red OrbAS, he asks that you follow him. He leads you and Steven to the cave entrance, where you find Maxie, Archie, and TabithaOR/ShellyAS. They've been waiting for you, and TabithaOR/ShellyAS gives you the Magma SuitOR/Aqua SuitAS, a suit made by the villainous team to protect the wearer from the elements. Wallace assures the group that the Orb you hold will protect you and your Pokémon, and that together with the suit you just received, it will finally become possible to stand up to the forces of nature. Even May/Brendan shows up to wish you luck!
Cave of Origin
The Cave of Origin is said to hold a great source of ancient power. Whatever lies in its uncharted depths, it has drawn the attention of the super-ancient Pokémon. It must be stopped, and only you can save Hoenn from its destructive influence!
| Available Pokémon | ||||||||||||||||||||||||||||||||||||||||||||||||||||||||||||||||||||||||||||||||||||||||||||||||||||||||||||||||||||||||||||||||||||||||||||||||||||||||||||||
|---|---|---|---|---|---|---|---|---|---|---|---|---|---|---|---|---|---|---|---|---|---|---|---|---|---|---|---|---|---|---|---|---|---|---|---|---|---|---|---|---|---|---|---|---|---|---|---|---|---|---|---|---|---|---|---|---|---|---|---|---|---|---|---|---|---|---|---|---|---|---|---|---|---|---|---|---|---|---|---|---|---|---|---|---|---|---|---|---|---|---|---|---|---|---|---|---|---|---|---|---|---|---|---|---|---|---|---|---|---|---|---|---|---|---|---|---|---|---|---|---|---|---|---|---|---|---|---|---|---|---|---|---|---|---|---|---|---|---|---|---|---|---|---|---|---|---|---|---|---|---|---|---|---|---|---|---|---|---|
| ||||||||||||||||||||||||||||||||||||||||||||||||||||||||||||||||||||||||||||||||||||||||||||||||||||||||||||||||||||||||||||||||||||||||||||||||||||||||||||||
| Items | ||||||||||||||||
|---|---|---|---|---|---|---|---|---|---|---|---|---|---|---|---|---|
| ||||||||||||||||
Entrance
There's not a moment to lose! Sprint down the torch-lit entry hall to reach the cave's first floor.
1F
Dowse to find a hidden X Attack near the entrance, then head in a clockwise direction to reach the stairs in the northeast.
B1F
Inspect the nearby area to find a Revive, then continue on to the stairs in the southwest.
B2F
Great quakes rock the cave as you descend to its lower floors, and a thick mist begins to swirl around you. Race northward to find the next set of stairs.
B3F
Terrible roars echo from below as you near the cave's lowest floor. Hurry southward to reach the final set of stairs.
B4F
When you reach the edge of the lavaOR/waterAS, you pull on the protective suit and attach the Blue OrbOR/Red OrbAS to it. The super-ancient Pokémon then appears with a cry, and you receive a radio message from MaxieOR/ArchieAS instructing you to hop on its back and ride it to the cave's deepest level. The sound cuts out, but your course is clear. The suit you wear, combined with the power of the Orb you hold, protect you from harm as you ride the ancient creature along a river of lavaOR/an underwater currentAS to the cave's deepest chamber.
Final Chamber
In the final chamber, you pull off your protective suit as GroudonOR/KyogreAS takes its place under a large stalactite. The super-ancient Pokémon begins drawing vast power from the mysterious crystal hanging above in order to undergo Primal Reversion, leaving you to watch in awe.
VS GroudonOR
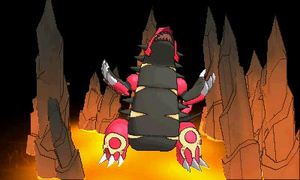
Primal Groudon's Desolate Land Ability summons extremely harsh sunlight for as long as it remains in battle. This strengthens all Fire moves and evaporates all Water moves. Unlike other weather-affecting tactics, Desolate Land can't be overridden by most other Abilities or moves. In addition to its new Ability, Primal Groudon also receives a new move—Precipice Blades, a Ground-type physical attack. Summoning vast power, Primal Groudon's Attack, Defense, and Special Attack have all increased, making it an incredibly formidable opponent. Its type has changed as well, from Ground to Ground/Fire; this combined with its Ability leaves it vulnerable only to Ground moves, unless you use a Psyduck or Golduck with the Cloud Nine ability. Bring it down before all of Hoenn goes up in flames!
| ||||||||||||||||||||||||||||||||||
VS KyogreAS
Primal Kyogre's Primordial Sea Ability summons heavy rain for as long as it remains in battle. This strengthens all Water moves and douses all Fire moves. Unlike other weather-affecting tactics, Primordial Sea can't be overridden by most other Abilities or moves. In addition to its new Ability, Primal Kyogre also receives a new move—Origin Pulse, a Water-type special attack. Summoning vast power, Primal Kyogre's Attack, Special Attack, and Special Defense have all increased, making it an incredibly formidable opponent. Its type remains the same, leaving it vulnerable to Grass and Electric moves. Bring it down before all of Hoenn falls beneath the waves!
| ||||||||||||||||||||||||||||||||
Aftermath
With the super-ancient Pokémon's rampage put to an end, the remaining energy released within the Cave of Origin spills out as a beam of green light rising into the atmosphere. The skies quickly clear and the climate returns to normal as you emerge from the cave. Amazed by your success, MaxieOR/ArchieAS can't help but wish that he'd never bothered the slumbering Pokémon. Seeing how well you handle the Blue OrbOR/Red OrbAS, he gives you the other to keep as well. If you managed to catch it, giving the super-ancient Pokémon the same-colored Orb to hold allows it to unleash its Primal Reversion during battle!
Team Magma and Team Aqua depart, leaving you, Steven, and May/Brendan to catch up. Proud of all you've accomplished, Steven gives you a great gift: the Eon Flute. With this, you can summon LatiosOR/LatiasAS and Soar through Hoenn's skies. Steven suggests doing just that, as the region has now been enriched by the great energy released from the Cave of Origin. May/Brendan can't believe how far you've come, and is happy to have shared so many adventures with you.
Soaring in the Sky
With the Eon Flute, you and LatiosOR/LatiasAS can Soar the skies high above Hoenn. Soar is a variation of Flying that only these two Pokémon can use. In this way, you can visit all the same locations as with Fly, but that's not all. As you Soar freely over the region, you may stumble across new locations inaccessible by other means, and find more Pokémon you couldn't find before! As Soar functions similarly to Fly, you no longer need to keep a Pokémon that knows Fly in your party. It's even possible to Soar when the Eon Pokémon is in the PC. The top screen shows the action as you Soar the skies, while the Touch Screen shows a map of Hoenn with a yellow arrow marking your current location. As you pass over locations, their names will appear on-screen.
When Soaring, you may find flocks of Flying Pokémon; make contact to be drawn into battle! In addition, each day a new Mirage spot will appear somewhere in Hoenn. These locations always appear as sparkling red beacons. There, you may find valuable items and unusual Pokémon, even Legendary Pokémon when certain conditions are fulfilled.
Hoenn, Enriched
The great energy released by Groudon/Kyogre's Primal Reversion has blanketed the region, transforming the land into a rich, fertile habitat for Pokémon. This event marks the appearance of new Pokémon all over Hoenn. These Pokémon can be found hiding in the field, so use the DexNav's Detector Mode to find them. In addition, several new Mega Stones have appeared across the region.
|
| ||||||||||||||||||||||||||||||||||||||||||||||||
A Stone Seller will also appear on Route 114, southeast of the Route 114 sign who will sell you five items. Two of these items are important as they are the remaining Mega Stones for the other two Hoenn Starter Pokémon that you did not receive from Professor Birch earlier that are sold at $1,500 each (sold as Withered Tree, Fading Fire, or Ebbing Tide).
Sootopolis Gym
The Sootopolis Gym specializes in Water-type Pokémon. Grass- and Electric-type moves are best here, while Fire, Ground, and Rock Pokémon may struggle. The Gym features three platforms where each icy tile must be traversed once in order to reveal the next stairway. Walking over an ice tile once cracks it; passing by a second time shatters it, leaving you to fall to the Gym's watery underbelly where plenty of Trainers await.
The first puzzle is a 5×5 grid of ice. Starting on the south-central tile, move →2, ↑4, ←1, ↓3, ←1, ↑2, ←1, ↓3, ←1, ↑4, and →2. This reveals the first stairway.
The second puzzle is a 7×7 grid, with a 3×3 platform that can be freely traversed. From the south-central tile, move →3, ↑6, ←1, ↓5, ←3, ↓1, ←2, ↑1, →1, ↑1, ←1, ↑4, →2, ↓1, ←1, ↓2, →2 onto the platform, ↑2, →1, ↑1, and ←1. This reveals the second stairway.
The final puzzle is a 7×15 grid, with a trio of 3×3 platforms. Starting on the south-central tile, move ←7, ↑6, →6, ↓1, ←5, ↓4, →4, ↑3, →1 onto the middle platform, ↓3, →2, ↓1, →1, ↑4, ←2 onto the middle platform, ↑1, →6, ↓4, ←3, ↓1, →4, ↑6, and ←7. This reveals the stairway to the Gym Leader.
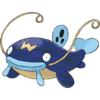
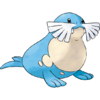
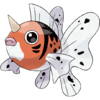
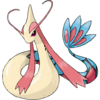
Wallace leads with his Luvdisc; not much of a threat, but it may still confuse its target with Sweet Kiss, and further hinder male targets with Attract. As a Water/Ground Pokémon, his Whiscash is only vulnerable to Grass moves; its Mud Sport weakens Electric moves for a few turns, while Earthquake packs a punch. Sealeo's Water/Ice typing gives it additional weaknesses to Fighting and Rock moves; Waterfall and Body Slam deal damage while Encore forces the target to repeat its previous move. His Seaking is somewhat dangerous, if its target is Level 44 or less, when Horn Drill may score a one-hit knockout. Also, Rain Dance combined with Waterfall can deal a suprisingly lot of damage. Finally, his Milotic can deal heavy damage with Hydro Pump, and use Ice Beam to deal with Grass types other than the Lotad family; use powerful moves to defeat it quickly, before it can regain health with Recover.
Defeated, Wallace awards you the Rain Badge, which ensures obedience from all Pokémon. He also gives you HM05 (Waterfall) as a prize. With all eight Badges, your next destination is the Pokémon League in Ever Grande City to the southeast. But first, consider exploring Hoenn's remaining areas, including Route 129 and beyond. In addition, Wallace suggests visiting Birch back in Littleroot, as he's heard a rumor that the professor has created a more powerful Pokédex.
|
Omega Ruby and Alpha Sapphire walkthrough |
|

|
This article is part of Project Walkthroughs, a Bulbapedia project that aims to write comprehensive step-by-step guides on each Pokémon game. |
