Shady House: Difference between revisions
| (19 intermediate revisions by 11 users not shown) | |||
| Line 39: | Line 39: | ||
{{trainerheader|building}} | {{trainerheader|building}} | ||
{{trainerdiv|building|1F}} | {{trainerdiv|building|1F}} | ||
{{Trainerentry|VSTeam Skull Grunt M.png{{!}}150px|Team Skull Grunt||1,120|3|041|Zubat|♂|34|None|092|Gastly|♂|34|None|757|Salandit|♂|35|None}} | {{Trainerentry|VSTeam Skull Grunt M.png{{!}}150px|game=7|Team Skull Grunt||1,120|3|041|Zubat|♂|34|None|092|Gastly|♂|34|None|757|Salandit|♂|35|None}} | ||
{{trainerdiv|building}} | {{trainerdiv|building}} | ||
{{Trainerentry|VSTeam Skull Grunt F.png{{!}}150px|Team Skull Grunt||1,120|1|747|Mareanie|♀|35|None}} | {{Trainerentry|VSTeam Skull Grunt F.png{{!}}150px|game=7|Team Skull Grunt||1,120|1|747|Mareanie|♀|35|None}} | ||
{{trainerdiv|building|1F (north room)}} | {{trainerdiv|building|1F (north room)}} | ||
{{Trainerentry|VSTeam Skull Grunt F.png{{!}}150px|Team Skull Grunt||1,120|1|093|Haunter|♀|35|None}} | {{Trainerentry|VSTeam Skull Grunt F.png{{!}}150px|game=7|Team Skull Grunt||1,120|1|093|Haunter|♀|35|None}} | ||
{{trainerdiv|building|2F}} | {{trainerdiv|building|2F}} | ||
{{Trainerentry|VSTeam Skull Grunt M.png{{!}}150px|Team Skull Grunt||1,120|2|767|Wimpod|♂|34|None|096|Drowzee|♂|35|None}} | {{Trainerentry|VSTeam Skull Grunt M.png{{!}}150px|game=7|Team Skull Grunt||1,120|2|767|Wimpod|♂|34|None|096|Drowzee|♂|35|None}} | ||
{{trainerdiv|building|2F (west room)}} | {{trainerdiv|building|2F (west room)}} | ||
{{Trainerentry|VSTeam Skull Grunt F.png{{!}}150px|Team Skull Grunt||1,120|1|019A|Rattata|♀|35|None}} | {{Trainerentry|VSTeam Skull Grunt F.png{{!}}150px|game=7|Team Skull Grunt||1,120|1|019A|Rattata|♀|35|None}} | ||
{{trainerdiv|building}} | {{trainerdiv|building}} | ||
{{Trainerentry|VSTeam Skull Grunt F.png{{!}}150px|Team Skull Grunt||1,120|1|020A|Raticate|♀|35|None}} | {{Trainerentry|VSTeam Skull Grunt F.png{{!}}150px|game=7|Team Skull Grunt||1,120|1|020A|Raticate|♀|35|None}} | ||
{{trainerdiv|building|2F (southwest room)}} | {{trainerdiv|building|2F (southwest room)}} | ||
{{Trainerentry|VSTeam Skull Grunt M.png{{!}}150px|Team Skull Grunt||1,120|1|753|Fomantis|♂|35|None}} | {{Trainerentry|VSTeam Skull Grunt M.png{{!}}150px|game=7|Team Skull Grunt||1,120|1|753|Fomantis|♂|35|None}} | ||
{{trainerdiv|building|Roof}} | {{trainerdiv|building|Roof}} | ||
{{Trainerentry|VSTeam Skull Grunt F.png{{!}}150px|Team Skull Grunt||1,120|1|042|Golbat|♀|35|None}} | {{Trainerentry|VSTeam Skull Grunt F.png{{!}}150px|game=7|Team Skull Grunt||1,120|1|042|Golbat|♀|35|None}} | ||
{{trainerfooter|building|7}} | {{trainerfooter|building|7}} | ||
| Line 97: | Line 97: | ||
{{trainerheader|building}} | {{trainerheader|building}} | ||
{{trainerdiv|building|1F}} | {{trainerdiv|building|1F}} | ||
{{Trainerentry|VSTeam Skull Grunt M.png{{!}}150px|Team Skull Grunt||1,216|1|096|Drowzee|♂|38|None}} | {{Trainerentry|VSTeam Skull Grunt M.png{{!}}150px|game=7|Team Skull Grunt||1,216|1|096|Drowzee|♂|38|None}} | ||
{{trainerdiv|building}} | {{trainerdiv|building}} | ||
{{Trainerentry|VSTeam Skull Grunt F.png{{!}}150px|Team Skull Grunt||1,216|2|757|Salandit|♂|38|None|753|Fomantis|♂|38|None}} | {{Trainerentry|VSTeam Skull Grunt F.png{{!}}150px|game=7|Team Skull Grunt||1,216|2|757|Salandit|♂|38|None|753|Fomantis|♂|38|None}} | ||
{{trainerdiv|building|1F (north room)}} | {{trainerdiv|building|1F (north room)}} | ||
{{Trainerentry|VSTeam Skull Grunt F.png{{!}}150px|Team Skull Grunt||1,216|2|568|Trubbish|♀|38|None|228|Houndour|♀|38|None}} | {{Trainerentry|VSTeam Skull Grunt F.png{{!}}150px|game=7|Team Skull Grunt||1,216|2|568|Trubbish|♀|38|None|228|Houndour|♀|38|None}} | ||
{{trainerdiv|building|2F}} | {{trainerdiv|building|2F}} | ||
{{Trainerentry|VSTeam Skull Grunt M.png{{!}}150px|Team Skull Grunt||1,216|1|559|Scraggy|♂|38|None}} | {{Trainerentry|VSTeam Skull Grunt M.png{{!}}150px|game=7|Team Skull Grunt||1,216|1|559|Scraggy|♂|38|None}} | ||
{{trainerdiv|building|2F (west room)}} | {{trainerdiv|building|2F (west room)}} | ||
{{Trainerentry|VSTeam Skull Grunt F.png{{!}}150px|Team Skull Grunt||1,216|1|019A|Rattata|♀|38|None}} | {{Trainerentry|VSTeam Skull Grunt F.png{{!}}150px|game=7|Team Skull Grunt||1,216|1|019A|Rattata|♀|38|None}} | ||
{{trainerdiv|building}} | {{trainerdiv|building}} | ||
{{Trainerentry|VSTeam Skull Grunt F.png{{!}}150px|Team Skull Grunt||1,216|1|020A|Raticate|♀|38|None}} | {{Trainerentry|VSTeam Skull Grunt F.png{{!}}150px|game=7|Team Skull Grunt||1,216|1|020A|Raticate|♀|38|None}} | ||
{{trainerdiv|building|2F (southwest room)}} | {{trainerdiv|building|2F (southwest room)}} | ||
{{Trainerentry|VSTeam Skull Grunt M.png{{!}}150px|Team Skull Grunt||1,216|2|093|Haunter|♂|38|None|088A|Grimer|♂|38|None}} | {{Trainerentry|VSTeam Skull Grunt M.png{{!}}150px|game=7|Team Skull Grunt||1,216|2|093|Haunter|♂|38|None|088A|Grimer|♂|38|None}} | ||
{{trainerdiv|building|Roof}} | {{trainerdiv|building|Roof}} | ||
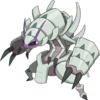
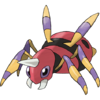
{{Trainerentry|VSTeam Skull Grunt F.png{{!}}150px|Team Skull Grunt||1,216|3|167|Spinarak|♀|38|None|624|Pawniard|♀|38|None|042|Golbat|♀|38|None}} | {{Trainerentry|VSTeam Skull Grunt F.png{{!}}150px|game=7|Team Skull Grunt||1,216|3|167|Spinarak|♀|38|None|624|Pawniard|♀|38|None|042|Golbat|♀|38|None}} | ||
{{trainerfooter|building|7}} | {{trainerfooter|building|7}} | ||
| Line 160: | Line 160: | ||
|move3=X-Scissor|move3type=Bug|move3cat=Physical}} | |move3=X-Scissor|move3type=Bug|move3cat=Physical}} | ||
{{Party/Footer}} | {{Party/Footer}} | ||
==In the spin-off games== | |||
===[[Pokémon Masters EX]]=== | |||
Artwork depicting the Shady House is seen in {{mas|Guzma}}'s mindscape. | |||
{| style="background: #7B30B2; {{roundy}}; border: #7B30B2;" | |||
| | |||
{| style="background: #AB60E2; {{roundy}}; border: #AB60E2;" | |||
|- style="text-align:center" | |||
| | |||
{| style="background: #{{bug color light}}; {{roundy}}; border: #{{bug color light}}; padding: 0px 5px 5px 5px" | |||
|- | |||
|<big>'''{{color2|000|Guzma (Masters)#Golisopod|Guzma & Golisopod}}'''</big> | |||
|- | |||
| [[File:Guzma Mindscape.png|200px]] | |||
|} | |||
|} | |||
|} | |||
==In the anime== | ==In the anime== | ||
[[File:Shady House anime.png|thumb|250px| | [[File:Shady House anime.png|thumb|250px|Shady House in the {{pkmn|anime}}]] | ||
Shady House first appeared in [[SM115]], where [[Team Skull]] | The Shady House first appeared in ''[[SM115|The Dealer of Destruction!]]'', where [[Team Skull]] watched a [[television]] broadcast of the press conference announcing the [[Alola League]]. After [[Guzma]]'s {{pkmn|battle}} against {{Ash}} at the [[Pokémon School]], the team returned to their hideout. | ||
The Shady House reappeared in a flashback in ''[[SM136|Getting Down to The Ire!]]'', where [[Plumeria]] was seen examining Guzma's collection of smashed second place trophies. | |||
The house made another flashback appearance in ''[[SM137|The Wisdom Not to Run!]]''. In the same episode's [[Poké Problem]] segment, Team Skull was shown to have returned there after Guzma's loss at the [[Manalo Conference]]. | |||
{{-}} | |||
==In the manga== | |||
[[File:Shady House Adventures.png|thumb|250px|Shady House in [[Pokémon Adventures]]]] | |||
===Pokémon Adventures=== | |||
===={{MangaArc|Sun, Moon, Ultra Sun & Ultra Moon}}==== | |||
In ''[[PASM02|The Delivery of Rotom and the Girl]]'', a pair of {{tc|Team Skull Grunt}}s met [[Guzma]] at the Shady House to inform him of their loss against {{adv|Sun}}. | |||
In ''[[PASM14|Flash and Cosmog's Secret]]'', when [[Gladion]] arrived in Po Town after being hired as a [[Team Skull]] enforcer by Guzma, [[Plumeria]] told him that his job was to guard the Shady House. | |||
In ''[[PASM17|A Raid and Po Town]]'', when the [[Trial Captain]]s and [[Hau]] came to Po Town to talk with Team Skull, Guzma greeted them from the Shady House's balcony and told them he'd talk to them if they got inside in one piece, revealing that they had been surrounded by a group of [[Ultra Beast]]s. When the Trial Captains managed to hold on against the Ultra Beasts longer than expected, Guzma revealed a {{p|Cosmog}} he had under his possession, and had it open [[Ultra Wormhole]]s to summon more UBs. Gladion confronted Guzma, demanding to know who had given him the Cosmog, but Guzma refused to tell anything, and was soon whisked away into [[Ultra Space]] by a {{p|Nihilego}}. | |||
{{-}} | {{-}} | ||
==Trivia== | ==Trivia== | ||
* If the player sits down on [[Guzma]]'s chair after defeating him, a Team Skull Grunt will rush in, momentarily mistaking the player for his boss before realizing his mistake and leaving. | * If the player sits down on [[Guzma]]'s chair after defeating him, a Team Skull Grunt will rush in, momentarily mistaking the player for his boss before realizing his mistake and leaving. | ||
* Upon entering the second room on the west side of the second floor, the player will observe two female Grunts arguing with one another over mistaking each other's clothing. One of the Grunts offers a solution that they should write their names on the tags. This is immediately dismissed by the other, who notes that they all are named Grunt, defeating the purpose. This is a joke on the fact that no [[ | * Upon entering the second room on the west side of the second floor, the player will observe two female Grunts arguing with one another over mistaking each other's clothing. One of the Grunts offers a solution that they should write their names on the tags. This is immediately dismissed by the other, who notes that they all are named Grunt, defeating the purpose. This is a joke on the fact that no [[villainous team]] [[Grunt]]s are given unique names, even with the introduction of Trainer names in [[Generation II]]. | ||
* After defeating Guzma, the player cannot call [[Poké Ride|Charizard Glide]] until encountering [[Nanu]] in front of the Shady House. However, they can travel to [[Poké Pelago]]. | * After defeating Guzma, the player cannot call [[Poké Ride|Charizard Glide]] until encountering [[Nanu]] in front of the Shady House. However, they can travel to [[Poké Pelago]]. | ||
* In {{g|Ultra Sun and Ultra Moon}}, upon entering the room directly north of the front door, there is a chance encounter with a {{p|Delibird}}, who briefly comes down the chimney and into the fireplace, before disappearing into the chimney again, making an allusion to {{wp|Santa Claus}}. | * In {{g|Ultra Sun and Ultra Moon}}, upon entering the room directly north of the front door, there is a chance encounter with a {{p|Delibird}}, who briefly comes down the chimney and into the fireplace, before disappearing into the chimney again, making an allusion to {{wp|Santa Claus}}. | ||
* On the lower left room of the second floor, the player can find a couple of [[Wii|Nintendo Wiis]] and [[Wii U]]s scattered by the TVs. | |||
==In other languages== | ==In other languages== | ||
| Line 182: | Line 215: | ||
|es=Mansión Misteriosa | |es=Mansión Misteriosa | ||
}} | }} | ||
==Related articles== | |||
{{Team Skull}} | {{Team Skull}} | ||
{{Alola}}<br> | {{Alola}}<br> | ||
Latest revision as of 18:10, 15 September 2024

|
This article is incomplete. Please feel free to edit this article to add missing information and complete it. Reason: Missing layout section with images |
| ||||
| ||||
| Map description: | A mansion abandoned by a certain rich citizen. People sometimes call it the "Shady Chateau," too. | |||
|---|---|---|---|---|
| Location: | Po Town | |||
| Region: | Alola | |||
| Generations: | VII | |||
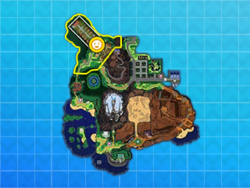 Location of Shady House in Alola. | ||||
| Pokémon world locations | ||||
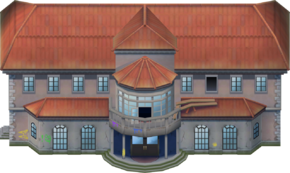
The Shady House (Japanese: いかがわしき屋敷 Suspicious Mansion) is a location on Ula'ula Island in Alola, located at the north end of Po Town. Team Skull is headquartered here.
Geography
The Shady House is a dilapidated mansion covered in graffiti and grime. It has two floors, with one of the second story bedrooms serving as Guzma's makeshift throne room. The player must collect three secret passwords from around the mansion and answer a Grunt on the second floor correctly in order to be able to reach Guzma. In Pokémon Sun and Moon, the passwords involve Guzma, while in Pokémon Ultra Sun and Ultra Moon, they involve Plumeria.
Items
| Item | Location | Games | |
|---|---|---|---|
| Max Revive | 1F, in the middle room on the west side with the sleeping Team Skull Grunt | S M US UM | |
| Heal Powder | 1F, in the northeast storage room, through the room running behind the stairs | S M US UM | |
| TM36 (Sludge Bomb) | 2F, in the northwest room | S M US UM | |
| Iron | 2F, in the southwest room | S M US UM | |
| Escape Rope | Roof, on the east end | S M US UM | |
| Buginium Z | Guzma's room, in the chest next to the chair | S M US UM | |
Totem Stickers
| Item | Location | Games | |
|---|---|---|---|
| Totem Sticker | 1F, on a box above the bed | US UM | |
| Totem Sticker | On a door on the left side of the roof | US UM | |
Trainers
After defeating Guzma here, none of the Team Skull Grunts will battle the player, acting as if they had already been defeated.
Pokémon Sun and Moon
| Trainer | Pokémon | |||||||||||
|---|---|---|---|---|---|---|---|---|---|---|---|---|
| 1F | ||||||||||||
|
| |||||||||||
| ||||||||||||
| ||||||||||||
|
| |||||||||||
| 1F (north room) | ||||||||||||
|
| |||||||||||
| 2F | ||||||||||||
|
| |||||||||||
| ||||||||||||
| 2F (west room) | ||||||||||||
|
| |||||||||||
|
| |||||||||||
| 2F (southwest room) | ||||||||||||
|
| |||||||||||
| Roof | ||||||||||||
|
| |||||||||||
|
||||||||||||||||||||||||||||||||||||||||||||||||||||||||||||||||||||||||
| ||||||||||||||||||||||||||||||||||||||||||||||||||||||||||||||||||||||||
Pokémon Ultra Sun and Ultra Moon
| Trainer | Pokémon | |||||||||||
|---|---|---|---|---|---|---|---|---|---|---|---|---|
| 1F | ||||||||||||
|
| |||||||||||
|
| |||||||||||
| ||||||||||||
| 1F (north room) | ||||||||||||
|
| |||||||||||
| ||||||||||||
| 2F | ||||||||||||
|
| |||||||||||
| 2F (west room) | ||||||||||||
|
| |||||||||||
|
| |||||||||||
| 2F (southwest room) | ||||||||||||
|
| |||||||||||
| ||||||||||||
| Roof | ||||||||||||
|
| |||||||||||
| ||||||||||||
| ||||||||||||
|
|||||||||||||||||||||||||||||||||||||||||||||||||||||||||||||||||||||||||||||||||||||||||||||||||||||||||||
| |||||||||||||||||||||||||||||||||||||||||||||||||||||||||||||||||||||||||||||||||||||||||||||||||||||||||||
In the spin-off games
Pokémon Masters EX
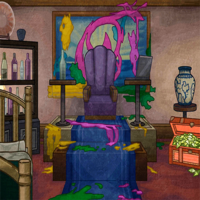
Artwork depicting the Shady House is seen in Guzma's mindscape.
|
In the anime

The Shady House first appeared in The Dealer of Destruction!, where Team Skull watched a television broadcast of the press conference announcing the Alola League. After Guzma's battle against Ash at the Pokémon School, the team returned to their hideout.
The Shady House reappeared in a flashback in Getting Down to The Ire!, where Plumeria was seen examining Guzma's collection of smashed second place trophies.
The house made another flashback appearance in The Wisdom Not to Run!. In the same episode's Poké Problem segment, Team Skull was shown to have returned there after Guzma's loss at the Manalo Conference.
In the manga

Pokémon Adventures
Sun, Moon, Ultra Sun & Ultra Moon arc
In The Delivery of Rotom and the Girl, a pair of Team Skull Grunts met Guzma at the Shady House to inform him of their loss against Sun.
In Flash and Cosmog's Secret, when Gladion arrived in Po Town after being hired as a Team Skull enforcer by Guzma, Plumeria told him that his job was to guard the Shady House.
In A Raid and Po Town, when the Trial Captains and Hau came to Po Town to talk with Team Skull, Guzma greeted them from the Shady House's balcony and told them he'd talk to them if they got inside in one piece, revealing that they had been surrounded by a group of Ultra Beasts. When the Trial Captains managed to hold on against the Ultra Beasts longer than expected, Guzma revealed a Cosmog he had under his possession, and had it open Ultra Wormholes to summon more UBs. Gladion confronted Guzma, demanding to know who had given him the Cosmog, but Guzma refused to tell anything, and was soon whisked away into Ultra Space by a Nihilego.
Trivia
- If the player sits down on Guzma's chair after defeating him, a Team Skull Grunt will rush in, momentarily mistaking the player for his boss before realizing his mistake and leaving.
- Upon entering the second room on the west side of the second floor, the player will observe two female Grunts arguing with one another over mistaking each other's clothing. One of the Grunts offers a solution that they should write their names on the tags. This is immediately dismissed by the other, who notes that they all are named Grunt, defeating the purpose. This is a joke on the fact that no villainous team Grunts are given unique names, even with the introduction of Trainer names in Generation II.
- After defeating Guzma, the player cannot call Charizard Glide until encountering Nanu in front of the Shady House. However, they can travel to Poké Pelago.
- In Pokémon Ultra Sun and Ultra Moon, upon entering the room directly north of the front door, there is a chance encounter with a Delibird, who briefly comes down the chimney and into the fireplace, before disappearing into the chimney again, making an allusion to Santa Claus.
- On the lower left room of the second floor, the player can find a couple of Nintendo Wiis and Wii Us scattered by the TVs.
In other languages
| ||||||||||||||||||||||||||
Related articles
| Po Town • Shady House | ||||||
| Boss | Administrator | Enforcer | ||||

|

|

| ||||
| Guzma (Masters) | Plumeria (Masters) | Gladion (Masters) | ||||
| Other members | ||||||
|---|---|---|---|---|---|---|
| Team Skull Grunts Pokémon the Series: Tupp • Zipp • Rapp • Okazaki Manga: Borosue (I Choose You! Remix) | ||||||
| Former members | ||||||
| Punk Guy • Punk Girl | ||||||
| See also: Aether Foundation | ||||||

|
This article is part of Project Locations, a Bulbapedia project that aims to write comprehensive articles on every location in the Pokémon world. |
