Wild Area: Difference between revisions
(→Trivia: Open world) |
YoungMan16 (talk | contribs) |
||
| Line 235: | Line 235: | ||
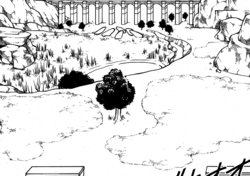
[[File:Wild Area Adventures.png|thumb|250px|The Wild Area in Pokémon Adventures]] | [[File:Wild Area Adventures.png|thumb|250px|The Wild Area in Pokémon Adventures]] | ||
===In the Pokemon Adventures manga=== | ===In the Pokemon Adventures manga=== | ||
The Wild Area first appeared in | The Wild Area first appeared in [[PASS04]], where [[Sōdo Tsurugi|Sōdo]], [[Shirudomiria Tate|Shirudomiria]], [[Professor Magnolia]], and [[Marvin]] went there to investigate the [[Pokémon Den]]s in the [[Rolling Fields]]. | ||
{{-}} | {{-}} | ||
Revision as of 00:33, 30 December 2020
The Wild Area (Japanese: ワイルドエリア Wild Area) is an extensive area in the Galar region. It adjoins several towns in the region.
The Pokémon found in the Wild Area vary depending on the weather, which can vary wildly between the different subareas. Pokémon with higher levels also wander outside of the normal tall grass in many places. The areas north of the Motostoke River are home to Pokémon with higher levels overall. Once the player has started the Darkest Day or captured Eternatus, Pokémon found throughout the Wild Area will generally have higher levels.
Unlike in most other areas in the game (which use a fixed perspective), in the Wild Area the player can control the camera using the right control stick. These mechanics, as well as the weather and wild Pokémon mechanics, carry over to the Isle of Armor and Crown Tundra.
Locations
The Wild Area is composed of many subareas. The player first enters the Wild Area from the south, but the locations below are listed from north to south in accordance with the map. The Town Map's representation of the Wild Area is only a rough layout and may diverge from in-game borders.
- South Wild Area
- Watchtower Ruins lies in the northwestern corner.
- East Lake Axewell is the large area in the north in front of the gate to Motostoke and includes most of the eastern half of Lake Axewell.
- Axew's Eye is the island that lies in the middle of Lake Axewell.
- North Lake Miloch lies in the northeastern corner and includes a part of the northern end of Lake Miloch.
- West Lake Axewell is the western half of Lake Axewell (in the west). Despite the depiction on the Town Map, it also extends north of the footbridge to Motostoke's wall.
- Dappled Grove lies in the southwestern corner.
- Rolling Fields is the large central area in the south.
- Meetup Spot is the southernmost point.
- South Lake Miloch encompasses the majority of Lake Miloch (in the east).
- Giant's Seat lies along the south and east borders of the Wild Area.
- North Wild Area
- Lake of Outrage lies in the northwestern-most corner.
- Hammerlocke Hills lies along the north before the gate to Hammerlocke.
- Giant's Cap is on the west, lying along the eastern shore of the Lake of Outrage.
- Dusty Bowl is the large central area north of the Route 5 bridge.
- Giant's Mirror lies along the east, east of Dusty Bowl.
- Stony Wilderness lies just north of the Route 5 bridge.
- Bridge Field encompasses most of the area between the Motostoke Outskirts and Route 5 bridges.
- Motostoke Riverbank is the southernmost area, north of the river and slightly beyond the Motostoke Outskirts bridge.
Weather
The weather in the Wild Area varies between areas, and each area changes weather when the date changes. The weather determines which wild Pokémon can appear, and may cause certain weather conditions and terrain to appear in battle.
Thunderstorms, blizzards, sandstorms, and fog are rarer than other weather conditions. If these weather conditions are occurring anywhere in the Wild Area, this fact will be advertised on the X menu.
Sandstorms, blizzards, and fog will not appear until the player has reached certain points in the games. If they would appear in the Wild Area, they instead appear as intense sun, snow, or clear (respectively). Once the player unlocks the weather, any instances of it that would have appeared immediately become that weather (even without changing the date).
On certain special dates, the whole Wild Area will have the same weather. These dates are typically the first of a month.
Since symbol encounters and wanderers are spawned based on the weather the player is currently experiencing, it is possible for the weather of one zone to affect these types of spawns in another zone near a border.
| Icon | Weather | Common Pokémon | Effect in battle | Prerequisite | Special dates |
|---|---|---|---|---|---|
| Clear (はれ) | Normal, Grass, Flying | — | — | May 1 | |
| Cloudy (くもり) | Fighting, Poison, Dark | — | — | March 1 | |
| Rain (あめ) | Water, Bug | Rain | — | October 1 | |
| Thunderstorm (豪雨) | Water, Electric, Dragon | Rain, Electric Terrain | — | November 1 | |
| Snow (ゆき) | Ice | Hail | — | December 1 December 25 | |
| Blizzard (吹雪) | Ice, Steel | Hail | Visit Hammerlocke | February 1 | |
| Harsh sunlight (ひでり) | Fire, Ground | Harsh sunlight | — | July 1 | |
| Sandstorm (砂嵐) | Ground, Rock | Sandstorm | Visit Hammerlocke | April 1 | |
| Fog (霧) | Psychic, Ghost, Fairy | Misty Terrain | Become Champion | February 29 June 1 |
Features
The Wild Area has a number of features that appear in many different areas:
- The Wild Area is populated with 99 Pokémon Dens, where the player can participate in Max Raid Battles.
- There are a large number of hidden items throughout the Wild Area. These items respawn daily, and each specific spot may yield different items on different days.
- Watt Traders allow the player to trade Watts for items, participate in the Rotom Rally, change the color of their outfit, and upgrade their Rotom Bike.
Items
Hidden items
There are a large number of hidden items throughout the Wild Area. These hidden items regenerate each day, even if the player has not obtained them.
Each spot has one or more possible items that it can yield, with the possible items depending on the spot. Every item that regenerates daily can also rarely regenerate as a Wishing Piece (at approximately a 1% chance) instead of the items in its standard pool.
100-Watt gifts
Hikers and Fishers may appear in different parts of the Wild Area to offer the player an unspecified item for 100 Watts. The player does not know what the item is until they agree to purchase it.
Fisher
| Item | Location | Games | |
|---|---|---|---|
| Pearl ×3 | Common | Sw Sh | |
| Big Pearl | Common | Sw Sh | |
| Big Pearl ×2 | Average | Sw Sh | |
| Big Pearl ×3 | Average | Sw Sh | |
| Pearl String | Average | Sw Sh | |
| Pearl String ×2 | Rare | Sw Sh | |
| Wishing Piece | Rare | Sw Sh | |
Hiker
A Hiker's possible items depend on the player's progress, changing when the player gains their second Badge and when they become Champion.
| Item | Rate | ||
|---|---|---|---|
| 0-1 Badge | 2-8 Badges | Champion | |
| Common | |||
| Common | |||
| Common | |||
| Average | |||
| Common | |||
| Rare | Common | Common | |
| Common | Common | ||
| Rare | |||
| Rare | Common | ||
| Uncommon | |||
| Rare | |||
| Rare | Rare | Rare | |
| Very Rare | Very Rare | Very Rare | |
Trainers
Pokémon Breeder Chloe can appear in many different Wild Area zones. She eventually reappears after being defeated.
She can appear in the following Wild Area zones:
| Trainer | Pokémon | |||||||||||
|---|---|---|---|---|---|---|---|---|---|---|---|---|
| Before earning the Fire Badge | ||||||||||||
|
| |||||||||||
| ||||||||||||
| ||||||||||||
| After earning the Fire Badge | ||||||||||||
|
| |||||||||||
| ||||||||||||
| ||||||||||||
| After becoming Champion | ||||||||||||
|
| |||||||||||
| ||||||||||||
| ||||||||||||
In the anime

In the main series
The Wild Area appeared in Mind-Boggling Dynamax!, where Ash and Goh explored it after their arrival in Galar. They witnessed a Snorlax Gigantamaxing, but it blocked a railroad line in the process, threatening to cause an accident. However, Ash and Goh were able to make Snorlax move off the tracks, saving the train. Afterwards, in the same area, Goh caught the Scorbunny that had followed him from Wyndon.
Pokémon found in the Wild Area
 Braviary |
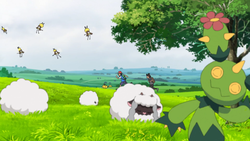 Maractus |
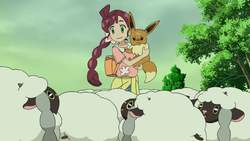 Wooloo |
 Ribombee |
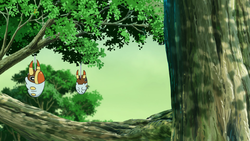 Grubbin |
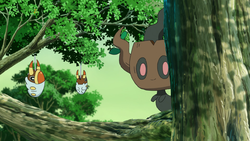 Phantump |
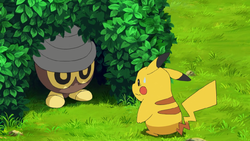 Seedot |
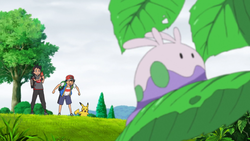 Goomy |
 Hippopotas |
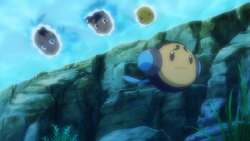 Tympole |
 Frillish |
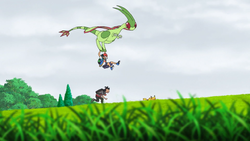 Flygon |
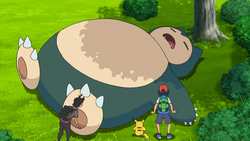 Snorlax ↔ Gigantamax Snorlax |
In Pokémon: Twilight Wings
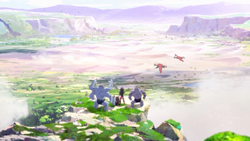
The Wild Area first appeared during a montage at the end of Letter, where Bea was shown confronting a wild Rhydon. Bea's visit to the Wild Area was shown in full in Training, where she took a Flying Taxi there to train with her Machop, Machoke, and Machamp following her loss against Leon in a battle.
In the manga
In the Pokemon Adventures manga
The Wild Area first appeared in PASS04, where Sōdo, Shirudomiria, Professor Magnolia, and Marvin went there to investigate the Pokémon Dens in the Rolling Fields.
Trivia
- The theme used for the northern parts of the Wild Area, including Bridge Field onward, is shortened for Routes 6, 7, 8, and 9.
- The Wild Area is based off of Lake District.[1]
- The Wild Area is a 3D open world area that draws similarity to various role-playing games, for example The Legend of Zelda: Breath of the Wild.
In other languages
| |||||||||||||||||||||||||||||||||||

|
This article is part of Project Locations, a Bulbapedia project that aims to write comprehensive articles on every location in the Pokémon world. |


