Breakneck Blitz (move): Difference between revisions
m (→Effect) |
m (→Effect) |
||
| Line 41: | Line 41: | ||
! Base move | ! Base move | ||
! Power | ! Power | ||
! | ! Cat. | ||
|- | |- | ||
| {{m|Barrage}} | | {{m|Barrage}} | ||
| 100 | | 100 | ||
{{statustable|Physical}} | |||
|- | |- | ||
| {{m|Bide}} | | {{m|Bide}} | ||
| 100 | | 100 | ||
{{statustable|Physical}} | |||
|- | |- | ||
| {{m|Bind}} | | {{m|Bind}} | ||
| 100 | | 100 | ||
{{statustable|Physical}} | |||
|- | |- | ||
| {{m|Body Slam}} | | {{m|Body Slam}} | ||
| 160 | | 160 | ||
{{statustable|Physical}} | |||
|- | |- | ||
| {{m|Boomburst}} | | {{m|Boomburst}} | ||
| 200 | | 200 | ||
{{statustable|Special}} | |||
|- | |- | ||
| {{m|Chip Away}} | | {{m|Chip Away}} | ||
| 140 | | 140 | ||
{{statustable|Physical}} | |||
|- | |- | ||
| {{m|Comet Punch}} | | {{m|Comet Punch}} | ||
| 100 | | 100 | ||
{{statustable|Physical}} | |||
|- | |- | ||
| {{m|Constrict}} | | {{m|Constrict}} | ||
| 100 | | 100 | ||
{{statustable|Physical}} | |||
|- | |- | ||
| {{m|Covet}} | | {{m|Covet}} | ||
| 120 | | 120 | ||
{{statustable|Physical}} | |||
|- | |- | ||
| {{m|Crush Claw}} | | {{m|Crush Claw}} | ||
| 140 | | 140 | ||
{{statustable|Physical}} | |||
|- | |- | ||
| {{m|Crush Grip}} | | {{m|Crush Grip}} | ||
| 190 | | 190 | ||
{{statustable|Physical}} | |||
|- | |- | ||
| {{m|Cut}} | | {{m|Cut}} | ||
| 100 | | 100 | ||
{{statustable|Physical}} | |||
|- | |- | ||
| {{m|Dizzy Punch}} | | {{m|Dizzy Punch}} | ||
| 140 | | 140 | ||
{{statustable|Physical}} | |||
|- | |- | ||
| {{m|Double Hit}} | | {{m|Double Hit}} | ||
| 140 | | 140 | ||
{{statustable|Physical}} | |||
|- | |- | ||
| {{m|Double Slap}} | | {{m|Double Slap}} | ||
| 100 | | 100 | ||
{{statustable|Physical}} | |||
|- | |- | ||
| {{m|Double-Edge}} | | {{m|Double-Edge}} | ||
| 190 | | 190 | ||
{{statustable|Physical}} | |||
|- | |- | ||
| {{m|Echoed Voice}} | | {{m|Echoed Voice}} | ||
| 100 | | 100 | ||
{{statustable|Special}} | |||
|- | |- | ||
| {{m|Egg Bomb}} | | {{m|Egg Bomb}} | ||
| 180 | | 180 | ||
{{statustable|Physical}} | |||
|- | |- | ||
| {{m|Endeavor}} | | {{m|Endeavor}} | ||
| 160 | | 160 | ||
{{statustable|Physical}} | |||
|- | |- | ||
| {{m|Explosion}} | | {{m|Explosion}} | ||
| 200 | | 200 | ||
{{statustable|Physical}} | |||
|- | |- | ||
| {{m|Extreme Speed}} | | {{m|Extreme Speed}} | ||
| 160 | | 160 | ||
{{statustable|Physical}} | |||
|- | |- | ||
| {{m|Facade}} | | {{m|Facade}} | ||
| 140 | | 140 | ||
{{statustable|Physical}} | |||
|- | |- | ||
| {{m|Fake Out}} | | {{m|Fake Out}} | ||
| 100 | | 100 | ||
{{statustable|Physical}} | |||
|- | |- | ||
| {{m|False Swipe}} | | {{m|False Swipe}} | ||
| 100 | | 100 | ||
{{statustable|Physical}} | |||
|- | |- | ||
| {{m|Feint}} | | {{m|Feint}} | ||
| 100 | | 100 | ||
{{statustable|Physical}} | |||
|- | |- | ||
| {{m|Flail}} | | {{m|Flail}} | ||
| 160 | | 160 | ||
{{statustable|Physical}} | |||
|- | |- | ||
| {{m|Frustration}} | | {{m|Frustration}} | ||
| 160 | | 160 | ||
{{statustable|Physical}} | |||
|- | |- | ||
| {{m|Fury Attack}} | | {{m|Fury Attack}} | ||
| 100 | | 100 | ||
{{statustable|Physical}} | |||
|- | |- | ||
| {{m|Fury Swipes}} | | {{m|Fury Swipes}} | ||
| 100 | | 100 | ||
{{statustable|Physical}} | |||
|- | |- | ||
| {{m|Giga Impact}} | | {{m|Giga Impact}} | ||
| 200 | | 200 | ||
{{statustable|Physical}} | |||
|- | |- | ||
| {{m|Guillotine}} | | {{m|Guillotine}} | ||
| 180 | | 180 | ||
{{statustable|Physical}} | |||
|- | |- | ||
| {{m|Head Charge}} | | {{m|Head Charge}} | ||
| 190 | | 190 | ||
{{statustable|Physical}} | |||
|- | |- | ||
| {{m|Headbutt}} | | {{m|Headbutt}} | ||
| 140 | | 140 | ||
{{statustable|Physical}} | |||
|- | |- | ||
| {{m|Hidden Power}} | | {{m|Hidden Power}} | ||
| 120 | | 120 | ||
{{statustable|Special}} | |||
|- | |- | ||
| {{m|Hold Back}} | | {{m|Hold Back}} | ||
| 100 | | 100 | ||
{{statustable|Physical}} | |||
|- | |- | ||
| {{m|Horn Attack}} | | {{m|Horn Attack}} | ||
| 120 | | 120 | ||
{{statustable|Physical}} | |||
|- | |- | ||
| {{m|Horn Drill}} | | {{m|Horn Drill}} | ||
| 180 | | 180 | ||
{{statustable|Physical}} | |||
|- | |- | ||
| {{m|Hyper Beam}} | | {{m|Hyper Beam}} | ||
| 200 | | 200 | ||
{{statustable|Special}} | |||
|- | |- | ||
| {{m|Hyper Fang}} | | {{m|Hyper Fang}} | ||
| 160 | | 160 | ||
{{statustable|Physical}} | |||
|- | |- | ||
| {{m|Hyper Voice}} | | {{m|Hyper Voice}} | ||
| 175 | | 175 | ||
{{statustable|Special}} | |||
|- | |- | ||
| {{m|Judgment}} | | {{m|Judgment}} | ||
| 180 | | 180 | ||
{{statustable|Special}} | |||
|- | |- | ||
| {{m|Last Resort}} | | {{m|Last Resort}} | ||
| 200 | | 200 | ||
{{statustable|Physical}} | |||
|- | |- | ||
| {{m|Mega Kick}} | | {{m|Mega Kick}} | ||
| 190 | | 190 | ||
{{statustable|Physical}} | |||
|- | |- | ||
| {{m|Mega Punch}} | | {{m|Mega Punch}} | ||
| 160 | | 160 | ||
{{statustable|Physical}} | |||
|- | |- | ||
| {{m|Multi-Attack}} | | {{m|Multi-Attack}} | ||
| 185 | | 185 | ||
{{statustable|Physical}} | |||
|- | |- | ||
| {{m|Natural Gift}} | | {{m|Natural Gift}} | ||
| 160 | | 160 | ||
{{statustable|Physical}} | |||
|- | |- | ||
| {{m|Pay Day}} | | {{m|Pay Day}} | ||
| 100 | | 100 | ||
{{statustable|Physical}} | |||
|- | |- | ||
| {{m|Pound}} | | {{m|Pound}} | ||
| 100 | | 100 | ||
{{statustable|Physical}} | |||
|- | |- | ||
| {{m|Present}} | | {{m|Present}} | ||
| 100 | | 100 | ||
{{statustable|Physical}} | |||
|- | |- | ||
| {{m|Quick Attack}} | | {{m|Quick Attack}} | ||
| 100 | | 100 | ||
{{statustable|Physical}} | |||
|- | |- | ||
| {{m|Rage}} | | {{m|Rage}} | ||
| 100 | | 100 | ||
{{statustable|Physical}} | |||
|- | |- | ||
| {{m|Rapid Spin}} | | {{m|Rapid Spin}} | ||
| 100 | | 100 | ||
{{statustable|Physical}} | |||
|- | |- | ||
| {{m|Razor Wind}} | | {{m|Razor Wind}} | ||
| 160 | | 160 | ||
{{statustable|Special}} | |||
|- | |- | ||
| {{m|Relic Song}} | | {{m|Relic Song}} | ||
| 140 | | 140 | ||
{{statustable|Special}} | |||
|- | |- | ||
| {{m|Retaliate}} | | {{m|Retaliate}} | ||
| 140 | | 140 | ||
{{statustable|Physical}} | |||
|- | |- | ||
| {{m|Return}} | | {{m|Return}} | ||
| 160 | | 160 | ||
{{statustable|Physical}} | |||
|- | |- | ||
| {{m|Revelation Dance}} | | {{m|Revelation Dance}} | ||
| 175 | | 175 | ||
{{statustable|Special}} | |||
|- | |- | ||
| {{m|Rock Climb}} | | {{m|Rock Climb}} | ||
| 175 | | 175 | ||
{{statustable|Physical}} | |||
|- | |- | ||
| {{m|Round}} | | {{m|Round}} | ||
| 120 | | 120 | ||
{{statustable|Special}} | |||
|- | |- | ||
| {{m|Scratch}} | | {{m|Scratch}} | ||
| 100 | | 100 | ||
{{statustable|Physical}} | |||
|- | |- | ||
| {{m|Secret Power}} | | {{m|Secret Power}} | ||
| 140 | | 140 | ||
{{statustable|Physical}} | |||
|- | |- | ||
| {{m|Self-Destruct}} | | {{m|Self-Destruct}} | ||
| 200 | | 200 | ||
{{statustable|Physical}} | |||
|- | |- | ||
| {{m|Skull Bash}} | | {{m|Skull Bash}} | ||
| 195 | | 195 | ||
{{statustable|Physical}} | |||
|- | |- | ||
| {{m|Slam}} | | {{m|Slam}} | ||
| 160 | | 160 | ||
{{statustable|Physical}} | |||
|- | |- | ||
| {{m|Slash}} | | {{m|Slash}} | ||
| 140 | | 140 | ||
{{statustable|Physical}} | |||
|- | |- | ||
| {{m|Smelling Salts}} | | {{m|Smelling Salts}} | ||
| 140 | | 140 | ||
{{statustable|Physical}} | |||
|- | |- | ||
| {{m|Snore}} | | {{m|Snore}} | ||
| 100 | | 100 | ||
{{statustable|Special}} | |||
|- | |- | ||
| {{m|Sonic Boom}} | | {{m|Sonic Boom}} | ||
| 100 | | 100 | ||
{{statustable|Special}} | |||
|- | |- | ||
| {{m|Spike Cannon}} | | {{m|Spike Cannon}} | ||
| 100 | | 100 | ||
{{statustable|Physical}} | |||
|- | |- | ||
| {{m|Spit Up}} | | {{m|Spit Up}} | ||
| 100 | | 100 | ||
{{statustable|Special}} | |||
|- | |- | ||
| {{m|Stomp}} | | {{m|Stomp}} | ||
| 120 | | 120 | ||
{{statustable|Physical}} | |||
|- | |- | ||
| {{m|Strength}} | | {{m|Strength}} | ||
| 160 | | 160 | ||
{{statustable|Physical}} | |||
|- | |- | ||
| {{m|Struggle}} | | {{m|Struggle}} | ||
| 1 | | 1 | ||
{{statustable|Physical}} | |||
|- | |- | ||
| {{m|Super Fang}} | | {{m|Super Fang}} | ||
| 100 | | 100 | ||
{{statustable|Physical}} | |||
|- | |- | ||
| {{m|Swift}} | | {{m|Swift}} | ||
| 120 | | 120 | ||
{{statustable|Special}} | |||
|- | |- | ||
| {{m|Tackle}} | | {{m|Tackle}} | ||
| 100 | | 100 | ||
{{statustable|Physical}} | |||
|- | |- | ||
| {{m|Tail Slap}} | | {{m|Tail Slap}} | ||
| 140 | | 140 | ||
{{statustable|Physical}} | |||
|- | |- | ||
| {{m|Take Down}} | | {{m|Take Down}} | ||
| 175 | | 175 | ||
{{statustable|Physical}} | |||
|- | |- | ||
| {{m|Techno Blast}} | | {{m|Techno Blast}} | ||
| 190 | | 190 | ||
{{statustable|Special}} | |||
|- | |- | ||
| {{m|Thrash}} | | {{m|Thrash}} | ||
| 190 | | 190 | ||
{{statustable|Physical}} | |||
|- | |- | ||
| {{m|Tri Attack}} | | {{m|Tri Attack}} | ||
| 160 | | 160 | ||
{{statustable|Special}} | |||
|- | |- | ||
| {{m|Trump Card}} | | {{m|Trump Card}} | ||
| 160 | | 160 | ||
{{statustable|Special}} | |||
|- | |- | ||
| {{m|Uproar}} | | {{m|Uproar}} | ||
| 175 | | 175 | ||
{{statustable|Special}} | |||
|- | |- | ||
| {{m|Vice Grip}} | | {{m|Vice Grip}} | ||
| 100 | | 100 | ||
{{statustable|Physical}} | |||
|- | |- | ||
| {{m|Weather Ball}}{{tt|*|only in foggy weather, a mysterious air current, or if there is no special weather condition present}} | | {{m|Weather Ball}}{{tt|*|only in foggy weather, a mysterious air current, or if there is no special weather condition present}} | ||
| 160 | | 160 | ||
{{statustable|Special}} | |||
|- | |- | ||
| {{m|Wrap}} | | {{m|Wrap}} | ||
| 100 | | 100 | ||
{{statustable|Physical}} | |||
|- | |- | ||
| {{m|Wring Out}} | | {{m|Wring Out}} | ||
| 190 | | 190 | ||
{{statustable|Special}} | |||
|} | |} | ||
|} | |} | ||
Revision as of 15:14, 19 January 2020
| Breakneck Blitz ウルトラダッシュアタック Ultra Dash Attack | ||||||||||||
| ||||||||||||
Range
| ||||||||||||
Availability
| ||||||||||||
| ||||||||||||
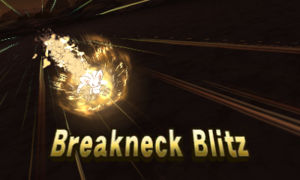
Breakneck Blitz (Japanese: ウルトラダッシュアタック Ultra Dash Attack) is a damage-dealing Normal-type Z-Move introduced in Generation VII.
Effect
Breakneck Blitz inflicts damage. Its power and whether it is a special or physical move depends on the move it is based on.
Breakneck Blitz is unaffected by Pixilate, Refrigerate, Aerilate, and Galvanize. However, it is affected by Ion Deluge and Electrify.
If Breakneck Blitz is used during weather with Weather Ball as its base move, it will turn into the Z-Move of the type corresponding to the type Weather Ball would be in that weather. This does not occur if Weather Ball is turned into a Z-Move via another move (e.g. via Z-Sleep Talk).
Description
|
Learnset
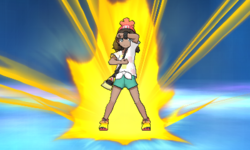
Any Pokémon can use Breakneck Blitz if it knows a damaging Normal-type move, holds a Normalium Z, and if its Trainer wears a Z-RingSM or Z-Power RingUSUM.
In the anime
| The user gathers Z-Power and attacks the opponent with a powerful tackle. | |||
| Pokémon | Method | ||
|---|---|---|---|
| User | First Used In | Notes | |

|
Pikachu strikes a series of synchronized poses with its Trainer to build Z-Power. It then becomes surrounded in an orange aura and charges at the opponent with a full-speed tackle. | ||
| Ash's Pikachu | Trial and Tribulation! | Debut Base move is Quick Attack | |

|
Rowlet strikes a series of synchronized poses with its Trainer to build Z-Power. It then becomes surrounded in an orange aura and charges at the opponent with a full-speed tackle. | ||
| Ash's Rowlet | Young Kiawe Had a Farm! | Base move is Tackle | |

|
Rockruff strikes a series of synchronized poses with its Trainer to build Z-Power. It then becomes surrounded in an orange aura and charges at the opponent with a full-speed tackle. | ||
| Ash's Rockruff | A Guardian Rematch! | Base move is Tackle | |

|
Litten strikes a series of synchronized poses with its Trainer to build Z-Power. It then becomes surrounded in an orange aura and charges at the opponent with a full-speed tackle. | ||
| Ash's Litten | Currying Favor and Flavor! | Base move is Fury Swipes, Slash, or Scratch | |

|
Silvally builds Z-Power. It then charges at the opponent with a full-speed tackle. | ||
| Gladion's Silvally | The Prism Between Light and Darkness! | Base move is Crush Claw or Multi-Attack | |
In the manga
In the Pokémon Adventures manga
|
| |||
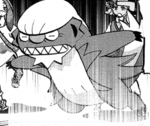
| The user builds up its momentum using its Z-Power and crashes into the target at full speed. | |||
| Pokémon | Method | ||
|---|---|---|---|
| User | First Chapter Used In | Notes | |

|
Gumshoos's Trainer strikes a series of poses to build Z-Power. It then charges at the opponent with a full-force tackle. | ||
| Ilima's Gumshoos | PASM34 | Debut | |
Appearance
Pose
In other languages
| |||||||||||||||||||||||||||||||||||||||||||
| Type-based Z-Moves | |
|---|---|
| |
| Species-based Z-Moves | |
|

|
This article is part of Project Moves and Abilities, a Bulbapedia project that aims to write comprehensive articles on two related aspects of the Pokémon games. |


