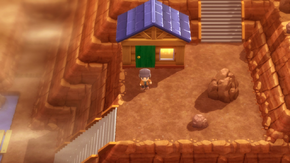
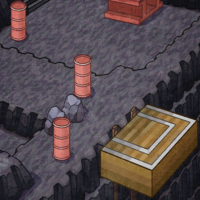
Iron Island: Difference between revisions
m (→In {{2v2|Diamond|Pearl}}: Added winnings values) |
YoungMan16 (talk | contribs) m (→In the anime) |
||
| (227 intermediate revisions by 99 users not shown) | |||
| Line 1: | Line 1: | ||
{{Infobox location | {{Infobox location | ||
|image= | |image=Iron Island BDSP.png | ||
|type=cave | |type=cave | ||
|location_name=Iron Island | |location_name=Iron Island | ||
|japanese_name= | |japanese_name={{tt|鋼鉄島|Kōtetsu Jima}} | ||
|translated_name=Steel Island | |translated_name=Steel Island | ||
|location=Off the | |mapdesc=A small, ore-rich island that is off the coast of Eterna City.<br/>Inside the island are remnants of an iron ore mining operation from the past. | ||
|location=Off the western coast of [[Sinnoh]] | |||
|region=Sinnoh | |region=Sinnoh | ||
|generation={{gen|IV}} | |generation={{gen|IV}}, {{gen|VIII}} | ||
}} | }} | ||
'''Iron Island''' (Japanese: '''こうてつじま''' ''Steel Island'') is an island off | '''Iron Island''' (Japanese: '''{{tt|鋼鉄島|こうてつじま}}''' ''Steel Island'') is an island off the western coast of [[Sinnoh]]. It is only accessible via ship from [[Canalave City]]. | ||
The cave on Iron Island was once a prosperous ore mine, but it was shut down after the ore reserves dried up. Since then, it has been kept open as a training area and habitat for [[wild Pokémon]]. [[Byron]], [[Riley]], and the members of the [[Canalave Gym]] come here to train, as did [[Roark]] in his childhood. {{tc|Team Galactic Grunt}}s are also found within the abandoned mine. | |||
==Geography== | |||
===Exterior=== | |||
The main point of access to Iron Island is at its southwest corner, which has a dock for access by boat from [[Canalave City]]. One of the openings to the inside of the island is blocked by ledges, and thus its role is more like that of an exit. In front of the dock is two sets of stairs, separated by a landing on which a cabin apparently owned by Canalave Gym Leader [[Byron]] is located. The stairs lead to another cave opening, the only other way to enter the island. | |||
===Interior=== | |||
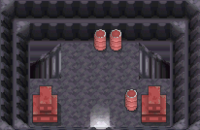
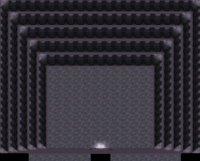
The cave inside the island is brown in Diamond and Pearl and its [[Pokémon Brilliant Diamond and Shining Pearl|its remakes]], and black in Platinum. In all three games, the floor of the cave throughout the island is lined with oil drums and {{wp|I-beam}}s, with the former occasionally serving as obstacles which the {{player}} must navigate around in order to access certain parts of the cave sections. | |||
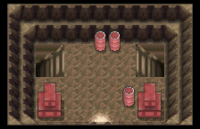
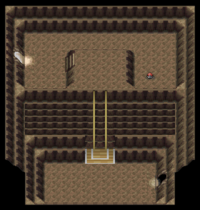
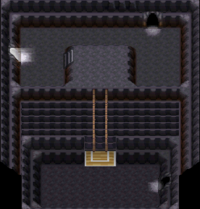
When the player first enters, a pair of stairs facing left and right provide access to the first basement of the island. The left stair leads to a dead-end section, in which a single {{tc|Camper}} can be battled. The right stair leads to a larger cave section with several Trainers, where a platform lift at the end can be used to gain access to the second basement of the cave. Once again, there are two sets of stairs facing left and right at the end of the platform lift; this time the right one leads to a dead-end section, where two {{tc|Worker}}s can be battled. The left stair leads to the largest single cave section of the island, where Riley will partner the player the first time the player enters it, participating in Tag Battles with his {{p|Lucario}}. Following this point, the remaining Trainers present in the cave are set up in a way such that tag battles against them with Riley as partner are possible, though strictly optional save for the battle with the two {{tc|Team Galactic Grunt}}s at the end of the section. | |||
After the battle with the Team Galactic Grunts, Riley will cease his partnership with the player, and presents them with a {{p|Riolu}} Egg as a parting gift; if the player's party is full, he will remain until the player returns with an empty slot in their party. The departure of the two Team Galactic Grunts will also allow the player to access another platform lift that takes them down to the third basement. A cave opening in the wall leads to the exit section with another lift, which will take the player straight back to entrance level, where they can leave the inside of the island. In {{game|Platinum}}, this section also contains the entrance to the {{si|Iron Ruins}}, where {{p|Registeel}} can be battled if the player has a [[fateful encounter]] {{p|Regigigas}} in their party. | |||
==Items== | ==Items== | ||
{{Itlisth|cave}} | |||
{{Itemlist|Max Ether BDSP|Exterior, on the small rock in front of the house ''(hidden)''|D=yes|P=yes|BD=yes|SP=yes|display=[[Max Ether]]}} | |||
{{Itemlist|Star Piece|Exterior, on the small rock in front of the house ''(hidden)''|Pt=yes}} | |||
{{Itemlist|Metal Coat BDSP|In the house, from [[Byron]] after obtaining the [[National Pokédex]]|D=yes|P=yes|Pt=yes|BD=yes|SP=yes|display=[[Metal Coat]]}} | |||
{{Itemlist|HM Normal|Exterior, from Riley when the player first arrives on the Island|Pt=yes|display={{HM|04|Strength}}}} | |||
{{Itemlist|Yellow Shard|B1F 1, center of the room|Pt=yes}} | |||
{{Itemlist|Iron Ball BDSP|B1F 1; upper-left part of raised section|D=yes|P=yes|BD=yes|SP=yes|display=[[Iron Ball]]}} | |||
{{Itemlist|Protector|B1F 1, upper-left part of raised section|Pt=yes}} | |||
{{Itemlist|Escape Rope BDSP|B1F 2, northwest of the lift|D=yes|P=yes|Pt=yes|BD=yes|SP=yes|display=[[Escape Rope]]}} | |||
{{Itemlist|Super Repel BDSP|B1F 2, in front of stone northeast of Picnicker Summer|D=yes|P=yes|BD=yes|SP=yes|display=[[Super Repel]]}} | |||
{{Itemlist|Max Repel|B1F 2, in front of stone northeast of Picnicker Summer|Pt=yes}} | |||
{{Itemlist|Tiny Mushroom BDSP|B1F 2, on pile of beams next to Picnicker Summer ''(hidden)''|D=yes|P=yes|BD=yes|SP=yes|display=[[Tiny Mushroom]]}} | |||
{{Itemlist|Star Piece|B1F 2, to the right of the three barrels northwest of Picnicker Summer ([[Recurring item|daily]]) ''(hidden)''|Pt=yes}} | |||
{{Itemlist|Revive|B1F 2, left of lift|Pt=yes}} | |||
{{Itemlist|Max Ether BDSP|B2F 1; east of Worker Willy|D=yes|P=yes|BD=yes|SP=yes|display=[[Max Ether]]}} | |||
{{Itemlist|Elixir|B2F 1, east of Worker Noel|Pt=yes}} | |||
{{Itemlist|TM Steel BDSP|B2F 1, in western half of pit southeast of Worker Braden|D=yes|P=yes|Pt=yes|BD=yes|SP=yes|display={{TM|23|Iron Tail}}}} | |||
{{Itemlist|Iron BDSP|B2F 1, in eastern half of pit southeast of Worker Braden ''(hidden)''|D=yes|P=yes|BD=yes|SP=yes|display=[[Iron]]}} | |||
{{Itemlist|Star Piece|B2F 1, in eastern half of pit southeast of Worker Braden ([[Recurring item|daily]]) ''(hidden)''|Pt=yes}} | |||
{{Itemlist|Full Restore BDSP|B2F 2, on barrel south of Hiker Maurice past a raised section of rock ''(hidden)''|D=yes|P=yes|BD=yes|SP=yes|display=[[Full Restore]]}} | |||
{{Itemlist|Magnet BDSP|B2F 2, northeast of Black Belt Kendal and Battle Girl Tyler|D=yes|P=yes|BD=yes|SP=yes|display=[[Magnet]]}} | |||
{{Itemlist|Ultra Ball|B2F 2, northeast of Black Belt Kendal and Battle Girl Tyler|Pt=yes}} | |||
{{Itemlist|Ultra Ball BDSP|B2F 2, northwest corner beside two steel drums|D=yes|P=yes|BD=yes|SP=yes|display=[[Ultra Ball]]}} | |||
{{Itemlist|Dusk Ball|B2F 2, northwest corner beside two steel drums|Pt=yes}} | |||
{{Itemlist|Max Potion BDSP|B2F 2, southwest of Ultra Ball{{sup/4|DP}}{{sup/8|BDSP}}/Dusk Ball{{sup/4|Pt}} near two small rocks|D=yes|P=yes|Pt=yes|BD=yes|SP=yes|display=[[Max Potion]]}} | |||
{{Itemlist|Magnet|B2F Left, southwest of Max Potion|Pt=yes}} | |||
{{Itemlist|Star Piece|B2F 2, on the raised platform south of Worker Brendon and Worker Quentin ([[Recurring item|daily]]) ''(hidden)''|Pt=yes}} | |||
{{Itemlist|Iron Plate BDSP|B2F 2, in pit in southeast corner ''(hidden)''|D=yes|P=yes|Pt=yes|BD=yes|SP=yes|display=[[Iron Plate]]}} | |||
{{Itemlist|Revive BDSP|B2F 2, on the barrel just west of Ace Trainer Jonah, only accessible from the west ''(hidden)''|D=yes|P=yes|BD=yes|SP=yes|display=[[Revive]]}} | |||
{{Itemlist|Star Piece|B2F 2, on small rock right of Ace Trainer Jonah and Ace Trainer Brenda ([[Recurring item|daily]]) ''(hidden)''|Pt=yes}} | |||
{{Itemlist|HP Up BDSP|B2F 2, just north of the two Team Galactic Grunts|D=yes|P=yes|Pt=yes|BD=yes|SP=yes|display=[[HP Up]]}} | |||
{{Itemlist|Red Shard|B2F 2, just northeast of Worker Brendon and Worker Quentin|Pt=yes}} | |||
{{Itemlist|Shiny Stone BDSP|B3F 1, east of the raised section in the middle of the room|D=yes|P=yes|Pt=yes|BD=yes|SP=yes|display=[[Shiny Stone]]}} | |||
{{Itemlist|Metal Coat|B3F 2|Pt=yes}} | |||
{{Itemlist|Nugget|B3F 2, northwest of Metal Coat ''(hidden)''|Pt=yes}} | |||
{{Itlistfoot|cave}} | |||
==Partner Trainer== | |||
When entering the western portion of B2F of Iron Island for the first time, the {{player}} encounters [[Riley]]. He offers to travel through the rest of the mine with the player. He is one of the [[Stat Trainers]], specializing in the {{stat|Attack}} stat. While he is with the player, all {{pkmn2|wild}} battles become [[Double Battle]]s, and all Trainer battles that would otherwise be Double Battles become [[Multi Battle]]s. After every battle, he will completely heal the player's party. He leaves the player once they have reached the elevator leading to the exit of the mine. Before he goes, he will give the player a {{p|Riolu}} {{pkmn|Egg}}, if the player has a space for it in their party; if not, he will wait until the player returns with a free slot. In {{g|Brilliant Diamond and Shining Pearl}}, the Egg will be sent to a [[Pokémon Storage System|Box]] if the player's party is full. | |||
===Pokémon Diamond, Pearl, and Platinum=== | |||
{{Party/Single | |||
|color={{attack color}} | |||
|bordercolor={{attack color dark}} | |||
|headcolor={{attack color light}} | |||
|class={{PK}}{{MN}} Trainer | |||
|classlink=Pokémon Trainer | |||
|name={{color2|000|Riley}} | |||
|sprite=DP Riley Back.png | |||
|game=DPPt | |||
|location=Iron Island | |||
|prize=none | |||
|pokemon=1}} | |||
| style="margin:auto" | | |||
{{Pokémon/4 | |||
|pokemon=Lucario | |||
|type1=Fighting|type2=Steel | |||
|ndex=448 | |||
|gender=male | |||
|game=Platinum | |||
|back=yes | |||
|level={{tt|34|Diamond and Pearl}}/{{tt|41|Platinum}} | |||
|ability=Steadfast | |||
|move1=Metal Claw|move1type=Steel|move1cat=Physical | |||
|move2=Bone Rush|move2type=Ground|move2cat=Physical | |||
|move3=Force Palm|move3type=Fighting|move3cat=Physical | |||
|move4=Quick Attack|move4type=Normal|move4cat=Physical}} | |||
{{Party/Footer}} | |||
===Pokémon Brilliant Diamond and Shining Pearl=== | |||
{{Party/Single | |||
|color={{attack color}} | |||
|bordercolor={{attack color dark}} | |||
|headcolor={{attack color light}} | |||
|class=Pokémon Trainer | |||
|classlink=Pokémon Trainer | |||
|name={{color2|000|Riley}} | |||
|sprite=BDSP Riley Back.png{{!}}90px | |||
|game=BDSP | |||
|location=Iron Island | |||
|prize=none | |||
|pokemon=1}} | |||
| style="margin:auto" | | |||
{{Pokémon/8 | |||
|pokemon=Lucario | |||
|type1=Fighting|type2=Steel | |||
|ndex=448 | |||
|gender=male | |||
|game=Diamond | |||
|level=34 | |||
|ability=Steadfast | |||
|move1=Metal Claw|move1type=Steel|move1cat=Physical | |||
|move2=Force Palm|move2type=Fighting|move2cat=Physical | |||
|move3=Screech|move3type=Normal|move3cat=Status | |||
|move4=Laser Focus|move4type=Normal|move4cat=Status}} | |||
{{Party/Footer}} | |||
==Pokémon== | |||
===Generation IV=== | |||
====Exterior==== | |||
{{catch/header|Mountain|4}} | |||
{{Catch/div|water|Surfing}} | |||
{{catch/entry4|072|Tentacool|yes|yes|no|Surf|20-30|all=60%|type1=Water|type2=Poison}} | |||
{{catch/entry4|072|Tentacool|no|no|yes|Surf|20-30|all=30%|type1=Water|type2=Poison}} | |||
{{catch/entry4|073|Tentacruel|yes|yes|no|Surf|20-40|all=5%|type1=Water|type2=Poison}} | |||
{{catch/entry4|073|Tentacruel|no|no|yes|Surf|20-40|all=1%|type1=Water|type2=Poison}} | |||
{{catch/entry4|278|Wingull|yes|yes|no|Surf|20-30|all=30%|type1=Water|type2=Flying}} | |||
{{catch/entry4|278|Wingull|no|no|yes|Surf|20-30|all=60%|type1=Water|type2=Flying}} | |||
{{catch/entry4|279|Pelipper|yes|yes|no|Surf|20-40|all=5%|type1=Water|type2=Flying}} | |||
{{catch/entry4|279|Pelipper|no|no|yes|Surf|20-40|all=9%|type1=Water|type2=Flying}} | |||
{{Catch/div|water|Fishing}} | |||
{{catch/entry4|129|Magikarp|yes|yes|no|Fish Old|3-10|all=100%|type1=Water}} | |||
{{catch/entry4|129|Magikarp|no|no|yes|Fish Old|3-15|all=100%|type1=Water}} | |||
{{catch/entry4|129|Magikarp|yes|yes|yes|Fish Good|10-25|all=55%|type1=Water}} | |||
{{catch/entry4|456|Finneon|yes|yes|yes|Fish Good|10-25|all=45%|type1=Water}} | |||
{{catch/entry4|130|Gyarados|yes|yes|no|Fish Super|30-40|all=40%|type1=Water|type2=Flying}} | |||
{{catch/entry4|130|Gyarados|no|no|yes|Fish Super|30-55|all=40%|type1=Water|type2=Flying}} | |||
{{catch/entry4|211|Qwilfish|yes|yes|no|Fish Super|20-40|all=15%|type1=Water|type2=Poison}} | |||
{{catch/entry4|211|Qwilfish|no|no|yes|Fish Super|20-50|all=15%|type1=Water|type2=Poison}} | |||
{{catch/entry4|457|Lumineon|yes|yes|no|Fish Super|20-50|all=45%|type1=Water}} | |||
{{catch/entry4|457|Lumineon|no|no|yes|Fish Super|30-55|all=45%|type1=Water}} | |||
{{catch/footer|Mountain}} | |||
====Interior==== | |||
=====1F===== | |||
{{catch/header|Mountain|4}} | |||
{{catch/entry4|041|Zubat|yes|yes|yes|Cave|30|all=10%|type1=Poison|type2=Flying}} | |||
{{catch/entry4|042|Golbat|yes|yes|no|Cave|31|all=10%|type1=Poison|type2=Flying}} | |||
{{catch/entry4|042|Golbat|no|no|yes|Cave|32|all=10%|type1=Poison|type2=Flying}} | |||
{{catch/entry4|074|Geodude|yes|yes|no|Cave|29-31|all=35%|type1=Rock|type2=Ground}} | |||
{{catch/entry4|074|Geodude|no|no|yes|Cave|30-32|all=35%|type1=Rock|type2=Ground}} | |||
{{catch/entry4|075|Graveler|yes|yes|yes|Cave|31-33|all=35%|type1=Rock|type2=Ground}} | |||
{{catch/entry4|095|Onix|yes|yes|no|Cave|32-33|all=10%|type1=Rock|type2=Ground}} | |||
{{catch/entry4|095|Onix|no|no|yes|Cave|31, 33|all=10%|type1=Rock|type2=Ground}} | |||
{{catch/footer|Mountain}} | |||
=====B1F===== | |||
{{catch/header|Mountain|4}} | |||
{{catch/entry4|042|Golbat|yes|yes|no|Cave|30-31|all=20%|type1=Poison|type2=Flying}} | |||
{{catch/entry4|042|Golbat|no|no|yes|Cave|30, 32|all=20%|type1=Poison|type2=Flying}} | |||
{{catch/entry4|074|Geodude|yes|yes|no|Cave|31|all=1%|type1=Rock|type2=Ground}} | |||
{{catch/entry4|075|Graveler|yes|yes|no|Cave|29-33|all=69%|type1=Rock|type2=Ground}} | |||
{{catch/entry4|075|Graveler|no|no|yes|Cave|30-33|all=70%|type1=Rock|type2=Ground}} | |||
{{catch/entry4|095|Onix|yes|yes|no|Cave|32-33|all=10%|type1=Rock|type2=Ground}} | |||
{{catch/entry4|095|Onix|no|no|yes|Cave|31, 33|all=10%|type1=Rock|type2=Ground}} | |||
{{catch/div|cave|Special}} | |||
{{catch/entry4|302|Sableye|yes|yes|no|S|31, 33|all=8%|type1=Ghost|type2=Dark}} | |||
{{catch/entry4|302|Sableye|no|no|yes|S|30-31|all=8%|type1=Ghost|type2=Dark}} | |||
{{catch/entry4|303|Mawile|yes|yes|no|R|31, 33|all=8%|type1=Steel}} | |||
{{catch/entry4|303|Mawile|no|no|yes|R|30-31|all=8%|type1=Steel}} | |||
{{catch/footer|Mountain}} | |||
=====B2F 1===== | |||
{{catch/header|Mountain|4}} | |||
{{catch/entry4|042|Golbat|yes|yes|no|Cave|30-31|all=20%|type1=Poison|type2=Flying}} | |||
{{catch/entry4|042|Golbat|no|no|yes|Cave|31, 33|all=20%|type1=Poison|type2=Flying}} | |||
{{catch/entry4|074|Geodude|yes|yes|no|Cave|31|all=1%|type1=Rock|type2=Ground}} | |||
{{catch/entry4|075|Graveler|yes|yes|no|Cave|29-33|all=49%|type1=Rock|type2=Ground}} | |||
{{catch/entry4|075|Graveler|no|no|yes|Cave|31-34|all=50%|type1=Rock|type2=Ground}} | |||
{{catch/entry4|095|Onix|yes|yes|no|Cave|31-33|all=30%|type1=Rock|type2=Ground}} | |||
{{catch/entry4|095|Onix|no|no|yes|Cave|32|all=20%|type1=Rock|type2=Ground}} | |||
{{catch/entry4|208|Steelix|no|no|yes|Cave|33, 35|all=10%|type1=Steel|type2=Ground}} | |||
{{catch/div|cave|Special}} | |||
{{catch/entry4|302|Sableye|yes|yes|no|S|31, 33|all=8%|type1=Ghost|type2=Dark}} | |||
{{catch/entry4|302|Sableye|no|no|yes|S|31-32|all=8%|type1=Ghost|type2=Dark}} | |||
{{catch/entry4|303|Mawile|yes|yes|no|R|31, 33|all=8%|type1=Steel}} | |||
{{catch/entry4|303|Mawile|no|no|yes|R|31-32|all=8%|type1=Steel}} | |||
{{catch/footer|cave}} | |||
=====B2F 2===== | |||
''While [[Riley]] is with the {{player}}, the following Pokémon (excluding dual-slot Pokémon) will be faced in [[Double Battle]]s, with Riley as the player's partner.'' | |||
{{catch/header|Mountain|4}} | |||
{{catch/entry4|042|Golbat|yes|yes|no|Cave|31-32|all=20%|type1=Poison|type2=Flying}} | |||
{{catch/entry4|042|Golbat|no|no|yes|Cave|31, 33|all=20%|type1=Poison|type2=Flying}} | |||
{{catch/entry4|074|Geodude|yes|yes|no|Cave|32|all=1%|type1=Rock|type2=Ground}} | |||
{{catch/entry4|075|Graveler|yes|yes|no|Cave|30-34|all=39%|type1=Rock|type2=Ground}} | |||
{{catch/entry4|075|Graveler|no|no|yes|Cave|31-34|all=50%|type1=Rock|type2=Ground}} | |||
{{catch/entry4|095|Onix|yes|yes|no|Cave|32-33|all=30%|type1=Rock|type2=Ground}} | |||
{{catch/entry4|095|Onix|no|no|yes|Cave|32|all=20%|type1=Rock|type2=Ground}} | |||
{{catch/entry4|208|Steelix|yes|yes|no|Cave|33-34|all=10%|type1=Steel|type2=Ground}} | |||
{{catch/entry4|208|Steelix|no|no|yes|Cave|33, 35|all=10%|type1=Steel|type2=Ground}} | |||
{{Catch/div|cave|Gift Pokémon}} | |||
{{catch/entry4|447|Riolu|yes|yes|yes|Egg|1|all={{tt|One|Gift from Riley after defeating the two Galactic Grunts}}|type1=Fighting}} | |||
{{catch/div|cave|Special}} | |||
{{catch/entry4|302|Sableye|yes|yes|no|S|32, 34|all=8%|type1=Ghost|type2=Dark}} | |||
{{catch/entry4|302|Sableye|no|no|yes|S|31-32|all=8%|type1=Ghost|type2=Dark}} | |||
{{catch/entry4|303|Mawile|yes|yes|no|R|32, 34|all=8%|type1=Steel}} | |||
{{catch/entry4|303|Mawile|no|no|yes|R|31-32|all=8%|type1=Steel}} | |||
{{catch/footer|Mountain}} | |||
=====B3F===== | |||
{{catch/header|Mountain|4}} | |||
{{catch/entry4|042|Golbat|yes|yes|no|Cave|31-32|all=20%|type1=Poison|type2=Flying}} | |||
{{catch/entry4|042|Golbat|no|no|yes|Cave|31, 33|all=20%|type1=Poison|type2=Flying}} | |||
{{catch/entry4|074|Geodude|yes|yes|no|Cave|32|all=1%|type1=Rock|type2=Ground}} | |||
{{catch/entry4|075|Graveler|yes|yes|no|Cave|30-34|all=39%|type1=Rock|type2=Ground}} | |||
{{catch/entry4|075|Graveler|no|no|yes|Cave|31-34|all=50%|type1=Rock|type2=Ground}} | |||
{{catch/entry4|095|Onix|yes|yes|no|Cave|32-33|all=30%|type1=Rock|type2=Ground}} | |||
{{catch/entry4|208|Steelix|yes|yes|no|Cave|33-34|all=10%|type1=Steel|type2=Ground}} | |||
{{catch/entry4|208|Steelix|no|no|yes|Cave|32-33, 35|all=30%|type1=Steel|type2=Ground}} | |||
{{catch/div|cave|Special}} | |||
{{catch/entry4|302|Sableye|yes|yes|no|S|32, 34|all=8%|type1=Ghost|type2=Dark}} | |||
{{catch/entry4|302|Sableye|no|no|yes|S|31-32|all=8%|type1=Ghost|type2=Dark}} | |||
{{catch/entry4|303|Mawile|yes|yes|no|R|32, 34|all=8%|type1=Steel}} | |||
{{catch/entry4|303|Mawile|no|no|yes|R|31-32|all=8%|type1=Steel}} | |||
{{catch/footer|Mountain}} | |||
===Generation VIII=== | |||
====Exterior==== | |||
{{Catch/header|Mountain}} | |||
{{catch/div|water|Surfing}} | |||
{{Catch/entrybdsp|072|Tentacool|yes|yes|Surf|20-30|all=60%|type1=Water|type2=Poison}} | |||
{{Catch/entrybdsp|073|Tentacruel|yes|yes|Surf|20-40|all=5%|type1=Water|type2=Poison}} | |||
{{Catch/entrybdsp|278|Wingull|yes|yes|Surf|20-30|all=30%|type1=Water|type2=Flying}} | |||
{{Catch/entrybdsp|279|Pelipper|yes|yes|Surf|20-40|all=5%|type1=Water|type2=Flying}} | |||
{{catch/div|water|Fishing}} | |||
{{Catch/entrybdsp|129|Magikarp|yes|yes|Fish Old|3-10|all=100%|type1=Water}} | |||
{{Catch/entrybdsp|129|Magikarp|yes|yes|Fish Good|10-25|all=55%|type1=Water}} | |||
{{Catch/entrybdsp|456|Finneon|yes|yes|Fish Good|10-25|all=45%|type1=Water}} | |||
{{Catch/entrybdsp|130|Gyarados|yes|yes|Fish Super|30-40|all=40%|type1=Water|type2=Flying}} | |||
{{Catch/entrybdsp|211|Qwilfish|yes|yes|Fish Super|20-40|all=15%|type1=Water|type2=Poison}} | |||
{{Catch/entrybdsp|457|Lumineon|yes|yes|Fish Super|20-50|all=45%|type1=Water}} | |||
{{Catch/footer|Mountain}} | |||
== | ====Interior==== | ||
=== | =====1F===== | ||
{{ | {{Catch/header|Mountain}} | ||
{{ | {{Catch/entrybdsp|041|Zubat|yes|yes|Cave|30|all=10%|type1=Poison|type2=Flying}} | ||
{{Catch/entrybdsp|042|Golbat|yes|yes|Cave|31|all=10%|type1=Poison|type2=Flying}} | |||
{{ | {{Catch/entrybdsp|074|Geodude|yes|yes|Cave|29-31|all=35%|type1=Rock|type2=Ground}} | ||
{{Catch/entrybdsp|075|Graveler|yes|yes|Cave|31-33|all=35%|type1=Rock|type2=Ground}} | |||
{{ | {{Catch/entrybdsp|095|Onix|yes|yes|Cave|32-33|all=10%|type1=Rock|type2=Ground}} | ||
{{Catch/footer|Mountain}} | |||
{{ | |||
{{ | |||
{{ | |||
=== | =====B1F===== | ||
{{ | {{Catch/header|Mountain}} | ||
{{ | {{Catch/entrybdsp|042|Golbat|yes|yes|Cave|30-31|all=20%|type1=Poison|type2=Flying}} | ||
{{Catch/entrybdsp|074|Geodude|yes|yes|Cave|31|all=1%|type1=Rock|type2=Ground}} | |||
{{ | {{Catch/entrybdsp|075|Graveler|yes|yes|Cave|29-33|all=69%|type1=Rock|type2=Ground}} | ||
{{ | {{Catch/entrybdsp|095|Onix|yes|yes|Cave|32-33|all=10%|type1=Rock|type2=Ground}} | ||
{{ | {{Catch/footer|Mountain}} | ||
{{ | |||
=== | =====B2F Right===== | ||
{{ | {{Catch/header|Mountain}} | ||
{{ | {{Catch/entrybdsp|042|Golbat|yes|yes|Cave|30-31|all=20%|type1=Poison|type2=Flying}} | ||
{{ | {{Catch/entrybdsp|074|Geodude|yes|yes|Cave|31|all=1%|type1=Rock|type2=Ground}} | ||
{{ | {{Catch/entrybdsp|075|Graveler|yes|yes|Cave|29-33|all=49%|type1=Rock|type2=Ground}} | ||
{{ | {{Catch/entrybdsp|095|Onix|yes|yes|Cave|31-33|all=30%|type1=Rock|type2=Ground}} | ||
{{Catch/footer|Mountain}} | |||
{{ | |||
=== | =====B2F Left===== | ||
{{ | ''While [[Riley]] is with the {{player}}, the following Pokémon will be faced in [[Double Battle]]s, with Riley as the player's partner.'' | ||
{{ | {{Catch/header|Mountain}} | ||
{{ | {{Catch/entrybdsp|042|Golbat|yes|yes|Cave|31-32|all=20%|type1=Poison|type2=Flying}} | ||
{{ | {{Catch/entrybdsp|074|Geodude|yes|yes|Cave|32|all=1%|type1=Rock|type2=Ground}} | ||
{{ | {{Catch/entrybdsp|075|Graveler|yes|yes|Cave|30-34|all=39%|type1=Rock|type2=Ground}} | ||
{{ | {{Catch/entrybdsp|095|Onix|yes|yes|Cave|32-33|all=30%|type1=Rock|type2=Ground}} | ||
{{ | {{Catch/entrybdsp|208|Steelix|yes|yes|Cave|33-34|all=10%|type1=Steel|type2=Ground}} | ||
{{ | {{Catch/div|cave|Gift Pokémon}} | ||
{{catch/entrybdsp|447|Riolu|yes|yes|Egg|1|all={{tt|One|Gift from Riley after defeating the two Galactic Grunts}}|type1=Fighting}} | |||
{{Catch/footer|Mountain}} | |||
=== | =====B3F===== | ||
{{ | {{Catch/header|Mountain}} | ||
{{ | {{Catch/entrybdsp|042|Golbat|yes|yes|Cave|31-32|all=20%|type1=Poison|type2=Flying}} | ||
{{ | {{Catch/entrybdsp|074|Geodude|yes|yes|Cave|32|all=1%|type1=Rock|type2=Ground}} | ||
{{ | {{Catch/entrybdsp|075|Graveler|yes|yes|Cave|30-34|all=39%|type1=Rock|type2=Ground}} | ||
{{ | {{Catch/entrybdsp|095|Onix|yes|yes|Cave|32-33|all=30%|type1=Rock|type2=Ground}} | ||
{{ | {{Catch/entrybdsp|208|Steelix|yes|yes|Cave|33-34|all=10%|type1=Steel|type2=Ground}} | ||
{{Catch/footer|Mountain}} | |||
{{ | |||
==Trainers== | ==Trainers== | ||
=== | ==={{game|Diamond and Pearl|s}}=== | ||
====B1F 1==== | |||
{{trainerheader|cave}} | |||
{{Trainerentry|Spr DP Camper.png|Camper|Lawrence|496|2|404|Luxio|♂|31|None|434|Stunky|♂|31|None|36=セイギ|37=Seigi}} | |||
{{Trainerfooter|cave|4}} | |||
====B1F 2==== | |||
{{trainerheader|cave}} | |||
{{Trainerentry|Spr DP Picnicker.png|Picnicker|Summer|496|2|397|Staravia|♀|31|None|421|Cherrim|♀ | |||
|31|None|36=ナルミ|37=Narumi}} | |||
{{Trainerfooter|cave|4}} | |||
====B2F 1==== | |||
{{trainerheader|cave}} | {{trainerheader|cave}} | ||
{{Trainerentry| | {{Trainerentry|Spr DP Worker.png|Worker|Willy|1240|2|095|Onix|♂|31|None|075|Graveler|♂|31|None|36=テツジ|37=Tetsuji}} | ||
{{Trainerdiv|cave}} | {{Trainerdiv|cave}} | ||
{{Trainerentry| | {{Trainerentry|Spr DP Worker.png|Worker|Braden|1320|1|075|Graveler|♂|33|None|36=ミチテル|37=Michiteru}} | ||
{{Trainerfooter|cave|4}} | |||
{{ | |||
====B2F 2==== | |||
{{ | ''While [[Riley]] is with the {{player}}, the following Trainers, if they would normally be faced in [[Double Battle]]s, will instead be faced in [[Multi Battle]]s, with Riley as the player's partner.'' | ||
{{trainerheader|cave}} | |||
{{ | {{Trainerentry|Spr DP Hiker.png|Hiker|Damon|992<br><small>Potential [[Multi Battle|Multi]] or [[Double Battle]] with Maurice</small>|3|041|Zubat|♂|28|None|095|Onix|♂|31|None|042|Golbat|♂ | ||
{{Trainerentry| | |31|None|36=カツオ|37=Katsuo}} | ||
|31|None | {{Trainerentry|Spr DP Hiker.png|Hiker|Maurice|1024<br><small>Potential [[Multi Battle|Multi]] or [[Double Battle]] with Damon</small>|2|075|Graveler|♂|30|None|067|Machoke|♂|32|None|36=カンタロウ|37=Kantarō}} | ||
{{Trainerentry| | |||
{{Trainerdiv|cave}} | {{Trainerdiv|cave}} | ||
{{Trainerentry| | {{Trainerentry|Spr DP Black Belt.png|Black Belt|Kendal|840<br><small>Potential [[Multi Battle|Multi]] or [[Double Battle]] with Tyler</small>|1|453|Croagunk|♂|35|None|36=タケノリ|37=Takenori}} | ||
| | {{Trainerentry|Spr DP Battle Girl.png|Battle Girl|Tyler|544<br><small>Potential [[Multi Battle|Multi]] or [[Double Battle]] with Kendal</small>|1|308|Medicham|♀|34|None|36=キリカ|37=Kirika}} | ||
{{Trainerdiv|cave}} | {{Trainerdiv|cave}} | ||
{{Trainerentry| | {{Trainerentry|Spr DP Worker.png|Worker|Brendon|1320<br><small>Potential [[Multi Battle|Multi]] or [[Double Battle]] with Quentin</small>|2|095|Onix|♂|29|None|208|Steelix|♂|33|None|36=ヤスオ|37=Yasuo}} | ||
|31|None| | {{Trainerentry|Spr DP Worker.png|Worker|Quentin|1240<br><small>Potential [[Multi Battle|Multi]] or [[Double Battle]] with Brendon</small>|3|074|Geodude|♂|27|None|075|Graveler|♂ | ||
|31|None|095|Onix|♂|31|None|36=トモヒコ|37=Tomohiko}} | |||
{{Trainerdiv|cave}} | {{Trainerdiv|cave}} | ||
{{Trainerentry| | {{Trainerentry|Spr DP Ace Trainer M 1.png|Ace Trainer|Jonah|2040<br><small>Potential [[Multi Battle]] with Brenda</small>|3|077|Ponyta|♂|31|None|093|Haunter|♂ | ||
|33|None|185|Sudowoodo|♀|33|None}} | |31|None|419|Floatzel|♂|34|None|36=カツヨシ|37=Katsuyoshi}} | ||
{{Trainerentry|Spr DP Ace Trainer F 1.png|Ace Trainer|Brenda|1980<br><small>Potential [[Multi Battle]] with Jonah</small>|2|279|Pelipper|♀ | |||
|33|None|185|Sudowoodo|♀|33|None|36=レイナ|37=Reina}} | |||
{{Trainerdiv|cave}} | {{Trainerdiv|cave}} | ||
{{Trainerentry| | {{Trainerentry|Spr DP Galactic Grunt M.png|Galactic Grunt||1360<br><sup>[[Multi Battle]] with the following Grunt</sup>|3|041|Zubat|♂|31|None|041|Zubat|♂ | ||
|31|None|042|Golbat|♂|34|None}} | |31|None|042|Golbat|♂|34|None}} | ||
{{Trainerentry|Spr DP Galactic Grunt M.png|Galactic Grunt||1280<br><sup>[[Multi Battle]] with the previous Grunt</sup>|3|431|Glameow|♀|32|None|453|Croagunk|♂ | |||
{{Trainerentry| | |||
|32|None|434|Stunky|♂|32|None}} | |32|None|434|Stunky|♂|32|None}} | ||
{{Trainerfooter|cave}} | {{Trainerfooter|cave|4}} | ||
==={{game|Platinum}}=== | |||
====B1F 1==== | |||
{{trainerheader|cave}} | |||
{{Trainerentry|Spr DP Camper.png|Camper|Lawrence|576|2|190|Aipom|♂|34|None|419|Floatzel|♂|36|None|36=セイギ|37=Seigi}} | |||
{{Trainerfooter|cave|4}} | |||
====B1F 2==== | |||
{{trainerheader|cave}} | |||
{{Trainerentry|Spr DP Picnicker.png|Picnicker|Summer|592|1|026|Raichu|♀|37|None|36=ナルミ|37=Narumi}} | |||
{{Trainerfooter|cave|4}} | |||
=== | ====B2F 1==== | ||
{{trainerheader|cave}} | {{trainerheader|cave}} | ||
{{Trainerentry| | {{Trainerentry|Spr DP Worker.png|Worker|Noel|1440|2|081|Magnemite|-|34|None|081|Magnemite|-|36|None|36=ヨシミツ|37=Yoshimitsu}} | ||
{{Trainerdiv|cave}} | {{Trainerdiv|cave}} | ||
{{Trainerentry| | {{Trainerentry|Spr DP Worker.png|Worker|Braden|1480|1|208|Steelix|♂|37|None|36=ミチテル|37=Michiteru}} | ||
{{Trainerfooter|cave|4}} | |||
====B2F 2==== | |||
''While [[Riley]] is with the {{player}}, the following Trainers, if they would normally be faced in [[Double Battle]]s, will instead be faced in [[Multi Battle]]s, with Riley as the player's partner.'' | |||
{{trainerheader|cave}} | |||
{{Trainerentry|Spr DP Hiker.png|Hiker|Damon|1088<br><small>Potential [[Multi Battle|Multi]] or [[Double Battle]] with Maurice</small>|3|299|Nosepass|♂|35|None|095|Onix|♂ | |||
|33|None|208|Steelix|♂|34|None|36=カツオ|37=Katsuo}} | |||
{{Trainerentry|Spr DP Hiker.png|Hiker|Maurice|1120<br><small>Potential [[Multi Battle|Multi]] or [[Double Battle]] with Damon</small>|2|075|Graveler|♂|35|None|111|Rhyhorn|♂|35|None|36=カンタロウ|37=Kantarō}} | |||
{{Trainerdiv|cave}} | {{Trainerdiv|cave}} | ||
{{Trainerentry| | {{Trainerentry|Spr DP Black Belt.png|Black Belt|Kendal|912<br><small>Potential [[Multi Battle|Multi]] or [[Double Battle]] with Tyler</small>|1|454|Toxicroak|♂|38|None|36=タケノリ|37=Takenori}} | ||
{{Trainerentry|Spr DP Battle Girl.png|Battle Girl|Tyler|608<br><small>Potential [[Multi Battle|Multi]] or [[Double Battle]] with Kendal</small>|1|308|Medicham|♀|38|None|36=キリカ|37=Kirika}} | |||
{{Trainerdiv|cave}} | {{Trainerdiv|cave}} | ||
{{Trainerentry| | {{Trainerentry|Spr DP Worker.png|Worker|Brendon|1440<br><small>Potential [[Multi Battle|Multi]] or [[Double Battle]] with Quentin</small>|3|074|Geodude|♂|33|None|074|Geodude|♂ | ||
|33|None|067|Machoke|♂|36|None|36=ヤスオ|37=Yasuo}} | |||
{{Trainerentry|Spr DP Worker.png|Worker|Quentin|1360<br><small>Potential [[Multi Battle|Multi]] or [[Double Battle]] with Brendon</small>|3|081|Magnemite|-|34|None|075|Graveler|♂ | |||
|34|None|066|Machop|♂|34|None|36=トモヒコ|37=Tomohiko}} | |||
{{Trainerdiv|cave}} | {{Trainerdiv|cave}} | ||
{{Trainerentry| | {{Trainerentry|Spr DP Ace Trainer M 1.png|Ace Trainer|Jonah|2280<br><small>Potential [[Multi Battle|Multi]] or [[Double Battle]] with Brenda</small>|3|195|Quagsire|♂|35|None|398|Staraptor| | ||
| | ♂|36|None|449|Hippopotas|♂|38|None|36=カツヨシ|37=Katsuyoshi}} | ||
{{Trainerentry|Spr DP Ace Trainer F 1.png|Ace Trainer|Brenda|2100<br><small>Potential [[Multi Battle|Multi]] or [[Double Battle]] with Jonah</small>|3|428|Lopunny|♀|38|None|308|Medicham|♀ | |||
|35|None|281|Kirlia|♀|36|None|36=レイナ|37=Reina}} | |||
{{Trainerdiv|cave}} | {{Trainerdiv|cave}} | ||
{{Trainerentry| | {{Trainerentry|Spr DP Galactic Grunt M.png|Galactic Grunt||1360<br><small>[[Double Battle]] with the following Grunt</small>|3|041|Zubat|♂|34|None|228|Houndour|♂ | ||
|34|None|042|Golbat|♂|34|None}} | |||
{{Trainerentry|Spr DP Galactic Grunt M.png|Galactic Grunt||1360<br><small>[[Double Battle]] with the previous Grunt</small>|3|431|Glameow|♀|34|None|453|Croagunk|♂ | |||
|34|None|434|Stunky|♂|34|None}} | |||
{{Trainerfooter|cave|4}} | |||
==={{g|Brilliant Diamond and Shining Pearl}}=== | |||
====B1F 1==== | |||
{{trainerheader|cave}} | |||
{{Trainerentry|VSCamper BDSP.png{{!}}90px|game=BDSP|Camper|Lawrence|744|2|404|Luxio|♂|31|None|434|Stunky|♂|31|None|36=セイギ|37=Seigi}} | |||
{{Trainerfooter|cave|4}} | |||
====B1F 2==== | |||
{{trainerheader|cave}} | |||
{{Trainerentry|VSPicnicker BDSP.png{{!}}90px|game=BDSP|Picnicker|Summer|744|2|397|Staravia|♀|31|None|421|Cherrim|♀ | |||
|31|None|36=ナルミ|37=Narumi}} | |||
{{Trainerfooter|cave|4}} | |||
====B2F 1==== | |||
{{trainerheader|cave}} | |||
{{Trainerentry|VSWorker BDSP.png{{!}}90px|game=BDSP|Worker|Willy|1,488|2|095|Onix|♂|31|None|075|Graveler|♂|31|None|36=テツジ|37=Tetsuji}} | |||
{{Trainerdiv|cave}} | {{Trainerdiv|cave}} | ||
{{Trainerentry| | {{Trainerentry|VSWorker BDSP.png{{!}}90px|game=BDSP|Worker|Braden|1,584|1|075|Graveler|♂|33|None|36=ミチテル|37=Michiteru}} | ||
{{Trainerfooter|cave|4}} | |||
====B2F 2==== | |||
''While [[Riley]] is with the {{player}}, the following Trainers, if they would normally be faced in [[Double Battle]]s, will instead be faced in [[Multi Battle]]s, with Riley as the player's partner.'' | |||
{{trainerheader|cave}} | |||
{{Trainerentry|VSHiker BDSP.png{{!}}90px|game=BDSP|Hiker|Damon|1,240<br><small>Potential [[Multi Battle|Multi]] or [[Double Battle]] with Maurice</small>|3|041|Zubat|♂|28|None|095|Onix|♂|31|None|042|Golbat|♂ | |||
|31|None|36=カツオ|37=Katsuo}} | |||
{{Trainerentry|VSHiker BDSP.png{{!}}90px|game=BDSP|Hiker|Maurice|1,280<br><small>Potential [[Multi Battle|Multi]] or [[Double Battle]] with Damon</small>|2|075|Graveler|♂|30|None|067|Machoke|♂|32|None|36=カンタロウ|37=Kantarō}} | |||
{{Trainerdiv|cave}} | {{Trainerdiv|cave}} | ||
{{Trainerentry| | {{Trainerentry|VSBlack Belt BDSP.png{{!}}90px|game=BDSP|Black Belt|Kendal|1,120<br><small>Potential [[Multi Battle|Multi]] or [[Double Battle]] with Tyler</small>|1|453|Croagunk|♂|35|None|36=タケノリ|37=Takenori}} | ||
{{Trainerentry|VSBattle Girl BDSP.png{{!}}90px|game=BDSP|Battle Girl|Tyler|816<br><small>Potential [[Multi Battle|Multi]] or [[Double Battle]] with Kendal</small>|1|308|Medicham|♀|34|None|36=キリカ|37=Kirika}} | |||
{{Trainerdiv|cave}} | {{Trainerdiv|cave}} | ||
{{Trainerentry| | {{Trainerentry|VSWorker BDSP.png{{!}}90px|game=BDSP|Worker|Brendon|1,584<br><small>Potential [[Multi Battle|Multi]] or [[Double Battle]] with Quentin</small>|2|095|Onix|♂|29|None|208|Steelix|♂|33|None|36=ヤスオ|37=Yasuo}} | ||
| | {{Trainerentry|VSWorker BDSP.png{{!}}90px|game=BDSP|Worker|Quentin|1,488<br><small>Potential [[Multi Battle|Multi]] or [[Double Battle]] with Brendon</small>|3|074|Geodude|♂|27|None|075|Graveler|♂|31|None|095|Onix|♂|31|None|36=トモヒコ|37=Tomohiko}} | ||
{{Trainerdiv|cave}} | {{Trainerdiv|cave}} | ||
{{Trainerentry| | {{Trainerentry|VSAce Trainer M BDSP.png{{!}}90px|game=BDSP|Ace Trainer|Jonah|2,312<br><small>Potential [[Multi Battle]] with Brenda</small>|3|077|Ponyta|♂|31|None|093|Haunter|♂ | ||
| | |31|None|419|Floatzel|♂|34|None|36=カツヨシ|37=Katsuyoshi}} | ||
{{Trainerentry|VSAce Trainer F BDSP.png{{!}}90px|game=BDSP|Ace Trainer|Brenda|2,244<br><small>Potential [[Multi Battle]] with Jonah</small>|2|279|Pelipper|♀ | |||
|33|None|185|Sudowoodo|♀|33|None|36=レイナ|37=Reina}} | |||
{{Trainerdiv|cave}} | {{Trainerdiv|cave}} | ||
{{Trainerentry| | {{Trainerentry|VSTeam Galactic Grunt M BDSP.png{{!}}90px|game=BDSP|Team Galactic Grunt||3,168<br><sup>[[Multi Battle]] with the following Grunt</sup>|3|041|Zubat|♂|31|None|041|Zubat|♂ | ||
|31|None|042|Golbat|♂|34|None}} | |||
{{ | {{Trainerentry|VSTeam Galactic Grunt M BDSP.png{{!}}90px|game=BDSP|Team Galactic Grunt||3,168<br><sup>[[Multi Battle]] with the previous Grunt</sup>|3|431|Glameow|♀|32|None|453|Croagunk|♂ | ||
|32|None|434|Stunky|♂|32|None}} | |||
| | {{Trainerfooter|cave|4}} | ||
{{ | |||
{{ | ==Layout== | ||
| | ===Outside and 1F-B1F=== | ||
{{ | {| class="roundy" style="margin:auto; background: #000; border: 3px solid #{{locationcolor/dark|cave}}" | ||
{{ | |- | ||
| | ! style="background:#{{locationcolor/light|cave}}; {{roundytl|5px}}" | Version | ||
{{ | ! style="background:#{{locationcolor/light|cave}}" | Exterior | ||
! style="background:#{{locationcolor/light|cave}}" | 1F | |||
! style="background:#{{locationcolor/light|cave}}" | B1F 1 | |||
! style="background:#{{locationcolor/light|cave}}; {{roundytr|5px}}" | B1F 2 | |||
|- | |||
! style="background:#{{diamond color}}" | {{color2|000|Pokémon Diamond and Pearl Versions|Diamond}} | |||
| rowspan="2" | [[File:Iron Island DP.png|200px]] | |||
| rowspan="2" | [[File:Iron Island 1F DP.png|200px]] | |||
| rowspan="2" | [[File:Iron Island B1F L DP.png|200px]] | |||
| rowspan="2" | [[File:Iron Island B1F R DP.png|200px]] | |||
|- | |||
! style="background:#{{pearl color}}" | {{color2|000|Pokémon Diamond and Pearl Versions|Pearl}} | |||
|- | |||
! style="background:#{{platinum color}}" | {{color2|000|Pokémon Platinum Version|Platinum}} | |||
| [[File:Iron Island Pt.png|200px]] | |||
| [[File:Iron Island 1F Pt.png|200px]] | |||
| [[File:Iron Island B1F L Pt.png|200px]] | |||
| [[File:Iron Island B1F R Pt.png|200px]] | |||
|- | |||
| colspan="5" style="background:#{{locationcolor/light|cave}}; {{roundybottom|5px}}" | | |||
|} | |||
===B2F and B3F=== | |||
{| class="roundy" style="margin:auto; background: #000; border: 3px solid #{{locationcolor/dark|cave}}" | |||
|- | |||
! style="background:#{{locationcolor/light|cave}}; {{roundytl|5px}}" | Version | |||
! style="background:#{{locationcolor/light|cave}}" | B2F 1 | |||
! style="background:#{{locationcolor/light|cave}}" | B2F 2 | |||
! style="background:#{{locationcolor/light|cave}}" | B3F 1 | |||
! style="background:#{{locationcolor/light|cave}}; {{roundytr|5px}}" | B3F 2 | |||
|- | |||
! style="background:#{{diamond color}}" | {{color2|000|Pokémon Diamond and Pearl Versions|Diamond}} | |||
| rowspan="2" | [[File:Iron Island B2F R DP.png|200px]] | |||
| rowspan="2" | [[File:Iron Island B2F L DP.png|200px]] | |||
| rowspan="2" | [[File:Iron Island Exit DP.png|200px]] | |||
| | |||
|- | |||
! style="background:#{{pearl color}}" | {{color2|000|Pokémon Diamond and Pearl Versions|Pearl}} | |||
|- | |||
! style="background:#{{platinum color}}" | {{color2|000|Pokémon Platinum Version|Platinum}} | |||
| [[File:Iron Island B2F R Pt.png|200px]] | |||
| [[File:Iron Island B2F L Pt.png|200px]] | |||
| [[File:Iron Island Exit Pt.png|200px]] | |||
| [[File:Iron Island Registeel Pt.png|200px]] | |||
|- | |||
| colspan="5" style="background:#{{locationcolor/light|cave}}; {{roundybottom|5px}}" | | |||
|} | |||
==In the spin-off games== | |||
===[[Pokémon Masters EX]]=== | |||
Artwork depicting Iron Island is seen in {{mas|Riley}}'s mindscape. | |||
{| style="background: #7B30B2; {{roundy}}; border: #7B30B2;" | |||
| | |||
{| style="background: #AB60E2; {{roundy}}; border: #AB60E2;" | |||
|- style="text-align:center" | |||
| | |||
{| style="background: #{{fighting color light}}; {{roundy}}; border: #{{fighting color light}}; padding: 0px 5px 5px 5px" | |||
|- | |||
|<big>'''{{color2|000|Riley (Masters)#Lucario|Riley & Lucario}}'''</big> | |||
|- | |||
| [[File:Riley Mindscape.png|200px]] | |||
|} | |||
|} | |||
|} | |||
==In the anime== | ==In the anime== | ||
[[ | [[File:Iron Island anime.png|thumb|250px|Iron Island in the {{pkmn|anime}}]] | ||
Iron Island | [[File:Iron Island Town.png|thumb|left|250px|Iron Island's port and town]] | ||
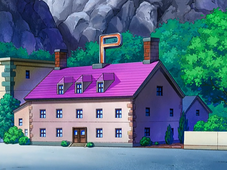
In the {{pkmn|anime}}, Iron Island has a port town with a [[Pokémon Center]]. | |||
{{an|Barry}} first mentioned Iron Island in ''[[DP102|Shield with a Twist!]]''. He credited his time battling the island's {{type|Steel}} Pokémon with helping him win at the [[Canalave Gym]]. He later returned to Iron Island in ''[[DP103|Jumping Rocket Ship!]]'' to continue {{pkmn|training}}. | |||
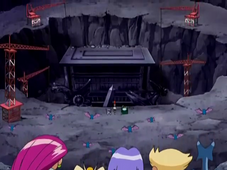
After receiving a call for help from Barry, {{Ash}} and {{ashfr}} sailed over to Iron Island in ''[[DP110|Steeling Peace of Mind!]]''. There, they encountered [[Riley]] and his partner {{TP|Riley|Lucario}} and also uncovered [[Team Galactic]]’s latest operation. The group discovered that Team Galactic were trying to activate the {{si|Iron Ruins}} present on the island. The resulting low-frequency energy waves were wreaking havoc and caused all of the Steel-type Pokémon, including [[Barry's Empoleon]] and later Riley’s Lucario, to go berserk. | |||
In ''[[DP111|Saving the World from Ruins!]]'', Team Galactic activated the Iron Ruins using the stolen [[Spear Key]] to scan [[Mount Coronet]] for the location of the [[Spear Pillar]]. Ash and the group succeeded in stopping Team Galactic's operation, and Riley and Lucario successively contained detonating bombs placed by Team Galactic which were to destroy the island. However, significant progress was made towards Team Galactic's goal, as [[Mars]] and her {{tc|Team Galactic Grunt}}s still escaped with the Spear Key and [[Cyrus]] learned with definitive evidence that the Spear Pillar was somewhere on Mount Coronet. | |||
Later, [[Professor Carolina]] arrived to investigate the connection between the Iron Ruins, which were only uncovered because of Team Galactic, and Spear Pillar. She enlisted Riley's assistance, hoping his local knowledge would be useful. She revealed that Iron Island and the Ruins are made of the same compound as [[Veilstone City]]'s meteorites. Later, Ash and his friends left for [[Chocovine Town]]. | |||
====Gallery==== | |||
{| style="margin:auto; text-align:center; background: #{{locationcolor/med|cave}}; {{roundy}}; border: 3px solid #{{locationcolor/dark|cave}}" | |||
|- style="background:#{{locationcolor/light|cave}}" | |||
! style="{{roundytl|5px}}" | {{color2|000|Pokémon Center}} | |||
! style="{{roundytr|5px}}" | {{color2|000|Iron Ruins (Sinnoh)|Iron Ruins}} | |||
|- style="background:#fff" | |||
| [[File:Iron Island Pokémon Center.png|x170px]] | |||
| [[File:Iron Ruins Sinnoh anime.png|x170px]] | |||
|} | |||
==In the manga== | |||
===Pokémon Adventures=== | |||
[[File:Iron Island Adventures.png|thumb|250px|Iron Island in [[Pokémon Adventures]]]] | |||
===={{MangaArc|Diamond & Pearl}}==== | |||
In ''[[PS377|Hurrah for Rapidash]]'', [[Byron]] instructed {{adv|Diamond}} to go {{pkmn|training|train}} on Iron Island. The island itself appeared from ''[[PS379|Lucky Lucario I]]'' to ''[[PS382|Vexing Vespiquen & Unmanageable Mothim II]]'', where Diamond undertook training there, instructed by [[Riley]]. After losing a training battle against Riley, Diamond was instructed to traverse through the island five times and train his battle skills against the [[wild Pokémon]] living in the island's caves. Riley accompanied Diamond the first time through, leaving the [[Pokédex holder]] to handle the remaining times on his own and healing his Pokémon after each round. | |||
[[File:Iron Island DPA.png|thumb|left|150px|Iron Island in [[Pokémon Diamond and Pearl Adventure!]]]] | |||
After Diamond had completed the five rounds, Riley gave him one last training mission, telling him to retrieve a [[Pokémon Egg]] he had placed at the deepest part of the island. When Diamond found the {{p|Steelix}} that he had fought against during the first round defeated, Riley decided to accompany him for the round. Suddenly, they were attacked by a pair of {{tc|Roughneck}}s, who blinded Riley and his {{TP|Riley|Lucario}}, disrupted their [[Aura]] sense with their {{p|Mothim}}'s {{m|Air Slash}}, and took the Egg hostage. As such, Diamond took on the Roughnecks himself, revealing that he had secretly been training on a way to make [[Tru]]'s {{m|Razor Leaf}} faster. He had figured out that the attack became faster the less leaves it used, so he had trained Tru to launch only one Razor Leaf per attack, which made the [[move]] so fast it could strike before Diamond could even finish saying its name. With this technique, Diamond was able to defeat the Roughnecks' {{p|Vespiquen}} and Mothim, saving the Egg and allowing Riley to finish the Roughnecks off himself. Afterwards, the Egg hatched into a {{p|Riolu}} and Diamond headed back to [[Canalave City]]. | |||
The island made a cameo appearance in ''[[PS415|Double Trouble with Dialga and Palkia V]]'', where {{tc|Ranchers|Belle & Pa}} wound up there due to the disturbances in space-time caused by {{DL|Pokémon of Myth (Adventures)|Dialga}} and {{DL|Pokémon of Myth (Adventures)|Palkia}}'s fight at the [[Spear Pillar]]. | |||
===Pokémon Diamond and Pearl Adventure!=== | |||
In ''[[DPA10|Serious Training on Iron Island!!]]'', [[Hareta]] went to train at Iron Island after losing to [[Byron]] in a Gym battle. He met [[Riley]], who gave him an {{pkmn|Egg}}, which soon hatched into a {{p|Riolu}}. After {{pkmn2|caught|catching}} several Pokémon, he drove off a {{tc|Team Galactic Grunt}}, at which point his {{p|Shinx}} evolved into {{TP|Hareta|Luxio}}. He returned to [[Canalave City]] in [[DPA11|the next chapter]]. | |||
{{-}} | |||
==Trivia== | ==Trivia== | ||
*Worker Noel calls himself as a "working class hero" | *Worker Willy{{sup/4|DP}}{{sup/8|BDSP}}/Noel{{sup/4|Pt}} calls himself as a "working class hero," which may be a reference to the {{wp|John Lennon}} song ''{{wp|Working Class Hero}}''. His name in {{v2|Platinum}} may also refer to {{wp|Noel Gallagher}} formerly of {{wp|Oasis (band)|Oasis}}, who was often called the "working class hero" in his heyday. | ||
* | *In Platinum, Ace Trainer Brenda's team consists of the members of [[Team Charm]]. However, {{p|Gardevoir}} is replaced with its pre-evolution Kirlia. | ||
==In other languages== | ==In other languages== | ||
{{Langtable|color={{locationcolor/light|cave}}|bordercolor={{locationcolor/dark|cave}} | |||
|zh_yue=鋼鐵島 ''{{tt|Gongtit Dóu|Steel Island}}'' | |||
|zh_cmn=鋼鐵島 / 钢铁岛 ''{{tt|Gāngtiě Dǎo|Steel Island}}'' | |||
|bg=Остров Айрон ''Ostrov Ayron'' | |||
{{Sinnoh}} | |fi=Iron-saari | ||
|fr=Île de Fer | |||
|da=Iron Øen | |||
|de=Eiseninsel | |||
|it=Isola Ferrosa | |||
|ko=강철섬 ''Gangcheol Seom'' | |||
|pl=Żelazna Wyspa | |||
|es=Isla Hierro | |||
|pt_br=Ilha Iron | |||
|ru=Айрон Айленд ''Ayron Aylend'' | |||
|sv=Iron-ön | |||
|vi=Đảo Sắt | |||
}} | |||
{{-}} | |||
{{Sinnoh}}<br/> | |||
{{Project Locations notice}} | {{Project Locations notice}} | ||
[[Category:Islands]] | [[Category:Islands]] | ||
[[Category:Caves]] | [[Category:Caves]] | ||
[[Category:Diamond and Pearl locations]] | [[Category:Diamond and Pearl locations]] | ||
[[Category:Platinum locations]] | [[Category:Platinum locations]] | ||
[[Category:Brilliant Diamond and Shining Pearl locations]] | |||
[[de:Eiseninsel]] | [[de:Eiseninsel]] | ||
[[es:Isla Hierro]] | |||
[[fr:Île de Fer]] | |||
[[it:Isola Ferrosa]] | |||
[[ja:こうてつじま]] | [[ja:こうてつじま]] | ||
[[zh:钢铁岛]] | |||
Latest revision as of 00:49, 16 August 2024
| ||||
| ||||
| Map description: | A small, ore-rich island that is off the coast of Eterna City. Inside the island are remnants of an iron ore mining operation from the past. | |||
|---|---|---|---|---|
| Location: | Off the western coast of Sinnoh | |||
| Region: | Sinnoh | |||
| Generations: | IV, VIII | |||
 Location of Iron Island in Sinnoh. | ||||
| Pokémon world locations | ||||
Iron Island (Japanese: 鋼鉄島 Steel Island) is an island off the western coast of Sinnoh. It is only accessible via ship from Canalave City.
The cave on Iron Island was once a prosperous ore mine, but it was shut down after the ore reserves dried up. Since then, it has been kept open as a training area and habitat for wild Pokémon. Byron, Riley, and the members of the Canalave Gym come here to train, as did Roark in his childhood. Team Galactic Grunts are also found within the abandoned mine.
Geography
Exterior
The main point of access to Iron Island is at its southwest corner, which has a dock for access by boat from Canalave City. One of the openings to the inside of the island is blocked by ledges, and thus its role is more like that of an exit. In front of the dock is two sets of stairs, separated by a landing on which a cabin apparently owned by Canalave Gym Leader Byron is located. The stairs lead to another cave opening, the only other way to enter the island.
Interior
The cave inside the island is brown in Diamond and Pearl and its its remakes, and black in Platinum. In all three games, the floor of the cave throughout the island is lined with oil drums and I-beams, with the former occasionally serving as obstacles which the player must navigate around in order to access certain parts of the cave sections.
When the player first enters, a pair of stairs facing left and right provide access to the first basement of the island. The left stair leads to a dead-end section, in which a single Camper can be battled. The right stair leads to a larger cave section with several Trainers, where a platform lift at the end can be used to gain access to the second basement of the cave. Once again, there are two sets of stairs facing left and right at the end of the platform lift; this time the right one leads to a dead-end section, where two Workers can be battled. The left stair leads to the largest single cave section of the island, where Riley will partner the player the first time the player enters it, participating in Tag Battles with his Lucario. Following this point, the remaining Trainers present in the cave are set up in a way such that tag battles against them with Riley as partner are possible, though strictly optional save for the battle with the two Team Galactic Grunts at the end of the section.
After the battle with the Team Galactic Grunts, Riley will cease his partnership with the player, and presents them with a Riolu Egg as a parting gift; if the player's party is full, he will remain until the player returns with an empty slot in their party. The departure of the two Team Galactic Grunts will also allow the player to access another platform lift that takes them down to the third basement. A cave opening in the wall leads to the exit section with another lift, which will take the player straight back to entrance level, where they can leave the inside of the island. In Pokémon Platinum, this section also contains the entrance to the Iron Ruins, where Registeel can be battled if the player has a fateful encounter Regigigas in their party.
Items
| Item | Location | Games | |
|---|---|---|---|
| Max Ether | Exterior, on the small rock in front of the house (hidden) | D P BD SP | |
| Star Piece | Exterior, on the small rock in front of the house (hidden) | Pt | |
| Metal Coat | In the house, from Byron after obtaining the National Pokédex | D P Pt BD SP | |
| HM04 (Strength) | Exterior, from Riley when the player first arrives on the Island | Pt | |
| Yellow Shard | B1F 1, center of the room | Pt | |
| Iron Ball | B1F 1; upper-left part of raised section | D P BD SP | |
| Protector | B1F 1, upper-left part of raised section | Pt | |
| Escape Rope | B1F 2, northwest of the lift | D P Pt BD SP | |
| Super Repel | B1F 2, in front of stone northeast of Picnicker Summer | D P BD SP | |
| Max Repel | B1F 2, in front of stone northeast of Picnicker Summer | Pt | |
| Tiny Mushroom | B1F 2, on pile of beams next to Picnicker Summer (hidden) | D P BD SP | |
| Star Piece | B1F 2, to the right of the three barrels northwest of Picnicker Summer (daily) (hidden) | Pt | |
| Revive | B1F 2, left of lift | Pt | |
| Max Ether | B2F 1; east of Worker Willy | D P BD SP | |
| Elixir | B2F 1, east of Worker Noel | Pt | |
| TM23 (Iron Tail) | B2F 1, in western half of pit southeast of Worker Braden | D P Pt BD SP | |
| Iron | B2F 1, in eastern half of pit southeast of Worker Braden (hidden) | D P BD SP | |
| Star Piece | B2F 1, in eastern half of pit southeast of Worker Braden (daily) (hidden) | Pt | |
| Full Restore | B2F 2, on barrel south of Hiker Maurice past a raised section of rock (hidden) | D P BD SP | |
| Magnet | B2F 2, northeast of Black Belt Kendal and Battle Girl Tyler | D P BD SP | |
| Ultra Ball | B2F 2, northeast of Black Belt Kendal and Battle Girl Tyler | Pt | |
| Ultra Ball | B2F 2, northwest corner beside two steel drums | D P BD SP | |
| Dusk Ball | B2F 2, northwest corner beside two steel drums | Pt | |
| Max Potion | B2F 2, southwest of Ultra BallDPBDSP/Dusk BallPt near two small rocks | D P Pt BD SP | |
| Magnet | B2F Left, southwest of Max Potion | Pt | |
| Star Piece | B2F 2, on the raised platform south of Worker Brendon and Worker Quentin (daily) (hidden) | Pt | |
| Iron Plate | B2F 2, in pit in southeast corner (hidden) | D P Pt BD SP | |
| Revive | B2F 2, on the barrel just west of Ace Trainer Jonah, only accessible from the west (hidden) | D P BD SP | |
| Star Piece | B2F 2, on small rock right of Ace Trainer Jonah and Ace Trainer Brenda (daily) (hidden) | Pt | |
| HP Up | B2F 2, just north of the two Team Galactic Grunts | D P Pt BD SP | |
| Red Shard | B2F 2, just northeast of Worker Brendon and Worker Quentin | Pt | |
| Shiny Stone | B3F 1, east of the raised section in the middle of the room | D P Pt BD SP | |
| Metal Coat | B3F 2 | Pt | |
| Nugget | B3F 2, northwest of Metal Coat (hidden) | Pt | |
Partner Trainer
When entering the western portion of B2F of Iron Island for the first time, the player encounters Riley. He offers to travel through the rest of the mine with the player. He is one of the Stat Trainers, specializing in the Attack stat. While he is with the player, all wild battles become Double Battles, and all Trainer battles that would otherwise be Double Battles become Multi Battles. After every battle, he will completely heal the player's party. He leaves the player once they have reached the elevator leading to the exit of the mine. Before he goes, he will give the player a Riolu Egg, if the player has a space for it in their party; if not, he will wait until the player returns with a free slot. In Pokémon Brilliant Diamond and Shining Pearl, the Egg will be sent to a Box if the player's party is full.
Pokémon Diamond, Pearl, and Platinum
|
||||||||||||||||||||||||||||||||||||
| ||||||||||||||||||||||||||||||||||||
Pokémon Brilliant Diamond and Shining Pearl
|
||||||||||||||||||||||||||||||||||||
| ||||||||||||||||||||||||||||||||||||
Pokémon
Generation IV
Exterior
| Pokémon | Games | Location | Levels | Rate | |||||||||||
|---|---|---|---|---|---|---|---|---|---|---|---|---|---|---|---|
| Surfing | |||||||||||||||
|
D | P | Pt |
|
20-30 | 60% | |||||||||
|
D | P | Pt |
|
20-30 | 30% | |||||||||
|
D | P | Pt |
|
20-40 | 5% | |||||||||
|
D | P | Pt |
|
20-40 | 1% | |||||||||
|
D | P | Pt |
|
20-30 | 30% | |||||||||
|
D | P | Pt |
|
20-30 | 60% | |||||||||
|
D | P | Pt |
|
20-40 | 5% | |||||||||
|
D | P | Pt |
|
20-40 | 9% | |||||||||
| Fishing | |||||||||||||||
|
D | P | Pt |
|
3-10 | 100% | |||||||||
|
D | P | Pt |
|
3-15 | 100% | |||||||||
|
D | P | Pt |
|
10-25 | 55% | |||||||||
|
D | P | Pt |
|
10-25 | 45% | |||||||||
|
D | P | Pt |
|
30-40 | 40% | |||||||||
|
D | P | Pt |
|
30-55 | 40% | |||||||||
|
D | P | Pt |
|
20-40 | 15% | |||||||||
|
D | P | Pt |
|
20-50 | 15% | |||||||||
|
D | P | Pt |
|
20-50 | 45% | |||||||||
|
D | P | Pt |
|
30-55 | 45% | |||||||||
| A colored background means that the Pokémon can be found in this location in the specified game. A white background with a colored letter means that the Pokémon cannot be found here. | |||||||||||||||
Interior
1F
| Pokémon | Games | Location | Levels | Rate | |||||||||||
|---|---|---|---|---|---|---|---|---|---|---|---|---|---|---|---|
|
D | P | Pt |
|
30 | 10% | |||||||||
|
D | P | Pt |
|
31 | 10% | |||||||||
|
D | P | Pt |
|
32 | 10% | |||||||||
|
D | P | Pt |
|
29-31 | 35% | |||||||||
|
D | P | Pt |
|
30-32 | 35% | |||||||||
|
D | P | Pt |
|
31-33 | 35% | |||||||||
|
D | P | Pt |
|
32-33 | 10% | |||||||||
|
D | P | Pt |
|
31, 33 | 10% | |||||||||
| A colored background means that the Pokémon can be found in this location in the specified game. A white background with a colored letter means that the Pokémon cannot be found here. | |||||||||||||||
B1F
| Pokémon | Games | Location | Levels | Rate | |||||||||||
|---|---|---|---|---|---|---|---|---|---|---|---|---|---|---|---|
|
D | P | Pt |
|
30-31 | 20% | |||||||||
|
D | P | Pt |
|
30, 32 | 20% | |||||||||
|
D | P | Pt |
|
31 | 1% | |||||||||
|
D | P | Pt |
|
29-33 | 69% | |||||||||
|
D | P | Pt |
|
30-33 | 70% | |||||||||
|
D | P | Pt |
|
32-33 | 10% | |||||||||
|
D | P | Pt |
|
31, 33 | 10% | |||||||||
| Special Pokémon | |||||||||||||||
|
D | P | Pt |
|
31, 33 | 8% | |||||||||
|
D | P | Pt |
|
30-31 | 8% | |||||||||
|
D | P | Pt |
|
31, 33 | 8% | |||||||||
|
D | P | Pt |
|
30-31 | 8% | |||||||||
| A colored background means that the Pokémon can be found in this location in the specified game. A white background with a colored letter means that the Pokémon cannot be found here. | |||||||||||||||
B2F 1
| Pokémon | Games | Location | Levels | Rate | |||||||||||
|---|---|---|---|---|---|---|---|---|---|---|---|---|---|---|---|
|
D | P | Pt |
|
30-31 | 20% | |||||||||
|
D | P | Pt |
|
31, 33 | 20% | |||||||||
|
D | P | Pt |
|
31 | 1% | |||||||||
|
D | P | Pt |
|
29-33 | 49% | |||||||||
|
D | P | Pt |
|
31-34 | 50% | |||||||||
|
D | P | Pt |
|
31-33 | 30% | |||||||||
|
D | P | Pt |
|
32 | 20% | |||||||||
|
D | P | Pt |
|
33, 35 | 10% | |||||||||
| Special Pokémon | |||||||||||||||
|
D | P | Pt |
|
31, 33 | 8% | |||||||||
|
D | P | Pt |
|
31-32 | 8% | |||||||||
|
D | P | Pt |
|
31, 33 | 8% | |||||||||
|
D | P | Pt |
|
31-32 | 8% | |||||||||
| A colored background means that the Pokémon can be found in this location in the specified game. A white background with a colored letter means that the Pokémon cannot be found here. | |||||||||||||||
B2F 2
While Riley is with the player, the following Pokémon (excluding dual-slot Pokémon) will be faced in Double Battles, with Riley as the player's partner.
| Pokémon | Games | Location | Levels | Rate | |||||||||||
|---|---|---|---|---|---|---|---|---|---|---|---|---|---|---|---|
|
D | P | Pt |
|
31-32 | 20% | |||||||||
|
D | P | Pt |
|
31, 33 | 20% | |||||||||
|
D | P | Pt |
|
32 | 1% | |||||||||
|
D | P | Pt |
|
30-34 | 39% | |||||||||
|
D | P | Pt |
|
31-34 | 50% | |||||||||
|
D | P | Pt |
|
32-33 | 30% | |||||||||
|
D | P | Pt |
|
32 | 20% | |||||||||
|
D | P | Pt |
|
33-34 | 10% | |||||||||
|
D | P | Pt |
|
33, 35 | 10% | |||||||||
| Gift Pokémon | |||||||||||||||
|
D | P | Pt |
|
1 | One | |||||||||
| Special Pokémon | |||||||||||||||
|
D | P | Pt |
|
32, 34 | 8% | |||||||||
|
D | P | Pt |
|
31-32 | 8% | |||||||||
|
D | P | Pt |
|
32, 34 | 8% | |||||||||
|
D | P | Pt |
|
31-32 | 8% | |||||||||
| A colored background means that the Pokémon can be found in this location in the specified game. A white background with a colored letter means that the Pokémon cannot be found here. | |||||||||||||||
B3F
| Pokémon | Games | Location | Levels | Rate | |||||||||||
|---|---|---|---|---|---|---|---|---|---|---|---|---|---|---|---|
|
D | P | Pt |
|
31-32 | 20% | |||||||||
|
D | P | Pt |
|
31, 33 | 20% | |||||||||
|
D | P | Pt |
|
32 | 1% | |||||||||
|
D | P | Pt |
|
30-34 | 39% | |||||||||
|
D | P | Pt |
|
31-34 | 50% | |||||||||
|
D | P | Pt |
|
32-33 | 30% | |||||||||
|
D | P | Pt |
|
33-34 | 10% | |||||||||
|
D | P | Pt |
|
32-33, 35 | 30% | |||||||||
| Special Pokémon | |||||||||||||||
|
D | P | Pt |
|
32, 34 | 8% | |||||||||
|
D | P | Pt |
|
31-32 | 8% | |||||||||
|
D | P | Pt |
|
32, 34 | 8% | |||||||||
|
D | P | Pt |
|
31-32 | 8% | |||||||||
| A colored background means that the Pokémon can be found in this location in the specified game. A white background with a colored letter means that the Pokémon cannot be found here. | |||||||||||||||
Generation VIII
Exterior
| Pokémon | Games | Location | Levels | Rate | ||||||||||
|---|---|---|---|---|---|---|---|---|---|---|---|---|---|---|
| Surfing | ||||||||||||||
| BD | SP | 20-30 | 60% | |||||||||||
| BD | SP | 20-40 | 5% | |||||||||||
| BD | SP | 20-30 | 30% | |||||||||||
| BD | SP | 20-40 | 5% | |||||||||||
| Fishing | ||||||||||||||
| BD | SP | 3-10 | 100% | |||||||||||
| BD | SP | 10-25 | 55% | |||||||||||
| BD | SP | 10-25 | 45% | |||||||||||
| BD | SP | 30-40 | 40% | |||||||||||
| BD | SP | 20-40 | 15% | |||||||||||
| BD | SP | 20-50 | 45% | |||||||||||
| A colored background means that the Pokémon can be found in this location in the specified game. A white background with a colored letter means that the Pokémon cannot be found here. | ||||||||||||||
Interior
1F
| Pokémon | Games | Location | Levels | Rate | |||||||||
|---|---|---|---|---|---|---|---|---|---|---|---|---|---|
| BD | SP | 30 | 10% | ||||||||||
| BD | SP | 31 | 10% | ||||||||||
| BD | SP | 29-31 | 35% | ||||||||||
| BD | SP | 31-33 | 35% | ||||||||||
| BD | SP | 32-33 | 10% | ||||||||||
| A colored background means that the Pokémon can be found in this location in the specified game. A white background with a colored letter means that the Pokémon cannot be found here. | |||||||||||||
B1F
| Pokémon | Games | Location | Levels | Rate | |||||||||
|---|---|---|---|---|---|---|---|---|---|---|---|---|---|
| BD | SP | 30-31 | 20% | ||||||||||
| BD | SP | 31 | 1% | ||||||||||
| BD | SP | 29-33 | 69% | ||||||||||
| BD | SP | 32-33 | 10% | ||||||||||
| A colored background means that the Pokémon can be found in this location in the specified game. A white background with a colored letter means that the Pokémon cannot be found here. | |||||||||||||
B2F Right
| Pokémon | Games | Location | Levels | Rate | |||||||||
|---|---|---|---|---|---|---|---|---|---|---|---|---|---|
| BD | SP | 30-31 | 20% | ||||||||||
| BD | SP | 31 | 1% | ||||||||||
| BD | SP | 29-33 | 49% | ||||||||||
| BD | SP | 31-33 | 30% | ||||||||||
| A colored background means that the Pokémon can be found in this location in the specified game. A white background with a colored letter means that the Pokémon cannot be found here. | |||||||||||||
B2F Left
While Riley is with the player, the following Pokémon will be faced in Double Battles, with Riley as the player's partner.
| Pokémon | Games | Location | Levels | Rate | ||||||||||
|---|---|---|---|---|---|---|---|---|---|---|---|---|---|---|
| BD | SP | 31-32 | 20% | |||||||||||
| BD | SP | 32 | 1% | |||||||||||
| BD | SP | 30-34 | 39% | |||||||||||
| BD | SP | 32-33 | 30% | |||||||||||
| BD | SP | 33-34 | 10% | |||||||||||
| Gift Pokémon | ||||||||||||||
| BD | SP | 1 | One | |||||||||||
| A colored background means that the Pokémon can be found in this location in the specified game. A white background with a colored letter means that the Pokémon cannot be found here. | ||||||||||||||
B3F
| Pokémon | Games | Location | Levels | Rate | |||||||||
|---|---|---|---|---|---|---|---|---|---|---|---|---|---|
| BD | SP | 31-32 | 20% | ||||||||||
| BD | SP | 32 | 1% | ||||||||||
| BD | SP | 30-34 | 39% | ||||||||||
| BD | SP | 32-33 | 30% | ||||||||||
| BD | SP | 33-34 | 10% | ||||||||||
| A colored background means that the Pokémon can be found in this location in the specified game. A white background with a colored letter means that the Pokémon cannot be found here. | |||||||||||||
Trainers
Pokémon Diamond and Pearl
B1F 1
| Trainer | Pokémon | |||||||||||
|---|---|---|---|---|---|---|---|---|---|---|---|---|
|
| |||||||||||
| ||||||||||||
| Trainers with a Vs. Seeker by their names, when alerted for a rematch using the item, may use higher-level Pokémon. | ||||||||||||
B1F 2
| Trainer | Pokémon | |||||||||||
|---|---|---|---|---|---|---|---|---|---|---|---|---|
|
| |||||||||||
| ||||||||||||
| Trainers with a Vs. Seeker by their names, when alerted for a rematch using the item, may use higher-level Pokémon. | ||||||||||||
B2F 1
| Trainer | Pokémon | |||||||||||
|---|---|---|---|---|---|---|---|---|---|---|---|---|
|
| |||||||||||
| ||||||||||||
|
| |||||||||||
| Trainers with a Vs. Seeker by their names, when alerted for a rematch using the item, may use higher-level Pokémon. | ||||||||||||
B2F 2
While Riley is with the player, the following Trainers, if they would normally be faced in Double Battles, will instead be faced in Multi Battles, with Riley as the player's partner.
| Trainer | Pokémon | |||||||||||
|---|---|---|---|---|---|---|---|---|---|---|---|---|
|
| |||||||||||
| ||||||||||||
| ||||||||||||
|
| |||||||||||
| ||||||||||||
|
| |||||||||||
|
| |||||||||||
|
| |||||||||||
| ||||||||||||
|
| |||||||||||
| ||||||||||||
| ||||||||||||
|
| |||||||||||
| ||||||||||||
| ||||||||||||
|
| |||||||||||
| ||||||||||||
|
| |||||||||||
| ||||||||||||
| ||||||||||||
|
| |||||||||||
| ||||||||||||
| ||||||||||||
| Trainers with a Vs. Seeker by their names, when alerted for a rematch using the item, may use higher-level Pokémon. | ||||||||||||
Pokémon Platinum
B1F 1
| Trainer | Pokémon | |||||||||||
|---|---|---|---|---|---|---|---|---|---|---|---|---|
|
| |||||||||||
| ||||||||||||
| Trainers with a Vs. Seeker by their names, when alerted for a rematch using the item, may use higher-level Pokémon. | ||||||||||||
B1F 2
| Trainer | Pokémon | |||||||||||
|---|---|---|---|---|---|---|---|---|---|---|---|---|
|
| |||||||||||
| Trainers with a Vs. Seeker by their names, when alerted for a rematch using the item, may use higher-level Pokémon. | ||||||||||||
B2F 1
| Trainer | Pokémon | |||||||||||
|---|---|---|---|---|---|---|---|---|---|---|---|---|
|
| |||||||||||
| ||||||||||||
|
| |||||||||||
| Trainers with a Vs. Seeker by their names, when alerted for a rematch using the item, may use higher-level Pokémon. | ||||||||||||
B2F 2
While Riley is with the player, the following Trainers, if they would normally be faced in Double Battles, will instead be faced in Multi Battles, with Riley as the player's partner.
| Trainer | Pokémon | |||||||||||
|---|---|---|---|---|---|---|---|---|---|---|---|---|
|
| |||||||||||
| ||||||||||||
| ||||||||||||
|
| |||||||||||
| ||||||||||||
|
| |||||||||||
|
| |||||||||||
|
| |||||||||||
| ||||||||||||
| ||||||||||||
|
| |||||||||||
| ||||||||||||
| ||||||||||||
|
| |||||||||||
| ||||||||||||
| ||||||||||||
|
| |||||||||||
| ||||||||||||
| ||||||||||||
|
| |||||||||||
| ||||||||||||
| ||||||||||||
|
| |||||||||||
| ||||||||||||
| ||||||||||||
| Trainers with a Vs. Seeker by their names, when alerted for a rematch using the item, may use higher-level Pokémon. | ||||||||||||
Pokémon Brilliant Diamond and Shining Pearl
B1F 1
| Trainer | Pokémon | |||||||||||
|---|---|---|---|---|---|---|---|---|---|---|---|---|
|
| |||||||||||
| ||||||||||||
| Trainers with a Vs. Seeker by their names, when alerted for a rematch using the item, may use higher-level Pokémon. | ||||||||||||
B1F 2
| Trainer | Pokémon | |||||||||||
|---|---|---|---|---|---|---|---|---|---|---|---|---|
|
| |||||||||||
| ||||||||||||
| Trainers with a Vs. Seeker by their names, when alerted for a rematch using the item, may use higher-level Pokémon. | ||||||||||||
B2F 1
| Trainer | Pokémon | |||||||||||
|---|---|---|---|---|---|---|---|---|---|---|---|---|
|
| |||||||||||
| ||||||||||||
|
| |||||||||||
| Trainers with a Vs. Seeker by their names, when alerted for a rematch using the item, may use higher-level Pokémon. | ||||||||||||
B2F 2
While Riley is with the player, the following Trainers, if they would normally be faced in Double Battles, will instead be faced in Multi Battles, with Riley as the player's partner.
| Trainer | Pokémon | |||||||||||
|---|---|---|---|---|---|---|---|---|---|---|---|---|
|
| |||||||||||
| ||||||||||||
| ||||||||||||
|
| |||||||||||
| ||||||||||||
|
| |||||||||||
|
| |||||||||||
|
| |||||||||||
| ||||||||||||
|
| |||||||||||
| ||||||||||||
| ||||||||||||
|
| |||||||||||
| ||||||||||||
| ||||||||||||
|
| |||||||||||
| ||||||||||||
|
| |||||||||||
| ||||||||||||
| ||||||||||||
|
| |||||||||||
| ||||||||||||
| ||||||||||||
| Trainers with a Vs. Seeker by their names, when alerted for a rematch using the item, may use higher-level Pokémon. | ||||||||||||
Layout
Outside and 1F-B1F
| Version | Exterior | 1F | B1F 1 | B1F 2 |
|---|---|---|---|---|
| Diamond | 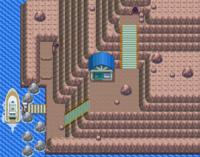
|
|

|

|
| Pearl | ||||
| Platinum | 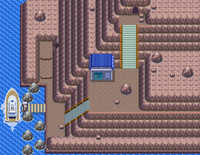
|
|

|

|
B2F and B3F
| Version | B2F 1 | B2F 2 | B3F 1 | B3F 2 |
|---|---|---|---|---|
| Diamond | 
|

|
|
|
| Pearl | ||||
| Platinum | 
|

|
|
|
In the spin-off games
Pokémon Masters EX
Artwork depicting Iron Island is seen in Riley's mindscape.
|
In the anime

In the anime, Iron Island has a port town with a Pokémon Center.
Barry first mentioned Iron Island in Shield with a Twist!. He credited his time battling the island's Steel-type Pokémon with helping him win at the Canalave Gym. He later returned to Iron Island in Jumping Rocket Ship! to continue training.
After receiving a call for help from Barry, Ash and his friends sailed over to Iron Island in Steeling Peace of Mind!. There, they encountered Riley and his partner Lucario and also uncovered Team Galactic’s latest operation. The group discovered that Team Galactic were trying to activate the Iron Ruins present on the island. The resulting low-frequency energy waves were wreaking havoc and caused all of the Steel-type Pokémon, including Barry's Empoleon and later Riley’s Lucario, to go berserk.
In Saving the World from Ruins!, Team Galactic activated the Iron Ruins using the stolen Spear Key to scan Mount Coronet for the location of the Spear Pillar. Ash and the group succeeded in stopping Team Galactic's operation, and Riley and Lucario successively contained detonating bombs placed by Team Galactic which were to destroy the island. However, significant progress was made towards Team Galactic's goal, as Mars and her Team Galactic Grunts still escaped with the Spear Key and Cyrus learned with definitive evidence that the Spear Pillar was somewhere on Mount Coronet.
Later, Professor Carolina arrived to investigate the connection between the Iron Ruins, which were only uncovered because of Team Galactic, and Spear Pillar. She enlisted Riley's assistance, hoping his local knowledge would be useful. She revealed that Iron Island and the Ruins are made of the same compound as Veilstone City's meteorites. Later, Ash and his friends left for Chocovine Town.
Gallery
| Pokémon Center | Iron Ruins |
|---|---|
|
|
In the manga
Pokémon Adventures

Diamond & Pearl arc
In Hurrah for Rapidash, Byron instructed Diamond to go train on Iron Island. The island itself appeared from Lucky Lucario I to Vexing Vespiquen & Unmanageable Mothim II, where Diamond undertook training there, instructed by Riley. After losing a training battle against Riley, Diamond was instructed to traverse through the island five times and train his battle skills against the wild Pokémon living in the island's caves. Riley accompanied Diamond the first time through, leaving the Pokédex holder to handle the remaining times on his own and healing his Pokémon after each round.

After Diamond had completed the five rounds, Riley gave him one last training mission, telling him to retrieve a Pokémon Egg he had placed at the deepest part of the island. When Diamond found the Steelix that he had fought against during the first round defeated, Riley decided to accompany him for the round. Suddenly, they were attacked by a pair of Roughnecks, who blinded Riley and his Lucario, disrupted their Aura sense with their Mothim's Air Slash, and took the Egg hostage. As such, Diamond took on the Roughnecks himself, revealing that he had secretly been training on a way to make Tru's Razor Leaf faster. He had figured out that the attack became faster the less leaves it used, so he had trained Tru to launch only one Razor Leaf per attack, which made the move so fast it could strike before Diamond could even finish saying its name. With this technique, Diamond was able to defeat the Roughnecks' Vespiquen and Mothim, saving the Egg and allowing Riley to finish the Roughnecks off himself. Afterwards, the Egg hatched into a Riolu and Diamond headed back to Canalave City.
The island made a cameo appearance in Double Trouble with Dialga and Palkia V, where Belle & Pa wound up there due to the disturbances in space-time caused by Dialga and Palkia's fight at the Spear Pillar.
Pokémon Diamond and Pearl Adventure!
In Serious Training on Iron Island!!, Hareta went to train at Iron Island after losing to Byron in a Gym battle. He met Riley, who gave him an Egg, which soon hatched into a Riolu. After catching several Pokémon, he drove off a Team Galactic Grunt, at which point his Shinx evolved into Luxio. He returned to Canalave City in the next chapter.
Trivia
- Worker WillyDPBDSP/NoelPt calls himself as a "working class hero," which may be a reference to the John Lennon song Working Class Hero. His name in Platinum may also refer to Noel Gallagher formerly of Oasis, who was often called the "working class hero" in his heyday.
- In Platinum, Ace Trainer Brenda's team consists of the members of Team Charm. However, Gardevoir is replaced with its pre-evolution Kirlia.
In other languages
| ||||||||||||||||||||||||||||||||||||||||||||||||||

|
This article is part of Project Locations, a Bulbapedia project that aims to write comprehensive articles on every location in the Pokémon world. |
