Appendix:Omega Ruby and Alpha Sapphire walkthrough/Section 10: Difference between revisions
| Line 125: | Line 125: | ||
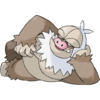
In the final room, your father has been waiting for you. Now that you have earned four other Badges, he is now ready to accept your challenge. [[Norman]] leads with the first of his two {{p|Slaking}}. Slaking usually leads with {{m|Yawn}}; if you switch out your Pokémon to keep it from falling {{status|Sleep|asleep}}, your next Pokémon will be safe from attack. This is due to Slaking's Ability, {{a|Truant}}, which prevents it from attacking every other turn. However, his {{p|Vigoroth}} has no such problem. When it appears in battle, use {{m|Protect}} or {{m|Detect}} to avoid serious damage from its {{m|Retaliate}} move, which doubles in power if its ally was defeated a turn earlier. His third Pokémon's {{m|Chip Away}} move ignores the target's stat changes, like {{stat|Defense}} boosts from moves like {{m|Bulk Up}} or {{m|Iron Defense}}. While {{t|Ghost}} Pokémon are usually unaffected by Normal-type attacks, and vice-versa, Norman's entire team can use {{m|Feint Attack}} to deal serious damage to such Pokémon. | In the final room, your father has been waiting for you. Now that you have earned four other Badges, he is now ready to accept your challenge. [[Norman]] leads with the first of his two {{p|Slaking}}. Slaking usually leads with {{m|Yawn}}; if you switch out your Pokémon to keep it from falling {{status|Sleep|asleep}}, your next Pokémon will be safe from attack. This is due to Slaking's Ability, {{a|Truant}}, which prevents it from attacking every other turn. However, his {{p|Vigoroth}} has no such problem. When it appears in battle, use {{m|Protect}} or {{m|Detect}} to avoid serious damage from its {{m|Retaliate}} move, which doubles in power if its ally was defeated a turn earlier. His third Pokémon's {{m|Chip Away}} move ignores the target's stat changes, like {{stat|Defense}} boosts from moves like {{m|Bulk Up}} or {{m|Iron Defense}}. While {{t|Ghost}} Pokémon are usually unaffected by Normal-type attacks, and vice-versa, Norman's entire team can use {{m|Feint Attack}} to deal serious damage to such Pokémon. | ||
{| align="center" | {| align="center" | ||
|- align="center" valign="top" | |- align="center" valign="top" | ||
Revision as of 18:27, 24 September 2017
These pages follow the remade Nintendo 3DS iteration, not Pokémon Ruby and Sapphire. The guide for those games can be found here.
Route 111 (desert)
With the Go-Goggles, you can finally venture into the windswept desert on Route 111. The powerful sandstorm deters most would-be explorers, so no one has yet claimed the valuable treasures lying among the dunes.
| Trainers | |||||||||||||||||||||||||||||||||||||||||||||||||||||||||||||||||||||||||||||||||||||||||||||||||||||||||||||||||||||||||||||||||||||||||||||||||||||||||||||||||||||||||||||||||||||||||||||||||||||||||||||||
|---|---|---|---|---|---|---|---|---|---|---|---|---|---|---|---|---|---|---|---|---|---|---|---|---|---|---|---|---|---|---|---|---|---|---|---|---|---|---|---|---|---|---|---|---|---|---|---|---|---|---|---|---|---|---|---|---|---|---|---|---|---|---|---|---|---|---|---|---|---|---|---|---|---|---|---|---|---|---|---|---|---|---|---|---|---|---|---|---|---|---|---|---|---|---|---|---|---|---|---|---|---|---|---|---|---|---|---|---|---|---|---|---|---|---|---|---|---|---|---|---|---|---|---|---|---|---|---|---|---|---|---|---|---|---|---|---|---|---|---|---|---|---|---|---|---|---|---|---|---|---|---|---|---|---|---|---|---|---|---|---|---|---|---|---|---|---|---|---|---|---|---|---|---|---|---|---|---|---|---|---|---|---|---|---|---|---|---|---|---|---|---|---|---|---|---|---|---|---|---|---|---|---|---|---|---|---|---|
| |||||||||||||||||||||||||||||||||||||||||||||||||||||||||||||||||||||||||||||||||||||||||||||||||||||||||||||||||||||||||||||||||||||||||||||||||||||||||||||||||||||||||||||||||||||||||||||||||||||||||||||||
| Available Pokémon | ||||||||||||||||||||||||||||||||||||||||||||||||||||||||||||||||||||||||||||||||||||||||||||||||||||||||||||||||||||||||||||||
|---|---|---|---|---|---|---|---|---|---|---|---|---|---|---|---|---|---|---|---|---|---|---|---|---|---|---|---|---|---|---|---|---|---|---|---|---|---|---|---|---|---|---|---|---|---|---|---|---|---|---|---|---|---|---|---|---|---|---|---|---|---|---|---|---|---|---|---|---|---|---|---|---|---|---|---|---|---|---|---|---|---|---|---|---|---|---|---|---|---|---|---|---|---|---|---|---|---|---|---|---|---|---|---|---|---|---|---|---|---|---|---|---|---|---|---|---|---|---|---|---|---|---|---|---|---|---|
| ||||||||||||||||||||||||||||||||||||||||||||||||||||||||||||||||||||||||||||||||||||||||||||||||||||||||||||||||||||||||||||||
| Items | ||||||||||||||||||||||||||||||||||||||||
|---|---|---|---|---|---|---|---|---|---|---|---|---|---|---|---|---|---|---|---|---|---|---|---|---|---|---|---|---|---|---|---|---|---|---|---|---|---|---|---|---|
| ||||||||||||||||||||||||||||||||||||||||
Relic Recovery!
The unending sandstorm seems to have uncovered two treasures from the ancient past in the desert's northeast corner. The Root and Claw Fossils belong to two species that once lived in the primordial ocean. The researchers at Devon Corporation back in Rustboro are able to revive any Fossil they receive into a long-lost Pokémon. The Root Fossil becomes the Rock/Grass Lileep, while the Claw Fossil turns into the Rock/Bug Anorith. Removing either one from their resting place causes the other to sink into the sand, so choose carefully!
Desert Ruins
The unusual arrangement of stones to the south is known as the Desert Ruins. It is believed to mark the resting place of a legendary Pokémon. But with the entrance sealed, you won't be able to investigate until later.
Back to Petalburg City
Now that you've claimed your fourth Badge and combed the desert for treasure, your next stop is Petalburg City. The city is far to the southwest, but there are several ways by which to return there.
- Backtrack through Mt. Chimney and Jagged Pass to Lavaridge. Speak to May/Brendan outside the Gym to quickly travel with your friend on her/his way back to Petalburg.
- Head northwest around the volcano to Fallarbor Town, then south through Meteor Falls to return to Rustboro.
- Go south from the desert to Mauville City, then west to Verdanturf Town. Cut through Rusturf Tunnel to return to Rustboro.
If you decide not to accompany your friend to the city, be sure to stop by Devon Corporation on the way to have the researchers there revive your Fossil Pokémon.
Petalburg City
Petalburg Gym

The Petalburg Gym, which specializes in Normal-type Pokémon, is styled as a traditional dojo with multiple rooms. Each room has a single Trainer who uses special items to gain the upper hand in battle. The sign on each door gives a clue to the strategy of the Trainer in the room behind it. The first two rooms beyond the lobby are labeled "Speed" and "Accuracy". The three rooms farther on are named "Zero Reduction", "Defense", and "Recovery". The final two rooms before the Gym Leader are labeled "Strength" and "One-Hit KO". A minimum of three Gym Trainers must be defeated to reach the Gym Leader. Fighting types like Machop and Makuhita will give you the upper hand here.
| Room | Opponent | Item Used | Notes |
|---|---|---|---|
| Front rooms | |||
| Speed Room | Ace Trainer Randall | X Speed | Paralyze his Delcatty to counter its Speed boost, or just knock it out quickly. |
| Accuracy Room | Ace Trainer Mary | X Accuracy | Her Delcatty's Sing can become problematic, with accuracy rising from 55% to 73%. |
| Middle rooms | |||
| Zero Reduction Room | Ace Trainer Parker | Guard Spec. | Prevents stat reduction. Avoid stat-lowering moves and simply attack. |
| Defense Room | Ace Trainer Lori | X Defense | Use Special attacks to ignore her Linoone's Defense boost. |
| Recovery Room | Ace Trainer George | Super Potion | Use super-effective moves to defeat his Linoone before it can be healed. |
| Back rooms | |||
| Strength Room | Ace Trainer Jody | X Attack | Counter with Attack-lowering Abilities, like Intimidate, or moves, like Growl and Charm. |
| One-Hit KO Room | Ace Trainer Berke | Dire Hit | Sharply raises Zangoose's critical hit ratio. Knock it out quickly with super-effective moves. |
In the final room, your father has been waiting for you. Now that you have earned four other Badges, he is now ready to accept your challenge. Norman leads with the first of his two Slaking. Slaking usually leads with Yawn; if you switch out your Pokémon to keep it from falling asleep, your next Pokémon will be safe from attack. This is due to Slaking's Ability, Truant, which prevents it from attacking every other turn. However, his Vigoroth has no such problem. When it appears in battle, use Protect or Detect to avoid serious damage from its Retaliate move, which doubles in power if its ally was defeated a turn earlier. His third Pokémon's Chip Away move ignores the target's stat changes, like Defense boosts from moves like Bulk Up or Iron Defense. While Ghost Pokémon are usually unaffected by Normal-type attacks, and vice-versa, Norman's entire team can use Feint Attack to deal serious damage to such Pokémon.
| ||||||||||||||||||||||||||||||||||||||||||||||||||||||||||||||||||||||||||||||||||||||||||||||||||||||||||||||||||||||||||||||||||||||||||||||||||||||||||||||||||||||||||||||||||||||||||||||||||||||||||||||||||||||||||||||||||||||||||||||||||||||||||||||||||||||||||||||||||||||||||||||||||||||||||||||||||||||||||||
Afterwards, your father awards you the Balance Badge, which ensures the obedience of all Pokémon up to level 60 and enables the use of Surf in the field. He also hands you TM67 (Retaliate) as a gift. Norman then leads you outside, where the two of you run into Wally and his father as they are visiting the city. After a short discussion about Wally and his improving health, his father gives you HM03 (Surf) as thanks for helping the young Trainer. In battle, Surf is a strong Water-type attack; in the field, it allows you to cross bodies of water. Norman says that you should now be able to handle the stronger opponents on Hoenn's east coast, beyond Route 118. The two Trainers set off for Mauville City to prepare, and the two fathers have another short discussion.
Route 118
The seaside Route 118 links the west and east sides of the region together. Several new species of Pokémon can be found here, including Electric types that will be of great value in the upcoming Gym.
| Trainers | ||||||||||||||||||||||||||||||||||||||||||||||||||||||||||||||||||||||||||||||||||||||||||||||||||||||||||||||||||||||||||||||||||||||||||||||||||||||||||||||||||||||||||||||||||||||||||||||||||||||||||||||||||||||||||||||||||||||||||||||||||||||||||||||||||||||||||||||||||||||||||||||||||||||||||||||||||||||||||||||||||||||||||||||||||||||||||||||||
|---|---|---|---|---|---|---|---|---|---|---|---|---|---|---|---|---|---|---|---|---|---|---|---|---|---|---|---|---|---|---|---|---|---|---|---|---|---|---|---|---|---|---|---|---|---|---|---|---|---|---|---|---|---|---|---|---|---|---|---|---|---|---|---|---|---|---|---|---|---|---|---|---|---|---|---|---|---|---|---|---|---|---|---|---|---|---|---|---|---|---|---|---|---|---|---|---|---|---|---|---|---|---|---|---|---|---|---|---|---|---|---|---|---|---|---|---|---|---|---|---|---|---|---|---|---|---|---|---|---|---|---|---|---|---|---|---|---|---|---|---|---|---|---|---|---|---|---|---|---|---|---|---|---|---|---|---|---|---|---|---|---|---|---|---|---|---|---|---|---|---|---|---|---|---|---|---|---|---|---|---|---|---|---|---|---|---|---|---|---|---|---|---|---|---|---|---|---|---|---|---|---|---|---|---|---|---|---|---|---|---|---|---|---|---|---|---|---|---|---|---|---|---|---|---|---|---|---|---|---|---|---|---|---|---|---|---|---|---|---|---|---|---|---|---|---|---|---|---|---|---|---|---|---|---|---|---|---|---|---|---|---|---|---|---|---|---|---|---|---|---|---|---|---|---|---|---|---|---|---|---|---|---|---|---|---|---|---|---|---|---|---|---|---|---|---|---|---|---|---|---|---|---|---|---|---|---|---|---|---|---|---|---|---|---|---|---|---|---|---|---|---|---|---|---|---|---|---|---|---|---|---|---|---|---|---|---|---|---|---|---|---|---|---|---|---|---|---|---|---|---|---|---|
| ||||||||||||||||||||||||||||||||||||||||||||||||||||||||||||||||||||||||||||||||||||||||||||||||||||||||||||||||||||||||||||||||||||||||||||||||||||||||||||||||||||||||||||||||||||||||||||||||||||||||||||||||||||||||||||||||||||||||||||||||||||||||||||||||||||||||||||||||||||||||||||||||||||||||||||||||||||||||||||||||||||||||||||||||||||||||||||||||
| Available Pokémon | ||||||||||||||||||||||||||||||||||||||||||||||||||||||||||||||||||||||||||||||||||||||||||||||||||||||||||||||||||||||||||||||||||||||||||||||||||||||||||||||||||||||||||||||||||||||||||||||||||||||||||||||||||||||||||||||||||||||||||||||||||||||||||||||||||||||||||||||||||||||||||||||||||||||||||||||||||||||||||||||||||||||||||||||||||||||||||||||||||||||||||||||||||||||||||||||||||||||||||||||||||||||||||||||||||||||||||||||||||||||||||||||||||||||||||||
|---|---|---|---|---|---|---|---|---|---|---|---|---|---|---|---|---|---|---|---|---|---|---|---|---|---|---|---|---|---|---|---|---|---|---|---|---|---|---|---|---|---|---|---|---|---|---|---|---|---|---|---|---|---|---|---|---|---|---|---|---|---|---|---|---|---|---|---|---|---|---|---|---|---|---|---|---|---|---|---|---|---|---|---|---|---|---|---|---|---|---|---|---|---|---|---|---|---|---|---|---|---|---|---|---|---|---|---|---|---|---|---|---|---|---|---|---|---|---|---|---|---|---|---|---|---|---|---|---|---|---|---|---|---|---|---|---|---|---|---|---|---|---|---|---|---|---|---|---|---|---|---|---|---|---|---|---|---|---|---|---|---|---|---|---|---|---|---|---|---|---|---|---|---|---|---|---|---|---|---|---|---|---|---|---|---|---|---|---|---|---|---|---|---|---|---|---|---|---|---|---|---|---|---|---|---|---|---|---|---|---|---|---|---|---|---|---|---|---|---|---|---|---|---|---|---|---|---|---|---|---|---|---|---|---|---|---|---|---|---|---|---|---|---|---|---|---|---|---|---|---|---|---|---|---|---|---|---|---|---|---|---|---|---|---|---|---|---|---|---|---|---|---|---|---|---|---|---|---|---|---|---|---|---|---|---|---|---|---|---|---|---|---|---|---|---|---|---|---|---|---|---|---|---|---|---|---|---|---|---|---|---|---|---|---|---|---|---|---|---|---|---|---|---|---|---|---|---|---|---|---|---|---|---|---|---|---|---|---|---|---|---|---|---|---|---|---|---|---|---|---|---|---|---|---|---|---|---|---|---|---|---|---|---|---|---|---|---|---|---|---|---|---|---|---|---|---|---|---|---|---|---|---|---|---|---|---|---|---|---|---|---|---|---|---|---|---|---|---|---|---|---|---|---|---|---|---|---|---|---|---|---|---|---|---|---|---|---|---|---|---|---|---|---|---|---|---|---|---|---|---|---|---|---|---|---|---|---|---|---|---|---|---|---|---|---|---|---|---|---|---|---|---|---|---|---|---|---|---|---|---|
| ||||||||||||||||||||||||||||||||||||||||||||||||||||||||||||||||||||||||||||||||||||||||||||||||||||||||||||||||||||||||||||||||||||||||||||||||||||||||||||||||||||||||||||||||||||||||||||||||||||||||||||||||||||||||||||||||||||||||||||||||||||||||||||||||||||||||||||||||||||||||||||||||||||||||||||||||||||||||||||||||||||||||||||||||||||||||||||||||||||||||||||||||||||||||||||||||||||||||||||||||||||||||||||||||||||||||||||||||||||||||||||||||||||||||||||
| Items | ||||||||||||||||||||||||||||||||||||||||||||||||||||||||||||||||||
|---|---|---|---|---|---|---|---|---|---|---|---|---|---|---|---|---|---|---|---|---|---|---|---|---|---|---|---|---|---|---|---|---|---|---|---|---|---|---|---|---|---|---|---|---|---|---|---|---|---|---|---|---|---|---|---|---|---|---|---|---|---|---|---|---|---|---|
| ||||||||||||||||||||||||||||||||||||||||||||||||||||||||||||||||||
Surf's Up!
When you're ready to cross the river, approach the beach and use Surf. Hop on your seafaring Pokémon's back to glide across the water. While Surfing, it is impossible to use the field moves Cut, Strength, or Rock Smash; however, several other moves are allowed. The Dowsing Machine can't be used while crossing the waves, but you can use an Escape Rope or a fishing rod while doing so. Most Pokémon will let you travel twice as fast as on foot, the same speed as the Acro Bike. Set sail with a Sharpedo and you will be able to move at triple the speed, on par with that of the Mach Bike; however, the high speed makes it too difficult to use a fishing rod.
Get Good with a Good Rod
The Fisherman on the river's eastern bank believes that Good Rods are really good. Agree with his statement to receive your very own Good Rod, a mid-level fishing rod that can catch even more kinds of Pokémon than the Old Rod.
Gabby and Ty
After being interviewed by Gabby and Ty on the south side of Route 111, the intrepid news team can be found searching for their next story on the eastern bank of Route 118's river. Accept their challenge to another Double Battle and be sure to give them a great interview when the dust settles!
Meet up with Steven
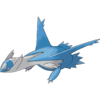
As you leave the beach, you are noticed by Steven. He hasn't seen you since your first meeting in Granite Cave, and is pleased to see how much you have grown as a Trainer. He wonders if you will raise Pokémon of all types, or only your favorite one. He turns to leave, but the two of you suddenly heard a Pokémon cry out. As the two of you scan the horizon for the source, you see the legendary Pokémon LatiasOR/LatiosAS headed your way! There seems to be trouble brewing, and Steven asks that you come along to help. The two Trainers climb onto the Pokémon's back and soar off to the south.
Southern Island
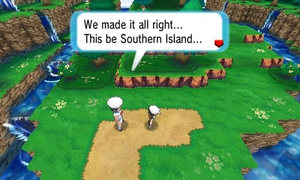
Southern Island is a tiny, remote island in the southern ocean. Widely considered a mirage, the island is surrounded by a mysterious veil that makes approach impossible for mere humans. This same anomaly also prevents anyone from Flying or Teleporting from the island.
| Available Pokémon | |||||||||||||||||||||||||||||||||||||||||||||||||||||||||||||||||||||||||||
|---|---|---|---|---|---|---|---|---|---|---|---|---|---|---|---|---|---|---|---|---|---|---|---|---|---|---|---|---|---|---|---|---|---|---|---|---|---|---|---|---|---|---|---|---|---|---|---|---|---|---|---|---|---|---|---|---|---|---|---|---|---|---|---|---|---|---|---|---|---|---|---|---|---|---|---|
| |||||||||||||||||||||||||||||||||||||||||||||||||||||||||||||||||||||||||||
| Items | ||||||||||||||||||||
|---|---|---|---|---|---|---|---|---|---|---|---|---|---|---|---|---|---|---|---|---|
| ||||||||||||||||||||
Exterior
Steven gets an odd feeling about the place immediately upon arrival, like he's walking through an illusion. He recounts an old tale about the two Pokémon that live on the island, which are believed to guard some secret about Mega Evolution. He wonders if something dangerous could be here because of that. As you approach the forest up ahead, a strange voice calls out to you with a telepathic message: (Those whose memories fade seek to carve them in their hearts…).
Interior
Continue on to find the other Pokémon, LatiosOR/LatiasAS, in hiding. A short time later, Team MagmaOR/Team AquaAS arrives. They're aiming to catch rare Pokémon and steal Mega Stones, and they can't be allowed to succeed! Join forces with Steven and his Metang as you take them on in a Multi Battle.
VS Team Magma
| |||||||||||||||||||||||||||||||||||||||||||||||||||||||||||||||||||||||||||||||||||||||
VS Team Aqua
| |||||||||||||||||||||||||||||||||||||||||||||||||||||||||||||||||||||||||||||||||||||||
Mega Evolution
|
| ||||||||||||||||||||||||||||||||||||||||||||||||||||||||||||||||||||||
Shocked by their loss, the villainous pair has no choice but to flee the island, after which Steven restores your team to full health. LatiosOR/LatiasAS has been saved, and the grateful Pokémon repays you by joining you in your travels! You may need to send a party Pokémon to the PC to make room for the Dragon/Psychic type. The legendary Pokémon even brings its Mega Stone, the LatiositeOR/LatiasiteAS, along with it! Steven gives you the Mega Bracelet, which you immediately equip. The Key Stone embedded in it will allow you to temporarily Mega Evolve certain Pokémon during battle, given that they hold the appropriate Mega Stone. The process may change a Pokémon's stats, Ability, or even type, making them much more formidable for the rest of the battle. Now that you've chased off Team MagmaOR/Team AquaAS, you and Steven catch a ride back to Route 118, where he leaves you to continue your journey.
Also if you have an Eon Ticket which you can generally get from StreetPass, you can make a return trip to catch the other Eon Pokémon.
|
Omega Ruby and Alpha Sapphire walkthrough |
|

|
This article is part of Project Walkthroughs, a Bulbapedia project that aims to write comprehensive step-by-step guides on each Pokémon game. |


