Stow-on-Side: Difference between revisions
(→Trivia) |
m (→Trivia) |
||
| (83 intermediate revisions by 30 users not shown) | |||
| Line 29: | Line 29: | ||
}} | }} | ||
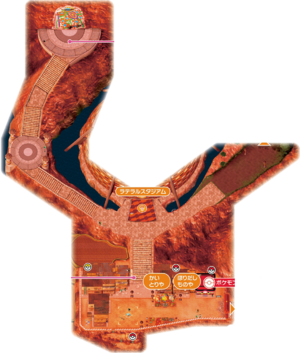
'''Stow-on-Side''' (Japanese: '''ラテラルタウン''' ''Lateral Town'') is a town situated in the | '''Stow-on-Side''' (Japanese: '''ラテラルタウン''' ''Lateral Town'') is a town situated in the west-central [[Galar]] [[region]]. It connects to {{rt|6|Galar}} in the east and [[Glimwood Tangle]] in the north. It houses the [[Stow-on-Side Stadium]], the fourth [[Gym]] in Galar's [[Galar League|Gym Challenge]]. | ||
==Slogan== | ==Slogan== | ||
| Line 35: | Line 35: | ||
==Places of interest== | ==Places of interest== | ||
The upper, northern part of Stow-on-Side consists of a Y-shaped intersection of paths. The [[Stow-on-Side Stadium]] sits at the intersection; the western path, up the stairs, leads to the ancient mural; and the eastern path leads to [[Glimwood Tangle]]. The lower, southern part of Stow-on-Side consists of a wide market area that houses the bargain shop, valuable item buyer's stall, and a [[Pokémon Center]]. | |||
===Stow-on-Side Stadium=== | ===Stow-on-Side Stadium=== | ||
{{main|Stow-on-Side Stadium}} | {{main|Stow-on-Side Stadium}} | ||
| Line 40: | Line 42: | ||
===Ancient mural=== | ===Ancient mural=== | ||
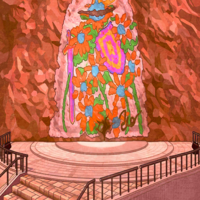
At the northernmost point of the town | At the northernmost point of the town, up two flights of stairs, a colorful recreation of an ancient mural covers a large stone wall. During the game's story, [[Bede]] attempts to destroy the mural to find [[Wishing Star]]s, causing it to collapse. The mural's collapse reveals a hidden chamber that contains statues of {{p|Zacian}}, {{p|Zamazenta}}, and the [[Ancient Galarian kings]]. | ||
===Bargain shop=== | ===Bargain shop=== | ||
The bargain shop | The bargain shop sits just to the west of the [[Pokémon Center]]. The shopkeeper will sell the {{player}} one item per day for {{pdollar}}3,000. If asked, the shopkeeper will also tell the player which item the shop will sell the next day. If the player does not purchase the daily item from the bargain shop, the shop will sell that item the following day for {{pdollar}}5,000.<ref>https://x.com/Sibuna_Switch/status/1822789445625508139</ref> | ||
During the post-game, the shopkeeper gives the player various {{cat|legendary artifacts}} if the player owns the appropriate {{pkmn2|Legendary}} or [[Mythical Pokémon]]. | |||
<div class="mw-collapsible" style="width: -moz-fit-content; width: fit-content"> | <div class="mw-collapsible" style="width: -moz-fit-content; width: fit-content"> | ||
{{ | {| class="roundy" style="background: #{{locationcolor/med|mountain}}; border: 2px solid #{{locationcolor/dark|mountain}}" colspan=4 cellspacing="2" cellpadding="4" | ||
{{itemlist|Binding Band| | |- | ||
{{itemlist|Black Belt| | ! colspan="2" style="background: #{{locationcolor/light|mountain}}; color:#{{locationcolor/text|mountain}}; {{roundytl|5px}}" | Item | ||
{{itemlist|Black Glasses| | ! style="background: #{{locationcolor/light|mountain}}; color:#{{locationcolor/text|mountain}};" | Rarity | ||
{{itemlist|Black Sludge| | ! style="background: #{{locationcolor/light|mountain}}; color:#{{locationcolor/text|mountain}}; {{roundytr|5px}}" | Games | ||
{{itemlist|Charcoal| | {{itemlist|Binding Band|3%|Sw=yes|Sh=yes}} | ||
{{itemlist|Chipped Pot| | {{itemlist|Black Belt|1%|Sw=yes|Sh=yes|display={{i|Black Belt}}}} | ||
{{itemlist|Cracked Pot| | {{itemlist|Black Glasses|1%|Sw=yes|Sh=yes}} | ||
{{itemlist|Dragon Fang| | {{itemlist|Black Sludge|3%|Sw=yes|Sh=yes}} | ||
{{itemlist|Focus Band| | {{itemlist|Charcoal|3%|Sw=yes|Sh=yes}} | ||
{{itemlist|Magnet| | {{itemlist|Chipped Pot|3%|Sw=yes|Sh=yes}} | ||
{{itemlist|Metal Coat| | {{itemlist|Cracked Pot|20%|Sw=yes|Sh=yes}} | ||
{{itemlist|Metronome| | {{itemlist|Dragon Fang|3%|Sw=yes|Sh=yes}} | ||
{{itemlist|Miracle Seed| | {{itemlist|Focus Band|3%|Sw=yes|Sh=yes}} | ||
{{itemlist|Mystic Water| | {{itemlist|Magnet|1%|Sw=yes|Sh=yes}} | ||
{{itemlist|Never-Melt Ice| | {{itemlist|Metal Coat|5%|Sw=yes|Sh=yes}} | ||
{{itemlist|Pixie Plate| | {{itemlist|Metronome|3%|Sw=yes|Sh=yes|display={{i|Metronome}}}} | ||
{{itemlist|Poison Barb| | {{itemlist|Miracle Seed|3%|Sw=yes|Sh=yes}} | ||
{{itemlist|Protective Pads| | {{itemlist|Mystic Water|3%|Sw=yes|Sh=yes}} | ||
{{itemlist|Protector| | {{itemlist|Never-Melt Ice|1%|Sw=yes|Sh=yes}} | ||
{{itemlist|Quick Claw| | {{itemlist|Pixie Plate|1%|Sw=yes|Sh=yes}} | ||
{{itemlist|Razor Claw| | {{itemlist|Poison Barb|1%|Sw=yes|Sh=yes}} | ||
{{itemlist|Reaper Cloth| | {{itemlist|Protective Pads|3%|Sw=yes|Sh=yes}} | ||
{{itemlist|Ring Target| | {{itemlist|Protector|7%|Sw=yes|Sh=yes}} | ||
{{itemlist|Sharp Beak| | {{itemlist|Quick Claw|4%|Sw=yes|Sh=yes}} | ||
{{itemlist|Silk Scarf| | {{itemlist|Razor Claw|7%|Sw=yes|Sh=yes}} | ||
{{itemlist|Silver Powder| | {{itemlist|Reaper Cloth|7%|Sw=yes|Sh=yes}} | ||
{{itemlist|Spell Tag| | {{itemlist|Ring Target|3%|Sw=yes|Sh=yes}} | ||
{{itemlist|Twisted Spoon| | {{itemlist|Sharp Beak|3%|Sw=yes|Sh=yes}} | ||
{{itemlist|Silk Scarf|1%|Sw=yes|Sh=yes}} | |||
{{itemlist|Silver Powder|1%|Sw=yes|Sh=yes}} | |||
{{itemlist|Spell Tag|3%|Sw=yes|Sh=yes}} | |||
{{itemlist|Twisted Spoon|3%|Sw=yes|Sh=yes}} | |||
{{Itlistfoot|mountain}} | {{Itlistfoot|mountain}} | ||
</div> | </div> | ||
===Valuable item buyer=== | ===Valuable item buyer=== | ||
A man next to the bargain shop will buy one [[valuable item]] from the player per day at a higher price than what a [[Poké Mart]] would offer. The highest | A man next to the bargain shop will buy one [[valuable item]] from the player per day at a higher price than what a [[Poké Mart]] would offer. The highest purchase price difference — a {{PDollar}}17,500 increase from the normal price — is available for a [[Balm Mushroom]], [[Pearl String]], or [[Comet Shard]]. | ||
{{shop|Item buyer}} | {{shop|Item buyer}} | ||
| Line 90: | Line 98: | ||
===Pokémon Center=== | ===Pokémon Center=== | ||
The Stow-on-Side [[Pokémon Center]] is located in the southeast of the town, right next to the {{rt|6|Galar}} exit. | |||
====Poké Mart==== | ====Poké Mart==== | ||
As with all Pokémon Centers in Galar, the Stow-on-Side Pokémon Center contains a [[Poké Mart]]. | |||
{{shop|Cashier}} | {{shop|Cashier}} | ||
| Line 126: | Line 134: | ||
{{itemlist|TM Flying VI|From a {{tc|Cabbie}} in the house right below the stairs|Sw=yes|Sh=yes|display={{TM|06|Fly}}}} | {{itemlist|TM Flying VI|From a {{tc|Cabbie}} in the house right below the stairs|Sw=yes|Sh=yes|display={{TM|06|Fly}}}} | ||
{{itemlist|Cracked Pot|On the roof accessible via the ladder on the right side of the stairs|Sw=yes|Sh=yes}} | {{itemlist|Cracked Pot|On the roof accessible via the ladder on the right side of the stairs|Sw=yes|Sh=yes}} | ||
{{itemlist|Max Revive|On the left side of the first platform on the way to the mural ''(hidden)''|Sw=yes|Sh=yes}} | |||
{{itemlist|Revive|From [[Sonia]] after the mural collapses|Sw=yes|Sh=yes|display=[[Revive]] ×2}} | {{itemlist|Revive|From [[Sonia]] after the mural collapses|Sw=yes|Sh=yes|display=[[Revive]] ×2}} | ||
{{itemlist|Beast Ball|From the bargain shop keeper after becoming {{pkmn|Champion}}|Sw=yes|Sh=yes}} | {{itemlist|Beast Ball|From the bargain shop keeper after becoming {{pkmn|Champion}}|Sw=yes|Sh=yes}} | ||
{{itemlist|Soul Dew|From the bargain shop keeper, if the player owns a {{p|Latias}} or {{p|Latios}}|Sw=yes|Sh=yes}} | |||
{{itemlist|Adamant Orb|From the bargain shop keeper, if the player owns a {{p|Dialga}}|Sw=yes|Sh=yes}} | |||
{{itemlist|Lustrous Orb|From the bargain shop keeper, if the player owns a {{p|Palkia}}|Sw=yes|Sh=yes}} | |||
{{itemlist|Griseous Orb|From the bargain shop keeper, if the player owns a {{p|Giratina}}|Sw=yes|Sh=yes}} | |||
{{itemlist|Reveal Glass|From the bargain shop keeper, if the player owns a {{p|Tornadus}}, {{p|Thundurus}}, or {{p|Landorus}}|Sw=yes|Sh=yes}} | |||
{{itemlist|DNA Splicers|From the bargain shop keeper, if the player owns a {{p|Kyurem}}|Sw=yes|Sh=yes}} | {{itemlist|DNA Splicers|From the bargain shop keeper, if the player owns a {{p|Kyurem}}|Sw=yes|Sh=yes}} | ||
{{itemlist|Shock Drive|From the bargain shop keeper, if the player owns a {{p|Genesect}}|Sw=yes|Sh=yes}} | |||
{{itemlist|Burn Drive|From the bargain shop keeper, if the player owns a Genesect|Sw=yes|Sh=yes}} | |||
{{itemlist|Chill Drive|From the bargain shop keeper, if the player owns a Genesect|Sw=yes|Sh=yes}} | |||
{{itemlist|Douse Drive|From the bargain shop keeper, if the player owns a Genesect|Sw=yes|Sh=yes}} | |||
{{itemlist|Zygarde Cube|From the bargain shop keeper, if the player owns a {{p|Zygarde}}|Sw=yes|Sh=yes}} | |||
{{itemlist|N-Solarizer|From the bargain shop keeper, if the player owns a {{p|Necrozma}}|Sw=yes|Sh=yes}} | {{itemlist|N-Solarizer|From the bargain shop keeper, if the player owns a {{p|Necrozma}}|Sw=yes|Sh=yes}} | ||
{{itemlist|N-Lunarizer|From the bargain shop keeper, if the player owns a Necrozma|Sw=yes|Sh=yes}} | {{itemlist|N-Lunarizer|From the bargain shop keeper, if the player owns a Necrozma|Sw=yes|Sh=yes}} | ||
| Line 134: | Line 153: | ||
==Pokémon== | ==Pokémon== | ||
A man sitting on | A man sitting on a western building's rooftop will offer to trade the player his Hatenna{{sup/8|Sw}}/Impidimp{{sup/8|Sh}} [[nickname]]d "Fringe"{{sup/8|Sw}}/"Peepers"{{sup/8|Sh}} in exchange for a Maractus. | ||
{{catch/header/8|mountain|no}} | {{catch/header/8|mountain|no}} | ||
| Line 143: | Line 162: | ||
==Trainers== | ==Trainers== | ||
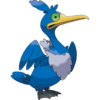
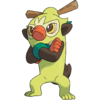
{{MSP|810|Grookey}} If the {{player}} chose {{p|Grookey}}:<br> | {{MSP/8|810|Grookey}} If the {{player}} chose {{p|Grookey}}:<br> | ||
{{Party/Single | {{Party/Single | ||
|color={{sword color}} | |color={{sword color}} | ||
| Line 162: | Line 181: | ||
|pokemon=Cramorant | |pokemon=Cramorant | ||
|gender=male | |gender=male | ||
|level= | |level=28 | ||
|type1=Flying | |type1=Flying | ||
|type2=Water | |type2=Water | ||
| Line 205: | Line 224: | ||
{{Party/Footer}} | {{Party/Footer}} | ||
{{MSP|813|Scorbunny}} If the {{player}} chose {{p|Scorbunny}}:<br> | {{MSP/8|813|Scorbunny}} If the {{player}} chose {{p|Scorbunny}}:<br> | ||
{{Party/Single | {{Party/Single | ||
|color={{sword color}} | |color={{sword color}} | ||
| Line 267: | Line 286: | ||
{{Party/Footer}} | {{Party/Footer}} | ||
{{MSP|816|Sobble}} If the {{player}} chose {{p|Sobble}}:<br> | {{MSP/8|816|Sobble}} If the {{player}} chose {{p|Sobble}}:<br> | ||
{{Party/Single | {{Party/Single | ||
|color={{sword color}} | |color={{sword color}} | ||
| Line 351: | Line 370: | ||
|type1=Psychic | |type1=Psychic | ||
|ability=Magic Guard | |ability=Magic Guard | ||
|move1=Light Screen|move1type=Psychic|move1cat= | |move1=Light Screen|move1type=Psychic|move1cat=Status | ||
|move2=Reflect|move2type=Psychic|move2cat=Status | |move2=Reflect|move2type=Psychic|move2cat=Status | ||
|move3=Psyshock|move3type=Psychic|move3cat=Special | |move3=Psyshock|move3type=Psychic|move3cat=Special | ||
| Line 387: | Line 406: | ||
|move2=Psybeam|move2type=Psychic|move2cat=Special}} | |move2=Psybeam|move2type=Psychic|move2cat=Special}} | ||
{{Party/Footer}} | {{Party/Footer}} | ||
==In the spin-off games== | |||
===[[Pokémon Masters EX]]=== | |||
Artwork depicting Stow-on-Side is seen in {{mas|Bede}}'s mindscape. | |||
{| style="background: #7B30B2; {{roundy}}; border: #7B30B2;" | |||
| | |||
{| style="background: #AB60E2; {{roundy}}; border: #AB60E2;" | |||
|- style="text-align:center" | |||
| | |||
{| style="background: #{{fairy color light}}; {{roundy}}; border: #{{fairy color light}}; padding: 0px 5px 5px 5px" | |||
|- | |||
|<big>'''{{color2|000|Bede (Masters)#Hatterene|Bede & Hatterene}}'''</big> | |||
|- | |||
| [[File:Bede Mindscape.png|200px]] | |||
|} | |||
|} | |||
|} | |||
==In the anime== | |||
[[File:Stow-on-Side anime.png|thumb|250px|Stow-on-Side in the {{pkmn|anime}}]] | |||
Stow-on-Side first appeared in ''[[JN043|Sword and Shield: The Darkest Day!]]'', where [[Sonia]] took [[Goh]] to visit the ancient mural. When they were about to leave, one of [[Oleana's subordinate]]s attacked them with his [[Gigantamax]] {{p|Garbodor}}. In response, Goh [[Dynamax]]ed his {{TP|Goh|Raboot}}. During the ensuing {{pkmn|battle}}, Raboot accidentally destroyed the mural, revealing a set of statues hidden behind it. The battle concluded in [[JN044|the next episode]], with Raboot defeating its opponent. After examining the statues and identifying them as {{p|Zacian}} and {{p|Zamazenta}}, Goh and Sonia headed to the [[Slumbering Weald]] to go find the two [[Legendary Pokémon]]. | |||
In ''[[JN045|Sword and Shield... The Legends Awaken!]]'', a {{rf|Galarian}} {{p|Yamask}} was shown to have involuntarily Dynamaxed at Stow-on-Side due to {{TP|Goh|Eternatus}}'s influence. Once Eternatus was defeated and the [[Darkest Day]] ended, it reverted back to normal. | |||
In ''[[JN085|Battle Three With Bea!]]'', {{Ash}} and Goh traveled to Stow-on-Side for Ash's [[World Coronation Series]] [[rematch]] against [[Bea]]. They were soon joined by {{an|Korrina}}, who declared that she was going to cheer for both Ash and Bea. The battle begun the next day and continued in [[JN086|the next episode]], ending with Ash as the victor. | |||
Ash and Goh arrived in Stow-on-Side once more at the end of ''[[JN091|The Spectral Express!]]''. In [[JN092|the next episode]], they visited [[Allister]]'s {{type|Ghost}} Gym to get help in [[Gigantamax]]ing [[Ash's Gengar]]. After collecting some [[Max Mushrooms]] with Allister's help and having him make {{DL|Master Dojo|Max Soup}} out of them, Ash was able to Gigantamax Gengar at the Stow-on-Side Stadium. | |||
In ''[[JN139|Must Be Our Heroes and the Witch!]]'', Ash and {{an|Misty}} visited Stow-on-Side, where they met {{an|Brock}} and {{an|Cilan}}. Brock had tried to impress a pretty young woman named [[Kathy]] by working for her at a local café, but was left heartbroken once he learned that she already had a boyfriend whom she was about to marry. Once Brock had gotten over his heartbreak following an adventure in [[Glimwood Tangle]], he decided to rejoin Ash and Misty on their travels, while Cilan headed back to [[Unova]]. | |||
===Gallery=== | |||
{| style="margin:auto; text-align:center; background: #E0C068; {{roundy}}; border: 3px solid #927D44" | |||
|- style="background:#EBD69D" | |||
! style="{{roundytl|5px}}" | Mural | |||
! Statues | |||
! {{color2|000|Stow-on-Side Stadium|Stadium}} | |||
! {{color2|000|Pokémon Center}} | |||
! style="{{roundytr|5px}}" | Ghost-type Gym | |||
|- style="background:#fff" | |||
| [[File:Stow-on-Side mural anime.png|200px]] | |||
| [[File:Stow-on-Side statues anime.png|200px]] | |||
| [[File:Stow-on-Side Stadium anime.png|200px]] | |||
| [[File:Stow-on-Side Pokémon Center.png|200px]] | |||
| [[File:Stow-on-Side Ghost Gym.png|200px]] | |||
|} | |||
==In the manga== | |||
===Pokémon Adventures=== | |||
[[File:Stow-on-Side Adventures.png|thumb|250px|Stow-on-Side in [[Pokémon Adventures]]]] | |||
===={{MangaArc|Sword & Shield}}==== | |||
Stow-on-Side first appeared in ''[[PASS13|Glittering!! The Tapestry in the Vault]]'', where {{Henry}}, {{Casey}}, [[Marvin]], and [[Professor Magnolia]] arrived there, accompanied by [[Opal]], whom they had met in [[Hammerlocke]]. After their arrival, Henry and Casey prepared to challenge [[Allister]] at the [[Stow-on-Side Stadium]], while Professor Magnolia headed to [[Ballonlea]] with Opal. | |||
After Henry had won his Gym battle in ''[[PASS14|Teary!! The Voice of the Master]]'', the local mural was attacked by [[Bede]], who was searching for [[Wishing Star]]s for [[Rose|Chairman Rose]]. However, Rose soon appeared in person, and, disappointed in Bede's actions, revoked his {{tc|Gym Challenger}} status. Later, Casey also challeged and successfully defeated Allister. | |||
In ''[[PASS20|Cracking!! Brilliant Tap-Dancing]]'', [[Sonia]] told Henry, Casey, and Marvin that the damage Bede had caused to the mural had resulted in it breaking apart completely, revealing statues of {{p|Zacian}} and {{p|Zamazenta}}. She theorized that the statues had been hidden in order to prevent the two Pokémon's involvement in the legend about Galar's history from being found out. In ''[[PASS28|Splash!! The Return of the Two Pokémon]]'', this was revealed to have been the work of [[Sordward]] and [[Shielbert]]'s family in order to make them seem like the true heroes. | |||
====Gallery==== | |||
{| style="margin:auto; text-align:center; background: #E0C068; {{roundy}}; border: 3px solid #927D44" | |||
|- style="background:#EBD69D" | |||
! style="{{roundytl|5px}}" | Stadium | |||
! Mural | |||
! style="{{roundytr|5px}}" | Statues | |||
|- style="background:#fff" | |||
| [[File:Stow-on-Side Stadium Adventures.png|250px]] | |||
| [[File:Stow-on-Side mural Adventures.png|200px]] | |||
| [[File:Stow-on-Side statues Adventures.png|200px]] | |||
|} | |||
==Trivia== | ==Trivia== | ||
* The street lamps are modeled after Chandelure. | * The street lamps here are modeled after {{p|Chandelure}}. | ||
* | * Stow-on-Side has similarities with [[Lentimas Town]] in [[Unova]]. | ||
===Name origin=== | ** Both are desert towns surrounded by mountains. | ||
** Both have architecture reminiscent of {{wp|Pueblo architecture|Native American}} or {{wp|Spanish Colonial architecture|Spanish colonial}} styles in the southwestern United States and northern Mexico. | |||
* Stow-on-Side is the only known location with hyphens in its English name. | |||
===Origin=== | |||
<!--{{main|Pokémon world in relation to the real world#Galar|Pokémon world in relation to the real world → Galar}}--> | |||
====Name origin==== | |||
{| class="roundy" style="background: #DA8A67; border: 3px solid #635147" | {| class="roundy" style="background: #DA8A67; border: 3px solid #635147" | ||
! Language | ! Language | ||
| Line 401: | Line 493: | ||
| From ''{{wp|lateral pass}}'' | | From ''{{wp|lateral pass}}'' | ||
|- style="background:#FFF" | |- style="background:#FFF" | ||
| English | | English, Brazilian<br>Portuguese, Polish | ||
| Stow-on-Side | | Stow-on-Side | ||
| From ''stow'' (British toponym for place) and ''onside'' (not {{wp|Offside (sport)|offside}}) or ''onside pass'' (lateral pass in Canadian football) | | From ''stow'' (British toponym for place) and ''onside'' (not {{wp|Offside (sport)|offside}}) or ''onside pass'' (lateral pass in Canadian football) | ||
| Line 433: | Line 525: | ||
|} | |} | ||
==References== | |||
{{reflist}} | |||
{{-}} | |||
{{Galar}}<br> | {{Galar}}<br> | ||
{{Project Cities and Towns notice}} | {{Project Cities and Towns notice}} | ||
[[Category:Sword and Shield locations]] | [[Category:Sword and Shield locations]] | ||
[[Category: | [[Category:Towns]] | ||
[[de:Passbeck]] | [[de:Passbeck]] | ||
Latest revision as of 20:35, 27 August 2024
| ||||||||||
| ||||||||||
Stow-on-Side Gym - Galar Gym #4Sw
| ||||||||||
Stow-on-Side Gym - Galar Gym #4Sh
| ||||||||||
| ||||||||||
Location 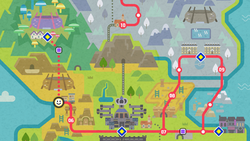 Location of Stow-on-Side in Galar. | ||||||||||
Stow-on-Side (Japanese: ラテラルタウン Lateral Town) is a town situated in the west-central Galar region. It connects to Route 6 in the east and Glimwood Tangle in the north. It houses the Stow-on-Side Stadium, the fourth Gym in Galar's Gym Challenge.
Slogan
A vibrant town that has grown up around an ancient mural tucked away in the mountains. (Japanese: 古代の 芸術を 中心に 栄えてきた 山間の 町 A town in the mountains that has flourished around ancient art.)
Places of interest
The upper, northern part of Stow-on-Side consists of a Y-shaped intersection of paths. The Stow-on-Side Stadium sits at the intersection; the western path, up the stairs, leads to the ancient mural; and the eastern path leads to Glimwood Tangle. The lower, southern part of Stow-on-Side consists of a wide market area that houses the bargain shop, valuable item buyer's stall, and a Pokémon Center.
Stow-on-Side Stadium
- Main article: Stow-on-Side Stadium
Stow-on-Side Stadium is the town's official Gym. In Pokémon Sword, it is led by the Fighting-type expert Bea, while in Pokémon Shield, its leader is the Ghost-type expert Allister.
Ancient mural
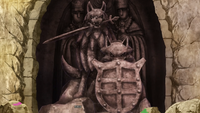
At the northernmost point of the town, up two flights of stairs, a colorful recreation of an ancient mural covers a large stone wall. During the game's story, Bede attempts to destroy the mural to find Wishing Stars, causing it to collapse. The mural's collapse reveals a hidden chamber that contains statues of Zacian, Zamazenta, and the Ancient Galarian kings.
Bargain shop
The bargain shop sits just to the west of the Pokémon Center. The shopkeeper will sell the player one item per day for $3,000. If asked, the shopkeeper will also tell the player which item the shop will sell the next day. If the player does not purchase the daily item from the bargain shop, the shop will sell that item the following day for $5,000.[1]
During the post-game, the shopkeeper gives the player various legendary artifacts if the player owns the appropriate Legendary or Mythical Pokémon.
| Item | Rarity | Games | |
|---|---|---|---|
| Binding Band | 3% | Sw Sh | |
| Black Belt | 1% | Sw Sh | |
| Black Glasses | 1% | Sw Sh | |
| Black Sludge | 3% | Sw Sh | |
| Charcoal | 3% | Sw Sh | |
| Chipped Pot | 3% | Sw Sh | |
| Cracked Pot | 20% | Sw Sh | |
| Dragon Fang | 3% | Sw Sh | |
| Focus Band | 3% | Sw Sh | |
| Magnet | 1% | Sw Sh | |
| Metal Coat | 5% | Sw Sh | |
| Metronome | 3% | Sw Sh | |
| Miracle Seed | 3% | Sw Sh | |
| Mystic Water | 3% | Sw Sh | |
| Never-Melt Ice | 1% | Sw Sh | |
| Pixie Plate | 1% | Sw Sh | |
| Poison Barb | 1% | Sw Sh | |
| Protective Pads | 3% | Sw Sh | |
| Protector | 7% | Sw Sh | |
| Quick Claw | 4% | Sw Sh | |
| Razor Claw | 7% | Sw Sh | |
| Reaper Cloth | 7% | Sw Sh | |
| Ring Target | 3% | Sw Sh | |
| Sharp Beak | 3% | Sw Sh | |
| Silk Scarf | 1% | Sw Sh | |
| Silver Powder | 1% | Sw Sh | |
| Spell Tag | 3% | Sw Sh | |
| Twisted Spoon | 3% | Sw Sh | |
Valuable item buyer
A man next to the bargain shop will buy one valuable item from the player per day at a higher price than what a Poké Mart would offer. The highest purchase price difference — a $17,500 increase from the normal price — is available for a Balm Mushroom, Pearl String, or Comet Shard.
| Item buyer | |||||||
|---|---|---|---|---|---|---|---|
|
| ||||||
|
| ||||||
|
| ||||||
|
| ||||||
|
| ||||||
Pokémon Center
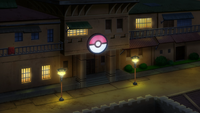
The Stow-on-Side Pokémon Center is located in the southeast of the town, right next to the Route 6 exit.
Poké Mart
As with all Pokémon Centers in Galar, the Stow-on-Side Pokémon Center contains a Poké Mart.
| Cashier | |||||||
|---|---|---|---|---|---|---|---|
|
| ||||||
|
| ||||||
|
| ||||||
|
| ||||||
|
| ||||||
|
| ||||||
|
| ||||||
|
| ||||||
|
| ||||||
|
|||||||
Demographics
Pokémon Sword and Shield
Stow-on-Side has a population of 44.
Items
| Item | Location | Games | |
|---|---|---|---|
| Dusk Stone | In a corner behind the Pokémon Center | Sw Sh | |
| Fossilized Bird ×2 | From a man on the left-hand side of the Pokémon Center | Sw | |
| Fossilized Drake ×2 | From a man on the left-hand side of the Pokémon Center | Sh | |
| Rare Bone ×3 | On the lower tier accessible via ladders in the south of town, next to a group of bags (hidden) | Sw Sh | |
| Rocky Helmet | On the lower tier accessible via ladders in the south of town | Sw Sh | |
| Metal Coat | On the roof accessible via the ladder in the west of the town (hidden) | Sw Sh | |
| TM74 (Venoshock) | On the roof accessible via the ladder in the west of the town | Sw Sh | |
| X Sp. Atk ×2 | To the left of the Bronzong (hidden) | Sw Sh | |
| Bea's League Card | From Opal after defeating Hop | Sw | |
| Allister's League Card | From Opal after defeating Hop | Sh | |
| TM06 (Fly) | From a Cabbie in the house right below the stairs | Sw Sh | |
| Cracked Pot | On the roof accessible via the ladder on the right side of the stairs | Sw Sh | |
| Max Revive | On the left side of the first platform on the way to the mural (hidden) | Sw Sh | |
| Revive ×2 | From Sonia after the mural collapses | Sw Sh | |
| Beast Ball | From the bargain shop keeper after becoming Champion | Sw Sh | |
| Soul Dew | From the bargain shop keeper, if the player owns a Latias or Latios | Sw Sh | |
| Adamant Orb | From the bargain shop keeper, if the player owns a Dialga | Sw Sh | |
| Lustrous Orb | From the bargain shop keeper, if the player owns a Palkia | Sw Sh | |
| Griseous Orb | From the bargain shop keeper, if the player owns a Giratina | Sw Sh | |
| Reveal Glass | From the bargain shop keeper, if the player owns a Tornadus, Thundurus, or Landorus | Sw Sh | |
| DNA Splicers | From the bargain shop keeper, if the player owns a Kyurem | Sw Sh | |
| Shock Drive | From the bargain shop keeper, if the player owns a Genesect | Sw Sh | |
| Burn Drive | From the bargain shop keeper, if the player owns a Genesect | Sw Sh | |
| Chill Drive | From the bargain shop keeper, if the player owns a Genesect | Sw Sh | |
| Douse Drive | From the bargain shop keeper, if the player owns a Genesect | Sw Sh | |
| Zygarde Cube | From the bargain shop keeper, if the player owns a Zygarde | Sw Sh | |
| N-Solarizer | From the bargain shop keeper, if the player owns a Necrozma | Sw Sh | |
| N-Lunarizer | From the bargain shop keeper, if the player owns a Necrozma | Sw Sh | |
Pokémon
A man sitting on a western building's rooftop will offer to trade the player his HatennaSw/ImpidimpSh nicknamed "Fringe"Sw/"Peepers"Sh in exchange for a Maractus.
| Pokémon | Games | Location | Levels | Rate | ||||||||||
|---|---|---|---|---|---|---|---|---|---|---|---|---|---|---|
| Special Pokémon | ||||||||||||||
| Sw | Sh | 30 | One | |||||||||||
| Sw | Sh | 30 | One | |||||||||||
| A colored background means that the Pokémon can be found in this location in the specified game. A white background with a colored letter means that the Pokémon cannot be found here. | ||||||||||||||
Trainers
|
|||||||||||||||||||||||||||||||||||||||||||||||||||||||||||||||||||||||||||||||||||||||||||||||||||||||||||||||||||||||||||||||||||||||||||
| |||||||||||||||||||||||||||||||||||||||||||||||||||||||||||||||||||||||||||||||||||||||||||||||||||||||||||||||||||||||||||||||||||||||||||
 If the player chose Scorbunny:
|
|||||||||||||||||||||||||||||||||||||||||||||||||||||||||||||||||||||||||||||||||||||||||||||||||||||||||||||||||||||||||||||||||||||||||||
| |||||||||||||||||||||||||||||||||||||||||||||||||||||||||||||||||||||||||||||||||||||||||||||||||||||||||||||||||||||||||||||||||||||||||||
|
|||||||||||||||||||||||||||||||||||||||||||||||||||||||||||||||||||||||||||||||||||||||||||||||||||||||||||||||||||||||||||||||||||||||||||
| |||||||||||||||||||||||||||||||||||||||||||||||||||||||||||||||||||||||||||||||||||||||||||||||||||||||||||||||||||||||||||||||||||||||||||
|
|||||||||||||||||||||||||||||||||||||||||||||||||||||||||||||||||||||||||||||||||||||||||||||||||||||||||||||||||||||||||||||||||||||||||
| |||||||||||||||||||||||||||||||||||||||||||||||||||||||||||||||||||||||||||||||||||||||||||||||||||||||||||||||||||||||||||||||||||||||||
In the spin-off games
Pokémon Masters EX
Artwork depicting Stow-on-Side is seen in Bede's mindscape.
|
In the anime
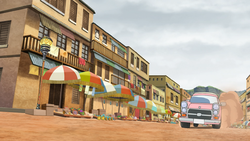
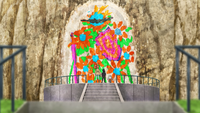
Stow-on-Side first appeared in Sword and Shield: The Darkest Day!, where Sonia took Goh to visit the ancient mural. When they were about to leave, one of Oleana's subordinates attacked them with his Gigantamax Garbodor. In response, Goh Dynamaxed his Raboot. During the ensuing battle, Raboot accidentally destroyed the mural, revealing a set of statues hidden behind it. The battle concluded in the next episode, with Raboot defeating its opponent. After examining the statues and identifying them as Zacian and Zamazenta, Goh and Sonia headed to the Slumbering Weald to go find the two Legendary Pokémon.
In Sword and Shield... The Legends Awaken!, a Galarian Yamask was shown to have involuntarily Dynamaxed at Stow-on-Side due to Eternatus's influence. Once Eternatus was defeated and the Darkest Day ended, it reverted back to normal.
In Battle Three With Bea!, Ash and Goh traveled to Stow-on-Side for Ash's World Coronation Series rematch against Bea. They were soon joined by Korrina, who declared that she was going to cheer for both Ash and Bea. The battle begun the next day and continued in the next episode, ending with Ash as the victor.
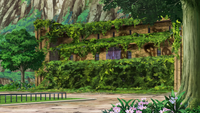
Ash and Goh arrived in Stow-on-Side once more at the end of The Spectral Express!. In the next episode, they visited Allister's Ghost-type Gym to get help in Gigantamaxing Ash's Gengar. After collecting some Max Mushrooms with Allister's help and having him make Max Soup out of them, Ash was able to Gigantamax Gengar at the Stow-on-Side Stadium.
In Must Be Our Heroes and the Witch!, Ash and Misty visited Stow-on-Side, where they met Brock and Cilan. Brock had tried to impress a pretty young woman named Kathy by working for her at a local café, but was left heartbroken once he learned that she already had a boyfriend whom she was about to marry. Once Brock had gotten over his heartbreak following an adventure in Glimwood Tangle, he decided to rejoin Ash and Misty on their travels, while Cilan headed back to Unova.
Gallery
| Mural | Statues | Stadium | Pokémon Center | Ghost-type Gym |
|---|---|---|---|---|
|
|

|
|
|
In the manga
Pokémon Adventures

Sword & Shield arc
Stow-on-Side first appeared in Glittering!! The Tapestry in the Vault, where Henry, Casey, Marvin, and Professor Magnolia arrived there, accompanied by Opal, whom they had met in Hammerlocke. After their arrival, Henry and Casey prepared to challenge Allister at the Stow-on-Side Stadium, while Professor Magnolia headed to Ballonlea with Opal.
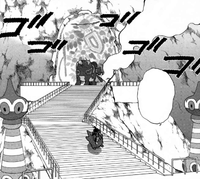
After Henry had won his Gym battle in Teary!! The Voice of the Master, the local mural was attacked by Bede, who was searching for Wishing Stars for Chairman Rose. However, Rose soon appeared in person, and, disappointed in Bede's actions, revoked his Gym Challenger status. Later, Casey also challeged and successfully defeated Allister.
In Cracking!! Brilliant Tap-Dancing, Sonia told Henry, Casey, and Marvin that the damage Bede had caused to the mural had resulted in it breaking apart completely, revealing statues of Zacian and Zamazenta. She theorized that the statues had been hidden in order to prevent the two Pokémon's involvement in the legend about Galar's history from being found out. In Splash!! The Return of the Two Pokémon, this was revealed to have been the work of Sordward and Shielbert's family in order to make them seem like the true heroes.
Gallery
| Stadium | Mural | Statues |
|---|---|---|

|
|

|
Trivia
- The street lamps here are modeled after Chandelure.
- Stow-on-Side has similarities with Lentimas Town in Unova.
- Both are desert towns surrounded by mountains.
- Both have architecture reminiscent of Native American or Spanish colonial styles in the southwestern United States and northern Mexico.
- Stow-on-Side is the only known location with hyphens in its English name.
Origin
Name origin
| Language | Name | Origin |
|---|---|---|
| Japanese | ラテラルタウン Lateral Town | From lateral pass |
| English, Brazilian Portuguese, Polish |
Stow-on-Side | From stow (British toponym for place) and onside (not offside) or onside pass (lateral pass in Canadian football) |
| German | Passbeck | From Pass, back, and beck (British toponym for stream) |
| Spanish | Pueblo Ladera | From ladera (slope) |
| French | Old Chister | From old and chistera (flick pass in rugby) |
| Italian | Latermore | From lateral and more (British toponym for large) |
| Korean | 래터럴마을 Lateral Maeul | From its Japanese name |
| Chinese (Mandarin) | 溯傳鎮 / 溯传镇 Sùchuán Zhèn | From 溯 sù / sou (to trace back) and 傳球 / 传球 chuánqiú / chyùhnkàuh (to pass the ball) |
| Chinese (Cantonese) | 溯傳鎮 Souchyùhn Jan |
References

|
This article is part of Project Cities and Towns, a Bulbapedia project that aims to write comprehensive articles on every city and town in the Pokémon world. |
