Brooklet Hill: Difference between revisions
m (→Pokémon) |
m (→Layout) |
||
| (24 intermediate revisions by 16 users not shown) | |||
| Line 30: | Line 30: | ||
! Ally Alomomola | ! Ally Alomomola | ||
|- | |- | ||
| Aura: {{stat|Defense}} | | Aura: +1 {{stat|Defense}} | ||
|- | |- style="vertical-align:top" | ||
|{{Pokémon/7 | |{{Pokémon/7 | ||
|ndex=746 | |ndex=746 | ||
| Line 77: | Line 77: | ||
Unlike other non-Totem [[SOS Battle]]s, the initially encountered trial Pokémon in the third lake will successfully call for help every turn as long as it does not already have an ally, even if it has a [[status condition]]; the Pokémon called as allies will not themselves call for help. The Pokémon encountered in the second lake do not call for help. | Unlike other non-Totem [[SOS Battle]]s, the initially encountered trial Pokémon in the third lake will successfully call for help every turn as long as it does not already have an ally, even if it has a [[status condition]]; the Pokémon called as allies will not themselves call for help. The Pokémon encountered in the second lake do not call for help. | ||
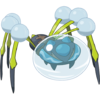
When the player enters the Totem's Den, they will see a small water splash in the center of the den, which Lana tells them is the Totem Pokémon. When initiating the battle with the Totem Pokémon, the overworld rain gets stronger throughout the whole area (although the regular rain condition still occurs in battle), remaining in effect until the player defeats the Totem Pokémon even if the player loses to it. In the battle with {{pkmn2|Totem}} {{p|Araquanid}}, it will call {{p|Dewpider}} on its first turn, and call {{p|Masquerain}} if its HP is below half (if the ally Dewpider has been defeated). If its HP drops below approximately 2/3 before it has a chance to call an ally, it will call Masquerain first, then call Dewpider at the first opportunity after Masquerain has fainted. Once an ally is defeated, Totem Araquanid cannot call it again. | When the player enters the Totem's Den, they will see a small water splash in the center of the den, which Lana tells them is the Totem Pokémon. When initiating the battle with the Totem Pokémon, the overworld rain gets stronger throughout the whole area (although the regular rain condition still occurs in battle), remaining in effect until the player defeats the Totem Pokémon even if the player loses to it. Though the Wishiwashi try to gather into their School Form, they are scattered by the arrival of a new {{pkmn2|Totem}} Pokémon, {{p|Araquanid}}. | ||
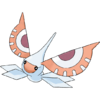
In the battle with {{pkmn2|Totem}} {{p|Araquanid}}, it will call {{p|Dewpider}} on its first turn, and call {{p|Masquerain}} if its HP is below half (if the ally Dewpider has been defeated). If its HP drops below approximately 2/3 before it has a chance to call an ally, it will call Masquerain first, then call Dewpider at the first opportunity after Masquerain has fainted. Once an ally is defeated, Totem Araquanid cannot call it again. | |||
After defeating the Totem Pokémon, the game cuts to Lana and the player talking on the shore. Lana gives the player a [[Waterium Z]] as a reward, as well as the [[Fishing Rod]] and ten [[Dive Ball]]s. After completing the trial, [[wild Pokémon]] will appear in the Brooklet Hill trial site and Totem's Den. | After defeating the Totem Pokémon, the game cuts to Lana and the player talking on the shore. Lana gives the player a [[Waterium Z]] as a reward, as well as the [[Fishing Rod]] and ten [[Dive Ball]]s. After completing the trial, [[wild Pokémon]] will appear in the Brooklet Hill trial site and Totem's Den. | ||
| Line 86: | Line 88: | ||
! Second lake: Northern splashes | ! Second lake: Northern splashes | ||
! Second lake: Southern splashes | ! Second lake: Southern splashes | ||
|- | |- style="vertical-align:top" | ||
|{{Pokémon/7 | |{{Pokémon/7 | ||
|ndex=751 | |ndex=751 | ||
| Line 114: | Line 116: | ||
! Third lake: Northern splashes | ! Third lake: Northern splashes | ||
! Third lake: Southern splashes | ! Third lake: Southern splashes | ||
|- | |- style="vertical-align:top" | ||
|{{Pokémon/7 | |{{Pokémon/7 | ||
|ndex=746 | |ndex=746 | ||
| Line 147: | Line 149: | ||
! Ally Masquerain | ! Ally Masquerain | ||
|- | |- | ||
| Aura: {{stat|Speed}} | | Aura: +1 {{stat|Speed}} | ||
|- | |- style="vertical-align:top" | ||
|{{Pokémon/7 | |{{Pokémon/7 | ||
|ndex=752 | |ndex=752 | ||
| Line 191: | Line 193: | ||
===Brooklet Hill proper=== | ===Brooklet Hill proper=== | ||
{{Itlisth|lake}} | {{Itlisth|lake}} | ||
{{Itemlist||From Lana upon starting the trial, at the trial gates|US=yes|UM=yes|display=[[Poké Ride|Lapras Paddle]]|sprite= | {{Itemlist||From Lana upon starting the trial, at the trial gates|US=yes|UM=yes|display=[[Poké Ride|Lapras Paddle]]|sprite=131MS6}} | ||
{{Itemlist|Net Ball|On the west bank of the lake near the Route 5 entrance|Su=yes|M=yes|US=yes|UM=yes}} | {{Itemlist|Net Ball|On the west bank of the lake near the Route 5 entrance|Su=yes|M=yes|US=yes|UM=yes}} | ||
{{Itemlist|Rare Candy|On a beach on the south side of the lake near the Route 5 entrance (requires [[Poké Ride|Lapras Paddle]] or [[Poké Ride|Sharpedo Jet]])|Su=yes|M=yes|US=yes|UM=yes}} | {{Itemlist|Rare Candy|On a beach on the south side of the lake near the Route 5 entrance (requires [[Poké Ride|Lapras Paddle]] or [[Poké Ride|Sharpedo Jet]])|Su=yes|M=yes|US=yes|UM=yes}} | ||
{{Itemlist|Elixir|At the southern tip of the bare patch next to the grass field closest to the Route 5 entrance ''(hidden)''|Su=yes|M=yes|US=yes|UM=yes}} | {{Itemlist|Elixir|At the southern tip of the bare patch next to the grass field closest to the Route 5 entrance ''(hidden)''|Su=yes|M=yes|US=yes|UM=yes}} | ||
{{Itemlist||From Lana at the water's edge|Su=yes|M=yes|display=[[Poké Ride|Lapras Paddle]]|sprite= | {{Itemlist||From Lana at the water's edge|Su=yes|M=yes|display=[[Poké Ride|Lapras Paddle]]|sprite=131MS6}} | ||
{{Itemlist|X Sp. Atk|In the northeast corner of the shore north of the second lake from the Route 5 entrance|Su=yes|M=yes|US=yes|UM=yes}} | {{Itemlist|X Sp. Atk|In the northeast corner of the shore north of the second lake from the Route 5 entrance|Su=yes|M=yes|US=yes|UM=yes}} | ||
{{Itemlist|Revive|On the southern shore of the second lake from the Route 5 entrance, on top of a Photo Spot|Su=yes|M=yes|US=yes|UM=yes}} | {{Itemlist|Revive|On the southern shore of the second lake from the Route 5 entrance, on top of a Photo Spot|Su=yes|M=yes|US=yes|UM=yes}} | ||
| Line 245: | Line 247: | ||
{{Catch/entry7|751|Dewpider|yes|yes|Surf|14-17|40%|-|type1=Water|type2=Bug}} | {{Catch/entry7|751|Dewpider|yes|yes|Surf|14-17|40%|-|type1=Water|type2=Bug}} | ||
{{Catch/div|lake|Fishing}} | {{Catch/div|lake|Fishing}} | ||
{{Catch/entry7|118|Goldeen|yes|yes|Fish|10-15|all=29%|type1=Water|allies={{ | {{Catch/entry7|118|Goldeen|yes|yes|Fish|10-15|all=29%|type1=Water|allies={{MSN|118|Goldeen}}<br>{{MSN|119|Seaking}}}} | ||
{{Catch/entry7|129|Magikarp|yes|yes|Fish|10-15|all=70%|type1=Water|allies={{ | {{Catch/entry7|129|Magikarp|yes|yes|Fish|10-15|all=70%|type1=Water|allies={{MSN|129|Magikarp}}<br>{{MSN|130|Gyarados}}}} | ||
{{Catch/entry7|349|Feebas|yes|yes|Fish|10-15|all=1%|type1=Water}} | {{Catch/entry7|349|Feebas|yes|yes|Fish|10-15|all=1%|type1=Water}} | ||
{{Catch/div|lake|Fishing at a bubbling spot}} | {{Catch/div|lake|Fishing at a bubbling spot}} | ||
{{Catch/entry7|118|Goldeen|yes|yes|Fish|10-15|all=45%|type1=Water|allies={{ | {{Catch/entry7|118|Goldeen|yes|yes|Fish|10-15|all=45%|type1=Water|allies={{MSN|118|Goldeen}}<br>{{MSN|119|Seaking}}}} | ||
{{Catch/entry7|129|Magikarp|yes|yes|Fish|10-15|all=50%|type1=Water|allies={{ | {{Catch/entry7|129|Magikarp|yes|yes|Fish|10-15|all=50%|type1=Water|allies={{MSN|129|Magikarp}}<br>{{MSN|130|Gyarados}}}} | ||
{{Catch/entry7|349|Feebas|yes|yes|Fish|10-15|all=5%|type1=Water}} | {{Catch/entry7|349|Feebas|yes|yes|Fish|10-15|all=5%|type1=Water}} | ||
{{Catch/div|land|Exclusively from {{color2|000|QR Scanner#Island Scan|Island Scan}}}} | {{Catch/div|land|Exclusively from {{color2|000|QR Scanner#Island Scan|Island Scan}}}} | ||
{{Catch/entry7|183|Marill|yes|yes|Grass|17|all={{tt|One|Knows Aqua Jet}}{{dotw|Sa}}|type1=Water|type2=Fairy|alliesna=N/A}} | {{Catch/entry7|183|Marill|yes|yes|Grass|17|all={{tt|One|Knows Aqua Jet}}{{dotw|Sa}}|type1=Water|type2=Fairy|alliesna=N/A}} | ||
| Line 267: | Line 266: | ||
{{Catch/entry7|456|Finneon|yes|yes|Surf|14-17|all=40%|type1=Water}} | {{Catch/entry7|456|Finneon|yes|yes|Surf|14-17|all=40%|type1=Water}} | ||
{{Catch/div|lake|Fishing}} | {{Catch/div|lake|Fishing}} | ||
{{Catch/entry7|129|Magikarp|yes|yes|Fish|10-15|all=79%|type1=Water|allies={{ | {{Catch/entry7|129|Magikarp|yes|yes|Fish|10-15|all=79%|type1=Water|allies={{MSN|129|Magikarp}}<br>{{MSN|130|Gyarados}}}} | ||
{{Catch/entry7|594|Alomomola|yes|yes|Fish|10-15|all=1%|type1=Water}} | {{Catch/entry7|594|Alomomola|yes|yes|Fish|10-15|all=1%|type1=Water}} | ||
{{Catch/entry7|746|Wishiwashi|yes|yes|Fish|10-15|all=20%|type1=Water}} | {{Catch/entry7|746|Wishiwashi|yes|yes|Fish|10-15|all=20%|type1=Water}} | ||
{{Catch/div|lake|Fishing at the bubbling spot}} | {{Catch/div|lake|Fishing at the bubbling spot}} | ||
{{Catch/entry7|129|Magikarp|yes|yes|Fish|10-15|all=50%|type1=Water|allies={{ | {{Catch/entry7|129|Magikarp|yes|yes|Fish|10-15|all=50%|type1=Water|allies={{MSN|129|Magikarp}}<br>{{MSN|130|Gyarados}}}} | ||
{{Catch/entry7|594|Alomomola|yes|yes|Fish|10-15|all=20%|type1=Water}} | {{Catch/entry7|594|Alomomola|yes|yes|Fish|10-15|all=20%|type1=Water}} | ||
{{Catch/entry7|746|Wishiwashi|yes|yes|Fish|10-15|all=30%|type1=Water}} | {{Catch/entry7|746|Wishiwashi|yes|yes|Fish|10-15|all=30%|type1=Water}} | ||
| Line 293: | Line 292: | ||
{{Catch/entryusum|751|Dewpider|yes|yes|Surf|14-17|40%|-|type1=Water|type2=Bug}} | {{Catch/entryusum|751|Dewpider|yes|yes|Surf|14-17|40%|-|type1=Water|type2=Bug}} | ||
{{Catch/div|lake|Fishing}} | {{Catch/div|lake|Fishing}} | ||
{{Catch/entryusum|118|Goldeen|yes|yes|Fish|10-16|all=30%|type1=Water|allies={{ | {{Catch/entryusum|118|Goldeen|yes|yes|Fish|10-16|all=30%|type1=Water|allies={{MSN|118|Goldeen}}<br>{{MSN|119|Seaking}}}} | ||
{{Catch/entryusum|129|Magikarp|yes|yes|Fish|10-16|all=44%|type1=Water|allies={{ | {{Catch/entryusum|129|Magikarp|yes|yes|Fish|10-16|all=44%|type1=Water|allies={{MSN|129|Magikarp}}<br>{{MSN|130|Gyarados}}}} | ||
{{Catch/entryusum|349|Feebas|yes|yes|Fish|10-16|all=1%|type1=Water}} | {{Catch/entryusum|349|Feebas|yes|yes|Fish|10-16|all=1%|type1=Water}} | ||
{{Catch/entryusum|550|Basculin|yes|no|Fish|10-16|all=25%|type1=Water|form=Red-Striped}} | {{Catch/entryusum|550|Basculin|yes|no|Fish|10-16|all=25%|type1=Water|form=Red-Striped}} | ||
{{Catch/entryusum|550B|Basculin|no|yes|Fish|10-16|all=25%|type1=Water|alliesna=N/A|form=Blue-Striped}} | {{Catch/entryusum|550B|Basculin|no|yes|Fish|10-16|all=25%|type1=Water|alliesna=N/A|form=Blue-Striped}} | ||
{{Catch/div|lake|Fishing at a bubbling spot}} | {{Catch/div|lake|Fishing at a bubbling spot}} | ||
{{Catch/entryusum|118|Goldeen|yes|yes|Fish|10-21|all=25%|type1=Water|allies={{ | {{Catch/entryusum|118|Goldeen|yes|yes|Fish|10-21|all=25%|type1=Water|allies={{MSN|118|Goldeen}}<br>{{MSN|119|Seaking}}}} | ||
{{Catch/entryusum|129|Magikarp|yes|yes|Fish|10-21|all=40%|type1=Water|allies={{ | {{Catch/entryusum|129|Magikarp|yes|yes|Fish|10-21|all=40%|type1=Water|allies={{MSN|129|Magikarp}}<br>{{MSN|130|Gyarados}}}} | ||
{{Catch/entryusum|349|Feebas|yes|yes|Fish|10-21|all=10%|type1=Water}} | {{Catch/entryusum|349|Feebas|yes|yes|Fish|10-21|all=10%|type1=Water}} | ||
{{Catch/entryusum|550|Basculin|yes|no|Fish|10-21|all=25%|type1=Water|form=Red-Striped}} | {{Catch/entryusum|550|Basculin|yes|no|Fish|10-21|all=25%|type1=Water|form=Red-Striped}} | ||
| Line 316: | Line 315: | ||
{{Catch/entryusum|456|Finneon|yes|yes|Surf|14-17|all=40%|type1=Water}} | {{Catch/entryusum|456|Finneon|yes|yes|Surf|14-17|all=40%|type1=Water}} | ||
{{Catch/div|lake|Fishing}} | {{Catch/div|lake|Fishing}} | ||
{{Catch/entryusum|129|Magikarp|yes|yes|Fish|10-16|all=55%|type1=Water|allies={{ | {{Catch/entryusum|129|Magikarp|yes|yes|Fish|10-16|all=55%|type1=Water|allies={{MSN|129|Magikarp}}<br>{{MSN|130|Gyarados}}}} | ||
{{Catch/entryusum|594|Alomomola|yes|yes|Fish|10-16|all=5%|type1=Water}} | {{Catch/entryusum|594|Alomomola|yes|yes|Fish|10-16|all=5%|type1=Water}} | ||
{{Catch/entryusum|746|Wishiwashi|yes|yes|Fish|10-16|all=40%|type1=Water}} | {{Catch/entryusum|746|Wishiwashi|yes|yes|Fish|10-16|all=40%|type1=Water}} | ||
{{Catch/div|lake|Fishing at the bubbling spot}} | {{Catch/div|lake|Fishing at the bubbling spot}} | ||
{{Catch/entryusum|129|Magikarp|yes|yes|Fish|10-21|all=40%|type1=Water|allies={{ | {{Catch/entryusum|129|Magikarp|yes|yes|Fish|10-21|all=40%|type1=Water|allies={{MSN|129|Magikarp}}<br>{{MSN|130|Gyarados}}}} | ||
{{Catch/entryusum|594|Alomomola|yes|yes|Fish|10-21|all=35%|type1=Water}} | {{Catch/entryusum|594|Alomomola|yes|yes|Fish|10-21|all=35%|type1=Water}} | ||
{{Catch/entryusum|746|Wishiwashi|yes|yes|Fish|10-21|all=25%|type1=Water}} | {{Catch/entryusum|746|Wishiwashi|yes|yes|Fish|10-21|all=25%|type1=Water}} | ||
{{Catch/footer|lake}} | {{Catch/footer|lake}} | ||
==Special encounters== | |||
===Pokémon Sun and Moon=== | |||
Two {{p|Wishiwashi}} that were raised by [[Lana]] are encountered here before the [[trial]]. | |||
They are coded to never be {{Shiny}}. | |||
{| | |||
|- style="vertical-align:top" | |||
|{{Pokémon/7 | |||
|ndex=746 | |||
|pokemon=Wishiwashi | |||
|gender=both | |||
|type1=Water | |||
|ability=Schooling | |||
|level=17 | |||
|move1=Helping Hand|move1type=Normal|move1cat=Status | |||
|move2=Feint Attack|move2type=Dark|move2cat=Physical | |||
|move3=Brine|move3type=Water|move3cat=Special | |||
|move4=Aqua Ring|move4type=Water|move4cat=Status}} | |||
|{{Pokémon/7 | |||
|ndex=746 | |||
|pokemon=Wishiwashi | |||
|gender=both | |||
|type1=Water | |||
|ability=Schooling | |||
|level=18 | |||
|move1=Helping Hand|move1type=Normal|move1cat=Status | |||
|move2=Feint Attack|move2type=Dark|move2cat=Physical | |||
|move3=Brine|move3type=Water|move3cat=Special | |||
|move4=Aqua Ring|move4type=Water|move4cat=Status}} | |||
|} | |||
==Trainers== | ==Trainers== | ||
| Line 329: | Line 359: | ||
====Brooklet Hill proper==== | ====Brooklet Hill proper==== | ||
{{trainerheader|lake}} | {{trainerheader|lake}} | ||
{{trainerentry|VSFisherman SM.png{{!}}150px|Fisherman|Hal|544<br><small>Requires [[Poké Ride|Lapras Paddle]] or [[Poké Ride| | {{trainerentry|VSFisherman SM.png{{!}}150px|game=7|Fisherman|Hal|544<br><small>Requires [[Poké Ride|Lapras Paddle]] or [[Poké Ride|Sharpedo Jet]]</small>|1|072|Tentacool|♂|17|None|36=ハルオ|37=Haruo}} | ||
{{trainerdiv|lake}} | {{trainerdiv|lake}} | ||
{{trainerentry|VSFisherman SM.png{{!}}150px|Fisherman|Ernest|544|2|339|Barboach|♂|16|None|118|Goldeen|♂|17|None|36=オキト|37=Okito}} | {{trainerentry|VSFisherman SM.png{{!}}150px|game=7|Fisherman|Ernest|544|2|339|Barboach|♂|16|None|118|Goldeen|♂|17|None|36=オキト|37=Okito}} | ||
{{trainerdiv|lake}} | {{trainerdiv|lake}} | ||
{{trainerentry|VSBackpacker F SM.png{{!}}150px|Backpacker|Mikiko|408|1|661|Fletchling|♀|17|None|36=ミチコ|37=Michiko}} | {{trainerentry|VSBackpacker F SM.png{{!}}150px|game=7|Backpacker|Mikiko|408|1|661|Fletchling|♀|17|None|36=ミチコ|37=Michiko}} | ||
{{trainerdiv|lake}} | {{trainerdiv|lake}} | ||
{{trainerentry|VSFisherman SM.png{{!}}150px|Fisherman|Herbert|544|1|060|Poliwag|♂|17|None|36=シュウヘイ|37=Shūhei}} | {{trainerentry|VSFisherman SM.png{{!}}150px|game=7|Fisherman|Herbert|544|1|060|Poliwag|♂|17|None|36=シュウヘイ|37=Shūhei}} | ||
{{trainerdiv|lake}} | {{trainerdiv|lake}} | ||
{{trainerentry|VSFisherman SM.png{{!}}150px|Fisherman|Carl|544<br><small>Requires [[Poké Ride|Lapras Paddle]] or [[Poké Ride| | {{trainerentry|VSFisherman SM.png{{!}}150px|game=7|Fisherman|Carl|544<br><small>Requires [[Poké Ride|Lapras Paddle]] or [[Poké Ride|Sharpedo Jet]]</small>|2|129|Magikarp|♂|16|None|129|Magikarp|♂|17|None|36=ケイジ|37=Keiji}} | ||
{{trainerfooter|lake|7}} | {{trainerfooter|lake|7}} | ||
| Line 392: | Line 422: | ||
====Brooklet Hill proper==== | ====Brooklet Hill proper==== | ||
{{trainerheader|lake}} | {{trainerheader|lake}} | ||
{{trainerentry|VSFisherman SM.png{{!}}150px|Fisherman|Hal|512<br><small>Requires [[Poké Ride|Lapras Paddle]] or [[Poké Ride| | {{trainerentry|VSFisherman SM.png{{!}}150px|game=7|Fisherman|Hal|512<br><small>Requires [[Poké Ride|Lapras Paddle]] or [[Poké Ride|Sharpedo Jet]]</small>|1|072|Tentacool|♂|16|None|36=ハルオ|37=Haruo}} | ||
{{trainerdiv|lake}} | {{trainerdiv|lake}} | ||
{{trainerentry|VSFisherman SM.png{{!}}150px|Fisherman|Ernest|512|2|339|Barboach|♂|16|None|118|Goldeen|♂|16|None|36=オキト|37=Okito}} | {{trainerentry|VSFisherman SM.png{{!}}150px|game=7|Fisherman|Ernest|512|2|339|Barboach|♂|16|None|118|Goldeen|♂|16|None|36=オキト|37=Okito}} | ||
{{trainerdiv|lake}} | {{trainerdiv|lake}} | ||
{{trainerentry|VSBackpacker F SM.png{{!}}150px|Backpacker|Mikiko|384|1|661|Fletchling|♀|16|None|36=ミチコ|37=Michiko}} | {{trainerentry|VSBackpacker F SM.png{{!}}150px|game=7|Backpacker|Mikiko|384|1|661|Fletchling|♀|16|None|36=ミチコ|37=Michiko}} | ||
{{trainerdiv|lake}} | {{trainerdiv|lake}} | ||
{{trainerentry|VSFisherman SM.png{{!}}150px|Fisherman|Herbert|512|1|060|Poliwag|♂|16|None|36=シュウヘイ|37=Shūhei}} | {{trainerentry|VSFisherman SM.png{{!}}150px|game=7|Fisherman|Herbert|512|1|060|Poliwag|♂|16|None|36=シュウヘイ|37=Shūhei}} | ||
{{trainerdiv|lake}} | {{trainerdiv|lake}} | ||
{{trainerentry|VSFisherman SM.png{{!}}150px|Fisherman|Carl|512<br><small>Requires [[Poké Ride|Lapras Paddle]] or [[Poké Ride| | {{trainerentry|VSFisherman SM.png{{!}}150px|game=7|Fisherman|Carl|512<br><small>Requires [[Poké Ride|Lapras Paddle]] or [[Poké Ride|Sharpedo Jet]]</small>|3|129|Magikarp|♂|16|None|129|Magikarp|♂|16|None|129|Magikarp|♂|16|None|36=ケイジ|37=Keiji}} | ||
{{trainerdiv|lake|After completing Lana's trial}} | {{trainerdiv|lake|After completing Lana's trial}} | ||
{{trainerentry|VSVeteran M SM.png{{!}}150px|Veteran|Johnny|1,672<br><small>During [[rain]]</small>|3|278|Wingull|♂|19|Damp Rock|458|Mantyke|♂|19|Damp Rock|339|Barboach|♂|19|Damp Rock|36=ジョニー|37=Johnny}} | {{trainerentry|VSVeteran M SM.png{{!}}150px|game=7|Veteran|Johnny|1,672<br><small>During [[rain]]</small>|3|278|Wingull|♂|19|Damp Rock|458|Mantyke|♂|19|Damp Rock|339|Barboach|♂|19|Damp Rock|36=ジョニー|37=Johnny}} | ||
{{trainerfooter|lake|7}} | {{trainerfooter|lake|7}} | ||
| Line 457: | Line 487: | ||
|move4=Frost Breath|move4type=Ice|move4cat=Special}} | |move4=Frost Breath|move4type=Ice|move4cat=Special}} | ||
{{Party/Footer}} | {{Party/Footer}} | ||
==Gallery== | |||
===Artwork=== | |||
{| style="margin:auto; text-align:center; {{roundy|20px}} border:2px solid #{{water color dark}}; background:#{{water color}}; font-size:80%" | |||
|style="{{roundy|5px}} border:2px solid #{{water color dark}}; background:#{{water color light}}"| [[File:Brooklet Hill SM Concept Art 2.jpg|x250px]] | |||
|style="{{roundy|5px}} border:2px solid #{{water color dark}}; background:#{{water color light}}"| [[File:Brooklet Hill SM Concept Art.jpg|x250px]] | |||
|- | |||
| colspan="2" | Concept art from {{color2|000|Pokémon Sun and Moon|Sun and Moon}} | |||
|} | |||
==Layout== | ==Layout== | ||
| Line 471: | Line 510: | ||
! style="background:#{{moon color}}" | {{color2|000|Pokémon Sun and Moon|Moon}} | ! style="background:#{{moon color}}" | {{color2|000|Pokémon Sun and Moon|Moon}} | ||
|- | |- | ||
! style="background:#{{Ultra sun color}}" | {{color2| | ! style="background:#{{Ultra sun color}}" | {{color2|FFF|Pokémon Ultra Sun and Ultra Moon|Ultra Sun}} | ||
| rowspan="2" | [[File:Brooklet Hill USUM.png|300px]] | | rowspan="2" | [[File:Brooklet Hill USUM.png|300px]] | ||
| rowspan="2" | [[File:Brooklet Hill Totem's Den USUM.png|300px]] | | rowspan="2" | [[File:Brooklet Hill Totem's Den USUM.png|300px]] | ||
|- | |- | ||
! style="background:#{{Ultra moon color}}" | {{color2| | ! style="background:#{{Ultra moon color}}" | {{color2|FFF|Pokémon Ultra Sun and Ultra Moon|Ultra Moon}} | ||
|- | |- | ||
| colspan="3" style="background:#{{Locationcolor/light|lake}}; {{roundybottom|5px}}" | | | colspan="3" style="background:#{{Locationcolor/light|lake}}; {{roundybottom|5px}}" | | ||
|} | |||
==In the spin-off games== | |||
===[[Pokémon Masters EX]]=== | |||
Artwork depicting Brooklet Hill is seen in {{mas|Lana}}'s mindscape. | |||
{| style="background: #7B30B2; {{roundy}}; border: #7B30B2;" | |||
| | |||
{| style="background: #AB60E2; {{roundy}}; border: #AB60E2;" | |||
|- style="text-align:center" | |||
| | |||
{| style="background: #{{water color light}}; {{roundy}}; border: #{{water color light}}; padding: 0px 5px 5px 5px" | |||
|- | |||
|<big>'''{{color2|000|Lana (Masters)#Araquanid|Lana & Araquanid}}'''</big> | |||
|- | |||
| [[File:Lana Mindscape.png|200px]] | |||
|} | |||
|} | |||
|} | |} | ||
| Line 499: | Line 555: | ||
==In the manga== | ==In the manga== | ||
[[File:Brooklet Hill Adventures.png|thumb|250px|Brooklet Hill in Pokémon Adventures]] | [[File:Brooklet Hill Adventures.png|thumb|250px|Brooklet Hill in [[Pokémon Adventures]]]] | ||
=== | ===Pokémon Adventures=== | ||
===={{MangaArc|Sun, Moon, Ultra Sun & Ultra Moon}}==== | |||
Brooklet Hill first appeared in ''[[PASM09|True Identity and the Totem Pokémon of Brooklet Hill]]''. [[Lana]] took {{adv|Sun}} there so that the latter could battle the [[Totem Pokémon]] causing havoc in the area. | Brooklet Hill first appeared in ''[[PASM09|True Identity and the Totem Pokémon of Brooklet Hill]]''. [[Lana]] took {{adv|Sun}} there so that the latter could battle the [[Totem Pokémon]] causing havoc in the area. | ||
There, Sun met and befriended a wild {{p|Wishiwashi}} that he decided to | There, Sun met and befriended a wild {{p|Wishiwashi}} that he decided to [[nickname]] Quarter. Sun asked Quarter to lead him to where the Totem was, only to waste several hours being shown the wrong Pokémon. Angered by this, Sun's {{p|Litten}}, {{adv|Dollar}}, tried to attack Quarter, causing it to get scared and flee. Shortly after, a school of Wishiwashi began to circle around Sun before leaping out of the water in their School Form, revealing to Sun that Quarter and the other Wishiwashi were the Totem the entire time. | ||
With the help of [[Cent]], Sun battled the Totem Pokémon. By having Cent attack Quarter, the Wishiwashi in control of the School Form, Sun caused the Totem to be reverted back into its component Solo Form Wishiwashi, defeating it and completing the trial. | With the help of [[Cent]], Sun battled the Totem Pokémon. By having Cent attack Quarter, the Wishiwashi in control of the School Form, Sun caused the Totem to be reverted back into its component Solo Form Wishiwashi, defeating it and completing the trial. Afterward, Sun formally added Quarter to his [[party]]. | ||
==In the TCG== | ==In the TCG== | ||
| Line 512: | Line 569: | ||
{{cardlist/header|Related cards|Water|char=yes}} | {{cardlist/header|Related cards|Water|char=yes}} | ||
{{cardlist/entry|cardname={{TCG ID|Alolan Moonlight|Brooklet Hill|50}}|type=Stadium|enset=Guardians Rising|enrarity=Uncommon|ennum=120/145|jpset=Alolan Moonlight|jprarity=U|jpnum=050/050|jpset2=GX Battle Boost|jprarity2=U|jpnum2=112/114|jpset3=Ultra Sun & Ultra Moon Premium Trainer Box|jpnum3=011/020}} | {{cardlist/entry|cardname={{TCG ID|Alolan Moonlight|Brooklet Hill|50}}|type=Stadium|enset=Guardians Rising|enrarity=Uncommon|ennum=120/145|jpset=Alolan Moonlight|jprarity=U|jpnum=050/050|jpset2=GX Battle Boost|jprarity2=U|jpnum2=112/114|jpset3=Ultra Sun & Ultra Moon Premium Trainer Box|jpnum3=011/020}} | ||
{{cardlist/entry|cardname={{TCG ID|Burning Shadows|Lana|117}}|type=Supporter|enset=Burning Shadows|enrarity=Uncommon|ennum=117/147|jpset=SM-P Promotional cards|jprarity=|jpnum=036/SM-P}} | |||
{{cardlist/footer|Water}} | {{cardlist/footer|Water}} | ||
| Line 535: | Line 593: | ||
|sv=Brooklet Hill | |sv=Brooklet Hill | ||
|th=เนินเขาสายธาร ''Brooklet Hill'' {{tt|*|TCG}} | |th=เนินเขาสายธาร ''Brooklet Hill'' {{tt|*|TCG}} | ||
|vi=Đồi Róc Rách | |||
}} | }} | ||
{{Alola}}<br> | {{Alola}}<br> | ||
Latest revision as of 02:50, 18 August 2024

|
This article is incomplete. Please feel free to edit this article to add missing information and complete it. Reason: Geography section |
| ||||
| ||||
| Map description: | The best fishing spot in the Alola region. Its series of cascading waterfalls make it look like a terrace field. | |||
|---|---|---|---|---|
| Location: | West of Route 5 | |||
| Region: | Alola | |||
| Generations: | VII | |||
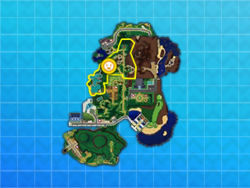 Location of Brooklet Hill in Alola. | ||||
| Pokémon world locations | ||||
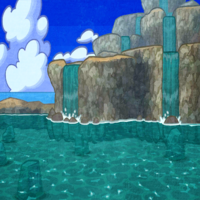
Brooklet Hill (Japanese: せせらぎの丘 Brooklet Hill) is a location on Akala Island in Alola, located west of Route 5. It is the location of Lana's trial.
Trial
Pokémon Sun and Moon
The trial begins as soon as the player walks through the trial gates (which are located immediately before the Totem's Den); however, the player can leave at any time with no impact on the trial, since the trial only includes the battle with the Totem Pokémon.
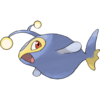
In this trial, the player must investigate the mysterious rippling water in the middle of the Totem's Den and defeat the Totem Pokémon. In the battle with Totem Wishiwashi, it will call Wishiwashi on its first turn, and call Alomomola if its HP is below half (if the ally Wishiwashi has been defeated). If its HP drops below approximately 2/3 before it has a chance to call an ally, it will call Alomomola first, then call Wishiwashi at the first opportunity after Alomomola has fainted. Once an ally is defeated, Totem Wishiwashi cannot call it again.
After defeating the Totem Pokémon, the game cuts to Lana and the player talking on the shore. Lana gives the player a Waterium Z as a reward, as well as the Fishing Rod and ten Dive Balls. After completing the trial, wild Pokémon will appear in the Totem's Den.
Trial Pokémon
Totem's Den
Unlike normal Wishiwashi, Totem Wishiwashi begins battle already in School Form. However, like normal Wishiwashi, if its HP drops below 25%, it will revert to Solo Form. The battle begins with rain in effect.
| Totem Wishiwashi | Ally Wishiwashi | Ally Alomomola | ||||||||||||||||||||||||||||||||||||||||||||||||||||||||||||||||||||||||||||||||||||||||||||||||
|---|---|---|---|---|---|---|---|---|---|---|---|---|---|---|---|---|---|---|---|---|---|---|---|---|---|---|---|---|---|---|---|---|---|---|---|---|---|---|---|---|---|---|---|---|---|---|---|---|---|---|---|---|---|---|---|---|---|---|---|---|---|---|---|---|---|---|---|---|---|---|---|---|---|---|---|---|---|---|---|---|---|---|---|---|---|---|---|---|---|---|---|---|---|---|---|---|---|---|
| Aura: +1 Defense | ||||||||||||||||||||||||||||||||||||||||||||||||||||||||||||||||||||||||||||||||||||||||||||||||||
|
|
| ||||||||||||||||||||||||||||||||||||||||||||||||||||||||||||||||||||||||||||||||||||||||||||||||
Pokémon Ultra Sun and Ultra Moon
The trial begins as soon as the player walks through the trial gates (which are located west of the first lake); however, the player can leave at any time with no impact on the trial.
In this trial, Lana requests that the player drive the Wishiwashi in Brooklet Hill's pools downstream in order to draw out the Totem Pokémon. The first lake is not part of the trial site. In both lakes within the trial site, each contains two water splashes, one containing a Dewpider and the other containing a Wishiwashi; to progress the trial, the player only needs to defeat the Wishiwashi (the Dewpider's water splashes disappear once the player completes the trial if they have not been defeated). Lana will not allow the player to proceed further south until they have defeated the Wishiwashi. Once the player sends both Wishiwashi downstream, it will start raining in all of Brooklet Hill, causing it to rain in all battles conducted there until the trial is complete.
Unlike other non-Totem SOS Battles, the initially encountered trial Pokémon in the third lake will successfully call for help every turn as long as it does not already have an ally, even if it has a status condition; the Pokémon called as allies will not themselves call for help. The Pokémon encountered in the second lake do not call for help.
When the player enters the Totem's Den, they will see a small water splash in the center of the den, which Lana tells them is the Totem Pokémon. When initiating the battle with the Totem Pokémon, the overworld rain gets stronger throughout the whole area (although the regular rain condition still occurs in battle), remaining in effect until the player defeats the Totem Pokémon even if the player loses to it. Though the Wishiwashi try to gather into their School Form, they are scattered by the arrival of a new Totem Pokémon, Araquanid.
In the battle with Totem Araquanid, it will call Dewpider on its first turn, and call Masquerain if its HP is below half (if the ally Dewpider has been defeated). If its HP drops below approximately 2/3 before it has a chance to call an ally, it will call Masquerain first, then call Dewpider at the first opportunity after Masquerain has fainted. Once an ally is defeated, Totem Araquanid cannot call it again.
After defeating the Totem Pokémon, the game cuts to Lana and the player talking on the shore. Lana gives the player a Waterium Z as a reward, as well as the Fishing Rod and ten Dive Balls. After completing the trial, wild Pokémon will appear in the Brooklet Hill trial site and Totem's Den.
Trial Pokémon
Brooklet Hill proper
| Second lake: Northern splashes | Second lake: Southern splashes | ||||||||||||||||||||||||||||||||||||||||||||||||||||||||||||||||||
|---|---|---|---|---|---|---|---|---|---|---|---|---|---|---|---|---|---|---|---|---|---|---|---|---|---|---|---|---|---|---|---|---|---|---|---|---|---|---|---|---|---|---|---|---|---|---|---|---|---|---|---|---|---|---|---|---|---|---|---|---|---|---|---|---|---|---|---|
|
| ||||||||||||||||||||||||||||||||||||||||||||||||||||||||||||||||||
| Third lake: Northern splashes | Third lake: Southern splashes | ||||||||||||||||||||||||||||||||||||||||||||||||||||||||||||||||||
|
| ||||||||||||||||||||||||||||||||||||||||||||||||||||||||||||||||||
Totem's Den
| Totem Araquanid | Ally Dewpider | Ally Masquerain | ||||||||||||||||||||||||||||||||||||||||||||||||||||||||||||||||||||||||||||||||||||||||||||||||||||||
|---|---|---|---|---|---|---|---|---|---|---|---|---|---|---|---|---|---|---|---|---|---|---|---|---|---|---|---|---|---|---|---|---|---|---|---|---|---|---|---|---|---|---|---|---|---|---|---|---|---|---|---|---|---|---|---|---|---|---|---|---|---|---|---|---|---|---|---|---|---|---|---|---|---|---|---|---|---|---|---|---|---|---|---|---|---|---|---|---|---|---|---|---|---|---|---|---|---|---|---|---|---|---|---|---|
| Aura: +1 Speed | ||||||||||||||||||||||||||||||||||||||||||||||||||||||||||||||||||||||||||||||||||||||||||||||||||||||||
|
|
| ||||||||||||||||||||||||||||||||||||||||||||||||||||||||||||||||||||||||||||||||||||||||||||||||||||||
Items
Brooklet Hill proper
| Item | Location | Games | |
|---|---|---|---|
| Lapras Paddle | From Lana upon starting the trial, at the trial gates | US UM | |
| Net Ball | On the west bank of the lake near the Route 5 entrance | S M US UM | |
| Rare Candy | On a beach on the south side of the lake near the Route 5 entrance (requires Lapras Paddle or Sharpedo Jet) | S M US UM | |
| Elixir | At the southern tip of the bare patch next to the grass field closest to the Route 5 entrance (hidden) | S M US UM | |
| Lapras Paddle | From Lana at the water's edge | S M | |
| X Sp. Atk | In the northeast corner of the shore north of the second lake from the Route 5 entrance | S M US UM | |
| Revive | On the southern shore of the second lake from the Route 5 entrance, on top of a Photo Spot | S M US UM | |
| Max Repel | Between the two grass fields, on the land south of the second lake from the Route 5 entrance (hidden) | S M US UM | |
| TM55 (Scald) | Past the grass field on the southeast side of the third lake from the Route 5 entrance | S M | |
| TM57 (Charge Beam) | Past the grass field on the southeast side of the third lake from the Route 5 entrance | US UM | |
Totem's Den
| Item | Location | Games | |
|---|---|---|---|
| Hyper Potion | At the southwestern end of the beach | S M US UM | |
| Waterium Z | From Lana after completing the trial | S M US UM | |
| Fishing Rod | From Lana after completing the trial | S M US UM | |
| Dive Ball ×10 | From Lana after completing the trial | S M US UM | |
Fishing
Sometimes when fishing, an item will be reeled in instead of a Pokémon.
| Item | Location | Games | |
|---|---|---|---|
| Heart Scale | Randomly reeled in when fishing | S M US UM | |
| Pearl | Randomly reeled in when fishing | S M US UM | |
| Big Pearl | Randomly reeled in when fishing | S M US UM | |
| Shell Bell | Randomly reeled in when fishing | US UM | |
Pokémon
Pokémon Sun and Moon
Brooklet Hill proper
| Pokémon | Allies | Games | Location | Levels | Rate | ||||||||||
|---|---|---|---|---|---|---|---|---|---|---|---|---|---|---|---|
| First field of grass | |||||||||||||||
|
S | M |
|
14-17 | 20% | - | |||||||||
|
S | M |
|
14-17 | 30% | ||||||||||
|
S | M |
|
14-17 | 10% | ||||||||||
|
S | M |
|
14-17 | 10% | ||||||||||
|
S | M |
|
14-17 | - | 10% | |||||||||
|
S | M |
|
14-17 | 20% | ||||||||||
|
S | M |
|
14-17 | 10% | - | |||||||||
|
S | M |
|
14-17 | - | 20% | |||||||||
| Fields of grass across second lake | |||||||||||||||
|
S | M |
|
14-17 | 30% | ||||||||||
|
S | M |
|
14-17 | 20% | ||||||||||
|
S | M |
|
14-17 | 30% | ||||||||||
|
S | M |
|
14-17 | - | 20% | |||||||||
|
S | M |
|
14-17 | 20% | - | |||||||||
| Surfing | |||||||||||||||
|
S | M |
|
14-17 | 20% | ||||||||||
|
S | M |
|
14-17 | 40% | ||||||||||
|
S | M |
|
14-17 | - | 40% | |||||||||
|
S | M |
|
14-17 | 40% | - | |||||||||
| Fishing | |||||||||||||||
|
S | M |
|
10-15 | 29% | ||||||||||
|
S | M |
|
10-15 | 70% | ||||||||||
|
S | M |
|
10-15 | 1% | ||||||||||
| Fishing at a bubbling spot | |||||||||||||||
|
S | M |
|
10-15 | 45% | ||||||||||
|
S | M |
|
10-15 | 50% | ||||||||||
|
S | M |
|
10-15 | 5% | ||||||||||
| Exclusively from Island Scan | |||||||||||||||
|
N/A | S | M |
|
17 | OneSa | |||||||||
| A colored background means that the Pokémon can be found in this location in the specified game. A white background with a colored letter means that the Pokémon cannot be found here. | |||||||||||||||
Totem's Den
Prior to completing the trial, wild Pokémon do not appear in Totem's Den (except trial Pokémon).
| Pokémon | Allies | Games | Location | Levels | Rate | ||||||||||
|---|---|---|---|---|---|---|---|---|---|---|---|---|---|---|---|
| Surfing | |||||||||||||||
|
S | M |
|
14-17 | 40% | ||||||||||
|
S | M |
|
14-17 | 20% | ||||||||||
|
S | M |
|
14-17 | 40% | ||||||||||
| Fishing | |||||||||||||||
|
S | M |
|
10-15 | 79% | ||||||||||
|
S | M |
|
10-15 | 1% | ||||||||||
|
S | M |
|
10-15 | 20% | ||||||||||
| Fishing at the bubbling spot | |||||||||||||||
|
S | M |
|
10-15 | 50% | ||||||||||
|
S | M |
|
10-15 | 20% | ||||||||||
|
S | M |
|
10-15 | 30% | ||||||||||
| A colored background means that the Pokémon can be found in this location in the specified game. A white background with a colored letter means that the Pokémon cannot be found here. | |||||||||||||||
Pokémon Ultra Sun and Ultra Moon
Brooklet Hill proper
Prior to completing the trial, wild Pokémon do not appear in the trial site (except trial Pokémon).
| Pokémon | Allies | Games | Location | Levels | Rate | ||||||||||
|---|---|---|---|---|---|---|---|---|---|---|---|---|---|---|---|
|
US | UM |
|
14-17 | 20% | - | |||||||||
|
US | UM |
|
14-17 | 20% | ||||||||||
|
US | UM |
|
14-17 | 20% | ||||||||||
|
US | UM |
|
14-17 | 20% | ||||||||||
|
US | UM |
|
14-17 | - | 20% | |||||||||
|
US | UM |
|
14-17 | 20% | - | |||||||||
|
US | UM |
|
14-17 | - | 20% | |||||||||
| Surfing | |||||||||||||||
|
US | UM |
|
14-17 | 20% | ||||||||||
|
US | UM |
|
14-17 | 40% | ||||||||||
|
US | UM |
|
14-17 | - | 40% | |||||||||
|
US | UM |
|
14-17 | 40% | - | |||||||||
| Fishing | |||||||||||||||
|
US | UM |
|
10-16 | 30% | ||||||||||
|
US | UM |
|
10-16 | 44% | ||||||||||
|
US | UM |
|
10-16 | 1% | ||||||||||
|
US | UM |
|
10-16 | 25% | ||||||||||
|
N/A | US | UM |
|
10-16 | 25% | |||||||||
| Fishing at a bubbling spot | |||||||||||||||
|
US | UM |
|
10-21 | 25% | ||||||||||
|
US | UM |
|
10-21 | 40% | ||||||||||
|
US | UM |
|
10-21 | 10% | ||||||||||
|
US | UM |
|
10-21 | 25% | ||||||||||
|
N/A | US | UM |
|
10-21 | 25% | |||||||||
| Exclusively from Island Scan | |||||||||||||||
|
N/A | US | UM |
|
17 | OneSa | |||||||||
| A colored background means that the Pokémon can be found in this location in the specified game. A white background with a colored letter means that the Pokémon cannot be found here. | |||||||||||||||
Totem's Den
Prior to completing the trial, wild Pokémon do not appear in Totem's Den (except trial Pokémon).
| Pokémon | Allies | Games | Location | Levels | Rate | ||||||||||
|---|---|---|---|---|---|---|---|---|---|---|---|---|---|---|---|
| Surfing | |||||||||||||||
|
US | UM |
|
14-17 | 40% | ||||||||||
|
US | UM |
|
14-17 | 20% | ||||||||||
|
US | UM |
|
14-17 | 40% | ||||||||||
| Fishing | |||||||||||||||
|
US | UM |
|
10-16 | 55% | ||||||||||
|
US | UM |
|
10-16 | 5% | ||||||||||
|
US | UM |
|
10-16 | 40% | ||||||||||
| Fishing at the bubbling spot | |||||||||||||||
|
US | UM |
|
10-21 | 40% | ||||||||||
|
US | UM |
|
10-21 | 35% | ||||||||||
|
US | UM |
|
10-21 | 25% | ||||||||||
| A colored background means that the Pokémon can be found in this location in the specified game. A white background with a colored letter means that the Pokémon cannot be found here. | |||||||||||||||
Special encounters
Pokémon Sun and Moon
Two Wishiwashi that were raised by Lana are encountered here before the trial.
They are coded to never be Shiny.
|
| ||||||||||||||||||||||||||||||||||||||||||||||||||||||||||||||||
Trainers
Pokémon Sun and Moon
Brooklet Hill proper
| Trainer | Pokémon | |||||||||||
|---|---|---|---|---|---|---|---|---|---|---|---|---|
|
| |||||||||||
|
| |||||||||||
| ||||||||||||
|
| |||||||||||
|
| |||||||||||
|
| |||||||||||
| ||||||||||||
- After Olivia's grand trial
After passing Olivia's grand trial, Lana will take the player here to battle them after the they've defeated her sisters in Konikoni City.
|
|||||||||||||||||||||||||||||||||||||||||||||||||||||||||||||||||||||||||||||||||||||||||||||||||||||||||||
| |||||||||||||||||||||||||||||||||||||||||||||||||||||||||||||||||||||||||||||||||||||||||||||||||||||||||||
Pokémon Ultra Sun and Ultra Moon
Brooklet Hill proper
| Trainer | Pokémon | |||||||||||
|---|---|---|---|---|---|---|---|---|---|---|---|---|
|
| |||||||||||
|
| |||||||||||
| ||||||||||||
|
| |||||||||||
|
| |||||||||||
|
| |||||||||||
| ||||||||||||
| ||||||||||||
| After completing Lana's trial | ||||||||||||
|
| |||||||||||
| ||||||||||||
| ||||||||||||
Post-game
After becoming Champion, Lana will take the player here to battle them after the they've defeated her sisters in Konikoni City.
|
||||||||||||||||||||||||||||||||||||||||||||||||||||||||||||||||||||||||||||||||||||||||||||||||||||||||||
| ||||||||||||||||||||||||||||||||||||||||||||||||||||||||||||||||||||||||||||||||||||||||||||||||||||||||||
Gallery
Artwork

|

|
| Concept art from Sun and Moon | |
Layout
| Game | Brooklet Hill proper | Totem's Den |
|---|---|---|
| Sun | 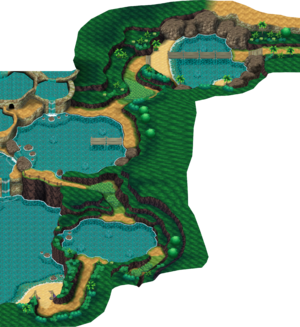
|

|
| Moon | ||
| Ultra Sun | 
|

|
| Ultra Moon | ||
In the spin-off games
Pokémon Masters EX
Artwork depicting Brooklet Hill is seen in Lana's mindscape.
|
In the anime

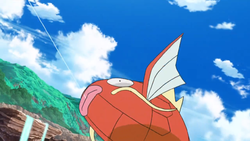
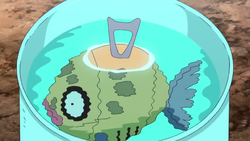
Brooklet Hill appeared in Big Sky, Small Fry! as the main setting of the episode. At the beginning of the episode, Team Rocket was seen fishing there in search for the local Totem Pokémon, but was soon taken away by Bewear. After hearing about the Totem Pokémon from Olivia, Ash and Lana traveled to Brooklet Hill as well. There, they encountered a master fisherman, who offered them his guidance and help in their search for the Totem.
Soon enough, Lana was able to hook up the Totem Pokémon, a School Form Wishiwashi, which she proceeded to battle with her Popplio. Thanks to Ash dealing with Wishiwashi's ally Alomomola and Popplio learning Aqua Jet, Lana was able to defeat the Totem Pokémon, earning herself a Waterium Z as a reward.
Pokémon found at Brooklet Hill
 Magikarp |
 Alomomola |
 Wishiwashi |
 Wishiwashi |
 Feebas |
In the manga

Pokémon Adventures
Sun, Moon, Ultra Sun & Ultra Moon arc
Brooklet Hill first appeared in True Identity and the Totem Pokémon of Brooklet Hill. Lana took Sun there so that the latter could battle the Totem Pokémon causing havoc in the area.
There, Sun met and befriended a wild Wishiwashi that he decided to nickname Quarter. Sun asked Quarter to lead him to where the Totem was, only to waste several hours being shown the wrong Pokémon. Angered by this, Sun's Litten, Dollar, tried to attack Quarter, causing it to get scared and flee. Shortly after, a school of Wishiwashi began to circle around Sun before leaping out of the water in their School Form, revealing to Sun that Quarter and the other Wishiwashi were the Totem the entire time.
With the help of Cent, Sun battled the Totem Pokémon. By having Cent attack Quarter, the Wishiwashi in control of the School Form, Sun caused the Totem to be reverted back into its component Solo Form Wishiwashi, defeating it and completing the trial. Afterward, Sun formally added Quarter to his party.
In the TCG
This listing is of cards mentioning or featuring Brooklet Hill in the Pokémon Trading Card Game.
| Related cards Cards listed with a blue background are only legal to use in the current Expanded format. Cards listed with a green background are legal to use in both the current Standard and Expanded formats. | |||||||
|---|---|---|---|---|---|---|---|
| Card | Type | English Expansion |
Rarity | # | Japanese Expansion |
Rarity | # |
| Brooklet Hill | St | Guardians Rising | 120/145 | Alolan Moonlight | 050/050 | ||
| GX Battle Boost | 112/114 | ||||||
| Ultra Sun & Ultra Moon Premium Trainer Box | 011/020 | ||||||
| Lana | Su | Burning Shadows | 117/147 | SM-P Promotional cards | 036/SM-P | ||
Trivia
- The Alomomola that the Totem Wishiwashi calls knows Water Gun, which Alomomola cannot learn.
In other languages
| ||||||||||||||||||||||||||||||||||||||||||||||||||||||||

|
This article is part of Project Locations, a Bulbapedia project that aims to write comprehensive articles on every location in the Pokémon world. |


