Max Raid Battle: Difference between revisions
(Added level) |
|||
| Line 674: | Line 674: | ||
===Special Max Raid Battles=== | ===Special Max Raid Battles=== | ||
{{spoilers}} | {{spoilers}} | ||
{{incomplete|section| | {{incomplete|section|Prerequisites for Greedent raid}} | ||
In the climax of {{g|Sword and Shield}}, as well as several times in the post-game story involving [[Sordward]] and [[Shielbert]], the player will participate in Max Raid Battles required to progress the story. In these battles, the player will have access to their full party. Initially, the player will be paired with special NPC partners, but eventually, the player will be challenged to fight their opponents by themselves. | In the climax of {{g|Sword and Shield}}, as well as several times in the post-game story involving [[Sordward]] and [[Shielbert]] and in the {{g|Sword and Shield Expansion Pass}}, the player will participate in Max Raid Battles that are often required to progress the story. In these battles, the player will have access to their full party. Initially, the player will be paired with special NPC partners, but eventually, the player will be challenged to fight their opponents by themselves. | ||
These | These special Max Raid Battles experience some differences compared to the Max Raid Battles available in the Wild Area, greater Isle of Armor, and greater Crown Tundra. The battles are do not have a 10-turn time limit, nor will they be forcibly ended after Pokémon have fainted 4 times. The player is also not limited to a single Pokémon, and may use their full party in the manner of a normal battle; fainted Pokémon will not automatically be revived, and the Cheer option is unavailable. | ||
====[[Tower summit]]==== | ====[[Tower summit]]==== | ||
| Line 1,032: | Line 1,032: | ||
====Honeycalm Island==== | ====Honeycalm Island==== | ||
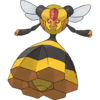
In [[The Isle of Armor]] storyline, after evolving {{p|Kubfu}} and completing the Sordward and Shielbert storyline, the player and Hop's search for an ingredient that will make {{DL|Master Dojo|Max Soup}} appetizing for {{p|Urshifu}} leads them to [[Honeycalm Island]]. Prompted to shake the giant tree in the center, the player is swept away into a [[Pokémon Den]] alone against a Dynamax {{p|Vespiquen}}. Defeating it yields the [[Max Honey]] neccessary for Urshifu's soup. | In [[The Isle of Armor]] storyline, after evolving {{p|Kubfu}} and completing the Sordward and Shielbert storyline, the player and Hop's search for an ingredient that will make {{DL|Master Dojo|Max Soup}} appetizing for {{p|Urshifu}} leads them to [[Honeycalm Island]]. Prompted to shake the giant tree in the center, the player is swept away into a [[Pokémon Den]] alone against a Dynamax {{p|Vespiquen}}. Defeating it yields the [[Max Honey]] neccessary for Urshifu's soup. This Vespiquen cannot be caught once defeated. | ||
{{Pokémon/8 | {{Pokémon/8 | ||
| Line 1,046: | Line 1,046: | ||
|move3=Defend Order|move3type=Bug|move3cat=Status | |move3=Defend Order|move3type=Bug|move3cat=Status | ||
|move4=Attack Order|move4type=Bug|move4cat=Physical | |move4=Attack Order|move4type=Bug|move4cat=Physical | ||
}} | |||
====Dyna Tree Hill==== | |||
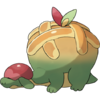
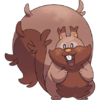
In the [[Crown Tundra]], interacting with the giant tree at [[Dyna Tree Hill]] will take the player into a [[Pokémon Den]] alone against a Dynamax {{p|Greedent}}. Defeating it yields a total of 82 [[Berries]] of various types. This Greedent cannot be caught once defeated. | |||
{{Pokémon/8 | |||
|ndex=820 | |||
|pokemon=Greedent | |||
|type1=Normal | |||
|ability=Cheek Pouch | |||
|level=90<br><small>{{color2|000|Dynamax}}</small> | |||
|move1=Body Slam|move1type=Normal|move1cat=Physical | |||
|move2=Counter|move2type=Fighting|move2cat=Physical | |||
|move3=Payback|move3type=Dark|move3cat=Physical | |||
|move4=Giga Impact|move4type=Normal|move4cat=Physical | |||
}} | }} | ||
Revision as of 19:41, 1 November 2020

A Max Raid Battle (Japanese: マックスレイドバトル Max Raid Battle) is a Pokémon battle in which four Trainers battle a wild Dynamax/Gigantamax Pokémon, which remains Dynamaxed or Gigantamaxed for the whole battle.
In the games
The player can start a Max Raid Battle by interacting with an active Pokémon Den, indicated by a beam of light shooting up from it. If a den is inactive, the player can throw a Wishing Piece into it to summon a Dynamax Pokémon.
When starting a Max Raid Battle, players can see a silhouette of the Dynamax Pokémon, its types, and a star rating of its difficulty. The current weather is also displayed. The loss condition, "The battle ends when Pokémon faint four times or the battle lasts for 10 turns", is displayed in the lower left corner. Additionally, the player can see the other three Trainers participating and the Pokémon they have selected to enter. Players have a time limit to select their Pokémon before the Max Raid Battle automatically starts with the Pokémon they have selected by default.
Players can only find up to three different star ratings at a time in their own dens, depending on their game progress:
| Star Level | HP Multiplier | Starts Appearing | Stops Appearing |
|---|---|---|---|
| ★ | 1.4× | Enter Wild Area | Obtain 4 Badges |
| ★★ | 1.6× | Obtain 1 Badge | Obtain 6 Badges |
| ★★★ | 1.9× | Obtain 3 Badges | Never |
| ★★★★ | 2.5× | Obtain 6 Badges | Never |
| ★★★★★ | 3.0× | Obtain 8 Badges | Never |
Four Trainers are required to conduct a Max Raid Battle. The player can connect with other players to challenge a Max Raid Battle by using the Y-Comm over the internet or local wireless. If there are less than four players, then the game will randomly select NPC Trainers to fill in the remaining slots.
Battle
Each Trainer uses a single Pokémon (from either their party or Box) against the Dynamax Pokémon. If a Trainer's Pokémon faints, they can cheer on the remaining Trainers as they attempt to complete the Max Raid Battle, which has the potential to generate positive effects such as healing or setting up Reflect; the fainted Pokémon will automatically be revived at full health the following turn. If the challengers' Pokémon faint a total of 4 times (even if it is the same Pokémon) or if the 10-turn limit is reached, the Max Raid Battle is lost. If both the Dynamax Pokémon and the 4th challenger Pokémon are knocked out in the same move (such as through the recoil effects of moves such as Brave Bird), the battle is counted as a loss for the challengers. If the Dynamax Pokémon is successfully defeated, all four Trainers can attempt to catch the Dynamax Pokémon and receive several various rewards based on the Dynamax Pokémon that was encountered. A Max Raid Battle can be repeatedly attempted until either the player wins (regardless of capture success) or when the dens reset.
Only one Trainer can Dynamax their Pokémon during a Max Raid Battle; unlike the wild Dynamax Pokémon, this transformation only lasts for the normal three turns. Each turn, one Trainer receives Dynamax Energy; only that player can Dynamax that turn, and if they do not, this energy is passed to another player next turn. The order is based on the order of which players joined the raid, so the player who hosts the Max Raid Battle will always be the first to have the option to Dynamax.
Depending on the star level, the Dynamax Pokémon may be able to use regular moves in addition to Max Moves. It can also attack up to three times per turn and create a shockwave, which cancels the effect of the players' Abilities and stat changes, while curing itself of non-volatile status conditions.
In three-star Max Raids and higher, the wild Dynamax Pokémon have specific HP thresholds in which they will create a protective barrier with two to eight segments, depending on its defensive power. In three- and four-star Max Raids, the Dynamax Pokémon will create a barrier one time; in five-star Max Raids, it will create a barrier twice, sometimes with the first barrier at the start of the battle. While this barrier is active, damage-dealing moves used against the Dynamax Pokémon are severely weakened and are unable to apply secondary effects, and status moves used against the Dynamax Pokémon will fail. Damage-dealing moves will deplete one bar of the barrier's strength, except Max Moves and one-hit knockout moves which instead deplete two bars. When the barrier runs out of bars, the barrier is destroyed, the Dynamax Pokémon's Defense and Special Defense will drop by two stages, and it takes a portion of the damage it would have received while its barriers were active.
Some moves work differently when raid bosses use them. For instance, Belch will work regardless of Berries, and moves with a charging turn (such as Dig) will attack immediately.
The following moves will fail if used in a Max Raid Battle:
Capture

|
This section is incomplete. Please feel free to edit this section to add missing information and complete it. Reason: Exact mechanics of catch rate for Wild Area News Gigantamax |
Upon defeating the Dynamax Pokémon, each player has a single chance to capture it. As a rule, the host's capture chance is higher than that of the guests. Should the capture fail, the Pokémon will disappear. Regardless of the attempt's success (or if the player declined to catch it), all players will be awarded Exp. Candies, TRs, and other items based on the Pokémon that was fought.
The caught Pokémon's moves and Ability will be the same as it was during the Max Raid Battle; some Dynamax Pokémon encountered in Max Raid Battles will have their Hidden Ability. If it was a Gigantamax Pokémon, the caught Pokémon will have the Gigantamax Factor. Pokémon caught in Max Raid Battles will also have a number of stats with the maximum 31 IVs and have increased their Dynamax Levels, increasingly with the Max Raid's difficulty.
The catch rate for a Dynamax Pokémon depends on several factors, such as whether the player is hosting the raid and whether the raid is from a Wild Area News event. They are all calculated with the Pokémon at 1 HP and no status conditions. If the Pokémon escapes, the host player may restart the game before it autosaves and reattempt the Max Raid.
| Gigantamax | Catch rate | ||
|---|---|---|---|
| Host | Guest | Wild Area News | |
| No | 255 | Species' | Species' |
| Yes | 255 | 3 | Unknown |
Trainers
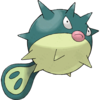
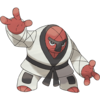
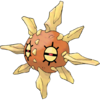
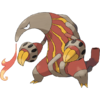
If less than four players initiate a Max Raid Battle, a random selection of these NPC Trainers will populate the vacant positions. The level of their Pokémon is set to 70% of the host player's Pokémon (rounded down), hence a maximum of Lv. 70 if the host player's Pokémon is Lv. 100. KlaraSw and AverySh only appear in Isle of Armor.
|
|
|
| ||||||||||||||||||||||||||||||||||||||||||||||||||||||||||||||||||||||||||||||||||||||||||||||||||||||||||||||||||||||||||||||||||||||||||||||||||||||||||||||||||||||||||||||||||||||||||
|
|
|
| ||||||||||||||||||||||||||||||||||||||||||||||||||||||||||||||||||||||||||||||||||||||||||||||||||||||||||||||||||||||||||||||||||||||||||||||||||||||||||||||||||||||||||||||||||||||||||
|
|
|
| ||||||||||||||||||||||||||||||||||||||||||||||||||||||||||||||||||||||||||||||||||||||||||||||||||||||||||||||||||||||||||||||||||||||||||||||||||||||||||||||||||||||||||||||||||||||||||
|
|
|
| ||||||||||||||||||||||||||||||||||||||||||||||||||||||||||||||||||||||||||||||||||||||||||||||||||||||||||||||||||||||||||||||||||||||||||||||||||||||||||||||||||||||||||||||||||||||||||
|
|
|
| ||||||||||||||||||||||||||||||||||||||||||||||||||||||||||||||||||||||||||||||||||||||||||||||||||||||||||||||||||||||||||||||||||||||||||||||||||||||||||||||||||||||||||||||||||||||||||
Isle of Armor
|
|
|
| ||||||||||||||||||||||||||||||||||||||||||||||||||||||||||||||||||||||||||||||||||||||||||||||||||||||||||||||||||||||||||||||||||||||||||||||||||||||||||||||||||||||||||||||||||||||||||
Special Max Raid Battles

|
This section is incomplete. Please feel free to edit this section to add missing information and complete it. Reason: Prerequisites for Greedent raid |
In the climax of Pokémon Sword and Shield, as well as several times in the post-game story involving Sordward and Shielbert and in the Pokémon Sword and Shield Expansion Pass, the player will participate in Max Raid Battles that are often required to progress the story. In these battles, the player will have access to their full party. Initially, the player will be paired with special NPC partners, but eventually, the player will be challenged to fight their opponents by themselves.
These special Max Raid Battles experience some differences compared to the Max Raid Battles available in the Wild Area, greater Isle of Armor, and greater Crown Tundra. The battles are do not have a 10-turn time limit, nor will they be forcibly ended after Pokémon have fainted 4 times. The player is also not limited to a single Pokémon, and may use their full party in the manner of a normal battle; fainted Pokémon will not automatically be revived, and the Cheer option is unavailable.
Tower summit
In this semi-scripted Max Raid Battle, the player and Hop will try to fight Eternatus in its Eternamax form, but will be unable to do anything against it until they summon Zacian and Zamazenta with the Rusted Sword and Shield they found in the Slumbering Weald. The player cannot Dynamax their Pokémon in this fight. After the battle, the player will catch Eternatus in a Poké Ball of their choice, with a 100% guaranteed success rate.
|
| ||||||||||||||||||||
| Eternatus Lv.60 | |||||||||||||||||||||
| |||||||||||||||||||||
Sordward and Shielbert
While the player and Hop pursue Sordward and Shielbert, they force these Pokémon to Dynamax in each Stadium in Galar. The player is tasked with defeating these Pokémon, which belong to Gym Trainers, to take them out of their frenzied state and restore safety to the area. Because these Pokémon belong to Trainers, the player does not have the opportunity to catch them.
The first Stadium attacked is Turffield's, then both Hulbury and Motostoke Stadiums. The player cooperates with Hop, Piers, and each Stadium's Gym Leader to resolve the crisis. After the player defeats all three and confronts the brothers in Wedgehurst, they'll cause more disruptions in the Stadiums in Stow-on-Side, Ballonlea, Circhester, and Hammerlocke. This time, multiple Dynamaxed Pokémon will attack each stadium, and the player and their friends will need to split up to deal with one of them each, with the exception of Ballonlea Stadium, where they discover that Bede took care of them all by himself.
| Turffield Stadium | Hulbury Stadium | Motostoke Stadium | Stow-on-Side Stadium | ||||||||||||||||||||||||||||||||||||||||||||||||||||||||||||||||||||||||||||||||||||||||||||||||||||||||||||||||||||||||||||||||||
|---|---|---|---|---|---|---|---|---|---|---|---|---|---|---|---|---|---|---|---|---|---|---|---|---|---|---|---|---|---|---|---|---|---|---|---|---|---|---|---|---|---|---|---|---|---|---|---|---|---|---|---|---|---|---|---|---|---|---|---|---|---|---|---|---|---|---|---|---|---|---|---|---|---|---|---|---|---|---|---|---|---|---|---|---|---|---|---|---|---|---|---|---|---|---|---|---|---|---|---|---|---|---|---|---|---|---|---|---|---|---|---|---|---|---|---|---|---|---|---|---|---|---|---|---|---|---|---|---|---|---|---|---|---|
| Pokémon Sword | |||||||||||||||||||||||||||||||||||||||||||||||||||||||||||||||||||||||||||||||||||||||||||||||||||||||||||||||||||||||||||||||||||||
|
|
|
| ||||||||||||||||||||||||||||||||||||||||||||||||||||||||||||||||||||||||||||||||||||||||||||||||||||||||||||||||||||||||||||||||||
| Stow-on-Side Stadium | Circhester Stadium | Hammerlocke Stadium | |||||||||||||||||||||||||||||||||||||||||||||||||||||||||||||||||||||||||||||||||||||||||||||||||||||||||||||||||||||||||||||||||||
| Pokémon Shield | Pokémon Sword | Pokémon Shield | |||||||||||||||||||||||||||||||||||||||||||||||||||||||||||||||||||||||||||||||||||||||||||||||||||||||||||||||||||||||||||||||||||
|
|
|
| ||||||||||||||||||||||||||||||||||||||||||||||||||||||||||||||||||||||||||||||||||||||||||||||||||||||||||||||||||||||||||||||||||
Ally Trainers
| Hop's Pokémon | Piers's Pokémon | |||||||||||||||||||||||||||||||||||||||||||||||||||||||||||||||||||||||||||||||||||||||||||||||||||||||||||||||||||||||||||||||||||||||||||||||||||||||||||||||||||||||||||||||||||||||||||||||
|---|---|---|---|---|---|---|---|---|---|---|---|---|---|---|---|---|---|---|---|---|---|---|---|---|---|---|---|---|---|---|---|---|---|---|---|---|---|---|---|---|---|---|---|---|---|---|---|---|---|---|---|---|---|---|---|---|---|---|---|---|---|---|---|---|---|---|---|---|---|---|---|---|---|---|---|---|---|---|---|---|---|---|---|---|---|---|---|---|---|---|---|---|---|---|---|---|---|---|---|---|---|---|---|---|---|---|---|---|---|---|---|---|---|---|---|---|---|---|---|---|---|---|---|---|---|---|---|---|---|---|---|---|---|---|---|---|---|---|---|---|---|---|---|---|---|---|---|---|---|---|---|---|---|---|---|---|---|---|---|---|---|---|---|---|---|---|---|---|---|---|---|---|---|---|---|---|---|---|---|---|---|---|---|---|---|---|---|---|---|---|---|---|
 If the player chose Grookey: If the player chose Grookey:
|
 If the player chose Scorbunny: If the player chose Scorbunny:
|
 If the player chose Sobble: If the player chose Sobble:
| ||||||||||||||||||||||||||||||||||||||||||||||||||||||||||||||||||||||||||||||||||||||||||||||||||||||||||||||||||||||||||||||||||||||||||||||||||||||||||||||||||||||||||||||||||||||||||||||
|
|
|
| |||||||||||||||||||||||||||||||||||||||||||||||||||||||||||||||||||||||||||||||||||||||||||||||||||||||||||||||||||||||||||||||||||||||||||||||||||||||||||||||||||||||||||||||||||||||||||||
| Milo's Pokémon | Nessa's Pokémon | Kabu's Pokémon | ||||||||||||||||||||||||||||||||||||||||||||||||||||||||||||||||||||||||||||||||||||||||||||||||||||||||||||||||||||||||||||||||||||||||||||||||||||||||||||||||||||||||||||||||||||||||||||||
| Pokémon Sword | Pokémon Shield | |||||||||||||||||||||||||||||||||||||||||||||||||||||||||||||||||||||||||||||||||||||||||||||||||||||||||||||||||||||||||||||||||||||||||||||||||||||||||||||||||||||||||||||||||||||||||||||||
|
|
|
| |||||||||||||||||||||||||||||||||||||||||||||||||||||||||||||||||||||||||||||||||||||||||||||||||||||||||||||||||||||||||||||||||||||||||||||||||||||||||||||||||||||||||||||||||||||||||||||
Honeycalm Island
In The Isle of Armor storyline, after evolving Kubfu and completing the Sordward and Shielbert storyline, the player and Hop's search for an ingredient that will make Max Soup appetizing for Urshifu leads them to Honeycalm Island. Prompted to shake the giant tree in the center, the player is swept away into a Pokémon Den alone against a Dynamax Vespiquen. Defeating it yields the Max Honey neccessary for Urshifu's soup. This Vespiquen cannot be caught once defeated.
|
| ||||||||||||||||||||
| Vespiquen♀ Lv.80 Dynamax | |||||||||||||||||||||
| |||||||||||||||||||||
Dyna Tree Hill
In the Crown Tundra, interacting with the giant tree at Dyna Tree Hill will take the player into a Pokémon Den alone against a Dynamax Greedent. Defeating it yields a total of 82 Berries of various types. This Greedent cannot be caught once defeated.
|
| ||||||||||||||||||||
| Greedent Lv.90 Dynamax | |||||||||||||||||||||
| |||||||||||||||||||||
Giant's Bed
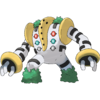
In the Crown Tundra, a den in the Giant's Bed cannot be made active by a Wishing Piece. After catching all 5 members of the Legendary titans and having them in the party, the player can interact with it and will instantly be pitted against a Dynamax Regigigas alone.
|
| ||||||||||||||||||||
| Regigigas Lv.100 Dynamax | |||||||||||||||||||||
| |||||||||||||||||||||
Wild Area News
- Main article: Wild Area News
Wild Area News, accessed through the Mystery Gift menu in Sword and Shield, changes the available spawns in Max Raid Battles to make certain Pokémon more common for a limited time, including and especially Gigantamax Pokémon, which vary between the two game versions. Prior to The Isle of Armor, these events were the only way to obtain Gigantamax Snorlax and Gigantamax Toxtricity.
Any den can spawn a Max Raid Battle from Wild Area News, and dens that do so will always beam a red light, indicating the "common" pool.
October 30 to November 1, 2020
This Halloween-themed Wild Area News event focuses on Ghost-type Pokémon. Notably, the 4★ encounters have a total 20% chance of being a Gourgeist of varying size while two of the 5★ encounters are battles with a guaranteed Shiny Gourgeist.
| Pokémon | Games | Location | Levels | Rate | ||||||||||
|---|---|---|---|---|---|---|---|---|---|---|---|---|---|---|
| ★ | ||||||||||||||
| Sw | Sh | 17 | 25% | |||||||||||
| Sw | Sh | 17 | 25% | |||||||||||
| Sw | Sh | 17 | 25% | |||||||||||
| Sw | Sh | 17 | 25% | |||||||||||
| ★★ | ||||||||||||||
| Sw | Sh | 30 | 20% | |||||||||||
| Sw | Sh | 30 | 20% | |||||||||||
| Sw | Sh | 30 | 20% | |||||||||||
| Sw | Sh | 30 | 20% | |||||||||||
| Sw | Sh | 30 | 20% | |||||||||||
| ★★★ | ||||||||||||||
| Sw | Sh | 40 | 20% | |||||||||||
| Sw | Sh | 40 | 20% | |||||||||||
| Sw | Sh | 40 | 20% | |||||||||||
| Sw | Sh | 40 | 20% | |||||||||||
| Sw | Sh | 40 | 20% | |||||||||||
| ★★★★ | ||||||||||||||
| Sw | Sh | 50 | 2% | |||||||||||
| Sw | Sh | 50 | 5% | |||||||||||
| Sw | Sh | 50 | 5% | |||||||||||
| Sw | Sh | 50 | 8% | |||||||||||
| Sw | Sh | 50 | 20% | |||||||||||
| Sw | Sh | 50 | 20% | |||||||||||
| Sw | Sh | 50 | 20% | |||||||||||
| Sw | Sh | 50 | 20% | |||||||||||
| ★★★★★ | ||||||||||||||
| Sw | Sh | 60 | 1% | |||||||||||
| Sw | Sh | 60 | 1% | |||||||||||
| Sw | Sh | 60 | 8% | |||||||||||
| Sw | Sh | 60 | 10% | |||||||||||
| Sw | Sh | 60 | 20% | |||||||||||
| Sw | Sh | 60 | 20% | |||||||||||
| Sw | Sh | 60 | 20% | |||||||||||
| Sw | Sh | 60 | 20% | |||||||||||
| A colored background means that the Pokémon can be found in this location in the specified game. A white background with a colored letter means that the Pokémon cannot be found here. | ||||||||||||||
In the manga
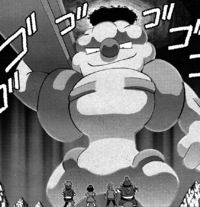
In the Pokémon Adventures manga
In PASS04, Sōdo and Shirudomiria forced a pair of Team Yell Grunts into a Max Raid Battle with them against a Dynamax Gurdurr. After defeating him, Sōdo was able to catch him, adding him to his party and nicknaming him Tekkotsun.
In other languages
| |||||||||||||||||||||||||||||
See also
| Pokémon battle variations | |
|---|---|
| Double Battle • Multi Battle • Triple Battle • Rotation Battle • Horde Encounter • SOS Battle • Support Play • Max Raid Battle • Full Battle Contest Battle • Launcher Battle • Sky Battle • Inverse Battle • Battle Royal • Dynamax Adventure • Auto Battle • Tera Raid Battle • Scripted battle Battle modes | |

|
This game mechanic article is part of Project Games, a Bulbapedia project that aims to write comprehensive articles on the Pokémon games. |

