Turnback Cave: Difference between revisions
| (131 intermediate revisions by 61 users not shown) | |||
| Line 1: | Line 1: | ||
{{ | {{Incomplete|needs=Images from Brilliant Diamond and Shining Pearl}} | ||
{{Infobox location | {{Infobox location | ||
|image= | |image=Turnback Cave Giratina Pt.png | ||
|image_size=256 | |image_size=256 | ||
|type= | |type=cave | ||
|location_name=Turnback Cave | |location_name=Turnback Cave | ||
|japanese_name= | |japanese_name={{tt|戻りの洞窟|Modori no Dōkutsu}} | ||
|translated_name=Returning Cave | |translated_name=Returning Cave | ||
|location=[[Sendoff Spring]] | |location=[[Sendoff Spring]]{{sup/4|DPPt}}{{sup/8|BDSP}}<br>[[Spring Path]]{{sup/8|LA}} | ||
|region=Sinnoh | |region=Sinnoh | ||
|generation={{gen|IV}} | |generation={{gen|IV}}, {{gen|VIII}} | ||
}} | }} | ||
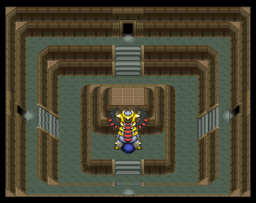
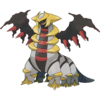
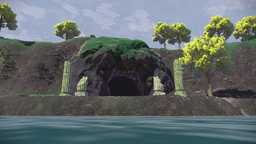
'''Turnback Cave''' (Japanese: ''' | '''Turnback Cave''' (Japanese: '''{{tt|戻|もど}}りの{{tt|洞窟|どうくつ}}''' ''Returning Cave'') is a cave which is home to the [[Legendary Pokémon]] {{p|Giratina}}. In [[Sinnoh]], it is located at the north-central region of [[Sendoff Spring]], which itself may be accessed through the [[Spring Path]]. The cave can only be entered after entering the [[Hall of Fame]]. In [[Hisui]], it is located in the center of a tall mountain crater in the Spring Path, which lies at the northwestern corner of the [[Cobalt Coastlands]]. Due to the slope of the crater, Turnback Cave is primarily accessible via {{hi|Ride Pokémon}}. | ||
[[Escape Rope]]s and {{m|Dig}} cannot be used to leave Turnback Cave. | |||
==Geography== | ==Geography== | ||
===Rooms and pillars=== | ===Pokémon Diamond, Pearl, Platinum, Brilliant Diamond, and Shining Pearl=== | ||
[[ | ====Rooms and pillars==== | ||
[[File:Turnback Cave Pillar Room DPPt.png|thumb|256px|right|A pillar]] | |||
Turnback Cave is a maze-like cave filled with dense [[fog]]. The cave has a fixed starting point—the entrance room—and a fixed terminal room—Giratina's room. The rooms between those points are random every time the player goes through a door, and the room generated will be in one of two types of layouts: a room with a single pillar in the center, or a room with an odd pattern of rocks that may obstruct other entrances. | |||
{| align=" | In {{pkmn|Diamond and Pearl|Pokémon Diamond, Pearl}}, {{pkmn|Brilliant Diamond and Shining Pearl|Brilliant Diamond, and Shining Pearl}}, the inscription on the wall on the central pedestal in the entrance room reads: | ||
: ''...Past three pillars... to the sleeping... ...before 30 is surpassed...'' | |||
In {{game|Platinum}}, the inscription instead reads: | |||
: ''...Past three pillars... offer up...to the... ... before 30 is surpassed...'' | |||
To reach Giratina's room, the {{player}} must find three pillar rooms; the room immediately after the third pillar room found is guaranteed to be Giratina's room. If the player passes through a total of 30 rooms before arriving at Giratina's room, the next door that is entered will return the player to the entrance room, where another attempt can be made. Exiting a room through the door from which it was entered returns the player to the entrance room, with the exception of the third pillar room and the door from the entrance room returning to Sendoff Spring. Each other door has a 25% chance to lead to the next pillar room. | |||
In the pillar rooms, The inscription at the base of the pillars features two numbers. The first denotes which pillar room the player is in, while the second denotes how many total rooms the player has traversed (including the current room) since leaving the entrance room. | |||
In Pokémon Diamond, Pearl, and Platinum, saving the game and reloading from within any intermediate room will cause all doors in that room to lead back to the entrance room. In Pokémon Brilliant Diamond and Shining Pearl, reloading a save within an intermediate room will cause the door which the room was originally entered from to be forgotten, meaning no door will lead to the entrance unless 30 rooms have already been entered. | |||
====Giratina's Room==== | |||
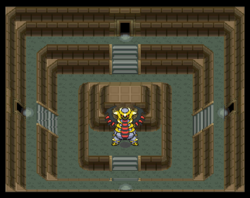
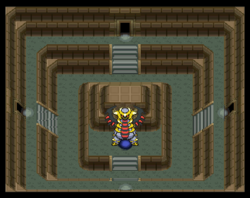
Giratina's room has four entrances like other rooms in the cave, and from each a set of stairs descends to a central pedestal upon which Giratina will stand (or an item if Giratina has already been caught). In Pokémon Platinum, Giratina will only be present if the player did not catch it in the [[Distortion World]]. If Giratina has been caught, there will be a portal to the Distortion World where the player can obtain the [[Griseous Orb]]. If Giratina is not present, there will be an item, which reappears upon each subsequent visit to the room. Exiting any one of the doors from this room will return the player back to the entrance room. | |||
There is an inscription on the wall on the central pedestal that reads: | |||
: ''This is... That where life sparkles... That where life has faded... A place where two worlds overlap...'' | |||
===Pokémon Legends: Arceus=== | |||
[[File:Turnback Cave LA.png|thumb|256px|Turnback Cave in {{pkmn|Legends: Arceus}}]] | |||
Turnback Cave is a small yet spacious rounded cavern that is empty, with stone pillars lining the wall. Giratina will appear in the cave after accepting {{DL|Task|Requests|Request}} 91: "On The Trail of Giratina" from [[Professor Laventon]]. | |||
{{-}} | |||
==Items== | |||
{{Itlisth|cave}} | |||
{{Itemlist|Reaper Cloth BDSP|Giratina's room, if the player reached it by passing through only 3 rooms and Giratina is not present (reappears each time)|D=yes|P=yes|Pt=yes|BD=yes|SP=yes|display=[[Reaper Cloth]]}} | |||
{{Itemlist|Rare Bone BDSP|Giratina's room, if the player reached it by passing through 4-15 rooms and Giratina is not present (reappears each time)|D=yes|P=yes|Pt=yes|BD=yes|SP=yes|display=[[Rare Bone]]}} | |||
{{Itemlist|Stardust BDSP|Giratina's room, if the player reached it by passing through 16-30 rooms and Giratina is not present (reappears each time)|D=yes|P=yes|Pt=yes|BD=yes|SP=yes|display=[[Stardust]]}} | |||
{{Itemlist|Griseous Core LA|size=32px|Rewarded for catching {{p|Giratina}} to complete {{DL|Task|Requests|Request}} 91|LA=yes|display=[[Griseous Core]]}} | |||
{{Itlistfoot|cave}} | |||
==Pokémon== | |||
===Generation IV=== | |||
====Before encountering a pillar==== | |||
{{catch/header|cave}} | |||
{{catch/entry4|042|Golbat|yes|yes|no|Cave|45-46|all=30%|type1=Poison|type2=Flying}} | |||
{{catch/entry4|042|Golbat|no|no|yes|Cave|17-18|all=25%|type1=Poison|type2=Flying}} | |||
{{catch/entry4|092|Gastly|no|no|yes|Cave|15, 17|all=30%|type1=Ghost|type2=Poison}} | |||
{{catch/entry4|092|Gastly|no|no|yes|Cave|16|10%|10%|0%|type1=Ghost|type2=Poison}} | |||
{{catch/entry4|093|Haunter|yes|yes|no|Cave|44-46|all=30%|type1=Ghost|type2=Poison}} | |||
{{catch/entry4|355|Duskull|no|no|yes|Cave|18|all=5%|type1=Ghost}} | |||
{{catch/entry4|356|Dusclops|no|no|yes|Cave|16|0%|0%|10%|type1=Ghost}} | |||
{{catch/entry4|433|Chingling|no|no|yes|Cave|16, 18|all=10%|type1=Psychic}} | |||
{{catch/entry4|436|Bronzor|yes|yes|no|Cave|44|all=5%|type1=Steel|type2=Psychic}} | |||
{{catch/entry4|436|Bronzor|no|no|yes|Cave|15|all=20%|type1=Steel|type2=Psychic}} | |||
{{catch/entry4|437|Bronzong|yes|yes|no|Cave|45-46|all=35%|type1=Steel|type2=Psychic}} | |||
{{catch/div|cave|Special}} | |||
{{catch/entry4|337|Lunatone|yes|yes|no|S|44, 46|all=8%|type1=Rock|type2=Psychic}} | |||
{{catch/entry4|337|Lunatone|no|no|yes|S|18|all=8%|type1=Rock|type2=Psychic}} | |||
{{catch/entry4|338|Solrock|yes|yes|no|R|44, 46|all=8%|type1=Rock|type2=Psychic}} | |||
{{catch/entry4|338|Solrock|no|no|yes|R|18|all=8%|type1=Rock|type2=Psychic}} | |||
{{catch/entry4|356|Dusclops|no|no|yes|FRLGE|18|all=4%|type1=Ghost}} | |||
{{catch/entry4|356|Dusclops|no|no|yes|Poké Radar|18|all=1%|type1=Ghost}} | |||
{{catch/footer|cave}} | |||
====Between first and second pillars==== | |||
{{catch/header|cave}} | |||
{{catch/entry4|042|Golbat|yes|yes|no|Cave|55-56|all=30%|type1=Poison|type2=Flying}} | |||
{{catch/entry4|042|Golbat|no|no|yes|Cave|25, 27|all=25%|type1=Poison|type2=Flying}} | |||
{{catch/entry4|093|Haunter|yes|yes|no|Cave|54-56|all=30%|type1=Ghost|type2=Poison}} | |||
{{catch/entry4|093|Haunter|no|no|yes|Cave|25, 27|all=30%|type1=Ghost|type2=Poison}} | |||
{{catch/entry4|093|Haunter|no|no|yes|Cave|26|10%|10%|0%|type1=Ghost|type2=Poison}} | |||
{{catch/entry4|358|Chimecho|no|no|yes|Cave|28|all=1%|type1=Psychic}} | |||
{{catch/entry4|355|Duskull|no|no|yes|Cave|28|all=4%|type1=Ghost}} | |||
{{catch/entry4|356|Dusclops|no|no|yes|Cave|26|0%|0%|10%|type1=Ghost}} | |||
{{catch/entry4|356|Dusclops|no|no|yes|Cave|28|all=1%|type1=Ghost}} | |||
{{catch/entry4|433|Chingling|no|no|yes|Cave|26, 28|all=9%|type1=Psychic}} | |||
{{catch/entry4|436|Bronzor|yes|yes|no|Cave|54|all=5%|type1=Steel|type2=Psychic}} | |||
{{catch/entry4|436|Bronzor|no|no|yes|Cave|25|all=20%|type1=Steel|type2=Psychic}} | |||
{{catch/entry4|437|Bronzong|yes|yes|no|Cave|55-56|all=35%|type1=Steel|type2=Psychic}} | |||
{{catch/div|cave|Special}} | |||
{{catch/entry4|337|Lunatone|yes|yes|no|S|54, 56|all=8%|type1=Rock|type2=Psychic}} | |||
{{catch/entry4|337|Lunatone|no|no|yes|S|28|all=8%|type1=Rock|type2=Psychic}} | |||
{{catch/entry4|338|Solrock|yes|yes|no|R|54, 56|all=8%|type1=Rock|type2=Psychic}} | |||
{{catch/entry4|338|Solrock|no|no|yes|R|28|all=8%|type1=Rock|type2=Psychic}} | |||
{{catch/entry4|356|Dusclops|no|no|yes|FRLGE|28|all=4%|type1=Ghost}} | |||
{{catch/footer|cave}} | |||
====Between second and third pillars==== | |||
Only five of the six possible rooms have wild encounters; the [[Media:Turnback Cave Two Pillar Random Rooms DPPt.png|second of the possible rooms]] between these pillars never has wild encounters. | |||
{{catch/header|cave}} | |||
{{catch/entry4|042|Golbat|yes|yes|no|Cave|65-66|all=30%|type1=Poison|type2=Flying}} | |||
{{catch/entry4|042|Golbat|no|no|yes|Cave|37-38|all=25%|type1=Poison|type2=Flying}} | |||
{{catch/entry4|093|Haunter|yes|yes|no|Cave|64-66|all=30%|type1=Ghost|type2=Poison}} | |||
{{catch/entry4|093|Haunter|no|no|yes|Cave|35, 37|all=30%|type1=Ghost|type2=Poison}} | |||
{{catch/entry4|093|Haunter|no|no|yes|Cave|36|10%|10%|0%|type1=Ghost|type2=Poison}} | |||
{{catch/entry4|356|Dusclops|no|no|yes|Cave|36|0%|0%|10%|type1=Ghost}} | |||
{{catch/entry4|356|Dusclops|no|no|yes|Cave|38|all=5%|type1=Ghost}} | |||
{{catch/entry4|358|Chimecho|no|no|yes|Cave|36, 38|all=10%|type1=Psychic}} | |||
{{catch/entry4|436|Bronzor|yes|yes|no|Cave|64|all=5%|type1=Steel|type2=Psychic}} | |||
{{catch/entry4|437|Bronzong|yes|yes|no|Cave|65-66|all=35%|type1=Steel|type2=Psychic}} | |||
{{catch/entry4|437|Bronzong|no|no|yes|Cave|35|all=20%|type1=Steel|type2=Psychic}} | |||
{{catch/div|cave|Special}} | |||
{{catch/entry4|337|Lunatone|yes|yes|no|S|64, 66|all=8%|type1=Rock|type2=Psychic}} | |||
{{catch/entry4|337|Lunatone|no|no|yes|S|38|all=8%|type1=Rock|type2=Psychic}} | |||
{{catch/entry4|338|Solrock|yes|yes|no|R|64, 66|all=8%|type1=Rock|type2=Psychic}} | |||
{{catch/entry4|338|Solrock|no|no|yes|R|38|all=8%|type1=Rock|type2=Psychic}} | |||
{{catch/footer|cave}} | |||
===== Note: After third pillar ===== | |||
While there is a fourth encounter table in the game code for generating encounters where everything is a further 10 levels higher after the third pillar, it is not used and is thus not encounterable through vanilla gameplay. Any tables with values of a Lvl. 45 Bronzong in Platinum, for example, are not representative of vanilla gameplay. | |||
===Generation VIII=== | |||
====Brilliant Diamond and Shining Pearl==== | |||
=====Before encountering a pillar===== | |||
{{Catch/header|cave}} | |||
{{Catch/entrybdsp|042|Golbat|yes|yes|Cave|45-46|all=30%|type1=Poison|type2=Flying}} | |||
{{Catch/entrybdsp|093|Haunter|yes|yes|Cave|44-46|all=30%|type1=Ghost|type2=Poison}} | |||
{{Catch/entrybdsp|436|Bronzor|yes|yes|Cave|44|all=5%|type1=Steel|type2=Psychic}} | |||
{{Catch/entrybdsp|437|Bronzong|yes|yes|Cave|45-46|all=35%|type1=Steel|type2=Psychic}} | |||
{{Catch/footer|cave}} | |||
=====Between first and second pillars===== | |||
{{catch/header|cave}} | |||
{{Catch/entrybdsp|042|Golbat|yes|yes|Cave|55-56|all=30%|type1=Poison|type2=Flying}} | |||
{{Catch/entrybdsp|093|Haunter|yes|yes|Cave|54-56|all=30%|type1=Ghost|type2=Poison}} | |||
{{Catch/entrybdsp|436|Bronzor|yes|yes|Cave|54|all=5%|type1=Steel|type2=Psychic}} | |||
{{Catch/entrybdsp|437|Bronzong|yes|yes|Cave|55-56|all=35%|type1=Steel|type2=Psychic}} | |||
{{catch/footer|cave}} | |||
=====Between second and third pillars===== | |||
{{catch/header|cave}} | |||
{{Catch/entrybdsp|042|Golbat|yes|yes|Cave|65-66|all=30%|type1=Poison|type2=Flying}} | |||
{{Catch/entrybdsp|093|Haunter|yes|yes|Cave|64-66|all=30%|type1=Ghost|type2=Poison}} | |||
{{Catch/entrybdsp|436|Bronzor|yes|yes|Cave|64|all=5%|type1=Steel|type2=Psychic}} | |||
{{Catch/entrybdsp|437|Bronzong|yes|yes|Cave|65-66|all=35%|type1=Steel|type2=Psychic}} | |||
{{catch/footer|cave}} | |||
==Special encounters== | |||
===Pokémon Diamond and Pearl=== | |||
A {{p|Giratina}} appears here on the first visit. If run from, it respawns upon leaving the area. | |||
{| | |||
|- style="vertical-align:top" | |||
|{{Pokémon/4 | |||
|game=Diamond | |||
|ndex=487 | |||
|pokemon=Giratina | |||
|type1=Ghost | |||
|type2=Dragon | |||
|ability=Pressure | |||
|level=70 | |||
|move1=Shadow Force|move1type=Ghost|move1cat=Physical | |||
|move2=Heal Block|move2type=Psychic|move2cat=Status | |||
|move3=Earth Power|move3type=Ground|move3cat=Special | |||
|move4=Slash|move4type=Normal|move4cat=Physical}} | |||
|} | |||
===Pokémon Platinum=== | |||
[[File:Altered Forme Giratina Encounter Pt.png|thumb|200px|Altered Forme Giratina at Turnback Cave in Platinum]] | |||
An Altered Forme {{p|Giratina}} appears here after entering the [[Hall of Fame]] if it was defeated or run from in the [[Distortion World]]. If it is defeated or run from, it respawns after entering the Hall of Fame again. | |||
{| | |||
|- style="vertical-align:top" | |||
|{{Pokémon/4 | |||
|game=Platinum | |||
|ndex=487 | |||
|pokemon=Giratina | |||
|type1=Ghost | |||
|type2=Dragon | |||
|ability=Pressure | |||
|level=47 | |||
|move1=Ominous Wind|move1type=Ghost|move1cat=Special | |||
|move2=AncientPower|move2type=Rock|move2cat=Special | |||
|move3=Dragon Claw|move3type=Dragon|move3cat=Physical | |||
|move4=Shadow Force|move4type=Ghost|move4cat=Physical}} | |||
|} | |||
===Pokémon Brilliant Diamond and Shining Pearl=== | |||
An Altered Forme {{p|Giratina}} appears here on the first visit. If defeated or run from, it respawns after entering the [[Hall of Fame]]. | |||
{| | |||
|- style="vertical-align:top" | |||
|{{Pokémon/8 | |||
|ndex=487 | |||
|pokemon=Giratina | |||
|type1=Ghost | |||
|type2=Dragon | |||
|ability=Pressure | |||
|level=70 | |||
|move1=Shadow Force|move1type=Ghost|move1cat=Physical | |||
|move2=Pain Split|move2type=Normal|move2cat=Status | |||
|move3=Aura Sphere|move3type=Fighting|move3cat=Special | |||
|move4=Dragon Claw|move4type=Dragon|move4cat=Physical}} | |||
|} | |||
===Pokémon Legends: Arceus=== | |||
[[File:Giratina Legends Arceus.png|thumb|250px|right|{{p|Giratina}} in Pokémon Legends: Arceus]] | |||
{{p|Giratina}} can be caught in its [[List of Pokémon with form differences#Pokémon of Myth|Origin Forme]] during [[Task#Requests|Request]] 91: "On the Trail of Giratina", which becomes available after completion of Mission 26: "Seeking the Remaining Plates". It is coded to never be {{Shiny}}. If defeated, it respawns after the player exits and reenters the cave. | |||
{{Pokémon/7/LG | |||
|ndex=487 | |||
|pokemon=Giratina | |||
|form=-Origin | |||
|level=70 | |||
|type1=Ghost | |||
|type2=Dragon | |||
|ability=None | |||
|move1=Dragon Claw|move1type=Dragon|move1cat=Physical | |||
|move2=Dragon Pulse|move2type=Dragon|move2cat=Special | |||
|move3=Earth Power|move3type=Ground|move3cat=Special | |||
|move4=Shadow Force|move4type=Ghost|move4cat=Physical}} | |||
==Layout== | |||
===Entrance, pillar room, and Giratina's room=== | |||
{| class="roundy" style="margin:auto; background: #000; border: 3px solid #{{locationcolor/dark|cave}}" | |||
|- | |- | ||
! style="background:#{{ | ! style="background:#{{locationcolor/light|cave}}; {{roundytl|5px}}" | Version | ||
! style="background:#{{locationcolor/light|cave}}" | Entrance | |||
! style="background:#{{ | ! style="background:#{{locationcolor/light|cave}}" | Pillar room | ||
! style="background:#{{ | ! style="background:#{{locationcolor/light|cave}}; {{roundytr|5px}}" | Giratina's room | ||
! style="background:#{{ | |||
|- | |- | ||
! | ! style="background:#{{diamond color}}" | {{color2|000|Pokémon Diamond and Pearl Versions|Diamond}} | ||
| rowspan="2" | [[File:Turnback Cave Entrance DP.png|250px]] | |||
| rowspan="3" | [[File:Turnback Cave Pillar Room DPPt.png|250px]] | |||
| rowspan="2" | [[File:Turnback Cave Giratina DP.png|250px]] | |||
|- | |- | ||
! | ! style="background:#{{pearl color}}" | {{color2|000|Pokémon Diamond and Pearl Versions|Pearl}} | ||
|- | |- | ||
| colspan=" | ! style="background:#{{platinum color}}" | {{color2|000|Pokémon Platinum Version|Platinum}} | ||
| [[File:Turnback Cave Entrance Pt.png|250px]] | |||
| [[File:Turnback Cave Giratina Pt.png|250px]] | |||
|- | |||
| colspan="4" style="background:#{{locationcolor/light|cave}}; {{roundybottom|5px}}" | | |||
|} | |} | ||
== | ===Random rooms=== | ||
{{ | {| class="roundy" style="margin:auto; background: #000; border: 3px solid #{{locationcolor/dark|cave}}" | ||
{{ | |- | ||
{{ | ! style="background:#{{locationcolor/light|cave}}; {{roundytl|5px}}" | Version | ||
{{ | ! style="background:#{{locationcolor/light|cave}}" | Between entrance and first pillar | ||
{{ | ! style="background:#{{locationcolor/light|cave}}" | Between first and second pillars | ||
! style="background:#{{locationcolor/light|cave}}; {{roundytr|5px}}" | Between second and third pillars | |||
|- | |||
! style="background:#{{diamond color}}" | {{color2|000|Pokémon Diamond and Pearl Versions|Diamond}} | |||
| rowspan="3" | [[File:Turnback Cave No Pillar Random Rooms DPPt.png|250px]] | |||
| rowspan="3" | [[File:Turnback Cave One Pillar Random Rooms DPPt.png|250px]] | |||
| rowspan="3" | [[File:Turnback Cave Two Pillar Random Rooms DPPt.png|250px]] | |||
|- | |||
! style="background:#{{pearl color}}" | {{color2|000|Pokémon Diamond and Pearl Versions|Pearl}} | |||
|- | |||
! style="background:#{{platinum color}}" | {{color2|000|Pokémon Platinum Version|Platinum}} | |||
|- | |||
| colspan="4" style="background:#{{locationcolor/light|cave}}; {{roundybottom|5px}}" | | |||
|} | |||
==In the manga== | |||
[[File:Turnback Cave Adventures.png|thumb|left|130px|Turnback Cave in [[Pokémon Adventures]]]] | |||
[[File:Turnback Cave portal Adventures.png|thumb|200px|The Distortion World portal in Pokémon Adventures]] | |||
===Pokémon Adventures=== | |||
===={{MangaArc|Platinum}}==== | |||
In ''[[PS435|The Final Dimensional Duel V]]'', [[Flint]] and [[Volkner]] entered the [[Distortion World]] through Turnback Cave. They were [[PS436|soon after]] followed by {{adv|Platinum}}, [[Palmer]], [[Cheryl]], [[Riley]], [[Mira]], [[Marley]], and the [[Advanced level Grunt]]. After leading the group to the portal, the Grunt was about to head out, but he was stopped by Platinum, who voiced her distrust towards him. She, however, promised to protect him from [[Team Galactic]], which the Grunt agreed to, and led them through the portal. | |||
==Pokémon== | ===Pokémon Diamond and Pearl Adventure!=== | ||
Turnback Cave appeared in ''[[DPA35|Enter the Distortion World!]]''. After managing to make [[Kaisei]] spill out how to get to the Distortion World, [[Charon]] traveled to the cave and entered {{p|Giratina}}'s realm through it with Kaisei, followed by [[Hareta]], [[Koya]], and {{OBP|Jun|DPA}}. | |||
{{-}} | |||
{{ | |||
{{ | |||
{{ | |||
==Trivia== | ==Trivia== | ||
* Turnback Cave is similar to certain locations in [[Kanto]] and [[Hoenn]]: | |||
** In Kanto, [[Cerulean Cave]] can only be visited after entering the [[Hall of Fame]] and is home to high-level [[wild Pokémon]] and a {{p|Mewtwo|level 70 Legendary Pokémon}}. | |||
* Turnback Cave is similar to locations in [[Kanto]] and [[Hoenn]] | ** In Hoenn, the [[Sky Pillar]] is home to high level Pokémon and a {{p|Rayquaza|level 70 Legendary Pokémon}}, and in the [[Pokémon Emerald Version|third version]] it can be visited before entering the Hall of Fame. | ||
** In Kanto, [[Cerulean Cave]] can only be visited after | * Turnback Cave's system of seemingly random room layout may be an advanced version of the system used in [[Lost Cave]] in the [[Sevii Islands]] in {{game|FireRed and LeafGreen|s}}. | ||
** In Hoenn, [[Sky Pillar]] is home to high level Pokémon and a {{p|Rayquaza|level 70 | |||
* Turnback Cave and the Distortion World may draw some inspiration from the Japanese underworld, {{wp|Yomi}}. Giratina itself can be seen as a parallel to the kami {{wp|Izanami}}. | * Turnback Cave and the Distortion World may draw some inspiration from the Japanese underworld, {{wp|Yomi}}. Giratina itself can be seen as a parallel to the kami {{wp|Izanami}}. | ||
* Turnback Cave shares its music with that of the [[Old Chateau]]. However, in {{game|Diamond and Pearl|s}}, the version of the track used in Turnback Cave and the surrounding areas is noticeably lacking certain soundfonts. Interestingly, this variation is not recognized as a separate track in the game's audio files and the normal variation of the track is used in {{game|Platinum}}, suggesting the difference between the versions was unintentional. | |||
==In other languages== | ==In other languages== | ||
{{langtable|color={{locationcolor/light|cave}}|bordercolor={{locationcolor/dark|cave}} | |||
|zh_yue=歸途洞窟 ''{{tt|Gwāitòuh Duhngfāt|Wayback Cave}}'' | |||
|zh_cmn=歸途洞窟 / 归途洞窟 ''{{tt|Guītú Dòngkū|Wayback Cave}}'' | |||
|fr=Grotte du Retour{{sup/8|BDSP}}<br>Grotte Retour{{sup/4|DPPt}} | |||
|de=Höhle der Umkehr | |||
|it=Grotta Ritorno | |||
|ko=귀혼동굴 ''Gwihon Donggul'' | |||
|es=Cueva Retorno | |||
|vi=Hang Quay Đầu | |||
}} | |||
==See also== | ==See also== | ||
*[[Sendoff Spring]] | * [[Sendoff Spring]] | ||
*[[Spring Path]] | * [[Spring Path]] | ||
*[[Distortion World]] | * [[Distortion World]] | ||
{{Sinnoh}} | {{Sinnoh}} | ||
{{ | {{Hisui}} | ||
{{legendarylocations|sinnoh}}<br/> | |||
{{Project Locations notice}} | {{Project Locations notice}} | ||
[[Category:Sinnoh locations]] | [[Category:Sinnoh locations]] | ||
[[Category:Hisui locations]] | |||
[[Category:Diamond and Pearl locations]] | [[Category:Diamond and Pearl locations]] | ||
[[Category:Platinum locations]] | [[Category:Platinum locations]] | ||
[[Category:Brilliant Diamond and Shining Pearl locations]] | |||
[[Category:Legends: Arceus locations]] | |||
[[Category:Caves]] | [[Category:Caves]] | ||
[[ | [[de:Höhle der Umkehr (Sinnoh)]] | ||
[[es:Cueva Retorno]] | |||
[[ | [[fr:Grotte du Retour]] | ||
[[fr:Grotte Retour]] | [[it:Grotta Ritorno]] | ||
[[ja:もどりのどうくつ]] | [[ja:もどりのどうくつ]] | ||
[[zh:归途洞窟]] | |||
Latest revision as of 11:49, 2 September 2024

|
This article is incomplete. Please feel free to edit this article to add missing information and complete it. Reason: Images from Brilliant Diamond and Shining Pearl |
| ||||
| ||||
| Location: | Sendoff SpringDPPtBDSP Spring PathLA | |||
|---|---|---|---|---|
| Region: | Sinnoh | |||
| Generations: | IV, VIII | |||
 Location of Turnback Cave in Sinnoh. | ||||
| Pokémon world locations | ||||
Turnback Cave (Japanese: 戻りの洞窟 Returning Cave) is a cave which is home to the Legendary Pokémon Giratina. In Sinnoh, it is located at the north-central region of Sendoff Spring, which itself may be accessed through the Spring Path. The cave can only be entered after entering the Hall of Fame. In Hisui, it is located in the center of a tall mountain crater in the Spring Path, which lies at the northwestern corner of the Cobalt Coastlands. Due to the slope of the crater, Turnback Cave is primarily accessible via Ride Pokémon.
Escape Ropes and Dig cannot be used to leave Turnback Cave.
Geography
Pokémon Diamond, Pearl, Platinum, Brilliant Diamond, and Shining Pearl
Rooms and pillars
Turnback Cave is a maze-like cave filled with dense fog. The cave has a fixed starting point—the entrance room—and a fixed terminal room—Giratina's room. The rooms between those points are random every time the player goes through a door, and the room generated will be in one of two types of layouts: a room with a single pillar in the center, or a room with an odd pattern of rocks that may obstruct other entrances.
In Pokémon Diamond, Pearl, Brilliant Diamond, and Shining Pearl, the inscription on the wall on the central pedestal in the entrance room reads:
- ...Past three pillars... to the sleeping... ...before 30 is surpassed...
In Pokémon Platinum, the inscription instead reads:
- ...Past three pillars... offer up...to the... ... before 30 is surpassed...
To reach Giratina's room, the player must find three pillar rooms; the room immediately after the third pillar room found is guaranteed to be Giratina's room. If the player passes through a total of 30 rooms before arriving at Giratina's room, the next door that is entered will return the player to the entrance room, where another attempt can be made. Exiting a room through the door from which it was entered returns the player to the entrance room, with the exception of the third pillar room and the door from the entrance room returning to Sendoff Spring. Each other door has a 25% chance to lead to the next pillar room.
In the pillar rooms, The inscription at the base of the pillars features two numbers. The first denotes which pillar room the player is in, while the second denotes how many total rooms the player has traversed (including the current room) since leaving the entrance room.
In Pokémon Diamond, Pearl, and Platinum, saving the game and reloading from within any intermediate room will cause all doors in that room to lead back to the entrance room. In Pokémon Brilliant Diamond and Shining Pearl, reloading a save within an intermediate room will cause the door which the room was originally entered from to be forgotten, meaning no door will lead to the entrance unless 30 rooms have already been entered.
Giratina's Room
Giratina's room has four entrances like other rooms in the cave, and from each a set of stairs descends to a central pedestal upon which Giratina will stand (or an item if Giratina has already been caught). In Pokémon Platinum, Giratina will only be present if the player did not catch it in the Distortion World. If Giratina has been caught, there will be a portal to the Distortion World where the player can obtain the Griseous Orb. If Giratina is not present, there will be an item, which reappears upon each subsequent visit to the room. Exiting any one of the doors from this room will return the player back to the entrance room.
There is an inscription on the wall on the central pedestal that reads:
- This is... That where life sparkles... That where life has faded... A place where two worlds overlap...
Pokémon Legends: Arceus
Turnback Cave is a small yet spacious rounded cavern that is empty, with stone pillars lining the wall. Giratina will appear in the cave after accepting Request 91: "On The Trail of Giratina" from Professor Laventon.
Items
| Item | Location | Games | |
|---|---|---|---|
| Reaper Cloth | Giratina's room, if the player reached it by passing through only 3 rooms and Giratina is not present (reappears each time) | D P Pt BD SP | |
| Rare Bone | Giratina's room, if the player reached it by passing through 4-15 rooms and Giratina is not present (reappears each time) | D P Pt BD SP | |
| Stardust | Giratina's room, if the player reached it by passing through 16-30 rooms and Giratina is not present (reappears each time) | D P Pt BD SP | |
| Griseous Core | Rewarded for catching Giratina to complete Request 91 | LA | |
Pokémon
Generation IV
Before encountering a pillar
| Pokémon | Games | Location | Levels | Rate | |||||||||||
|---|---|---|---|---|---|---|---|---|---|---|---|---|---|---|---|
|
D | P | Pt |
|
45-46 | 30% | |||||||||
|
D | P | Pt |
|
17-18 | 25% | |||||||||
|
D | P | Pt |
|
15, 17 | 30% | |||||||||
|
D | P | Pt |
|
16 | 10% | 10% | 0% | |||||||
|
D | P | Pt |
|
44-46 | 30% | |||||||||
|
D | P | Pt |
|
18 | 5% | |||||||||
|
D | P | Pt |
|
16 | 0% | 0% | 10% | |||||||
|
D | P | Pt |
|
16, 18 | 10% | |||||||||
|
D | P | Pt |
|
44 | 5% | |||||||||
|
D | P | Pt |
|
15 | 20% | |||||||||
|
D | P | Pt |
|
45-46 | 35% | |||||||||
| Special Pokémon | |||||||||||||||
|
D | P | Pt |
|
44, 46 | 8% | |||||||||
|
D | P | Pt |
|
18 | 8% | |||||||||
|
D | P | Pt |
|
44, 46 | 8% | |||||||||
|
D | P | Pt |
|
18 | 8% | |||||||||
|
D | P | Pt |
|
18 | 4% | |||||||||
|
D | P | Pt |
|
18 | 1% | |||||||||
| A colored background means that the Pokémon can be found in this location in the specified game. A white background with a colored letter means that the Pokémon cannot be found here. | |||||||||||||||
Between first and second pillars
| Pokémon | Games | Location | Levels | Rate | |||||||||||
|---|---|---|---|---|---|---|---|---|---|---|---|---|---|---|---|
|
D | P | Pt |
|
55-56 | 30% | |||||||||
|
D | P | Pt |
|
25, 27 | 25% | |||||||||
|
D | P | Pt |
|
54-56 | 30% | |||||||||
|
D | P | Pt |
|
25, 27 | 30% | |||||||||
|
D | P | Pt |
|
26 | 10% | 10% | 0% | |||||||
|
D | P | Pt |
|
28 | 1% | |||||||||
|
D | P | Pt |
|
28 | 4% | |||||||||
|
D | P | Pt |
|
26 | 0% | 0% | 10% | |||||||
|
D | P | Pt |
|
28 | 1% | |||||||||
|
D | P | Pt |
|
26, 28 | 9% | |||||||||
|
D | P | Pt |
|
54 | 5% | |||||||||
|
D | P | Pt |
|
25 | 20% | |||||||||
|
D | P | Pt |
|
55-56 | 35% | |||||||||
| Special Pokémon | |||||||||||||||
|
D | P | Pt |
|
54, 56 | 8% | |||||||||
|
D | P | Pt |
|
28 | 8% | |||||||||
|
D | P | Pt |
|
54, 56 | 8% | |||||||||
|
D | P | Pt |
|
28 | 8% | |||||||||
|
D | P | Pt |
|
28 | 4% | |||||||||
| A colored background means that the Pokémon can be found in this location in the specified game. A white background with a colored letter means that the Pokémon cannot be found here. | |||||||||||||||
Between second and third pillars
Only five of the six possible rooms have wild encounters; the second of the possible rooms between these pillars never has wild encounters.
| Pokémon | Games | Location | Levels | Rate | |||||||||||
|---|---|---|---|---|---|---|---|---|---|---|---|---|---|---|---|
|
D | P | Pt |
|
65-66 | 30% | |||||||||
|
D | P | Pt |
|
37-38 | 25% | |||||||||
|
D | P | Pt |
|
64-66 | 30% | |||||||||
|
D | P | Pt |
|
35, 37 | 30% | |||||||||
|
D | P | Pt |
|
36 | 10% | 10% | 0% | |||||||
|
D | P | Pt |
|
36 | 0% | 0% | 10% | |||||||
|
D | P | Pt |
|
38 | 5% | |||||||||
|
D | P | Pt |
|
36, 38 | 10% | |||||||||
|
D | P | Pt |
|
64 | 5% | |||||||||
|
D | P | Pt |
|
65-66 | 35% | |||||||||
|
D | P | Pt |
|
35 | 20% | |||||||||
| Special Pokémon | |||||||||||||||
|
D | P | Pt |
|
64, 66 | 8% | |||||||||
|
D | P | Pt |
|
38 | 8% | |||||||||
|
D | P | Pt |
|
64, 66 | 8% | |||||||||
|
D | P | Pt |
|
38 | 8% | |||||||||
| A colored background means that the Pokémon can be found in this location in the specified game. A white background with a colored letter means that the Pokémon cannot be found here. | |||||||||||||||
Note: After third pillar
While there is a fourth encounter table in the game code for generating encounters where everything is a further 10 levels higher after the third pillar, it is not used and is thus not encounterable through vanilla gameplay. Any tables with values of a Lvl. 45 Bronzong in Platinum, for example, are not representative of vanilla gameplay.
Generation VIII
Brilliant Diamond and Shining Pearl
Before encountering a pillar
| Pokémon | Games | Location | Levels | Rate | |||||||||
|---|---|---|---|---|---|---|---|---|---|---|---|---|---|
| BD | SP | 45-46 | 30% | ||||||||||
| BD | SP | 44-46 | 30% | ||||||||||
| BD | SP | 44 | 5% | ||||||||||
| BD | SP | 45-46 | 35% | ||||||||||
| A colored background means that the Pokémon can be found in this location in the specified game. A white background with a colored letter means that the Pokémon cannot be found here. | |||||||||||||
Between first and second pillars
| Pokémon | Games | Location | Levels | Rate | |||||||||
|---|---|---|---|---|---|---|---|---|---|---|---|---|---|
| BD | SP | 55-56 | 30% | ||||||||||
| BD | SP | 54-56 | 30% | ||||||||||
| BD | SP | 54 | 5% | ||||||||||
| BD | SP | 55-56 | 35% | ||||||||||
| A colored background means that the Pokémon can be found in this location in the specified game. A white background with a colored letter means that the Pokémon cannot be found here. | |||||||||||||
Between second and third pillars
| Pokémon | Games | Location | Levels | Rate | |||||||||
|---|---|---|---|---|---|---|---|---|---|---|---|---|---|
| BD | SP | 65-66 | 30% | ||||||||||
| BD | SP | 64-66 | 30% | ||||||||||
| BD | SP | 64 | 5% | ||||||||||
| BD | SP | 65-66 | 35% | ||||||||||
| A colored background means that the Pokémon can be found in this location in the specified game. A white background with a colored letter means that the Pokémon cannot be found here. | |||||||||||||
Special encounters
Pokémon Diamond and Pearl
A Giratina appears here on the first visit. If run from, it respawns upon leaving the area.
| ||||||||||||||||||||||||||||||||||
Pokémon Platinum
An Altered Forme Giratina appears here after entering the Hall of Fame if it was defeated or run from in the Distortion World. If it is defeated or run from, it respawns after entering the Hall of Fame again.
| ||||||||||||||||||||||||||||||||||
Pokémon Brilliant Diamond and Shining Pearl
An Altered Forme Giratina appears here on the first visit. If defeated or run from, it respawns after entering the Hall of Fame.
| ||||||||||||||||||||||||||||||||||
Pokémon Legends: Arceus

Giratina can be caught in its Origin Forme during Request 91: "On the Trail of Giratina", which becomes available after completion of Mission 26: "Seeking the Remaining Plates". It is coded to never be Shiny. If defeated, it respawns after the player exits and reenters the cave.
|
| ||||||||||||||||||||
| Giratina Lv.70 | |||||||||||||||||||||
| |||||||||||||||||||||
Layout
Entrance, pillar room, and Giratina's room
| Version | Entrance | Pillar room | Giratina's room |
|---|---|---|---|
| Diamond | 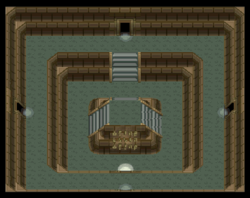
|

|
|
| Pearl | |||
| Platinum | 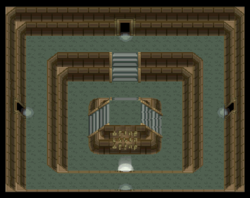
|
| |
Random rooms
| Version | Between entrance and first pillar | Between first and second pillars | Between second and third pillars |
|---|---|---|---|
| Diamond | 
|

|

|
| Pearl | |||
| Platinum | |||
In the manga
Pokémon Adventures
Platinum arc
In The Final Dimensional Duel V, Flint and Volkner entered the Distortion World through Turnback Cave. They were soon after followed by Platinum, Palmer, Cheryl, Riley, Mira, Marley, and the Advanced level Grunt. After leading the group to the portal, the Grunt was about to head out, but he was stopped by Platinum, who voiced her distrust towards him. She, however, promised to protect him from Team Galactic, which the Grunt agreed to, and led them through the portal.
Pokémon Diamond and Pearl Adventure!
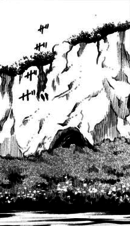
Turnback Cave appeared in Enter the Distortion World!. After managing to make Kaisei spill out how to get to the Distortion World, Charon traveled to the cave and entered Giratina's realm through it with Kaisei, followed by Hareta, Koya, and Jun.
Trivia
- Turnback Cave is similar to certain locations in Kanto and Hoenn:
- In Kanto, Cerulean Cave can only be visited after entering the Hall of Fame and is home to high-level wild Pokémon and a level 70 Legendary Pokémon.
- In Hoenn, the Sky Pillar is home to high level Pokémon and a level 70 Legendary Pokémon, and in the third version it can be visited before entering the Hall of Fame.
- Turnback Cave's system of seemingly random room layout may be an advanced version of the system used in Lost Cave in the Sevii Islands in Pokémon FireRed and LeafGreen.
- Turnback Cave and the Distortion World may draw some inspiration from the Japanese underworld, Yomi. Giratina itself can be seen as a parallel to the kami Izanami.
- Turnback Cave shares its music with that of the Old Chateau. However, in Pokémon Diamond and Pearl, the version of the track used in Turnback Cave and the surrounding areas is noticeably lacking certain soundfonts. Interestingly, this variation is not recognized as a separate track in the game's audio files and the normal variation of the track is used in Pokémon Platinum, suggesting the difference between the versions was unintentional.
In other languages
| |||||||||||||||||||||||||||||
See also
| Hisui | |||||||
|---|---|---|---|---|---|---|---|
|
| |||||||
|
| Game locations of Legendary and Mythical Pokémon | ||||||||||||||||||||||||||
|---|---|---|---|---|---|---|---|---|---|---|---|---|---|---|---|---|---|---|---|---|---|---|---|---|---|---|
| ||||||||||||||||||||||||||

|
This article is part of Project Locations, a Bulbapedia project that aims to write comprehensive articles on every location in the Pokémon world. |
