From Bulbapedia, the community-driven Pokémon encyclopedia.

|
This article is incomplete.
Please feel free to edit this article to add missing information and complete it.
|
| Ten Carat Hill
|
|
テンカラットヒル
Ten Carat Hill
|
| "Wild Missingno. appeared!"
|
|
|
|
| Map description:
|
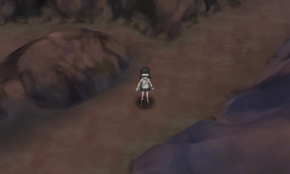
A great hill formed by the activity of an underwater volcano. It is famous for the hollow in its middle that is open to the air.
|
| Location:
|
Melemele Island (Route 1)
|
| Region:
|
Alola
|
| Generations:
|
VII
|

Location of Ten Carat Hill in Alola.
|
| Pokémon world locations
|
Ten Carat Hill (Japanese: テンカラットヒル Ten Carat Hill) is a location on Melemele Island in Alola accessed via Route 1, located west of the Pokémon Research Lab. It requires Tauros Charge to access initially, although it can be accessed later with only Charizard Glide.
An isolated area of Ten Carat Hill can be accessed from Melemele Sea using Sharpedo Jet. An isolated part of Ten Carat Hill: Farthest Hollow can be accessed from the west side of Ten Carat Hill's cave; in Pokémon Sun and Moon only, Machamp Shove is required to do this.
In the Pokémon Sun and Pokémon Moon Special Demo Version, a man at the northwest end of Hau'oli City by the Pokémon Center will guide the player here. He will also guide the player back to the city from the hill. In the demo, the area comprises the cave and the Farthest Hollow, as well as an open area which does not appear in the full game.
Geography
Cave
The cave part of Ten Carat Hill is a linear path connecting the Route 1 entrance to the Farthest Hollow, with a series of breakable rocks and a long ledge on the northern wall along the way. There is a second exit to a cliff overlooking the Farthest Hollow that can be accessed by pushing a heavy boulder near the first exit.
Farthest Hollow
As the name implies, the Farthest Hollow is the deepest part of Ten Carat Hill. A short path connects the cave to the center of an X-shaped field, with patches of tall grass at the end of each path except the northeastern branch. The southeastern branch is also longer than the others, curving along the southern wall of the area and leading to another patch of grass with TM62 (Acrobatics)SM or TM23 (Smack Down)USUM at the end. A cliff isolated from the rest of the Farthest Hollow is also accessible through a second exit in the cave area; the player can find a Flyinium Z here.
Items
Full games
Cave
Farthest Hollow
Tauros Charge is required to access the Farthest Hollow.
| Item
|
Location
|
Games
|

|
Hard Stone
|
On the west side, halfway down the path through the middle of the Farthest Hollow
|
S M US UM
|

|
Great Ball
|
On the opposite side of the southwest grass patch
|
S M US UM
|

|
Nugget
|
Central north side of the Farthest Hollow
|
S M US UM
|

|
Star Piece
|
Near the back of the grass field in the northwest (hidden)
|
S M US UM
|

|
Burn Heal
|
Northeast corner of the Farthest Hollow
|
S M US UM
|

|
TM62 (Acrobatics)
|
Before the grass patch reached by proceeding up the slope in the southeast
|
S M
|

|
TM23 (Smack Down)
|
Before the grass patch reached by proceeding up the slope in the southeast
|
US UM
|

|
Flyinium Z
|
On a cliff overlooking the hollow, via the path blocked by a heavy boulder in the cave (requires Machamp ShoveSM)
|
S M US UM
|
|
|
Ocean cave
Cave
Farthest Hollow
| Item
|
Location
|
Games
|

|
Z-Ring
|
From Kukui after completing the trial
|
S M
|

|
Electrium Z
|
From Kukui after completing the trial
|
S M
|
|
|
Transferable rewards
Outside
Pokémon
Pokémon Sun and Moon
Cave and ocean cave
| Pokémon
|
Allies
|
Games
|
Location
|
Levels
|
Rate
|
|
|
 Zubat Zubat
|
S
|
M
|
|
10-13
|
30%
|
|
|
 Diglett Diglett
|
S
|
M
|
|
10-13
|
20%
|
|
|
 Roggenrola Roggenrola
|
S
|
M
|
|
10-13
|
30%
|
|
|
 Carbink Carbink
 Sableye Sableye
|
S
|
M
|
|
10-13
|
20%
|
| Surfing
|
|
|
 Zubat Zubat
|
S
|
M
|
|
15-18
|
80%
|
|
|
 Psyduck Psyduck
|
S
|
M
|
|
15-18
|
20%
|
| Exclusively from Island Scan
|
|
|
N/A
|
S
|
M
|
|
13
|
OneTu
|
| A colored background means that the Pokémon can be found in this location in the specified game. A white background with a colored letter means that the Pokémon cannot be found here.
|
Farthest Hollow
| Pokémon
|
Allies
|
Games
|
Location
|
Levels
|
Rate
|
|
|
 Machop Machop
|
S
|
M
|
|
10-13
|
30%
|
|
|
 Spinda Spinda
|
S
|
M
|
|
10-13
|
10%
|
|
|
 Roggenrola Roggenrola
|
S
|
M
|
|
10-13
|
20%
|
|
|
 Carbink Carbink
|
S
|
M
|
|
10-13
|
20%
|
|
|
 Rockruff Rockruff
|
S
|
M
|
|
10-13
|
20%
|
Special Pokémon
After completing all Ultra Beast missions
|
|
|
N/A
|
S
|
M
|
|
75
|
One
|
| A colored background means that the Pokémon can be found in this location in the specified game. A white background with a colored letter means that the Pokémon cannot be found here.
|
Pokémon Ultra Sun and Ultra Moon
Cave and ocean cave
Farthest Hollow
| Pokémon
|
Allies
|
Games
|
Location
|
Levels
|
Rate
|
|
|
 Machop Machop
|
US
|
UM
|
|
11-14
|
30%
|
|
|
 Spinda Spinda
|
US
|
UM
|
|
11-14
|
30%
|
|
|
 Roggenrola Roggenrola
|
US
|
UM
|
|
11-14
|
10%
|
|
|
 Carbink Carbink
|
US
|
UM
|
|
11-14
|
10%
|
|
|
 Rockruff Rockruff
|
US
|
UM
|
|
11-14
|
20%
|
| A colored background means that the Pokémon can be found in this location in the specified game. A white background with a colored letter means that the Pokémon cannot be found here.
|
Pokémon Sun and Pokémon Moon Special Demo Version

The area only present in the Special Demo Version
Outside
| Pokémon
|
Allies
|
Games
|
Location
|
Levels
|
Rate
|

|

|
|
|
N/A
|
S
|
M
|
|
20-23
|
5%
|
|
|
N/A
|
S
|
M
|
|
20-23
|
50%
|
|
|
N/A
|
S
|
M
|
|
20-23
|
30%
|
|
|
N/A
|
S
|
M
|
|
20-23
|
15%
|
| Pokémon-catching challenge
|
|
|
N/A
|
S
|
M
|
|
30-34
|
5%
|
|
|
N/A
|
S
|
M
|
|
30-34
|
50%
|
|
|
N/A
|
S
|
M
|
|
30-34
|
30%
|
|
|
N/A
|
S
|
M
|
|
30-34
|
15%
|
| A colored background means that the Pokémon can be found in this location in the specified game. A white background with a colored letter means that the Pokémon cannot be found here.
|
Cave
| Pokémon
|
Allies
|
Games
|
Location
|
Levels
|
Rate
|

|

|
|
|
N/A
|
S
|
M
|

|
Only one
|
|
26
|
One
|
|
|
N/A
|
S
|
M
|

|
Only one
|
|
27
|
One
|
|
|
N/A
|
S
|
M
|

|
Only one
|
|
30
|
One
|
| A colored background means that the Pokémon can be found in this location in the specified game. A white background with a colored letter means that the Pokémon cannot be found here.
|
Totem Hakamo-o
Aura: +Sp. Def
|
Ally Rockruff
|
|
|
|
Trainers
Pokémon Sun and Pokémon Moon Special Demo Version
Outside
| Trainer
|
Pokémon
|
|
|
|
| After battling Plumeria
|

|
|
|
Lass Ellie
エリー Ellie
Reward: $864
|
|
|
|
|
|
|
|
|
|
|
|
|
|
|
|
|
|
|
|
|
|
Farthest Hollow

|
|
Reward: $4,320
|
|
|
|
|
|
Layout

|
This section is incomplete.
Please feel free to edit this section to add missing information and complete it.
Reason: Main interior, Demo outside
|
In the anime

Ten Carat Hill in the
animeTen Carat Hill first appeared in A Masked Warning!, where Ash was teleported there by Nebby while thinking about Gladion. There, he found Gladion training with his Type: Null. The two had a talk about Lillie's past and the Ultra Beasts, after which they had a battle between Type: Null and Lycanroc, which ended in Gladion's victory.
The area briefly reappeared in Night of a Thousand Poses!, when Lillie was thinking about Gladion.
The area reappeared again in The Prism Between Light and Darkness!, where Professor Kukui and Faba attacked Team Rocket's Matori Matrix Elite Force aircraft from there to prevent them from following the Ultra Guardians through an Ultra Wormhole. Gozu then descended down from the aircraft to confront Kukui and Faba directly, using his Mega Aggron to easily defeat Kukui's Braviary and Faba's Hypno and Alakazam.
The battle continued in Securing the Future!, where it, upon Faba revealing that he didn't have any more Pokémon, was left for Kukui alone. Using his Incineroar, Kukui was able to defeat Mega Aggron, although this allowed Faba to figure out that Kukui and the Masked Royal were the same person. After Team Rocket had been forced into retreat by Tapu Koko, Kukui, Faba, and Incineroar joined the other people and Pokémon in Alola in sending energy to Necrozma, with the Team Rocket trio and Bewear also doing the same nearby.
Pokémon found on Ten Carat Hill
In other languages


