Norman: Difference between revisions
Fawful2003 (talk | contribs) m (→Gym battle) |
m (Text replacement - "}}{{Animecharacters|" to "}} {{Animecharacters|") |
||
| (233 intermediate revisions by 81 users not shown) | |||
| Line 2: | Line 2: | ||
:''If you were looking for the [[character of the day]] in [[EP036|The Bridge Bike Gang]], see [[Norman (EP036)]].'' | :''If you were looking for the [[character of the day]] in [[EP036|The Bridge Bike Gang]], see [[Norman (EP036)]].'' | ||
---- | ---- | ||
{{ | {{Character Infobox | ||
color={{normal color}} | | |color={{normal color}} | ||
|bordercolor={{normal color dark}} | |||
|corecolor={{normal color light}} | |||
name=Norman | | |name=Norman | ||
jname=センリ | | |jname=センリ | ||
tmname=Senri | |tmname=Senri | ||
|sloganline=A man in pursuit of power! | |||
sloganline=A man in pursuit of power! | | |image=Omega Ruby Alpha Sapphire Norman.png | ||
image=Omega Ruby Alpha Sapphire Norman.png | | |size=150px | ||
size=150px | | |caption=Artwork from {{pkmn|Omega Ruby and Alpha Sapphire}} | ||
caption=Artwork from {{pkmn|Omega Ruby and Alpha Sapphire}} | | |gender=Male | ||
gender=Male | |eyes=Black{{tt|*|Games}}, Navy{{tt|*|Anime and Adventures}} | ||
|hair=Black{{tt|*|Games}}, Navy{{tt|*|Anime and Adventures}} | |||
eyes=Black{{tt|*|Games}}, Navy{{tt|*|Anime and Adventures}}| | |hometown=[[Littleroot Town]]{{tt|*|Games and Adventures}} (originally [[Olivine City]] in the games and [[Goldenrod City]] in Adventures)<br>[[Petalburg City]]{{tt|*|anime}} | ||
hair=Black{{tt|*|Games}}, Navy{{tt|*|Anime and Adventures}}| | |region=[[Hoenn]] (originally [[Johto]] in the games and Adventures) | ||
hometown=[[Littleroot Town]] ( | |relatives={{ga|Brendan}} (son) or {{ga|May}} (daughter), {{ho|Mom|wife}} (games)<br>{{adv|Ruby}} (son), unnamed wife (Adventures)<br>{{an|May}} (daughter), [[Max]] (son), [[Caroline]] (wife) (anime)<br>{{mas|Brendan}} (son) (Masters) | ||
region=[[Hoenn]] (originally [[Johto]]) | | |||
relatives={{ga|Brendan}} | |||
}} | }} | ||
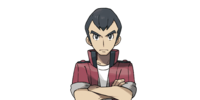
'''Norman''' (Japanese: '''センリ''' ''Senri'') is the father of the {{player}} and the [[Gym Leader]] of [[Petalburg City]]'s [[Gym]], known officially as the [[Petalburg Gym]] in {{game2|Ruby|Sapphire|Emerald}} and their [[Generation VI]] remakes [[Pokémon Omega Ruby and Alpha Sapphire|Omega Ruby and Alpha Sapphire]]. He is an expert of {{type|Normal}} {{OBP|Pokémon|species}}, and hands out the {{Badge|Balance}} to any {{pkmn|Trainer}} who defeats him. | {{Character Infobox/Game | ||
|color={{normal color light}} | |||
|gen={{gen|III}}, {{gen|V}}, {{gen|VI}}, {{gen|VII}} | |||
|counterpart=[[Norman (Masters)]] | |||
|games={{3v2|Ruby|Sapphire|Emerald}}, {{2v2|Black|White|2}}, {{pkmn|Omega Ruby and Alpha Sapphire}}<br>{{pkmn|Masters EX}} | |||
|trainer=[[Gym Leader]]{{sup/3|RSE}}{{sup/6|ORAS}}<br>[[Pokémon Trainer]]{{sup/5|B2W2}} | |||
|enva=Keith Silverstein<ref name="Keith Silverstein">[https://twitter.com/SilverTalkie/status/1482062833407782915 Keith Silverstein on Twitter]</ref> <small>({{pkmn|Masters EX}})</small> | |||
|jpva=Tomokazu Sugita <small>({{pkmn|Masters EX}})</small> | |||
}} | |||
{{Character Infobox/Team | |||
|color={{normal color light}} | |||
|member=[[Hoenn League]] | |||
|rank=[[Gym Leader]] | |||
|domain=[[Petalburg Gym]] | |||
|reward={{badge|Balance}} | |||
|specialty={{t|Normal}} types | |||
}} | |||
{{Character Infobox/Anime | |||
|color={{normal color light}} | |||
|series=''[[Pokémon the Series]]'' | |||
|debut=''[[AG003|There's no Place Like Hoenn]]'' | |||
|enva=[[Dan Green]] | |||
|jpva=Jūrōta Kosugi | |||
}} | |||
|} | |||
'''Norman''' (Japanese: '''センリ''' ''Senri'') is the father of the {{player}} and the [[Gym Leader]] of [[Petalburg City]]'s [[Gym]], known officially as the [[Petalburg Gym]] in {{game2|Ruby|Sapphire|Emerald}} and their [[Generation VI]] remakes [[Pokémon Omega Ruby and Alpha Sapphire|Omega Ruby and Alpha Sapphire]]. He is an [[Type expert|expert]] of {{type|Normal}} {{OBP|Pokémon|species}}, and hands out the {{Badge|Balance}} to any {{pkmn|Trainer}} who defeats him. | |||
==In the core series games== | |||
[[File:Norman ORAS.png|thumb|200px|Norman challenging the player]] | |||
Norman is also the [[player character]]'s father in {{game2|Ruby|Sapphire|Emerald}} no matter which gender is selected. The other gender choice (and therefore the [[rival]]) is the child of [[Professor Birch]]. | Norman is also the [[player character]]'s father in {{game2|Ruby|Sapphire|Emerald}} no matter which gender is selected. The other gender choice (and therefore the [[rival]]) is the child of [[Professor Birch]]. | ||
Although he is the first Gym Leader encountered, he refuses to battle until the player has at least four Badges. Before stating this, he first introduces the player to Wally (secondary rival) which is when the Pokémon catching tutorial happens. Once he is beaten, he gives the player the Balance Badge. | Although he is the first Gym Leader encountered, he refuses to battle until the player has at least four Badges. Before stating this, he first introduces the player to Wally (secondary rival) which is when the Pokémon catching tutorial happens. Once he is beaten, he gives the player the Balance Badge, as well as {{TM|42|Facade}} in {{3v2|Ruby|Sapphire|Emerald}} or {{TM|67|Retaliate}} in {{pkmn|Omega Ruby and Alpha Sapphire}}. | ||
Norman and his family are originally from [[Olivine City]] in [[Johto]]. He, as well as the player, have just moved to [[Hoenn]] so that he could take up the position of Gym Leader. People have come to describe him as someone who "lives for Pokémon". | Norman and his family are originally from [[Olivine City]] in [[Johto]]. He, as well as the player, have just moved to [[Hoenn]] so that he could take up the position of Gym Leader. People have come to describe him as someone who "lives for Pokémon". | ||
| Line 66: | Line 76: | ||
===={{game|Ruby and Sapphire|s}}==== | ===={{game|Ruby and Sapphire|s}}==== | ||
=====Loaned===== | =====Loaned===== | ||
Norman loans this Pokémon to | Norman loans this Pokémon to [[Wally]] to show him how to catch Pokémon. | ||
{{Pokémon/3 | {{Pokémon/3 | ||
|game=Ruby | |game=Ruby | ||
| Line 72: | Line 82: | ||
|ndex=263 | |ndex=263 | ||
|pokemon=Zigzagoon | |pokemon=Zigzagoon | ||
|gender= | |gender=both | ||
|ability=Pickup | |ability=Pickup | ||
|level=7 | |level=7 | ||
| Line 79: | Line 89: | ||
=====Gym battle===== | =====Gym battle===== | ||
Norman uses two [[Hyper Potion]]s. | |||
{{Party/Single | {{Party/Single | ||
|color={{normal color}} | |color={{normal color}} | ||
| Line 131: | Line 142: | ||
===={{game|Emerald}}==== | ===={{game|Emerald}}==== | ||
Norman uses two [[Hyper Potion]]s in the Gym battle and three [[Full Restore]]s in the rematches. | |||
=====Loaned===== | =====Loaned===== | ||
Norman loans this Pokémon to | Norman loans this Pokémon to [[Wally]] to show him how to catch Pokémon. | ||
{{Pokémon/3 | {{Pokémon/3 | ||
|game=Emerald | |game=Emerald | ||
| Line 138: | Line 150: | ||
|ndex=263 | |ndex=263 | ||
|pokemon=Zigzagoon | |pokemon=Zigzagoon | ||
|gender= | |gender=both | ||
|ability=Pickup | |ability=Pickup | ||
|level=7 | |level=7 | ||
| Line 160: | Line 172: | ||
|{{Pokémon/3 | |{{Pokémon/3 | ||
|game=Emerald | |game=Emerald | ||
|ndex= | |ndex=327Norman1 | ||
|pokemon=Spinda | |pokemon=Spinda | ||
|gender=male | |gender=male | ||
| Line 166: | Line 178: | ||
|level=27 | |level=27 | ||
|type1=Normal | |type1=Normal | ||
|move1= | |move1=Teeter Dance|move1type=Normal | ||
|move2= | |move2=Psybeam|move2type=Psychic | ||
|move3= | |move3=Facade|move3type=Normal | ||
|move4= | |move4=Encore|move4type=Normal}} | ||
|{{Pokémon/3 | |{{Pokémon/3 | ||
|game=Emerald | |game=Emerald | ||
| Line 179: | Line 191: | ||
|type1=Normal | |type1=Normal | ||
|move1=Slash|move1type=Normal | |move1=Slash|move1type=Normal | ||
|move2= | |move2=Facade|move2type=Normal | ||
|move3=Encore|move3type=Normal | |move3=Encore|move3type=Normal | ||
|move4= | |move4=Faint Attack|move4type=Dark}} | ||
{{Party/Div|color={{normal color}}}} | {{Party/Div|color={{normal color}}}} | ||
|{{Pokémon/3 | |{{Pokémon/3 | ||
| Line 193: | Line 205: | ||
|move1=Slash|move1type=Normal | |move1=Slash|move1type=Normal | ||
|move2=Belly Drum|move2type=Normal | |move2=Belly Drum|move2type=Normal | ||
|move3= | |move3=Facade|move3type=Normal | ||
|move4= | |move4=Headbutt|move4type=Normal}} | ||
|{{Pokémon/3 | |{{Pokémon/3 | ||
|game=Emerald | |game=Emerald | ||
| Line 204: | Line 216: | ||
|level=31 | |level=31 | ||
|type1=Normal | |type1=Normal | ||
|move1= | |move1=Counter|move1type=Fighting | ||
|move2= | |move2=Yawn|move2type=Normal | ||
|move3= | |move3=Facade|move3type=Normal | ||
|move4= | |move4=Faint Attack|move4type=Dark}} | ||
{{Party/Footer}} | {{Party/Footer}} | ||
| Line 232: | Line 244: | ||
|level=42 | |level=42 | ||
|type1=Normal | |type1=Normal | ||
|move1= | |move1=Light Screen|move1type=Psychic | ||
|move2= | |move2=Sing|move2type=Normal | ||
|move3= | |move3=Skill Swap|move3type=Psychic | ||
|move4=Focus Punch|move4type=Fighting}} | |move4=Focus Punch|move4type=Fighting}} | ||
|{{Pokémon/3 | |{{Pokémon/3 | ||
| Line 245: | Line 257: | ||
|level=42 | |level=42 | ||
|type1=Normal | |type1=Normal | ||
|move1= | |move1=Blizzard|move1type=Ice | ||
|move2= | |move2=Shadow Ball|move2type=Ghost | ||
|move3= | |move3=Double-Edge|move3type=Normal | ||
|move4= | |move4=Fire Blast|move4type=Fire}} | ||
{{Party/Div|color={{normal color}}}} | {{Party/Div|color={{normal color}}}} | ||
|{{Pokémon/3 | |{{Pokémon/3 | ||
|game=Emerald | |game=Emerald | ||
|ndex= | |ndex=327Norman2 | ||
|pokemon=Spinda | |pokemon=Spinda | ||
|gender=male | |gender=male | ||
| Line 258: | Line 270: | ||
|level=43 | |level=43 | ||
|type1=Normal | |type1=Normal | ||
|move1= | |move1=Teeter Dance|move1type=Normal | ||
|move2= | |move2=Skill Swap|move2type=Psychic | ||
|move3= | |move3=Facade|move3type=Normal | ||
|move4= | |move4=Hypnosis|move4type=Psychic}} | ||
|{{Pokémon/3 | |{{Pokémon/3 | ||
|game=Emerald | |game=Emerald | ||
| Line 271: | Line 283: | ||
|level=45 | |level=45 | ||
|type1=Normal | |type1=Normal | ||
|move1= | |move1=Hyper Beam|move1type=Normal | ||
|move2=Flamethrower|move2type=Fire | |move2=Flamethrower|move2type=Fire | ||
|move3=Thunderbolt|move3type=Electric | |move3=Thunderbolt|move3type=Electric | ||
|move4= | |move4=Shadow Ball|move4type=Ghost}} | ||
{{Party/Footer}} | {{Party/Footer}} | ||
| Line 291: | Line 303: | ||
|pokemon=5 | |pokemon=5 | ||
}} | }} | ||
|{{Pokémon/3 | |||
|game=Emerald | |||
|ndex=289 | |||
|pokemon=Slaking | |||
|gender=male | |||
|ability=Truant | |||
|held=Sitrus Berry | |||
|level=47 | |||
|type1=Normal | |||
|move1=Blizzard|move1type=Ice | |||
|move2=Shadow Ball|move2type=Ghost | |||
|move3=Double-Edge|move3type=Normal | |||
|move4=Fire Blast|move4type=Fire}} | |||
|{{Pokémon/3 | |{{Pokémon/3 | ||
|game=Emerald | |game=Emerald | ||
| Line 299: | Line 324: | ||
|level=47 | |level=47 | ||
|type1=Normal | |type1=Normal | ||
|move1= | |move1=Light Screen|move1type=Psychic | ||
|move2= | |move2=Sing|move2type=Normal | ||
|move3= | |move3=Skill Swap|move3type=Psychic | ||
|move4=Focus Punch|move4type=Fighting}} | |move4=Focus Punch|move4type=Fighting}} | ||
|{{Pokémon/3 | |{{Pokémon/3 | ||
|game=Emerald | |game=Emerald | ||
| Line 324: | Line 337: | ||
|type1=Normal | |type1=Normal | ||
|move1=Fake Out|move1type=Normal | |move1=Fake Out|move1type=Normal | ||
|move2= | |move2=Dizzy Punch|move2type=Normal | ||
|move3=Endure|move3type=Normal | |move3=Endure|move3type=Normal | ||
|move4= | |move4=Reversal|move4type=Fighting}} | ||
{{Party/Div|color={{normal color}}}} | {{Party/Div|color={{normal color}}}} | ||
| style="margin:auto" |{{Pokémon/3 | | style="margin:auto" |{{Pokémon/3 | ||
|game=Emerald | |game=Emerald | ||
|ndex= | |ndex=327Norman3 | ||
|pokemon=Spinda | |pokemon=Spinda | ||
|gender=male | |gender=male | ||
| Line 336: | Line 349: | ||
|level=48 | |level=48 | ||
|type1=Normal | |type1=Normal | ||
|move1= | |move1=Teeter Dance|move1type=Normal | ||
|move2= | |move2=Skill Swap|move2type=Psychic | ||
|move3= | |move3=Facade|move3type=Normal | ||
|move4= | |move4=Hypnosis|move4type=Psychic}} | ||
| style="margin:auto" |{{Pokémon/3 | | style="margin:auto" |{{Pokémon/3 | ||
|game=Emerald | |game=Emerald | ||
| Line 349: | Line 362: | ||
|level=50 | |level=50 | ||
|type1=Normal | |type1=Normal | ||
|move1= | |move1=Hyper Beam|move1type=Normal | ||
|move2=Flamethrower|move2type=Fire | |move2=Flamethrower|move2type=Fire | ||
|move3=Thunderbolt|move3type=Electric | |move3=Thunderbolt|move3type=Electric | ||
|move4= | |move4=Shadow Ball|move4type=Ghost}} | ||
{{Party/Footer}} | {{Party/Footer}} | ||
| Line 369: | Line 382: | ||
|pokemon=5 | |pokemon=5 | ||
}} | }} | ||
|{{Pokémon/3 | |||
|game=Emerald | |||
|ndex=289 | |||
|pokemon=Slaking | |||
|gender=male | |||
|ability=Truant | |||
|held=Sitrus Berry | |||
|level=52 | |||
|type1=Normal | |||
|move1=Blizzard|move1type=Ice | |||
|move2=Shadow Ball|move2type=Ghost | |||
|move3=Double-Edge|move3type=Normal | |||
|move4=Fire Blast|move4type=Fire}} | |||
|{{Pokémon/3 | |{{Pokémon/3 | ||
|game=Emerald | |game=Emerald | ||
| Line 377: | Line 403: | ||
|level=52 | |level=52 | ||
|type1=Normal | |type1=Normal | ||
|move1= | |move1=Light Screen|move1type=Psychic | ||
|move2= | |move2=Sing|move2type=Normal | ||
|move3= | |move3=Skill Swap|move3type=Psychic | ||
|move4=Focus Punch|move4type=Fighting}} | |move4=Focus Punch|move4type=Fighting}} | ||
|{{Pokémon/3 | |{{Pokémon/3 | ||
|game=Emerald | |game=Emerald | ||
| Line 402: | Line 416: | ||
|type1=Normal | |type1=Normal | ||
|move1=Fake Out|move1type=Normal | |move1=Fake Out|move1type=Normal | ||
|move2= | |move2=Dizzy Punch|move2type=Normal | ||
|move3=Endure|move3type=Normal | |move3=Endure|move3type=Normal | ||
|move4= | |move4=Reversal|move4type=Fighting}} | ||
{{Party/Div|color={{normal color}}}} | {{Party/Div|color={{normal color}}}} | ||
| style="margin:auto" |{{Pokémon/3 | | style="margin:auto" |{{Pokémon/3 | ||
|game=Emerald | |game=Emerald | ||
|ndex= | |ndex=327Norman4 | ||
|pokemon=Spinda | |pokemon=Spinda | ||
|gender=male | |gender=male | ||
| Line 414: | Line 428: | ||
|level=53 | |level=53 | ||
|type1=Normal | |type1=Normal | ||
|move1= | |move1=Teeter Dance|move1type=Normal | ||
|move2= | |move2=Skill Swap|move2type=Psychic | ||
|move3= | |move3=Facade|move3type=Normal | ||
|move4= | |move4=Hypnosis|move4type=Psychic}} | ||
| style="margin:auto" |{{Pokémon/3 | | style="margin:auto" |{{Pokémon/3 | ||
|game=Emerald | |game=Emerald | ||
| Line 427: | Line 441: | ||
|level=55 | |level=55 | ||
|type1=Normal | |type1=Normal | ||
|move1= | |move1=Hyper Beam|move1type=Normal | ||
|move2=Flamethrower|move2type=Fire | |move2=Flamethrower|move2type=Fire | ||
|move3=Thunderbolt|move3type=Electric | |move3=Thunderbolt|move3type=Electric | ||
|move4= | |move4=Shadow Ball|move4type=Ghost}} | ||
{{Party/Footer}} | {{Party/Footer}} | ||
=====Fourth rematch===== | =====Fourth rematch onwards===== | ||
{{Party/Single | {{Party/Single | ||
|color={{normal color}} | |color={{normal color}} | ||
| Line 447: | Line 461: | ||
|pokemon=6 | |pokemon=6 | ||
}} | }} | ||
|{{Pokémon/3 | |||
|game=Emerald | |||
|ndex=289 | |||
|pokemon=Slaking | |||
|gender=male | |||
|ability=Truant | |||
|held=Sitrus Berry | |||
|level=57 | |||
|type1=Normal | |||
|move1=Blizzard|move1type=Ice | |||
|move2=Shadow Ball|move2type=Ghost | |||
|move3=Double-Edge|move3type=Normal | |||
|move4=Fire Blast|move4type=Fire}} | |||
|{{Pokémon/3 | |{{Pokémon/3 | ||
|game=Emerald | |game=Emerald | ||
| Line 455: | Line 482: | ||
|level=57 | |level=57 | ||
|type1=Normal | |type1=Normal | ||
|move1= | |move1=Protect|move1type=Normal | ||
|move2= | |move2=Sing|move2type=Normal | ||
|move3= | |move3=Skill Swap|move3type=Psychic | ||
|move4=Focus Punch|move4type=Fighting}} | |move4=Focus Punch|move4type=Fighting}} | ||
|{{Pokémon/3 | |{{Pokémon/3 | ||
|game=Emerald | |game=Emerald | ||
| Line 480: | Line 495: | ||
|type1=Normal | |type1=Normal | ||
|move1=Fake Out|move1type=Normal | |move1=Fake Out|move1type=Normal | ||
|move2= | |move2=Dizzy Punch|move2type=Normal | ||
|move3=Endure|move3type=Normal | |move3=Endure|move3type=Normal | ||
|move4= | |move4=Reversal|move4type=Fighting}} | ||
{{Party/Div|color={{normal color}}}} | {{Party/Div|color={{normal color}}}} | ||
|{{Pokémon/3 | |{{Pokémon/3 | ||
| Line 493: | Line 508: | ||
|type1=Normal | |type1=Normal | ||
|move1=Take Down|move1type=Normal | |move1=Take Down|move1type=Normal | ||
|move2= | |move2=Protect|move2type=Normal | ||
|move3= | |move3=Fire Blast|move3type=Fire | ||
|move4= | |move4=Earthquake|move4type=Ground}} | ||
|{{Pokémon/3 | |{{Pokémon/3 | ||
|game=Emerald | |game=Emerald | ||
|ndex= | |ndex=327Norman5 | ||
|pokemon=Spinda | |pokemon=Spinda | ||
|gender=male | |gender=male | ||
| Line 504: | Line 519: | ||
|level=58 | |level=58 | ||
|type1=Normal | |type1=Normal | ||
|move1= | |move1=Teeter Dance|move1type=Normal | ||
|move2= | |move2=Skill Swap|move2type=Psychic | ||
|move3= | |move3=Facade|move3type=Normal | ||
|move4= | |move4=Hypnosis|move4type=Psychic}} | ||
|{{Pokémon/3 | |{{Pokémon/3 | ||
|game=Emerald | |game=Emerald | ||
| Line 517: | Line 532: | ||
|level=60 | |level=60 | ||
|type1=Normal | |type1=Normal | ||
|move1= | |move1=Hyper Beam|move1type=Normal | ||
|move2=Flamethrower|move2type=Fire | |move2=Flamethrower|move2type=Fire | ||
|move3=Thunderbolt|move3type=Electric | |move3=Thunderbolt|move3type=Electric | ||
|move4= | |move4=Shadow Ball|move4type=Ghost}} | ||
{{Party/Footer}} | {{Party/Footer}} | ||
===={{ | ===={{B2W2}}==== | ||
=====[[Pokémon World Tournament]]===== | =====[[Pokémon World Tournament]]===== | ||
Norman uses three of these Pokémon in [[Pokémon battle|Single Battles]], four in [[Double Battle|Double]] and [[Rotation Battle]]s, and all six in [[Triple Battle]]s. Norman will always lead with his signature Pokémon, {{p|Slaking}}. | Norman uses three of these Pokémon in [[Pokémon battle|Single Battles]], four in [[Double Battle|Double]] and [[Rotation Battle]]s, and all six in [[Triple Battle]]s. Norman will always lead with his signature Pokémon, {{p|Slaking}}. | ||
| Line 531: | Line 546: | ||
|color={{normal color}} | |color={{normal color}} | ||
|headcolor={{normal color light}} | |headcolor={{normal color light}} | ||
|bordercolor={{normal color dark}} | |bordercolor={{normal color dark}} | ||
|sprite=Spr B2W2 Norman.png | |sprite=Spr B2W2 Norman.png | ||
|prize=1{{color2|000|Battle Point|BP}} | |prize=1{{color2|000|Battle Point|BP}} | ||
| Line 626: | Line 641: | ||
|color={{normal color}} | |color={{normal color}} | ||
|headcolor={{normal color light}} | |headcolor={{normal color light}} | ||
|bordercolor={{normal color dark}} | |bordercolor={{normal color dark}} | ||
|sprite=Spr B2W2 Norman.png | |sprite=Spr B2W2 Norman.png | ||
|prize=1{{color2|000|Battle Point|BP}} | |prize=1{{color2|000|Battle Point|BP}} | ||
| Line 721: | Line 736: | ||
|color={{normal color}} | |color={{normal color}} | ||
|headcolor={{normal color light}} | |headcolor={{normal color light}} | ||
|bordercolor={{normal color dark}} | |bordercolor={{normal color dark}} | ||
|sprite=Spr B2W2 Norman.png | |sprite=Spr B2W2 Norman.png | ||
|prize=1{{color2|000|Battle Point|BP}} | |prize=1{{color2|000|Battle Point|BP}} | ||
| Line 739: | Line 754: | ||
|type1=Normal | |type1=Normal | ||
|ability=Truant | |ability=Truant | ||
|held=Chople Berry | |held=Chople Berry | ||
|move1=Giga Impact|move1type=Normal|move1cat=Physical | |move1=Giga Impact|move1type=Normal|move1cat=Physical | ||
|move2=Hammer Arm|move2type=Fighting|move2cat=Physical | |move2=Hammer Arm|move2type=Fighting|move2cat=Physical | ||
| Line 766: | Line 781: | ||
|type1=Normal | |type1=Normal | ||
|type2=Grass | |type2=Grass | ||
|ability=Sap Sipper | |ability=Sap Sipper | ||
|held=Occa Berry | |held=Occa Berry | ||
|move1=Horn Leech|move1type=Grass|move1cat=Physical | |move1=Horn Leech|move1type=Grass|move1cat=Physical | ||
| Line 789: | Line 804: | ||
===={{g|Omega Ruby and Alpha Sapphire}}==== | ===={{g|Omega Ruby and Alpha Sapphire}}==== | ||
=====Loaned===== | =====Loaned===== | ||
Norman loans this Pokémon to | Norman loans this Pokémon to [[Wally]] to show him how to catch Pokémon. | ||
{{Pokémon/6 | {{Pokémon/6 | ||
|back=yes | |back=yes | ||
| Line 810: | Line 825: | ||
|sprite=VSNorman.png | |sprite=VSNorman.png | ||
|size=150px | |size=150px | ||
|prize={{PDollar}} | |prize={{PDollar}}3,600 | ||
|class=Leader | |class=Leader | ||
|classlink=Gym Leader | |classlink=Gym Leader | ||
| Line 855: | Line 870: | ||
{{Party/Footer}} | {{Party/Footer}} | ||
== | ==In the spin-off games== | ||
===[[Pokémon Masters EX]]=== | |||
{{main|Norman (Masters)}} | |||
Norman forms a [[sync pair]] with {{TP|Norman|Slaking}} in [[Pokémon Masters EX]]. Norman became a playable sync pair since the game's release, with him joining the {{player}} after completing the seventh chapter of the [[PML Arc]]. | |||
In this game, Norman is {{mas|Brendan}}'s father and one of the PML Leaders of the [[Pokémon Masters League]], handing out the {{badge|Patience}} to those who defeat him. He has also made notable appearances in the game's Main Stories: the PML Arc, [[Legendary Adventures]], and the [[Villain Arc]]. | |||
{{PairDex/h|Normal}} | |||
{{PairDex|022|Norman|trainerlink=Norman (Masters)#Slaking|trainerimg=Norman|0289|Slaking|pokemonlink=Norman's Slaking|gender=male|Normal|Fighting|Physical Strike|3|Story<br>''Chapter 07''}} | |||
|} | |||
==Gallery== | |||
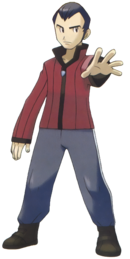
===Artwork=== | |||
==== | |||
{| style="margin:auto; text-align:center; {{roundy|20px}} border: 2px solid #{{normal color dark}}; background: #{{normal color}}; font-size: 80%" | {| style="margin:auto; text-align:center; {{roundy|20px}} border: 2px solid #{{normal color dark}}; background: #{{normal color}}; font-size: 80%" | ||
|- | |- | ||
| style="{{roundy|20px}} border: 2px solid #{{normal color dark}}; background: #{{normal color light}}" | [[File:Ruby Sapphire Norman.png|130px]] | | style="{{roundy|20px}} border: 2px solid #{{normal color dark}}; background: #{{normal color light}}" | [[File:Ruby Sapphire Norman.png|130px]] | ||
| style="{{roundy|20px}} border: 2px solid #{{normal color dark}}; background: #{{normal color light}}"| [[File:Norman ORAS concept art.png|250px]] | | style="{{roundy|20px}} border: 2px solid #{{normal color dark}}; background: #{{normal color light}}"| [[File:Norman ORAS concept art.png|250px]] | ||
|- | |- | ||
| Official artwork from<br>{{color2|000|Generation III}} | | Official artwork from<br>{{color2|000|Generation III}} | ||
| | | Concept artwork from<br>{{color2|000|Pokémon Omega Ruby and Alpha Sapphire|Omega Ruby and Alpha Sapphire}} | ||
|} | |} | ||
===Sprites=== | ===Sprites and models=== | ||
{| style="margin:auto; text-align:center; {{roundy|20px}} border: 2px solid #{{normal color dark}}; background: #{{normal color}}; font-size: 80%" | {| style="margin:auto; text-align:center; {{roundy|20px}} border: 2px solid #{{normal color dark}}; background: #{{normal color}}; font-size: 80%" | ||
|- | |- | ||
| style="{{roundy|80px}} border: 2px solid #{{normal color dark}}; background: #{{normal color light}}; width:80px" | [[File:Spr RS Norman.png]] | | style="{{roundy|80px}} border: 2px solid #{{normal color dark}}; background: #{{normal color light}}; width:80px" | [[File:Spr RS Norman.png]] | ||
| style="{{roundy|80px}} border: 2px solid #{{normal color dark}}; background: #{{normal color light}}; width:80px" | [[File:Spr B2W2 Norman.png]] | | style="{{roundy|80px}} border: 2px solid #{{normal color dark}}; background: #{{normal color light}}; width:80px" | [[File:Spr B2W2 Norman.png]] | ||
| style="{{roundy|20px}} border: 2px solid #{{normal color dark}}; background: #{{normal color light}}; width:80px" | [[File:VSNorman.png|200px]] | | style="{{roundy|20px}} border: 2px solid #{{normal color dark}}; background: #{{normal color light}}; width:80px" | [[File:VSNorman.png|200px]] | ||
|- | |- | ||
| Sprite from<br>{{color2|000|Pokémon Ruby and Sapphire Versions|Ruby, Sapphire}}, and {{color2|000|Pokémon Emerald Version|Emerald}} | | Sprite from<br>{{color2|000|Pokémon Ruby and Sapphire Versions|Ruby, Sapphire}}, and {{color2|000|Pokémon Emerald Version|Emerald}} | ||
| Sprite from<br>{{color2|000|Pokémon Black and White Versions 2|Black 2 and White 2}} | | Sprite from<br>{{color2|000|Pokémon Black and White Versions 2|Black 2 and<br>White 2}} | ||
| VS portrait from<br>{{color2|000|Pokémon Omega Ruby and Alpha Sapphire|Omega Ruby and Alpha Sapphire}} | |||
|- | |||
| style="{{roundy|80px}} border: 2px solid #{{normal color dark}}; background: #{{normal color light}}; width:80px" | [[File:Norman III OD.png]] | |||
| style="{{roundy|80px}} border: 2px solid #{{normal color dark}}; background: #{{normal color light}}; width:80px" | [[File:Norman OD.png]] | |||
| style="{{roundy|80px}} border: 2px solid #{{normal color dark}}; background: #{{normal color light}}; width:80px" | [[File:Norman ORAS OD.png|100px]] | |||
|- | |||
| Overworld sprite from<br>{{color2|000|Pokémon Ruby and Sapphire Versions|Ruby, Sapphire}}, and {{color2|000|Pokémon Emerald Version|Emerald}} | | Overworld sprite from<br>{{color2|000|Pokémon Ruby and Sapphire Versions|Ruby, Sapphire}}, and {{color2|000|Pokémon Emerald Version|Emerald}} | ||
| Overworld sprite from<br>{{color2|000|Pokémon Black and White Versions 2|Black 2 and White 2}} | | Overworld sprite from<br>{{color2|000|Pokémon Black and White Versions 2|Black 2 and<br>White 2}} | ||
| | | Overworld model from<br>{{color2|000|Pokémon Omega Ruby and Alpha Sapphire|Omega Ruby and Alpha Sapphire}} | ||
|} | |} | ||
==Quotes== | |||
{{main|Norman/Quotes}} | |||
==In the anime== | ==In the anime== | ||
[[File:Norman anime.png| | ===Main series=== | ||
In the {{pkmn|anime}}, Norman is the father of {{an|May}} and [[Max]], and the husband of [[Caroline]]. | ====History==== | ||
[[File:Norman anime.png|220px|thumb|Norman in the anime]] | |||
=====Pre-series===== | |||
Norman and his family only recently moved from the [[Johto]] [[region]] to [[Petalburg City]] and assumed his role as the local [[Gym Leader]]. | |||
=====''[[Pokémon the Series: Ruby and Sapphire]]''===== | |||
In the {{pkmn|anime}}, Norman is the father of {{an|May}} and [[Max]], two of Ash's former traveling companions, and the husband of [[Caroline]]. | |||
Very early in his Hoenn journey, {{Ash}} arrived with May in Petalburg City in the hope of getting his first Gym battle. Ash found the Petalburg Gym and met [[Max]], who posed as if he was the Gym Leader. May stopped him and allowed Ash to meet her parents, Caroline and Norman. Norman turned out be to the real [[Petalburg City]] [[Gym Leader]]. Norman used his Pokémon, a {{p|Vigoroth}}, to save [[May's Torchic]] from {{TRT}}. | Very early in his Hoenn journey, {{Ash}} arrived with May in Petalburg City in the hope of getting his first Gym battle. In ''[[AG003|There's no Place Like Hoenn]]'', Ash found the Petalburg Gym and met [[Max]], who posed as if he was the Gym Leader. May stopped him and allowed Ash to meet her parents, Caroline and Norman. Norman turned out be to the real [[Petalburg City]] [[Gym Leader]]. Norman used his Pokémon, a {{p|Vigoroth}}, in an exhibition battle against Pikachu, and later to save [[May's Torchic]] from {{TRT}}. | ||
Norman is a good friend of [[Professor Birch]] and was most likely the person to send May to [[Littleroot Town]] to get her first Pokémon. As May did not initially like Pokémon, this seemed to have created some distance between the two. Before Ash knew that Norman was May's father, he commented that it sounded like she knew the Petalburg Gym Leader pretty well, to which she replied, "No, I just wish I did," and became subdued. | Norman is a good friend of [[Professor Birch]] and was most likely the person to send May to [[Littleroot Town]] to get her first Pokémon. As May did not initially like Pokémon, this seemed to have created some distance between the two. Before Ash knew that Norman was May's father, he commented that it sounded like she knew the Petalburg Gym Leader pretty well, to which she replied, "No, I just wish I did," and became subdued. | ||
In ''[[AG069|Love, Petalburg Style!]]'', when Ash and his friends visited Petalburg City again, May and Max tried to figure out why Norman and Caroline were getting all worked up as Ash tried to save Norman's three Pokémon from Team Rocket. It all turned out that Norman had Nurse Joy set up a special firework display to make fireworks in a form of a {{p|Beautifly}} as a wedding anniversary gift for Caroline. | In ''[[AG068|A Double Dilemma]]'', Norman appeared in flashbacks and on memorabilia. It was also revealed that he had a large fanbase in [[North Petalburg]]. | ||
In ''[[AG069|Love, Petalburg Style!]]'', when Ash and his friends visited Petalburg City again, May and Max tried to figure out why Norman and Caroline were getting all worked up as Ash tried to save Norman's three Pokémon from Team Rocket. It all turned out that Norman had Nurse Joy set up a special firework display to make fireworks in a form of a {{p|Beautifly}} as a wedding anniversary gift for Caroline. During the episode, Norman showed that he was rather dense, not realizing that Caroline assumed that he was having an affair with Nurse Joy. | |||
Ash had his Gym battle with Norman in ''[[AG070|Balance of Power]]''. Using his {{AP|Grovyle}}, {{AP|Pikachu}}, and {{AP|Torkoal}}, Ash defeated Norman's Pokémon. Upset by his father's loss, Max stole the Balance Badge and locked himself up in Norman's greenhouse. Norman was able to calm Max down, and Max gave Ash his {{Badge|Balance}}. | Ash had his Gym battle with Norman in ''[[AG070|Balance of Power]]''. Using his {{AP|Grovyle}}, {{AP|Pikachu}}, and {{AP|Torkoal}}, Ash defeated Norman's Pokémon. Upset by his father's loss, Max stole the Balance Badge and locked himself up in Norman's greenhouse. Norman was able to calm Max down, and Max gave Ash his {{Badge|Balance}}. | ||
He reappeared in flashbacks in ''[[AG075|Whiscash and Ash]]'', | He reappeared in flashbacks in ''[[AG075|Whiscash and Ash]]'', ''[[AG089|A Scare to Remember!]]'', and ''[[AG103|A Cacturne for the Worse]]''. | ||
[[File:Norman Slaking DP.png|thumb|right|220px|Norman and family watching May compete in the Wallace Cup]] | |||
In ''[[AG121|Hi Ho Silver Wind!]]'', Caroline joined Ash and {{ashfr}} in [[Slateport City]] to watch May compete in the [[Hoenn Grand Festival]], though revealed that Norman was too busy at the Petalburg Gym, so he would be cheering her on from home. In ''[[AG122|Deceit and Assist]]'', Norman was watching May competing in the Hoenn Grand Festival on [[television]]. | |||
In ''[[AG126|Saved by the Beldum]]'', Norman watched Ash competing in the [[Ever Grande Conference]] from the comfort of his living room. | |||
===Pokémon=== | He reappeared in a fantasy in ''[[AG153|Tactics Theatrics!]]''. | ||
=====''[[Pokémon the Series: Diamond and Pearl]]''===== | |||
Norman appeared in a flashback in ''[[DP076|A Full Course Tag Battle!]]''. | |||
His latest appearances saw him watching May perform in the [[Wallace Cup]] on television in ''[[DP077|Staging a Heroes' Welcome!]]'' and ''[[DP079|Strategy with a Smile!]]''. | |||
====Character==== | |||
Norman cares deeply for his family, wishing his children to have some quality time and good friends. Norman is also very protective of them, often fighting even more aggressively in the process of protecting them. {{an|May}} and [[Max]] respect their father's extensive efforts to ensure a healthy relationship with them, such as coming home for lunch and playing with his children. In general, Norman is jovial and calm, but at times, he can sometimes overlook things and cannot see the actual problem at hand. | |||
Norman is very dedicated to running the Petalburg Gym, often working too hard. He and his assistant {{ho|Kenny}} handle most of the duties and the Pokémon in the greenhouse. | |||
In the broader community, Norman is quite popular for both his looks and his position as a [[Gym Leader]], having an enthusiastic fanbase in [[North Petalburg]] and an emerging image in [[Petalburg City]]. In battle, he is intensely focused and has perfected his Pokémon in both offensive and defensive tactics. Norman commonly utilizes his trio of {{p|Slakoth}}, {{p|Vigoroth}}, and {{p|Slaking}} to confuse his opponents because they are capable of moving at different speeds. Norman gives his opponent credit for an excellent strategy and accepts a loss as critical to personal growth. He enjoys a challenge, wanting to see his opponent struggle to overcome his strategy and sheer power. However, he does not let his children watch the battle, thinking it would distract the challenger. Max claimed that Norman was capable of entering the [[Elite Four]] in ''[[AG070|Balance of Power]]''. | |||
====Pokémon==== | |||
=====On hand===== | |||
{{missingInfo|1|enva}} | |||
This listing is of Norman's Pokémon in the [[Pokémon anime]]. | This listing is of Norman's Pokémon in the [[Pokémon anime]]. | ||
{{TrainerPoké | {{TrainerPoké | ||
|trainer=Norman | |trainer=Norman | ||
| Line 1,002: | Line 967: | ||
|epname=There's no Place Like Hoenn | |epname=There's no Place Like Hoenn | ||
|vajp=Yūji Ueda | |vajp=Yūji Ueda | ||
|vaen=Dan Green | |||
|desc={{p|Vigoroth}} was first seen | |desc={{p|Vigoroth}} was first seen after Norman agreed to have an unofficial {{pkmn|battle}} with {{Ash}} because he had less than three Pokémon at the time. After a tough battle with [[Ash's Pikachu]], Vigoroth managed to defeat him. Later, it helped in destroying one of [[Team Rocket's mechas]] that was attacking the Gym. | ||
In ''[[AG070|Balance of Power]]'', Vigoroth was the second Pokémon used by Norman in his official [[Gym]] battle with Ash. It managed to easily defeat {{AP|Torkoal}} before once again facing Pikachu. This time, Pikachu was able to defeat Vigoroth, but ended up exhausting all of his own energy as well in the process, resulting in a double knockout. | |||
It reappeared in flashbacks in ''[[AG057|Going for a Spinda]]'', ''[[AG068|A Double Dilemma]]'', ''[[AG089|A Scare to Remember!]]'', and ''[[ | It reappeared in flashbacks in ''[[AG057|Going for a Spinda]]'', ''[[AG068|A Double Dilemma]]'', and the Japanese version of ''[[AG089|A Scare to Remember!]]'', and made a cameo appearance in ''[[AG122|Deceit and Assist]]'', where it was watching May competing in the [[Hoenn Grand Festival]] on [[television]]. | ||
Vigoroth's known moves are {{m|Scratch}} and {{m|Flamethrower}}.}} | Vigoroth's known moves are {{m|Scratch}} and {{m|Flamethrower}}.}} | ||
| Line 1,020: | Line 983: | ||
|epnum=AG069 | |epnum=AG069 | ||
|epname=Love, Petalburg Style! | |epname=Love, Petalburg Style! | ||
|vajp=Shin | |vajp=Shin-ichiro Miki | ||
<!--|vaen=--> | <!--|vaen=--> | ||
|desc= | |desc={{p|Slakoth}} first appeared in the greenhouse where Norman keeps his Pokémon. It appeared again in ''[[AG070|Balance of Power!]]'', during Norman's [[Gym]] {{pkmn|battle}} with {{Ash}}. It first went up against {{AP|Pikachu}}, but when Pikachu's strategies failed to work, Ash switched him out for {{AP|Torkoal}}, who was able to defeat its opponent. | ||
It | It made a cameo appearance in ''[[AG122|Deceit and Assist]]'', where it was watching May competing in the [[Hoenn Grand Festival]] on [[television]]. | ||
Slakoth's known moves are {{m|Shadow Ball}}, {{m|Hidden Power}}, and {{m|Blizzard}}.}} | Slakoth's known moves are {{m|Shadow Ball}}, {{m|Hidden Power}}, and {{m|Blizzard}}.}} | ||
| Line 1,038: | Line 999: | ||
|epnum=AG069 | |epnum=AG069 | ||
|epname=Love, Petalburg Style! | |epname=Love, Petalburg Style! | ||
|vajp=Unshō Ishizuka | |vajp=Unshō Ishizuka | ||
|vaen=Dan Green | |vaen=Dan Green | ||
|desc={{p|Slaking}} | |desc={{p|Slaking}} debuted in Norman's greenhouse with the rest of his Pokémon. In ''[[AG070|Balance of Power!]]'', it battled {{AP|Grovyle}} during {{Ash}}'s [[Gym]] battle against Norman, but was ultimately defeated.}} | ||
===Voice actors=== | =====Cared for===== | ||
{| width="50%" | |||
| {{InactivePoké|May|Beautifly|May Beautifly with Caroline.png|bug|flying}} | |||
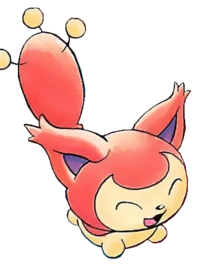
| {{InactivePoké|May|Skitty|May Skitty with Caroline.png|normal}} | |||
|} | |||
====Voice actors==== | |||
{{vatable|color={{normal color}}|bordercolor={{normal color light}} | {{vatable|color={{normal color}}|bordercolor={{normal color light}} | ||
|ja=小杉十郎太 ''Jūrōta Kosugi'' | |ja=小杉十郎太 ''Jūrōta Kosugi'' | ||
|en=[[Dan Green]] | |en=[[Dan Green]] | ||
|no=Erik Skøld | |fi=Jari Viitanen ([[AG003]])<br>Saku Mäkynen ([[AG069]]-[[AG070]]) | ||
|fr_eu=Alexandre Crépet | |it=Lorenzo Scattorin | ||
|no=Erik Skøld ([[AG003]])<br>Trond Teigen ([[AG069]]-[[AG070]]) | |||
|ru=Дмитрий Филимонов ''Dmitry Filimonov'' | |||
|fr_eu=Alexandre Crépet ([[AG003]])<br>Mathieu Moreau ([[AG069]]-[[AG070]]) | |||
|pl=Andrzej Chudy | |pl=Andrzej Chudy | ||
|pt_br=Élcio Sodré ([[AG003]])<br>Mauro Eduardo ([[AG069]]-[[AG070]]) | |pt_br=Élcio Sodré ([[AG003]])<br>Mauro Eduardo ([[AG069]]-[[AG070]]) | ||
|es_la=Enrique Mederos ([[AG003]]) <br>Salvador Delgado ([[AG069]]-[[AG070]]) | |es_la=Enrique Mederos ([[AG003]]) <br>Salvador Delgado ([[AG069]]-[[AG070]]) | ||
|es_eu=Luis Bajo ([[AG003]]) <br> Gabriel Jiménez ([[AG069]]-[[AG070]])}} | |es_eu=Luis Bajo ([[AG003]]) <br> Gabriel Jiménez ([[AG069]]-[[AG070]])}} | ||
===GOTCHA!=== | |||
Norman briefly appeared in [[GOTCHA!]]. | |||
==In the manga== | ==In the manga== | ||
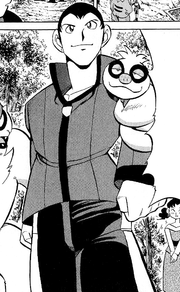
[[File:Norman AP.png|thumb|Norman in | [[File:Norman AP.png|thumb|180px|Norman in Ash & Pikachu]] | ||
=== | ===Ash & Pikachu=== | ||
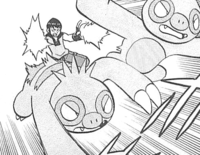
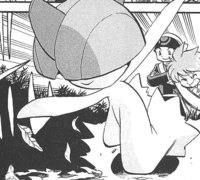
Norman | Norman appeared in ''[[SP25|I'll Win With My Own Battle Style!!]]'', where he, like in the anime, had a Gym battle with Ash. | ||
====Pokémon==== | ====Pokémon==== | ||
{{TrainerPoké | {{TrainerPoké | ||
|width=76 | |||
|main=yes | |main=yes | ||
|trainer=Norman | |trainer=Norman | ||
| Line 1,091: | Line 1,065: | ||
None of Vigoroth's moves are known.}} | None of Vigoroth's moves are known.}} | ||
=== | ===Pokémon Adventures=== | ||
[[File:Norman Juan Adventures.png|thumb|230px|Norman in Pokémon Adventures]] | [[File:Norman Juan Adventures.png|thumb|230px|Norman in Pokémon Adventures]] | ||
{{spoilers}} | {{spoilers}} | ||
====History==== | |||
====={{MangaArc|Ruby & Sapphire}}===== | |||
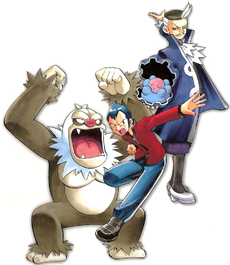
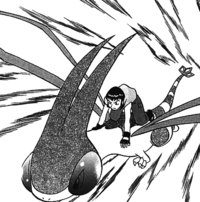
Norman is the father of {{adv|Ruby}} and the newly appointed Leader of the Petalburg Gym. On Ruby's 11th birthday, Norman had his wife and son move to Hoenn to live in Littleroot Town. Due to Norman's dislike of his son partaking in Pokémon Contests, Ruby held a grudge against his father. Ruby decided to run away and prove to his father the superiority of [[Pokémon Contest]]s to battling. As he left, he took the Running Shoes his father gave him as a birthday present. Upon arriving at Petalburg City, Ruby attempted to avoid being spotted by Norman. His attempts led him to meeting {{adv|Wally}}, a sickly boy attempting to capture his first Pokémon. Wally asks Norman if he will teach him how to capture Pokémon as he had previously requested. He refuses due to Wally neglecting to inform Norman about his illness. Norman senses Ruby's presence, but when his attempt to get him to come out fails, he just passes it off as another wild Pokémon and leaves. | |||
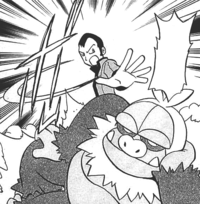
Norman's search leads him to the [[Weather Institute]], where he attacks Ruby, demanding to know why he ran away from home. Ruby considers running away, but he decides to stay and fight in order to prove to his father how determined he is. Norman easily gains the upper hand due to teaching Ruby all he knows about fighting, but Ruby turns the tide by using new tactics with the Pokémon he caught on his journey. The battle causes the worn-out institute to break apart, leaving Ruby and Norman left dangling above shrapnel that fell from their battle. With the Running Shoes he got as a gift from Norman, Ruby manages to save the both of them, but is left exhausted and defeated. Norman attempts to continue their battle, but he is stopped by fellow Gym Leader [[Winona]]. Winona tells Norman that he is in trouble for leaving his Gym despite challengers wanting to battle. Norman grudgingly obeys Winona's command to come with her. Before he leaves, Norman tells Ruby that he accepts his desire to partake in Pokémon Contests despite his own personal dislike of them. He demands that in return, Ruby should not return home until he has fully accomplished his goals. | Norman's search leads him to the [[Weather Institute]], where he attacks Ruby, demanding to know why he ran away from home. Ruby considers running away, but he decides to stay and fight in order to prove to his father how determined he is. Norman easily gains the upper hand due to teaching Ruby all he knows about fighting, but Ruby turns the tide by using new tactics with the Pokémon he caught on his journey. The battle causes the worn-out institute to break apart, leaving Ruby and Norman left dangling above shrapnel that fell from their battle. With the Running Shoes he got as a gift from Norman, Ruby manages to save the both of them, but is left exhausted and defeated. Norman attempts to continue their battle, but he is stopped by fellow Gym Leader [[Winona]]. Winona tells Norman that he is in trouble for leaving his Gym despite challengers wanting to battle. Norman grudgingly obeys Winona's command to come with her. Before he leaves, Norman tells Ruby that he accepts his desire to partake in Pokémon Contests despite his own personal dislike of them. He demands that in return, Ruby should not return home until he has fully accomplished his goals. | ||
Later, Norman and the other Gym Leaders are called by [[Flannery]] to meet in [[Fortree City]]. They have a discussion on [[Team Magma]] and [[Team Aqua]] about whether or not one of the teams is evil and the other is good. Norman refuses to pick a side out of disinterest and begins to leave. Winona reminds him that as one of the Gym Leaders chosen by the Pokémon Association, he has to comply with the others. Norman refuses and continues leaving, but is stopped by [[Wattson]].Wattson suggests that Norman use his strength to help in the upcoming Hoenn crisis and apologizes for the others' behavior due to their lack of knowledge about his past with the Pokémon Association. Norman politely tells Wattson to stop talking and heads off. | [[File:Norman ORAS chapter.png|thumb|left|140px|Norman in the thirteenth chapter]] | ||
Later, Norman and the other Gym Leaders are called by [[Flannery]] to meet in [[Fortree City]]. They have a discussion on [[Team Magma]] and [[Team Aqua]] about whether or not one of the teams is evil and the other is good. Norman refuses to pick a side out of disinterest and begins to leave. Winona reminds him that as one of the Gym Leaders chosen by the Pokémon Association, he has to comply with the others. Norman refuses and continues leaving, but is stopped by [[Wattson]]. Wattson suggests that Norman use his strength to help in the upcoming Hoenn crisis and apologizes for the others' behavior due to their lack of knowledge about his past with the Pokémon Association. Norman politely tells Wattson to stop talking and heads off. | |||
When {{ | When {{DL|Super-ancient Pokémon (Adventures)|Groudon}} and {{DL|Super-ancient Pokémon (Adventures)|Kyogre}} are awakened, they begin causing {{a|Drought|droughts}} and {{a|Drizzle|downpours}} throughout Hoenn. Instead of helping stop the Pokémon from causing havoc, Norman decides to fulfill Wally's request and takes him to the [[Sky Pillar]] for training. After several days of training, Wally becomes much stronger from climbing the tower and battling the wild Pokémon inside. As they continue to train, Norman gets a call from [[Scott]], who informs him that Ruby was chosen to be the wielder of the [[Red Orb]] used to control Groudon. This makes Norman decide to team up with Wally to awaken the third Legendary Pokémon that can stop Groudon and Kyogre, {{DL|Super-ancient Pokémon (Adventures)|Rayquaza}}. Upon succeeding, Norman leaves Wally behind and flies off on Rayquaza to [[Sootopolis City]]. | ||
When Norman arrives, Ruby is fighting Groudon and Kyogre alone with both the Red and Blue | When Norman arrives, Ruby is fighting Groudon and Kyogre alone with both the Red and [[Blue Orb]]s in hand. Together, they use [[Colored orbs|the orbs]] in conjunction with Rayquaza to send Groudon and Kyogre away to return to their long slumber. The strain of having controlled Rayquaza for too long causes Norman to collapse and begin dying. In his last breath, Norman reveals that five years ago, Ruby's battle with a [[Zinnia's Salamence|Salamence]] caused it to go berserk and accidentally free the Rayquaza captured by the Pokémon Association. Not wanting his son to take the blame, Norman lied to the association and put the fault on himself. The Association Director barred Norman from taking the Gym Leader test for five years and ordered him to find Rayquaza. Norman was forced to distance himself from his family during that time, which eventually led to Ruby becoming the way he is now. He then dies in Ruby's arms, much to the horror of his son. When [[Archie]] and [[Maxie]] come out of hiding to attack the exhausted Ruby, they decide to burn Norman's corpse to make sure he won't be able to return to stop their plans again. | ||
Once Archie and Maxie were defeated, Ruby used his {{p|Celebi}} to revive all the people that were killed in the final battle. Norman is brought back to life thanks to Celebi's time travel abilities. Afterward, Norman celebrated the victory with his allies and thanked Ruby and {{adv|Sapphire}} for their assistance in the battle. Sapphire immediately challenged Norman to a Gym battle, which she managed to win and earn the Balance Badge. | Once Archie and Maxie were defeated, Ruby used his {{p|Celebi}} to revive all the people that were killed in the final battle. Norman is brought back to life thanks to Celebi's [[time travel]] abilities. Afterward, Norman celebrated the victory with his allies and thanked Ruby and {{adv|Sapphire}} for their assistance in the battle. Sapphire immediately challenged Norman to a Gym battle, which she managed to win and earn the Balance Badge. | ||
====={{MangaArc|Omega Ruby & Alpha Sapphire}}===== | |||
Norman appears at [[Meteor Falls]]. He meets with the {{OBP|Elder|Meteor Village}} that lives there in hopes of getting information about Rayquaza again. There, he meets with Ruby and {{adv|Emerald}}, who had come there for the same reason. With the old woman's help, Norman determines the Rayquaza may be returning to the location where it was held captive by the Pokémon Association. With {{p|Hoopa}}'s rings, Norman and Ruby head to Johto. | |||
Upon arriving in Goldenrod City, Norman and Ruby enter the now-abandoned Pokémon Association research facility. After a search through the facility's data files, Norman comes across video footage of the moment where Rayquaza was first encountered at the [[Embedded Tower]]. Before they can witness Rayquaza's capture, the video cuts off. Ruby decides that if Rayquaza was found at {{rt|47|Johto}}, then it may have gone there instead of Goldenrod. Norman reveals that he asked Emerald to give him the [[Jade Orb|Green Orb]] core shortly before they entered Hoopa's ring. He reveals the core was originally created by the Association in order to create an artificial Green Orb capable of controlling Rayquaza, as it didn't have an orb like Groudon or Kyogre. When Rayquaza escaped its captivity, the project was scrapped and the core was thrown away before being completed, where it eventually ended up in Emerald's hands. Norman uses a machine to increase the core's purity, increasing its strength and turning it a shade of jade. | |||
Just as the process is completed, Norman and Ruby are shocked to see that Rayquaza has appeared in the skies. They find Rayquaza feeding on shards of the meteoroid, which have begun falling onto Johto as well. They take to the skies in order to confront Rayquaza and capture it. During the battle, Rayquaza manages to capture Ruby and blocks Norman's attempt to rescue his son. Ruby takes the opportunity to use the scroll he took from [[Zinnia]] in order to teach Rayquaza {{m|Dragon Ascent}}, which will allow it to destroy the meteoroid. When Rayquaza continues attacking Ruby, Norman attempts to control it with the Green Orb core, only for it to fail. Ruby tells Norman to call Emerald and ask Hoopa to bring them back to Hoenn, as he plans on destroying the meteoroid with Sapphire. | |||
After Hoopa opens the path to the Meteor Village, Ruby uses the Jade Orb core to lead Rayquaza back to Hoenn with Norman. When it sees Kyogre and Groudon through the ring, Rayquaza goes berserk and begins attacking the two. Rayquaza rushes towards the ring to confront Kyogre and Groudon, causing Norman to fall off and be left behind. It is later revealed by {{adv|Gold}} and {{adv|Silver}} that Norman would assist the combined efforts of the [[Kanto]] and [[Johto]] [[Gym Leader]]s and [[Elite Four]] to stop the meteoroid. | |||
====Pokémon==== | ====Pokémon==== | ||
| Line 1,118: | Line 1,104: | ||
|epnum=PS185 | |epnum=PS185 | ||
|epname=Nixing Nuzleaf | |epname=Nixing Nuzleaf | ||
|desc={{p|Vigoroth}} is Norman's first known Pokémon. | |desc={{p|Vigoroth}} is Norman's first known Pokémon. He was first used to battle a wild {{p|Breloom}} and easily won. Later, he battled against {{adv|Ruby}} at the [[Weather Institute]]. Using his quick speed, he returned the volley of {{m|Mud Shot}}s that [[Mumu]] attempted to trap Norman inside of. He has a Hasty [[nature]]. | ||
Vigoroth's known moves are {{m|Aerial Ace}} and {{m|Focus Punch}}, and | Vigoroth's known moves are {{m|Aerial Ace}} and {{m|Focus Punch}}, and his Ability is {{a|Vital Spirit}}.}} | ||
{{TrainerPoké | {{TrainerPoké | ||
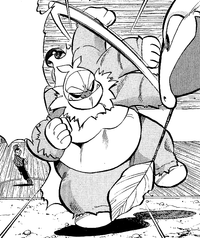
| Line 1,129: | Line 1,115: | ||
|type1=Normal | |type1=Normal | ||
|img=Norman Slaking Adventures.png | |img=Norman Slaking Adventures.png | ||
|epnum= | |epnum=PS186 | ||
|epname= | |epname=Brushing Past Breloom | ||
|desc={{p|Slaking}} is Norman's second known Pokémon. | |desc={{p|Slaking}} is Norman's second known Pokémon. He was used to try and get {{adv|Ruby}} to come out of hiding when Norman sensed his presence. Since then, he was used in several other battles. He has a Sassy [[nature]].}} | ||
{{TrainerPoké | {{TrainerPoké | ||
| Line 1,141: | Line 1,127: | ||
|epnum=PS258 | |epnum=PS258 | ||
||epname=Rayquaza Redemption I | ||epname=Rayquaza Redemption I | ||
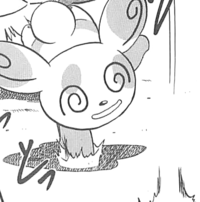
|desc={{p|Spinda}} is Norman's third known Pokémon. | |desc={{p|Spinda}} is Norman's third known Pokémon. He was first used in a training battle against {{adv|Wally}} on the Sky Pillar. With his moves that switch Abilities and confuse his opponents, Norman managed to easily defeat Wally. | ||
Spinda's known moves are {{m|Skill Swap}} and {{m|Teeter Dance}}, and | Spinda's known moves are {{m|Skill Swap}} and {{m|Teeter Dance}}, and his Ability is {{a|Own Tempo}}.}} | ||
{{TrainerPoké | {{TrainerPoké | ||
| Line 1,155: | Line 1,141: | ||
|desc=Norman owns two {{p|Slakoth}}. They were first seen in a flashback being used to battle the {{p|Rayquaza}} that escaped the Pokémon Association's captivity. They managed to block many of Rayquaza's attacks. | |desc=Norman owns two {{p|Slakoth}}. They were first seen in a flashback being used to battle the {{p|Rayquaza}} that escaped the Pokémon Association's captivity. They managed to block many of Rayquaza's attacks. | ||
None of Slakoth's moves are known.}} | None of Slakoth's moves are known and their Ability is {{a|Truant}}.}} | ||
{{TrainerPoké | |||
|trainer=Norman | |||
|pkmn=Sawsbuck | |||
|type1=Normal | |||
|type2=Grass | |||
|img=Norman Sawsbuck Adventures.png | |||
|epnum=PS611 | |||
|epname= | |||
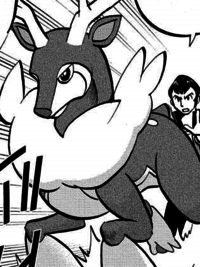
|desc=Norman owns a Winter Form {{p|Sawsbuck}}. It was first used to break into the Pokémon Association's old research facility. | |||
Sawsbuck's only known move is {{m|Horn Leech}}.}} | |||
{{TrainerPoké | {{TrainerPoké | ||
|trainer=Norman | |trainer=Norman | ||
|pkmn= | |pkmn=Staraptor | ||
|type1= | |type1=Normal | ||
|type2=Flying | |type2=Flying | ||
|img=Norman | |img=Norman Staraptor Adventures.png | ||
|epnum= | |epnum=PS611 | ||
|epname= | |epname= | ||
|desc={{p| | |desc=Norman owns a {{p|Staraptor}}. It was first used to fly up to Rayquaza in order to capture it. When Ruby was caught by Rayquaza, Norman used Staraptor to attempt to free his son, but failed. | ||
Staraptor's only known move is {{m|Final Gambit}}.}} | |||
=====Given away===== | =====Given away===== | ||
{{TrainerPoké | |||
|main=Nana | |||
|trainer=Ruby | |||
|pkmn=Poochyena | |||
|nick=Nana | |||
|gender=female | |||
|type1=Dark | |||
|img=Nana Poochyena.png | |||
|epnum=PS181 | |||
|epname=Creeping Past Cacnea | |||
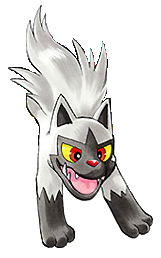
|desc={{p|Poochyena|Nana}} was a gift from Norman to Ruby when he was a small child. She learned many techniques from training with Norman.}} | |||
{{TrainerPoké | {{TrainerPoké | ||
|main=Kiki | |main=Kiki | ||
| Line 1,182: | Line 1,191: | ||
|epnum=PS181 | |epnum=PS181 | ||
|epname=Creeping Past Cacnea | |epname=Creeping Past Cacnea | ||
|desc={{p|Skitty|Kiki}} was a gift from Norman to Ruby when he was a small child. | |desc={{p|Skitty|Kiki}} was a gift from Norman to Ruby when he was a small child. She learned many techniques from training with Norman.}} | ||
{{TrainerPoké | {{TrainerPoké | ||
|main=Rara | |||
|trainer=Ruby | |trainer=Ruby | ||
|pkmn=Ralts | |pkmn=Ralts | ||
| Line 1,191: | Line 1,201: | ||
|gender=female | |gender=female | ||
|type1=Psychic | |type1=Psychic | ||
|type2=Fairy | |||
|img=Rara Ralts.png | |img=Rara Ralts.png | ||
|epnum=PS181 | |epnum=PS181 | ||
|epname=Creeping Past Cacnea | |epname=Creeping Past Cacnea | ||
|desc={{p|Ralts|Rara}} was a gift from Norman to Ruby when he was a small child. | |desc={{p|Ralts|Rara}} was a gift from Norman to Ruby when he was a small child. She learned many techniques from training with Norman.}} | ||
{{TrainerPoké | {{TrainerPoké | ||
| Line 1,216: | Line 1,215: | ||
|epnum=PS240 | |epnum=PS240 | ||
|epname=Talk About Timing, Treecko | |epname=Talk About Timing, Treecko | ||
|desc=Norman originally used this {{p|Flygon}} as a method of flight transportation. He later | |desc=Norman originally used this {{p|Flygon}} as a method of flight transportation. He later gave it to {{adv|Wally}} during their training on the Sky Pillar. | ||
Flygon's known moves are {{m|Fly}} and {{m|Sand Tomb}} and its Ability is {{a|Levitate}}.}} | |||
=====Temporary===== | |||
{{TrainerPoké | |||
|trainer=Norman | |||
|pkmn=Rayquaza | |||
|type1=Dragon | |||
|type2=Flying | |||
|img=Rayquaza Adventures.png | |||
|epnum=PS258 | |||
|epname=Rayquaza Redemption I | |||
|main=Super-ancient Pokémon (Adventures) | |||
|main_section=Rayquaza | |||
|desc={{p|Rayquaza}} is an ancient Legendary Pokémon related to {{DL|Super-ancient Pokémon (Adventures)|Groudon}} and {{DL|Super-ancient Pokémon (Adventures)|Kyogre}}. It was captured by the Pokémon Association so that they may find a way to control it so that its powers could be used to stop Groudon and Kyogre when they would one day awaken again. Due to a {{p|Salamence}} that went out of control from a previous battle with {{adv|Ruby}}, Rayquaza broke free and Norman was ordered to search for it again. Five years later, Norman teamed up with Wally and awakened Rayquaza on the Sky Pillar. Norman took Rayquaza and used it to stop Groudon and Kyogre with Ruby's help. The strain of controlling Rayquaza without an orb took too much strain on Norman, who proceeded to die shortly afterward. Angered that it was controlled, Rayquaza flew off to parts unknown.}} | |||
{{endspoilers}} | {{endspoilers}} | ||
=== | ===Pokémon Ruby-Sapphire=== | ||
[[File:Norman PMRS.png|thumb|Norman in | [[File:Norman PMRS.png|thumb|180px|Norman in Pokémon Pocket Monsters]] | ||
Norman appears in | Norman appears in ''[[PMRS04|There's Someone More Important Than Clefairy?!]]''. Unlike other media, Norman does not have any known relatives. | ||
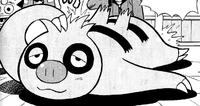
When {{OBP|Red|Pocket Monsters}} and his Pokémon visit the [[Petalburg Gym]] after getting startled by a Poké Ball that flew from there, they notice Norman drinking and feeling down. Norman revealed to the group as the one who threw the Poké Balls. He then revealed that he felt sad since his {{p|Slakoth}} refused to partake in any battles. Norman takes out a chart and shows it to Red and his Pokémon that the {{Badge|Balance}} is stuck inside Slakoth. After {{TP|Red|Clefairy}} took a nap, Norman explained to Red and his Pokémon that Slakoth doesn't like it when someone is lazier than it. Norman then watched as Clefairy went inside Slakoth to get the Balance Badge. After retrieving it, Norman demanded the group to return the badge to him but Clefairy refused. Afterwards, he became furious about this and chased after Red and his Pokémon since Clefairy refused to return the badge to Norman. | When {{OBP|Red|Pocket Monsters}} and his Pokémon visit the [[Petalburg Gym]] after getting startled by a Poké Ball that flew from there, they notice Norman drinking and feeling down. Norman revealed to the group as the one who threw the Poké Balls. He then revealed that he felt sad since his {{p|Slakoth}} refused to partake in any battles. Norman takes out a chart and shows it to Red and his Pokémon that the {{Badge|Balance}} is stuck inside Slakoth. After {{TP|Red|Clefairy}} took a nap, Norman explained to Red and his Pokémon that Slakoth doesn't like it when someone is lazier than it. Norman then watched as Clefairy went inside Slakoth to get the Balance Badge. After retrieving it, Norman demanded the group to return the badge to him but Clefairy refused. Afterwards, he became furious about this and chased after Red and his Pokémon since Clefairy refused to return the badge to Norman. | ||
====Pokémon==== | ====Pokémon==== | ||
This listing is for Norman's Pokémon in the Pokémon | This listing is for Norman's Pokémon in the Pokémon Pocket Monsters manga. | ||
{{TrainerPoké | {{TrainerPoké | ||
|trainer=Norman | |trainer=Norman | ||
|width=76 | |||
|pkmn=Slakoth | |pkmn=Slakoth | ||
|type1=Normal | |type1=Normal | ||
| Line 1,237: | Line 1,252: | ||
Slakoth's known moves are {{m|Yawn}} and {{m|Covet}}, and its Ability is {{a|Truant}}.}} | Slakoth's known moves are {{m|Yawn}} and {{m|Covet}}, and its Ability is {{a|Truant}}.}} | ||
===Pokémon Ruby & Sapphire=== | |||
Norman appeared as the newly-appointed Gym Leader of [[Petalburg City]]. He is the father of Ruby and a friend of Professor Birch's. | |||
He berated Ruby for failing to heal his {{p|Mudkip}} after a battle, but rescinded later on after seeing how Ruby and Mudkip began to develop a good relationship with each other. | |||
==In the TCG== | |||
[[File:NormanParadoxRift237.jpg|200px|thumb|Ultra rare print of Norman]] | |||
{{main|Norman (Paradox Rift 168)}} | |||
'''Norman''' was introduced as a {{TCG|Supporter card}} in the [[Pokémon Trading Card Game]] during the English Scarlet & Violet Series (the Japanese Scarlet & Violet Era). It was first released in the Japanese {{TCG|Ancient Roar}} expansion and the English {{TCG|Paradox Rift}} expansion, with artwork by [[Hideki Ishikawa]]. An {{TCG|ultra rare}} version with artwork by the same illustrator was released in the same sets. It allows players to draw 2 cards, and 2 more if their opponent's Active Pokémon is a {{TCG|Pokémon ex}}. | |||
In Japan, Norman and the Balance Badge were also featured on one of the {{TCG ID|XY-P|Gym Badge|Promo}} {{TCG|XY-P Promotional cards}} given out at events in 2015. | |||
{{-}} | |||
==Trivia== | ==Trivia== | ||
* | * Norman is the first and currently only father of the {{player}} that has been seen in the [[core series]] games. | ||
** However, in the early development of {{game|Diamond and Pearl|s}}, the player was originally going to have a father, which is further evidenced by script files leftover in their remakes, [[Pokémon Brilliant Diamond and Shining Pearl]].<ref>https://web.archive.org/web/20231001124935/https://twitter.com/Lewchube/status/1708462187696595066</ref> | |||
* In {{ | ** Norman was also the only known father of any player character in the core series games until [[Pokémon Ultra Sun and Ultra Moon]], although not directly seen. | ||
* Norman is the only | * In {{game2|Ruby|Sapphire|Emerald}}, a non-player character in [[Petalburg City]] mentions that Norman and his family are from [[Johto]]. In [[Pokémon Black and White Versions 2|Pokémon Black 2 and White 2]], Norman reveals that he is more specifically from [[Olivine City]]. In some new dialogue from [[Pokémon Omega Ruby and Alpha Sapphire]], the player's {{ho|Mom}} also mentions that they moved from Johto. | ||
** However, in the [[Pokémon Adventures]] manga, they are from [[Goldenrod City]] instead. This was introduced in the manga prior to the reveal that they are from Olivine City in the games. | |||
* In {{v2|Emerald}}, Norman owns a level 29 {{p|Linoone}} that knows {{m|Slash}}, even though Linoone [[Game move errors|cannot learn]] said move until level 41. {{p|Zigzagoon}}, its pre-evolved form, cannot learn the move. | |||
* In {{B2W2}}, along with [[Giovanni]], Norman uses more different species of Pokémon than any other [[Gym Leader]] at the [[Pokémon World Tournament]], with a total of 10. | |||
* Not counting Ash’s [[Ash's friends|Gym Leader companions]] and {{an|Giovanni}}, Norman is the first Gym Leader to physically reappear in the {{pkmn|anime}} outside of his home region’s debut series. | |||
* Norman is the only Gym Leader after [[Generation I]] who shares his English name in French, German, Italian, and Spanish. | |||
==Names== | ==Names== | ||
{| class="roundy" style="background: #{{normal color light}}; border: 3px solid #{{normal color | {| class="roundy" style="background:#{{normal color light}}; border: 3px solid #{{normal color}}" | ||
|- | |- | ||
! Language | ! Language | ||
! Name | ! Name | ||
! Origin | ! Origin | ||
|- style="background:#FFF" | |||
| Japanese | |||
| センリ ''Senri'' | |||
| From 仙蓼 ''senryō'' ({{wp|Sarcandra glabra|glabrous sarcandra}}) <!--or 千里胡麻 ''Senri-Goma'' (''Rehmannia japonica'')-->and 千里 ''senri'' (1000 {{wp|Li (unit)|li}}; great distance) | |||
|- style="background:#FFF;" | |- style="background:#FFF;" | ||
| | | English, German, Spanish,<br>French, Italian | ||
| Norman | |||
| From ''normal'' | |||
|- style="background:#FFF" | |||
| Korean | |||
|Norman | | 종길 ''Jonggil'' | ||
|From ''normal'' | | Possibly from 길 ''gil'' (road) | ||
|- style="background:#FFF | |- style="background:#FFF" | ||
|Korean | | Chinese ({{tt|Mandarin|Taiwan and Mainland China}}) | ||
|종길 ''Jonggil'' | | 千里 ''Qiānlǐ'' | ||
|Possibly from 길 ''gil'' | |rowspan="2"| From 千里 ''qiānlǐ / chīnléih'' (great distance) | ||
|- style="background:#FFF | |- style="background:#FFF" | ||
|Chinese ({{tt|Mandarin|Taiwan and | | Chinese ({{tt|Cantonese|Hong Kong}}) | ||
|千里 ''Qiānlǐ'' | | 千里 ''Chīnléih'' | ||
|From his Japanese name | |- style="background:#FFF" | ||
| Russian | |||
| Норман ''Norman'' | |||
| Transcription of his English name | |||
|- style="background:#FFF" | |||
| Vietnamese | |||
| Senri | |||
| Transcription of his Japanese name | |||
|} | |} | ||
== | ==References== | ||
<references /> | <references /> | ||
==Related articles== | |||
* [[a:Category:Norman|Images on the Bulbagarden Archives]] | |||
{{-}} | {{-}} | ||
{{Gym Leaders of Hoenn}} | {{Gym Leaders of Hoenn}} | ||
{{Animecharacters|normal}}<br> | {{Animecharacters|normal}}<br> | ||
{{Ash and Pikachu characters}}<br> | |||
{{Ash and Pikachu characters}} | |||
{{Pocket Monsters Characters}} | {{Pocket Monsters Characters}} | ||
{{Project CharacterDex notice}} | {{Project CharacterDex notice}} | ||
[[Category: | [[Category:Animation characters]] | ||
[[Category:Manga characters]] | [[Category:Manga characters]] | ||
[[Category:Ash | [[Category:Ash & Pikachu characters]] | ||
[[Category:Pokémon Adventures characters]] | [[Category:Pokémon Adventures characters]] | ||
[[Category:Pokémon Ruby-Sapphire characters]] | [[Category:Pokémon Ruby-Sapphire characters]] | ||
| Line 1,295: | Line 1,340: | ||
[[it:Norman]] | [[it:Norman]] | ||
[[ja:センリ]] | [[ja:センリ]] | ||
[[zh:千里]] | [[zh:千里]] | ||
Latest revision as of 21:59, 15 September 2024
- If you were looking for the president of 4Kids Productions, see Norman J. Grossfeld.
- If you were looking for the character of the day in The Bridge Bike Gang, see Norman (EP036).
| Norman センリ Senri | |
| "A man in pursuit of power!" | |
 Artwork from Omega Ruby and Alpha Sapphire | |
| Age | Unknown |
|---|---|
| Gender | Male |
| Eye color | Black*, Navy* |
| Hair color | Black*, Navy* |
| Hometown | Littleroot Town* (originally Olivine City in the games and Goldenrod City in Adventures) Petalburg City* |
| Region | Hoenn (originally Johto in the games and Adventures) |
| Relatives | Brendan (son) or May (daughter), wife (games) Ruby (son), unnamed wife (Adventures) May (daughter), Max (son), Caroline (wife) (anime) Brendan (son) (Masters) |
| Trainer class | Gym LeaderRSEORAS Pokémon TrainerB2W2 |
| Generation | III, V, VI, VII |
| Counterpart(s) | Norman (Masters) |
| Games | Ruby, Sapphire, and Emerald, Black 2 and White 2, Omega Ruby and Alpha Sapphire Masters EX |
| English voice actor | Keith Silverstein[1] (Masters EX) |
| Japanese voice actor | Tomokazu Sugita (Masters EX) |
| Member of | Hoenn League |
| Rank | Gym Leader |
| Leader of | Petalburg Gym |
| Badge | Balance Badge |
| Specializes in | Normal types |
| Animated series | Pokémon the Series |
| Debut | There's no Place Like Hoenn |
| English voice actor | Dan Green |
| Japanese voice actor | Jūrōta Kosugi |
Norman (Japanese: センリ Senri) is the father of the player and the Gym Leader of Petalburg City's Gym, known officially as the Petalburg Gym in Pokémon Ruby, Sapphire, and Emerald and their Generation VI remakes Omega Ruby and Alpha Sapphire. He is an expert of Normal-type Pokémon, and hands out the Balance Badge to any Trainer who defeats him.
In the core series games
Norman is also the player character's father in Pokémon Ruby, Sapphire, and Emerald no matter which gender is selected. The other gender choice (and therefore the rival) is the child of Professor Birch.
Although he is the first Gym Leader encountered, he refuses to battle until the player has at least four Badges. Before stating this, he first introduces the player to Wally (secondary rival) which is when the Pokémon catching tutorial happens. Once he is beaten, he gives the player the Balance Badge, as well as TM42 (Facade) in Ruby, Sapphire, and Emerald or TM67 (Retaliate) in Omega Ruby and Alpha Sapphire.
Norman and his family are originally from Olivine City in Johto. He, as well as the player, have just moved to Hoenn so that he could take up the position of Gym Leader. People have come to describe him as someone who "lives for Pokémon".
Norman also provides special items scanned in via e-Reader to the player.
Norman has known Birch since their school days.[2] According to the TV show Trouble Talk, they went to college together.
Trainer's Eyes/Match Call
Leader NormanRSORAS / Reliable One DadE
- Strategy
- I flexibly adapt my style.
- Trainer's Pokémon
- Grown in a balanced manner.RSE
- Those grown in a balanced manner.ORAS
- Self-Introduction
- Pokémon are my life. My chosen path is harsh...RS
- I walk the 30 minutes from home to here every day.E
- I've chosen to dedicate my life to Pokémon, but the road is hard...ORAS
Pokémon
Pokémon Ruby and Sapphire
Loaned
Norman loans this Pokémon to Wally to show him how to catch Pokémon.
|
| |||||||||||||||||||||
| Zigzagoon♂/♀ Lv.7 | ||||||||||||||||||||||
| ||||||||||||||||||||||
Gym battle
Norman uses two Hyper Potions.
|
||||||||||||||||||||||||||||||||||||||||||||||||||||||||||||||||||||||||||||
| ||||||||||||||||||||||||||||||||||||||||||||||||||||||||||||||||||||||||||||
Pokémon Emerald
Norman uses two Hyper Potions in the Gym battle and three Full Restores in the rematches.
Loaned
Norman loans this Pokémon to Wally to show him how to catch Pokémon.
|
| |||||||||||||||||||||
| Zigzagoon♂/♀ Lv.7 | ||||||||||||||||||||||
| ||||||||||||||||||||||
Gym battle
|
|||||||||||||||||||||||||||||||||||||||||||||||||||||||||||||||||||||||||||||||||||||||||||||||||||||
| |||||||||||||||||||||||||||||||||||||||||||||||||||||||||||||||||||||||||||||||||||||||||||||||||||||
First rematch
|
|||||||||||||||||||||||||||||||||||||||||||||||||||||||||||||||||||||||||||||||||||||||||||||||||||||
| |||||||||||||||||||||||||||||||||||||||||||||||||||||||||||||||||||||||||||||||||||||||||||||||||||||
Second rematch
|
||||||||||||||||||||||||||||||||||||||||||||||||||||||||||||||||||||||||||||||||||||||||||||||||||||||||||||||||||||||||||||||
| ||||||||||||||||||||||||||||||||||||||||||||||||||||||||||||||||||||||||||||||||||||||||||||||||||||||||||||||||||||||||||||||
Third rematch
|
||||||||||||||||||||||||||||||||||||||||||||||||||||||||||||||||||||||||||||||||||||||||||||||||||||||||||||||||||||||||||||||
| ||||||||||||||||||||||||||||||||||||||||||||||||||||||||||||||||||||||||||||||||||||||||||||||||||||||||||||||||||||||||||||||
Fourth rematch onwards
|
|||||||||||||||||||||||||||||||||||||||||||||||||||||||||||||||||||||||||||||||||||||||||||||||||||||||||||||||||||||||||||||||||||||||||||||||||||||||
| |||||||||||||||||||||||||||||||||||||||||||||||||||||||||||||||||||||||||||||||||||||||||||||||||||||||||||||||||||||||||||||||||||||||||||||||||||||||
Pokémon Black 2 and White 2
Pokémon World Tournament
Norman uses three of these Pokémon in Single Battles, four in Double and Rotation Battles, and all six in Triple Battles. Norman will always lead with his signature Pokémon, Slaking.
Hoenn Leaders Tournament
Type Expert/World Leaders Tournament
|
|||||||||||||||||||||||||||||||||||||||||||||||||||||||||||||||||||||||||||||||||||||||||||||||||||||||||||||||||||||||||||||||||||||||||||||||||||||||||||||||||||||||||||||||||||||||||||||||||||||||||||
| |||||||||||||||||||||||||||||||||||||||||||||||||||||||||||||||||||||||||||||||||||||||||||||||||||||||||||||||||||||||||||||||||||||||||||||||||||||||||||||||||||||||||||||||||||||||||||||||||||||||||||
Gathered! Gym Leader!
|
|||||||||||||||||||||||||||||||||||||||||||||||||||||||||||||||||||||||||||||||||||||||||||||||||||||||||||||||||||||||||||||||||||||||
| |||||||||||||||||||||||||||||||||||||||||||||||||||||||||||||||||||||||||||||||||||||||||||||||||||||||||||||||||||||||||||||||||||||||
Pokémon Omega Ruby and Alpha Sapphire
Loaned
Norman loans this Pokémon to Wally to show him how to catch Pokémon.
|
| ||||||||||||||||||||
| Zigzagoon♀ Lv.7 | |||||||||||||||||||||
| |||||||||||||||||||||
Gym battle
|
||||||||||||||||||||||||||||||||||||||||||||||||||||||||||||||||||||||||||||||||||||||||||||||||||||
| ||||||||||||||||||||||||||||||||||||||||||||||||||||||||||||||||||||||||||||||||||||||||||||||||||||
In the spin-off games
Pokémon Masters EX
- Main article: Norman (Masters)
Norman forms a sync pair with Slaking in Pokémon Masters EX. Norman became a playable sync pair since the game's release, with him joining the player after completing the seventh chapter of the PML Arc.
In this game, Norman is Brendan's father and one of the PML Leaders of the Pokémon Masters League, handing out the Patience Badge to those who defeat him. He has also made notable appearances in the game's Main Stories: the PML Arc, Legendary Adventures, and the Villain Arc.
| Dex | Trainer | NDex | Pokémon | Type | Weakness | Role | EX role | Base potential | Availability | ||
|---|---|---|---|---|---|---|---|---|---|---|---|
| #022 | Norman | #0289 | Slaking♂ |
Normal |
Fighting |
★★★ | Story Chapter 07 | ||||
Gallery
Artwork
|

|
| Official artwork from Generation III |
Concept artwork from Omega Ruby and Alpha Sapphire |
Sprites and models

|

|
|
| Sprite from Ruby, Sapphire, and Emerald |
Sprite from Black 2 and White 2 |
VS portrait from Omega Ruby and Alpha Sapphire |
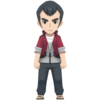
| ||
| Overworld sprite from Ruby, Sapphire, and Emerald |
Overworld sprite from Black 2 and White 2 |
Overworld model from Omega Ruby and Alpha Sapphire |
Quotes
- Main article: Norman/Quotes
In the anime
Main series
History
Pre-series
Norman and his family only recently moved from the Johto region to Petalburg City and assumed his role as the local Gym Leader.
Pokémon the Series: Ruby and Sapphire
In the anime, Norman is the father of May and Max, two of Ash's former traveling companions, and the husband of Caroline.
Very early in his Hoenn journey, Ash arrived with May in Petalburg City in the hope of getting his first Gym battle. In There's no Place Like Hoenn, Ash found the Petalburg Gym and met Max, who posed as if he was the Gym Leader. May stopped him and allowed Ash to meet her parents, Caroline and Norman. Norman turned out be to the real Petalburg City Gym Leader. Norman used his Pokémon, a Vigoroth, in an exhibition battle against Pikachu, and later to save May's Torchic from Team Rocket.
Norman is a good friend of Professor Birch and was most likely the person to send May to Littleroot Town to get her first Pokémon. As May did not initially like Pokémon, this seemed to have created some distance between the two. Before Ash knew that Norman was May's father, he commented that it sounded like she knew the Petalburg Gym Leader pretty well, to which she replied, "No, I just wish I did," and became subdued.
In A Double Dilemma, Norman appeared in flashbacks and on memorabilia. It was also revealed that he had a large fanbase in North Petalburg.
In Love, Petalburg Style!, when Ash and his friends visited Petalburg City again, May and Max tried to figure out why Norman and Caroline were getting all worked up as Ash tried to save Norman's three Pokémon from Team Rocket. It all turned out that Norman had Nurse Joy set up a special firework display to make fireworks in a form of a Beautifly as a wedding anniversary gift for Caroline. During the episode, Norman showed that he was rather dense, not realizing that Caroline assumed that he was having an affair with Nurse Joy.
Ash had his Gym battle with Norman in Balance of Power. Using his Grovyle, Pikachu, and Torkoal, Ash defeated Norman's Pokémon. Upset by his father's loss, Max stole the Balance Badge and locked himself up in Norman's greenhouse. Norman was able to calm Max down, and Max gave Ash his Balance Badge.
He reappeared in flashbacks in Whiscash and Ash, A Scare to Remember!, and A Cacturne for the Worse.
In Hi Ho Silver Wind!, Caroline joined Ash and his friends in Slateport City to watch May compete in the Hoenn Grand Festival, though revealed that Norman was too busy at the Petalburg Gym, so he would be cheering her on from home. In Deceit and Assist, Norman was watching May competing in the Hoenn Grand Festival on television.
In Saved by the Beldum, Norman watched Ash competing in the Ever Grande Conference from the comfort of his living room.
He reappeared in a fantasy in Tactics Theatrics!.
Pokémon the Series: Diamond and Pearl
Norman appeared in a flashback in A Full Course Tag Battle!.
His latest appearances saw him watching May perform in the Wallace Cup on television in Staging a Heroes' Welcome! and Strategy with a Smile!.
Character
Norman cares deeply for his family, wishing his children to have some quality time and good friends. Norman is also very protective of them, often fighting even more aggressively in the process of protecting them. May and Max respect their father's extensive efforts to ensure a healthy relationship with them, such as coming home for lunch and playing with his children. In general, Norman is jovial and calm, but at times, he can sometimes overlook things and cannot see the actual problem at hand.
Norman is very dedicated to running the Petalburg Gym, often working too hard. He and his assistant Kenny handle most of the duties and the Pokémon in the greenhouse.
In the broader community, Norman is quite popular for both his looks and his position as a Gym Leader, having an enthusiastic fanbase in North Petalburg and an emerging image in Petalburg City. In battle, he is intensely focused and has perfected his Pokémon in both offensive and defensive tactics. Norman commonly utilizes his trio of Slakoth, Vigoroth, and Slaking to confuse his opponents because they are capable of moving at different speeds. Norman gives his opponent credit for an excellent strategy and accepts a loss as critical to personal growth. He enjoys a challenge, wanting to see his opponent struggle to overcome his strategy and sheer power. However, he does not let his children watch the battle, thinking it would distract the challenger. Max claimed that Norman was capable of entering the Elite Four in Balance of Power.
Pokémon
On hand
| の | This article is missing information on this character's English voice actor. You can help by adding this information. |
This listing is of Norman's Pokémon in the Pokémon anime.
| Debut | There's no Place Like Hoenn |
|---|---|
| Voice actors | |
| Japanese | Yūji Ueda |
| English | Dan Green |
Vigoroth was first seen after Norman agreed to have an unofficial battle with Ash because he had less than three Pokémon at the time. After a tough battle with Ash's Pikachu, Vigoroth managed to defeat him. Later, it helped in destroying one of Team Rocket's mechas that was attacking the Gym.
In Balance of Power, Vigoroth was the second Pokémon used by Norman in his official Gym battle with Ash. It managed to easily defeat Torkoal before once again facing Pikachu. This time, Pikachu was able to defeat Vigoroth, but ended up exhausting all of his own energy as well in the process, resulting in a double knockout.
It reappeared in flashbacks in Going for a Spinda, A Double Dilemma, and the Japanese version of A Scare to Remember!, and made a cameo appearance in Deceit and Assist, where it was watching May competing in the Hoenn Grand Festival on television.
Vigoroth's known moves are Scratch and Flamethrower.
| Debut | Love, Petalburg Style! |
|---|---|
| Voice actors | |
| Japanese | Shin-ichiro Miki |
Slakoth first appeared in the greenhouse where Norman keeps his Pokémon. It appeared again in Balance of Power!, during Norman's Gym battle with Ash. It first went up against Pikachu, but when Pikachu's strategies failed to work, Ash switched him out for Torkoal, who was able to defeat its opponent.
It made a cameo appearance in Deceit and Assist, where it was watching May competing in the Hoenn Grand Festival on television.
Slakoth's known moves are Shadow Ball, Hidden Power, and Blizzard.
| Debut | Love, Petalburg Style! |
|---|---|
| Voice actors | |
| Japanese | Unshō Ishizuka |
| English | Dan Green |
- Main article: Norman's Slaking
Slaking debuted in Norman's greenhouse with the rest of his Pokémon. In Balance of Power!, it battled Grovyle during Ash's Gym battle against Norman, but was ultimately defeated.
Cared for
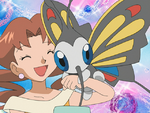 Beautifly |
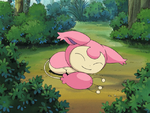 Skitty |
Voice actors
| ||||||||||||||||||||||||||||||||||||||
GOTCHA!
Norman briefly appeared in GOTCHA!.
In the manga
Ash & Pikachu
Norman appeared in I'll Win With My Own Battle Style!!, where he, like in the anime, had a Gym battle with Ash.
Pokémon
- Main article: Norman's Slaking
Slaking is Norman's first known Pokémon. During the Gym battle, he sent it out as his final Pokémon against Ash's Grovyle.
Slakoth briefly appeared battling Ash's Pikachu.
Slakoth's only known move is Shadow Ball.
Vigoroth briefly appeared battling Ash's Torkoal.
None of Vigoroth's moves are known.
Pokémon Adventures
History
Ruby & Sapphire arc
Norman is the father of Ruby and the newly appointed Leader of the Petalburg Gym. On Ruby's 11th birthday, Norman had his wife and son move to Hoenn to live in Littleroot Town. Due to Norman's dislike of his son partaking in Pokémon Contests, Ruby held a grudge against his father. Ruby decided to run away and prove to his father the superiority of Pokémon Contests to battling. As he left, he took the Running Shoes his father gave him as a birthday present. Upon arriving at Petalburg City, Ruby attempted to avoid being spotted by Norman. His attempts led him to meeting Wally, a sickly boy attempting to capture his first Pokémon. Wally asks Norman if he will teach him how to capture Pokémon as he had previously requested. He refuses due to Wally neglecting to inform Norman about his illness. Norman senses Ruby's presence, but when his attempt to get him to come out fails, he just passes it off as another wild Pokémon and leaves.
Norman's search leads him to the Weather Institute, where he attacks Ruby, demanding to know why he ran away from home. Ruby considers running away, but he decides to stay and fight in order to prove to his father how determined he is. Norman easily gains the upper hand due to teaching Ruby all he knows about fighting, but Ruby turns the tide by using new tactics with the Pokémon he caught on his journey. The battle causes the worn-out institute to break apart, leaving Ruby and Norman left dangling above shrapnel that fell from their battle. With the Running Shoes he got as a gift from Norman, Ruby manages to save the both of them, but is left exhausted and defeated. Norman attempts to continue their battle, but he is stopped by fellow Gym Leader Winona. Winona tells Norman that he is in trouble for leaving his Gym despite challengers wanting to battle. Norman grudgingly obeys Winona's command to come with her. Before he leaves, Norman tells Ruby that he accepts his desire to partake in Pokémon Contests despite his own personal dislike of them. He demands that in return, Ruby should not return home until he has fully accomplished his goals.
Later, Norman and the other Gym Leaders are called by Flannery to meet in Fortree City. They have a discussion on Team Magma and Team Aqua about whether or not one of the teams is evil and the other is good. Norman refuses to pick a side out of disinterest and begins to leave. Winona reminds him that as one of the Gym Leaders chosen by the Pokémon Association, he has to comply with the others. Norman refuses and continues leaving, but is stopped by Wattson. Wattson suggests that Norman use his strength to help in the upcoming Hoenn crisis and apologizes for the others' behavior due to their lack of knowledge about his past with the Pokémon Association. Norman politely tells Wattson to stop talking and heads off.
When Groudon and Kyogre are awakened, they begin causing droughts and downpours throughout Hoenn. Instead of helping stop the Pokémon from causing havoc, Norman decides to fulfill Wally's request and takes him to the Sky Pillar for training. After several days of training, Wally becomes much stronger from climbing the tower and battling the wild Pokémon inside. As they continue to train, Norman gets a call from Scott, who informs him that Ruby was chosen to be the wielder of the Red Orb used to control Groudon. This makes Norman decide to team up with Wally to awaken the third Legendary Pokémon that can stop Groudon and Kyogre, Rayquaza. Upon succeeding, Norman leaves Wally behind and flies off on Rayquaza to Sootopolis City.
When Norman arrives, Ruby is fighting Groudon and Kyogre alone with both the Red and Blue Orbs in hand. Together, they use the orbs in conjunction with Rayquaza to send Groudon and Kyogre away to return to their long slumber. The strain of having controlled Rayquaza for too long causes Norman to collapse and begin dying. In his last breath, Norman reveals that five years ago, Ruby's battle with a Salamence caused it to go berserk and accidentally free the Rayquaza captured by the Pokémon Association. Not wanting his son to take the blame, Norman lied to the association and put the fault on himself. The Association Director barred Norman from taking the Gym Leader test for five years and ordered him to find Rayquaza. Norman was forced to distance himself from his family during that time, which eventually led to Ruby becoming the way he is now. He then dies in Ruby's arms, much to the horror of his son. When Archie and Maxie come out of hiding to attack the exhausted Ruby, they decide to burn Norman's corpse to make sure he won't be able to return to stop their plans again.
Once Archie and Maxie were defeated, Ruby used his Celebi to revive all the people that were killed in the final battle. Norman is brought back to life thanks to Celebi's time travel abilities. Afterward, Norman celebrated the victory with his allies and thanked Ruby and Sapphire for their assistance in the battle. Sapphire immediately challenged Norman to a Gym battle, which she managed to win and earn the Balance Badge.
Omega Ruby & Alpha Sapphire arc
Norman appears at Meteor Falls. He meets with the Elder that lives there in hopes of getting information about Rayquaza again. There, he meets with Ruby and Emerald, who had come there for the same reason. With the old woman's help, Norman determines the Rayquaza may be returning to the location where it was held captive by the Pokémon Association. With Hoopa's rings, Norman and Ruby head to Johto.
Upon arriving in Goldenrod City, Norman and Ruby enter the now-abandoned Pokémon Association research facility. After a search through the facility's data files, Norman comes across video footage of the moment where Rayquaza was first encountered at the Embedded Tower. Before they can witness Rayquaza's capture, the video cuts off. Ruby decides that if Rayquaza was found at Route 47, then it may have gone there instead of Goldenrod. Norman reveals that he asked Emerald to give him the Green Orb core shortly before they entered Hoopa's ring. He reveals the core was originally created by the Association in order to create an artificial Green Orb capable of controlling Rayquaza, as it didn't have an orb like Groudon or Kyogre. When Rayquaza escaped its captivity, the project was scrapped and the core was thrown away before being completed, where it eventually ended up in Emerald's hands. Norman uses a machine to increase the core's purity, increasing its strength and turning it a shade of jade.
Just as the process is completed, Norman and Ruby are shocked to see that Rayquaza has appeared in the skies. They find Rayquaza feeding on shards of the meteoroid, which have begun falling onto Johto as well. They take to the skies in order to confront Rayquaza and capture it. During the battle, Rayquaza manages to capture Ruby and blocks Norman's attempt to rescue his son. Ruby takes the opportunity to use the scroll he took from Zinnia in order to teach Rayquaza Dragon Ascent, which will allow it to destroy the meteoroid. When Rayquaza continues attacking Ruby, Norman attempts to control it with the Green Orb core, only for it to fail. Ruby tells Norman to call Emerald and ask Hoopa to bring them back to Hoenn, as he plans on destroying the meteoroid with Sapphire.
After Hoopa opens the path to the Meteor Village, Ruby uses the Jade Orb core to lead Rayquaza back to Hoenn with Norman. When it sees Kyogre and Groudon through the ring, Rayquaza goes berserk and begins attacking the two. Rayquaza rushes towards the ring to confront Kyogre and Groudon, causing Norman to fall off and be left behind. It is later revealed by Gold and Silver that Norman would assist the combined efforts of the Kanto and Johto Gym Leaders and Elite Four to stop the meteoroid.
Pokémon
This listing is for Norman's Pokémon in the Pokémon Adventures manga.
On hand
| Debut | Nixing Nuzleaf |
|---|
Vigoroth is Norman's first known Pokémon. He was first used to battle a wild Breloom and easily won. Later, he battled against Ruby at the Weather Institute. Using his quick speed, he returned the volley of Mud Shots that Mumu attempted to trap Norman inside of. He has a Hasty nature.
Vigoroth's known moves are Aerial Ace and Focus Punch, and his Ability is Vital Spirit.
| Debut | Rayquaza Redemption I |
|---|
Spinda is Norman's third known Pokémon. He was first used in a training battle against Wally on the Sky Pillar. With his moves that switch Abilities and confuse his opponents, Norman managed to easily defeat Wally.
Spinda's known moves are Skill Swap and Teeter Dance, and his Ability is Own Tempo.
| Debut | It All Ends Now V |
|---|
| Debut | PS611 |
|---|
Norman owns a Winter Form Sawsbuck. It was first used to break into the Pokémon Association's old research facility.
Sawsbuck's only known move is Horn Leech.
| Debut | PS611 |
|---|
Norman owns a Staraptor. It was first used to fly up to Rayquaza in order to capture it. When Ruby was caught by Rayquaza, Norman used Staraptor to attempt to free his son, but failed.
Staraptor's only known move is Final Gambit.
Given away
| Debut | Creeping Past Cacnea |
|---|
| Debut | Creeping Past Cacnea |
|---|
| Debut | Creeping Past Cacnea |
|---|
Temporary
| Debut | Rayquaza Redemption I |
|---|
- Main article: Super-ancient Pokémon (Adventures) → Rayquaza
Rayquaza is an ancient Legendary Pokémon related to Groudon and Kyogre. It was captured by the Pokémon Association so that they may find a way to control it so that its powers could be used to stop Groudon and Kyogre when they would one day awaken again. Due to a Salamence that went out of control from a previous battle with Ruby, Rayquaza broke free and Norman was ordered to search for it again. Five years later, Norman teamed up with Wally and awakened Rayquaza on the Sky Pillar. Norman took Rayquaza and used it to stop Groudon and Kyogre with Ruby's help. The strain of controlling Rayquaza without an orb took too much strain on Norman, who proceeded to die shortly afterward. Angered that it was controlled, Rayquaza flew off to parts unknown.
| Spoilers end here. |
|---|
Pokémon Ruby-Sapphire
Norman appears in There's Someone More Important Than Clefairy?!. Unlike other media, Norman does not have any known relatives.
When Red and his Pokémon visit the Petalburg Gym after getting startled by a Poké Ball that flew from there, they notice Norman drinking and feeling down. Norman revealed to the group as the one who threw the Poké Balls. He then revealed that he felt sad since his Slakoth refused to partake in any battles. Norman takes out a chart and shows it to Red and his Pokémon that the Balance Badge is stuck inside Slakoth. After Clefairy took a nap, Norman explained to Red and his Pokémon that Slakoth doesn't like it when someone is lazier than it. Norman then watched as Clefairy went inside Slakoth to get the Balance Badge. After retrieving it, Norman demanded the group to return the badge to him but Clefairy refused. Afterwards, he became furious about this and chased after Red and his Pokémon since Clefairy refused to return the badge to Norman.
Pokémon
This listing is for Norman's Pokémon in the Pokémon Pocket Monsters manga.
Slakoth is Norman's Pokémon who refuses to participate in any Pokémon battles and has swallowed the Balance Badge to prove it. Clefairy tries to get the Badge out of Slakoth's stomach but the sloth Pokémon puts a stop to it by making Clefairy tired and swallowing the alarm clocks Clefairy strapped around to himself. Clefairy was able to go into Slakoth's body and get the Balance Badge out of there.
Slakoth's known moves are Yawn and Covet, and its Ability is Truant.
Pokémon Ruby & Sapphire
Norman appeared as the newly-appointed Gym Leader of Petalburg City. He is the father of Ruby and a friend of Professor Birch's. He berated Ruby for failing to heal his Mudkip after a battle, but rescinded later on after seeing how Ruby and Mudkip began to develop a good relationship with each other.
In the TCG
- Main article: Norman (Paradox Rift 168)
Norman was introduced as a Supporter card in the Pokémon Trading Card Game during the English Scarlet & Violet Series (the Japanese Scarlet & Violet Era). It was first released in the Japanese Ancient Roar expansion and the English Paradox Rift expansion, with artwork by Hideki Ishikawa. An ultra rare version with artwork by the same illustrator was released in the same sets. It allows players to draw 2 cards, and 2 more if their opponent's Active Pokémon is a Pokémon ex.
In Japan, Norman and the Balance Badge were also featured on one of the Gym Badge XY-P Promotional cards given out at events in 2015.
Trivia
- Norman is the first and currently only father of the player that has been seen in the core series games.
- However, in the early development of Pokémon Diamond and Pearl, the player was originally going to have a father, which is further evidenced by script files leftover in their remakes, Pokémon Brilliant Diamond and Shining Pearl.[3]
- Norman was also the only known father of any player character in the core series games until Pokémon Ultra Sun and Ultra Moon, although not directly seen.
- In Pokémon Ruby, Sapphire, and Emerald, a non-player character in Petalburg City mentions that Norman and his family are from Johto. In Pokémon Black 2 and White 2, Norman reveals that he is more specifically from Olivine City. In some new dialogue from Pokémon Omega Ruby and Alpha Sapphire, the player's Mom also mentions that they moved from Johto.
- However, in the Pokémon Adventures manga, they are from Goldenrod City instead. This was introduced in the manga prior to the reveal that they are from Olivine City in the games.
- In Emerald, Norman owns a level 29 Linoone that knows Slash, even though Linoone cannot learn said move until level 41. Zigzagoon, its pre-evolved form, cannot learn the move.
- In Pokémon Black 2 and White 2, along with Giovanni, Norman uses more different species of Pokémon than any other Gym Leader at the Pokémon World Tournament, with a total of 10.
- Not counting Ash’s Gym Leader companions and Giovanni, Norman is the first Gym Leader to physically reappear in the anime outside of his home region’s debut series.
- Norman is the only Gym Leader after Generation I who shares his English name in French, German, Italian, and Spanish.
Names
| Language | Name | Origin |
|---|---|---|
| Japanese | センリ Senri | From 仙蓼 senryō (glabrous sarcandra) and 千里 senri (1000 li; great distance) |
| English, German, Spanish, French, Italian |
Norman | From normal |
| Korean | 종길 Jonggil | Possibly from 길 gil (road) |
| Chinese (Mandarin) | 千里 Qiānlǐ | From 千里 qiānlǐ / chīnléih (great distance) |
| Chinese (Cantonese) | 千里 Chīnléih | |
| Russian | Норман Norman | Transcription of his English name |
| Vietnamese | Senri | Transcription of his Japanese name |
References
Related articles
| Gym Leaders of the Hoenn region | ||||||||||||||||||||||
|
|
|
| |||||||||||||||||||
|
|
|
| |||||||||||||||||||
| Pokémon the Series characters | ||||||||||||||
|---|---|---|---|---|---|---|---|---|---|---|---|---|---|---|
| ||||||||||||||
| See also: Pokémon Horizons characters | ||||||||||||||
| |||||||||||||||
| |||||||||||||||||||||||||||||

|
This game character article is part of Project CharacterDex, a Bulbapedia project that aims to write comprehensive articles on each character found in the Pokémon games. |
- Characters
- Male characters
- Animation characters
- Articles needing more information
- Characters with an unknown English voice actor
- Game characters
- Manga characters
- Ash & Pikachu characters
- Pokémon Adventures characters
- Pokémon Ruby-Sapphire characters
- Ruby and Sapphire characters
- Emerald characters
- Gym Leaders
- Normal-type Trainers
- Black 2 and White 2 characters
- Omega Ruby and Alpha Sapphire characters


