Z-Move: Difference between revisions
Muriloricci (talk | contribs) |
Storm Aurora (talk | contribs) m (Undo revision 4103208 by Trainersurrel0409 (talk) there's no reason to break up the link like that) Tag: Undo |
||
| (644 intermediate revisions by more than 100 users not shown) | |||
| Line 1: | Line 1: | ||
[[File:Sun Moon Z-Move artwork.png|thumb| | [[File:Sun Moon Z-Move artwork.png|thumb|300px|Artwork of a {{p|Pikachu}} using a Z-Move]] | ||
A '''Z-Move''' (Japanese: '''{{tt|Z|ゼット}}ワザ''' ''Z-Move'') is a special type of [[move]] introduced in [[Generation VII]], in which a {{pkmn|Trainer}} and their Pokémon's wishes combine to unleash an attack comprising the full power of both. Z-Moves require one of several available [[Z-Crystal]]s and a [[Z-Ring]]{{sup/7|SM}} or [[Z-Power Ring]]{{sup/7|USUM}} to channel [[Z-Power]] through. | |||
Z-Moves | They are no longer present in the [[core series]] from {{LGPE}} onwards, but they still appear in some {{spin-off games}}, such as {{g|Masters EX}}. | ||
{{-}} | |||
==List of Z-Moves== | ==In the core series games== | ||
Z-Moves are very powerful, but they can only be used once per {{pkmn|battle}}, unless {{DL|Rotom Pokédex|Z-Rotom Power}} is used. | |||
There are three different kinds of Z-Moves: Z-Moves which can be used by any {{OBP|Pokémon|species}}, with one Z-Move for each of the 18 [[type]]s; status moves that have been turned into Z-Moves by one of the 18 type-specific Z-Crystals; and Z-Moves that can only be used by specific Pokémon. The Z-Move that a Pokémon can perform depends on the [[Z-Crystal]] it [[held item|holds]]. There are 18 different Z-Crystals that correspond to each of the 18 types, and several others that correspond to specific Pokémon. Z-Moves work by powering up one of the Pokémon's normal moves, so the Pokémon must also know an appropriate move. For the type-related Z-Crystals, the Pokémon must know a move of the same type as the Z-Crystal it is holding. For the Pokémon-specific Z-Crystals, the move required differs for each Pokémon. | |||
A Pokémon can only use a Z-Move if its Trainer is wearing a [[Z-Ring]]{{sup/7|SM}} or [[Z-Power Ring]]{{sup/7|USUM}} and has the same Z-Crystal the Pokémon is holding. [[Mega Evolution|Mega Evolved]] and [[Primal Reversion|Primal]] Pokémon cannot use Z-Moves, even when holding an appropriate Z-Crystal (such as after {{m|Transform}}). | |||
===History=== | |||
{{main|Z-Power}} | |||
The origins of Z-Power, and by extension, Z-Moves, are largely shrouded in mystery. However, information by [[Professor Kukui]] and [[Professor Burnet]] indicate that Z-Power may be related to the energy produced by [[Ultra Wormhole]]s.<ref>[[Professor Kukui]], {{g|Sun and Moon}}:''"Burnet and I are looking into them and we think they might have some connection to the energy that pours outta those Ultra Wormholes."''</ref> In {{g|Ultra Sun and Ultra Moon}}, the [[Ultra Recon Squad]] reveal that the Z-Power that surrounds the user and their Pokémon when using a Z-Move and the aura that surrounds [[Totem Pokémon]] are a result of {{ga|Necrozma}}'s light shining down on Alola long ago.<ref>[[Dulse]], {{g|Ultra Sun and Ultra Moon|Ultra Sun}}: ''"These...auras...must have been particularly strong at the trial locations. And the Z-Power for the Z-Moves... It is also similar to the auras of the Totem Pokémon. Both came to Alola as Necrozma's light!"''</ref> | |||
Alolan legends found in the [[Malie City|Malie Library]] also indicate that {{p|Solgaleo}}{{sup/7|SUS}}/{{p|Lunala}}{{sup/7|MUM}} gifted the [[Tapunium Z]] to the [[guardian deities]] after fighting against them. The letter Z found at the start of Z-Move, Z-Power, Z-Ring, and Z-Power Ring comes from the word '''Zenith''' (Japanese: '''ゼンリョク/{{tt|全力|ぜんりょく}}''', ''zenryoku''<ref>[http://www.pokemon.co.jp/ex/sun_moon/fight/160801_01.html トレーナーとポケモンが一体となって放つゼンリョクの攻撃「Zワザ」|『ポケットモンスター サン・ムーン』公式サイト]</ref> "full power/force"), as the action of performing a Z-Move is done through a Trainer and their Pokémon combining their strength and vigor with one another. | |||
===Battle mechanics=== | |||
{{incomplete|section|needs=Are Z-Moves always obeyed?}} | |||
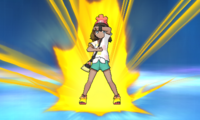
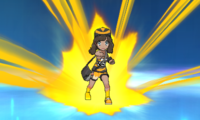
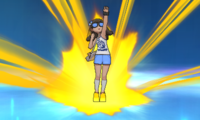
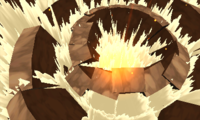
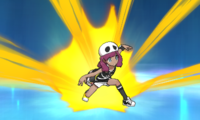
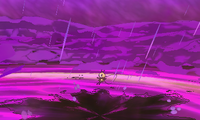
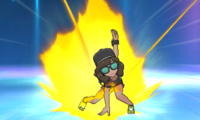
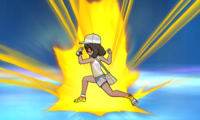
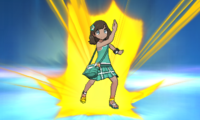
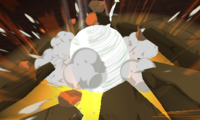
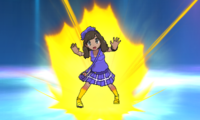
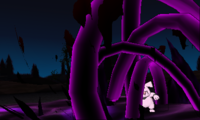
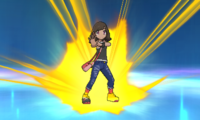
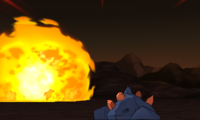
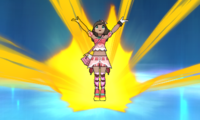
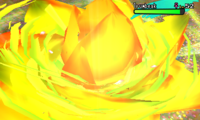
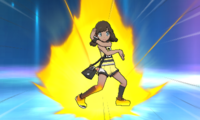
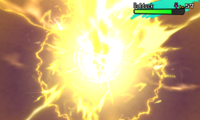
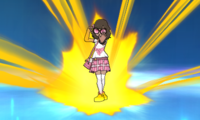
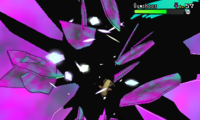
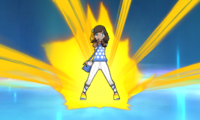
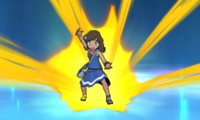
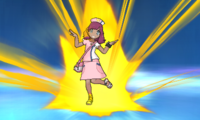
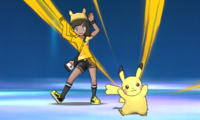
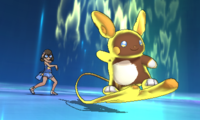
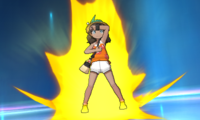
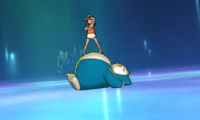
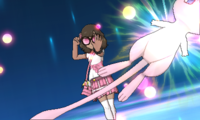
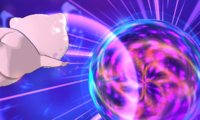
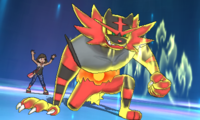
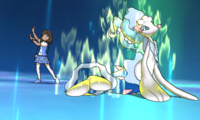
When using a Z-Move in the games, a special cutscene plays, first showing the Trainer performing a certain pose, before shifting to the Pokémon surrounding itself with its Z-Power and executing the Z-Move. This cutscene cannot be deactivated, even if battle animations are turned off. | |||
Z-Moves draw upon the [[PP]] of the Pokémon's original moves in order to execute, requiring and consuming PP upon use. When the Z-Move option is chosen in battle, a list of Z-Moves overlays the Pokémon's original list of moves, with each compatible move of the Pokémon's original moves overlain by a Z-Move option that draws upon that move. | |||
Damaging Z-Moves derive their [[damage category|category]] ([[physical move|physical]] or [[special move|special]]) and [[power]] from the base move. For example, a {{m|Gigavolt Havoc}} based on {{m|Nuzzle}} (with a power of 20) will have a power of 100 and be a physical move, while one based on {{m|Thunderbolt}} (with a power of 90) will have a power of 175 and be a special move. If the Pokémon knows more than one compatible move, it will be able to choose among different versions of the Z-Move with different stats, with the instance that has the highest power sparkling. Damaging Z-Moves do not inherit any other properties from the base move, so they have neutral [[priority]] and do not have the [[additional effect]]s of the base move. | |||
[[Signature move|Exclusive Z-Move]]s can be used only by specific {{OBP|Pokémon|species}}, and require a specific move to be upgraded. They have a fixed [[damage category|category]] and [[power]]. Exclusive Z-Moves can be used by a Pokémon {{m|transform}}ed into an appropriate species regardless of its original species, if it holds the corresponding Z-Crystal; if, however, the Pokémon who the move is exclusive to is transformed, it cannot use its own species' exclusive Z-Move unless it is transformed into another Pokémon of the same species. | |||
Damaging Z-Moves bypass {{stat|accuracy}} checks to always hit, unless the opponent is in the [[semi-invulnerable turn]] of a move such as {{m|Dig}} or {{m|Fly}}. Damaging Z-Moves cannot be fully protected against by {{cat|protection moves}} (such as {{m|Protect}} and {{m|Spiky Shield}}), instead dealing 25% of the original damage. The types of damaging Z-Moves are unaffected by {{cat|Abilities that can modify move types|type-modifying Abilities}} (although status Z-Moves' types are). However, their types are affected by {{m|Ion Deluge}} (if the Z-Move would be Normal-type) and {{m|Electrify}}. A Z-Move based on {{m|Nature Power}} will become a damaging Z-Move of the corresponding type based on the terrain, rather than a Z-Status Move. | |||
Z-Moves based on [[status move]]s are enhanced versions of the original moves, having a Z- prefixed to the start of the status move's name. While they have the effects of the original status move, the user usually also receives a '''Z-Power effect''' (Japanese: '''{{tt|Z|ゼット}}パワー{{tt|こうか|効果}}''' ''Z-Power effect''), which is executed before the move itself. For example, Z-{{m|Splash}} also boosts the user's {{stat|Attack}} by 3 stages, while Z-{{m|Parting Shot}} also restores the switch-in ally's HP by 100%. These effects are not affected by {{a|Contrary}}, {{a|Simple}}, or {{m|Heal Block}}. | |||
If a status Z-Move misses, fails (including failure caused by [[rain|heavy rain]], [[harsh sunlight|extremely harsh sunlight]], or [[strong winds]]), or is blocked by a protection move, it still applies its Z-Power effect. Status Z-Moves can be used without regard to the effects of {{m|Gravity}}, but Gravity will still cause them to fail after applying their Z-Power effect (e.g. Z-Magnet Rise will raise the user's evasion but then fail). | |||
Additionally, when used as a Z-Move, most {{cat|moves that call other moves}} convert the called move into its corresponding Z-Move, although [[status move]]s called this way do not get their Z-Power effect. Moves stolen by Z-{{m|Snatch}}, reflected by Z-{{m|Magic Coat}}, or instructed by Z-{{m|Instruct}} are not turned into Z-Moves. | |||
Z-Moves may be used without regard to the effects of {{m|Taunt}}, {{m|Torment}}, {{m|Disable}}, {{m|Encore}}, {{m|Imprison}}, and {{m|Heal Block}}; however, the Pokémon never has an opportunity to select a Z-Move if it is forced to use {{m|Struggle}} (e.g. if it is affected by Taunt and only knows [[status move]]s). Even if the target of Z-{{m|Heal Pulse}} or Z-{{m|Floral Healing}} is affected by Heal Block, that Pokémon's HP is restored. | |||
Like any other move, Z-Moves can be redirected by effects such as {{m|Follow Me}} and {{a|Storm Drain}}. Z-Moves are affected normally by {{m|Powder}} and [[weather]]. {{cat|Weather-changing moves}} turned into Z-Moves will disappear as usual during, but will apply their Z-Power effects regardless. | |||
If a Pokémon uses a damaging Z-Move on a Pokémon with {{a|Cursed Body}}, that damaging Z-Move can be disabled (with no effect on the base move). However, if Cursed Body would disable a status Z-Move (such as Z-{{m|Nature Power}}), the base status move will be disabled. | |||
===Power=== | |||
With the exceptions of {{m|Mega Drain}} (120), {{m|Weather Ball}} (160), {{m|Hex}} (160), {{m|V-create}} (220), {{m|Flying Press}} (170), and {{m|Core Enforcer}} (140), the powers of the type-specific damaging Z-Moves follow the following conversion table for base moves that have fixed powers and are not [[multistrike move]]s. {{m|Struggle}} has a power of 1 as a Z-Move in the game data, which does not follow this table, but it is not possible to turn Struggle into a Z-Move. Using a [[one-hit knockout move]] as the base move results in a Z-Move with a base power of 180. | |||
{| class="unsortable" style="text-align:center; border:1px solid #ccf; background:#ddf; margin-right: 5px; margin-bottom: 5px; {{roundy}}" | |||
|- | |||
! Base move power | |||
! Z-Move power | |||
|- style="background:#FFF" | |||
|0-55 || 100 | |||
|- style="background:#FFF" | |||
|60-65 || 120 | |||
|- style="background:#FFF" | |||
|70-75 || 140 | |||
|- style="background:#FFF" | |||
|80-85 || 160 | |||
|- style="background:#FFF" | |||
|90-95 || 175 | |||
|- style="background:#FFF" | |||
|100 ||180 | |||
|- style="background:#FFF" | |||
|110 ||185 | |||
|- style="background:#FFF" | |||
|120-125 ||190 | |||
|- style="background:#FFF" | |||
|130 ||195 | |||
|- style="background:#FFF" | |||
|140+ ||200 | |||
|- style="background:#FFF" | |||
|} | |||
===List of Z-Moves=== | |||
====For each type==== | |||
{| class="sortable roundy" style="margin:auto; background:#ddf; border:5px solid #ccf" | {| class="sortable roundy" style="margin:auto; background:#ddf; border:5px solid #ccf" | ||
|- | |- | ||
| Line 12: | Line 79: | ||
{| border=1 width="100%" class="sortable roundy" style="margin:auto; background:#fff; border:1px solid #ddf; border-collapse:collapse" | {| border=1 width="100%" class="sortable roundy" style="margin:auto; background:#fff; border:1px solid #ddf; border-collapse:collapse" | ||
|- style="background:#ddf" | |- style="background:#ddf" | ||
! style="width: 120px" | | ! style="width:120px" | Z-Move | ||
! style="width: 60px" | {{color2| | ! style="width:60px" | {{color2|000|Type}} | ||
! class="unsortable" | Pose | |||
! class="unsortable" | Image | ! class="unsortable" | Image | ||
! {{color2|000|Z-Crystal}} | |||
|- | |- | ||
| | | {{m|Breakneck Blitz}} | ||
{{typetable|Normal}} | {{typetable|Normal}} | ||
| [[File:Breakneck Blitz VII Pose.png|200px]] | |||
| [[File:Breakneck Blitz VII 2.png|200px]] | |||
| style="text-align:center"| [[File:Dream Normalium Z Sprite.png|Normalium]]<br>[[Normalium Z]] | |||
|- | |- | ||
| {{m| | | {{m|All-Out Pummeling}} | ||
{{typetable|Fighting}} | {{typetable|Fighting}} | ||
| [[File: | | [[File:All-Out Pummeling VII Pose.png|200px]] | ||
| [[File:All-Out Pummeling VII.png|200px]] | |||
| style="text-align:center"| [[File:Dream Fightinium Z Sprite.png|Fightinium]]<br>[[Fightinium Z]] | |||
|- | |- | ||
| | | {{m|Supersonic Skystrike}} | ||
{{typetable|Flying}} | {{typetable|Flying}} | ||
| [[File: | | [[File:Supersonic Skystrike VII Pose.png|200px]] | ||
| [[File:Supersonic Skystrike VII 2.png|200px]] | |||
| style="text-align:center"| [[File:Dream Flyinium Z Sprite.png|Flyinium]]<br>[[Flyinium Z]] | |||
|- | |- | ||
| | | {{m|Acid Downpour}} | ||
{{typetable|Poison}} | {{typetable|Poison}} | ||
| [[File: | | [[File:Acid Downpour VII Pose.png|200px]] | ||
| [[File:Acid Downpour VII 2.png|200px]] | |||
| style="text-align:center"| [[File:Dream Poisonium Z Sprite.png|Poisonium]]<br>[[Poisonium Z]] | |||
|- | |- | ||
| | | {{m|Tectonic Rage}} | ||
{{typetable|Ground}} | {{typetable|Ground}} | ||
| [[File: | | [[File:Tectonic Rage VII Pose.png|200px]] | ||
| [[File:Tectonic Rage VII 2.png|200px]] | |||
| style="text-align:center"| [[File:Dream Groundium Z Sprite.png|Groundium]]<br>[[Groundium Z]] | |||
|- | |- | ||
| | | {{m|Continental Crush}} | ||
{{typetable|Rock}} | {{typetable|Rock}} | ||
| [[File: | | [[File:Continental Crush VII Pose.png|200px]] | ||
| [[File:Continental Crush VII 2.png|200px]] | |||
| style="text-align:center"| [[File:Dream Rockium Z Sprite.png|Rockium]]<br>[[Rockium Z]] | |||
|- | |- | ||
| | | {{m|Savage Spin-Out}} | ||
{{typetable|Bug}} | {{typetable|Bug}} | ||
| [[File: | | [[File:Savage Spin-Out VII Pose.png|200px]] | ||
| [[File:Savage Spin-Out VII 2.png|200px]] | |||
| style="text-align:center"| [[File:Dream Buginium Z Sprite.png|Buginium]]<br>[[Buginium Z]] | |||
|- | |- | ||
| | | {{m|Never-Ending Nightmare}} | ||
{{typetable|Ghost}} | {{typetable|Ghost}} | ||
| [[File: | | [[File:Never-Ending Nightmare VII Pose.png|200px]] | ||
| [[File:Never-Ending Nightmare VII 2.png|200px]] | |||
| style="text-align:center"| [[File:Dream Ghostium Z Sprite.png|Ghostium]]<br>[[Ghostium Z]] | |||
|- | |- | ||
| | | {{m|Corkscrew Crash}} | ||
{{typetable|Steel}} | {{typetable|Steel}} | ||
| [[File: | | [[File:Corkscrew Crash VII Pose.png|200px]] | ||
- | | [[File:Corkscrew Crash VII 2.png|200px]] | ||
| style="text-align:center"| [[File:Dream Steelium Z Sprite.png|Steelium]]<br>[[Steelium Z]] | |||
|- | |- | ||
| {{m|Inferno Overdrive}} | | {{m|Inferno Overdrive}} | ||
{{typetable|Fire}} | {{typetable|Fire}} | ||
| [[File: | | [[File:Inferno Overdrive VII Pose.png|200px]] | ||
| [[File:Inferno Overdrive VII 2.png|200px]] | |||
| style="text-align:center"| [[File:Dream Firium Z Sprite.png|Firium]]<br>[[Firium Z]] | |||
|- | |- | ||
| {{m|Hydro Vortex}} | | {{m|Hydro Vortex}} | ||
{{typetable|Water}} | {{typetable|Water}} | ||
| [[File: | | [[File:Hydro Vortex VII Pose.png|200px]] | ||
| [[File:Hydro Vortex VII 2.png|200px]] | |||
| style="text-align:center"| [[File:Dream Waterium Z Sprite.png|Waterium]]<br>[[Waterium Z]] | |||
|- | |- | ||
| {{m|Bloom Doom}} | | {{m|Bloom Doom}} | ||
{{typetable|Grass}} | {{typetable|Grass}} | ||
| [[File: | | [[File:Bloom Doom VII Pose.png|200px]] | ||
| [[File:Bloom Doom VII 2.png|200px]] | |||
| style="text-align:center"| [[File:Dream Grassium Z Sprite.png|Grassium]]<br>[[Grassium Z]] | |||
|- | |- | ||
| {{m|Gigavolt Havoc}} | | {{m|Gigavolt Havoc}} | ||
{{typetable|Electric}} | {{typetable|Electric}} | ||
| [[File: | | [[File:Gigavolt Havoc VII Pose.png|200px]] | ||
< | | [[File:Gigavolt Havoc VII 2.png|200px]] | ||
| style="text-align:center"| [[File:Dream Electrium Z Sprite.png|Electrium]]<br>[[Electrium Z]] | |||
|- | |- | ||
| | | {{m|Shattered Psyche}} | ||
{{typetable|Psychic}} | {{typetable|Psychic}} | ||
| [[File: | | [[File:Shattered Psyche VII Pose.png|200px]] | ||
| [[File:Shattered Psyche VII 2.png|200px]] | |||
| style="text-align:center"| [[File:Dream Psychium Z Sprite.png|Psychium]]<br>[[Psychium Z]] | |||
|- | |- | ||
| | | {{m|Subzero Slammer}} | ||
{{typetable|Ice}} | {{typetable|Ice}} | ||
| [[File: | | [[File:Subzero Slammer VII Pose.png|200px]] | ||
| [[File:Subzero Slammer VII 2.png|200px]] | |||
| style="text-align:center"| [[File:Dream Icium Z Sprite.png|Icium]]<br>[[Icium Z]] | |||
|- | |- | ||
| | | {{m|Devastating Drake}} | ||
{{typetable|Dragon}} | {{typetable|Dragon}} | ||
| [[File: | | [[File:Devastating Drake VII Pose.png|200px]] | ||
| [[File:Devastating Drake VII 2.png|200px]] | |||
| style="text-align:center"| [[File:Dream Dragonium Z Sprite.png|Dragonium]]<br>[[Dragonium Z]] | |||
|- | |- | ||
| | | {{m|Black Hole Eclipse}} | ||
{{typetable|Dark}} | {{typetable|Dark}} | ||
| [[File: | | [[File:Black Hole Eclipse VII Pose.png|200px]] | ||
| [[File:Black Hole Eclipse VII 2.png|200px]] | |||
| style="text-align:center"| [[File:Dream Darkinium Z Sprite.png|Darkinium]]<br>[[Darkinium Z]] | |||
|- | |- | ||
| | | {{m|Twinkle Tackle}} | ||
{{typetable|Fairy}} | {{typetable|Fairy}} | ||
| [[File: | | [[File:Twinkle Tackle VII Pose.png|200px]] | ||
- | | [[File:Twinkle Tackle VII.png|200px]] | ||
| style="text-align:center"| [[File:Dream Fairium Z Sprite.png|Fairium]]<br>[[Fairium Z]] | |||
|} | |} | ||
|} | |} | ||
<!-- | |||
====For specific Pokémon==== | |||
{| class="sortable roundy" style="margin:auto; background:#ddf; border:5px solid #ccf" | |||
|- | |||
| | |||
{| border=1 width="100%" class="sortable roundy" style="margin:auto; background:#fff; border:1px solid #ddf; border-collapse:collapse" | |||
|- style="background:#ddf" | |||
! Introduced | |||
! Z-Move | |||
! Pokémon | |||
! Required move | |||
! {{color2|000|Type}} | |||
! {{color2|000|Damage category|Category}} | |||
! {{color2|000|Power}} | |||
! class="unsortable" | Pose | |||
! class="unsortable" | Image | |||
! {{color2|000|Z-Crystal}} | |||
|- | |||
| style="text-align:center"| {{gameabbrev7|SM}} | |||
| {{m|Catastropika}} | |||
| {{p|Pikachu}} | |||
| {{m|Volt Tackle}} | |||
{{typetable|Electric}} | |||
{{statustable|Physical}} | |||
| 210 | |||
| [[File:Catastropika VII Pose.png|200px]] | |||
| [[File:Catastropika VII 2.png|200px]] | |||
| style="text-align:center"| [[File:Dream Pikanium Z Sprite.png|Pikanium Z]]<br>[[Pikanium Z]] | |||
|- | |||
| style="text-align:center"| {{gameabbrev7|SM}} | |||
| {{m|10,000,000 Volt Thunderbolt}} | |||
| {{p|Pikachu}} [[Pikachu in a cap|in a cap]] | |||
| {{m|Thunderbolt}} | |||
{{typetable|Electric}} | |||
{{statustable|Special}} | |||
| 195 | |||
| [[File:10000000 Volt Thunderbolt VII Pose.png|200px]] | |||
| [[File:10000000 Volt Thunderbolt VII.png|200px]] | |||
| style="text-align:center"| [[File:Dream Pikashunium Z Sprite.png|Pikashunium Z]]<br>[[Pikashunium Z]] | |||
|- | |||
| style="text-align:center"| {{gameabbrev7|SM}} | |||
| {{m|Stoked Sparksurfer}} | |||
| {{rf|Alolan}} {{p|Raichu}} | |||
| {{m|Thunderbolt}} | |||
{{typetable|Electric}} | |||
{{statustable|Special}} | |||
| 175 | |||
| [[File:Stoked Sparksurfer VII Pose.png|200px]] | |||
| [[File:Stoked Sparksurfer VII 2.png|200px]] | |||
| style="text-align:center"| [[File:Dream Aloraichium Z Sprite.png|Aloraichium Z]]<br>[[Aloraichium Z]] | |||
|- | |||
| style="text-align:center"| {{gameabbrev7|SM}} | |||
| {{m|Extreme Evoboost}} | |||
| {{p|Eevee}} | |||
| {{m|Last Resort}} | |||
{{typetable|Normal}} | |||
{{statustable|Status}} | |||
| — | |||
| [[File:Extreme Evoboost VII Pose.png|200px]] | |||
| [[File:Extreme Evoboost VII 2.png|200px]] | |||
| style="text-align:center"| [[File:Dream Eevium Z Sprite.png|Eevium Z]]<br>[[Eevium Z]] | |||
|- | |||
| style="text-align:center"| {{gameabbrev7|SM}} | |||
| {{m|Pulverizing Pancake}} | |||
| {{p|Snorlax}} | |||
| {{m|Giga Impact}} | |||
{{typetable|Normal}} | |||
{{statustable|Physical}} | |||
| 210 | |||
| [[File:Pulverizing Pancake VII Pose.png|200px]] | |||
| [[File:Pulverizing Pancake VII 2.png|200px]] | |||
| style="text-align:center"| [[File:Dream Snorlium Z Sprite.png|Snorlium Z]]<br>[[Snorlium Z]] | |||
|- | |||
| style="text-align:center"| {{gameabbrev7|SM}} | |||
| {{m|Genesis Supernova}} | |||
| {{p|Mew}} | |||
| {{m|Psychic}} | |||
{{typetable|Psychic}} | |||
{{statustable|Special}} | |||
| 185 | |||
| [[File:Genesis Supernova VII Pose.png|200px]] | |||
| [[File:Genesis Supernova VII 2.png|200px]] | |||
| style="text-align:center"| [[File:Dream Mewnium Z Sprite.png|Mewnium Z]]<br>[[Mewnium Z]] | |||
|- | |||
| style="text-align:center"| {{gameabbrev7|SM}} | |||
| {{m|Sinister Arrow Raid}} | |||
| {{p|Decidueye}} | |||
| {{m|Spirit Shackle}} | |||
{{typetable|Ghost}} | |||
{{statustable|Physical}} | |||
| 180 | |||
| [[File:Sinister Arrow Raid VII Pose.png|200px]] | |||
| [[File:Sinister Arrow Raid VII 2.png|200px]] | |||
| style="text-align:center"| [[File:Dream Decidium Z Sprite.png|Decidium Z]]<br>[[Decidium Z]] | |||
|- | |||
| style="text-align:center"| {{gameabbrev7|SM}} | |||
| {{m|Malicious Moonsault}} | |||
| {{p|Incineroar}} | |||
| {{m|Darkest Lariat}} | |||
{{typetable|Dark}} | |||
{{statustable|Physical}} | |||
| 180 | |||
| [[File:Malicious Moonsault VII Pose.png|200px]] | |||
| [[File:Malicious Moonsault VII 2.png|200px]] | |||
| style="text-align:center"| [[File:Dream Incinium Z Sprite.png|Incinium Z]]<br>[[Incinium Z]] | |||
|- | |||
| style="text-align:center"| {{gameabbrev7|SM}} | |||
| {{m|Oceanic Operetta}} | |||
| {{p|Primarina}} | |||
| {{m|Sparkling Aria}} | |||
{{typetable|Water}} | |||
{{statustable|Special}} | |||
| 195 | |||
| [[File:Oceanic Operetta VII Pose.png|200px]] | |||
| [[File:Oceanic Operetta VII 2.png|200px]] | |||
| style="text-align:center"| [[File:Dream Primarium Z Sprite.png|Primarium Z]]<br>[[Primarium Z]] | |||
|- | |||
| style="text-align:center"| {{gameabbrev7|USUM}} | |||
| {{m|Splintered Stormshards}} | |||
| {{p|Lycanroc}} | |||
| {{m|Stone Edge}} | |||
{{typetable|Rock}} | |||
{{statustable|Physical}} | |||
| 190 | |||
| [[File:Splintered Stormshards USUM Pose.png|200px]] | |||
| [[File:Splintered Stormshards USUM Dusk 2.png|200px]] | |||
| style="text-align:center"| [[File:Dream Lycanium Z Sprite.png|Lycanium Z]]<br>[[Lycanium Z]] | |||
|- | |||
| style="text-align:center"| {{gameabbrev7|USUM}} | |||
| {{m|Let's Snuggle Forever}} | |||
| {{p|Mimikyu}} | |||
| {{m|Play Rough}} | |||
{{typetable|Fairy}} | |||
{{statustable|Physical}} | |||
| 190 | |||
| [[File:Lets Snuggle Forever USUM Pose.png|200px]] | |||
| [[File:Lets Snuggle Forever USUM.png|200px]] | |||
| style="text-align:center"| [[File:Dream Mimikium Z Sprite.png|Mimikium Z]]<br>[[Mimikium Z]] | |||
|- | |||
| style="text-align:center"| {{gameabbrev7|USUM}} | |||
| {{m|Clangorous Soulblaze}} | |||
| {{p|Kommo-o}} | |||
| {{m|Clanging Scales}} | |||
{{typetable|Dragon}} | |||
{{statustable|Special}} | |||
| 185 | |||
| [[File:Clangorous Soulblaze USUM Pose.png|200px]] | |||
| [[File:Clangorous Soulblaze USUM.png|200px]] | |||
| style="text-align:center"| [[File:Dream Kommonium Z Sprite.png|Kommonium Z]]<br>[[Kommonium Z]] | |||
|- | |||
| style="text-align:center"| {{gameabbrev7|SM}} | |||
| {{m|Guardian of Alola}} | |||
| [[Guardian deities]] | |||
| {{m|Nature's Madness}} | |||
{{typetable|Fairy}} | |||
{{statustable|Special}} | |||
| — | |||
| [[File:Guardian of Alola VII Pose.png|200px]] | |||
| [[File:Guardian of Alola VII.png|200px]] | |||
| style="text-align:center"| [[File:Dream Tapunium Z Sprite.png|Tapunium Z]]<br>[[Tapunium Z]] | |||
|- | |||
| style="text-align:center"| {{gameabbrev7|USUM}} | |||
| {{m|Searing Sunraze Smash}} | |||
| {{p|Solgaleo}}<br>{{DL|List of Pokémon with form differences|Necrozma|Dusk Mane}} {{p|Necrozma}} | |||
| {{m|Sunsteel Strike}} | |||
{{typetable|Steel}} | |||
{{statustable|Physical}} | |||
| 200 | |||
| [[File:Searing Sunraze Smash USUM Pose.png|200px]] | |||
| [[File:Searing Sunraze Smash USUM 2.png|200px]] | |||
| style="text-align:center"| [[File:Dream Solganium Z Sprite.png|Solganium Z]]<br>[[Solganium Z]] | |||
|- | |||
| style="text-align:center"| {{gameabbrev7|USUM}} | |||
| {{m|Menacing Moonraze Maelstrom}} | |||
| {{p|Lunala}}<br>{{DL|List of Pokémon with form differences|Necrozma|Dawn Wings}} {{p|Necrozma}} | |||
| {{m|Moongeist Beam}} | |||
{{typetable|Ghost}} | |||
{{statustable|Special}} | |||
| 200 | |||
| [[File:Menacing Moonraze Maelstrom USUM Pose.png|200px]] | |||
| [[File:Menacing Moonraze Maelstrom USUM 2.png|200px]] | |||
| style="text-align:center"| [[File:Dream Lunalium Z Sprite.png|Lunalium Z]]<br>[[Lunalium Z]] | |||
|- | |||
| style="text-align:center"| {{gameabbrev7|USUM}} | |||
| {{m|Light That Burns the Sky}} | |||
| Ultra {{p|Necrozma}} | |||
| {{m|Photon Geyser}} | |||
{{typetable|Psychic}} | |||
{{statustable|Special}} | |||
| 200 | |||
| [[File:Light That Burns the Sky USUM Pose.png|200px]] | |||
| [[File:Light That Burns the Sky USUM.png|200px]] | |||
| style="text-align:center"| [[File:Dream Ultranecrozium Z Sprite.png|Ultranecrozium Z]]<br>[[Ultranecrozium Z]] | |||
|- | |||
| style="text-align:center"| {{gameabbrev7|SM}} | |||
| {{m|Soul-Stealing 7-Star Strike}} | |||
| {{p|Marshadow}} | |||
| {{m|Spectral Thief}} | |||
{{typetable|Ghost}} | |||
{{statustable|Physical}} | |||
| 195 | |||
| [[File:Soul-Stealing 7-Star Strike VII Pose.png|200px]] | |||
| [[File:Soul-Stealing 7-Star Strike VII 2.png|200px]] | |||
| style="text-align:center"| [[File:Dream Marshadium Z Sprite.png|Marshadium Z]]<br>[[Marshadium Z]] | |||
|} | |||
|} | |||
===Z-Power effects of status moves=== | |||
{| class="sortable roundy" style="margin:auto; background:#ddf; border:5px solid #ccf" | |||
|- | |||
| | |||
{| border=1 width="100%" class="sortable" style="margin:auto; background:#fff; border:1px solid #ddf; border-collapse:collapse" | |||
|- style="background:#ddf" | |||
! Move | |||
! Type | |||
! style="border-right-width:0" | Z-Power Effect | |||
! class="unsortable" style="border-left-width:0" | Detail | |||
{{Movelist|Swords Dance|Normal|Reset Stats|Resets user's lowered stats|s2=10}} | |||
{{Movelist|Whirlwind|Normal|Special Defense ↑|Raises Special Defense by 1 stage|s2=4.1}} | |||
{{Movelist|Sand Attack|Ground|Evasiveness ↑|Raises evasiveness by 1 stage|s2=7.1}} | |||
{{Movelist|Tail Whip|Normal|Attack ↑|Raises Attack by 1 stage|s2=1.1}} | |||
{{Movelist|Leer|Normal|Attack ↑|Raises Attack by 1 stage|s2=1.1}} | |||
{{Movelist|Growl|Normal|Defense ↑|Raises Defense by 1 stage|s2=2.1}} | |||
{{Movelist|Roar|Normal|Defense ↑|Raises Defense by 1 stage|s2=2.1}} | |||
{{Movelist|Sing|Normal|Speed ↑|Raises Speed by 1 stage|s2=5.1}} | |||
{{Movelist|Supersonic|Normal|Speed ↑|Raises Speed by 1 stage|s2=5.1}} | |||
{{Movelist|Disable|Normal|Reset Stats|Resets user's lowered stats|s2=10}} | |||
{{Movelist|Mist|Ice|Restores HP|Fully restores user's HP|s2=11}} | |||
{{Movelist|Leech Seed|Grass|Reset Stats|Resets user's lowered stats|s2=10}} | |||
{{Movelist|Growth|Normal|Special Attack ↑|Raises Special Attack by 1 stage|s2=3.1}} | |||
{{Movelist|Poison Powder|Poison|Defense ↑|Raises Defense by 1 stage|s2=2.1}} | |||
{{Movelist|Stun Spore|Grass|Special Defense ↑|Raises Special Defense by 1 stage|s2=4.1}} | |||
{{Movelist|Sleep Powder|Grass|Speed ↑|Raises Speed by 1 stage|s2=5.1}} | |||
{{Movelist|String Shot|Bug|Speed ↑|Raises Speed by 1 stage|s2=5.1}} | |||
{{Movelist|Thunder Wave|Electric|Special Defense ↑|Raises Special Defense by 1 stage|s2=4.1}} | |||
{{Movelist|Toxic|Poison|Defense ↑|Raises Defense by 1 stage|s2=2.1}} | |||
{{Movelist|Hypnosis|Psychic|Speed ↑|Raises Speed by 1 stage|s2=5.1}} | |||
{{Movelist|Meditate|Psychic|Attack ↑|Raises Attack by 1 stage|s2=1.1}} | |||
{{Movelist|Agility|Psychic|Reset Stats|Resets user's lowered stats|s2=10}} | |||
{{Movelist|Teleport|Psychic|Restores HP|Fully restores user's HP|s2=11}} | |||
{{Movelist|Mimic|Normal|Accuracy ↑|Raises accuracy by 1 stage|s2=6.1}} | |||
{{Movelist|Screech|Normal|Attack ↑|Raises Attack by 1 stage|s2=1.1}} | |||
{{Movelist|Double Team|Normal|Reset Stats|Resets user's lowered stats|s2=10}} | |||
{{Movelist|Recover|Normal|Reset Stats|Resets user's lowered stats|s2=10}} | |||
{{Movelist|Harden|Normal|Defense ↑|Raises Defense by 1 stage|s2=2.1}} | |||
{{Movelist|Minimize|Normal|Reset Stats|Resets user's lowered stats|s2=10}} | |||
{{Movelist|Smokescreen|Normal|Evasiveness ↑|Raises evasiveness by 1 stage|s2=7.1}} | |||
{{Movelist|Confuse Ray|Ghost|Special Attack ↑|Raises Special Attack by 1 stage|s2=3.1}} | |||
{{Movelist|Withdraw|Water|Defense ↑|Raises Defense by 1 stage|s2=2.1}} | |||
{{Movelist|Defense Curl|Normal|Accuracy ↑|Raises accuracy by 1 stage|s2=6.1}} | |||
{{Movelist|Barrier|Psychic|Reset Stats|Resets user's lowered stats|s2=10}} | |||
{{Movelist|Light Screen|Psychic|Special Defense ↑|Raises Special Defense by 1 stage|s2=4.1}} | |||
{{Movelist|Haze|Ice|Restores HP|Fully restores user's HP|s2=11}} | |||
{{Movelist|Reflect|Psychic|Defense ↑|Raises Defense by 1 stage|s2=2.1}} | |||
{{Movelist|Focus Energy|Normal|Accuracy ↑|Raises accuracy by 1 stage|s2=6.1}} | |||
{{Movelist|Metronome|Normal|None|Calls a Z-move|s2=0}} | |||
{{Movelist|Mirror Move|Flying|Attack ↑↑|Raises Attack by 2 stages, calls a Z-move|s2=1.9}} | |||
{{Movelist|Amnesia|Psychic|Reset Stats|Resets user's lowered stats|s2=10}} | |||
{{Movelist|Kinesis|Psychic|Evasiveness ↑|Raises evasiveness by 1 stage|s2=7.1}} | |||
{{Movelist|Soft-Boiled|Normal|Reset Stats|Resets user's lowered stats|s2=10}} | |||
{{Movelist|Glare|Normal|Special Defense ↑|Raises Special Defense by 1 stage|s2=4.1}} | |||
{{Movelist|Poison Gas|Poison|Defense ↑|Raises Defense by 1 stage|s2=2.1}} | |||
{{Movelist|Lovely Kiss|Normal|Speed ↑|Raises Speed by 1 stage|s2=5.1}} | |||
{{Movelist|Transform|Normal|Restores HP|Fully restores user's HP|s2=11}} | |||
{{Movelist|Spore|Grass|Reset Stats|Resets user's lowered stats|s2=10}} | |||
{{Movelist|Flash|Normal|Evasiveness ↑|Raises evasiveness by 1 stage|s2=7.1}} | |||
{{Movelist|Splash|Normal|Attack ↑↑↑|Raises Attack by 3 stages|s2=1.3}} | |||
{{Movelist|Acid Armor|Poison|Reset Stats|Resets user's lowered stats|s2=10}} | |||
{{Movelist|Rest|Psychic|Reset Stats|Resets user's lowered stats|s2=10}} | |||
{{Movelist|Sharpen|Normal|Attack ↑|Raises Attack by 1 stage|s2=1.1}} | |||
{{Movelist|Conversion|Normal|Stats ↑|Raises Attack, Defense, Sp. Atk, Sp. Def, and Speed by 1 stage|s2=8}} | |||
{{Movelist|Substitute|Normal|Reset Stats|Resets user's lowered stats|s2=10}} | |||
{{Movelist|Sketch|Normal|Stats ↑|Raises Attack, Defense, Sp. Atk, Sp. Def, and Speed by 1 stage|s2=8}} | |||
{{Movelist|Spider Web|Bug|Defense ↑|Raises Defense by 1 stage|s2=2.1}} | |||
{{Movelist|Mind Reader|Normal|Special Attack ↑|Raises Special Attack by 1 stage|s2=3.1}} | |||
{{Movelist|Nightmare|Ghost|Special Attack ↑|Raises Special Attack by 1 stage|s2=3.1}} | |||
{{Movelist|Curse|Ghost|Changes depending on the type|Fully restores user's HP (Ghost-type)<br>Raises Attack by 1 stage (non Ghost-type)|s2=14}} | |||
{{Movelist|Conversion 2|Normal|Restores HP|Fully restores user's HP|s2=11}} | |||
{{Movelist|Cotton Spore|Grass|Reset Stats|Resets user's lowered stats|s2=10}} | |||
{{Movelist|Spite|Ghost|Restores HP|Fully restores user's HP|s2=11}} | |||
{{Movelist|Protect|Normal|Reset Stats|Resets user's lowered stats|s2=10}} | |||
{{Movelist|Scary Face|Normal|Speed ↑|Raises Speed by 1 stage|s2=5.1}} | |||
{{Movelist|Sweet Kiss|Fairy|Special Attack ↑|Raises Special Attack by 1 stage|s2=3.1}} | |||
{{Movelist|Belly Drum|Normal|Restores HP|Fully restores user's HP|s2=11}} | |||
{{Movelist|Spikes|Ground|Defense ↑|Raises Defense by 1 stage|s2=2.1}} | |||
{{Movelist|Foresight|Normal|Boosts critical-hit ratio|Boosts critical-hit ratio by 2 stages|s2=9}} | |||
{{Movelist|Destiny Bond|Ghost|Center of attention|User becomes center of attention|s2=13}} | |||
{{Movelist|Perish Song|Normal|Reset Stats|Resets user's lowered stats|s2=10}} | |||
{{Movelist|Detect|Fighting|Evasiveness ↑|Raises evasiveness by 1 stage|s2=7.1}} | |||
{{Movelist|Lock-On|Normal|Speed ↑|Raises Speed by 1 stage|s2=5.1}} | |||
{{Movelist|Sandstorm|Rock|Speed ↑|Raises Speed by 1 stage|s2=5.1}} | |||
{{Movelist|Endure|Normal|Reset Stats|Resets user's lowered stats|s2=10}} | |||
{{Movelist|Charm|Fairy|Defense ↑|Raises Defense by 1 stage|s2=2.1}} | |||
{{Movelist|Swagger|Normal|Reset Stats|Resets user's lowered stats|s2=10}} | |||
{{Movelist|Milk Drink|Normal|Reset Stats|Resets user's lowered stats|s2=10}} | |||
{{Movelist|Mean Look|Normal|Special Defense ↑|Raises Special Defense by 1 stage|s2=4.1}} | |||
{{Movelist|Attract|Normal|Reset Stats|Resets user's lowered stats|s2=10}} | |||
{{Movelist|Sleep Talk|Normal|Boosts critical-hit ratio|Boosts critical-hit ratio by 2 stages, calls a Z-move|s2=9.9}} | |||
{{Movelist|Heal Bell|Normal|Restores HP|Fully restores user's HP|s2=11}} | |||
{{Movelist|Safeguard|Normal|Speed ↑|Raises Speed by 1 stage|s2=5.1}} | |||
{{Movelist|Pain Split|Normal|Defense ↑|Raises Defense by 1 stage|s2=2.1}} | |||
{{Movelist|Baton Pass|Normal|Reset Stats|Resets user's lowered stats|s2=10}} | |||
{{Movelist|Encore|Normal|Speed ↑|Raises Speed by 1 stage|s2=5.1}} | |||
{{Movelist|Sweet Scent|Normal|Accuracy ↑|Raises accuracy by 1 stage|s2=6.1}} | |||
{{Movelist|Morning Sun|Normal|Reset Stats|Resets user's lowered stats|s2=10}} | |||
{{Movelist|Synthesis|Grass|Reset Stats|Resets user's lowered stats|s2=10}} | |||
{{Movelist|Moonlight|Fairy|Reset Stats|Resets user's lowered stats|s2=10}} | |||
{{Movelist|Rain Dance|Water|Speed ↑|Raises Speed by 1 stage|s2=5.1}} | |||
{{Movelist|Sunny Day|Fire|Speed ↑|Raises Speed by 1 stage|s2=5.1}} | |||
{{Movelist|Psych Up|Normal|Restores HP|Fully restores user's HP|s2=11}} | |||
{{Movelist|Stockpile|Normal|Restores HP|Fully restores user's HP|s2=11}} | |||
{{Movelist|Swallow|Normal|Reset Stats|Resets user's lowered stats|s2=10}} | |||
{{Movelist|Hail|Ice|Speed ↑|Raises Speed by 1 stage|s2=5.1}} | |||
{{Movelist|Torment|Dark|Defense ↑|Raises Defense by 1 stage|s2=2.1}} | |||
{{Movelist|Flatter|Dark|Special Defense ↑|Raises Special Defense by 1 stage|s2=4.1}} | |||
{{Movelist|Will-O-Wisp|Fire|Attack ↑|Raises Attack by 1 stage|s2=1.1}} | |||
{{Movelist|Memento|Dark|Restores replacement’s HP|Fully restores switched-in ally's HP{{tt|*|None in Version 1.0 of Sun and Moon}}|s2=12}} | |||
{{Movelist|Follow Me|Normal|Reset Stats|Resets user's lowered stats|s2=10}} | |||
{{Movelist|Nature Power|Normal|None|Calls a Z-move|s2=0}} | |||
{{Movelist|Charge|Electric|Special Defense ↑|Raises Special Defense by 1 stage|s2=4.1}} | |||
{{Movelist|Taunt|Dark|Attack ↑|Raises Attack by 1 stage|s2=1.1}} | |||
{{Movelist|Helping Hand|Normal|Reset Stats|Resets user's lowered stats|s2=10}} | |||
{{Movelist|Trick|Psychic|Speed ↑↑|Raises Speed by 2 stages|s2=5.2}} | |||
{{Movelist|Role Play|Psychic|Speed ↑|Raises Speed by 1 stage|s2=5.1}} | |||
{{Movelist|Wish|Normal|Special Defense ↑|Raises Special Defense by 1 stage|s2=4.1}} | |||
{{Movelist|Assist|Normal|None|Calls a Z-move|s2=0}} | |||
{{Movelist|Ingrain|Grass|Special Defense ↑|Raises Special Defense by 1 stage|s2=4.1}} | |||
{{Movelist|Magic Coat|Psychic|Special Defense ↑↑|Raises Special Defense by 2 stages|s2=4.2}} | |||
{{Movelist|Recycle|Normal|Speed ↑↑|Raises Speed by 2 stages|s2=5.2}} | |||
{{Movelist|Yawn|Normal|Speed ↑|Raises Speed by 1 stage|s2=5.1}} | |||
{{Movelist|Skill Swap|Psychic|Speed ↑|Raises Speed by 1 stage|s2=5.1}} | |||
{{Movelist|Imprison|Psychic|Special Defense ↑↑|Raises Special Defense by 2 stages|s2=4.2}} | |||
{{Movelist|Refresh|Normal|Restores HP|Fully restores user's HP|s2=11}} | |||
{{Movelist|Grudge|Ghost|Center of attention|User becomes center of attention|s2=13}} | |||
{{Movelist|Snatch|Dark|Speed ↑↑|Raises Speed by 2 stages|s2=5.2}} | |||
{{Movelist|Camouflage|Normal|Evasiveness ↑|Raises evasiveness by 1 stage|s2=7.1}} | |||
{{Movelist|Tail Glow|Bug|Reset Stats|Resets user's lowered stats|s2=10}} | |||
{{Movelist|Feather Dance|Flying|Defense ↑|Raises Defense by 1 stage|s2=2.1}} | |||
{{Movelist|Teeter Dance|Normal|Special Attack ↑|Raises Special Attack by 1 stage|s2=3.1}} | |||
{{Movelist|Mud Sport|Ground|Special Defense ↑|Raises Special Defense by 1 stage|s2=4.1}} | |||
{{Movelist|Slack Off|Normal|Reset Stats|Resets user's lowered stats|s2=10}} | |||
{{Movelist|Aromatherapy|Grass|Restores HP|Fully restores user's HP|s2=11}} | |||
{{Movelist|Fake Tears|Dark|Special Attack ↑|Raises Special Attack by 1 stage|s2=3.1}} | |||
{{Movelist|Odor Sleuth|Normal|Attack ↑|Raises Attack by 1 stage|s2=1.1}} | |||
{{Movelist|Metal Sound|Steel|Special Attack ↑|Raises Special Attack by 1 stage|s2=3.1}} | |||
{{Movelist|Grass Whistle|Grass|Speed ↑|Raises Speed by 1 stage|s2=5.1}} | |||
{{Movelist|Tickle|Normal|Defense ↑|Raises Defense by 1 stage|s2=2.1}} | |||
{{Movelist|Cosmic Power|Psychic|Special Defense ↑|Raises Special Defense by 1 stage|s2=4.1}} | |||
{{Movelist|Iron Defense|Steel|Reset Stats|Resets user's lowered stats|s2=10}} | |||
{{Movelist|Block|Normal|Defense ↑|Raises Defense by 1 stage|s2=2.1}} | |||
{{Movelist|Howl|Normal|Attack ↑|Raises Attack by 1 stage|s2=1.1}} | |||
{{Movelist|Bulk Up|Fighting|Attack ↑|Raises Attack by 1 stage|s2=1.1}} | |||
{{Movelist|Water Sport|Water|Special Defense ↑|Raises Special Defense by 1 stage|s2=4.1}} | |||
{{Movelist|Calm Mind|Psychic|Reset Stats|Resets user's lowered stats|s2=10}} | |||
{{Movelist|Dragon Dance|Dragon|Reset Stats|Resets user's lowered stats|s2=10}} | |||
{{Movelist|Roost|Flying|Reset Stats|Resets user's lowered stats|s2=10}} | |||
{{Movelist|Gravity|Psychic|Special Attack ↑|Raises Special Attack by 1 stage|s2=3.1}} | |||
{{Movelist|Miracle Eye|Psychic|Special Attack ↑|Raises Special Attack by 1 stage|s2=3.1}} | |||
{{Movelist|Healing Wish|Psychic|None|None|s2=0}} | |||
{{Movelist|Tailwind|Flying|Boosts critical-hit ratio|Boosts critical-hit ratio by 2 stages|s2=9}} | |||
{{Movelist|Acupressure|Normal|Boosts critical-hit ratio|Boosts critical-hit ratio by 2 stages|s2=9}} | |||
{{Movelist|Embargo|Dark|Special Attack ↑|Raises Special Attack by 1 stage|s2=3.1}} | |||
{{Movelist|Psycho Shift|Psychic|Special Attack ↑↑|Raises Special Attack by 2 stages|s2=3.2}} | |||
{{Movelist|Heal Block|Psychic|Special Attack ↑↑|Raises Special Attack by 2 stages|s2=3.2}} | |||
{{Movelist|Power Trick|Psychic|Attack ↑|Raises Attack by 1 stage|s2=1.1}} | |||
{{Movelist|Gastro Acid|Poison|Speed ↑|Raises Speed by 1 stage|s2=5.1}} | |||
{{Movelist|Lucky Chant|Normal|Evasiveness ↑|Raises evasiveness by 1 stage|s2=7.1}} | |||
{{Movelist|Me First|Normal|Speed ↑↑|Raises Speed by 2 stages, calls a Z-move|s2=5.9}} | |||
{{Movelist|Copycat|Normal|Accuracy ↑|Raises accuracy by 1 stage, calls a Z-move|s2=6.9}} | |||
{{Movelist|Power Swap|Psychic|Speed ↑|Raises Speed by 1 stage|s2=5.1}} | |||
{{Movelist|Guard Swap|Psychic|Speed ↑|Raises Speed by 1 stage|s2=5.1}} | |||
{{Movelist|Worry Seed|Grass|Speed ↑|Raises Speed by 1 stage|s2=5.1}} | |||
{{Movelist|Toxic Spikes|Poison|Defense ↑|Raises Defense by 1 stage|s2=2.1}} | |||
{{Movelist|Heart Swap|Psychic|Boosts critical-hit ratio|Boosts critical-hit ratio by 2 stages|s2=9}} | |||
{{Movelist|Aqua Ring|Water|Defense ↑|Raises Defense by 1 stage|s2=2.1}} | |||
{{Movelist|Magnet Rise|Electric|Evasiveness ↑|Raises evasiveness by 1 stage|s2=7.1}} | |||
{{Movelist|Rock Polish|Rock|Reset Stats|Resets user's lowered stats|s2=10}} | |||
{{Movelist|Switcheroo|Dark|Speed ↑↑|Raises Speed by 2 stages|s2=5.2}} | |||
{{Movelist|Nasty Plot|Dark|Reset Stats|Resets user's lowered stats|s2=10}} | |||
{{Movelist|Defog|Flying|Accuracy ↑|Raises accuracy by 1 stage|s2=6.1}} | |||
{{Movelist|Trick Room|Psychic|Accuracy ↑|Raises accuracy by 1 stage|s2=6.1}} | |||
{{Movelist|Captivate|Normal|Special Defense ↑↑|Raises Special Defense by 2 stages|s2=4.2}} | |||
{{Movelist|Stealth Rock|Rock|Defense ↑|Raises Defense by 1 stage|s2=2.1}} | |||
{{Movelist|Defend Order|Bug|Defense ↑|Raises Defense by 1 stage|s2=2.1}} | |||
{{Movelist|Heal Order|Bug|Reset Stats|Resets user's lowered stats|s2=10}} | |||
{{Movelist|Lunar Dance|Psychic|None|None|s2=0}} | |||
{{Movelist|Dark Void|Dark|Reset Stats|Resets user's lowered stats|s2=10}} | |||
{{Movelist|Hone Claws|Dark|Attack ↑|Raises Attack by 1 stage|s2=1.1}} | |||
{{Movelist|Wide Guard|Rock|Defense ↑|Raises Defense by 1 stage|s2=2.1}} | |||
{{Movelist|Guard Split|Psychic|Speed ↑|Raises Speed by 1 stage|s2=5.1}} | |||
{{Movelist|Power Split|Psychic|Speed ↑|Raises Speed by 1 stage|s2=5.1}} | |||
{{Movelist|Wonder Room|Psychic|Special Defense ↑|Raises Special Defense by 1 stage|s2=4.1}} | |||
{{Movelist|Autotomize|Steel|Reset Stats|Resets user's lowered stats|s2=10}} | |||
{{Movelist|Rage Powder|Bug|Reset Stats|Resets user's lowered stats|s2=10}} | |||
{{Movelist|Telekinesis|Psychic|Special Attack ↑|Raises Special Attack by 1 stage|s2=3.1}} | |||
{{Movelist|Magic Room|Psychic|Special Defense ↑|Raises Special Defense by 1 stage|s2=4.1}} | |||
{{Movelist|Quiver Dance|Bug|Reset Stats|Resets user's lowered stats|s2=10}} | |||
{{Movelist|Soak|Water|Special Attack ↑|Raises Special Attack by 1 stage|s2=3.1}} | |||
{{Movelist|Coil|Poison|Reset Stats|Resets user's lowered stats|s2=10}} | |||
{{Movelist|Simple Beam|Normal|Special Attack ↑|Raises Special Attack by 1 stage|s2=3.1}} | |||
{{Movelist|Entrainment|Normal|Special Defense ↑|Raises Special Defense by 1 stage|s2=4.1}} | |||
{{Movelist|After You|Normal|Speed ↑|Raises Speed by 1 stage|s2=5.1}} | |||
{{Movelist|Quick Guard|Fighting|Defense ↑|Raises Defense by 1 stage|s2=2.1}} | |||
{{Movelist|Ally Switch|Psychic|Speed ↑↑|Raises Speed by 2 stages|s2=5.2}} | |||
{{Movelist|Shell Smash|Normal|Reset Stats|Resets user's lowered stats|s2=10}} | |||
{{Movelist|Heal Pulse|Psychic|Reset Stats|Resets user's lowered stats|s2=10}} | |||
{{Movelist|Shift Gear|Steel|Reset Stats|Resets user's lowered stats|s2=10}} | |||
{{Movelist|Quash|Dark|Speed ↑|Raises Speed by 1 stage|s2=5.1}} | |||
{{Movelist|Reflect Type|Normal|Special Attack ↑|Raises Special Attack by 1 stage|s2=3.1}} | |||
{{Movelist|Bestow|Normal|Speed ↑↑|Raises Speed by 2 stages|s2=5.2}} | |||
{{Movelist|Work Up|Normal|Attack ↑|Raises Attack by 1 stage|s2=1.1}} | |||
{{Movelist|Cotton Guard|Grass|Reset Stats|Resets user's lowered stats|s2=10}} | |||
{{Movelist|Mat Block|Fighting|Defense ↑|Raises Defense by 1 stage|s2=2.1}} | |||
{{Movelist|Rototiller|Ground|Attack ↑|Raises Attack by 1 stage|s2=1.1}} | |||
{{Movelist|Sticky Web|Bug|Speed ↑|Raises Speed by 1 stage|s2=5.1}} | |||
{{Movelist|Trick-or-Treat|Ghost|Stats ↑|Raises Attack, Defense, Sp. Atk, Sp. Def, and Speed by 1 stage|s2=8}} | |||
{{Movelist|Noble Roar|Normal|Defense ↑|Raises Defense by 1 stage|s2=2.1}} | |||
{{Movelist|Ion Deluge|Electric|Special Attack ↑|Raises Special Attack by 1 stage|s2=3.1}} | |||
{{Movelist|Forest's Curse|Grass|Stats ↑|Raises Attack, Defense, Sp. Atk, Sp. Def, and Speed by 1 stage|s2=8}} | |||
{{Movelist|Parting Shot|Dark|Restores replacement’s HP|Fully restores switched-in ally's HP|s2=12}} | |||
{{Movelist|Topsy-Turvy|Dark|Attack ↑|Raises Attack by 1 stage|s2=1.1}} | |||
{{Movelist|Crafty Shield|Fairy|Special Defense ↑|Raises Special Defense by 1 stage|s2=4.1}} | |||
{{Movelist|Flower Shield|Fairy|Defense ↑|Raises Defense by 1 stage|s2=2.1}} | |||
{{Movelist|Grassy Terrain|Grass|Defense ↑|Raises Defense by 1 stage|s2=2.1}} | |||
{{Movelist|Misty Terrain|Fairy|Special Defense ↑|Raises Special Defense by 1 stage|s2=4.1}} | |||
{{Movelist|Electrify|Electric|Special Attack ↑|Raises Special Attack by 1 stage|s2=3.1}} | |||
{{Movelist|Fairy Lock|Fairy|Defense ↑|Raises Defense by 1 stage|s2=2.1}} | |||
{{Movelist|King's Shield|Steel|Reset Stats|Resets user's lowered stats|s2=10}} | |||
{{Movelist|Play Nice|Normal|Defense ↑|Raises Defense by 1 stage|s2=2.1}} | |||
{{Movelist|Confide|Normal|Special Defense ↑|Raises Special Defense by 1 stage|s2=4.1}} | |||
{{Movelist|Spiky Shield|Grass|Defense ↑|Raises Defense by 1 stage|s2=2.1}} | |||
{{Movelist|Aromatic Mist|Fairy|Special Defense ↑↑|Raises Special Defense by 2 stages|s2=4.2}} | |||
{{Movelist|Eerie Impulse|Electric|Special Defense ↑|Raises Special Defense by 1 stage|s2=4.1}} | |||
{{Movelist|Venom Drench|Poison|Defense ↑|Raises Defense by 1 stage|s2=2.1}} | |||
{{Movelist|Powder|Bug|Special Defense ↑↑|Raises Special Defense by 2 stages|s2=4.2}} | |||
{{Movelist|Geomancy|Fairy|Stats ↑|Raises Attack, Defense, Sp. Atk, Sp. Def, and Speed by 1 stage|s2=8}} | |||
{{Movelist|Magnetic Flux|Electric|Special Defense ↑|Raises Special Defense by 1 stage|s2=4.1}} | |||
{{Movelist|Happy Hour|Normal|Stats ↑|Raises Attack, Defense, Sp. Atk, Sp. Def, and Speed by 1 stage|s2=8}} | |||
{{Movelist|Electric Terrain|Electric|Speed ↑|Raises Speed by 1 stage|s2=5.1}} | |||
{{Movelist|Celebrate|Normal|Stats ↑|Raises Attack, Defense, Sp. Atk, Sp. Def, and Speed by 1 stage|s2=8}} | |||
{{Movelist|Hold Hands|Normal|Stats ↑|Raises Attack, Defense, Sp. Atk, Sp. Def, and Speed by 1 stage|s2=8}} | |||
{{Movelist|Baby-Doll Eyes|Fairy|Defense ↑|Raises Defense by 1 stage|s2=2.1}} | |||
{{Movelist|Shore Up|Ground|Reset Stats|Resets user's lowered stats|s2=10}} | |||
{{Movelist|Baneful Bunker|Poison|Defense ↑|Raises Defense by 1 stage|s2=2.1}} | |||
{{Movelist|Floral Healing|Fairy|Reset Stats|Resets user's lowered stats|s2=10}} | |||
{{Movelist|Strength Sap|Grass|Defense ↑|Raises Defense by 1 stage|s2=2.1}} | |||
{{Movelist|Spotlight|Normal|Special Defense ↑|Raises Special Defense by 1 stage|s2=4.1}} | |||
{{Movelist|Toxic Thread|Poison|Speed ↑|Raises Speed by 1 stage|s2=5.1}} | |||
{{Movelist|Laser Focus|Normal|Attack ↑|Raises Attack by 1 stage|s2=1.1}} | |||
{{Movelist|Gear Up|Steel|Special Attack ↑|Raises Special Attack by 1 stage|s2=3.1}} | |||
{{Movelist|Psychic Terrain|Psychic|Special Attack ↑|Raises Special Attack by 1 stage|s2=3.1}} | |||
{{Movelist|Speed Swap|Psychic|Speed ↑|Raises Speed by 1 stage|s2=5.1}} | |||
{{Movelist|Purify|Poison|Stats ↑|Raises Attack, Defense, Sp. Atk, Sp. Def, and Speed by 1 stage|s2=8}} | |||
{{Movelist|Instruct|Psychic|Special Attack ↑|Raises Special Attack by 1 stage|s2=3.1}} | |||
{{Movelist|Aurora Veil|Ice|Speed ↑|Raises Speed by 1 stage|s2=5.1}} | |||
{{Movelist|Tearful Look|Normal|Defense ↑|Raises Defense by 1 stage|s2=2.1}} | |||
|} | |||
|} | |||
==In the spin-off games== | |||
===[[Pokémon Masters EX]]=== | |||
[[File:Best Buds 10,000,000 Volt Thunderbolt Masters.png|thumb|150px|World Cap Pikachu using the sync move Best Buds 10,000,000 Volt Thunderbolt in {{g|Masters EX}}]] | |||
In {{g|Masters EX}}, several [[sync pair]]s, mainly those featuring Trainers from [[Alola]], perform a [[sync move]] based on a Z-Move. The following sync pairs perform Z-Move-based sync moves: | |||
{| style="margin:auto; text-align:center; background:#{{alola color}}; {{roundy|10px}}; border:3px solid #{{alola color dark}}" cellpadding=2px | |||
|- style="background:#{{alola color light}}" | |||
! style="{{roundytl|5px}}" | Trainer | |||
! Pokémon | |||
! Sync move | |||
! Base power | |||
! Max power | |||
! style="{{roundytr|5px}}" | Additional effect | |||
|- style="background:#fff" | |||
| [[File:VSScottie Masters.png|100px]][[File:VSBettie Masters.png|100px]]<br>[[Scottie]]/[[Bettie]] | |||
| [[File:Masters0791.png|100px]]<br>{{p|Solgaleo}} | |||
| [[File:SteelIC Masters.png|16px]] Shining Friendship {{m|Searing Sunraze Smash|Sunraze Smash}} | |||
| 250 | |||
| 300 | |||
| ''(6★ EX effect: Sync moves will target all opposing sync pairs.)'' | |||
|- style="background:#fff" | |||
| [[File:VSHau Masters.png|100px]]<br>{{mas|Hau}} | |||
| [[File:Masters0026A.png|100px]]<br>{{p|Raichu}} {{male}}<br><small>[[Alolan form|Alola Form]]</small> | |||
| [[File:ElectricIC Masters.png|16px]] Endless Summer {{m|Gigavolt Havoc}} | |||
| 250 | |||
| 300 | |||
| ''(6★ EX effect: Sync moves will target all opposing sync pairs.)'' | |||
|- style="background:#fff" | |||
| [[File:VSHau Sygna Masters.png|100px]]<br>[[Sygna suit|Sygna Suit]] {{mas|Hau}} | |||
| [[File:Masters0785.png|100px]]<br>{{p|Tapu Koko}} | |||
| [[File:ElectricIC Masters.png|16px]] Thundering Deity {{m|Gigavolt Havoc}} | |||
| 200 | |||
| 240 | |||
| This attack's power increases when the field is {{m|Electric Terrain}}.<br>''(6★ EX effect: Sync move power will be multiplied by 1.5.)''<br>''(EX role effect: Sync moves will target all opposing sync pairs.)'' | |||
|- style="background:#fff" | |||
| [[File:VSSophocles Masters.png|100px]]<br>{{mas|Sophocles}} | |||
| [[File:Masters0777.png|100px]]<br>{{TP|Sophocles|Togedemaru}} {{female}} | |||
| [[File:ElectricIC Masters.png|16px]] Whiz Kid {{m|Gigavolt Havoc}} | |||
| 200 | |||
| 240 | |||
| This attack’s power increases when the target is flinching. | |||
|- style="background:#fff" | |||
| [[File:VSMina Masters.png|100px]]<br>{{mas|Mina}} | |||
| [[File:Masters0210.png|100px]]<br>{{p|Granbull}} {{male}} | |||
| [[File:FairyIC Masters.png|16px]] Wandering Artist {{m|Twinkle Tackle}} | |||
| 200 | |||
| 240 | |||
| The more the opponent's Attack is lowered, the greater the power of this move.<br>''(6★ EX effect: Sync move power will be multiplied by 1.5.)'' | |||
|- style="background:#fff" | |||
| [[File:VSMina Sygna Masters.png|100px]]<br>[[Sygna suit|Sygna Suit]] {{mas|Mina}} | |||
| [[File:Masters0788.png|100px]]<br>{{p|Tapu Fini}} | |||
| [[File:FairyIC Masters.png|16px]] Ocean Colors {{m|Twinkle Tackle}} | |||
| 250 | |||
| 300 | |||
| ''(6★ EX effect: The sync buff is doubled the first time a sync move is used.)'' | |||
|- style="background:#fff" | |||
| [[File:VSOlivia Masters.png|100px]]<br>{{mas|Olivia}} | |||
| [[File:Masters0745Mn.png|100px]]<br>{{TP|Olivia|Lycanroc}} {{male}}<br><small>Midnight Form</small> | |||
| [[File:RockIC Masters.png|16px]] Shining Gem {{m|Continental Crush}} | |||
| 250 | |||
| 300 | |||
| ''(6★ EX effect: Sync moves will target all opposing sync pairs.)'' | |||
|- style="background:#fff" | |||
| [[File:VSHapu Masters.png|100px]]<br>{{mas|Hapu}} | |||
| [[File:Masters0750.png|100px]]<br>{{TP|Hapu|Mudsdale}} {{male}} | |||
| [[File:GroundIC Masters.png|16px]] Ultimately Worthy {{m|Tectonic Rage}} | |||
| 250 | |||
| 300 | |||
| ''(6★ EX effect: Sync moves will target all opposing sync pairs.)'' | |||
|- style="background:#fff" | |||
| [[File:VSKahili Masters.png|100px]]<br>{{mas|Kahili}} | |||
| [[File:Masters0733.png|100px]]<br>{{p|Toucannon}} {{male}} | |||
| [[File:FlyingIC Masters.png|16px]] {{m|Supersonic Skystrike}} Drive | |||
| 250 | |||
| 300 | |||
| No additional effect. | |||
|- style="background:#fff" | |||
| [[File:VSNanu Masters.png|100px]]<br>{{mas|Nanu}} | |||
| [[File:Masters0053A.png|100px]]<br>{{p|Persian}} {{female}}<br><small>[[Alolan form|Alola Form]]</small> | |||
| [[File:DarkIC Masters.png|16px]] Dark Authority {{m|Black Hole Eclipse}} | |||
| 200 | |||
| 240 | |||
| This attack's power increases when the target is flinching. | |||
|- style="background:#fff" | |||
| [[File:VSAcerola Masters.png|100px]]<br>{{mas|Acerola}} | |||
| [[File:Masters0770.png|100px]]<br>{{p|Palossand}} {{female}} | |||
| [[File:GhostIC Masters.png|16px]] {{m|Never-Ending Nightmare|Never-Ending Royal Nightmare}} | |||
| 200 | |||
| 240 | |||
| The more the user's Defense is raised, the greater the power of this attack.<br>''(6★ EX effect: Sync move power will be multiplied by 1.5.)'' | |||
|- style="background:#fff" | |||
| [[File:VSAcerola Sygna Masters.png|100px]]<br>[[Sygna suit|Sygna Suit]] {{mas|Acerola}} | |||
| [[File:Masters0787.png|100px]]<br>{{p|Tapu Bulu}} | |||
| [[File:GrassIC Masters.png|16px]] Gentle Warning {{m|Bloom Doom}} | |||
| 250 | |||
| 300 | |||
| ''(6★ EX effect: The sync buff is doubled the first time a sync move is used.)'' | |||
|- style="background:#fff" | |||
| [[File:VSLeaf Masters.png|100px]]<br>{{mas|Leaf}} | |||
| [[File:Masters0133.png|100px]]<br>{{p|Eevee}} {{male}} | |||
| [[File:NormalIC Masters.png|16px]] Endless Possibilities {{m|Extreme Evoboost}} | |||
| - | |||
| - | |||
| Charges the user's move gauge by its current move level.<br>Raises the Attack, Defense, Sp. Atk, Sp. Def, Speed, and accuracy of all allied sync pairs by 2 stat ranks.<br>''(6★ EX effect: The sync buff is doubled the first time a sync move is used.)'' | |||
|- style="background:#fff" | |||
| [[File:VSKukui Masters.png|100px]]<br>{{mas|Kukui}} | |||
| [[File:Masters0745.png|100px]]<br>{{TP|Professor Kukui|Lycanroc}} {{male}}<br><small>Midday Form</small> | |||
| [[File:RockIC Masters.png|16px]] Island {{m|Splintered Stormshards}} | |||
| 250 | |||
| 300 | |||
| Removes the Physical and Special Damage Reduction effects from the opponents’ field of play.<br>''(6★ EX effect: Sync move power will be multiplied by 1.5.)'' | |||
|- style="background:#fff" | |||
| [[File:VSGuzma Masters.png|100px]]<br>{{mas|Guzma}} | |||
| [[File:Masters0168.png|100px]]<br>{{p|Ariados}} {{male}} | |||
| [[File:BugIC Masters.png|16px]] Shake Things Up {{m|Savage Spin-Out}} | |||
| 250 | |||
| 300 | |||
| ''(6★ EX effect: The sync buff is doubled the first time a sync move is used.)''<br>''(EX role effect: Sync move power will be multiplied by 1.5.)'' | |||
|- style="background:#fff" | |||
| [[File:VSPlumeria Masters.png|100px]]<br>{{mas|Plumeria}} | |||
| [[File:Masters0758.png|100px]]<br>{{p|Salazzle}} {{female}} | |||
| [[File:PoisonIC Masters.png|16px]] Wicked Enforcer {{m|Acid Downpour}} | |||
| 250 | |||
| 300 | |||
| ''(6★ EX effect: Sync moves will target all opposing sync pairs.)'' | |||
|- style="background:#fff" | |||
| [[File:VSPlumeria Masters.png|100px]]<br>{{mas|Plumeria}} | |||
| [[File:Masters0094.png|100px]]<br>{{p|Gengar}} {{male}} | |||
| [[File:PoisonIC Masters.png|16px]] Ready to Go {{m|Acid Downpour}} | |||
| 200 | |||
| 240 | |||
| The more the user's Speed is raised, the greater the power of this attack.<br>''(6★ EX effect: The first time the user’s sync move is used each battle, the sync move countdown is reduced by three.)''<br>''(EX role effect: Sync move power will be multiplied by 1.5.)'' | |||
|- style="background:#fff" | |||
| [[File:VSLusamine Masters.png|100px]]<br>{{mas|Lusamine}} | |||
| [[File:Masters0795.png|100px]]<br>{{p|Pheromosa}} | |||
| [[File:BugIC Masters.png|16px]] Motherly Love {{m|Savage Spin-Out}} | |||
| 250 | |||
| 300 | |||
| ''(6★ EX effect: Sync moves will target all opposing sync pairs.)'' | |||
|- style="background:#fff" | |||
| [[File:VSLusamine Sygna Masters.png|100px]]<br>[[Sygna suit|Sygna Suit]] {{mas|Lusamine}} | |||
| [[File:Masters0800U.png|100px]]<br>{{p|Necrozma}}<br><small>Ultra Necrozma</small> | |||
| [[File:PsychicIC Masters.png|16px]] Loving {{m|Light That Burns the Sky}} | |||
| 250 | |||
| 300 | |||
| Become Ultra Necrozma until the end of battle.<br>''(6★ EX effect: Sync moves will target all opposing sync pairs.)''<br>''(EX role effect: The sync buff is doubled the first time a sync move is used.)'' | |||
|- style="background:#fff" | |||
| [[File:VSLillie Anniversary 2024 Masters.png|100px]]<br>{{mas|Lillie}} (Anniversary 2024) | |||
| [[File:Masters0791.png|100px]]<br>{{p|Solgaleo}} | |||
| [[File:SteelIC Masters.png|16px]] Wholesome Heart {{m|Searing Sunraze Smash|Sunraze Smash}} | |||
| 200 | |||
| 240 | |||
|The more the target's Speed is lowered, the greater the power of this attack.<br>''(6★ EX effect: The first time the user's sync move is used each battle, the sync move countdown is reduced by three.)''<br>''(EX role effect: Implements the following field effect just before the user's sync move is used the first time each battle. Extends the field effect duration only that time. • Steel Zone)'' | |||
|- style="background:#fff" | |||
| [[File:VSMolayne Masters.png|100px]]<br>{{mas|Molayne}} | |||
| [[File:Masters0051A.png|100px]]<br>{{p|Dugtrio}} {{male}}<br><small>[[Alolan form|Alola Form]]</small> | |||
| [[File:SteelIC Masters.png|16px]] Supernova {{m|Corkscrew Crash}} | |||
| 250 | |||
| 300 | |||
| No additional effect. | |||
|- style="background:#fff" | |||
| [[File:VSMallow Masters.png|100px]]<br>{{mas|Mallow}} | |||
| [[File:Masters0763.png|100px]]<br>{{TP|Mallow|Tsareena}} {{female}} | |||
| [[File:GrassIC Masters.png|16px]] Bold-Flavored {{m|Bloom Doom}} | |||
| 200 | |||
| 240 | |||
| This attack's power increases when the target is confused.<br>''(6★ EX effect: Sync move power will be multiplied by 1.5.)'' | |||
|- style="background:#fff" | |||
| [[File:VSMallow Masters.png|100px]]<br>{{mas|Mallow}} | |||
| [[File:Masters0756.png|100px]]<br>{{p|Shiinotic}} {{female}} | |||
| [[File:GrassIC Masters.png|16px]] Strong Kick to It {{m|Bloom Doom}} | |||
| 250 | |||
| 300 | |||
| ''(6★ EX effect: The sync buff is doubled the first time a sync move is used.)'' | |||
|- style="background:#fff" | |||
| [[File:VSSelene Masters.png|100px]]<br>{{mas|Selene}} | |||
| [[File:Masters0197.png|100px]]<br>{{p|Umbreon}} {{female}} | |||
| [[File:DarkIC Masters.png|16px]] Floating High {{m|Black Hole Eclipse}} | |||
| 200 | |||
| 240 | |||
| The more the target’s Defense is lowered, the greater the power of this attack.<br>''(6★ EX effect: Sync move power will be multiplied by 1.5.)''<br>''(EX role effect: The sync buff is doubled the first time a sync move is used.)'' | |||
|- style="background:#fff" | |||
| [[File:VSSelene Alt Masters.png|100px]]<br>{{mas|Selene}} (Alt.) | |||
| [[File:Masters0793.png|100px]]<br>{{p|Nihilego}} | |||
| [[File:RockIC Masters.png|16px]] Cute Quirks {{m|Continental Crush}} | |||
| 250 | |||
| 300 | |||
| ''(6★ EX effect: Sync moves will target all opposing sync pairs.)''<br>''(EX role effect: Sync move power will be multiplied by 1.5.)'' | |||
|- style="background:#fff" | |||
| [[File:VSElio Masters.png|100px]]<br>{{mas|Elio}} | |||
| [[File:Masters0730.png|100px]]<br>{{p|Primarina}} {{male}} | |||
| [[File:WaterIC Masters.png|16px]] Sunshine {{m|Oceanic Operetta}} | |||
| 250 | |||
| 300 | |||
| ''(6★ EX effect: The sync buff is doubled the first time a sync move is used.)'' | |||
|- style="background:#fff" | |||
| [[File:VSElio Masters.png|100px]]<br>{{mas|Elio}} | |||
| [[File:Masters0196.png|100px]]<br>{{p|Espeon}} {{male}} | |||
| [[File:PsychicIC Masters.png|16px]] Shining High {{m|Shattered Psyche}} | |||
| 200 | |||
| 240 | |||
| The more the target’s Sp. Def is lowered, the greater the power of this attack.<br>''(6★ EX effect: Sync move power will be multiplied by 1.5.)''<br>''(EX role effect: The sync buff is doubled the first time a sync move is used.)'' | |||
|- style="background:#fff" | |||
| [[File:VSElio Alt Masters.png|100px]]<br>{{mas|Elio}} (Alt.) | |||
| [[File:Masters0805.png|100px]]<br>{{p|Stakataka}} | |||
| [[File:RockIC Masters.png|16px]] Stacked-Up Emotions {{m|Continental Crush}} | |||
| 250 | |||
| 300 | |||
| ''(6★ EX effect: The sync buff is doubled the first time a sync move is used.)''<br>''(EX role effect: The first time the user's sync move is used each battle, the sync move countdown is reduced by three.)'' | |||
|- style="background:#fff" | |||
| [[File:VSLana Masters.png|100px]]<br>{{mas|Lana}} | |||
| [[File:Masters0752.png|100px]]<br>{{p|Araquanid}} {{female}} | |||
| [[File:WaterIC Masters.png|16px]] Seaside Sister {{m|Hydro Vortex}} | |||
| 250 | |||
| 300 | |||
| ''(6★ EX effect: The sync buff is doubled the first time a sync move is used.)'' | |||
|- style="background:#fff" | |||
| [[File:VSLana Sygna Masters.png|100px]]<br>[[Sygna suit|Sygna Suit]] {{mas|Lana}} | |||
| [[File:Masters0786.png|100px]]<br>{{p|Tapu Lele}} | |||
| [[File:PsychicIC Masters.png|16px]] Guileless Jest {{m|Shattered Psyche}} | |||
| 250 | |||
| 300 | |||
| ''(6★ EX effect: Sync moves will target all opposing sync pairs.)'' | |||
|- style="background:#fff" | |||
| [[File:VSKiawe Masters.png|100px]]<br>{{mas|Kiawe}} | |||
| [[File:Masters0105A.png|100px]]<br>{{TP|Kiawe|Marowak}} {{male}}<br><small>[[Alolan form|Alola Form]]</small> | |||
| [[File:FireIC Masters.png|16px]] Fire Dance {{m|Inferno Overdrive}} | |||
| 250 | |||
| 300 | |||
| ''(6★ EX effect: The sync buff is doubled the first time a sync move is used.)'' | |||
|- style="background:#fff" | |||
| [[File:VSKiawe Masters.png|100px]]<br>{{mas|Kiawe}} | |||
| [[File:Masters0059.png|100px]]<br>{{p|Arcanine}} {{male}} | |||
| [[File:FireIC Masters.png|16px]] Dance Together {{m|Inferno Overdrive}} | |||
| 200 | |||
| 240 | |||
| This attack’s power increases when the target is burned.<br>''(6★ EX effect: Sync move power will be multiplied by 1.5.)'' | |||
|- style="background:#fff" | |||
| [[File:VSMasked Royal Masters.png|100px]]<br>{{DL|Kukui (Masters)|Incineroar|The Masked Royal}} | |||
| [[File:Masters0727.png|100px]]<br>{{TP|Professor Kukui|Incineroar}} {{male}} | |||
| [[File:DarkIC Masters.png|16px]] Heel Turn {{m|Malicious Moonsault}} | |||
| 200 | |||
| 240 | |||
| The more the user's Speed has been raised, the greater the power of this attack.<br>''(6★ EX effect: Sync move power will be multiplied by 1.5.)'' | |||
|- style="background:#fff" | |||
| [[File:VSAsh Masters.png|100px]]<br>{{mas|Ash}} | |||
| [[File:Masters0025W.png|100px]]<br>{{AP|Pikachu}} {{male}}<br><small>[[Pikachu in a cap|World Cap]]</small>{{tt|*|Temporarily becomes World Cap Pikachu when using the Z-Move}} | |||
| [[File:ElectricIC Masters.png|16px]] Best Buds {{m|10,000,000 Volt Thunderbolt}} | |||
| 250 | |||
| 300 | |||
| Except in certain circumstances, successful hits with this attack become critical hits.<br>''(6★ EX effect: Sync moves will target all opposing sync pairs.)'' | |||
|} | |||
===[[Pokémon Ga-Olé]]=== | |||
{{sectionstub}} | |||
===[[Pokémon Mezastar]]=== | |||
{{sectionstub}} | |||
===Super Smash Bros. series=== | |||
====[[Super Smash Bros. Ultimate]]==== | |||
{{SSB|Incineroar}}'s [[Final Smash]] uses the Z-Move {{m|Malicious Moonsault}}. | |||
The {{p|Mimikyu}} summon from a [[Poké Ball]] will use the Z-Move {{m|Let's Snuggle Forever}}. | |||
==In the TCG== | |||
In the [[Pokémon Trading Card Game]], a mechanic similar to Z-Moves, introduced in the {{tcg|Sun & Moon}} expansion, is a type of attack called {{GX}} {{tcg|attack|attacks}}. They are distinguished from normal attacks by a "''GX''" suffix following the attack's name, such as in "Pulverizing Pancake{{GX}}". Only {{tcg|Pokémon-GX|Pokémon}}{{GX}} are printed with {{GX}} attacks. [[Z-Crystal#In_the_TCG|Z-Crystal cards]] can allow other Pokemon to use a ''GX'' attack printed on the Z-Crystal card if the Pokemon has a move of the correct name. | |||
Like Z-Moves, {{GX}} attacks have very powerful effects compared to those of other attacks. However, each player may only use one ''GX'' attack per game. {{GX}} {{TCG|marker}}s are used to denote whether a player has used their ''GX'' attack yet. If a player uses a ''GX'' attack, their {{GX}} marker is flipped over to expose its reverse side. Some effects check if a player has used a ''GX'' attack, either on the previous turn or in the game overall. | |||
A rare few effects, such as that of [[Misty & Lorelei (Cosmic Eclipse 199)|Misty & Lorelei]], allow for a player to use a ''GX'' attack even though they have already used a ''GX'' attack on a prior turn. When ''GX'' attacks are used as the effect of other attacks, such as through [[Nihilego (Lost Thunder 106)| Nihilego]]'s Nightcap attack, this still counts as using a ''GX'' attack and the ''GX'' marker must still be flipped. If the permission to use a ''GX'' attack has already been spent, the copied attack has no effect. (Many [[Pokémon Trading Card Game#Sun & Moon series|Sun & Moon series]] cards are designed to avoid this question. For example, [[Zoroark-GX (Shining Legends 53)|Zoroark-GX]]'s Trickster-''GX'' is already a ''GX'' attack and therefore never fails to copy a ''GX'' attack due to that player having used a ''GX'' attack before Trickster-''GX''. Another example is that [[Mimikyu (Guardians Rising 58)|Mimikyu]]'s Copycat is unable to copy ''GX'' attacks.) | |||
==In the anime== | ==In the anime== | ||
[[File:Ash Gigavolt Havoc pose.png|thumb|250px|Ash performing the pose for Gigavolt Havoc]] | |||
Similar to the {{pkmn|games}}, Z-Moves are powerful moves that can be executed by a Pokémon that knows an appropriate move that corresponds to the type of Z-Crystal on the Trainer's Z-Ring. Z-Moves were first featured in ''[[Pokémon the Series: Sun & Moon]]'' in episode ''[[SM001|Alola to New Adventure!]]'', where {{an|Kiawe}} and his {{TP|Kiawe|Turtonator}} used {{m|Inferno Overdrive}}, with the help of Kiawe's [[Z-Ring]] and [[Firium Z]], to defeat [[Zipp]]'s {{p|Yungoos}}, [[Tupp]]'s {{p|Salandit}}, and [[Rapp]]'s {{p|Zubat}}. | |||
According to {{an|Professor Kukui}} in ''[[SM001|Alola to New Adventure!]]'', only Trainers who are successful in the [[island challenge]] can use Z-Moves. As seen with [[Ash's Rowlet]] in ''[[SM011|Young Kiawe Had a Farm!]]'', Z-Moves drain a lot of the Pokémon's energy, but with adequate training, the Pokémon can reduce the amount of energy necessary to execute a Z-Move. In a similar manner, in ''[[SM040|Balloons, Brionne, and Belligerence!]]'', [[Lana's Popplio]] failed its first attempt at {{m|Hydro Vortex}} since it was not strong enough to execute the move. In ''[[SM105|Showdown on Poni Island!]]'', [[Gladion's Lycanroc]], having endured [[Ash's Lycanroc]]'s {{m|Splintered Stormshards}}, was able to take advantage of its opponent's fatigue by finishing it with a Z-Move of its own. | |||
Due to their vast blast radius and power, they can usually be used to wipe out many targets at once, like in a [[Battle Royal]]. Typically, bipedal or semi-bipedal Pokémon with arm-like forelimbs tend to mimic the poses of their Trainer during the activation. On the other hand, quadrupeds and the like, whose forelimbs show no manual dexterity, tend to stay still and wait until the activation is completed before acting. | |||
As revealed in ''[[SM076|A Battle Hand-Off!]]'', a Pokémon using a Z-Move can receive Z-Power from multiple other people and Pokémon provided they do the Z-Move pose as well. The additional participants do not need a Z-Ring or Crystal to contribute. The [[Team Rocket trio]] exemplifies this, as usually whenever [[Jessie]] or [[James]] uses a Z-Move the entire team does the poses together. In ''[[SM103|Heart of Fire! Heart of Stone!]]'', {{an|Brock}} helped [[Olivia]] and her {{TP|Olivia|Lycanroc}} use a variation of {{m|Continental Crush}} he named '''Continental Crush on You''' (Japanese: '''ワールズエンドフォーリンラブ''' ''World's End Fall in Love''). | |||
In ''[[SM087|Filling the Light with Darkness!]]'', an [[Ultra Wormhole]] sucked away Ultra Aura from Alola, weakening everyone's Z-Moves to almost unusable levels until {{an|Necrozma}} had left the dimension. In ''[[SM101|Parallel Friendships!]]'', {{al|Dia}} revealed that the use of Z-Moves had become impossible in the [[Ultra Ruin]] after the dimension's {{DL|Guardian deities (anime)|Shiny Tapu Koko|Tapu Koko}} left, indicating that a {{an|guardian deities|guardian deity}}'s presence is necessary for the use of Z-Moves. However, this didn't stop Z-Moves from being used outside of Alola in ''Pokémon the Series: Sun & Moon'' and ''[[Pokémon Journeys: The Series]]''. In ''[[JN076|All Out, All of the Time!]]'', it was emphasized that a Trainer and their Pokémon's hearts must be in perfect sync in order for a Z-Move to properly succeed. | |||
{{Ash}} first performed a Z-Move in ''[[SM002|The Guardian's Challenge!]]'', with his {{AP|Pikachu}} using {{m|Gigavolt Havoc}} thanks to the Z-Ring and [[Electrium Z]] Ash had received from {{DL|Guardian deities (anime)|Tapu Koko}}. After using the attack, however, the Electrium Z shattered, preventing Ash from using the move again until he obtained a new Electrium Z in ''[[SM010|Trial and Tribulation!]]''. | |||
In the Japanese, {{pmin|South Korea|Korean}}, {{pmin|Greater China|Mandarin Chinese}}, and {{pmin|Thailand|Thai}} versions, when a Z-Move is used, the name of the specific move is shown, like in the games; however, the names are removed in most other [[dub]]s. | |||
===List of Z-Moves used in the anime=== | |||
{| class="sortable roundtable" style="margin:auto; background:#ddf; border:5px solid #ccf; text-align: center" | |||
! colspan="2" | Pokémon | |||
! Trainer/<br>Partner | |||
! Z-Move | |||
! Pose | |||
! Image | |||
! class="unsortable" | Debut | |||
|- | |||
| {{MSP/HOME|0776|Turtonator}} | |||
| {{TP|Kiawe|Turtonator}} | |||
| {{an|Kiawe}} | |||
| {{m|Inferno Overdrive}} | |||
| [[File:Kiawe Inferno Overdrive pose.png|200px]] | |||
| [[File:Kiawe Turtonator Inferno Overdrive.png|200px]] | |||
| ''[[SM001|Alola to New Adventure!]]'' | |||
|- | |||
| {{MSP/HOME|0025|Pikachu}} | |||
| {{AP|Pikachu}} | |||
| {{Ash}} | |||
| {{m|Gigavolt Havoc}} | |||
| [[File:Ash Gigavolt Havoc pose.png|200px]] | |||
| [[File:Ash Pikachu Gigavolt Havoc.png|200px]] | |||
| ''[[SM002|The Guardian's Challenge!]]'' | |||
|- | |||
| {{MSP/HOME|0297|Hariyama}} | |||
| {{p|Hariyama}} | |||
| [[Hala]] | |||
| {{m|All-Out Pummeling}} | |||
| [[File:Hala All-Out Pummeling pose.png|200px]] | |||
| [[File:Hala Hariyama All-Out Pummeling.png|200px]] | |||
| ''[[SM010|Trial and Tribulation!]]'' | |||
|- | |||
| {{MSP/HOME|0025|Pikachu}} | |||
| {{AP|Pikachu}} | |||
| {{Ash}} | |||
| {{m|Breakneck Blitz}} | |||
| [[File:Ash Breakneck Blitz pose.png|200px]] | |||
| [[File:Ash Pikachu Breakneck Blitz.png|200px]] | |||
| ''[[SM010|Trial and Tribulation!]]'' | |||
|- | |||
| {{MSP/HOME|0722|Rowlet}} | |||
| {{AP|Rowlet}} | |||
| {{Ash}} | |||
| {{m|Breakneck Blitz}} | |||
| [[File:Ash Breakneck Blitz pose.png|200px]] | |||
| [[File:Ash Rowlet Breakneck Blitz.png|200px]] | |||
| ''[[SM011|Young Kiawe Had a Farm!]]'' | |||
|- | |||
| {{MSP/HOME|0744|Rockruff}} | |||
| {{AP|Rockruff}} | |||
| {{Ash}} | |||
| {{m|Breakneck Blitz}} | |||
| [[File:Ash Breakneck Blitz pose.png|200px]] | |||
| [[File:Ash Rockruff Breakneck Blitz.png|200px]] | |||
| ''[[SM019|A Guardian Rematch!]]'' | |||
|- | |||
| {{MSP/HOME|0745Mn|Lycanroc}} | |||
| {{TP|Gladion|Lycanroc}} | |||
| {{an|Gladion}} | |||
| {{m|Continental Crush}} | |||
| [[File:Gladion Continental Crush pose.png|200px]] | |||
| [[File:Gladion Lycanroc Continental Crush.png|200px]] | |||
| ''[[SM027|A Glaring Rivalry!]]'' | |||
|- | |||
| {{MSP/HOME|0143|Snorlax}} | |||
| {{p|Snorlax}} | |||
| [[Oluolu]] | |||
| {{m|Pulverizing Pancake}} | |||
| [[File:Oluolu Pulverizing Pancake pose.png|200px]] | |||
| [[File:Oluolu Snorlax Pulverizing Pancake.png|200px]] | |||
| ''[[SM028|Pulling Out the Pokémon Base Pepper!]]'' | |||
|- | |||
| {{MSP/HOME|0802|Marshadow}} | |||
| {{OBP|Marshadow|M20}} | |||
| None | |||
| {{m|Soul-Stealing 7-Star Strike}} | |||
| | |||
| [[File:Marshadow Soul-Stealing 7-Star Strike 1 M20.png|200px]]<br>[[File:Marshadow Soul-Stealing 7-Star Strike 2 M20.png|200px]] | |||
| ''[[M20|I Choose You!]]'' | |||
|- | |||
| {{MSP/HOME|0725|Litten}} | |||
| {{AP|Litten}} | |||
| {{Ash}} | |||
| {{m|Breakneck Blitz}} | |||
| [[File:Ash Breakneck Blitz pose.png|200px]] | |||
| [[File:Ash Litten Breakneck Blitz.png|200px]] | |||
| ''[[SM035|Currying Favor and Flavor!]]'' | |||
|- | |||
| {{MSP/HOME|0745|Lycanroc}} | |||
| {{TP|Olivia|Lycanroc}} | |||
| [[Olivia]] | |||
| {{m|Continental Crush}} | |||
| [[File:Olivia Continental Crush pose.png|200px]] | |||
| [[File:Olivia Lycanroc Continental Crush.png|200px]] | |||
| ''[[SM036|Trials and Determinations!]]'' | |||
|- | |||
| {{MSP/HOME|0722|Rowlet}} | |||
| {{AP|Rowlet}} | |||
| {{Ash}} | |||
| {{m|Bloom Doom}} | |||
| [[File:Ash Bloom Doom pose.png|200px]] | |||
| [[File:Ash Rowlet Bloom Doom.png|200px]] | |||
| ''[[SM036|Trials and Determinations!]]'' | |||
|- | |||
| {{MSP/HOME|0745D|Lycanroc}} | |||
| {{AP|Lycanroc}} | |||
| {{Ash}} | |||
| {{m|Continental Crush}} | |||
| [[File:Ash Continental Crush pose.png|200px]] | |||
| [[File:Ash Lycanroc Continental Crush.png|200px]] | |||
| ''[[SM038|Mimikyu Unmasked!]]'' | |||
|- | |||
| {{MSP/HOME|0729|Brionne}} | |||
| {{p|Brionne}} | |||
| [[Ida]] | |||
| {{m|Hydro Vortex}} | |||
| [[File:Ida Hydro Vortex pose.png|200px]] | |||
| [[File:Ida Brionne Hydro Vortex.png|200px]] | |||
| ''[[SM040|Balloons, Brionne, and Belligerence!]]'' | |||
|- | |||
| {{MSP/HOME|0728|Popplio}} | |||
| {{TP|Lana|Popplio}} | |||
| {{an|Lana}} | |||
| {{m|Hydro Vortex}} | |||
| [[File:Lana Hydro Vortex pose.png|200px]] | |||
| [[File:Lana Popplio Hydro Vortex.png|200px]] | |||
| ''[[SM040|Balloons, Brionne, and Belligerence!]]'' | |||
|- | |||
| {{MSP/HOME|0791|Solgaleo}} | |||
| {{DL|Nebby|In the anime|Nebby}} | |||
| {{Ash}} | |||
| {{m|Searing Sunraze Smash}} | |||
| [[File:Ash Searing Sunraze Smash pose.png|200px]] | |||
| [[File:Nebby Searing Sunraze Smash.png|200px]] | |||
| ''[[SM052|Revealing the Stuff of Legend!]]'' | |||
|- | |||
| {{MSP/HOME|0025A|Pikachu}} | |||
| {{AP|Pikachu}}<br>([[Pikachu in a cap|Alola Cap]]) | |||
| {{Ash}} | |||
| {{m|10,000,000 Volt Thunderbolt}} | |||
| [[File:Ash 10000000 Volt Thunderbolt pose.png|200px]] | |||
| [[File:Ash Pikachu 10000000 Volt Thunderbolt.png|200px]] | |||
| ''[[SM054|10,000,000 Reasons to Fight!]]'' | |||
|- | |||
| {{MSP/HOME|0727|Incineroar}} | |||
| {{TP|Professor Kukui|Incineroar}} | |||
| {{an|Professor Kukui|Professor Kukui/<br>The Masked Royal}} | |||
| {{m|Malicious Moonsault}} | |||
| [[File:Kukui Malicious Moonsault pose.png|200px]] | |||
| [[File:Kukui Incineroar Malicious Moonsault.png|200px]] | |||
| ''[[SM063|Pushing the Fiery Envelope!]]'' | |||
|- | |||
| {{MSP/HOME|0133|Eevee}} | |||
| {{p|Eevee}} | |||
| [[Ilima]] | |||
| {{m|Extreme Evoboost}} | |||
| [[File:Ilima Extreme Evoboost pose.png|200px]] | |||
| [[File:Ilima Eevee Extreme Evoboost.png|200px]] | |||
| ''[[SM065|Turning Heads and Training Hard!]]'' | |||
|- | |||
| {{MSP/HOME|0105A|Marowak}} | |||
| {{rf|Alolan}} {{TP|Kiawe|Marowak}} | |||
| {{an|Kiawe}} | |||
| {{m|Inferno Overdrive}} | |||
| [[File:Kiawe Inferno Overdrive pose.png|200px]] | |||
| [[File:Kiawe Marowak Inferno Overdrive.png|200px]] | |||
| ''[[SM070|The Young Flame Strikes Back!]]'' | |||
|- | |||
| {{MSP/HOME|0747|Mareanie}} | |||
| {{TP|James|Mareanie}} | |||
| [[James]] | |||
| {{m|Black Hole Eclipse}} | |||
| [[File:James Black Hole Eclipse pose.png|200px]] | |||
| [[File:James Mareanie Black Hole Eclipse.png|200px]] | |||
| ''[[SM073|Why Not Give Me a Z-Ring Sometime?]]'' | |||
|- | |||
| {{MSP/HOME|0778|Mimikyu}} | |||
| {{TP|Jessie|Mimikyu}} | |||
| [[Jessie]] | |||
| {{m|Let's Snuggle Forever}} | |||
| [[File:Jessie Lets Snuggle Forever pose.png|200px]] | |||
| [[File:Jessie Mimikyu Lets Snuggle Forever.png|200px]] | |||
| ''[[SM076|A Battle Hand-Off!]]'' | |||
|- | |||
| {{MSP/HOME|0053A|Persian}} | |||
| {{rf|Alolan}} {{p|Persian}} | |||
| [[Nanu]] | |||
| {{m|Black Hole Eclipse}} | |||
| [[File:Nanu Black Hole Eclipse pose.png|200px]] | |||
| [[File:Nanu Persian Black Hole Eclipse.png|200px]] | |||
| ''[[SM077|Guiding an Awakening!]]'' | |||
|- | |||
| {{MSP/HOME|0745D|Lycanroc}} | |||
| {{AP|Lycanroc}} | |||
| {{Ash}} | |||
| {{m|Splintered Stormshards}} | |||
| [[File:Ash Splintered Stormshards pose.png|200px]] | |||
| [[File:Ash Lycanroc Splintered Stormshards.png|200px]] | |||
| ''[[SM078|Twirling with a Bang!]]'' | |||
|- | |||
| {{MSP/HOME|0773|Silvally}} | |||
| {{TP|Gladion|Silvally}} | |||
| {{an|Gladion}} | |||
| {{m|Breakneck Blitz}} | |||
| | |||
| [[File:Gladion Silvally Breakneck Blitz.png|200px]] | |||
| ''[[SM089|The Prism Between Light and Darkness!]]'' | |||
|- | |||
| {{MSP/HOME|0792|Lunala}} | |||
| {{an|Lunala}} | |||
| {{an|Gladion}} | |||
| {{m|Menacing Moonraze Maelstrom}} | |||
| [[File:Gladion Menacing Moonraze Maelstrom pose.png|200px]] | |||
| [[File:Lunala Menacing Moonraze Maelstrom.png|200px]] | |||
| ''[[SM090|Securing the Future!]]'' | |||
|- | |||
| {{MSP/HOME|0025 s|Pikachu}} | |||
| {{DL|Pikala|Boss}} | |||
| [[Pikala]] | |||
| {{m|Catastropika}} | |||
| [[File:Pikala Catastropika pose.png|200px]] | |||
| [[File:Pikala Boss Catastropika.png|200px]] | |||
| ''[[SM091|A Plethora of Pikachu!]]'' | |||
|- | |||
| {{MSP/HOME|0807|Zeraora}} | |||
| {{p|Zeraora}} | |||
| {{al|Dia}} | |||
| {{m|Gigavolt Havoc}} | |||
| | |||
| [[File:Dia Zeraora Gigavolt Havoc.png|200px]] | |||
| ''[[SM101|Parallel Friendships!]]'' | |||
|- | |||
| {{MSP/HOME|0745Mn|Lycanroc}} | |||
| {{TP|Gladion|Lycanroc}} | |||
| {{an|Gladion}} | |||
| {{m|Devastating Drake}} | |||
| [[File:Gladion Devastating Drake pose.png|200px]] | |||
| [[File:Gladion Lycanroc Devastating Drake.png|200px]] | |||
| ''[[SM105|Showdown on Poni Island!]]'' | |||
|- | |||
| {{MSP/HOME|0730|Primarina}} | |||
| {{p|Primarina}} | |||
| [[Ida]] | |||
| {{m|Oceanic Operetta}} | |||
| [[File:Ida Oceanic Operetta pose.png|200px]] | |||
| [[File:Ida Primarina Oceanic Operetta.png|200px]] | |||
| ''[[SM106|Evolving Research!]]'' | |||
|- | |||
| {{MSP/HOME|0006|Charizard}} | |||
| {{TP|Kiawe|Charizard}} | |||
| {{an|Kiawe}} | |||
| {{m|Supersonic Skystrike}} | |||
| [[File:Kiawe Supersonic Skystrike pose.png|200px]] | |||
| [[File:Kiawe Charizard Supersonic Skystrike.png|200px]] | |||
| ''[[SM107|Run, Heroes, Run!]]'' | |||
|- | |||
| {{MSP/HOME|0750|Mudsdale}} | |||
| {{TP|Hapu|Mudsdale}} | |||
| [[Hapu]] | |||
| {{m|Tectonic Rage}} | |||
| [[File:Hapu Tectonic Rage pose.png|200px]] | |||
| [[File:Hapu Mudsdale Tectonic Rage.png|200px]] | |||
| ''[[SM109|A Grand Debut!]]'' | |||
|- | |||
| {{MSP/HOME|0025|Pikachu}} | |||
| {{AP|Pikachu}} | |||
| {{Ash}} | |||
| {{m|Corkscrew Crash}} | |||
| [[File:Ash Corkscrew Crash pose.png|200px]] | |||
| [[File:Ash Pikachu Corkscrew Crash.png|200px]] | |||
| ''[[SM115|The Dealer of Destruction!]]'' | |||
|- | |||
| {{MSP/HOME|0730|Primarina}} | |||
| {{TP|Lana|Primarina}} | |||
| {{an|Lana}} | |||
| {{m|Oceanic Operetta}} | |||
| [[File:Lana Oceanic Operetta pose.png|200px]] | |||
| [[File:Lana Primarina Oceanic Operetta.png|200px]] | |||
| ''[[SM123|A Fiery Training Camp Trick!]]'' | |||
|- | |||
| {{MSP/HOME|0738|Vikavolt}} | |||
| {{TP|Sophocles|Vikavolt}} | |||
| {{an|Sophocles}} | |||
| {{m|Savage Spin-Out}} | |||
| [[File:Sophocles Savage Spin-Out pose.png|200px]] | |||
| [[File:Sophocles Vikavolt Savage Spin-Out 1.png|200px]]<br>[[File:Sophocles Vikavolt Savage Spin-Out 2.png|200px]] | |||
| ''[[SM123|A Fiery Training Camp Trick!]]'' | |||
|- | |||
| {{MSP/HOME|0726|Torracat}} | |||
| {{AP|Torracat}} | |||
| {{Ash}} | |||
| {{m|Inferno Overdrive}} | |||
| [[File:Ash Inferno Overdrive pose.png|200px]] | |||
| [[File:Ash Torracat Inferno Overdrive.png|200px]] | |||
| ''[[SM125|A Timeless Encounter!]]'' | |||
|- | |||
| {{MSP/HOME|0037A|Vulpix}} | |||
| [[Snowy]] | |||
| {{an|Lillie}} | |||
| {{m|Subzero Slammer}} | |||
| [[File:Lillie Subzero Slammer pose.png|200px]] | |||
| [[File:Snowy Subzero Slammer.png|200px]] | |||
| ''[[SM127|Chasing Memories, Creating Dreams!]]'' | |||
|- | |||
| {{MSP/HOME|0763|Tsareena}} | |||
| {{TP|Mallow|Tsareena}} | |||
| {{an|Mallow}} | |||
| {{m|Bloom Doom}} | |||
| [[File:Mallow Bloom Doom pose.png|200px]] | |||
| [[File:Mallow Tsareena Bloom Doom.png|200px]] | |||
| ''[[SM130|Battling Besties!]]'' | |||
|- | |||
| {{MSP/HOME|0724|Decidueye}} | |||
| {{p|Decidueye}} | |||
| [[Hau]] | |||
| {{m|Sinister Arrow Raid}} | |||
| [[File:Hau Sinister Arrow Raid pose.png|200px]] | |||
| [[File:Hau Decidueye Sinister Arrow Raid.png|200px]] | |||
| ''[[SM132|Imitation Is the Sincerest Form of Strategy!]]'' | |||
|- | |||
| {{MSP/HOME|0571|Zoroark}} | |||
| {{TP|Gladion|Zoroark}} | |||
| {{an|Gladion}} | |||
| {{m|Never-Ending Nightmare}} | |||
| [[File:Gladion Never-Ending Nightmare pose.png|200px]] | |||
| [[File:Gladion Zoroark Never-Ending Nightmare 1.png|200px]]<br>[[File:Gladion Zoroark Never-Ending Nightmare 2.png|200px]] | |||
| ''[[SM139|Enter the Champion!]]'' | |||
|- | |||
| {{MSP/HOME|0804|Naganadel}} | |||
| {{AP|Naganadel}} | |||
| {{an|Professor Kukui|The Masked Royal}} | |||
| {{m|Gigavolt Havoc}} | |||
| | |||
| [[File:Ash Naganadel Gigavolt Havoc.png|200px]] | |||
| ''[[SM140|Z-Move Showdown!]]'' | |||
|- | |||
| {{MSP/HOME|0727|Incineroar}} | |||
| {{TP|Professor Kukui|Incineroar}} | |||
| {{an|Professor Kukui}} | |||
| {{m|Inferno Overdrive}} | |||
| [[File:Kukui Inferno Overdrive pose.png|200px]] | |||
| [[File:Kukui Incineroar Inferno Overdrive.png|200px]] | |||
| ''[[SM143|Fiery Surprises!]]'' | |||
|- | |||
| {{MSP/HOME|0785|Tapu Koko}} | |||
| {{DL|Guardian deities (anime)|Tapu Koko}} | |||
| {{an|Professor Kukui}} | |||
| {{m|Guardian of Alola}} | |||
| [[File:Kukui Guardian of Alola pose.png|200px]] | |||
| [[File:Tapu Koko Guardian of Alola 1.png|200px]]<br>[[File:Tapu Koko Guardian of Alola 2.png|200px]] | |||
| ''[[SM144|From Z to Shining Z!]]'' | |||
|- | |||
| {{MSP/HOME|0006|Charizard}} | |||
| {{TP|Kiawe|Charizard}} | |||
| {{an|Kiawe}} | |||
| {{m|Inferno Overdrive}} | |||
| [[File:Kiawe Inferno Overdrive pose.png|200px]] | |||
| [[File:Kiawe Charizard Inferno Overdrive.png|200px]] | |||
| ''[[SM145|Dreams of the Sun and Moon!]]'' | |||
|- | |||
| {{MSP/HOME|0784|Kommo-o}} | |||
| {{p|Kommo-o}} | |||
| [[All-Out Brothers]] | |||
| {{m|Clangorous Soulblaze}} | |||
| [[File:All-Out Brothers Clangorous Soulblaze pose.png|200px]] | |||
| [[File:Phil Kommo-o Clangorous Soulblaze.png|200px]] | |||
| ''[[JN076|All Out, All of the Time!]]'' | |||
|- | |||
| {{MSP/HOME|0025W|Pikachu}} | |||
| {{AP|Pikachu}}<br>([[Pikachu in a cap|World Cap]]) | |||
| {{Ash}} | |||
| {{m|10,000,000 Volt Thunderbolt}} | |||
| [[File:Ash 10000000 Volt Thunderbolt pose JN.png|200px]] | |||
| [[File:Ash Pikachu World Cap 10000000 Volt Thunderbolt.png|200px]] | |||
| ''[[JN077|Ultra Exciting from the Shocking Start!]]'' | |||
|} | |||
==In the manga== | ==In the manga== | ||
===Pokémon Adventures=== | |||
===={{MangaArc|Sun, Moon, Ultra Sun & Ultra Moon}}==== | |||
Z-Moves first appeared in this arc. [[Olivia]] had her {{TP|Olivia|Lycanroc}} use {{m|Continental Crush}} while [[Nanu]] had his {{rf|Alolan}} {{p|Persian}} use {{m|Black Hole Eclipse}} during an {{wp|exhibition game|exhibition match}} against each other. [[Hala]] stepped in to stop both Pokémon before either could successfully use their moves. | |||
During his battle against [[Gladion]] in an [[Iki Town]] festival tournament, {{adv|Sun}} inadvertently used a Z-Move with his {{adv|Dollar}}, allowing it to defeat [[Gladion's Type: Null]] with an incomplete version of {{m|Inferno Overdrive}}. Due to not knowing how to use Z-Moves at the time, Sun received Z-Power from a nearby [[Ultra Wormhole]] instead of building it up with a pose. Later, he was taught how to properly perform Z-Moves by [[Kiawe]] in order to battle Gladion a second time. With his newly obtained Z-Ring, Sun and Dollar successfully used Inferno Overdrive properly. | |||
At [[Mount Lanakila]], [[Ilima]], [[Lana]], Kiawe, [[Mallow]], [[Sophocles]], [[Molayne]], [[Mina]], and [[Hapu]] were attacked by a group of {{tc|Aether Foundation Employee}}s and their [[Ultra Beast]]s. With the power of their barrage of Z-Moves, the Ultra Beasts were defeated one by one. | |||
====List of Z-Moves used==== | |||
{| class="sortable roundtable" style="margin:auto; background:#ddf; border:5px solid #ccf; text-align:center" | |||
! colspan="2" | Pokémon | |||
! Trainer | |||
! Z-Move | |||
! Pose | |||
! Image | |||
! class="unsortable" | Debut | |||
|- | |||
| {{MSP/HOME|0725|Litten}} | |||
| {{adv|Dollar}} | |||
| {{adv|Sun}} | |||
| {{m|Inferno Overdrive}} | |||
| [[File:Sun Inferno Overdrive pose Adventures.png|200px]] | |||
| [[File:Dollar Litten Inferno Overdrive.png|200px]] | |||
| ''[[PASM07|The Final Match and a Surprising Finale!]]'' | |||
|- | |||
| {{MSP/HOME|0726|Torracat}} | |||
| {{adv|Dollar}} | |||
| {{adv|Sun}} | |||
| {{m|Inferno Overdrive}} | |||
| [[File:Sun Inferno Overdrive pose Adventures.png|200px]] | |||
| [[File:Dollar Torracat Inferno Overdrive.png|200px]] | |||
| ''[[PASM16|A Photoshoot and the Abandoned Thrifty Megamart]]'' | |||
|- | |||
| {{MSP/HOME|0735|Gumshoos}} | |||
| {{p|Gumshoos}} | |||
| [[Ilima]] | |||
| {{m|Breakneck Blitz}} | |||
| [[File:Ilima Gumshoos Adventures.png|200px]] | |||
| [[File:Ilima Gumshoos Mina Ribombee Breakneck Blitz Twinkle Tackle Adventures.png|200px]] | |||
| ''[[PASM34|Destroy!! Results of the Training!]]'' | |||
|- | |||
| {{MSP/HOME|0743|Ribombee}} | |||
| {{p|Ribombee}} | |||
| [[Mina]] | |||
| {{m|Twinkle Tackle}} | |||
| [[File:Mina Twinkle Tackle pose Adventures.png|200px]] | |||
| [[File:Ilima Gumshoos Mina Ribombee Breakneck Blitz Twinkle Tackle Adventures.png|200px]] | |||
| ''[[PASM34|Destroy!! Results of the Training!]]'' | |||
|- | |||
| {{MSP/HOME|0752|Araquanid}} | |||
| {{p|Araquanid}} | |||
| [[Lana]] | |||
| {{m|Hydro Vortex}} | |||
| [[File:Lana Araquanid Hydro Vortex Adventures.png|200px]] | |||
| [[File:Lana Araquanid Hydro Vortex Adventures.png|200px]] | |||
| ''[[PASM34|Destroy!! Results of the Training!]]'' | |||
|- | |||
| {{MSP/HOME|0750|Mudsdale}} | |||
| {{TP|Hapu|Mudsdale}} | |||
| [[Hapu]] | |||
| {{m|Tectonic Rage}} | |||
| [[File:Hapu Tectonic Rage pose Adventures.png|200px]] | |||
| [[File:Hapu Mudsdale Tectonic Rage Adventures.png|200px]] | |||
| ''[[PASM34|Destroy!! Results of the Training!]]'' | |||
|- | |||
| {{MSP/HOME|0051A|Dugtrio}} | |||
| {{rf|Alolan}} {{p|Dugtrio}} | |||
| [[Molayne]] | |||
| {{m|Corkscrew Crash}} | |||
| [[File:Sophocles Togedemaru Molayne Dugtrio Gigavolt Havoc Corkscrew Crash Adventures.png|200px]] | |||
| [[File:Sophocles Togedemaru Molayne Dugtrio Gigavolt Havoc Corkscrew Crash Adventures.png|200px]] | |||
| ''[[PASM34|Destroy!! Results of the Training!]]'' | |||
|- | |||
| {{MSP/HOME|0777|Togedemaru}} | |||
| {{TP|Sophocles|Togedemaru}} | |||
| [[Sophocles]] | |||
| {{m|Gigavolt Havoc}} | |||
| [[File:Sophocles Togedemaru Molayne Dugtrio Gigavolt Havoc Corkscrew Crash Adventures.png|200px]] | |||
| [[File:Sophocles Togedemaru Molayne Dugtrio Gigavolt Havoc Corkscrew Crash Adventures.png|200px]] | |||
| ''[[PASM34|Destroy!! Results of the Training!]]'' | |||
|- | |||
| {{MSP/HOME|0105A|Marowak}} | |||
| {{rf|Alolan}}<br>{{TP|Kiawe|Marowak}} | |||
| [[Kiawe]] | |||
| {{m|Inferno Overdrive}} | |||
| [[File:Kiawe Inferno Overdrive pose Adventures.png|200px]] | |||
| [[File:Kiawe Marowak Inferno Overdrive Adventures.png|200px]] | |||
| ''[[PASM34|Destroy!! Results of the Training!]]'' | |||
|- | |||
| {{MSP/HOME|0763|Tsareena}} | |||
| {{TP|Mallow|Tsareena}} | |||
| [[Mallow]] | |||
| {{m|Bloom Doom}} | |||
| [[File:Mallow Bloom Doom pose Adventures.png|200px]] | |||
| [[File:Mallow Tsareena Bloom Doom Adventures.png|200px]] | |||
| ''[[PASM34|Destroy!! Results of the Training!]]'' | |||
|} | |||
[[File:Ash Pikachu 10000000 Volt Thunderbolt ICYR.png|200px|thumb|left|Pikachu using the Z-Move 10,000,000 Volt Thunderbolt in [[Pocket Monsters the Movie: I Choose You! Remix|I Choose You! Remix]]]] | |||
[[File:Ash Pikachu 10000000 Volt Thunderbolt JNM.png|200px|thumb|Pikachu using the Z-Move 10,000,000 Volt Thunderbolt in [[Pokémon Journeys: The Series (manga)|Pokémon Journeys: The Series manga]]]] | |||
===Movie adaptations=== | |||
{{OBP|Ash Ketchum|M20|Ash}} and his {{AP|Pikachu|Pikachu (M20)}} performed the {{m|10,000,000 Volt Thunderbolt}} Z-Move in [[ICYR1]] during a {{pkmn|battle}} against a {{pkmn2|Totem}} {{p|Kommo-o}}. | |||
{{OBP|Marshadow|M20}} and {{OBP|Ken|ICYR}} performed the {{m|Soul-Stealing 7-Star Strike}} Z-Move in [[ICYR2]] in order to defeat [[Borosue]]. | |||
===Pokémon Horizon=== | |||
{{sectionstub}} | |||
===Pokémon Journeys: The Series=== | |||
{{Ash}} and his {{AP|Pikachu}} performed the Z-Move, {{m|10,000,000 Volt Thunderbolt}} in ''[[JNM24|Ultra Exciting from the Shocking Start! & Trial on a Golden Scale! (Part 2)]]'' during a [[World Coronation Series]] battle against [[Volkner]]'s {{p|Electivire}}. | |||
{{-}} | |||
==Gallery== | |||
===Artwork=== | |||
====Game art==== | |||
{| style="margin:auto; text-align:center; {{roundy|20px}} border: 2px solid #{{alola color dark}}; background: #{{alola color}}; font-size:80%"" | |||
|- | |||
| style="{{roundy|15px}} border: 2px solid #{{alola color dark}}; background: #{{alola color light}};"| [[File:Sun Moon Z-Move artwork.png|350px]] | |||
| style="{{roundy|15px}} border: 2px solid #{{alola color dark}}; background: #{{alola color light}};"| [[File:Marshadow Z Move artwork.png|350px]] | |||
|- | |||
| Artwork of {{color2|000|Gigavolt Havoc (move)|Gigavolt Havoc}} for {{color2|000|Pokémon Sun and Moon}} | |||
| Artwork of {{color2|000|Soul-Stealing 7-Star Strike (move)|Soul-Stealing 7-Star Strike}} for {{color2|000|Pokémon Sun and Moon}} | |||
|- | |||
| style="{{roundy|15px}} border: 2px solid #{{alola color dark}}; background: #{{alola color light}};"| [[File:Cap Pikachu Pikashunium Z Event.png|350px]] | |||
| style="{{roundy|15px}} border: 2px solid #{{alola color dark}}; background: #{{alola color light}};"| [[File:Psyduck Hydro Vortex.jpg|350px]] | |||
|- | |||
| Artwork for {{color2|000|10,000,000 Volt Thunderbolt (move)|10,000,000 Volt Thunderbolt}} for {{color2|000|Pokémon Sun and Moon}} | |||
| Promotional artwork for {{color2|000|Pokémon Center (store)|Pokémon Center}} of {{color2|000|Psyduck (Pokémon)|Psyduck}} using a Z-Move | |||
|} | |||
====Concept art==== | |||
{| style="margin:auto; text-align:center; {{roundy|20px}} border: 2px solid #{{alola color dark}}; background: #{{alola color}}; font-size:80%"" | |||
|- | |||
| style="{{roundy|15px}} border: 2px solid #{{alola color dark}}; background: #{{alola color light}};"| [[File:SM Z-Power Z-Move.jpg|350px]] | |||
|- | |||
| Concept art of Z-Moves and Z-Power for {{color2|000|Pokémon Sun and Moon}} | |||
|} | |||
--> | ==Trivia== | ||
[[File:Z-Crystal Proto 2.png|thumb|right|250px|Early Z-Power design]] | |||
* Internal data in the games also refer to Z-Move as ''ZenryokuWaza'', which literally means "full-powered move". | |||
*[https://www.youtube.com/watch?v=ydWfZFx0iXE|Sound Roster -Behind the Scene- #2 GAME FREAK], a video focusing on the sound and music design of Sun and Moon, show cases an early build from 2015. In this build, another symbol is used rather than the usual Z-Power symbol used in the final version. | |||
* Some animations and effects when using a Z-Move bear similarities to [[Appeal#Spectacular Talent|Spectacular Talent]] animations used in [[Pokémon Contest|Pokémon Contest Spectaculars]] from {{g|Omega Ruby and Alpha Sapphire}}. | |||
* No NPC Trainer has a Pokémon holding a Z-Crystal for an exclusive Z-Move. | |||
* No Pokémon with an exclusive Z-Move is capable of [[Mega Evolution]]. | |||
* {{t|Electric}} and {{t|Ghost}} have the most Z-Moves out of any type, with both having four. | |||
** Before the release of {{g|Ultra Sun and Ultra Moon}}, Electric had the most amount of Z-Moves, with four. | |||
* Overall, six Z-Moves haven't appeared in the {{pkmn|anime}}: {{m|Acid Downpour}}, {{m|Shattered Psyche}}, {{m|Twinkle Tackle}}, {{m|Stoked Sparksurfer}}, {{m|Genesis Supernova}}, and {{m|Light That Burns the Sky}}. | |||
** {{m|Clangorous Soulblaze}} is the only Z-Move to have [[List of moves by animated series debut|debuted]] outside of ''[[Pokémon the Series: Sun & Moon]]''. | |||
* Despite Z-Moves being unusable in {{g|Scarlet and Violet}}, [[Iono]] briefly mentions {{m|10,000,000 Volt Thunderbolt}}, the exclusive move for [[Pikachu in a cap]].<ref>{{g|Scarlet and Violet}}: "You’re as flashy and bright as a 10,000,000-volt Thunderbolt, friendo!" </ref> | |||
** In Iono's [[Iono/Quotes|dialogue]], the Z-Move's name is misspelled as 10,000,000''-volt'' Thunderbolt. | |||
==In other languages== | ==In other languages== | ||
{{Langtable|color= | {{Langtable|color={{alola color}}|bordercolor={{alola color dark}} | ||
|zh_yue= | |zh_yue=Z招式 ''Z-Jīusīk'' | ||
|zh_cmn= | |zh_cmn=Z招式 ''Z-Zhāoshì'' | ||
|cs=Z- | |cs=Z-Move{{tt|*|Ultra Sun and Ultra Moon website}}<br>Z-útok{{tt|*|Sun and Moon material}} | ||
|da=Z-træk | |||
|nl=Z-move{{tt|*|anime}}<br>Z-aanval{{tt|*|Sun and Moon website}} | |||
|fi=Z-liike | |||
|fr=Capacité Z | |fr=Capacité Z | ||
|de=Z-Attacke | |de=Z-Attacke | ||
|hu=Z- | |hu=Z-támadás{{tt|*|Ultra Sun and Ultra Moon website}}<br>Z-Mozdulat{{tt|*|Sun and Moon material}} | ||
|id=Jurus Z{{tt|*|Pokémon the Series: Sun & Moon official website}}<br>Gerakan Z | |||
|it=Mossa Z | |it=Mossa Z | ||
|ko=Z기술 ''Z-Gisul'' | |ko=Z기술 ''Z-Gisul'' | ||
|ms=Gerakan Z<br>Serangan Z | |||
|no=Z-trekk | |||
|pl=Ruch-Z | |pl=Ruch-Z | ||
|pt_br=Movimento Z | |||
|pt_eu=Técnica Z | |||
|ru=Атака-Z ''Ataka-Z'' | |ru=Атака-Z ''Ataka-Z'' | ||
|es=Movimiento Z | |es=Movimiento Z | ||
|sv=Z-Move{{tt|*|SM038}}<br>Z-attack{{tt|*|SM024-present, Sun and Moon material}}<br>Z-move{{tt|*|SM001-SM023}} | |||
|tr=Z-Hamlesi | |||
|vi=Tuyệt Kĩ Z | |||
|th=ไม้ตาย-Z | |||
}} | }} | ||
==See also== | ==See also== | ||
* [[ | * [[Z-Power]] | ||
* [[Z-Crystal]] | |||
* [[Max Move]] | |||
* [[G-Max Move]] | |||
* [[Light trio]] | |||
==References== | |||
<references /> | |||
{{-}} | {{-}} | ||
{{Z-Moves}}<br> | |||
{{Project Moves and Abilities notice}} | {{Project Moves and Abilities notice}} | ||
| Line 127: | Line 1,516: | ||
[[Category:Terminology]] | [[Category:Terminology]] | ||
[[Category:Moves|*1]] | [[Category:Moves|*1]] | ||
[[Category:Z-Moves|*]] | |||
[[de:Z-Attacke]] | [[de:Z-Attacke]] | ||
[[es:Movimiento Z]] | |||
[[fr:Capacité Z]] | [[fr:Capacité Z]] | ||
[[zh: | [[it:Mossa Z]] | ||
[[ja:Zワザ]] | |||
[[zh:Z招式]] | |||
Latest revision as of 02:01, 6 September 2024

A Z-Move (Japanese: Zワザ Z-Move) is a special type of move introduced in Generation VII, in which a Trainer and their Pokémon's wishes combine to unleash an attack comprising the full power of both. Z-Moves require one of several available Z-Crystals and a Z-RingSM or Z-Power RingUSUM to channel Z-Power through.
They are no longer present in the core series from Pokémon: Let's Go, Pikachu! and Let's Go, Eevee! onwards, but they still appear in some spin-off games, such as Pokémon Masters EX.
In the core series games
Z-Moves are very powerful, but they can only be used once per battle, unless Z-Rotom Power is used.
There are three different kinds of Z-Moves: Z-Moves which can be used by any Pokémon, with one Z-Move for each of the 18 types; status moves that have been turned into Z-Moves by one of the 18 type-specific Z-Crystals; and Z-Moves that can only be used by specific Pokémon. The Z-Move that a Pokémon can perform depends on the Z-Crystal it holds. There are 18 different Z-Crystals that correspond to each of the 18 types, and several others that correspond to specific Pokémon. Z-Moves work by powering up one of the Pokémon's normal moves, so the Pokémon must also know an appropriate move. For the type-related Z-Crystals, the Pokémon must know a move of the same type as the Z-Crystal it is holding. For the Pokémon-specific Z-Crystals, the move required differs for each Pokémon.
A Pokémon can only use a Z-Move if its Trainer is wearing a Z-RingSM or Z-Power RingUSUM and has the same Z-Crystal the Pokémon is holding. Mega Evolved and Primal Pokémon cannot use Z-Moves, even when holding an appropriate Z-Crystal (such as after Transform).
History
- Main article: Z-Power
The origins of Z-Power, and by extension, Z-Moves, are largely shrouded in mystery. However, information by Professor Kukui and Professor Burnet indicate that Z-Power may be related to the energy produced by Ultra Wormholes.[1] In Pokémon Ultra Sun and Ultra Moon, the Ultra Recon Squad reveal that the Z-Power that surrounds the user and their Pokémon when using a Z-Move and the aura that surrounds Totem Pokémon are a result of Necrozma's light shining down on Alola long ago.[2]
Alolan legends found in the Malie Library also indicate that SolgaleoSUS/LunalaMUM gifted the Tapunium Z to the guardian deities after fighting against them. The letter Z found at the start of Z-Move, Z-Power, Z-Ring, and Z-Power Ring comes from the word Zenith (Japanese: ゼンリョク/全力, zenryoku[3] "full power/force"), as the action of performing a Z-Move is done through a Trainer and their Pokémon combining their strength and vigor with one another.
Battle mechanics

|
This section is incomplete. Please feel free to edit this section to add missing information and complete it. Reason: Are Z-Moves always obeyed? |
When using a Z-Move in the games, a special cutscene plays, first showing the Trainer performing a certain pose, before shifting to the Pokémon surrounding itself with its Z-Power and executing the Z-Move. This cutscene cannot be deactivated, even if battle animations are turned off.
Z-Moves draw upon the PP of the Pokémon's original moves in order to execute, requiring and consuming PP upon use. When the Z-Move option is chosen in battle, a list of Z-Moves overlays the Pokémon's original list of moves, with each compatible move of the Pokémon's original moves overlain by a Z-Move option that draws upon that move.
Damaging Z-Moves derive their category (physical or special) and power from the base move. For example, a Gigavolt Havoc based on Nuzzle (with a power of 20) will have a power of 100 and be a physical move, while one based on Thunderbolt (with a power of 90) will have a power of 175 and be a special move. If the Pokémon knows more than one compatible move, it will be able to choose among different versions of the Z-Move with different stats, with the instance that has the highest power sparkling. Damaging Z-Moves do not inherit any other properties from the base move, so they have neutral priority and do not have the additional effects of the base move.
Exclusive Z-Moves can be used only by specific Pokémon, and require a specific move to be upgraded. They have a fixed category and power. Exclusive Z-Moves can be used by a Pokémon transformed into an appropriate species regardless of its original species, if it holds the corresponding Z-Crystal; if, however, the Pokémon who the move is exclusive to is transformed, it cannot use its own species' exclusive Z-Move unless it is transformed into another Pokémon of the same species.
Damaging Z-Moves bypass accuracy checks to always hit, unless the opponent is in the semi-invulnerable turn of a move such as Dig or Fly. Damaging Z-Moves cannot be fully protected against by protection moves (such as Protect and Spiky Shield), instead dealing 25% of the original damage. The types of damaging Z-Moves are unaffected by type-modifying Abilities (although status Z-Moves' types are). However, their types are affected by Ion Deluge (if the Z-Move would be Normal-type) and Electrify. A Z-Move based on Nature Power will become a damaging Z-Move of the corresponding type based on the terrain, rather than a Z-Status Move.
Z-Moves based on status moves are enhanced versions of the original moves, having a Z- prefixed to the start of the status move's name. While they have the effects of the original status move, the user usually also receives a Z-Power effect (Japanese: Zパワーこうか Z-Power effect), which is executed before the move itself. For example, Z-Splash also boosts the user's Attack by 3 stages, while Z-Parting Shot also restores the switch-in ally's HP by 100%. These effects are not affected by Contrary, Simple, or Heal Block.
If a status Z-Move misses, fails (including failure caused by heavy rain, extremely harsh sunlight, or strong winds), or is blocked by a protection move, it still applies its Z-Power effect. Status Z-Moves can be used without regard to the effects of Gravity, but Gravity will still cause them to fail after applying their Z-Power effect (e.g. Z-Magnet Rise will raise the user's evasion but then fail).
Additionally, when used as a Z-Move, most moves that call other moves convert the called move into its corresponding Z-Move, although status moves called this way do not get their Z-Power effect. Moves stolen by Z-Snatch, reflected by Z-Magic Coat, or instructed by Z-Instruct are not turned into Z-Moves.
Z-Moves may be used without regard to the effects of Taunt, Torment, Disable, Encore, Imprison, and Heal Block; however, the Pokémon never has an opportunity to select a Z-Move if it is forced to use Struggle (e.g. if it is affected by Taunt and only knows status moves). Even if the target of Z-Heal Pulse or Z-Floral Healing is affected by Heal Block, that Pokémon's HP is restored.
Like any other move, Z-Moves can be redirected by effects such as Follow Me and Storm Drain. Z-Moves are affected normally by Powder and weather. Weather-changing moves turned into Z-Moves will disappear as usual during, but will apply their Z-Power effects regardless.
If a Pokémon uses a damaging Z-Move on a Pokémon with Cursed Body, that damaging Z-Move can be disabled (with no effect on the base move). However, if Cursed Body would disable a status Z-Move (such as Z-Nature Power), the base status move will be disabled.
Power
With the exceptions of Mega Drain (120), Weather Ball (160), Hex (160), V-create (220), Flying Press (170), and Core Enforcer (140), the powers of the type-specific damaging Z-Moves follow the following conversion table for base moves that have fixed powers and are not multistrike moves. Struggle has a power of 1 as a Z-Move in the game data, which does not follow this table, but it is not possible to turn Struggle into a Z-Move. Using a one-hit knockout move as the base move results in a Z-Move with a base power of 180.
| Base move power | Z-Move power |
|---|---|
| 0-55 | 100 |
| 60-65 | 120 |
| 70-75 | 140 |
| 80-85 | 160 |
| 90-95 | 175 |
| 100 | 180 |
| 110 | 185 |
| 120-125 | 190 |
| 130 | 195 |
| 140+ | 200 |
List of Z-Moves
For each type
For specific Pokémon
|
Z-Power effects of status moves
|
In the spin-off games
Pokémon Masters EX

In Pokémon Masters EX, several sync pairs, mainly those featuring Trainers from Alola, perform a sync move based on a Z-Move. The following sync pairs perform Z-Move-based sync moves:
| Trainer | Pokémon | Sync move | Base power | Max power | Additional effect |
|---|---|---|---|---|---|
  Scottie/Bettie |
 Solgaleo |
250 | 300 | (6★ EX effect: Sync moves will target all opposing sync pairs.) | |
 Hau |
 Raichu ♂ Alola Form |
250 | 300 | (6★ EX effect: Sync moves will target all opposing sync pairs.) | |
 Sygna Suit Hau |
 Tapu Koko |
200 | 240 | This attack's power increases when the field is Electric Terrain. (6★ EX effect: Sync move power will be multiplied by 1.5.) (EX role effect: Sync moves will target all opposing sync pairs.) | |
 Sophocles |
 Togedemaru ♀ |
200 | 240 | This attack’s power increases when the target is flinching. | |
 Mina |
 Granbull ♂ |
200 | 240 | The more the opponent's Attack is lowered, the greater the power of this move. (6★ EX effect: Sync move power will be multiplied by 1.5.) | |
 Sygna Suit Mina |
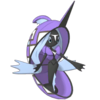 Tapu Fini |
250 | 300 | (6★ EX effect: The sync buff is doubled the first time a sync move is used.) | |
 Olivia |
 Lycanroc ♂ Midnight Form |
250 | 300 | (6★ EX effect: Sync moves will target all opposing sync pairs.) | |
 Hapu |
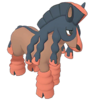 Mudsdale ♂ |
250 | 300 | (6★ EX effect: Sync moves will target all opposing sync pairs.) | |
 Kahili |
 Toucannon ♂ |
250 | 300 | No additional effect. | |
 Nanu |
 Persian ♀ Alola Form |
200 | 240 | This attack's power increases when the target is flinching. | |
 Acerola |
 Palossand ♀ |
200 | 240 | The more the user's Defense is raised, the greater the power of this attack. (6★ EX effect: Sync move power will be multiplied by 1.5.) | |
 Sygna Suit Acerola |
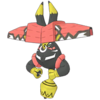 Tapu Bulu |
250 | 300 | (6★ EX effect: The sync buff is doubled the first time a sync move is used.) | |
 Leaf |
 Eevee ♂ |
- | - | Charges the user's move gauge by its current move level. Raises the Attack, Defense, Sp. Atk, Sp. Def, Speed, and accuracy of all allied sync pairs by 2 stat ranks. (6★ EX effect: The sync buff is doubled the first time a sync move is used.) | |
 Kukui |
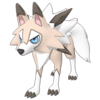 Lycanroc ♂ Midday Form |
250 | 300 | Removes the Physical and Special Damage Reduction effects from the opponents’ field of play. (6★ EX effect: Sync move power will be multiplied by 1.5.) | |
 Guzma |
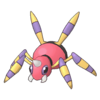 Ariados ♂ |
250 | 300 | (6★ EX effect: The sync buff is doubled the first time a sync move is used.) (EX role effect: Sync move power will be multiplied by 1.5.) | |
 Plumeria |
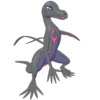 Salazzle ♀ |
250 | 300 | (6★ EX effect: Sync moves will target all opposing sync pairs.) | |
 Plumeria |
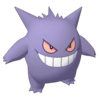 Gengar ♂ |
200 | 240 | The more the user's Speed is raised, the greater the power of this attack. (6★ EX effect: The first time the user’s sync move is used each battle, the sync move countdown is reduced by three.) (EX role effect: Sync move power will be multiplied by 1.5.) | |
 Lusamine |
 Pheromosa |
250 | 300 | (6★ EX effect: Sync moves will target all opposing sync pairs.) | |
 Sygna Suit Lusamine |
 Necrozma Ultra Necrozma |
250 | 300 | Become Ultra Necrozma until the end of battle. (6★ EX effect: Sync moves will target all opposing sync pairs.) (EX role effect: The sync buff is doubled the first time a sync move is used.) | |
 Lillie (Anniversary 2024) |
 Solgaleo |
200 | 240 | The more the target's Speed is lowered, the greater the power of this attack. (6★ EX effect: The first time the user's sync move is used each battle, the sync move countdown is reduced by three.) (EX role effect: Implements the following field effect just before the user's sync move is used the first time each battle. Extends the field effect duration only that time. • Steel Zone) | |
 Molayne |
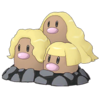 Dugtrio ♂ Alola Form |
250 | 300 | No additional effect. | |
 Mallow |
 Tsareena ♀ |
200 | 240 | This attack's power increases when the target is confused. (6★ EX effect: Sync move power will be multiplied by 1.5.) | |
 Mallow |
 Shiinotic ♀ |
250 | 300 | (6★ EX effect: The sync buff is doubled the first time a sync move is used.) | |
 Selene |
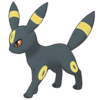 Umbreon ♀ |
200 | 240 | The more the target’s Defense is lowered, the greater the power of this attack. (6★ EX effect: Sync move power will be multiplied by 1.5.) (EX role effect: The sync buff is doubled the first time a sync move is used.) | |
 Selene (Alt.) |
 Nihilego |
250 | 300 | (6★ EX effect: Sync moves will target all opposing sync pairs.) (EX role effect: Sync move power will be multiplied by 1.5.) | |
 Elio |
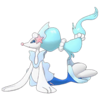 Primarina ♂ |
250 | 300 | (6★ EX effect: The sync buff is doubled the first time a sync move is used.) | |
 Elio |
 Espeon ♂ |
200 | 240 | The more the target’s Sp. Def is lowered, the greater the power of this attack. (6★ EX effect: Sync move power will be multiplied by 1.5.) (EX role effect: The sync buff is doubled the first time a sync move is used.) | |
 Elio (Alt.) |
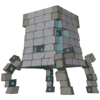 Stakataka |
250 | 300 | (6★ EX effect: The sync buff is doubled the first time a sync move is used.) (EX role effect: The first time the user's sync move is used each battle, the sync move countdown is reduced by three.) | |
 Lana |
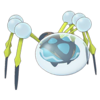 Araquanid ♀ |
250 | 300 | (6★ EX effect: The sync buff is doubled the first time a sync move is used.) | |
 Sygna Suit Lana |
 Tapu Lele |
250 | 300 | (6★ EX effect: Sync moves will target all opposing sync pairs.) | |
 Kiawe |
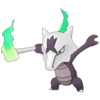 Marowak ♂ Alola Form |
250 | 300 | (6★ EX effect: The sync buff is doubled the first time a sync move is used.) | |
 Kiawe |
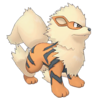 Arcanine ♂ |
200 | 240 | This attack’s power increases when the target is burned. (6★ EX effect: Sync move power will be multiplied by 1.5.) | |
 The Masked Royal |
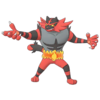 Incineroar ♂ |
200 | 240 | The more the user's Speed has been raised, the greater the power of this attack. (6★ EX effect: Sync move power will be multiplied by 1.5.) | |
 Ash |
 Pikachu ♂ World Cap* |
250 | 300 | Except in certain circumstances, successful hits with this attack become critical hits. (6★ EX effect: Sync moves will target all opposing sync pairs.) |
Pokémon Ga-Olé
Pokémon Mezastar
Super Smash Bros. series
Super Smash Bros. Ultimate
Incineroar's Final Smash uses the Z-Move Malicious Moonsault.
The Mimikyu summon from a Poké Ball will use the Z-Move Let's Snuggle Forever.
In the TCG
In the Pokémon Trading Card Game, a mechanic similar to Z-Moves, introduced in the Sun & Moon expansion, is a type of attack called ![]() attacks. They are distinguished from normal attacks by a "GX" suffix following the attack's name, such as in "Pulverizing Pancake
attacks. They are distinguished from normal attacks by a "GX" suffix following the attack's name, such as in "Pulverizing Pancake![]() ". Only Pokémon
". Only Pokémon![]() are printed with
are printed with ![]() attacks. Z-Crystal cards can allow other Pokemon to use a GX attack printed on the Z-Crystal card if the Pokemon has a move of the correct name.
attacks. Z-Crystal cards can allow other Pokemon to use a GX attack printed on the Z-Crystal card if the Pokemon has a move of the correct name.
Like Z-Moves, ![]() attacks have very powerful effects compared to those of other attacks. However, each player may only use one GX attack per game.
attacks have very powerful effects compared to those of other attacks. However, each player may only use one GX attack per game. ![]() markers are used to denote whether a player has used their GX attack yet. If a player uses a GX attack, their
markers are used to denote whether a player has used their GX attack yet. If a player uses a GX attack, their ![]() marker is flipped over to expose its reverse side. Some effects check if a player has used a GX attack, either on the previous turn or in the game overall.
marker is flipped over to expose its reverse side. Some effects check if a player has used a GX attack, either on the previous turn or in the game overall.
A rare few effects, such as that of Misty & Lorelei, allow for a player to use a GX attack even though they have already used a GX attack on a prior turn. When GX attacks are used as the effect of other attacks, such as through Nihilego's Nightcap attack, this still counts as using a GX attack and the GX marker must still be flipped. If the permission to use a GX attack has already been spent, the copied attack has no effect. (Many Sun & Moon series cards are designed to avoid this question. For example, Zoroark-GX's Trickster-GX is already a GX attack and therefore never fails to copy a GX attack due to that player having used a GX attack before Trickster-GX. Another example is that Mimikyu's Copycat is unable to copy GX attacks.)
In the anime
Similar to the games, Z-Moves are powerful moves that can be executed by a Pokémon that knows an appropriate move that corresponds to the type of Z-Crystal on the Trainer's Z-Ring. Z-Moves were first featured in Pokémon the Series: Sun & Moon in episode Alola to New Adventure!, where Kiawe and his Turtonator used Inferno Overdrive, with the help of Kiawe's Z-Ring and Firium Z, to defeat Zipp's Yungoos, Tupp's Salandit, and Rapp's Zubat.
According to Professor Kukui in Alola to New Adventure!, only Trainers who are successful in the island challenge can use Z-Moves. As seen with Ash's Rowlet in Young Kiawe Had a Farm!, Z-Moves drain a lot of the Pokémon's energy, but with adequate training, the Pokémon can reduce the amount of energy necessary to execute a Z-Move. In a similar manner, in Balloons, Brionne, and Belligerence!, Lana's Popplio failed its first attempt at Hydro Vortex since it was not strong enough to execute the move. In Showdown on Poni Island!, Gladion's Lycanroc, having endured Ash's Lycanroc's Splintered Stormshards, was able to take advantage of its opponent's fatigue by finishing it with a Z-Move of its own.
Due to their vast blast radius and power, they can usually be used to wipe out many targets at once, like in a Battle Royal. Typically, bipedal or semi-bipedal Pokémon with arm-like forelimbs tend to mimic the poses of their Trainer during the activation. On the other hand, quadrupeds and the like, whose forelimbs show no manual dexterity, tend to stay still and wait until the activation is completed before acting.
As revealed in A Battle Hand-Off!, a Pokémon using a Z-Move can receive Z-Power from multiple other people and Pokémon provided they do the Z-Move pose as well. The additional participants do not need a Z-Ring or Crystal to contribute. The Team Rocket trio exemplifies this, as usually whenever Jessie or James uses a Z-Move the entire team does the poses together. In Heart of Fire! Heart of Stone!, Brock helped Olivia and her Lycanroc use a variation of Continental Crush he named Continental Crush on You (Japanese: ワールズエンドフォーリンラブ World's End Fall in Love).
In Filling the Light with Darkness!, an Ultra Wormhole sucked away Ultra Aura from Alola, weakening everyone's Z-Moves to almost unusable levels until Necrozma had left the dimension. In Parallel Friendships!, Dia revealed that the use of Z-Moves had become impossible in the Ultra Ruin after the dimension's Tapu Koko left, indicating that a guardian deity's presence is necessary for the use of Z-Moves. However, this didn't stop Z-Moves from being used outside of Alola in Pokémon the Series: Sun & Moon and Pokémon Journeys: The Series. In All Out, All of the Time!, it was emphasized that a Trainer and their Pokémon's hearts must be in perfect sync in order for a Z-Move to properly succeed.
Ash first performed a Z-Move in The Guardian's Challenge!, with his Pikachu using Gigavolt Havoc thanks to the Z-Ring and Electrium Z Ash had received from Tapu Koko. After using the attack, however, the Electrium Z shattered, preventing Ash from using the move again until he obtained a new Electrium Z in Trial and Tribulation!.
In the Japanese, Korean, Mandarin Chinese, and Thai versions, when a Z-Move is used, the name of the specific move is shown, like in the games; however, the names are removed in most other dubs.
List of Z-Moves used in the anime
| Pokémon | Trainer/ Partner |
Z-Move | Pose | Image | Debut | |
|---|---|---|---|---|---|---|
| Turtonator | Kiawe | Inferno Overdrive | 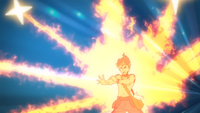
|

|
Alola to New Adventure! | |
| Pikachu | Ash | Gigavolt Havoc | 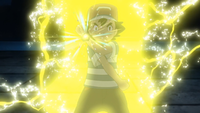
|

|
The Guardian's Challenge! | |
| Hariyama | Hala | All-Out Pummeling | 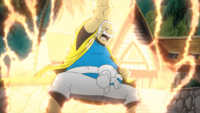
|
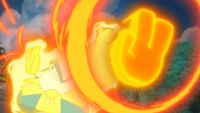
|
Trial and Tribulation! | |
| Pikachu | Ash | Breakneck Blitz | 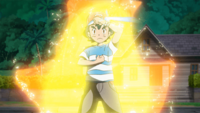
|
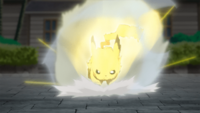
|
Trial and Tribulation! | |
| Rowlet | Ash | Breakneck Blitz | 
|
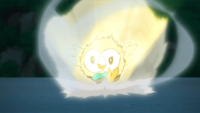
|
Young Kiawe Had a Farm! | |
| Rockruff | Ash | Breakneck Blitz | 
|

|
A Guardian Rematch! | |
| Lycanroc | Gladion | Continental Crush | 
|
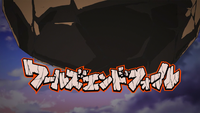
|
A Glaring Rivalry! | |
| Snorlax | Oluolu | Pulverizing Pancake | 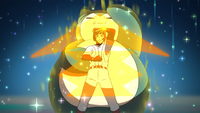
|

|
Pulling Out the Pokémon Base Pepper! | |
| Marshadow | None | Soul-Stealing 7-Star Strike |  
|
I Choose You! | ||
| Litten | Ash | Breakneck Blitz | 
|

|
Currying Favor and Flavor! | |
| Lycanroc | Olivia | Continental Crush | 
|

|
Trials and Determinations! | |
| Rowlet | Ash | Bloom Doom | 
|
|
Trials and Determinations! | |
| Lycanroc | Ash | Continental Crush | 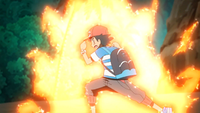
|
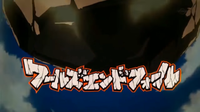
|
Mimikyu Unmasked! | |
| Brionne | Ida | Hydro Vortex | 
|

|
Balloons, Brionne, and Belligerence! | |
| Popplio | Lana | Hydro Vortex | 
|

|
Balloons, Brionne, and Belligerence! | |
| Nebby | Ash | Searing Sunraze Smash | 
|
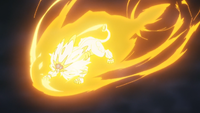
|
Revealing the Stuff of Legend! | |
| Pikachu (Alola Cap) |
Ash | 10,000,000 Volt Thunderbolt | 
|

|
10,000,000 Reasons to Fight! | |
| Incineroar | Professor Kukui/ The Masked Royal |
Malicious Moonsault | 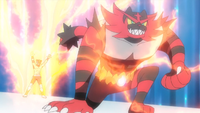
|
|
Pushing the Fiery Envelope! | |
| Eevee | Ilima | Extreme Evoboost | 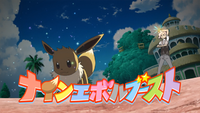
|

|
Turning Heads and Training Hard! | |
| Alolan Marowak | Kiawe | Inferno Overdrive | 
|
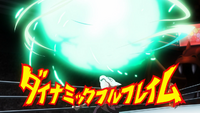
|
The Young Flame Strikes Back! | |
| Mareanie | James | Black Hole Eclipse | 
|

|
Why Not Give Me a Z-Ring Sometime? | |
| Mimikyu | Jessie | Let's Snuggle Forever | 
|

|
A Battle Hand-Off! | |
| Alolan Persian | Nanu | Black Hole Eclipse | 
|

|
Guiding an Awakening! | |
| Lycanroc | Ash | Splintered Stormshards | 
|

|
Twirling with a Bang! | |
| Silvally | Gladion | Breakneck Blitz | 
|
The Prism Between Light and Darkness! | ||
| Lunala | Gladion | Menacing Moonraze Maelstrom | 
|
|
Securing the Future! | |
| Boss | Pikala | Catastropika | 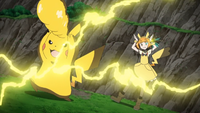
|
|
A Plethora of Pikachu! | |
| Zeraora | Dia | Gigavolt Havoc | 
|
Parallel Friendships! | ||
| Lycanroc | Gladion | Devastating Drake | 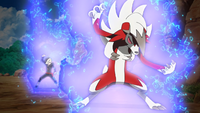
|
|
Showdown on Poni Island! | |
| Primarina | Ida | Oceanic Operetta | 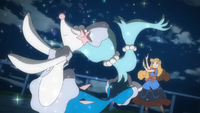
|
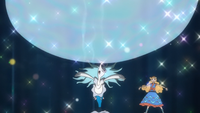
|
Evolving Research! | |
| Charizard | Kiawe | Supersonic Skystrike | 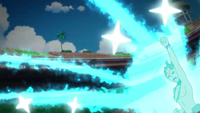
|
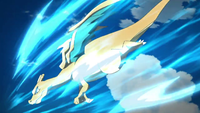
|
Run, Heroes, Run! | |
| Mudsdale | Hapu | Tectonic Rage | 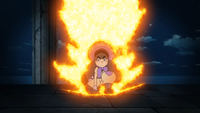
|
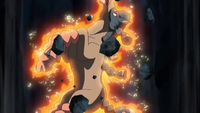
|
A Grand Debut! | |
| Pikachu | Ash | Corkscrew Crash | 
|

|
The Dealer of Destruction! | |
| Primarina | Lana | Oceanic Operetta | 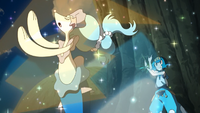
|

|
A Fiery Training Camp Trick! | |
| Vikavolt | Sophocles | Savage Spin-Out | 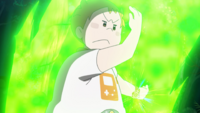
|
 
|
A Fiery Training Camp Trick! | |
| Torracat | Ash | Inferno Overdrive | 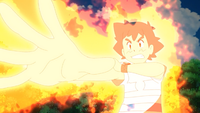
|

|
A Timeless Encounter! | |
| Snowy | Lillie | Subzero Slammer | 
|
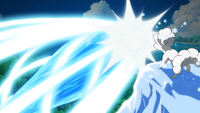
|
Chasing Memories, Creating Dreams! | |
| Tsareena | Mallow | Bloom Doom | 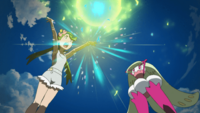
|
|
Battling Besties! | |
| Decidueye | Hau | Sinister Arrow Raid | 
|

|
Imitation Is the Sincerest Form of Strategy! | |
| Zoroark | Gladion | Never-Ending Nightmare | 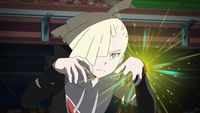
|
 
|
Enter the Champion! | |
| Naganadel | The Masked Royal | Gigavolt Havoc | 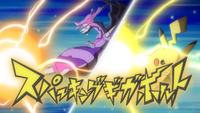
|
Z-Move Showdown! | ||
| Incineroar | Professor Kukui | Inferno Overdrive | 
|
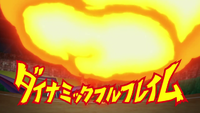
|
Fiery Surprises! | |
| Tapu Koko | Professor Kukui | Guardian of Alola | 
|
 
|
From Z to Shining Z! | |
| Charizard | Kiawe | Inferno Overdrive | 
|
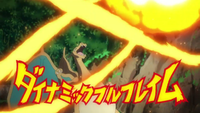
|
Dreams of the Sun and Moon! | |
| Kommo-o | All-Out Brothers | Clangorous Soulblaze | 
|

|
All Out, All of the Time! | |
| Pikachu (World Cap) |
Ash | 10,000,000 Volt Thunderbolt | 
|

|
Ultra Exciting from the Shocking Start! | |
In the manga
Pokémon Adventures
Sun, Moon, Ultra Sun & Ultra Moon arc
Z-Moves first appeared in this arc. Olivia had her Lycanroc use Continental Crush while Nanu had his Alolan Persian use Black Hole Eclipse during an exhibition match against each other. Hala stepped in to stop both Pokémon before either could successfully use their moves.
During his battle against Gladion in an Iki Town festival tournament, Sun inadvertently used a Z-Move with his Dollar, allowing it to defeat Gladion's Type: Null with an incomplete version of Inferno Overdrive. Due to not knowing how to use Z-Moves at the time, Sun received Z-Power from a nearby Ultra Wormhole instead of building it up with a pose. Later, he was taught how to properly perform Z-Moves by Kiawe in order to battle Gladion a second time. With his newly obtained Z-Ring, Sun and Dollar successfully used Inferno Overdrive properly.
At Mount Lanakila, Ilima, Lana, Kiawe, Mallow, Sophocles, Molayne, Mina, and Hapu were attacked by a group of Aether Foundation Employees and their Ultra Beasts. With the power of their barrage of Z-Moves, the Ultra Beasts were defeated one by one.
List of Z-Moves used
| Pokémon | Trainer | Z-Move | Pose | Image | Debut | |
|---|---|---|---|---|---|---|
| Dollar | Sun | Inferno Overdrive | 
|
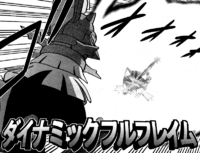
|
The Final Match and a Surprising Finale! | |
| Dollar | Sun | Inferno Overdrive | 
|

|
A Photoshoot and the Abandoned Thrifty Megamart | |
| Gumshoos | Ilima | Breakneck Blitz | 
|

|
Destroy!! Results of the Training! | |
| Ribombee | Mina | Twinkle Tackle | 
|

|
Destroy!! Results of the Training! | |
| Araquanid | Lana | Hydro Vortex | 
|

|
Destroy!! Results of the Training! | |
| Mudsdale | Hapu | Tectonic Rage | 
|

|
Destroy!! Results of the Training! | |
| Alolan Dugtrio | Molayne | Corkscrew Crash | 
|

|
Destroy!! Results of the Training! | |
| Togedemaru | Sophocles | Gigavolt Havoc | 
|

|
Destroy!! Results of the Training! | |
| Alolan Marowak |
Kiawe | Inferno Overdrive | 
|

|
Destroy!! Results of the Training! | |
| Tsareena | Mallow | Bloom Doom | 
|

|
Destroy!! Results of the Training! | |


Movie adaptations
Ash and his Pikachu performed the 10,000,000 Volt Thunderbolt Z-Move in ICYR1 during a battle against a Totem Kommo-o.
Marshadow and Ken performed the Soul-Stealing 7-Star Strike Z-Move in ICYR2 in order to defeat Borosue.
Pokémon Horizon
Pokémon Journeys: The Series
Ash and his Pikachu performed the Z-Move, 10,000,000 Volt Thunderbolt in Ultra Exciting from the Shocking Start! & Trial on a Golden Scale! (Part 2) during a World Coronation Series battle against Volkner's Electivire.
Gallery
Artwork
Game art

|

|
| Artwork of Gigavolt Havoc for Pokémon Sun and Moon | Artwork of Soul-Stealing 7-Star Strike for Pokémon Sun and Moon |

|
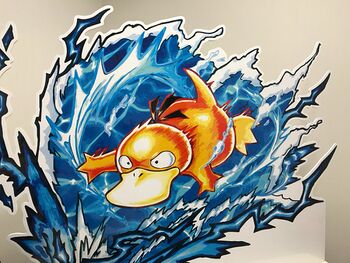
|
| Artwork for 10,000,000 Volt Thunderbolt for Pokémon Sun and Moon | Promotional artwork for Pokémon Center of Psyduck using a Z-Move |
Concept art
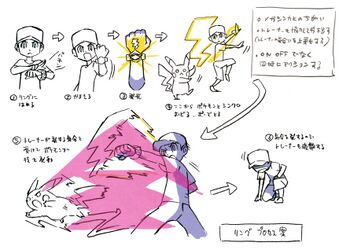
|
| Concept art of Z-Moves and Z-Power for Pokémon Sun and Moon |
Trivia
- Internal data in the games also refer to Z-Move as ZenryokuWaza, which literally means "full-powered move".
- Roster -Behind the Scene- #2 GAME FREAK, a video focusing on the sound and music design of Sun and Moon, show cases an early build from 2015. In this build, another symbol is used rather than the usual Z-Power symbol used in the final version.
- Some animations and effects when using a Z-Move bear similarities to Spectacular Talent animations used in Pokémon Contest Spectaculars from Pokémon Omega Ruby and Alpha Sapphire.
- No NPC Trainer has a Pokémon holding a Z-Crystal for an exclusive Z-Move.
- No Pokémon with an exclusive Z-Move is capable of Mega Evolution.
- Electric and Ghost have the most Z-Moves out of any type, with both having four.
- Before the release of Pokémon Ultra Sun and Ultra Moon, Electric had the most amount of Z-Moves, with four.
- Overall, six Z-Moves haven't appeared in the anime: Acid Downpour, Shattered Psyche, Twinkle Tackle, Stoked Sparksurfer, Genesis Supernova, and Light That Burns the Sky.
- Clangorous Soulblaze is the only Z-Move to have debuted outside of Pokémon the Series: Sun & Moon.
- Despite Z-Moves being unusable in Pokémon Scarlet and Violet, Iono briefly mentions 10,000,000 Volt Thunderbolt, the exclusive move for Pikachu in a cap.[4]
- In Iono's dialogue, the Z-Move's name is misspelled as 10,000,000-volt Thunderbolt.
In other languages
| |||||||||||||||||||||||||||||||||||||||||||||||||||||||||||||||||||||||||
See also
References
- ↑ Professor Kukui, Pokémon Sun and Moon:"Burnet and I are looking into them and we think they might have some connection to the energy that pours outta those Ultra Wormholes."
- ↑ Dulse, Pokémon Ultra Sun and Ultra Moon: "These...auras...must have been particularly strong at the trial locations. And the Z-Power for the Z-Moves... It is also similar to the auras of the Totem Pokémon. Both came to Alola as Necrozma's light!"
- ↑ トレーナーとポケモンが一体となって放つゼンリョクの攻撃「Zワザ」|『ポケットモンスター サン・ムーン』公式サイト
- ↑ Pokémon Scarlet and Violet: "You’re as flashy and bright as a 10,000,000-volt Thunderbolt, friendo!"
| Type-based Z-Moves | |
|---|---|
| |
| Species-based Z-Moves | |
|

|
This article is part of Project Moves and Abilities, a Bulbapedia project that aims to write comprehensive articles on two related aspects of the Pokémon games. |
